How to Connect SendPulse as Data Destination
The integration will allow you to add or remove contacts, as well as add/remove emails to the unsubscribe list in SendPulse based on data from other systems. For example, you can add a contact based on data from your website, landing page, or Google Sheets. This will allow you to effectively automate your workflows and save a lot of time by eliminating the need to manually add or remove each contact.
Let's go through the entire SendPulse setup steps together!
Navigation:
1. What will the integration with SendPulse do?
2. How to connect your SendPulse account to ApiX-Drive?
3. How can I set up data transfer to SendPulse in the selected action?
4. An example of the data that will be sent to your SendPulse.
5. Auto-update and update interval.
Once you have set up a Data Source system, such as Google Sheets, you can begin setting up SendPulse as a Data Destination.
To do this, click “Start configuring Data Destination”.
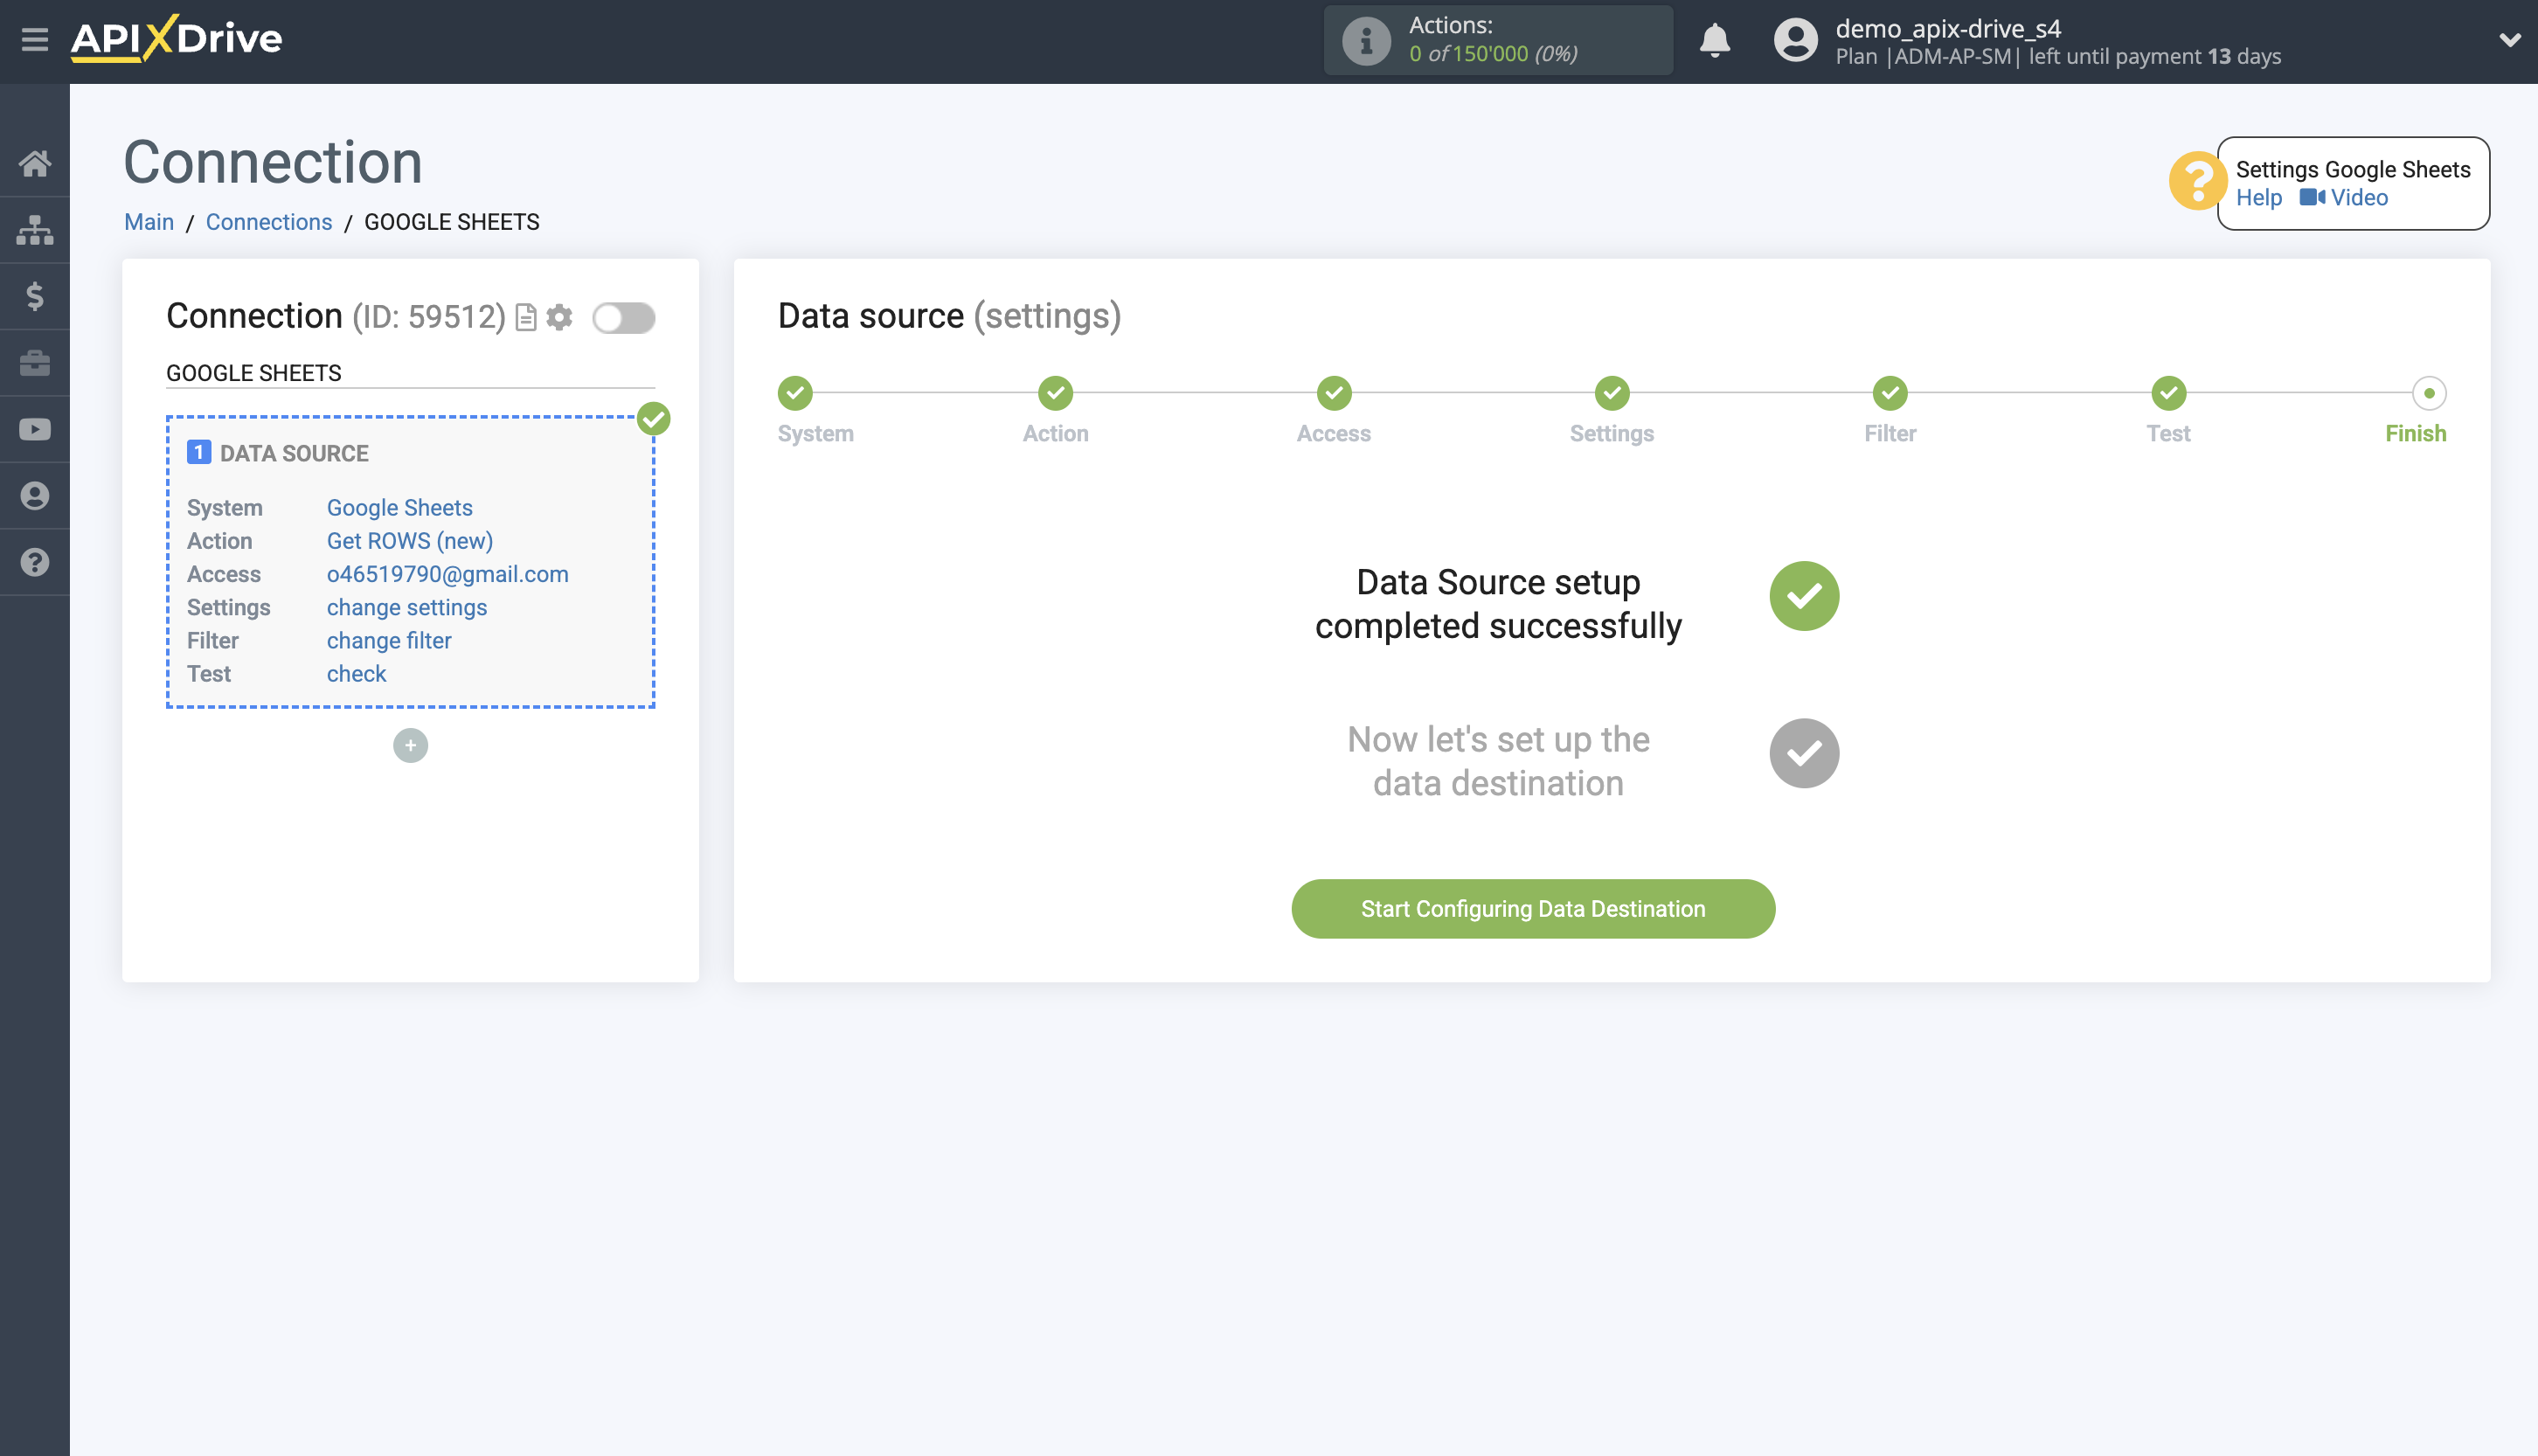
Select the system as Data Destination. In this case, you must specify SendPulse.
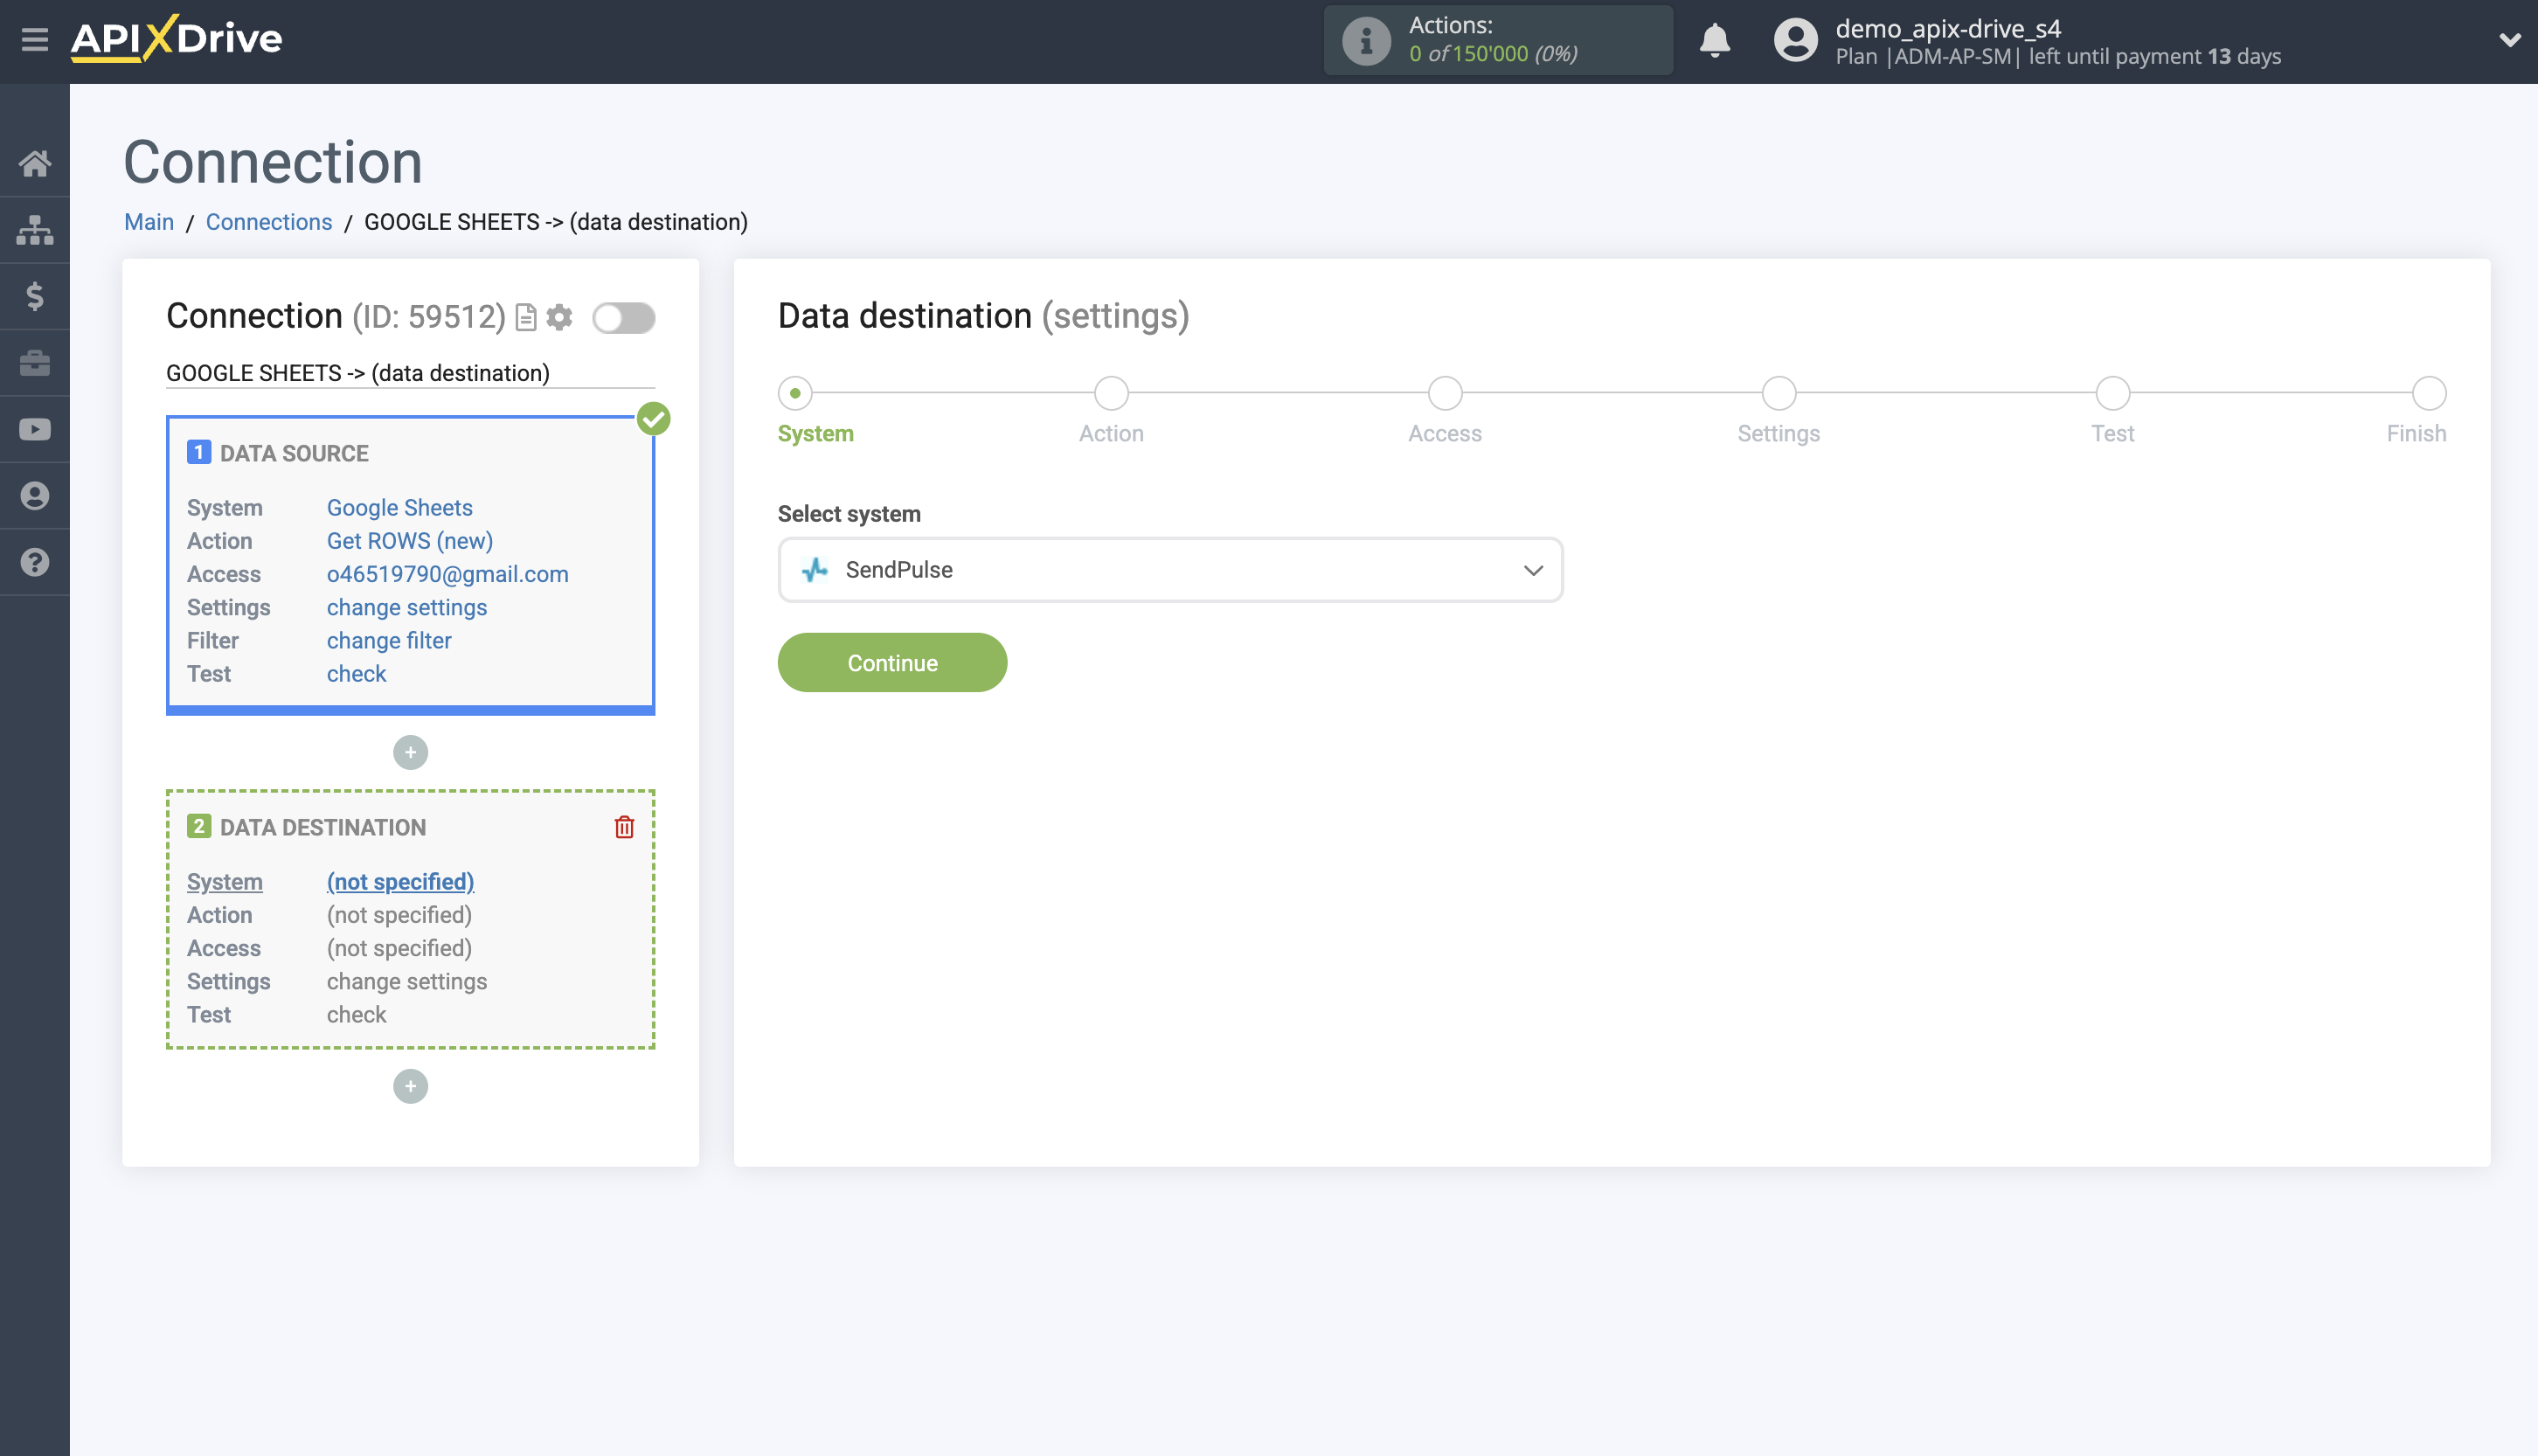
Next, you need to specify an action, for example "Add CONTACT".
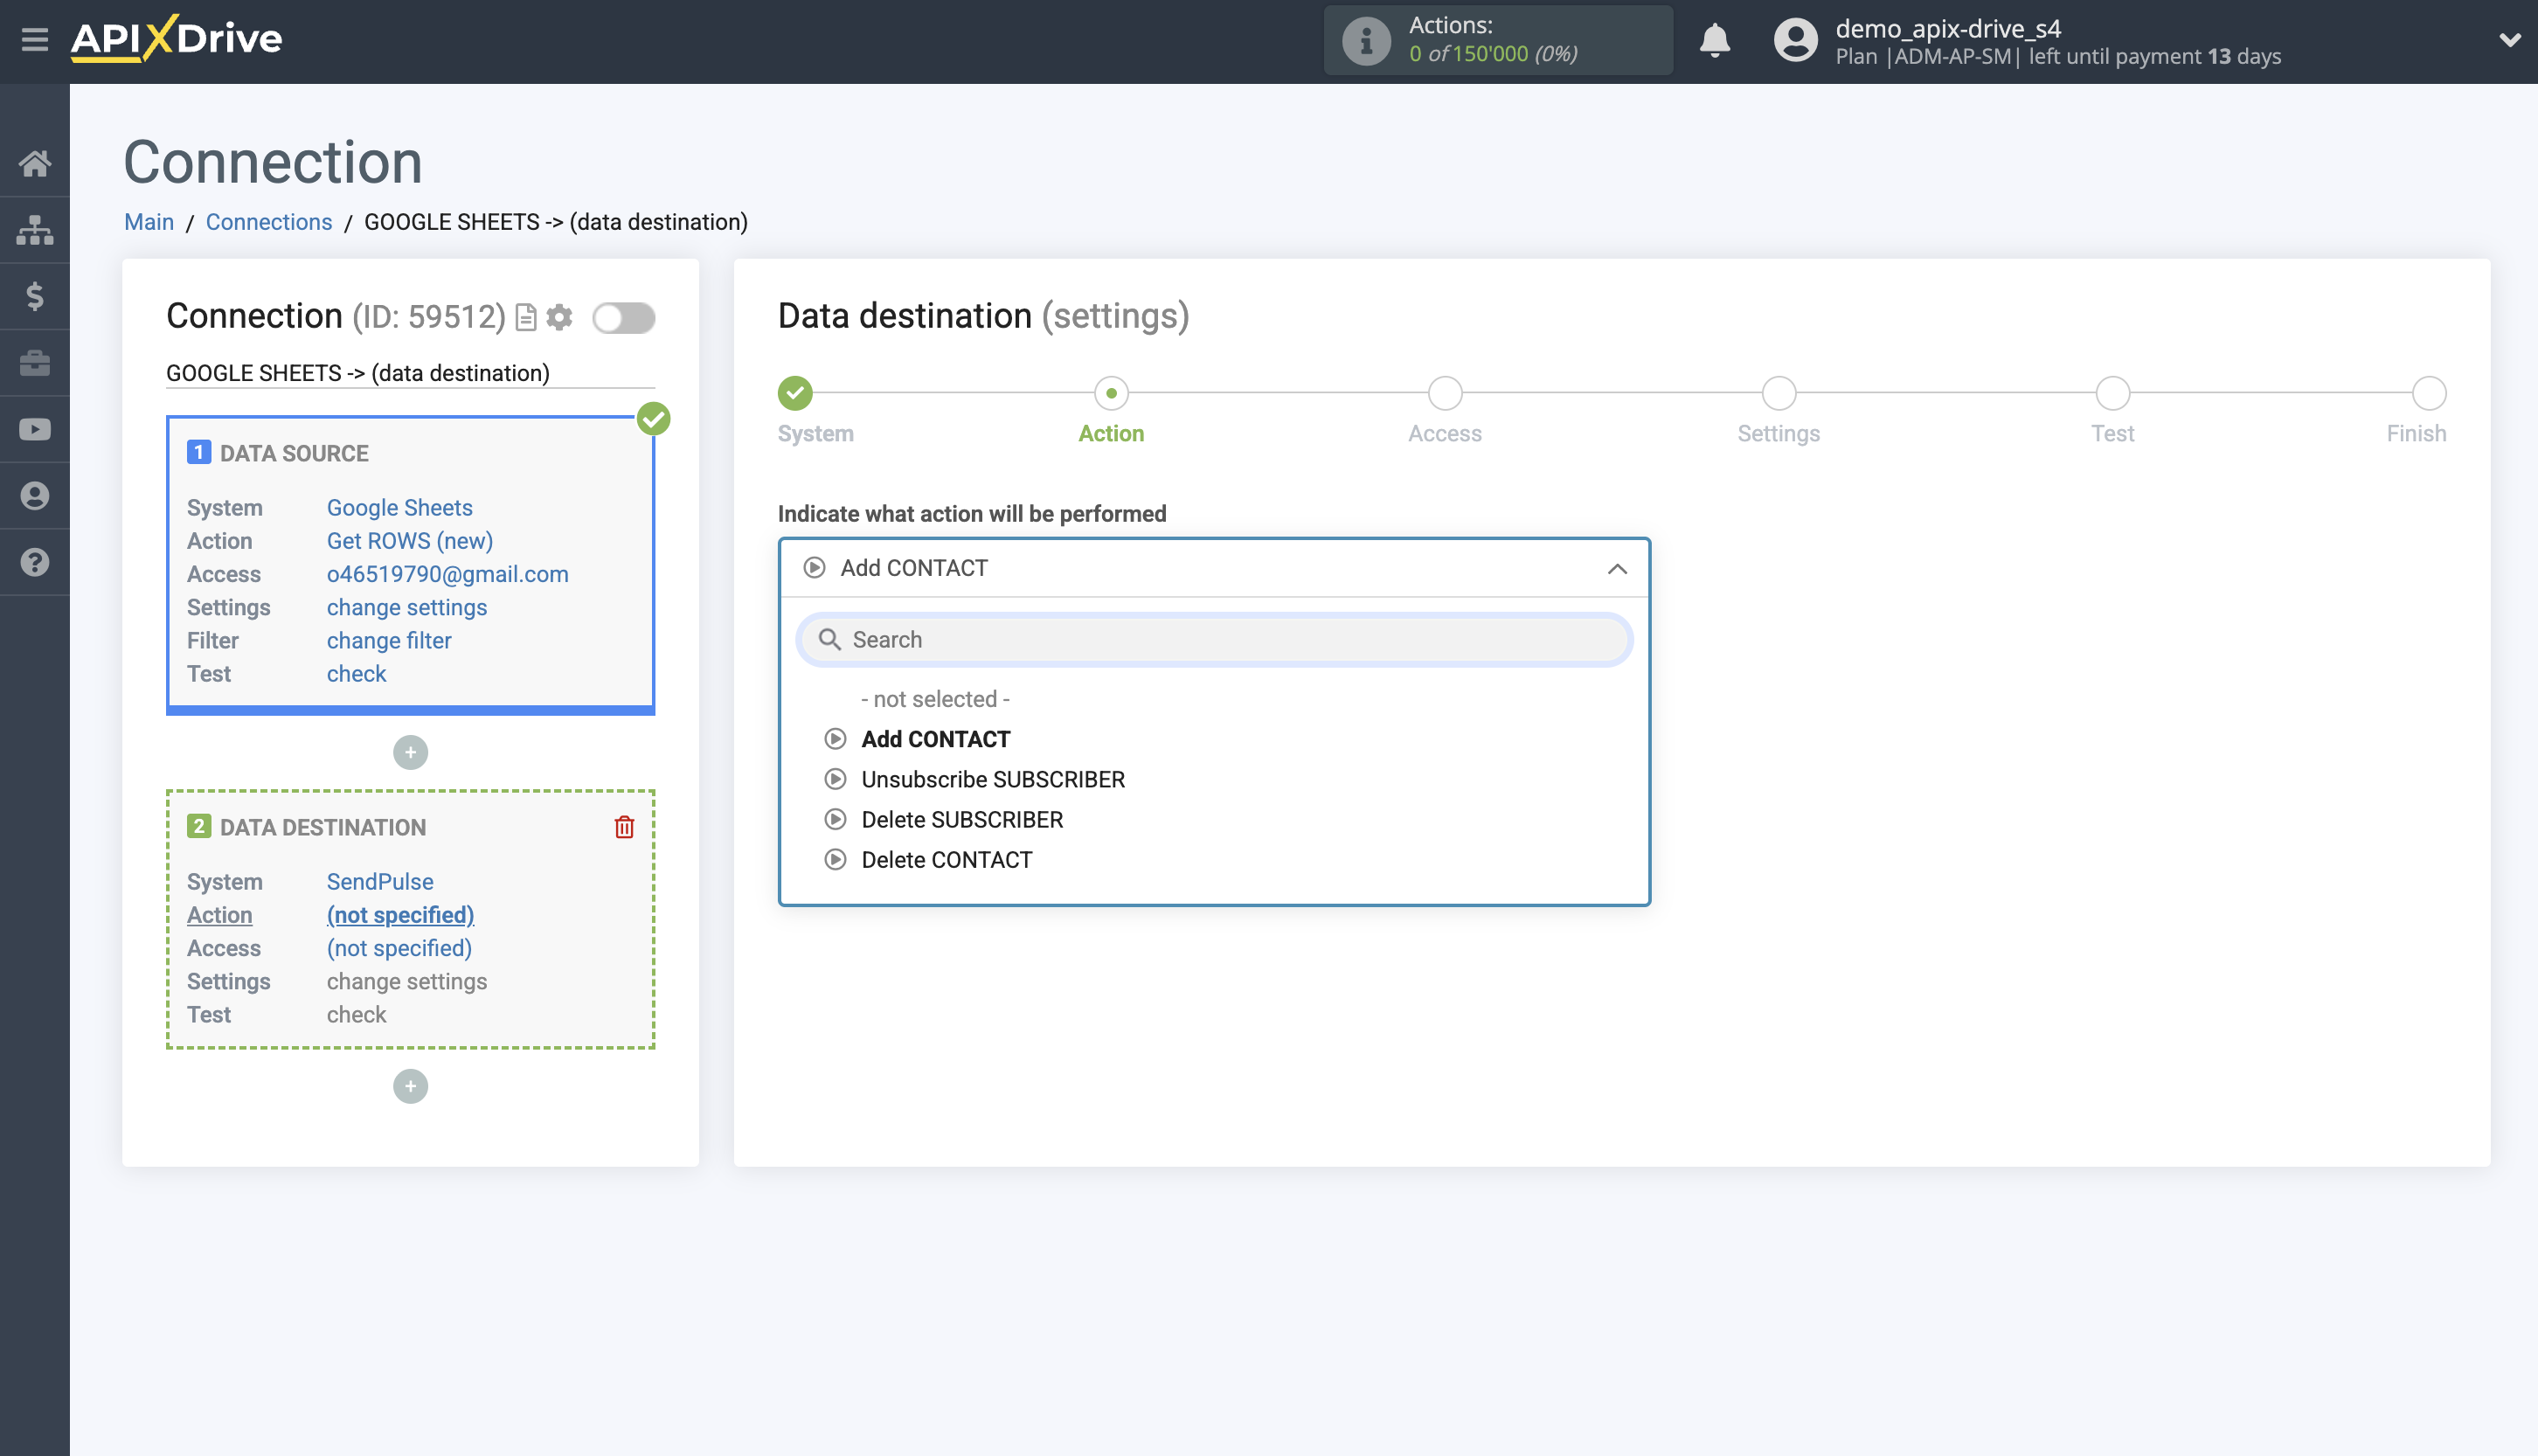
- Add CONTACT - in your SendPulse account, the Contact will be added to the address book. The system, based on the data from the Data Sources block, will add the Contact to the address book.
- Delete CONTACT - in your SendPulse account, the Contact will be deleted from the address book. The system, based on the data from the Data Sources block, will delete the Contact from the address book.
- Unsubscribe SUBSCRIBER - in your SendPulse account, the Subscriber will be unsubscribed from the mailing lists. The system, based on the data from the Data Sources block, will unsubscribe the Subscriber from the mailing list.
- Delete SUBSCRIBER - in your SendPulse account, the Subscriber will be deleted from the mailing list. The system, based on the data from the Data Sources block, will delete the Subscriber from the mailing list.
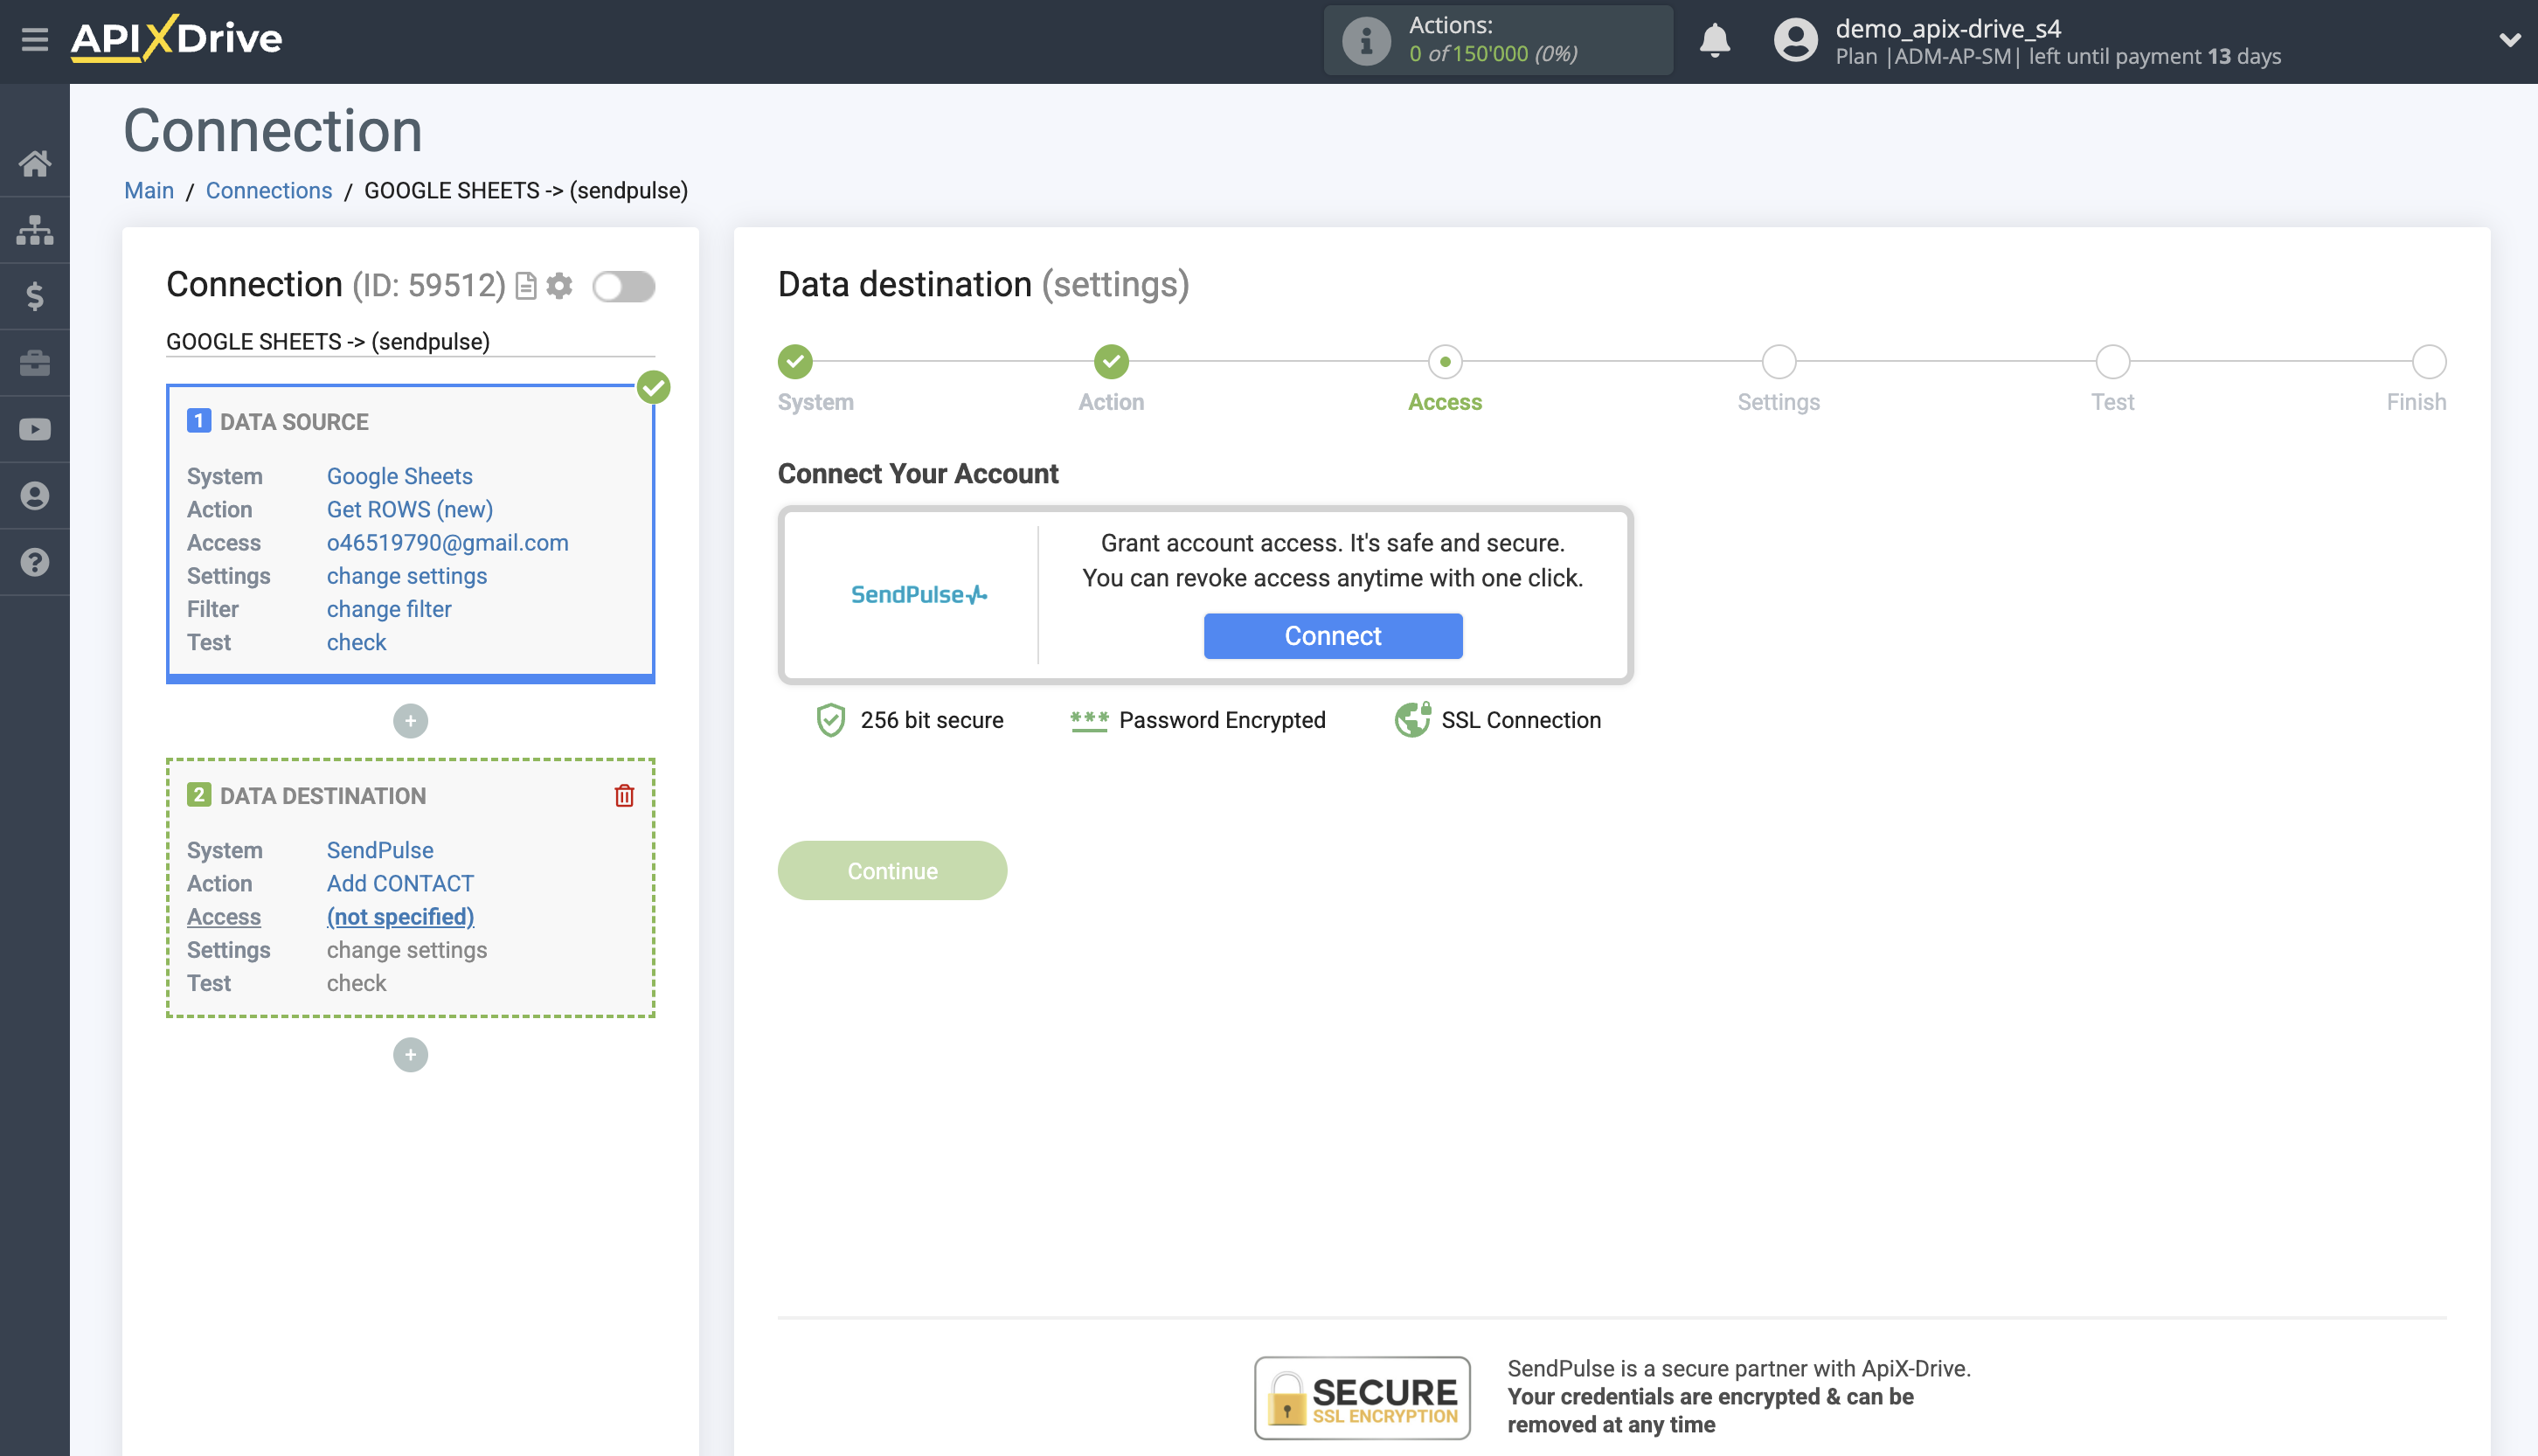
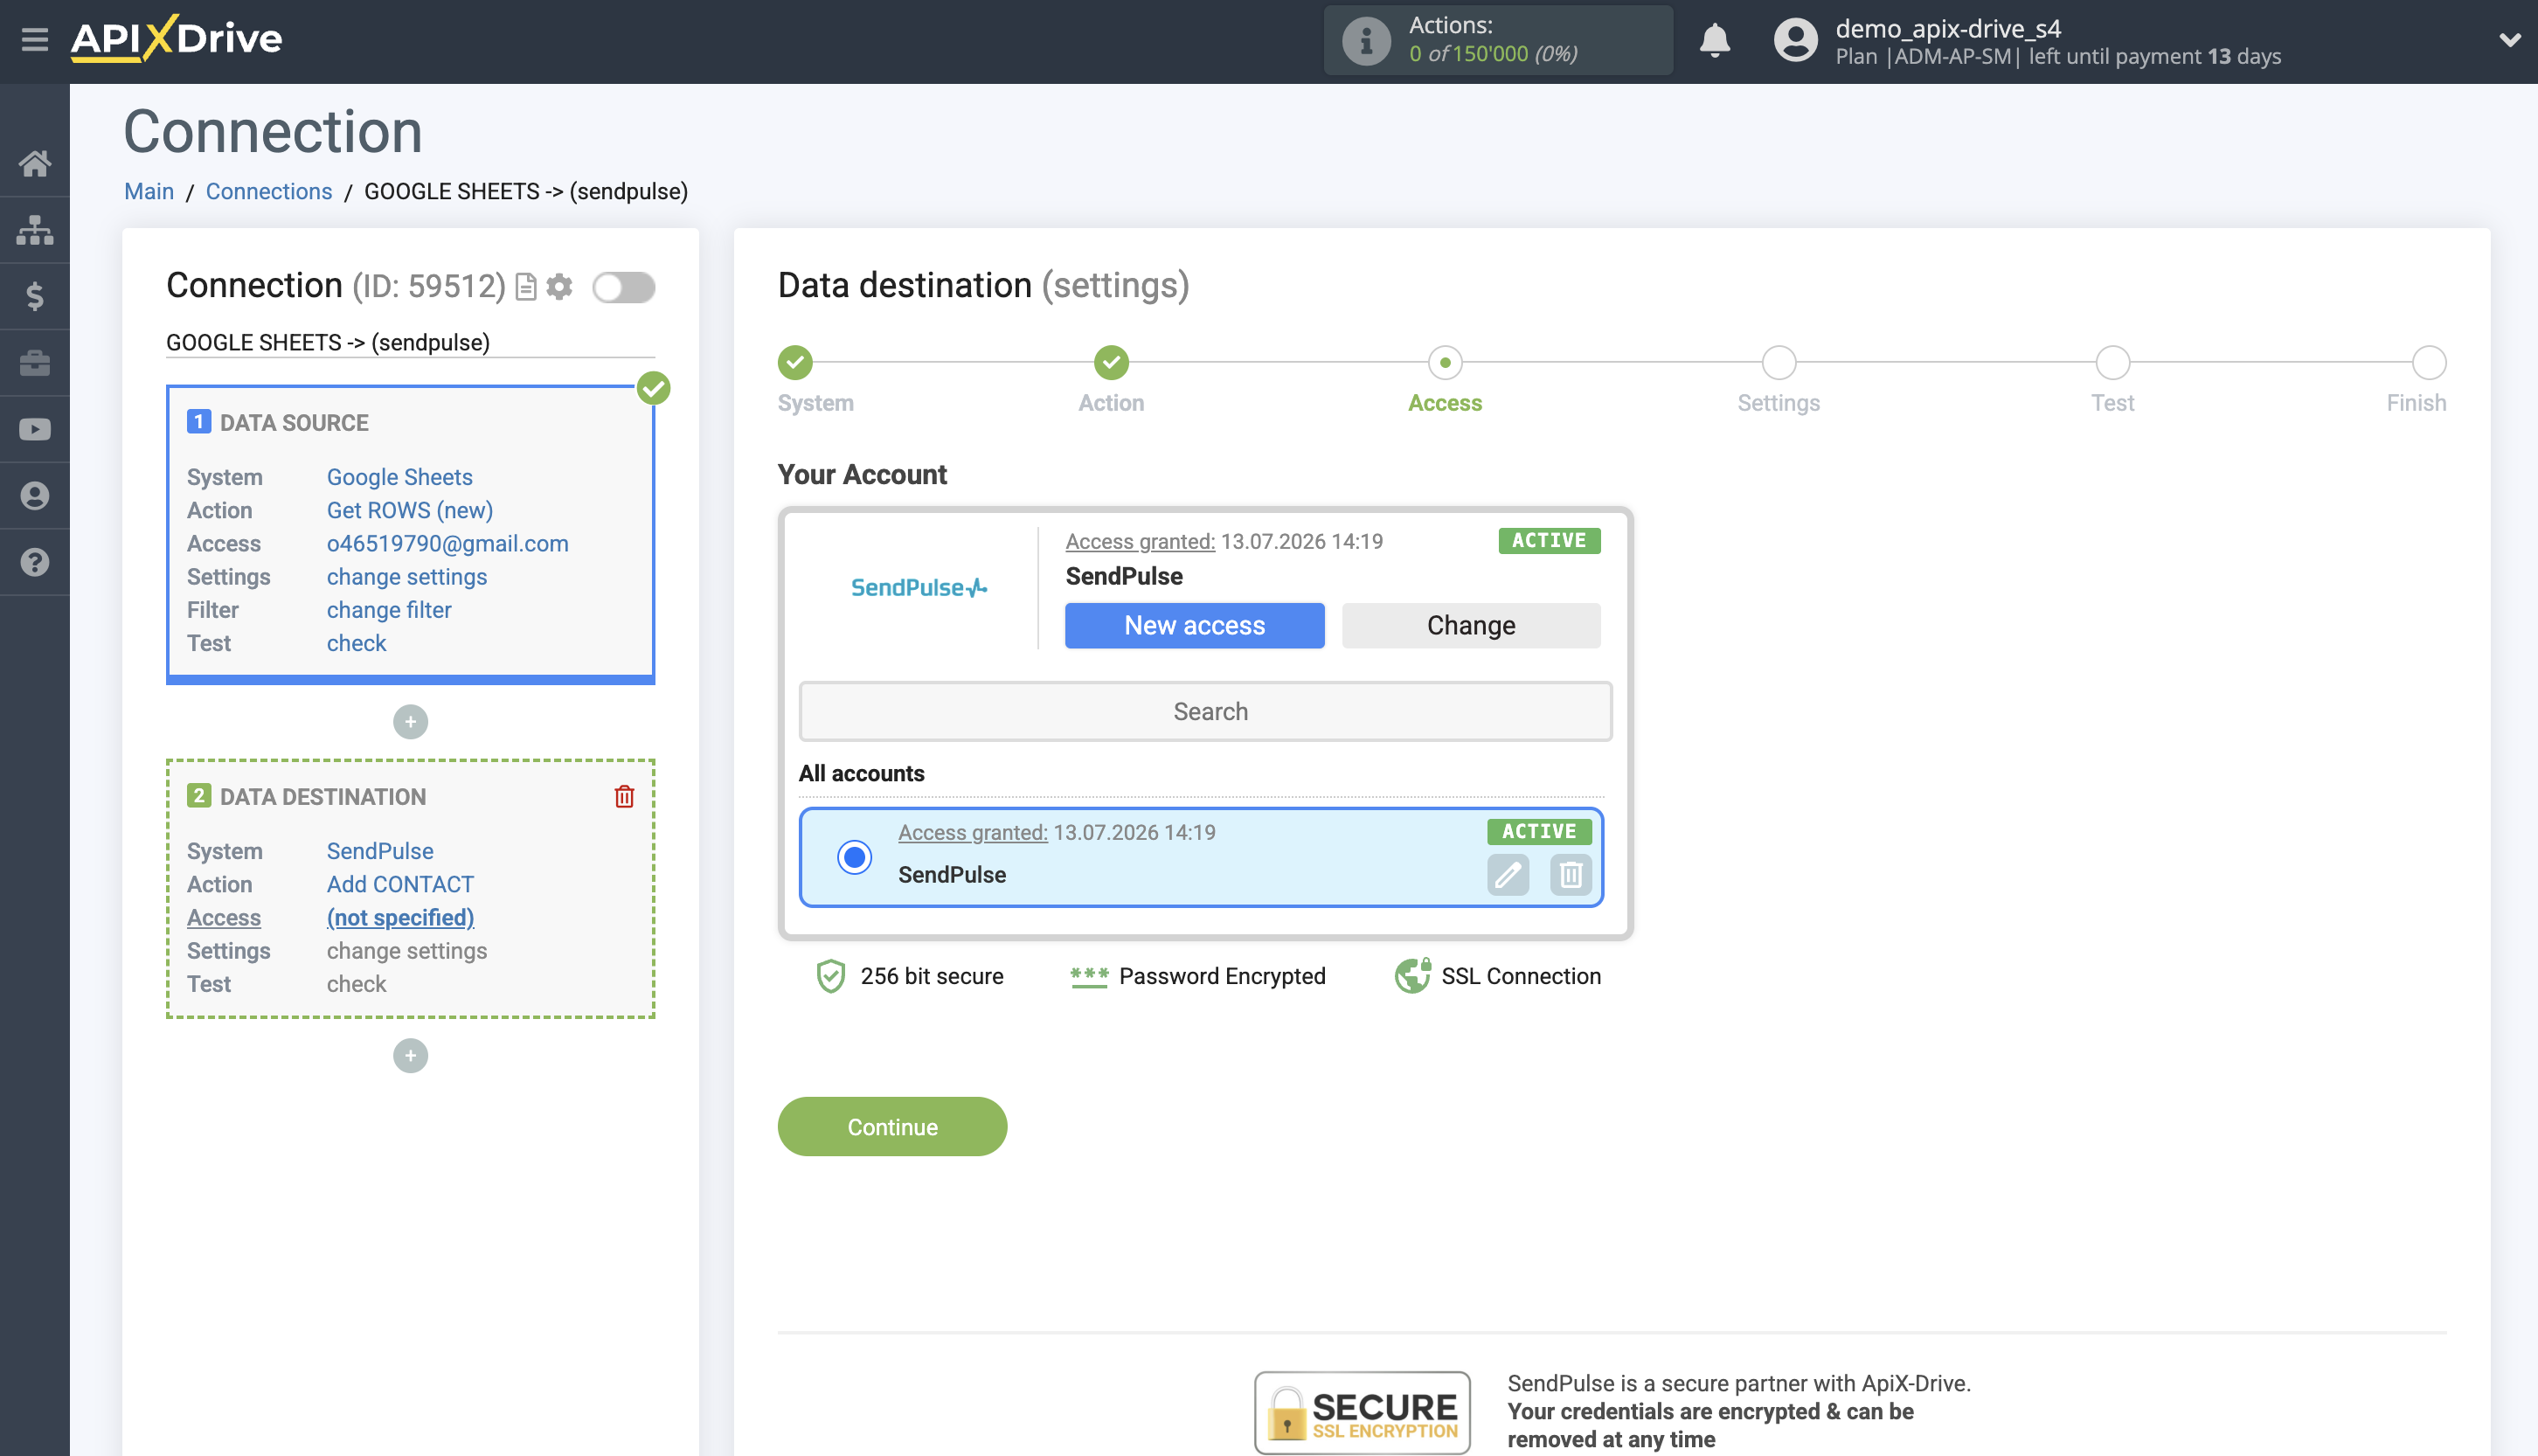
The next step is to select the SendPulse account to which the data will be sent.
If there are no accounts connected to the ApiX-Drive system, click “Connect account”.
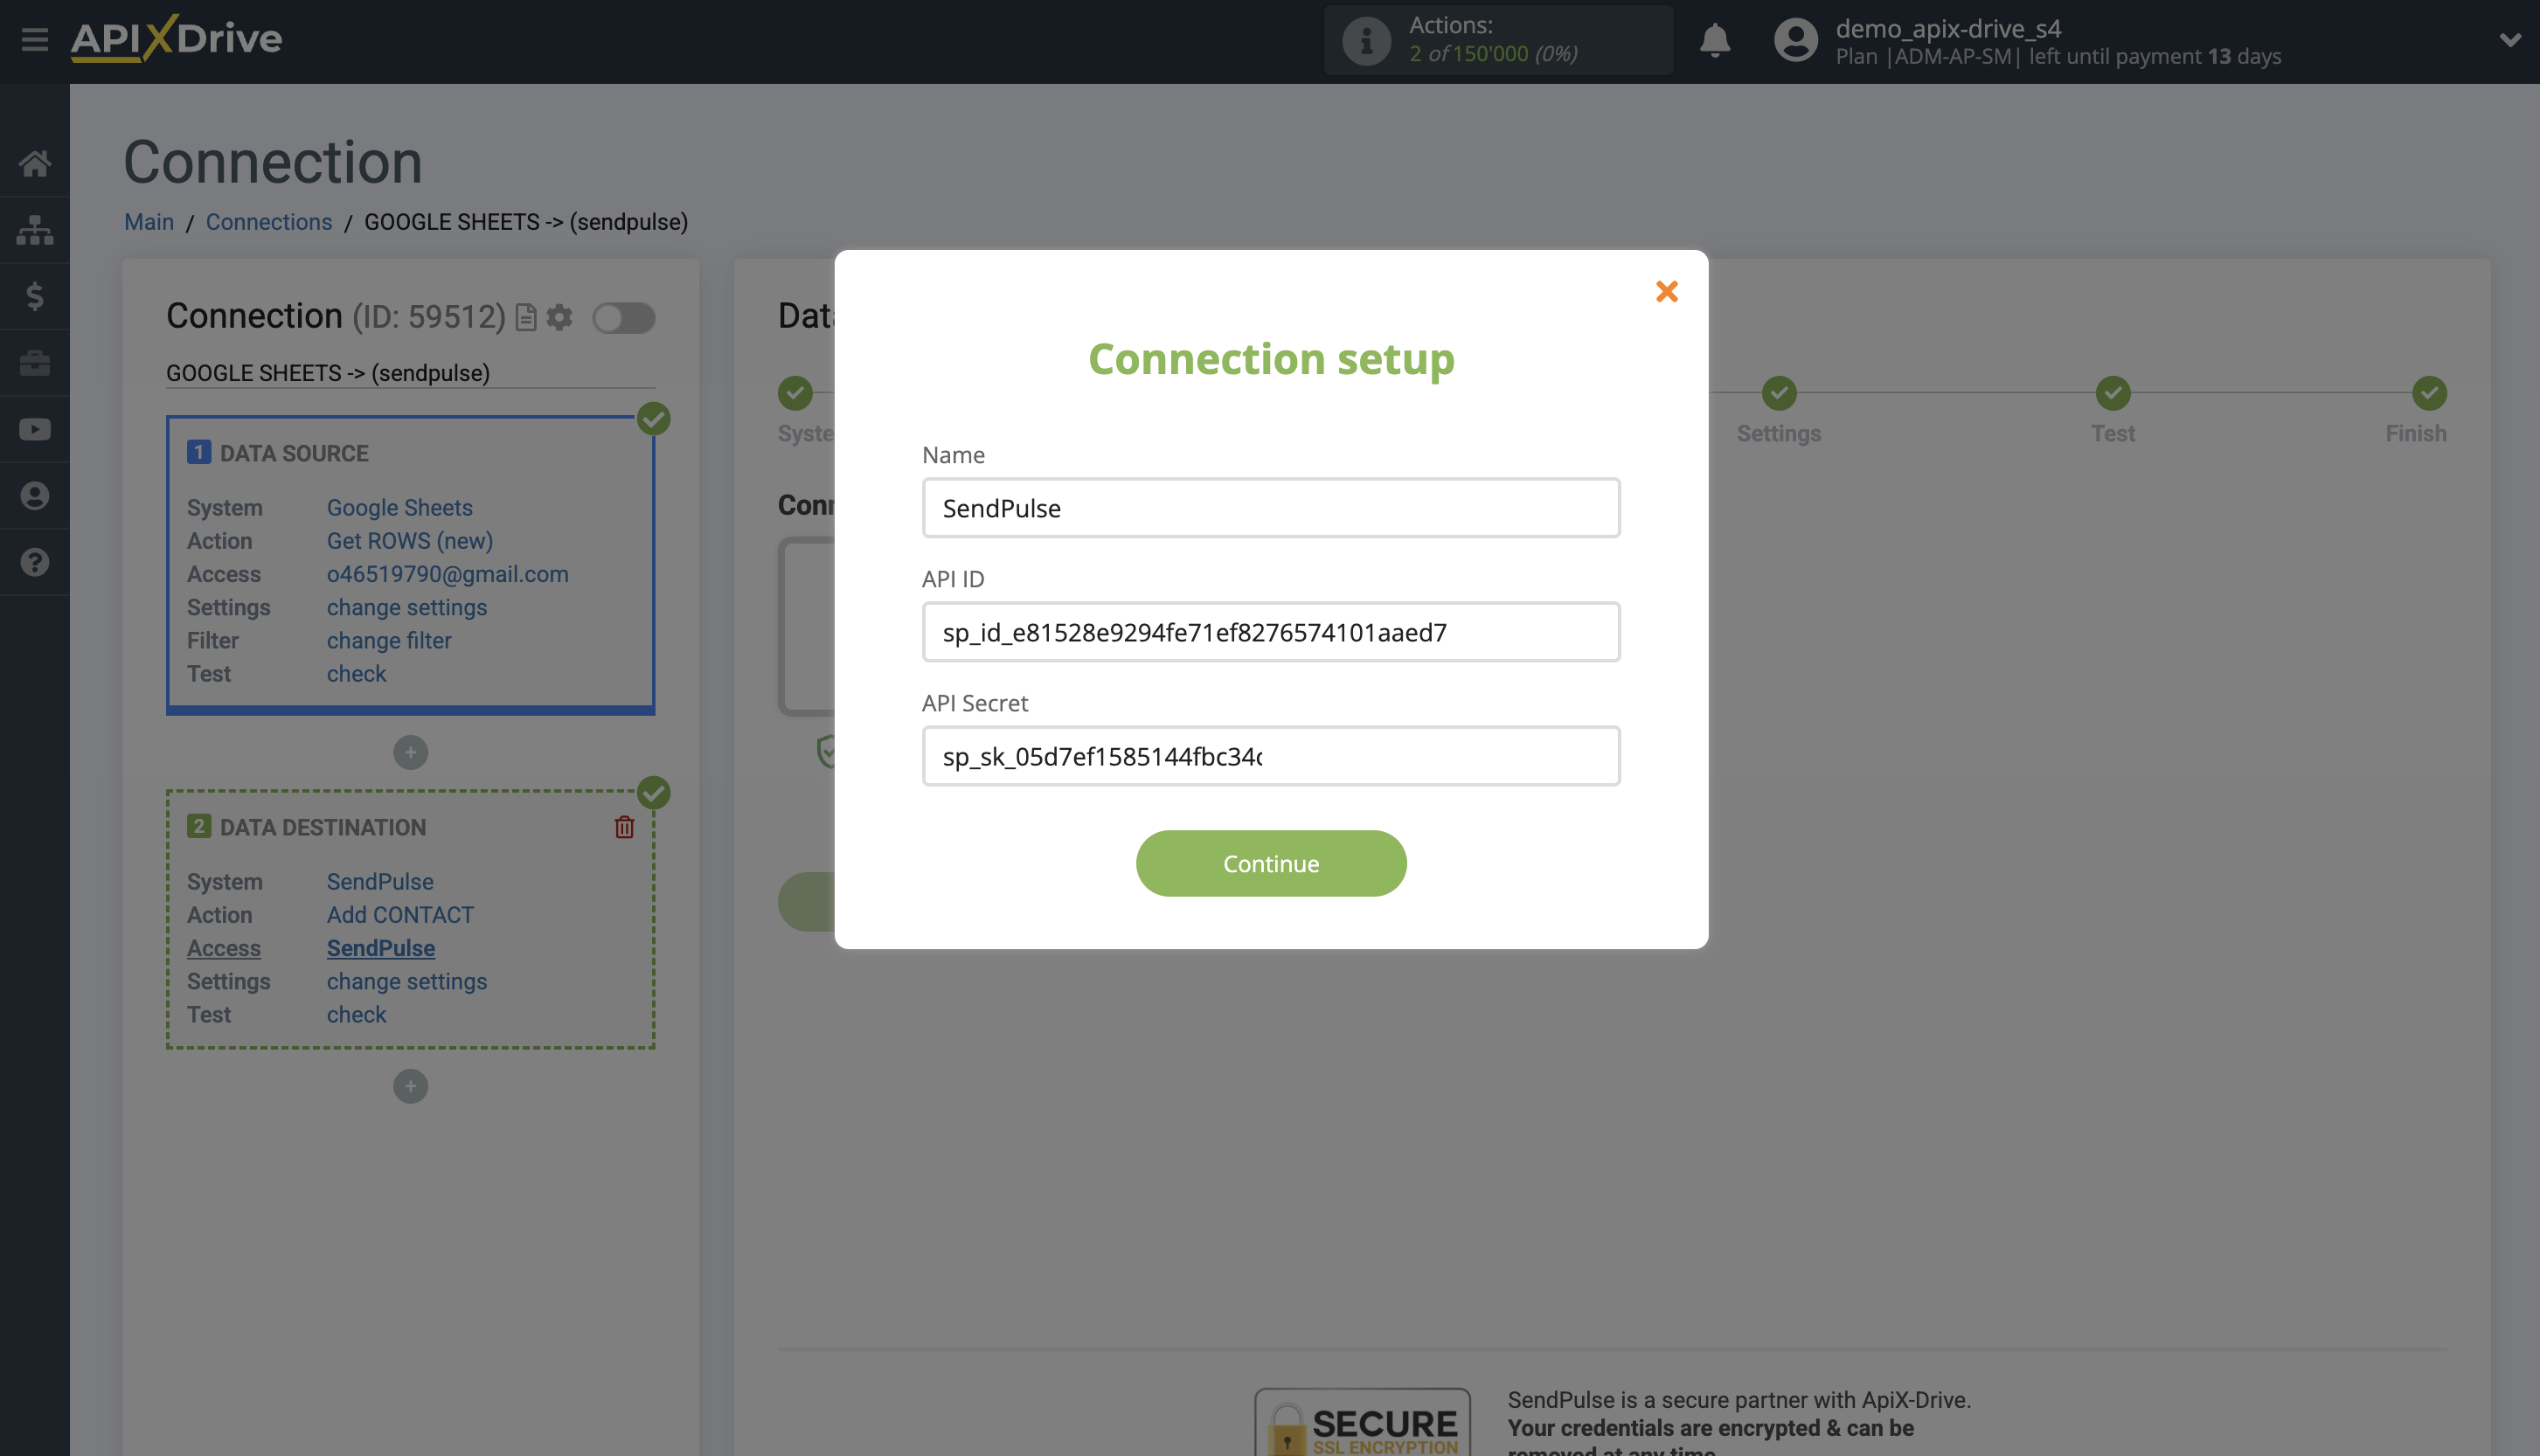
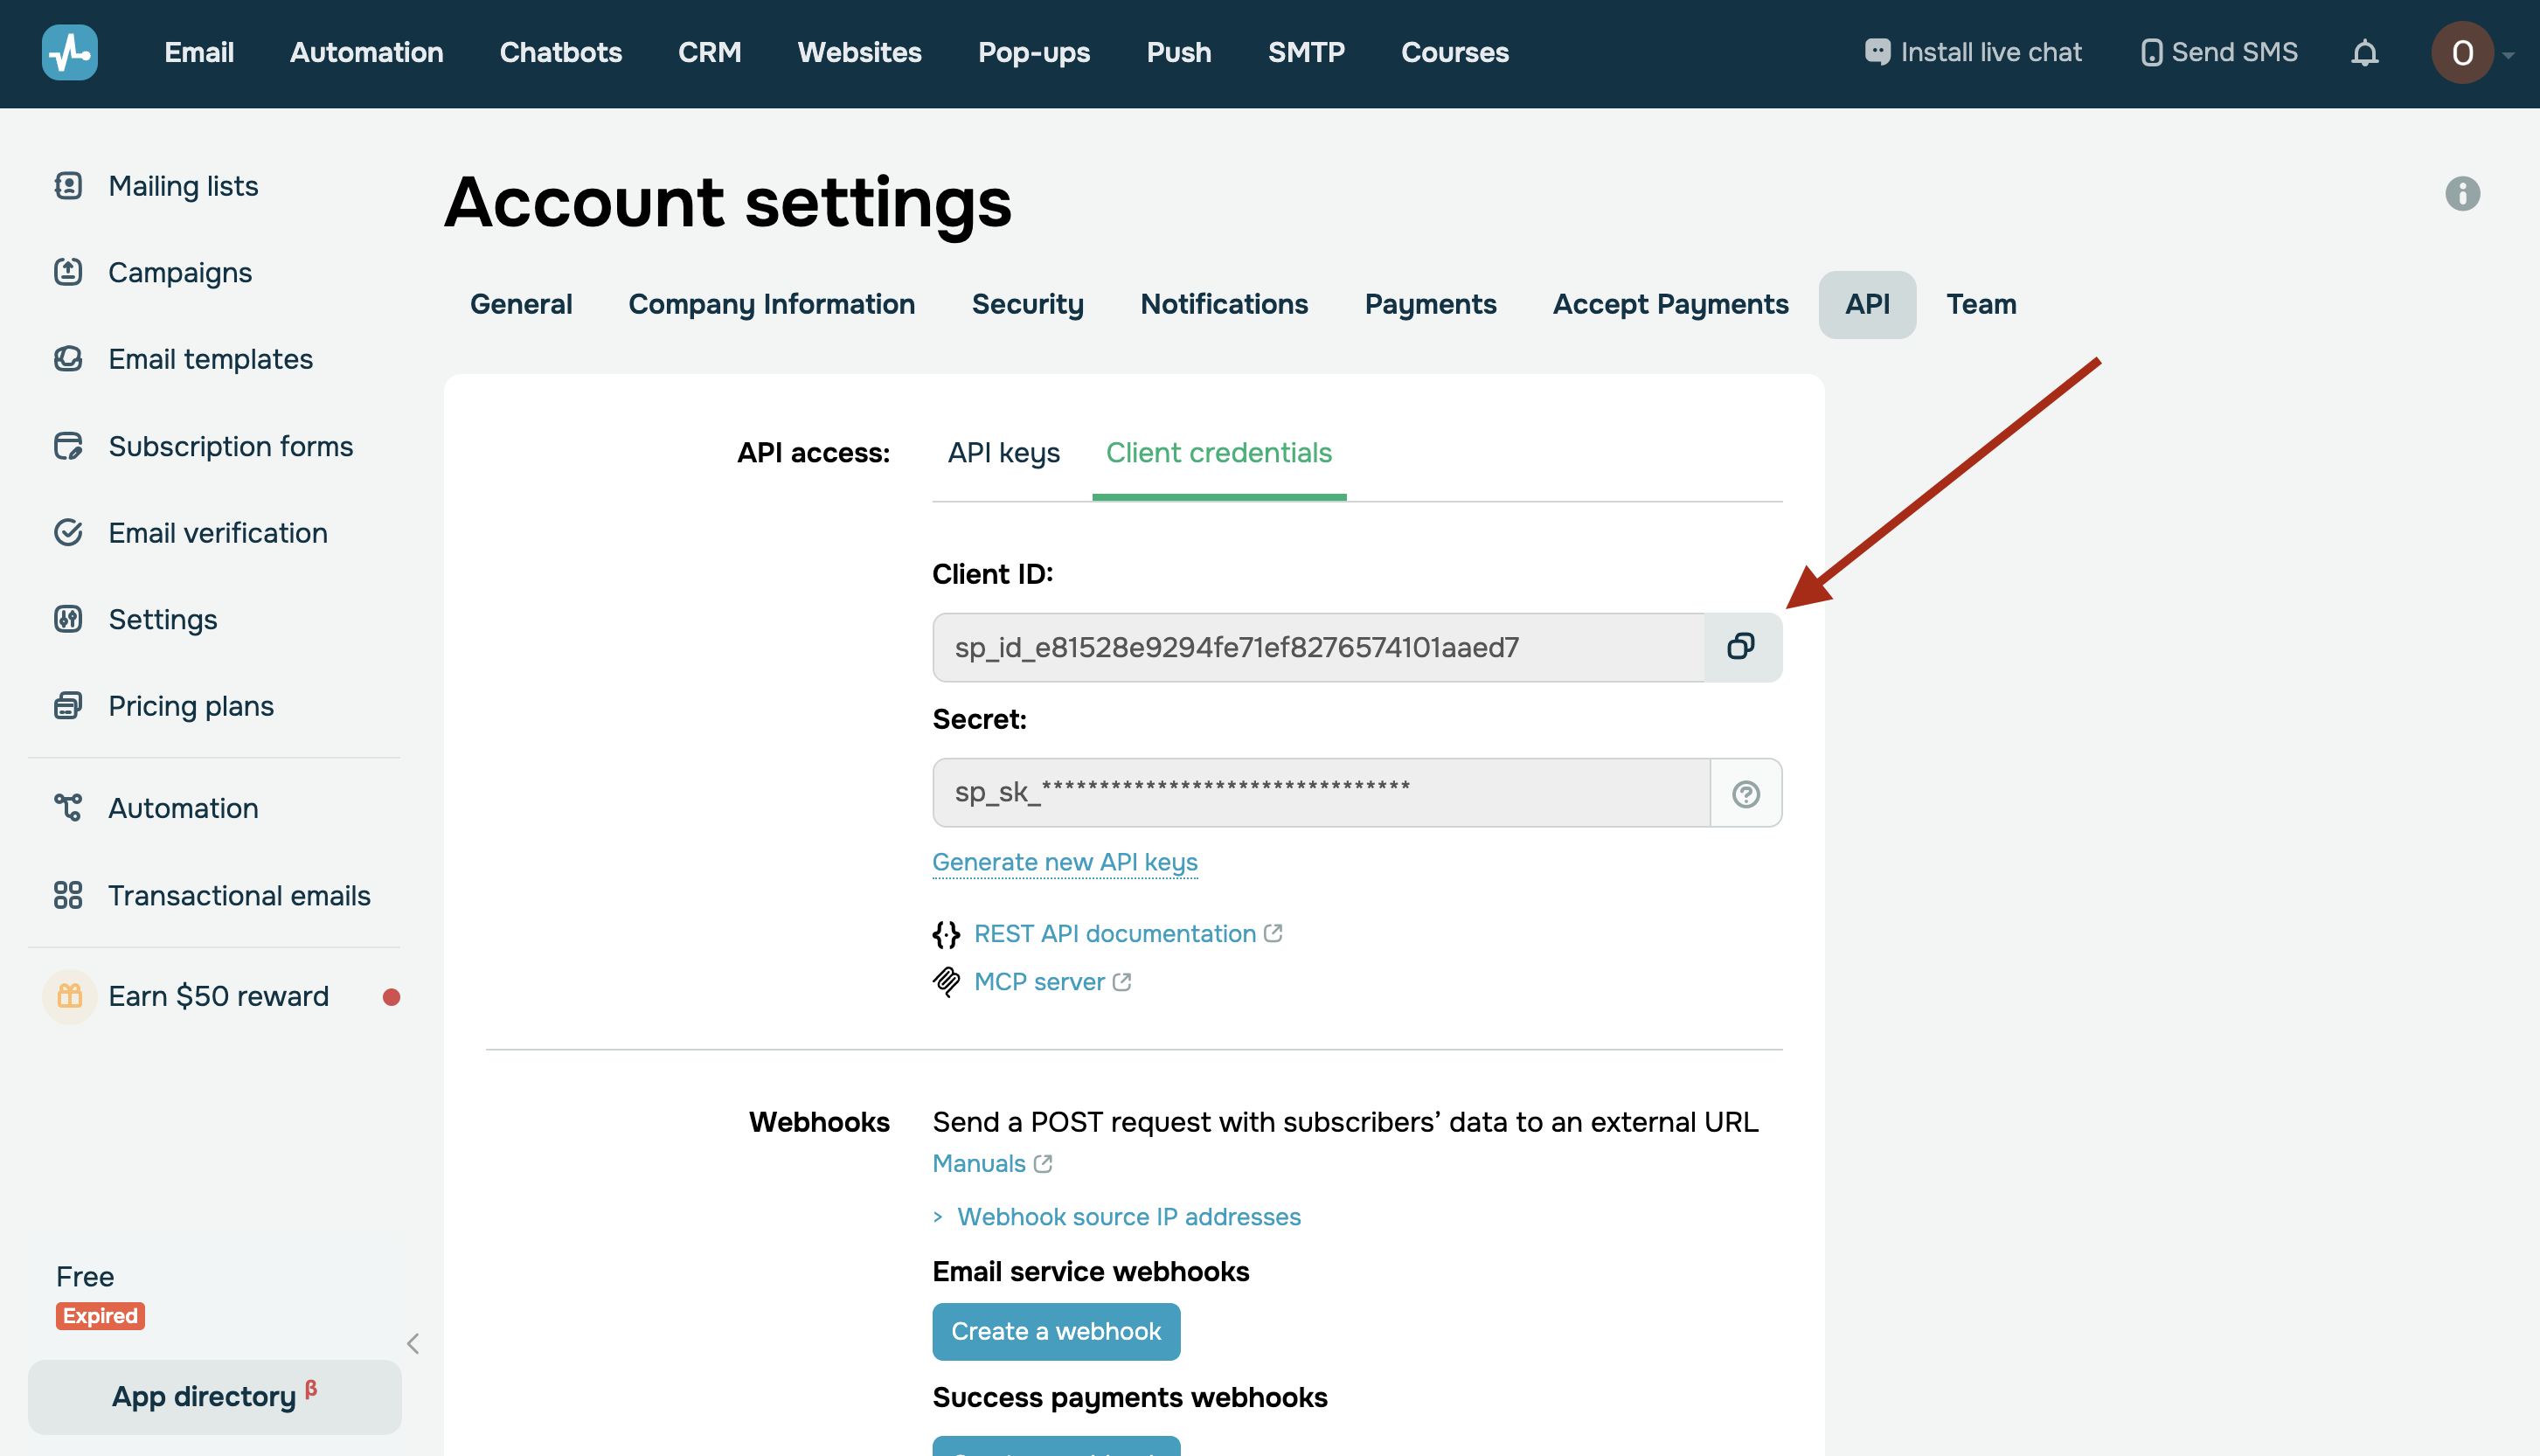
In the window that opens, you must fill in the "API ID" and "API Secret" fields.
To do this, let's go to your SendPulse personal account.
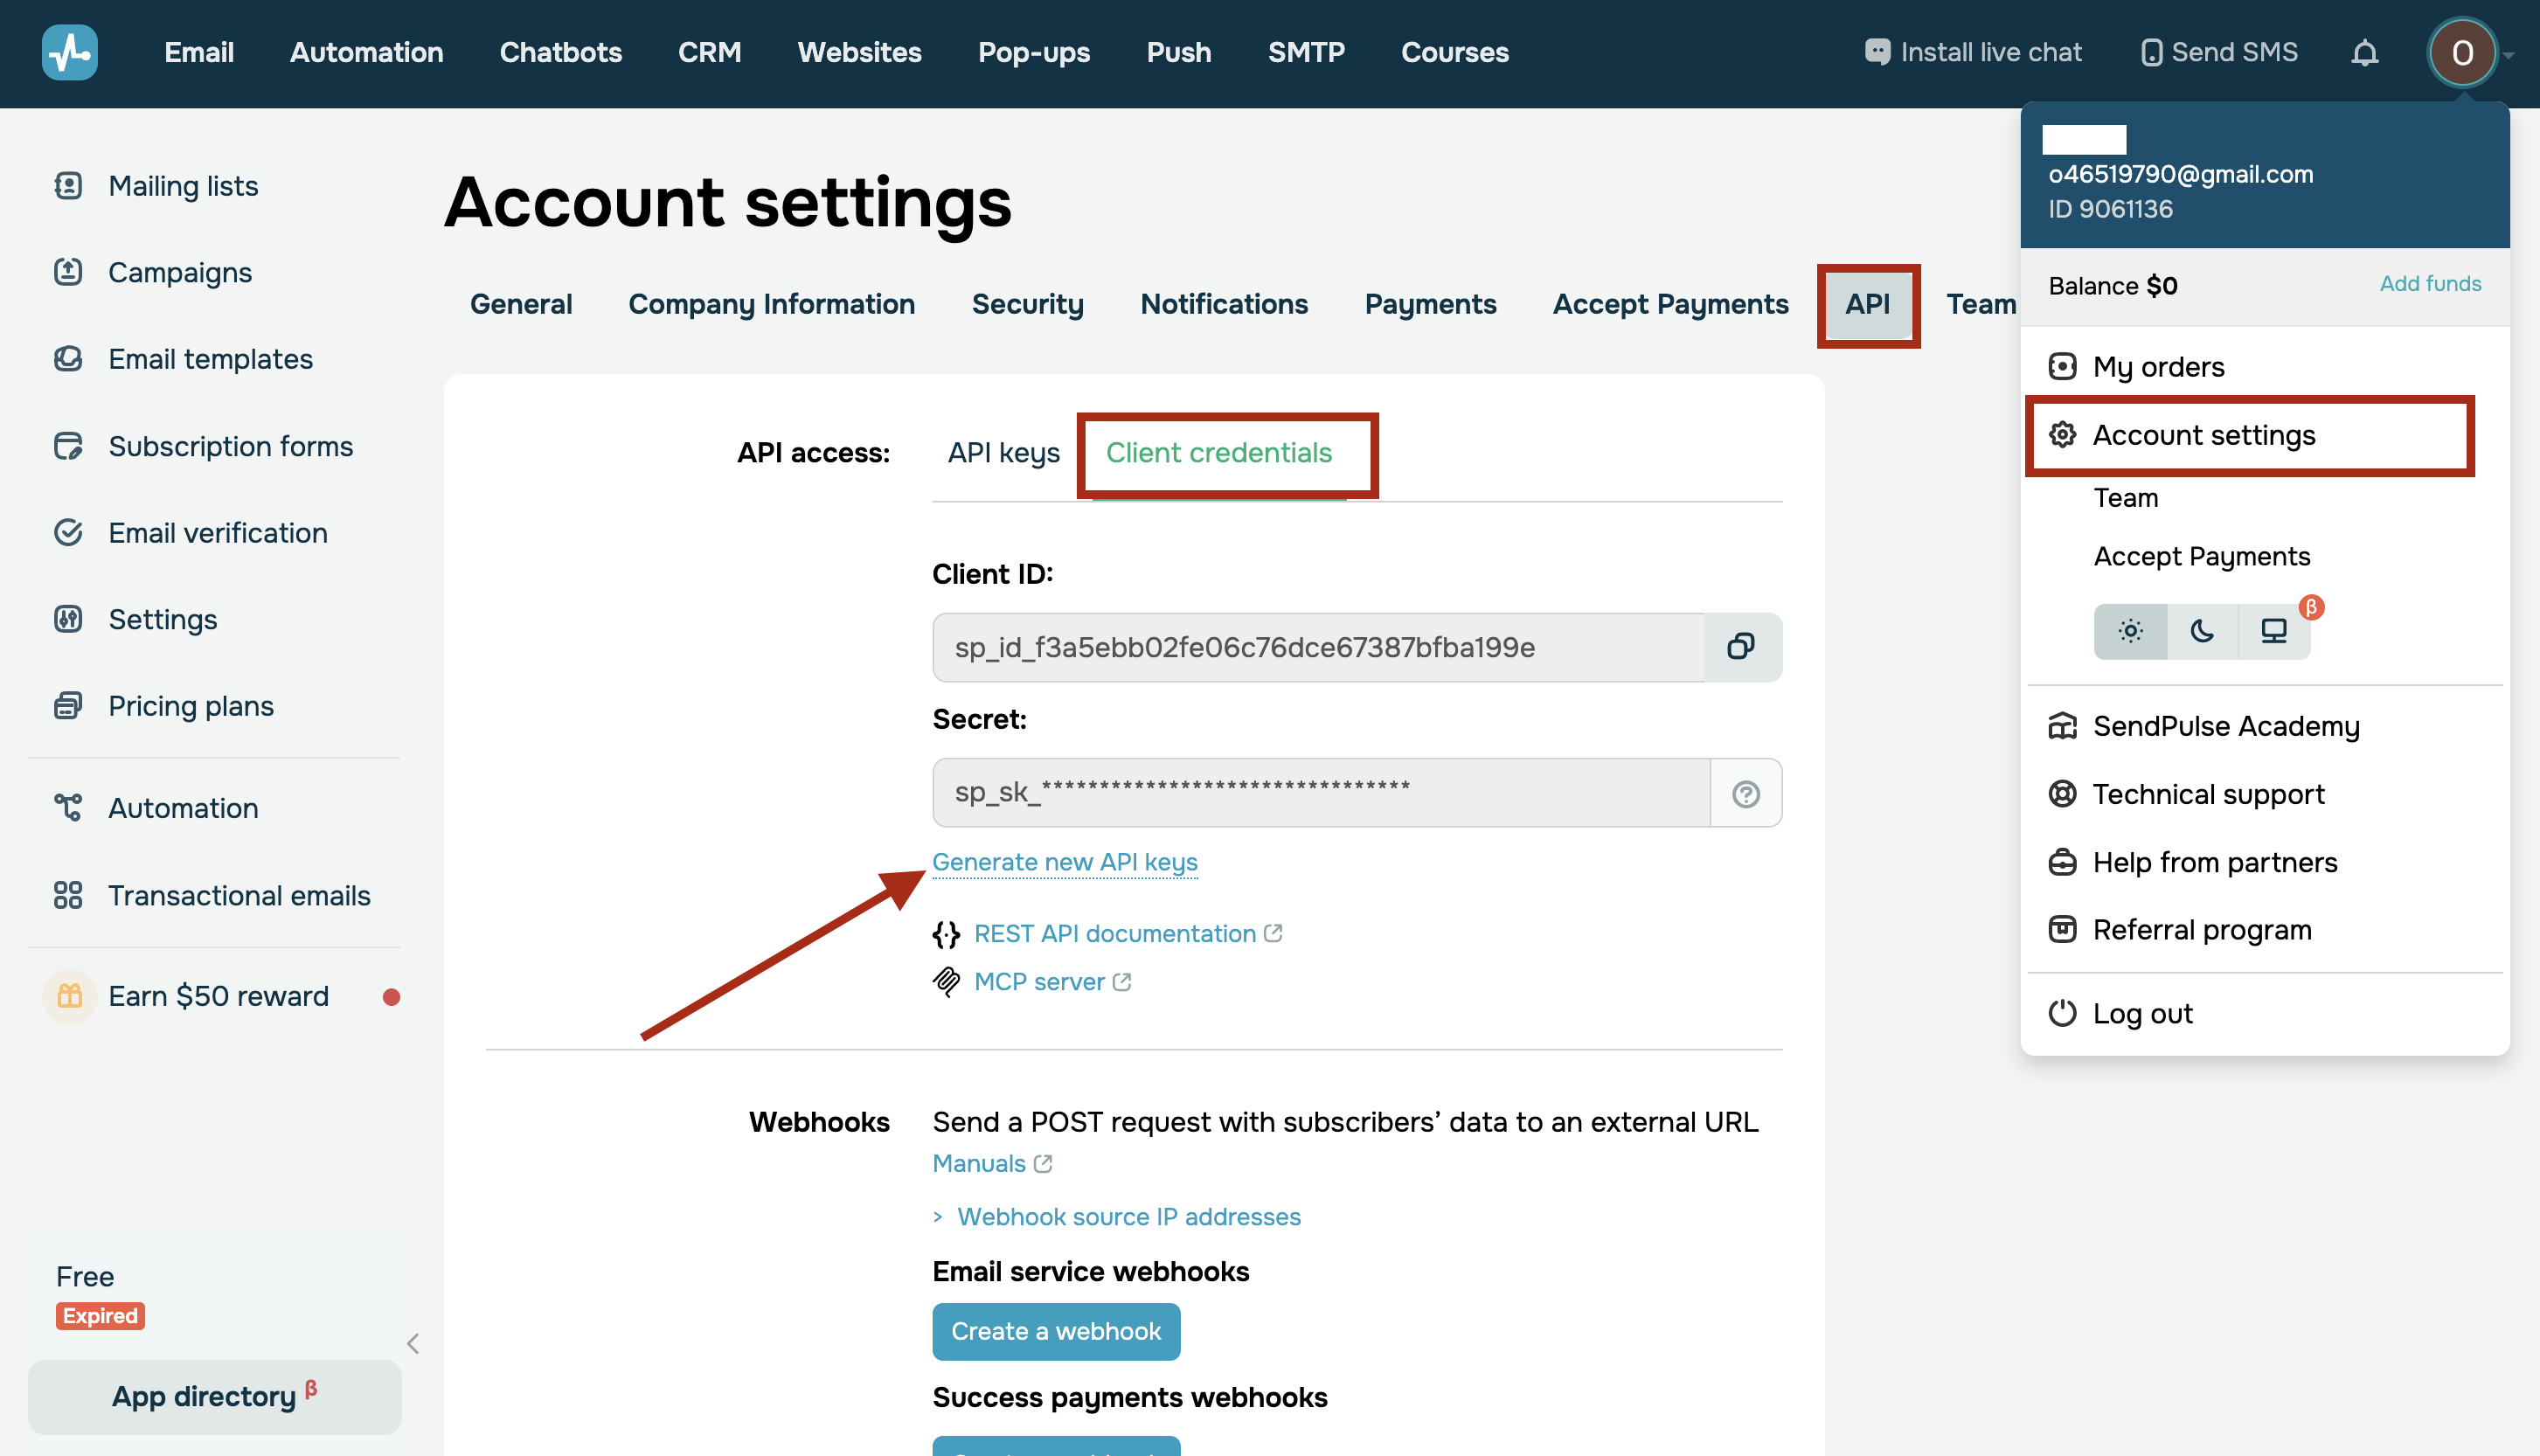
Go to the account settings in the API settings, Client credentials section. Then click Generate new API keys.
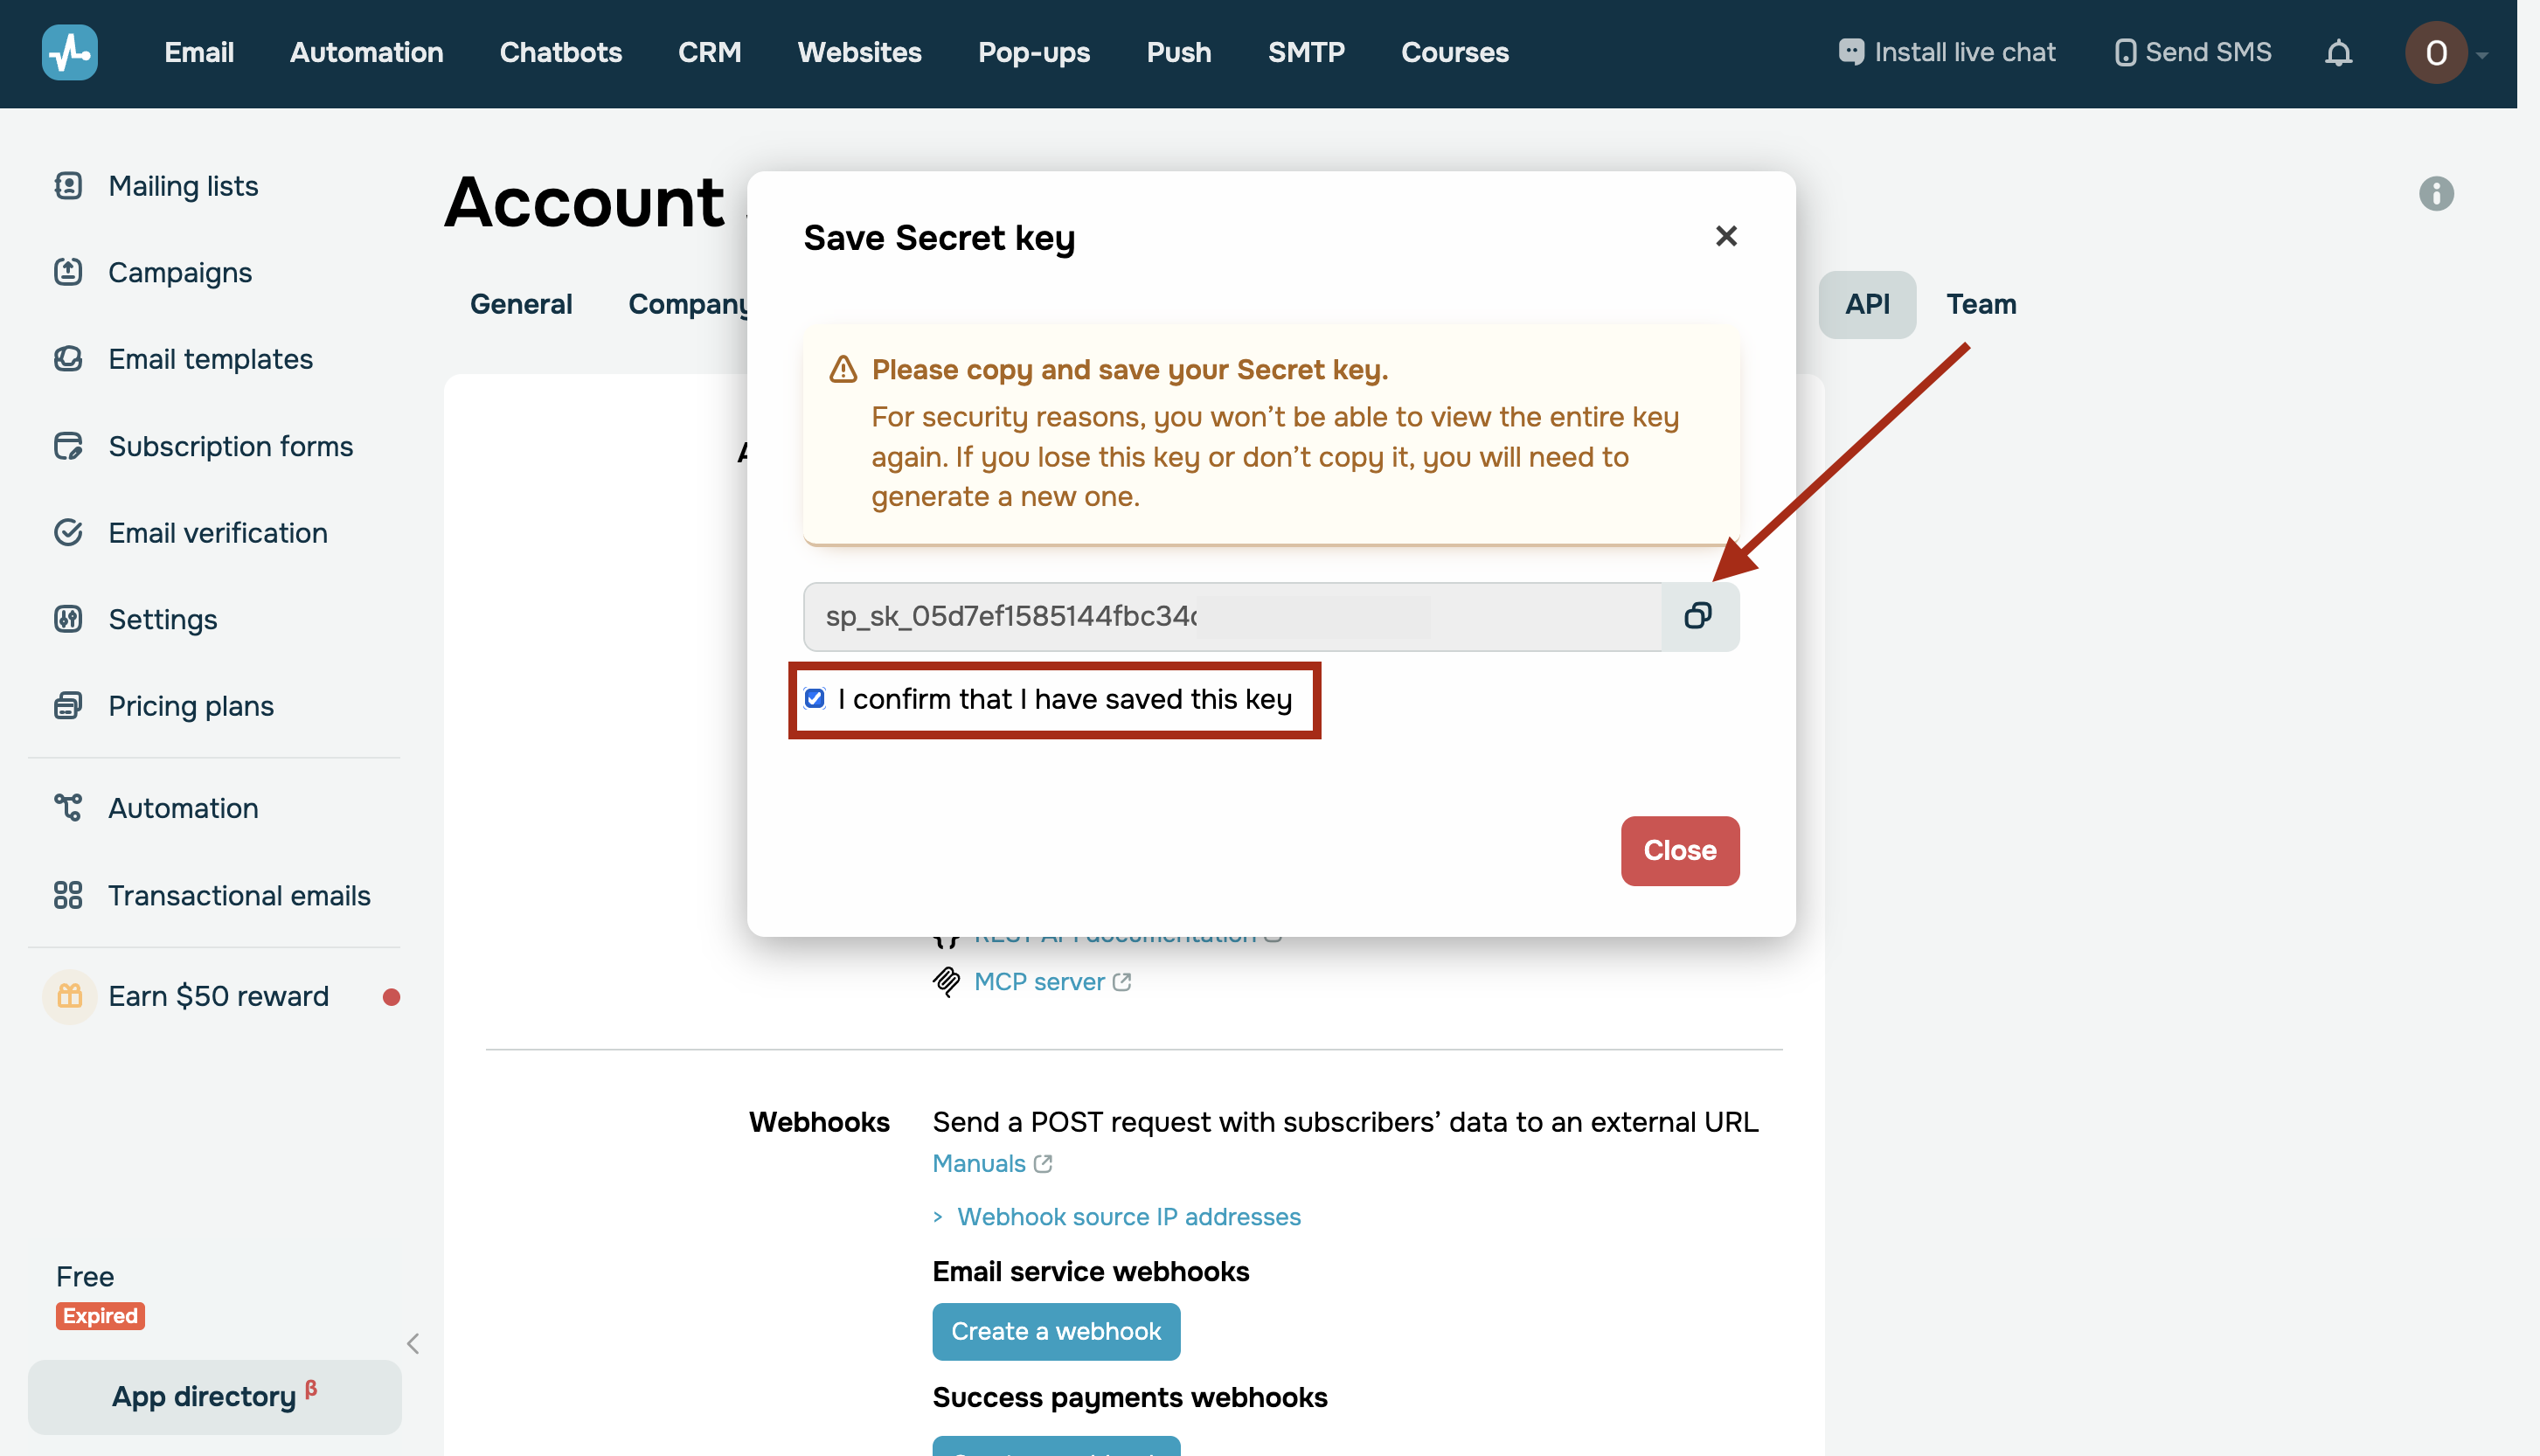
Save, immediately copy the Secret key and paste it into the appropriate field in the ApiX-Drive system.
Also copy the ID and paste it into the API ID field in the ApiX-Drive system and save the settings.
When the connected account appears in the "active accounts" list, select it.
Attention! If your account is on the "inactive accounts" list, check your access to this login!
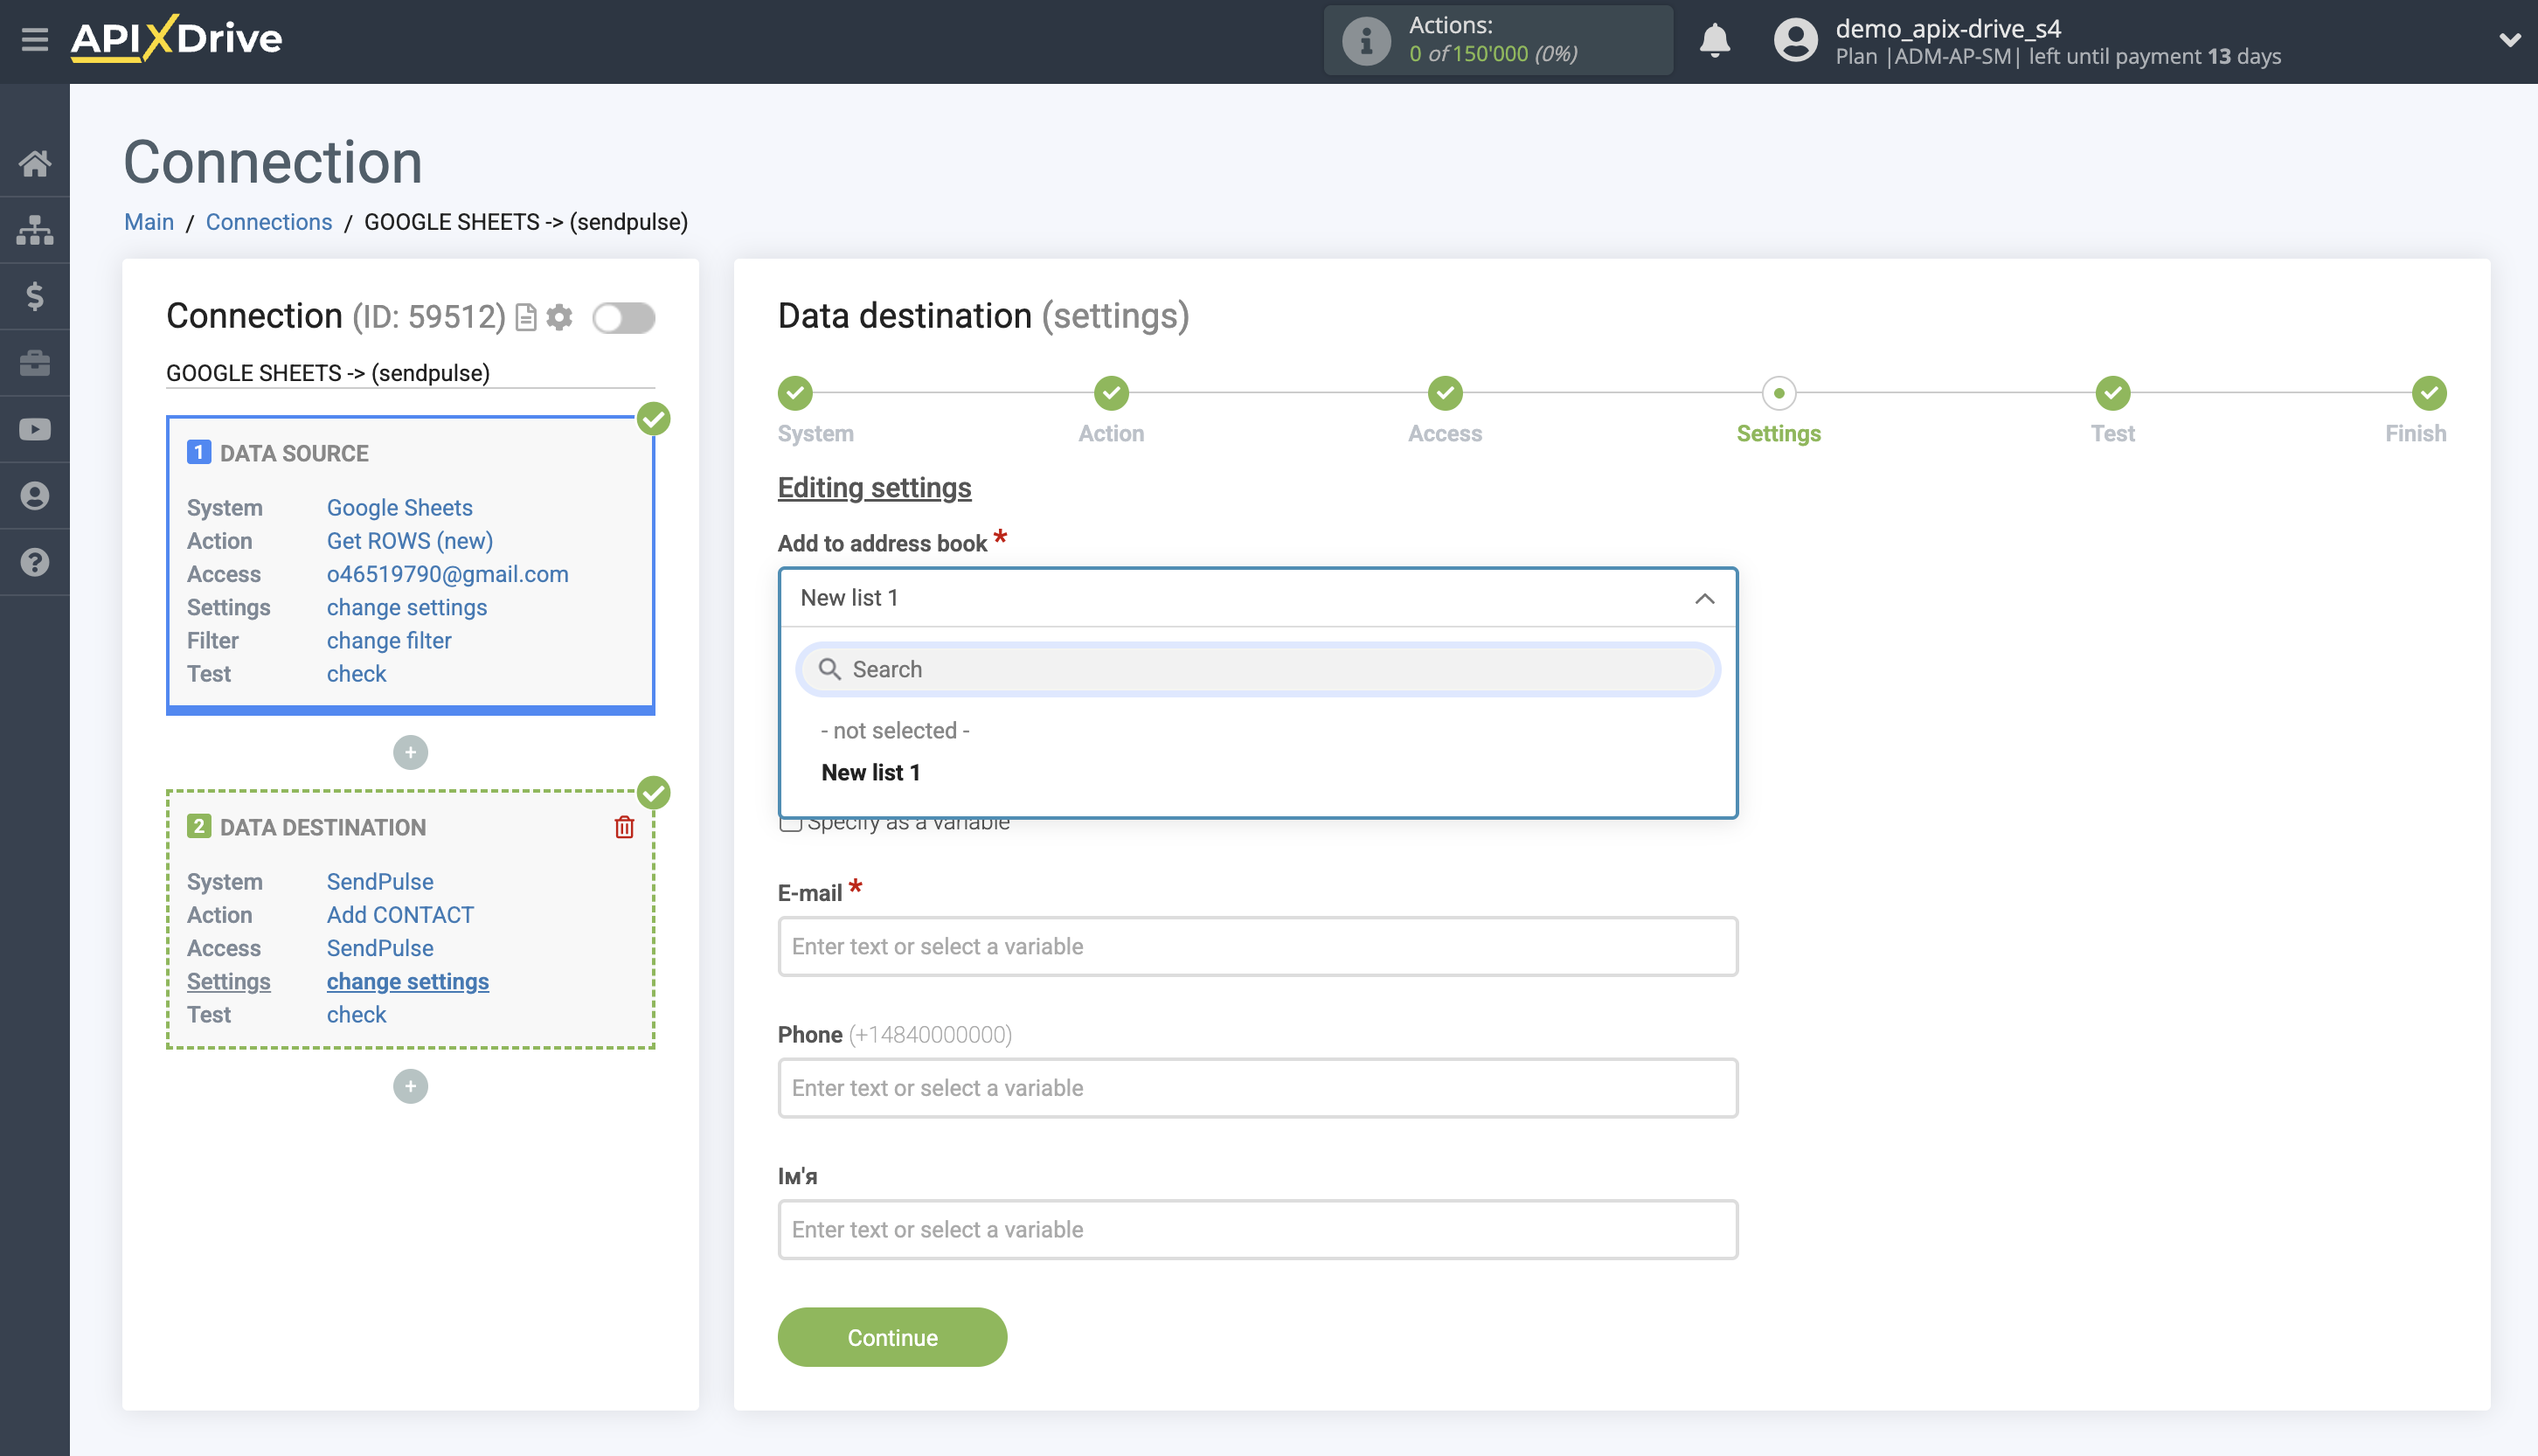
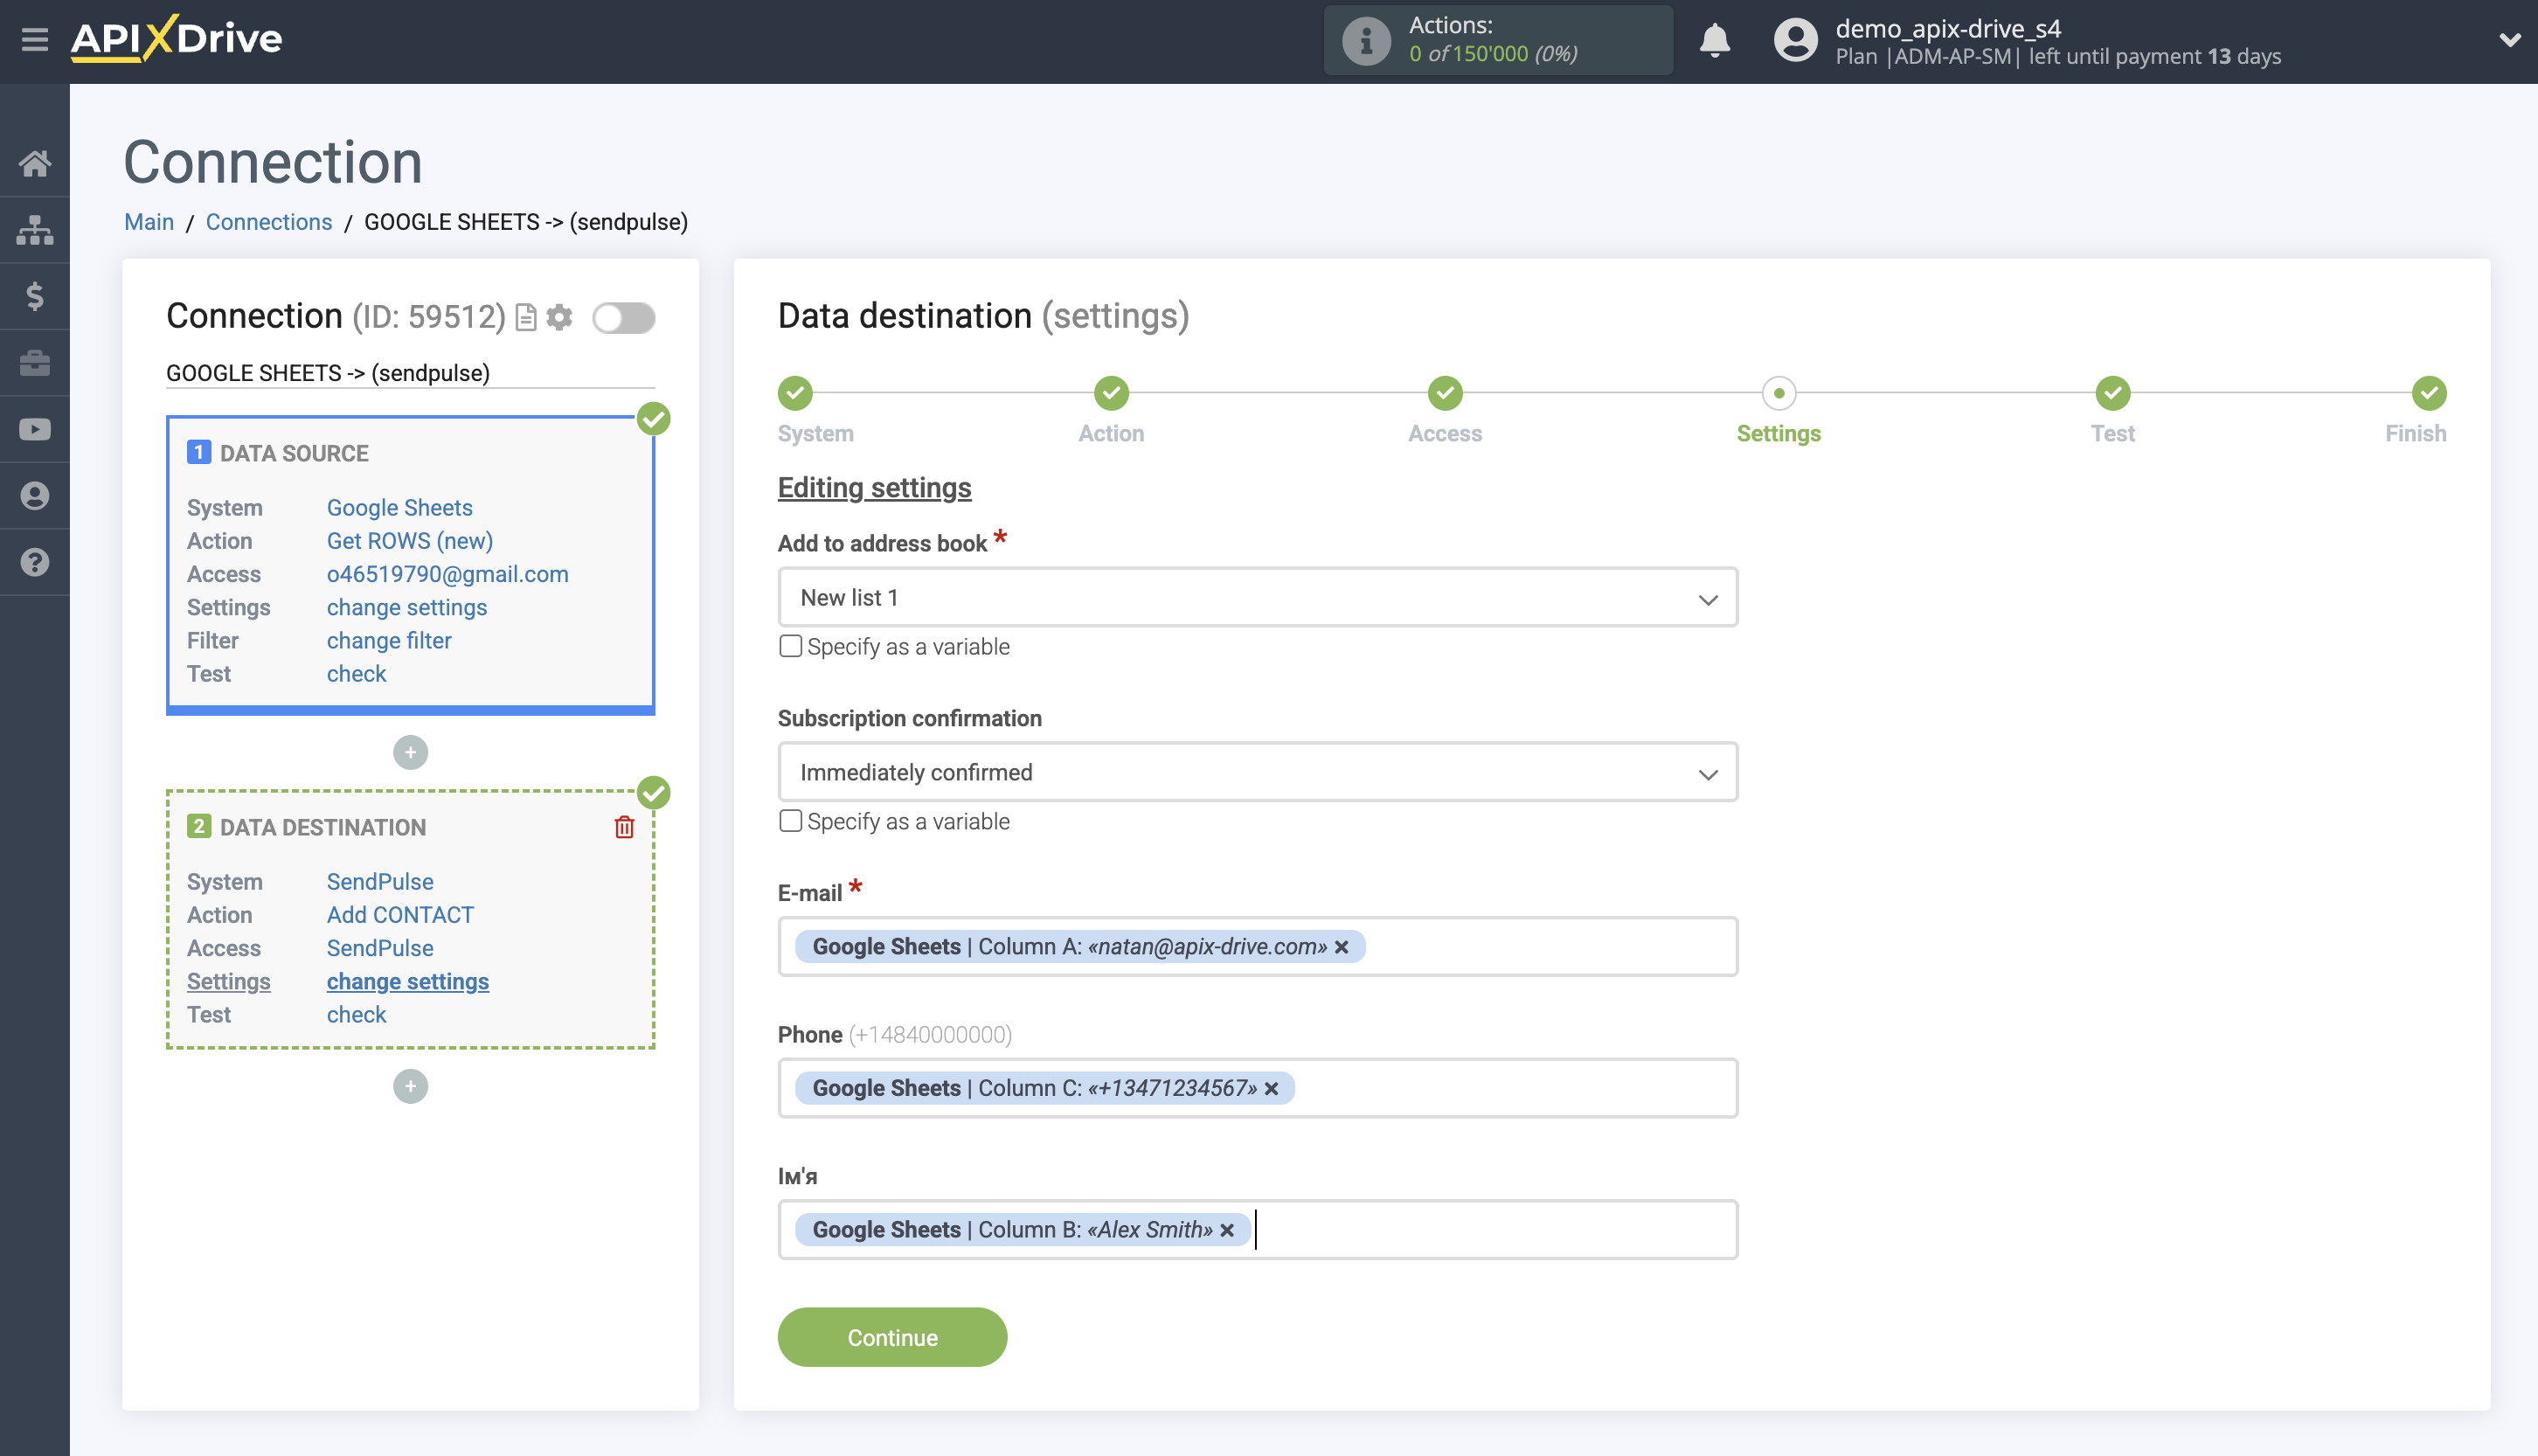
Now you need to specify the SendPulse address book to which the data from the source will be sent.
You can select the address book to add or remove the desired contact.
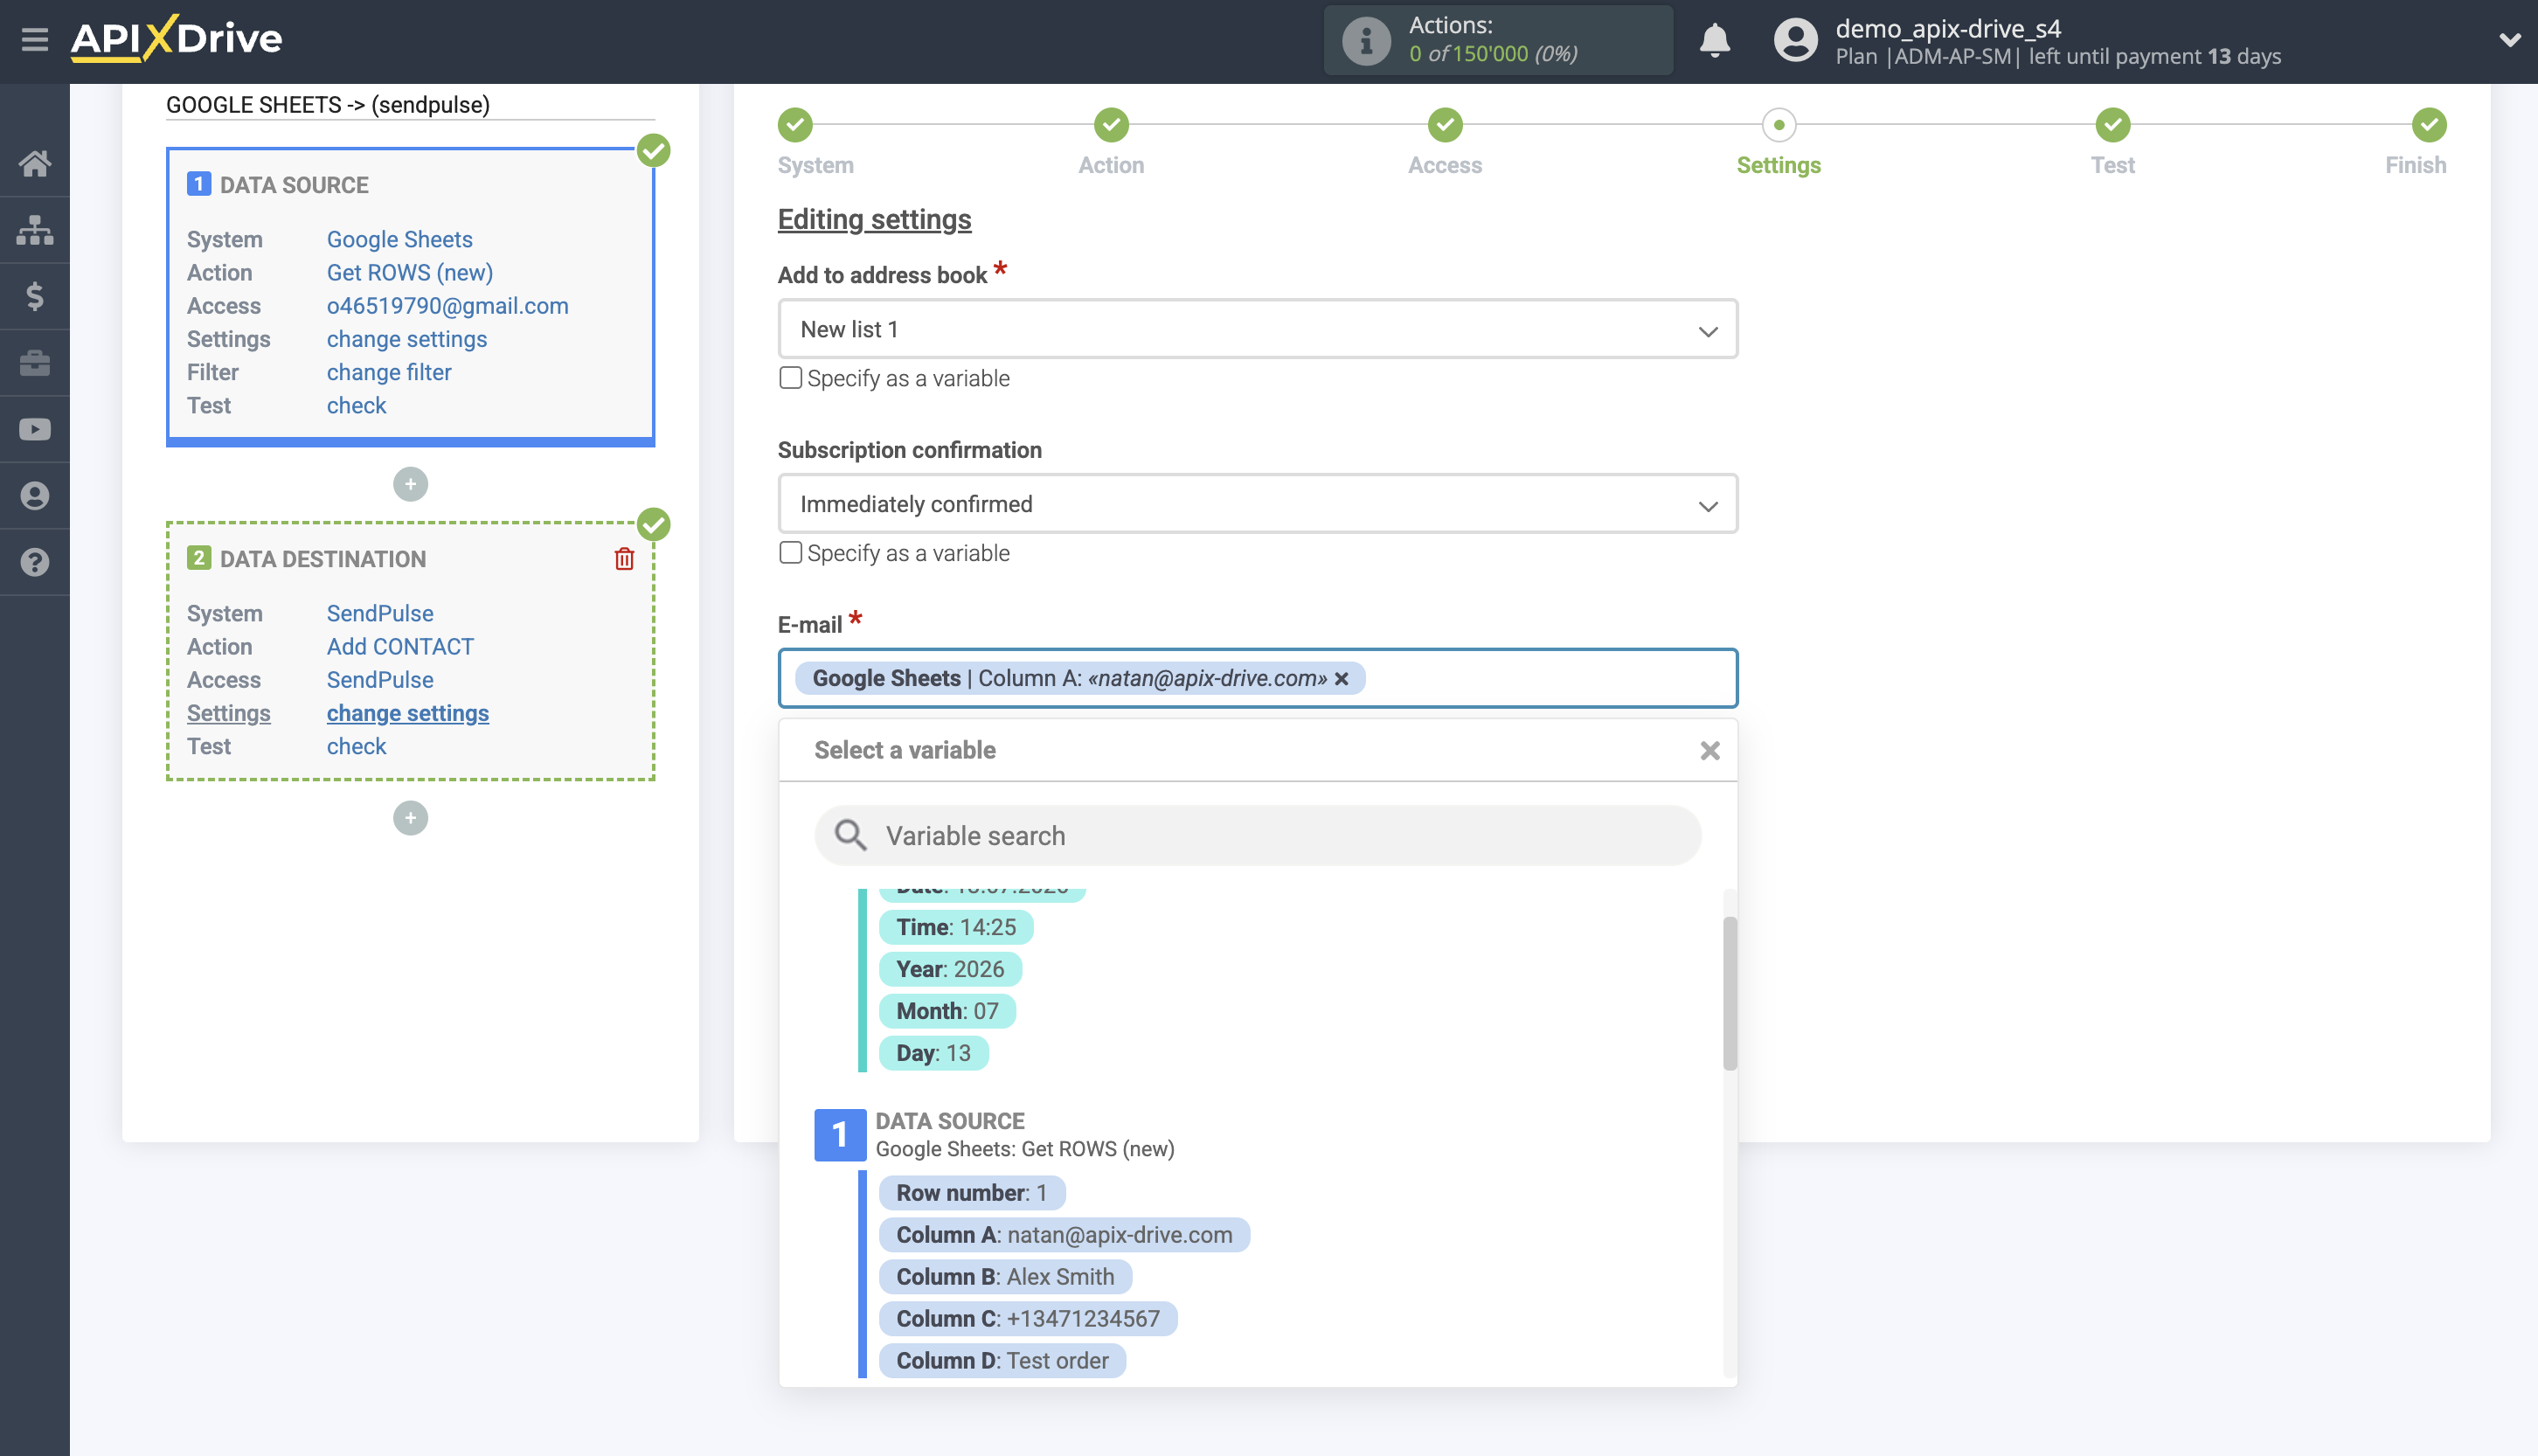
You also need to specify the source field from which the recipient's email will be downloaded, in our case the email is located in Google Sheets in column А.
Please note that by default in SendPulse the name is transmitted in lowercase, but in our system there is a separate field where the name will be written in uppercase.
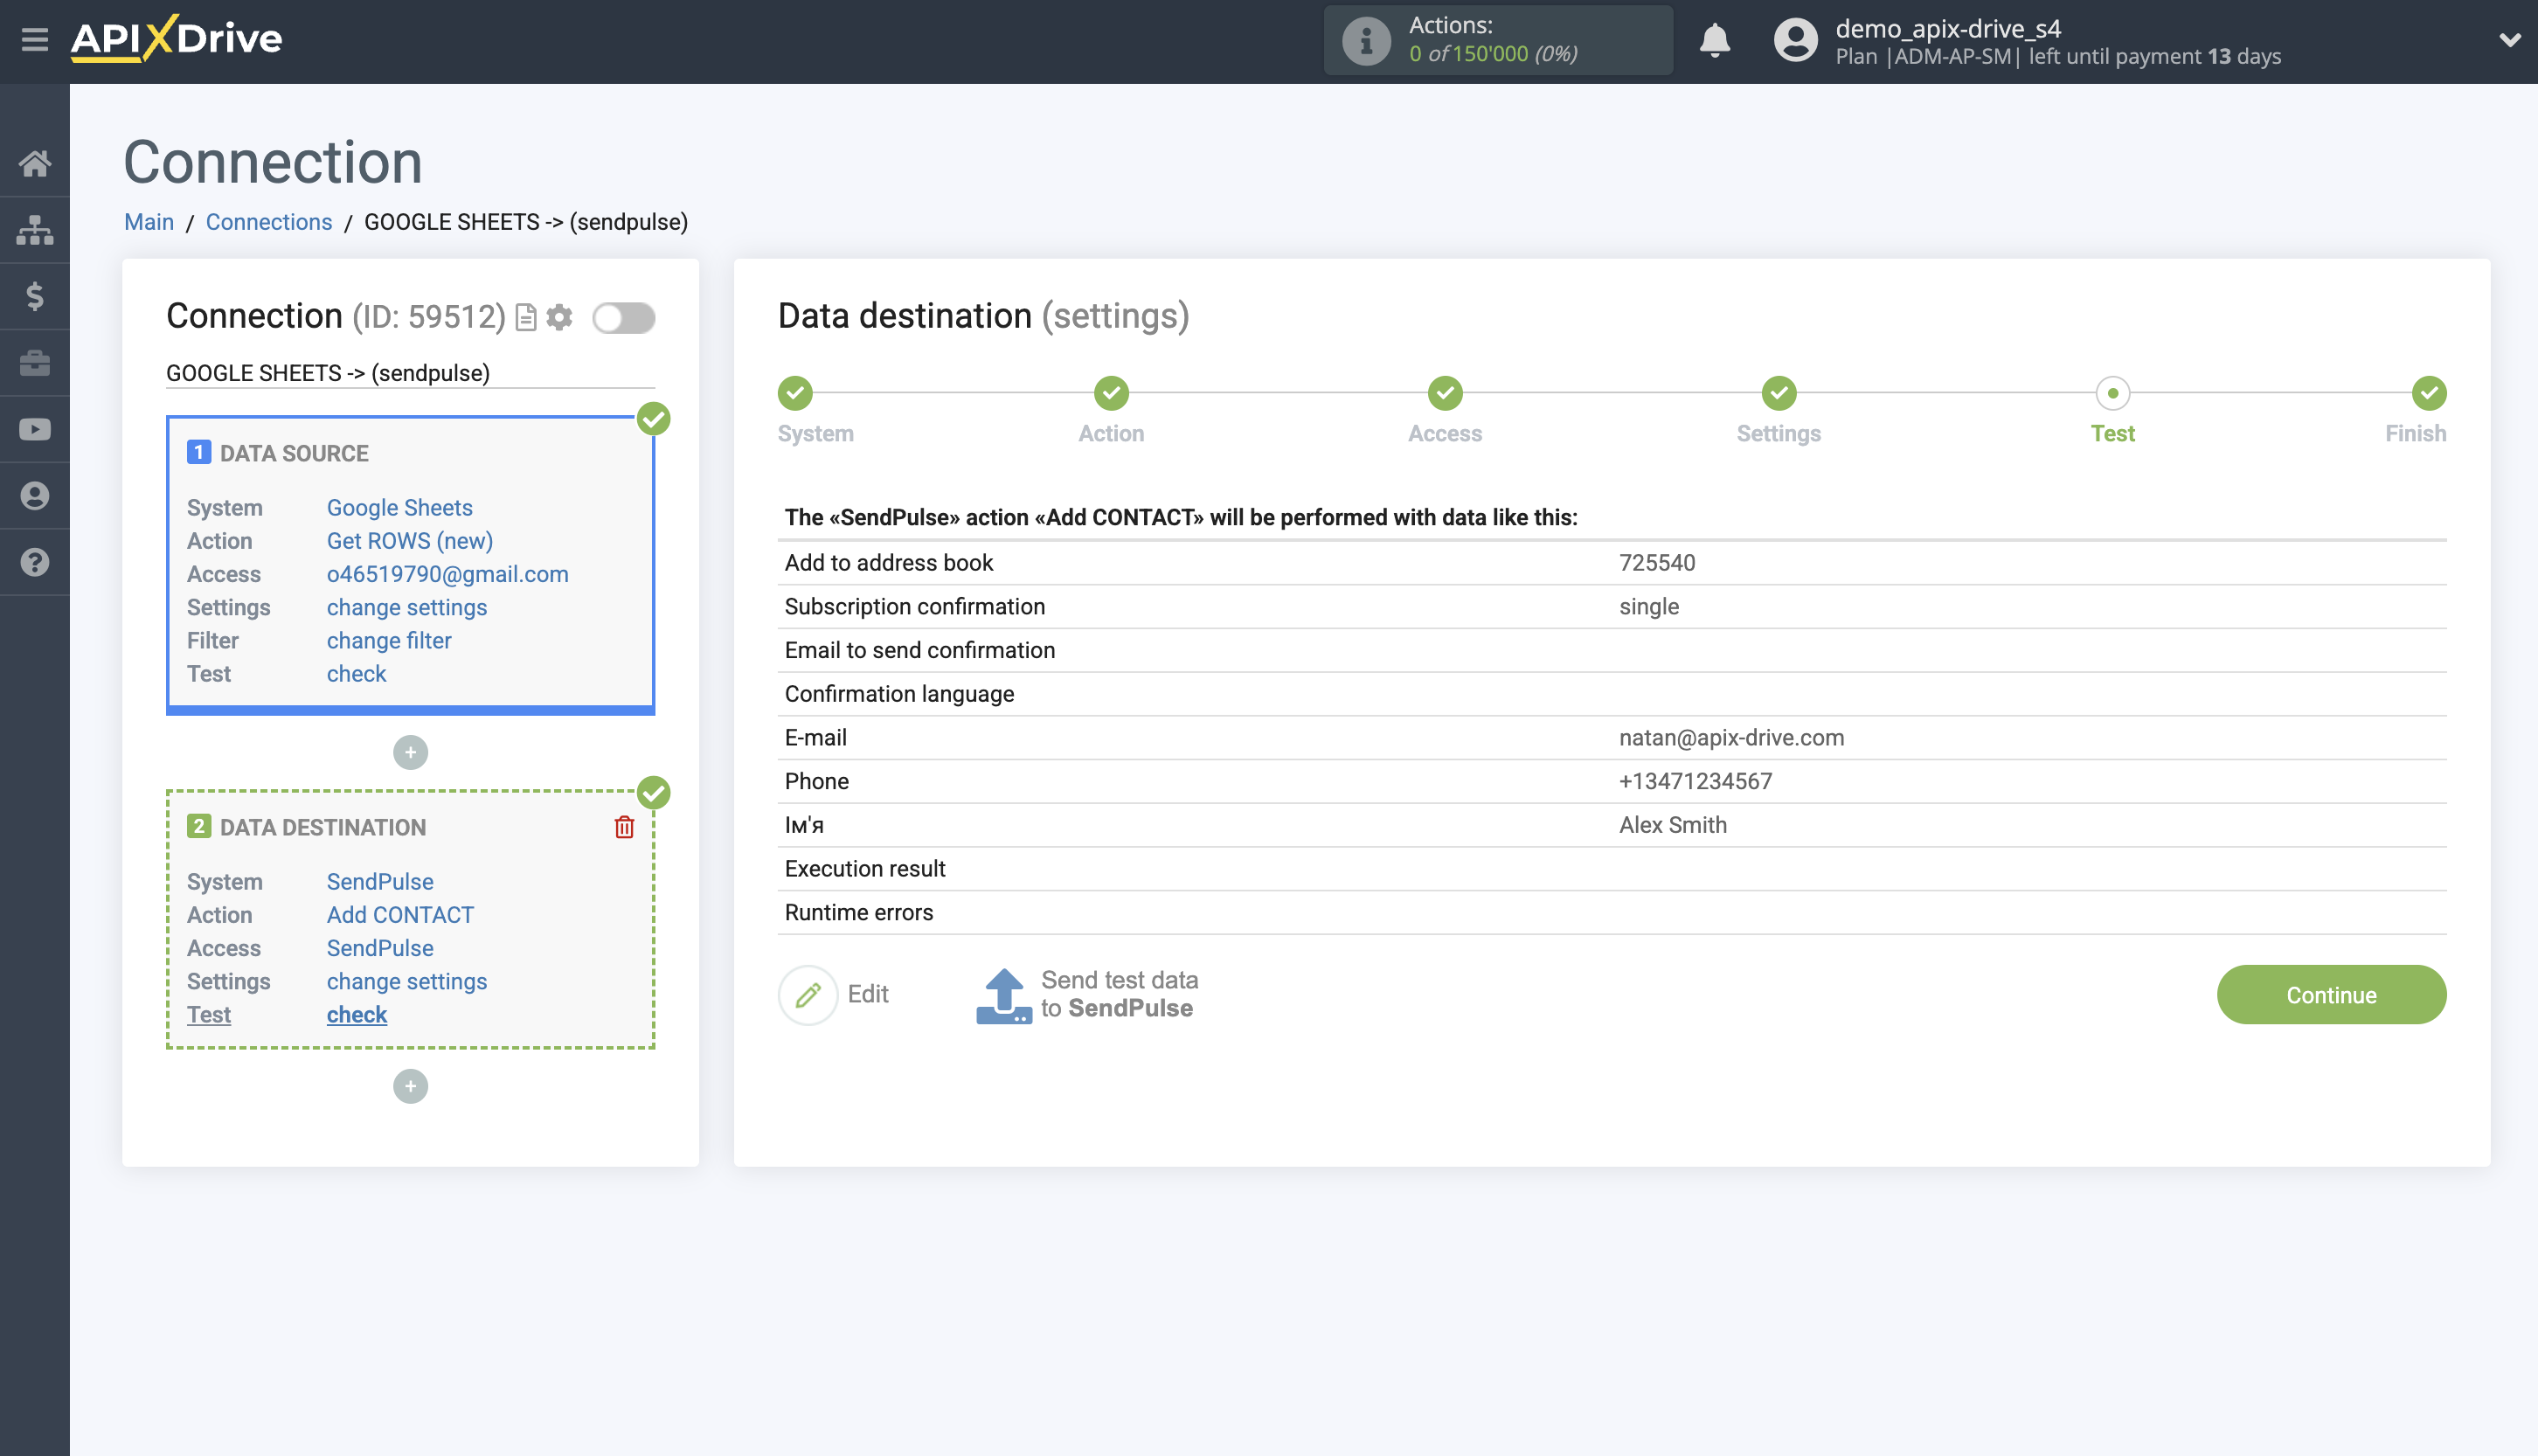
Now you see the test data that will be uploaded to SendPulse.
Click "Send test data to SendPulse" and go to the SendPulse account in the appropriate address book to check if the connection works.
If you are not satisfied with something, click “Edit” and go back a step.
If you are satisfied with everything, click “Next” to continue the setup.
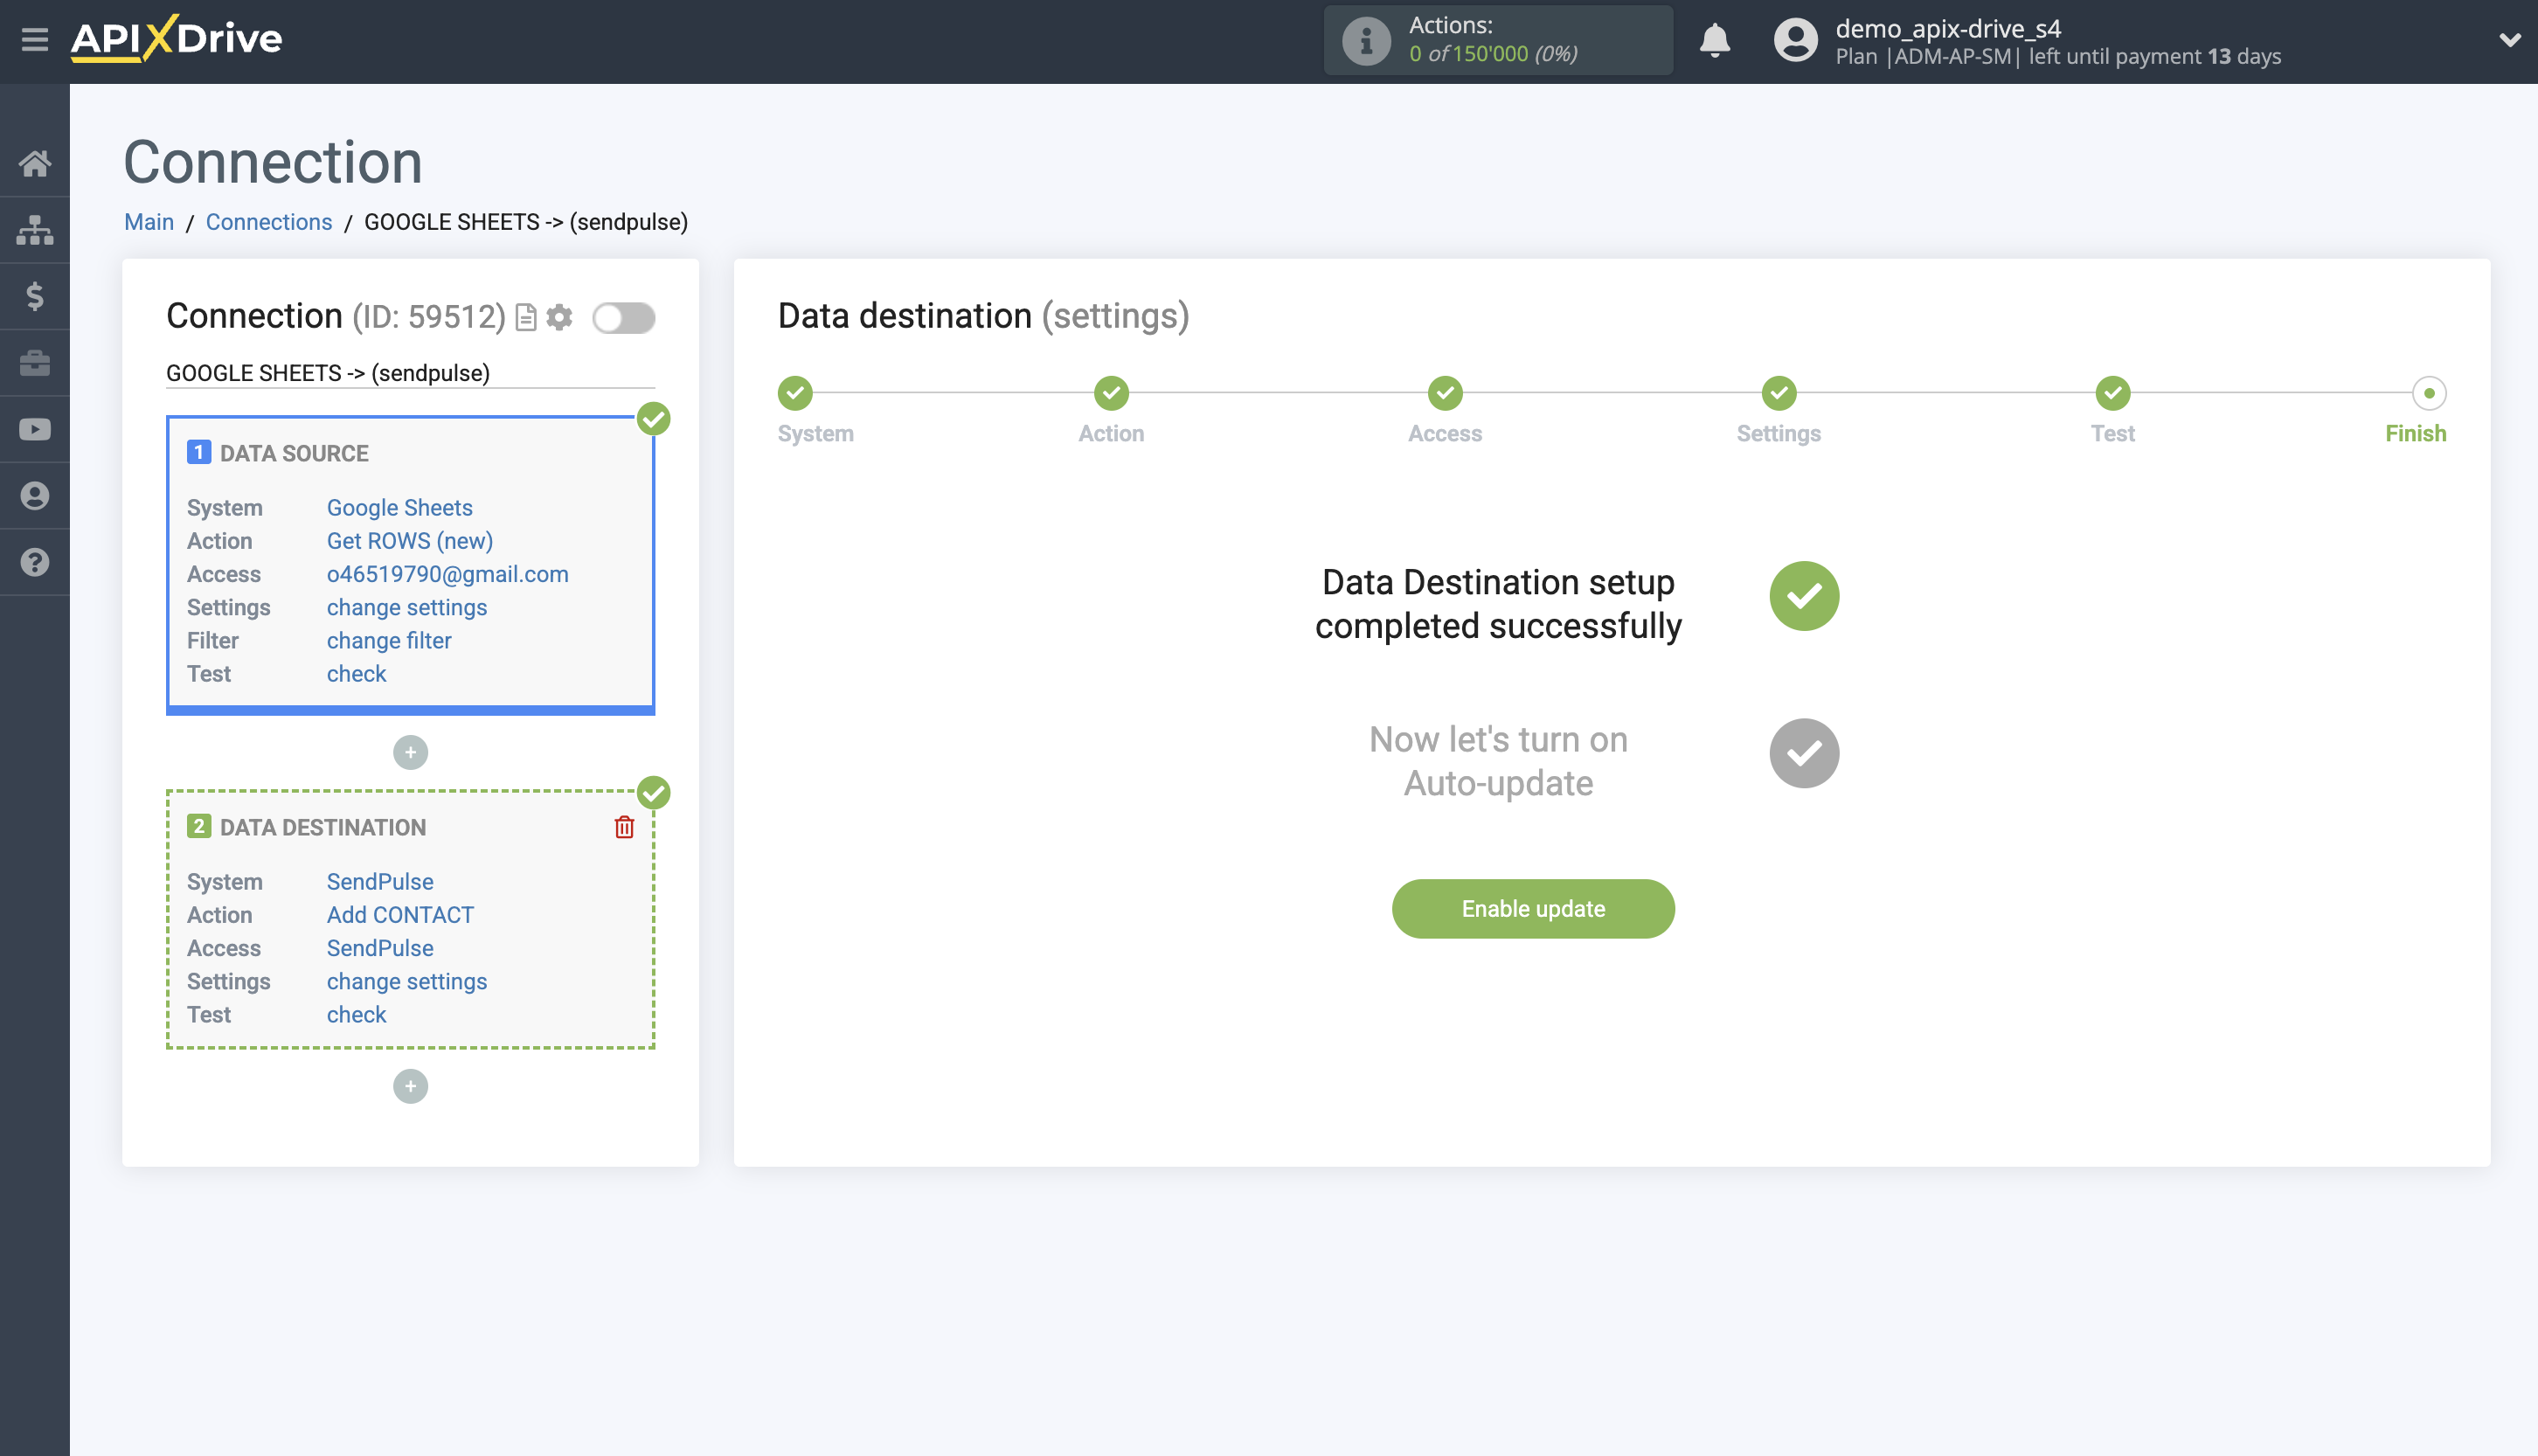
This completes the Data Destination setup!
Now you can start choosing the update interval and enabling auto-update.
To do this, click "Enable auto-update".
On the main screen, click on the gear icon to select the required update interval or setup scheduled launch. To start the connection by time, select scheduled start and specify the desired time for the connection update will be started, or add several options at once when you need the connection will be started.
Attention! In order for the scheduled run to work at the specified time, the interval between the current time and the specified time must be more than 5 minutes. For example, you select the time 12:10 and the current time is 12:08 - in this case, the automatic update of the connection will occur at 12:10 the next day. If you select the time 12:20 and the current time is 12:13 - the auto-update of the connection will work today and then every day at 12:20.
To make the current connection transmit data only after another connection, check the box "Update connection only after start other connection" and specify the connection after which the current connection will be started.
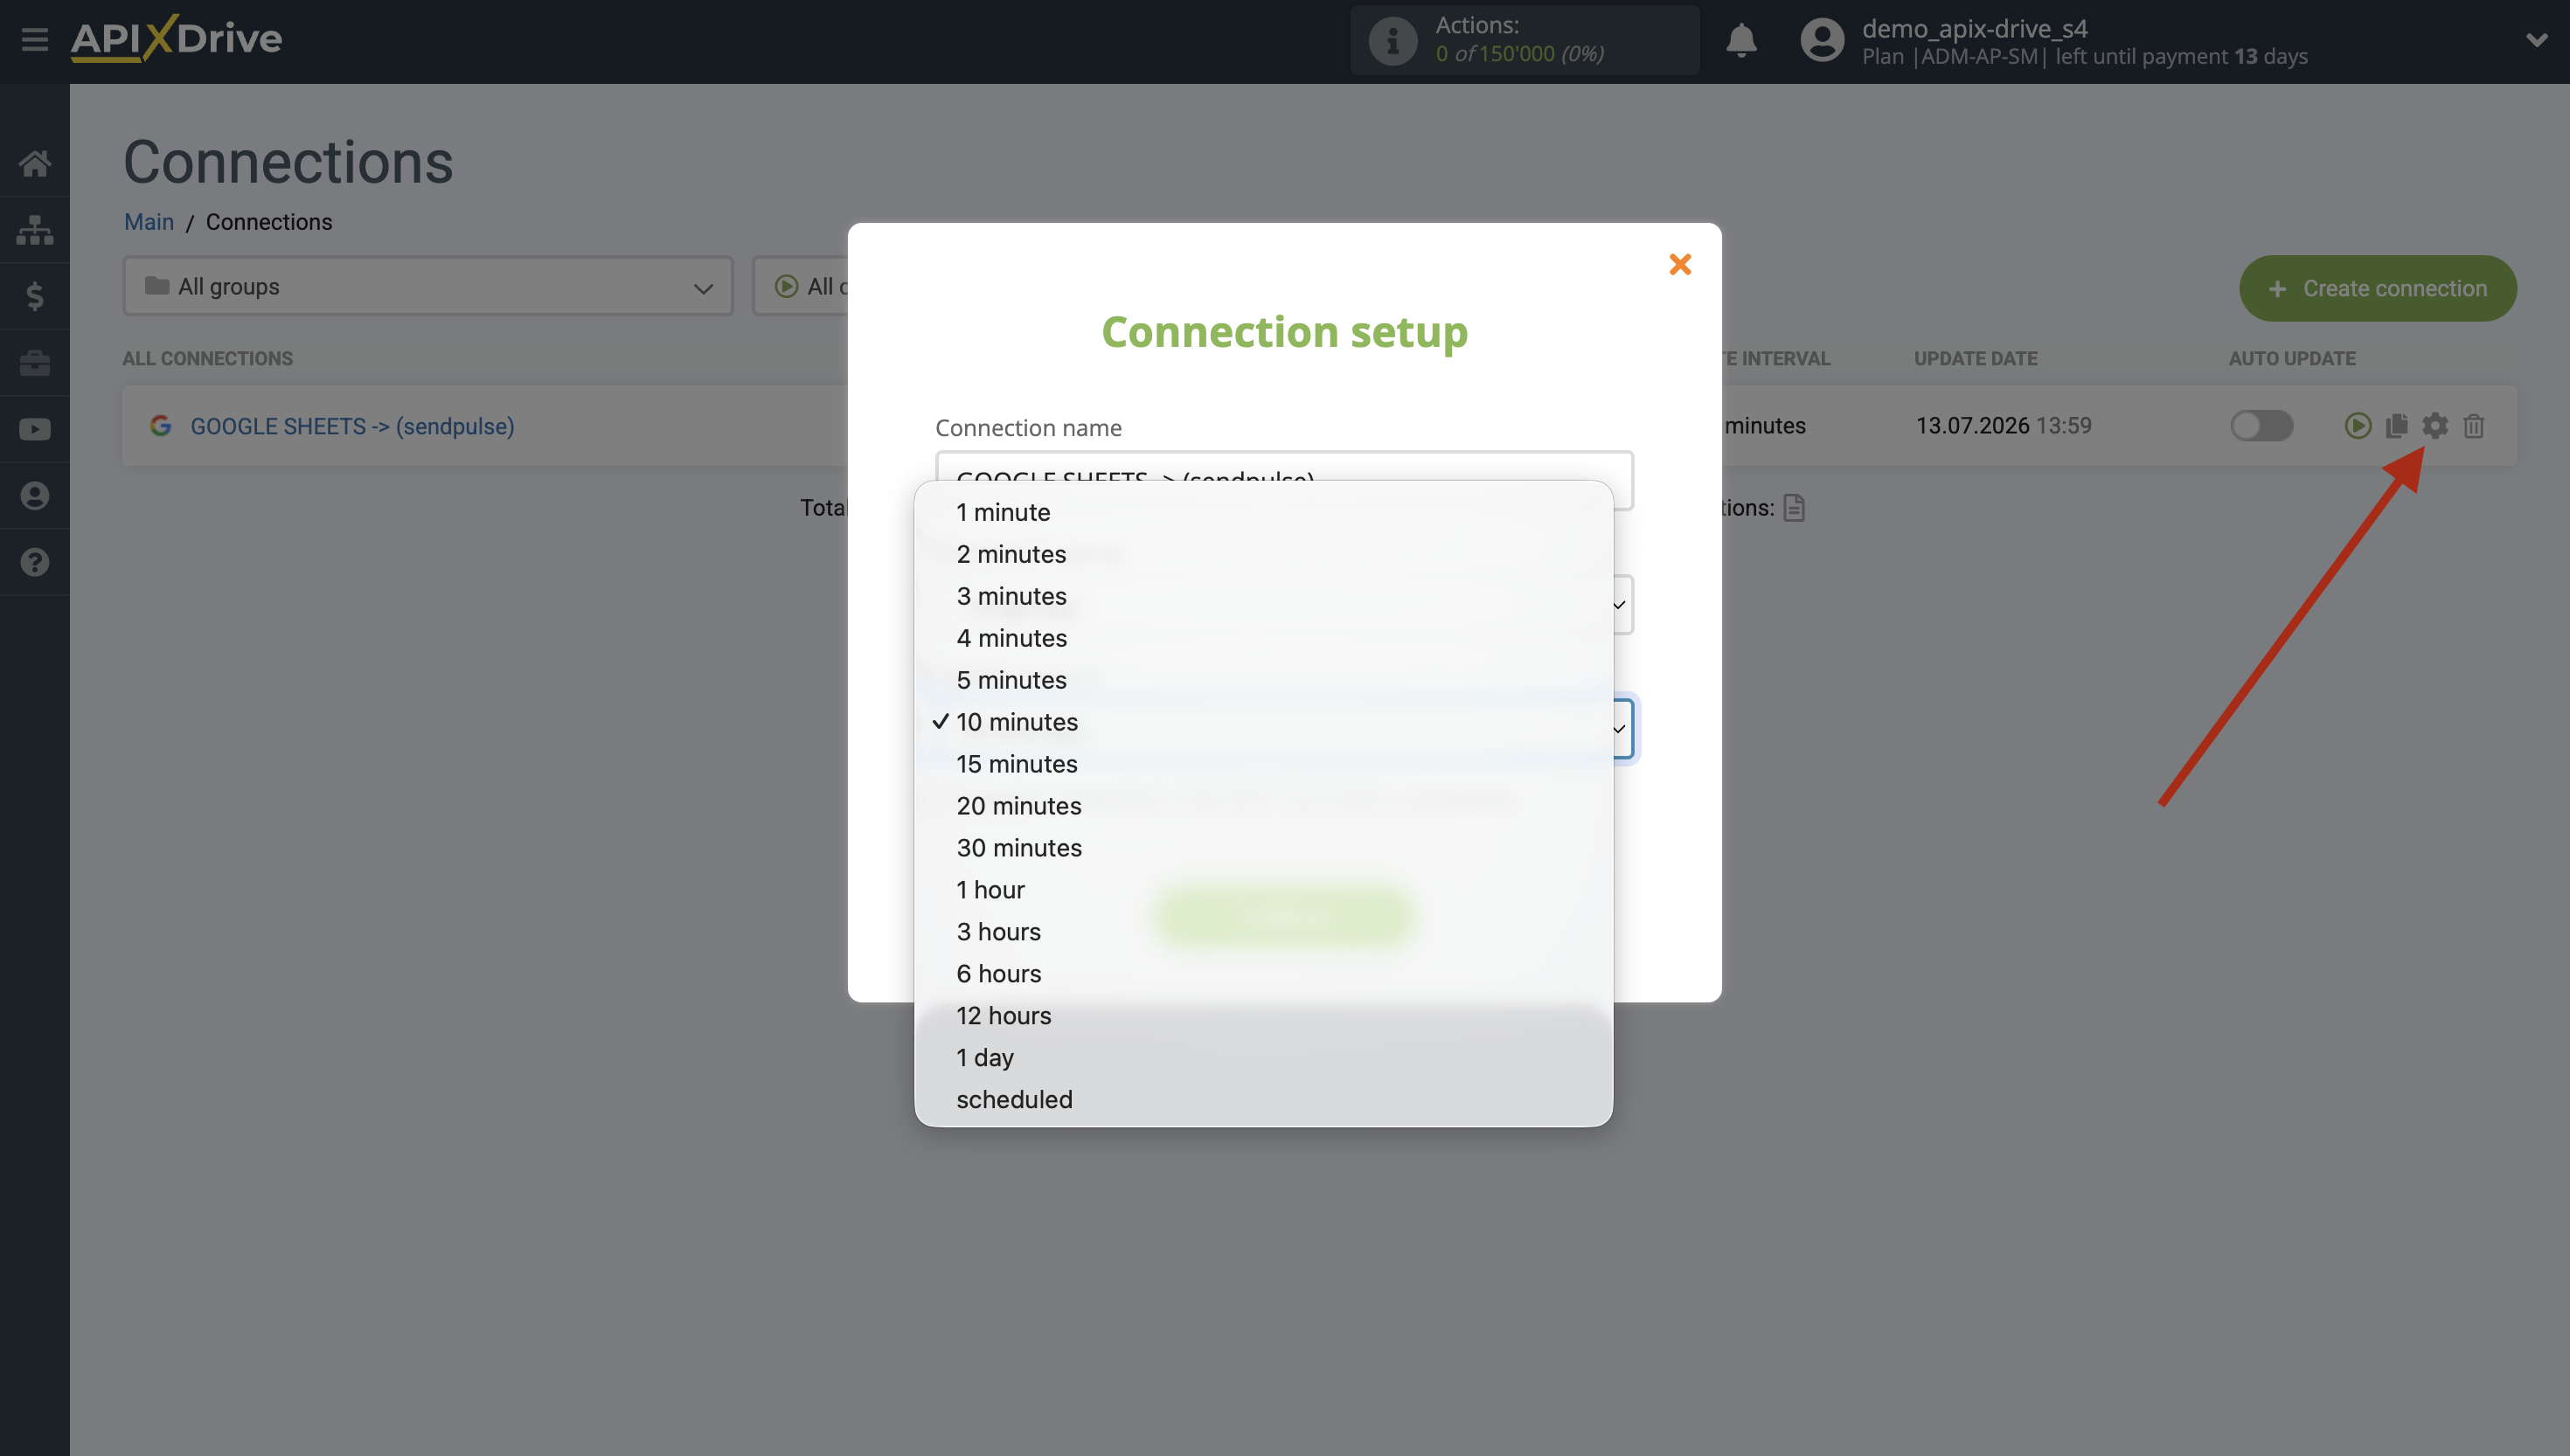
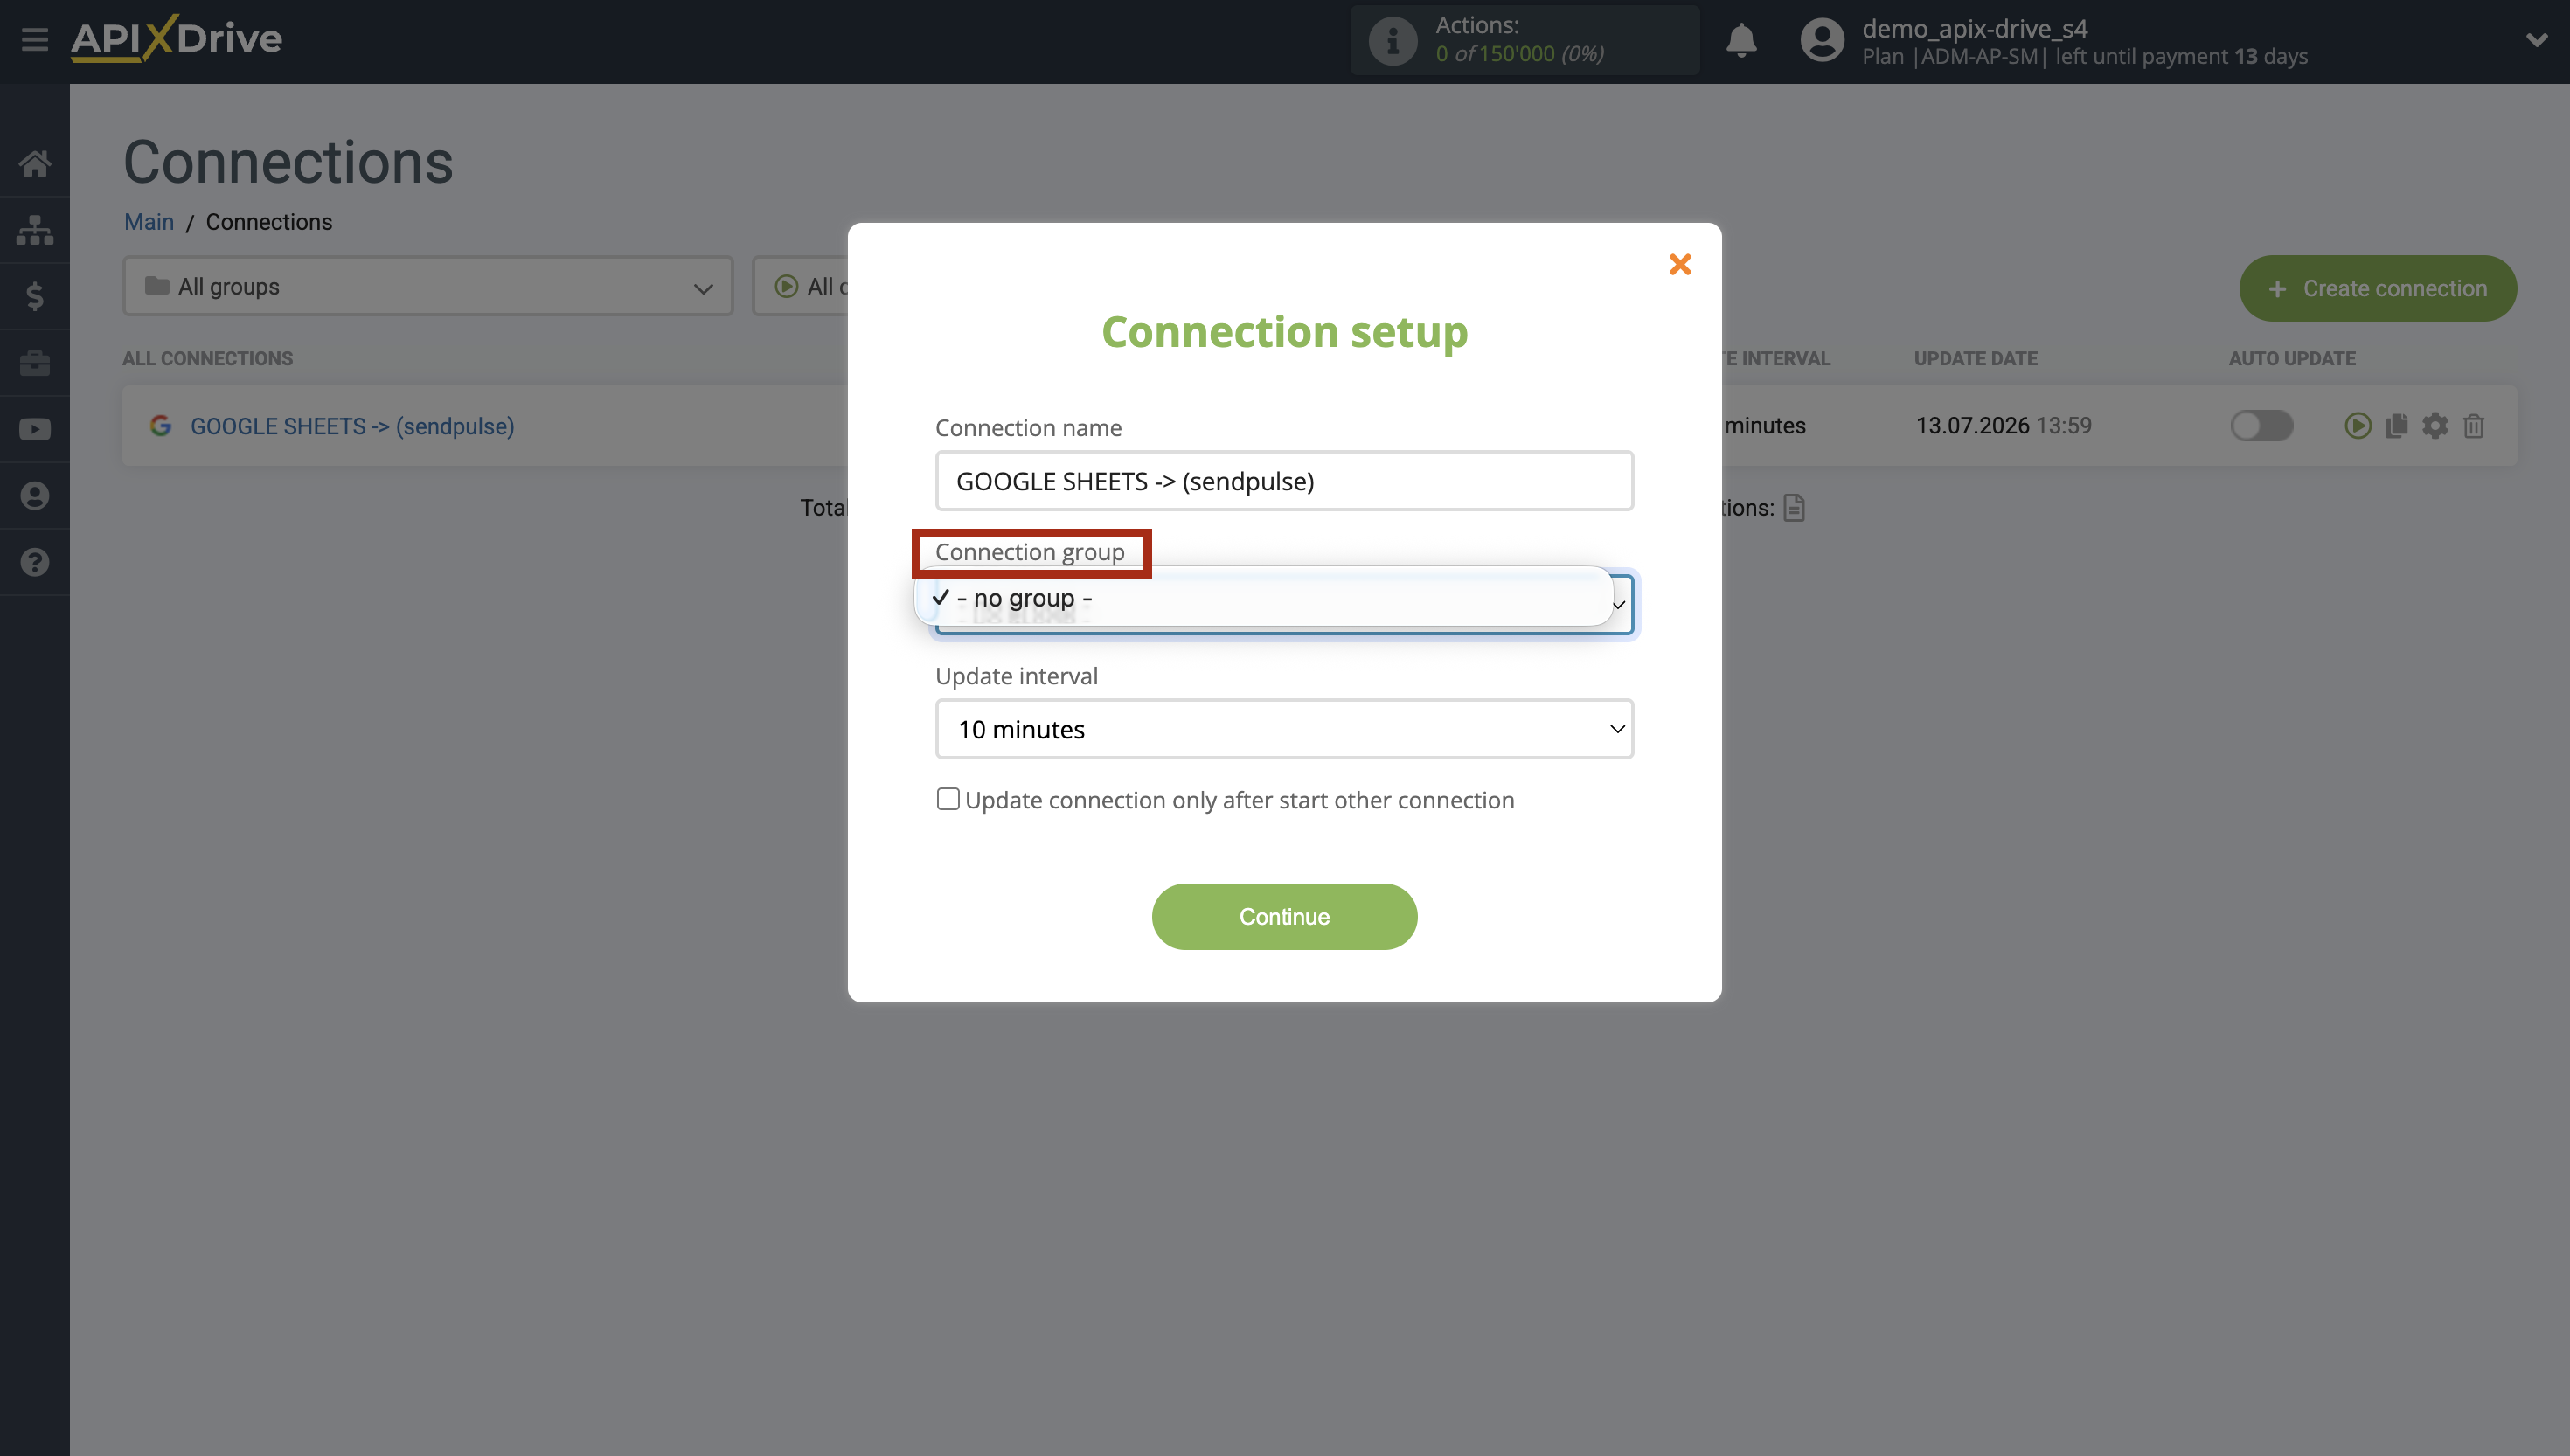
To enable auto-update, switch the slider to the position as shown in the picture.
To force a connection, click on the arrow icon.
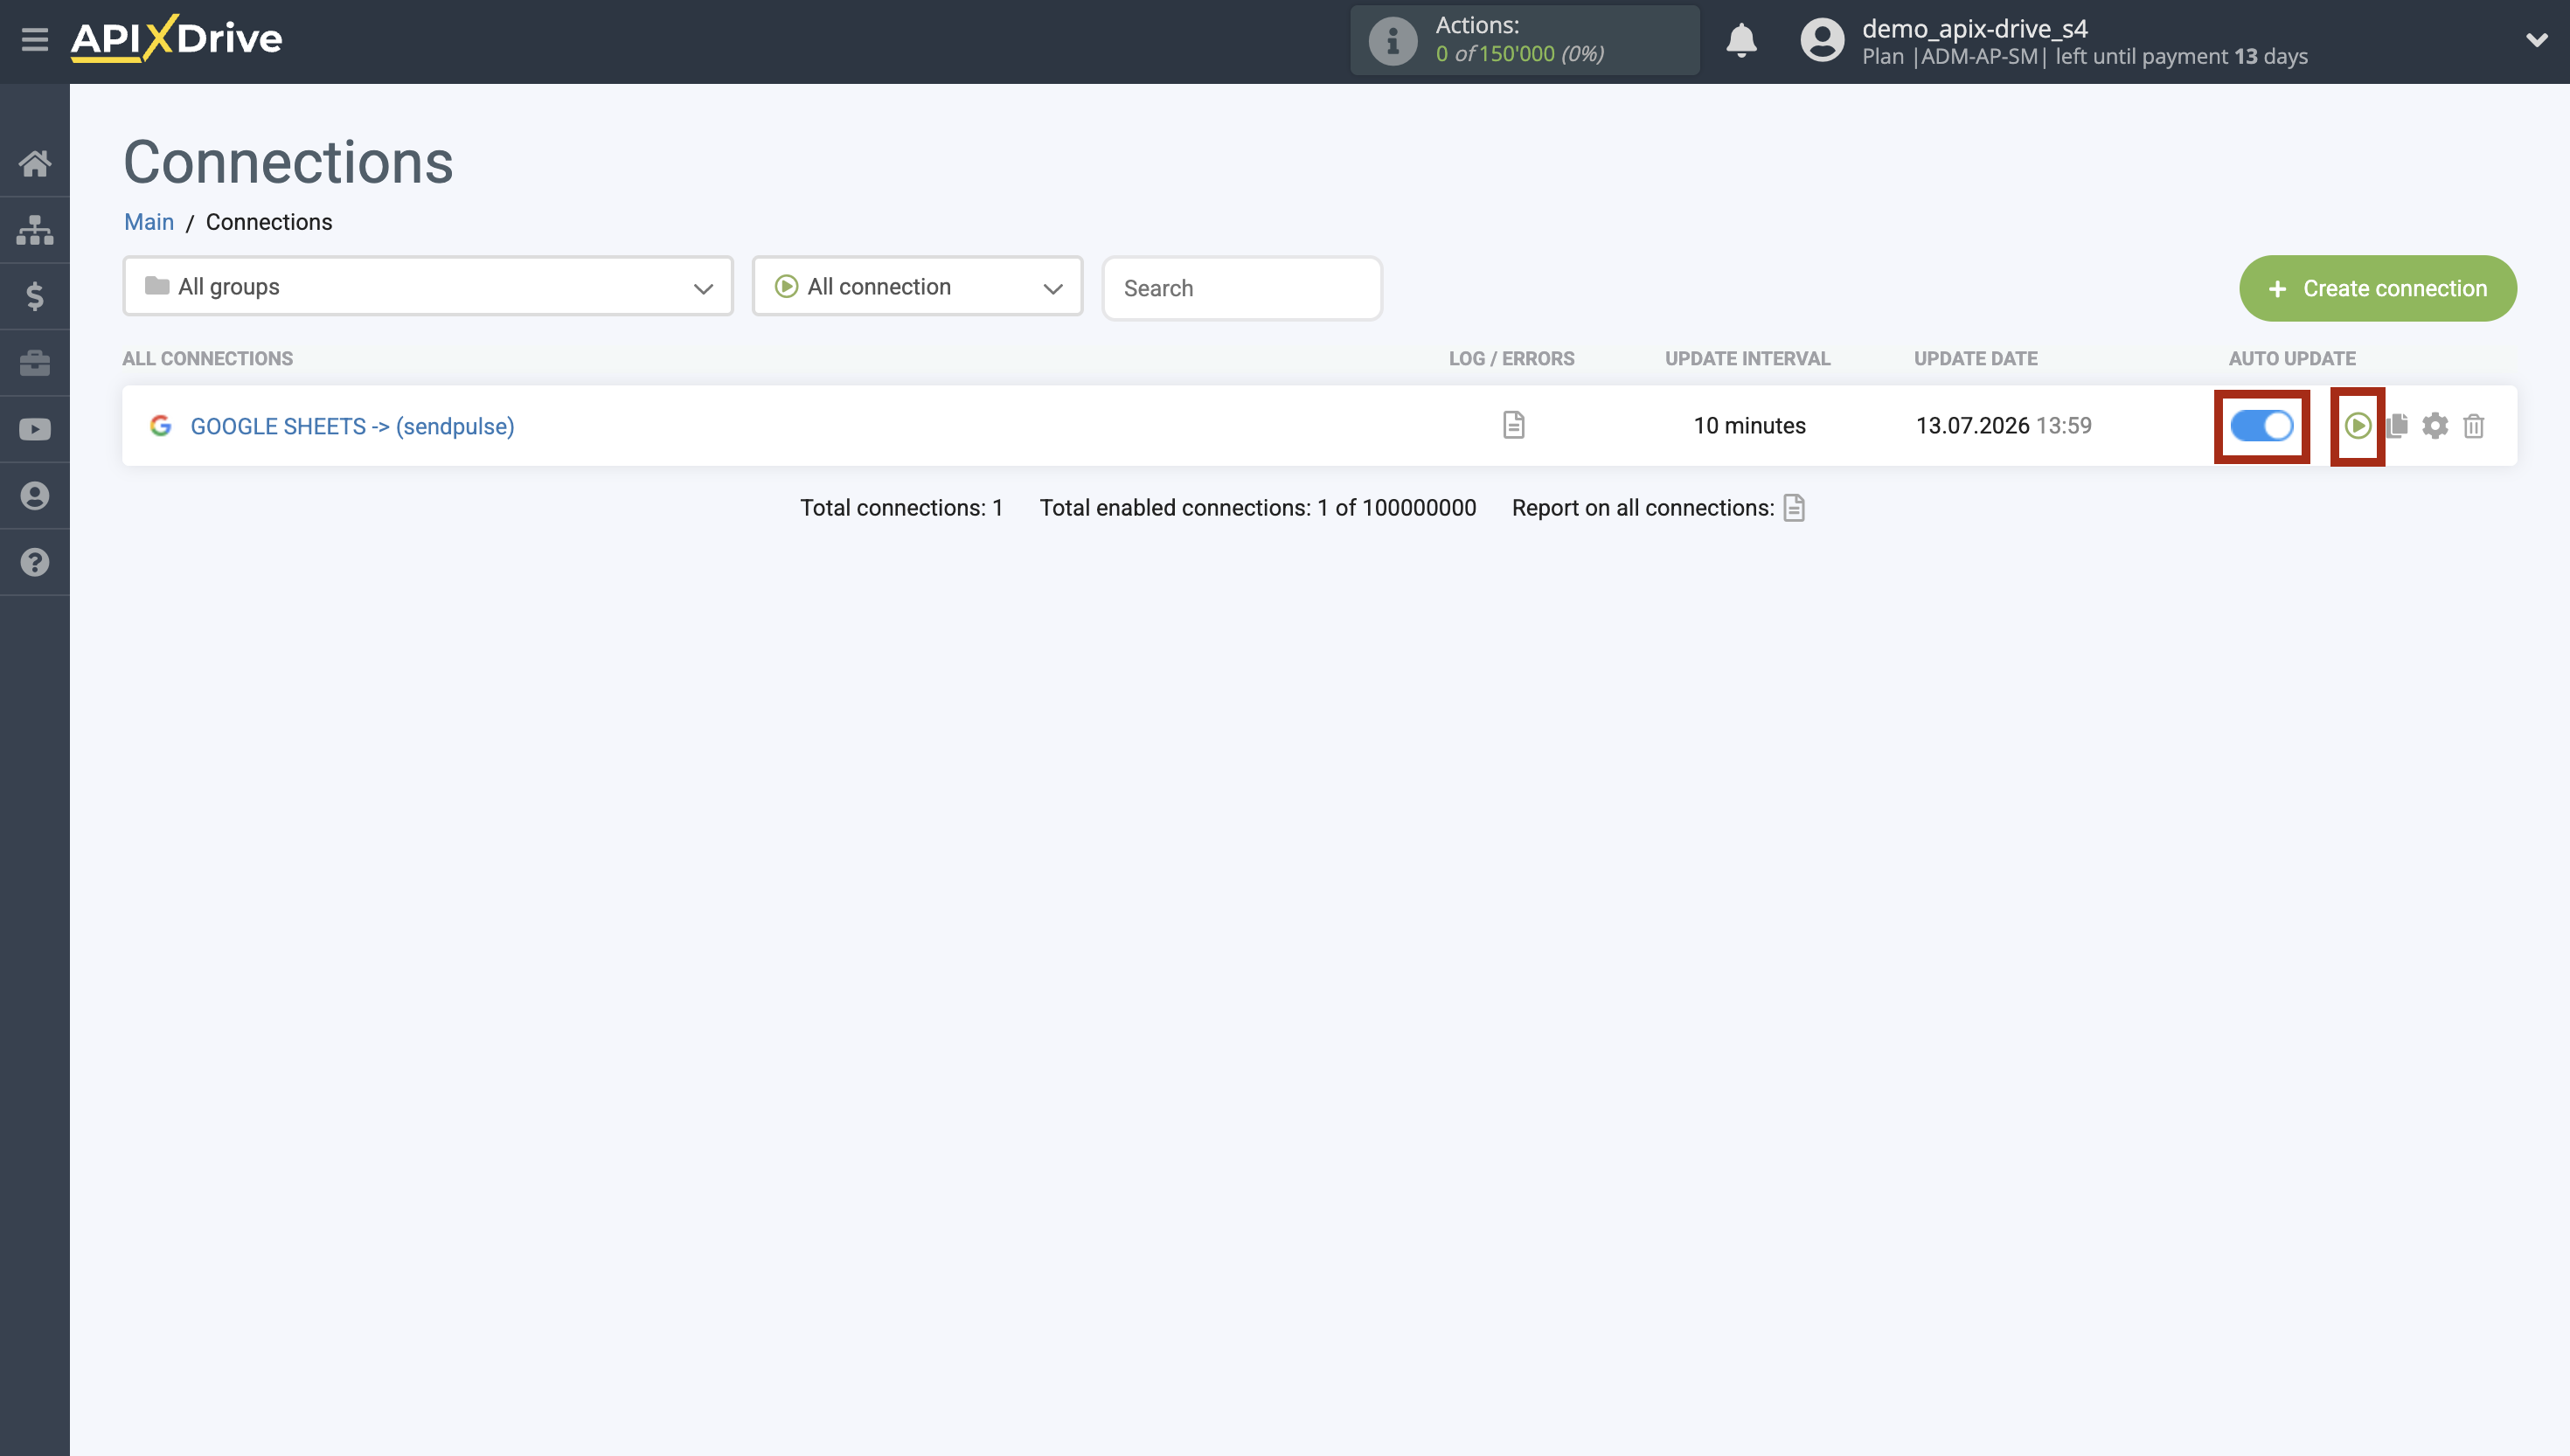
This completes the setting of SendPulse as a Data Destination! See how simple it is!?
Now don't worry, ApiX-Drive will do everything on its own!