How to Connect Telegram as Data Destination
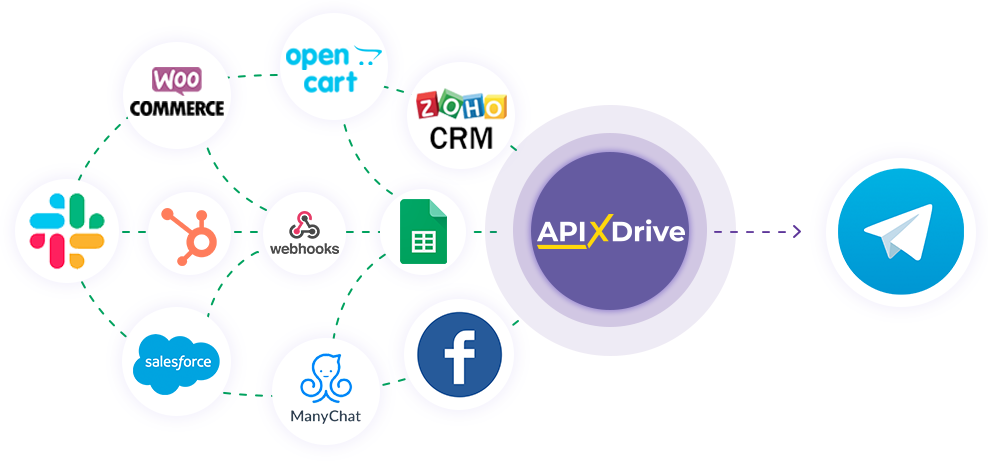
The integration will allow you to send messages to Telegram in response to an action on other systems. For example, if there is a new row in Google Sheets, the lead in CRM has moved to another stage of the funnel or when a new lead appears on your site, the message will be automatically sent to Telegram. This will allow you to automate workflows efficiently and save a lot of time.
Let's go through the entire Telegram setup steps together!
Navigation:
1. What will integration with Telegram do?
2. How to connect a Telegram account to ApiX-Drive?
Send MESSAGE
Send MESSAGE (your bot)
3. How to set up data transfer to Telegram in the selected action?
4. An example of the data will be sent to your Telegram.
5. Auto-update and update interval.
Answers to frequently asked questions:
1. There is no test message or response that the bot is successfully connected.
2. You have already connected the bot, but you need to transfer data to a group or channel.
After configuring Data Source, click "Start Configuring Data Destination"
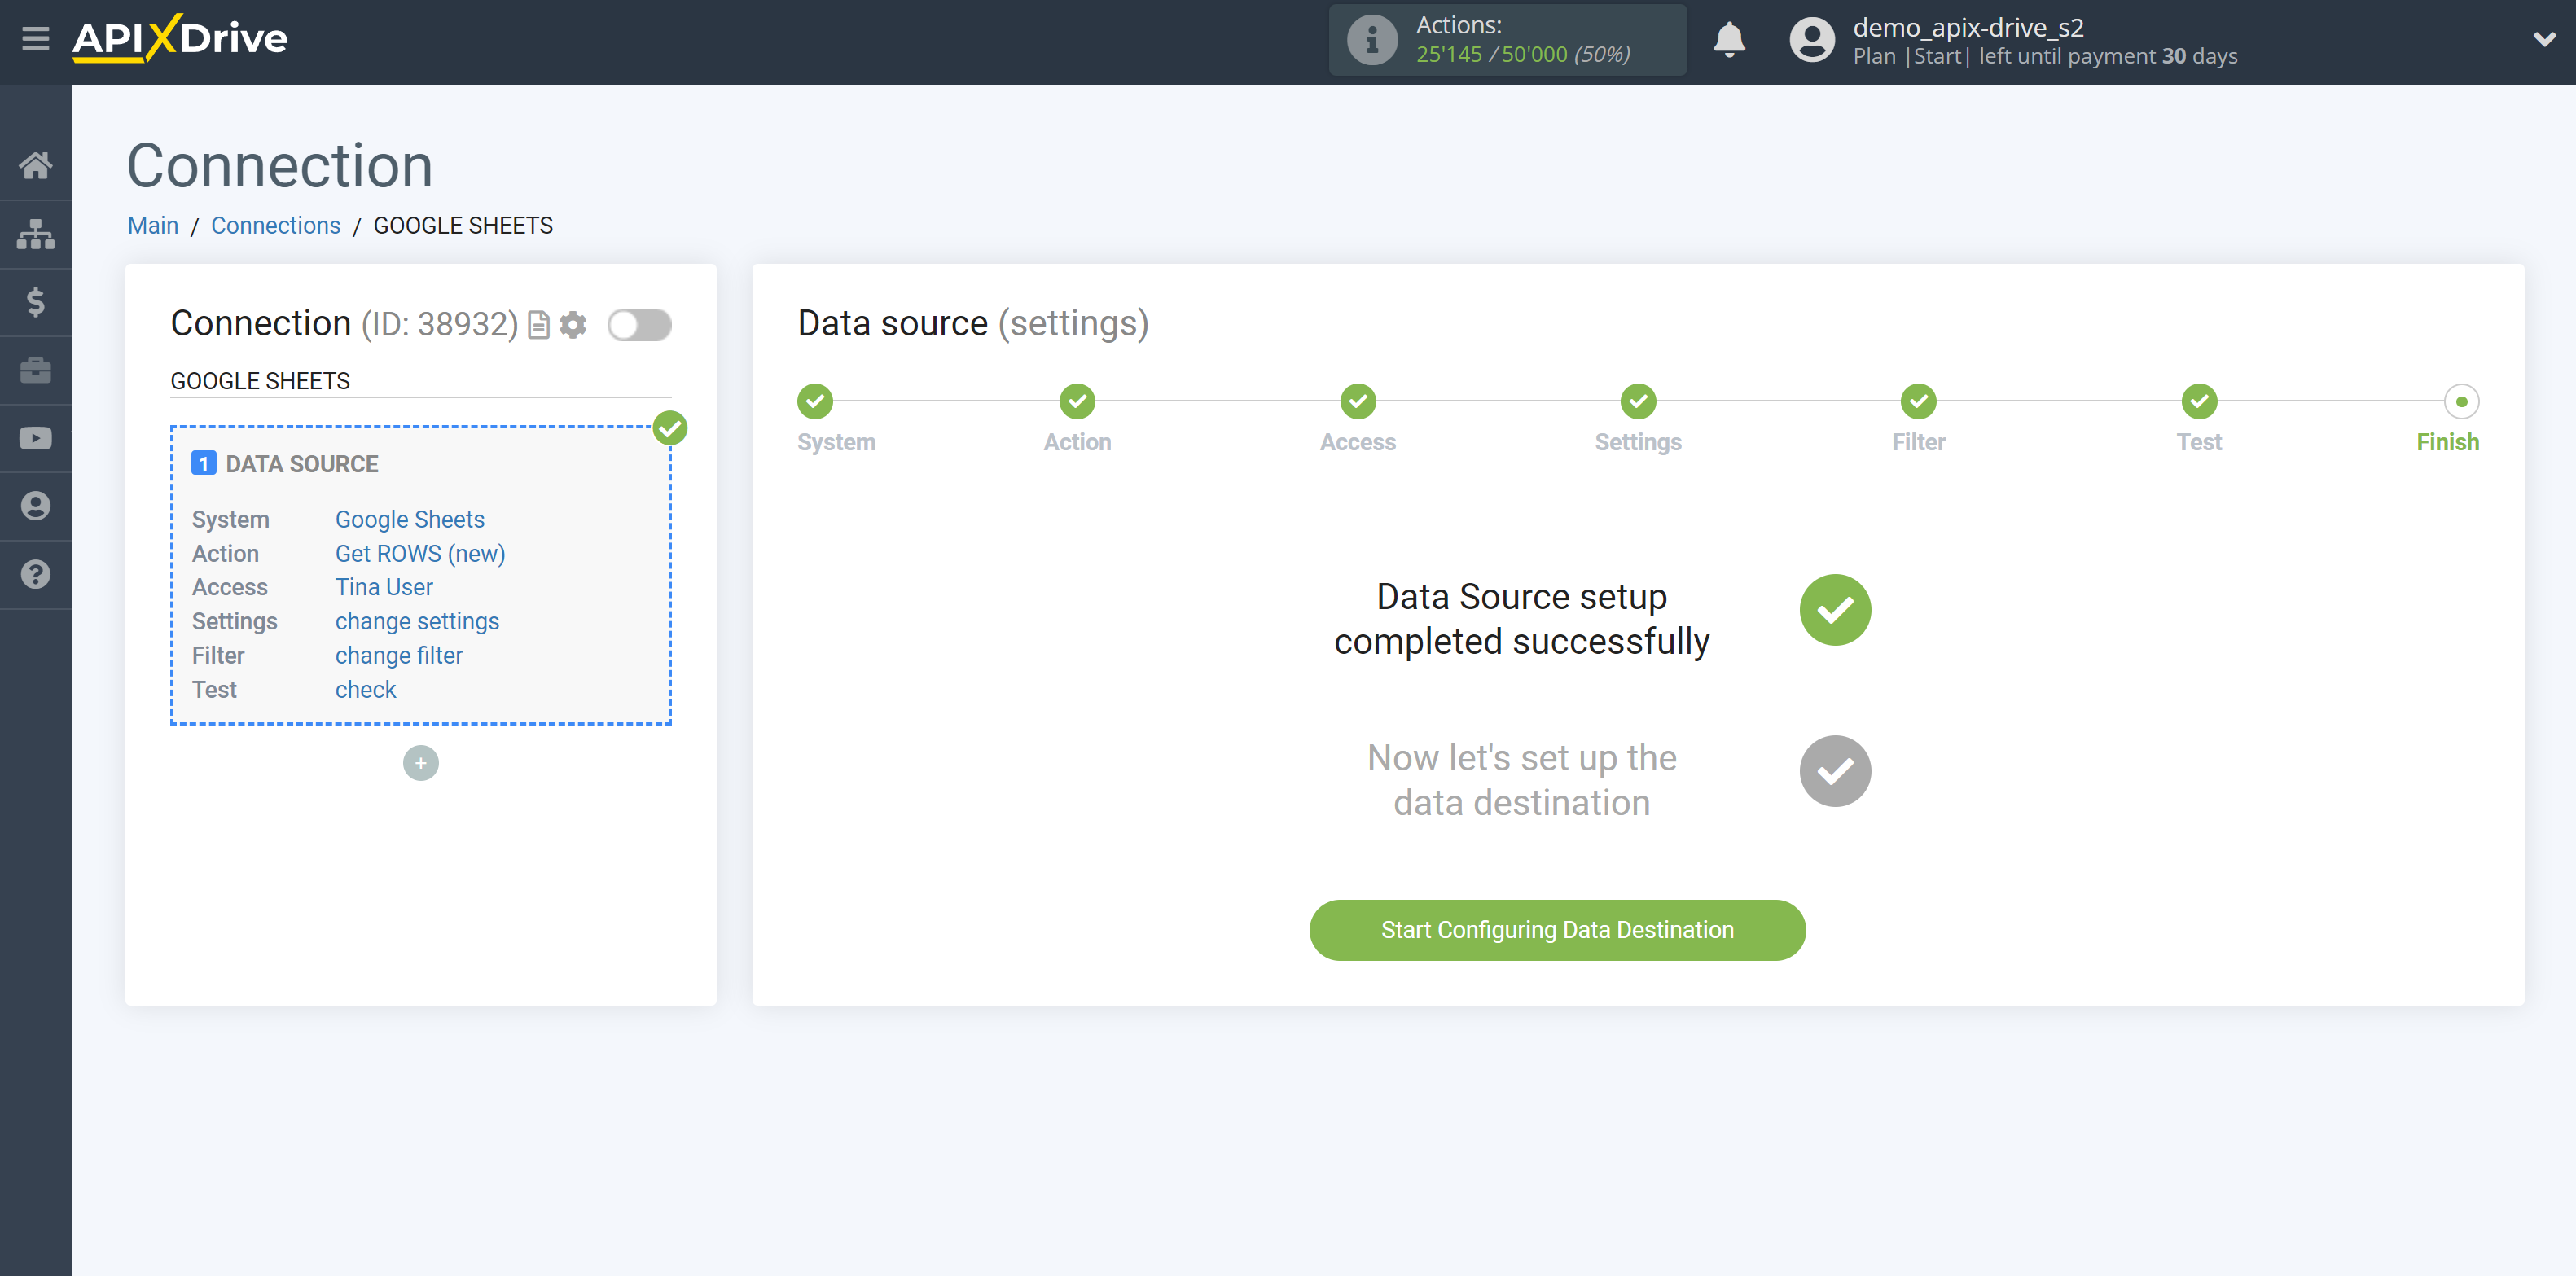
Select the system as Data Destination. In this case, you must specify Telegram.
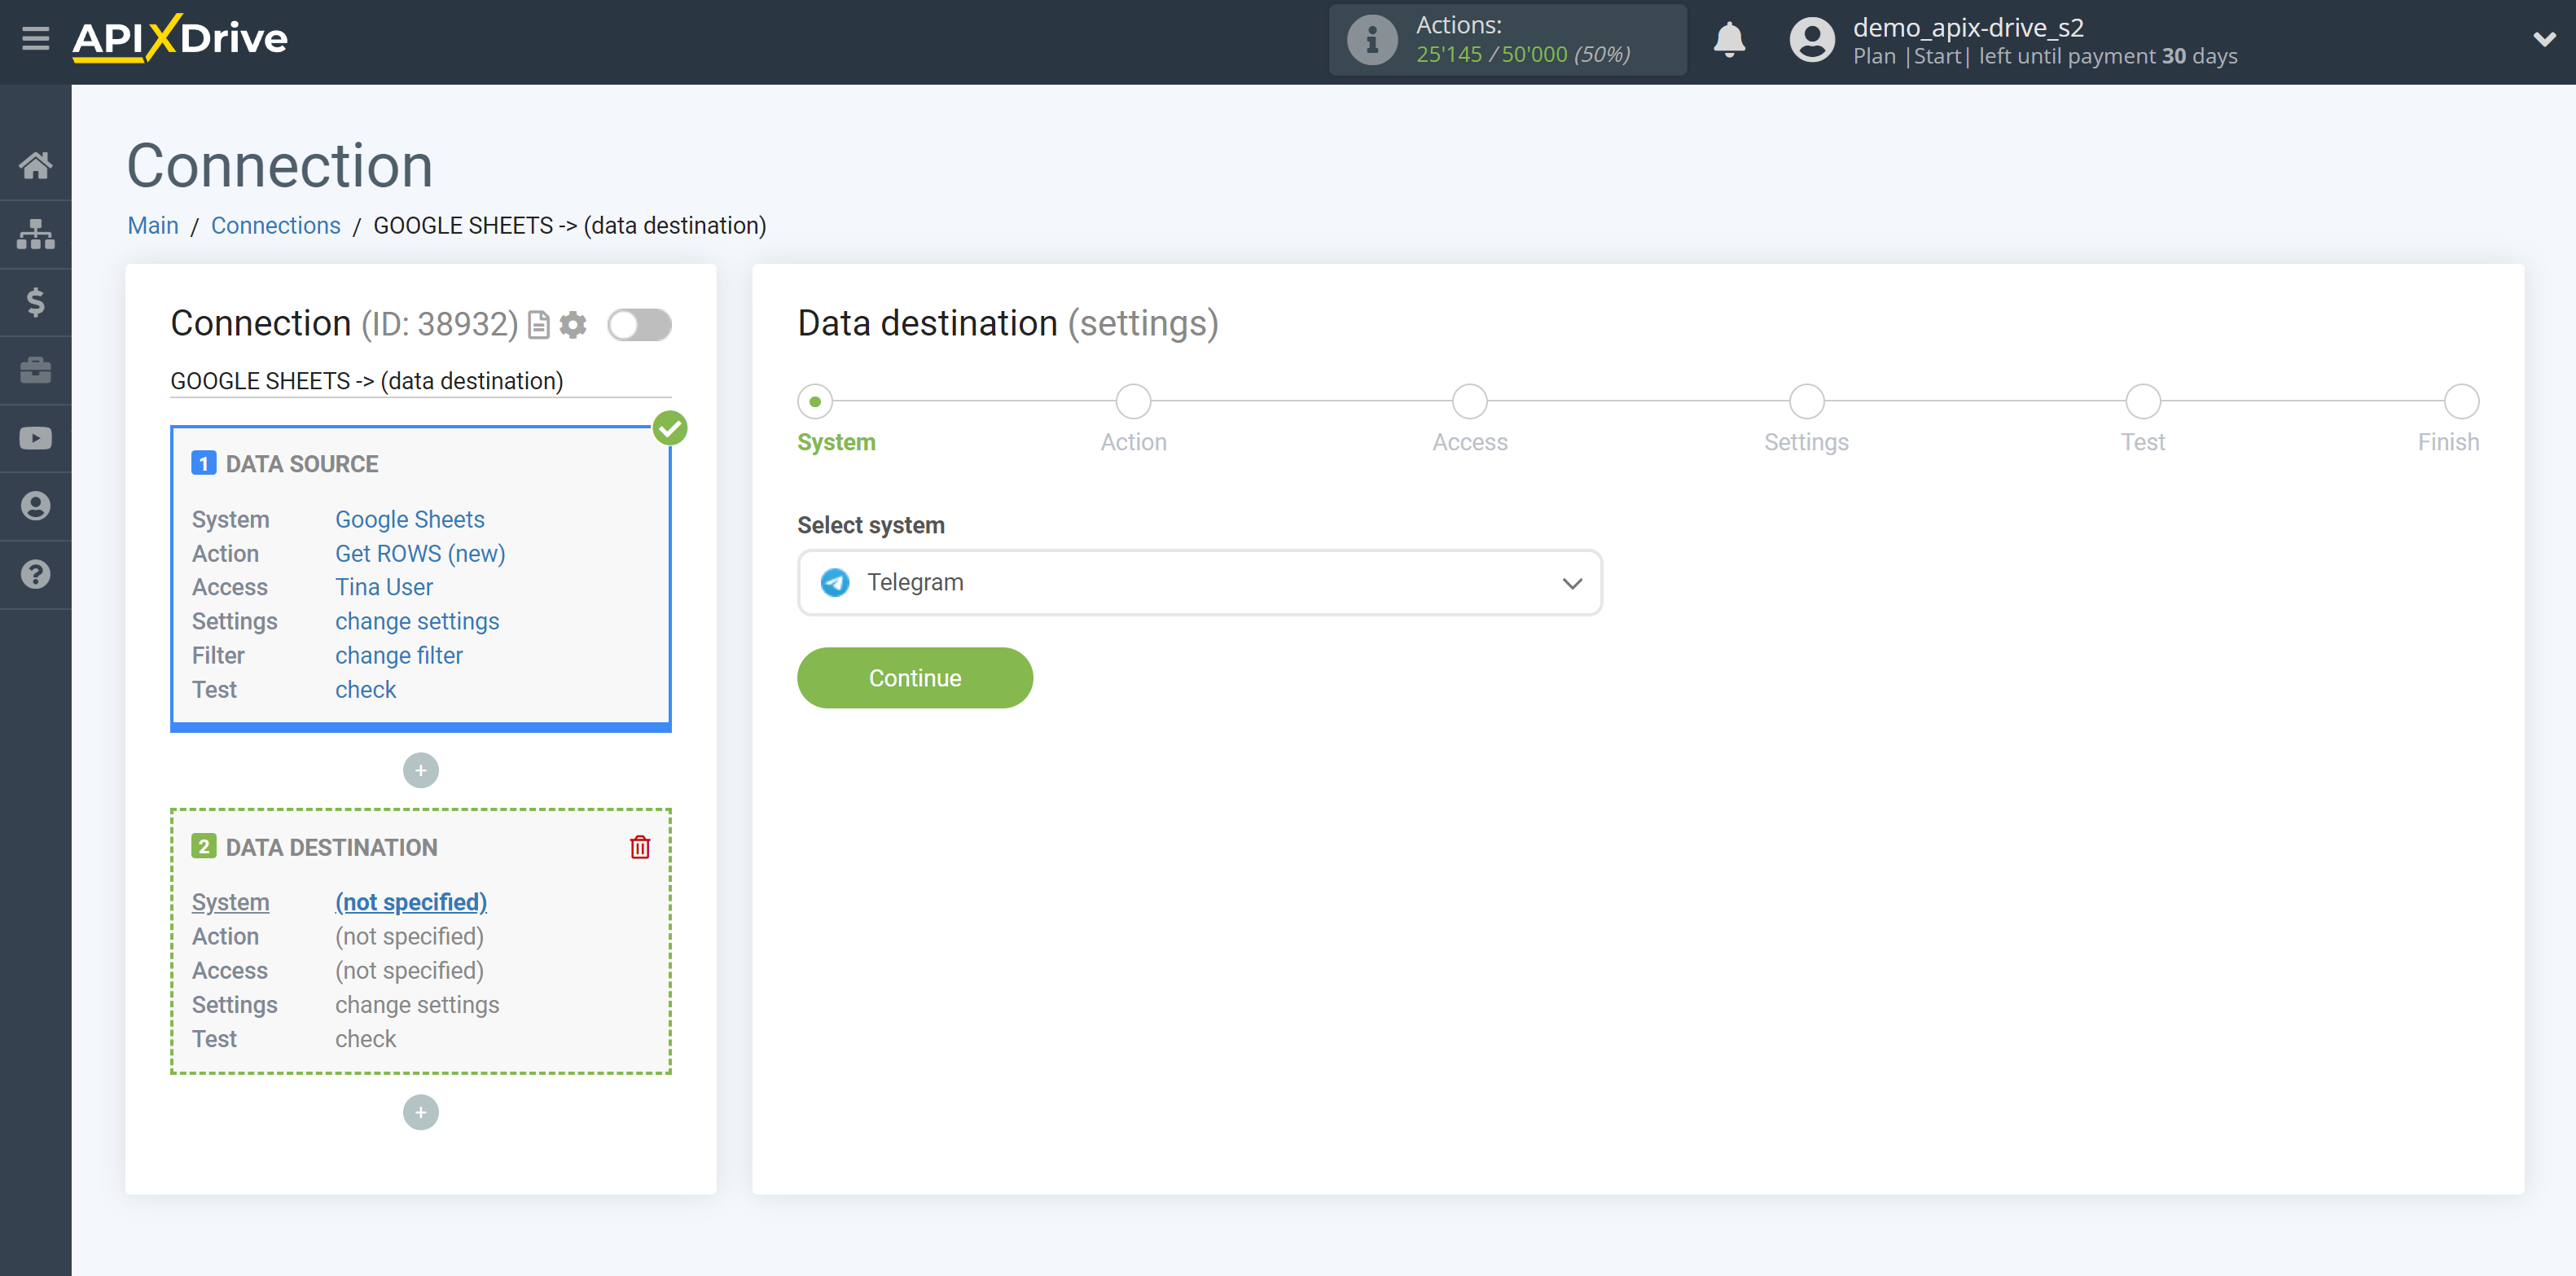
Next, you need to specify the action "Send MESSAGE".
You can add our bot and receive notifications from it about important events from other systems in your Telegram or group.
The next step is to select the Telegram account from which will get the data.
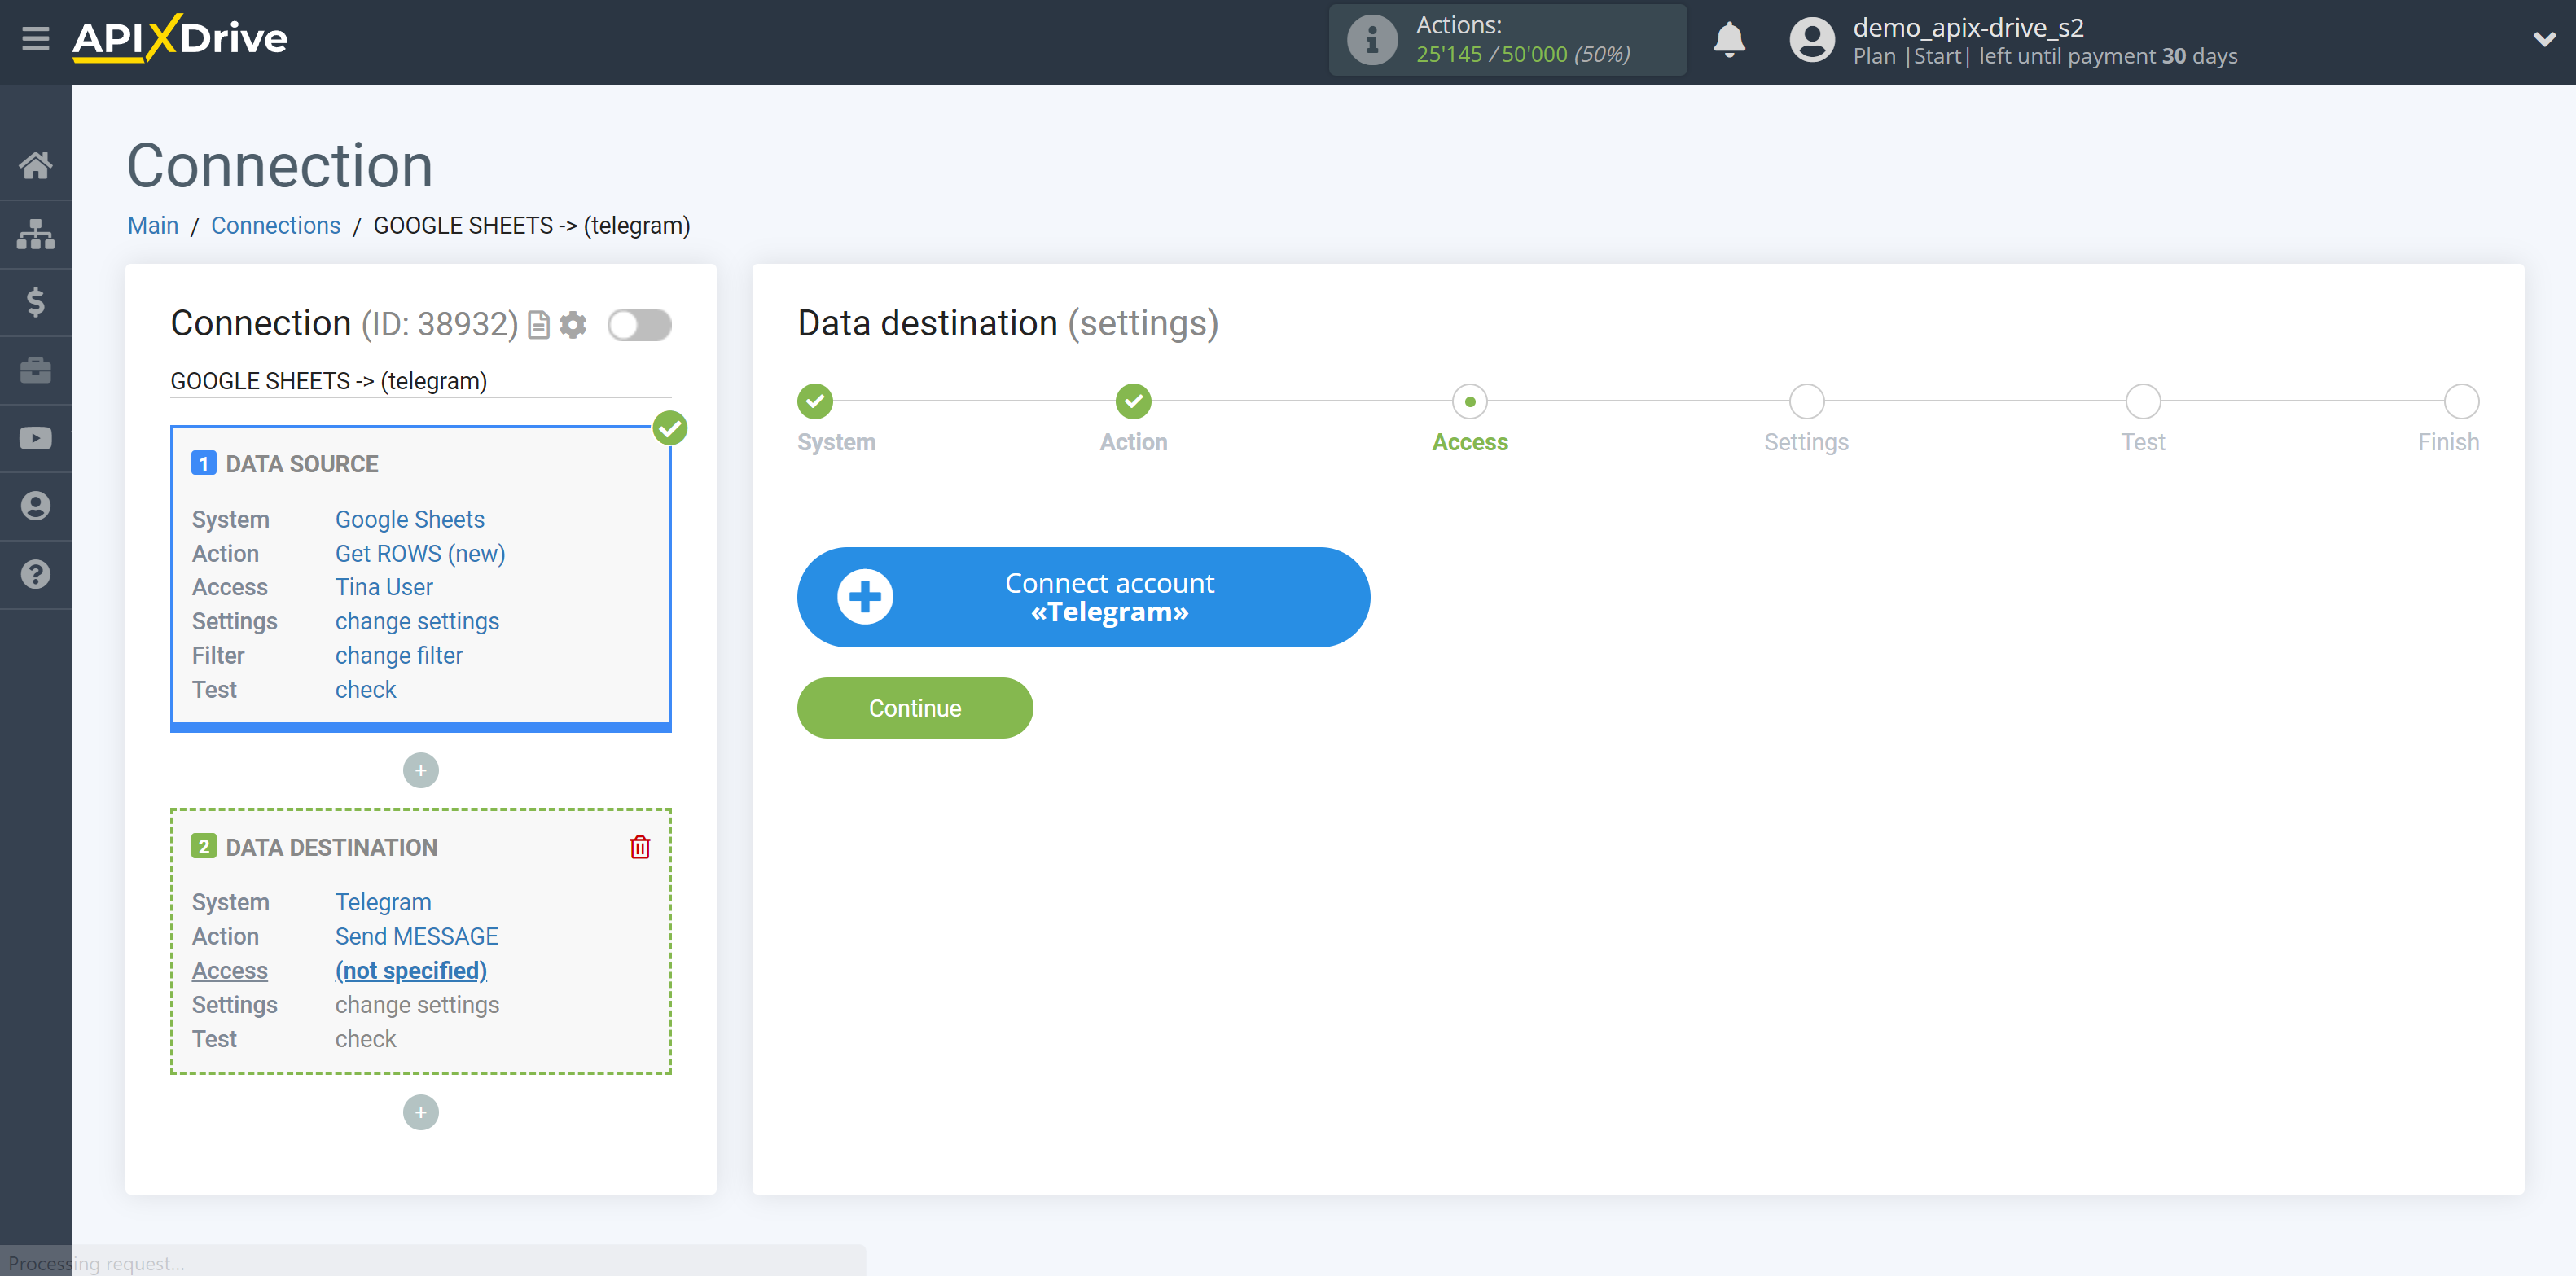
If there are no accounts connected to the system, click "Connect account".
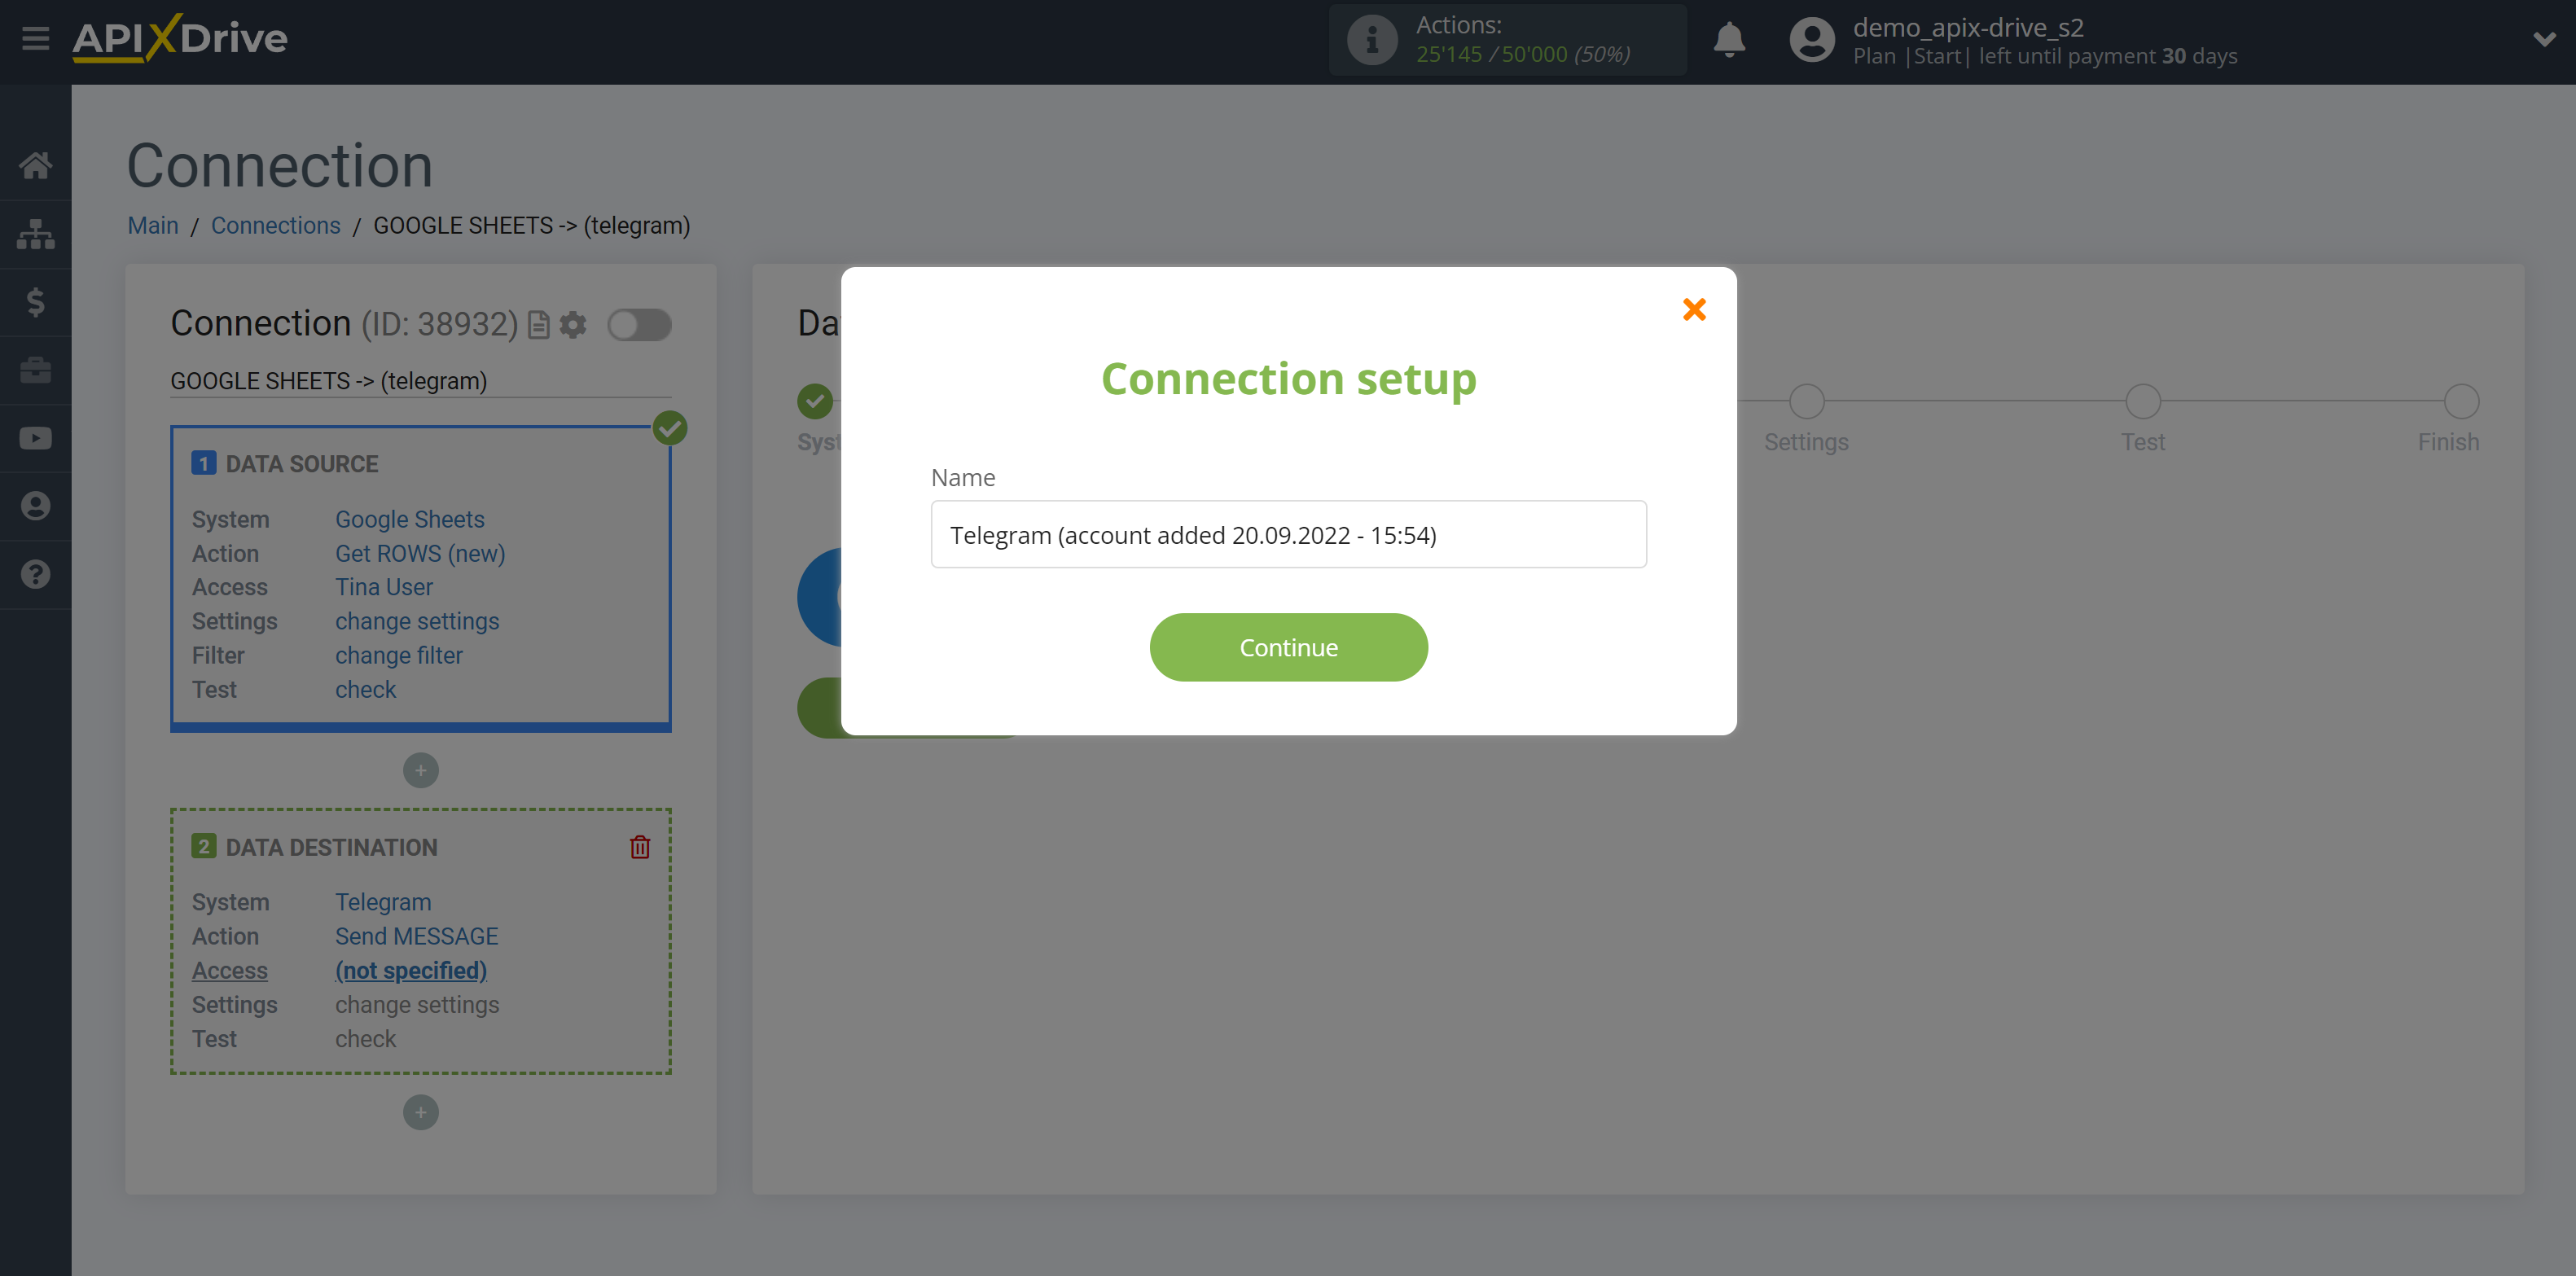
In the window that appears, enter the name of the account and click "Continue".
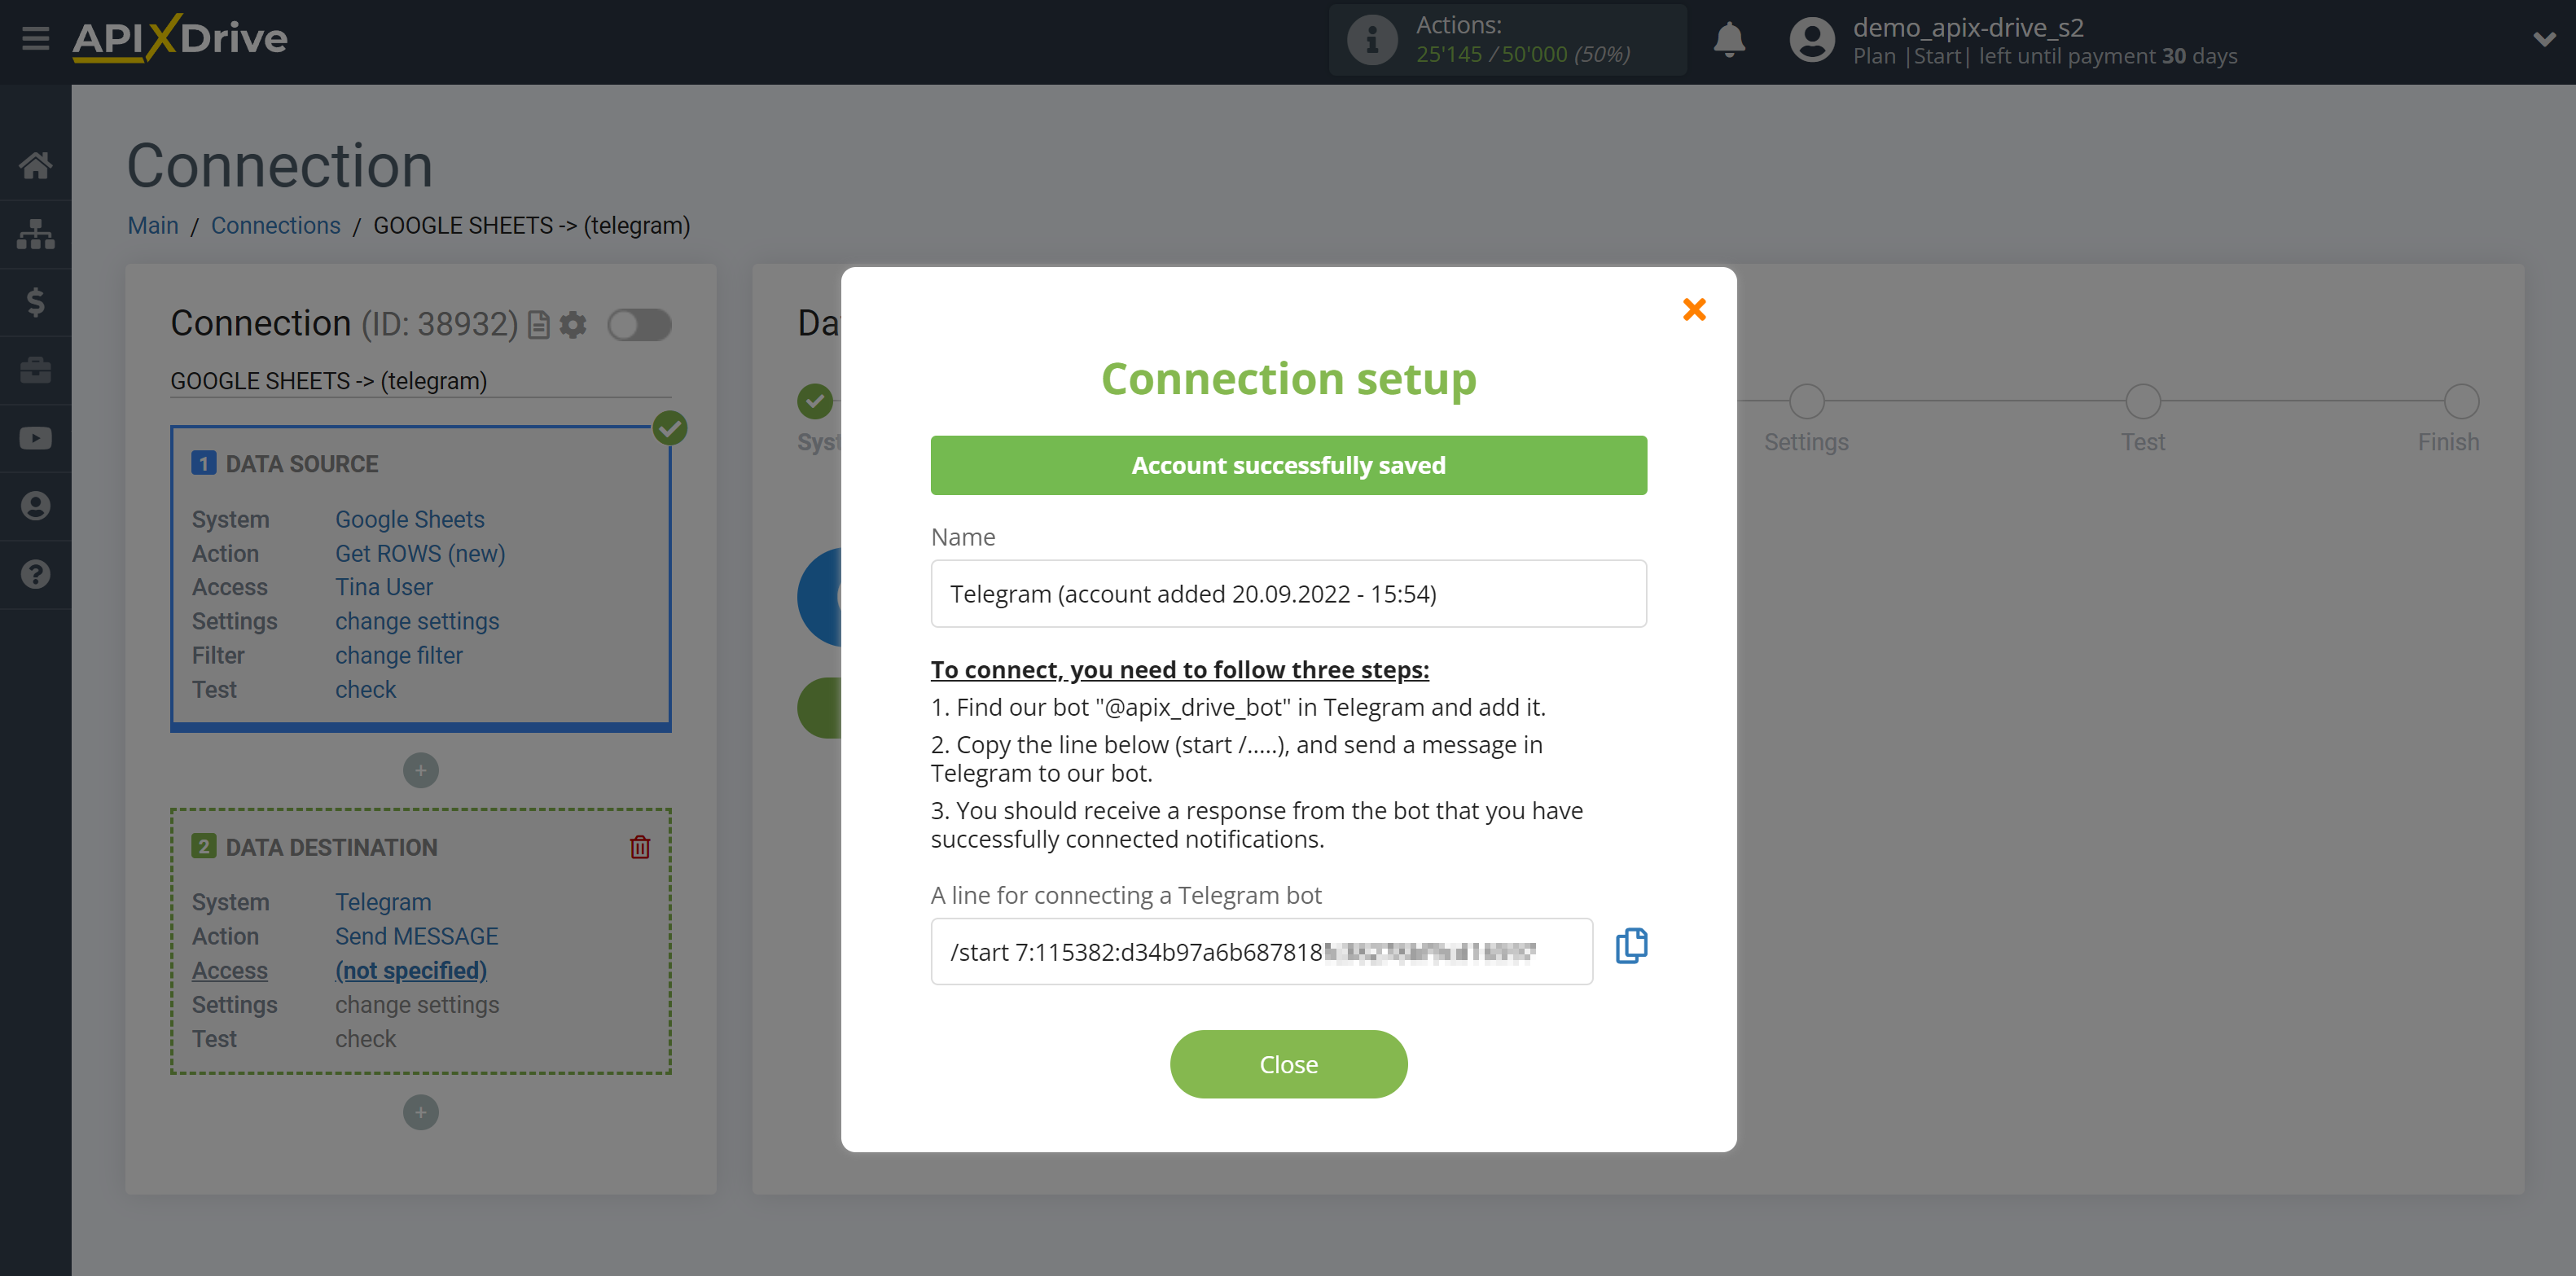
Next, a new window will open in which you need to copy the data in the "A line for connecting a Telegram bot" field.
Then close this window, reload the page and select the created account.
Now you need to go to your Telegram application.
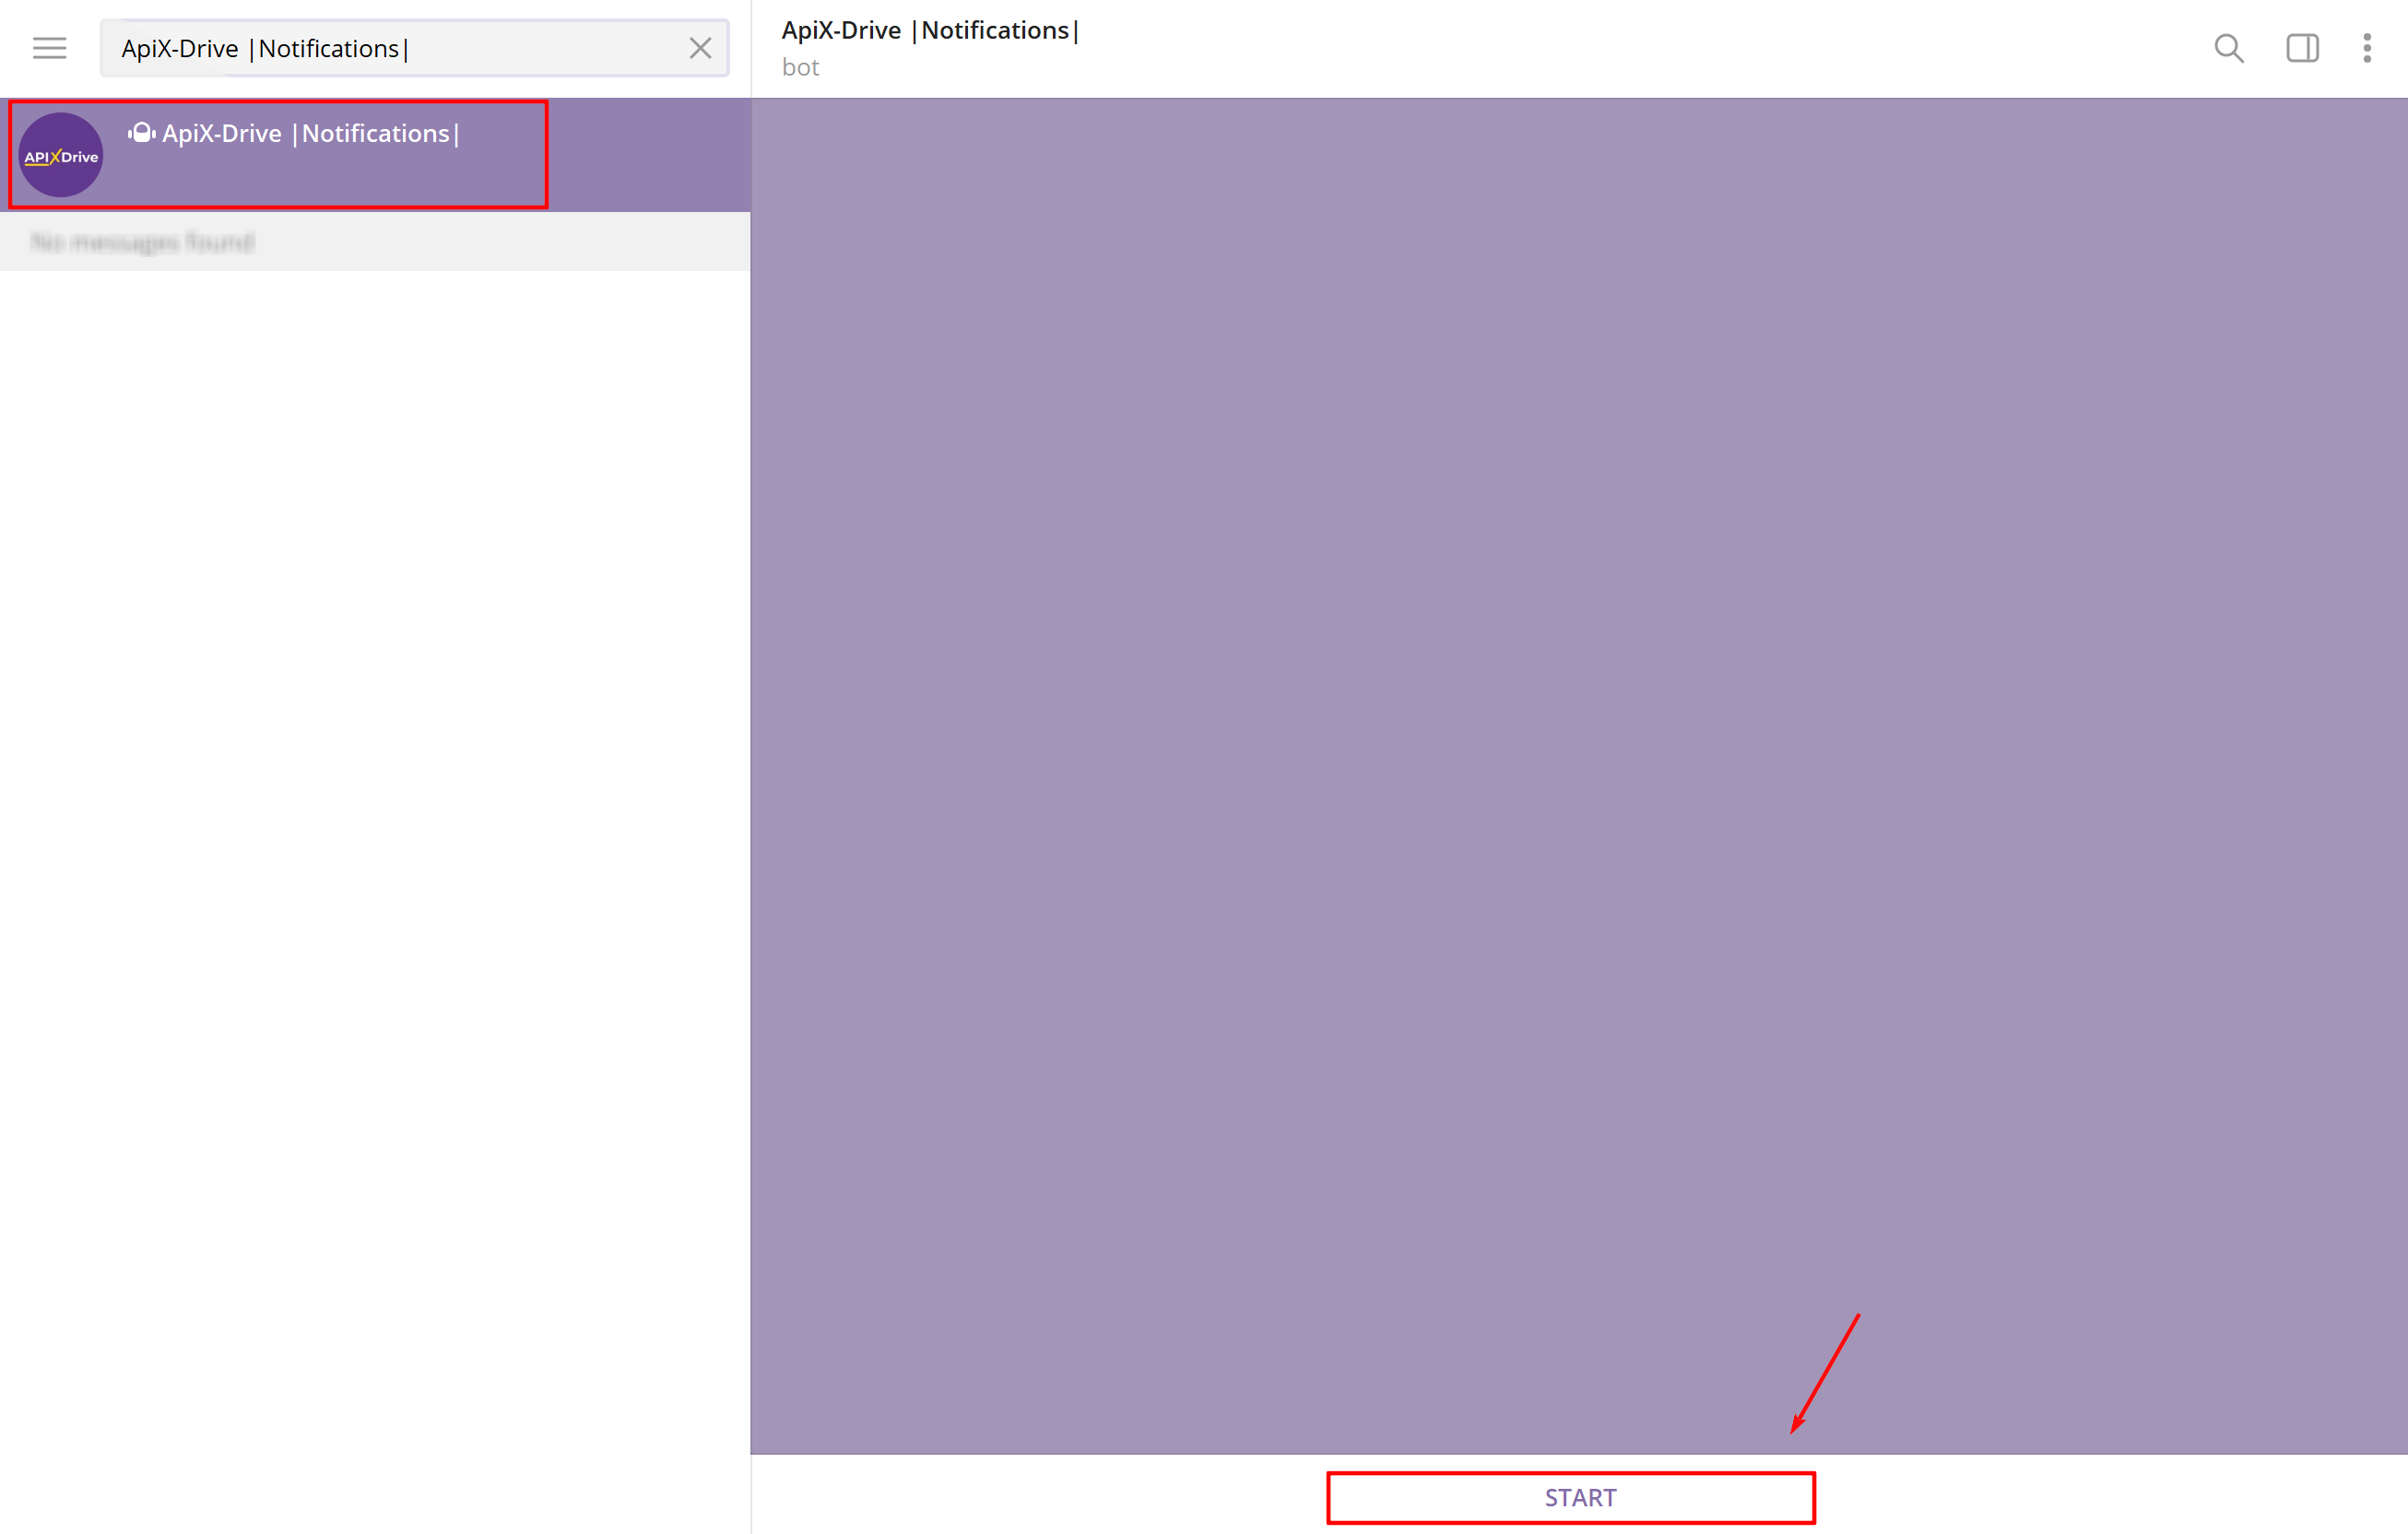
In your Telegram application, enter @apix_drive_bot in the search bar.
Click on the bot profile and click "Start".
Send a message to the bot with the connection line that was copied from the ApiX-Drive system.
Wait for a response message about a successful connection to the system.
After that, return to the ApiX-Drive system and continue with the configuration.
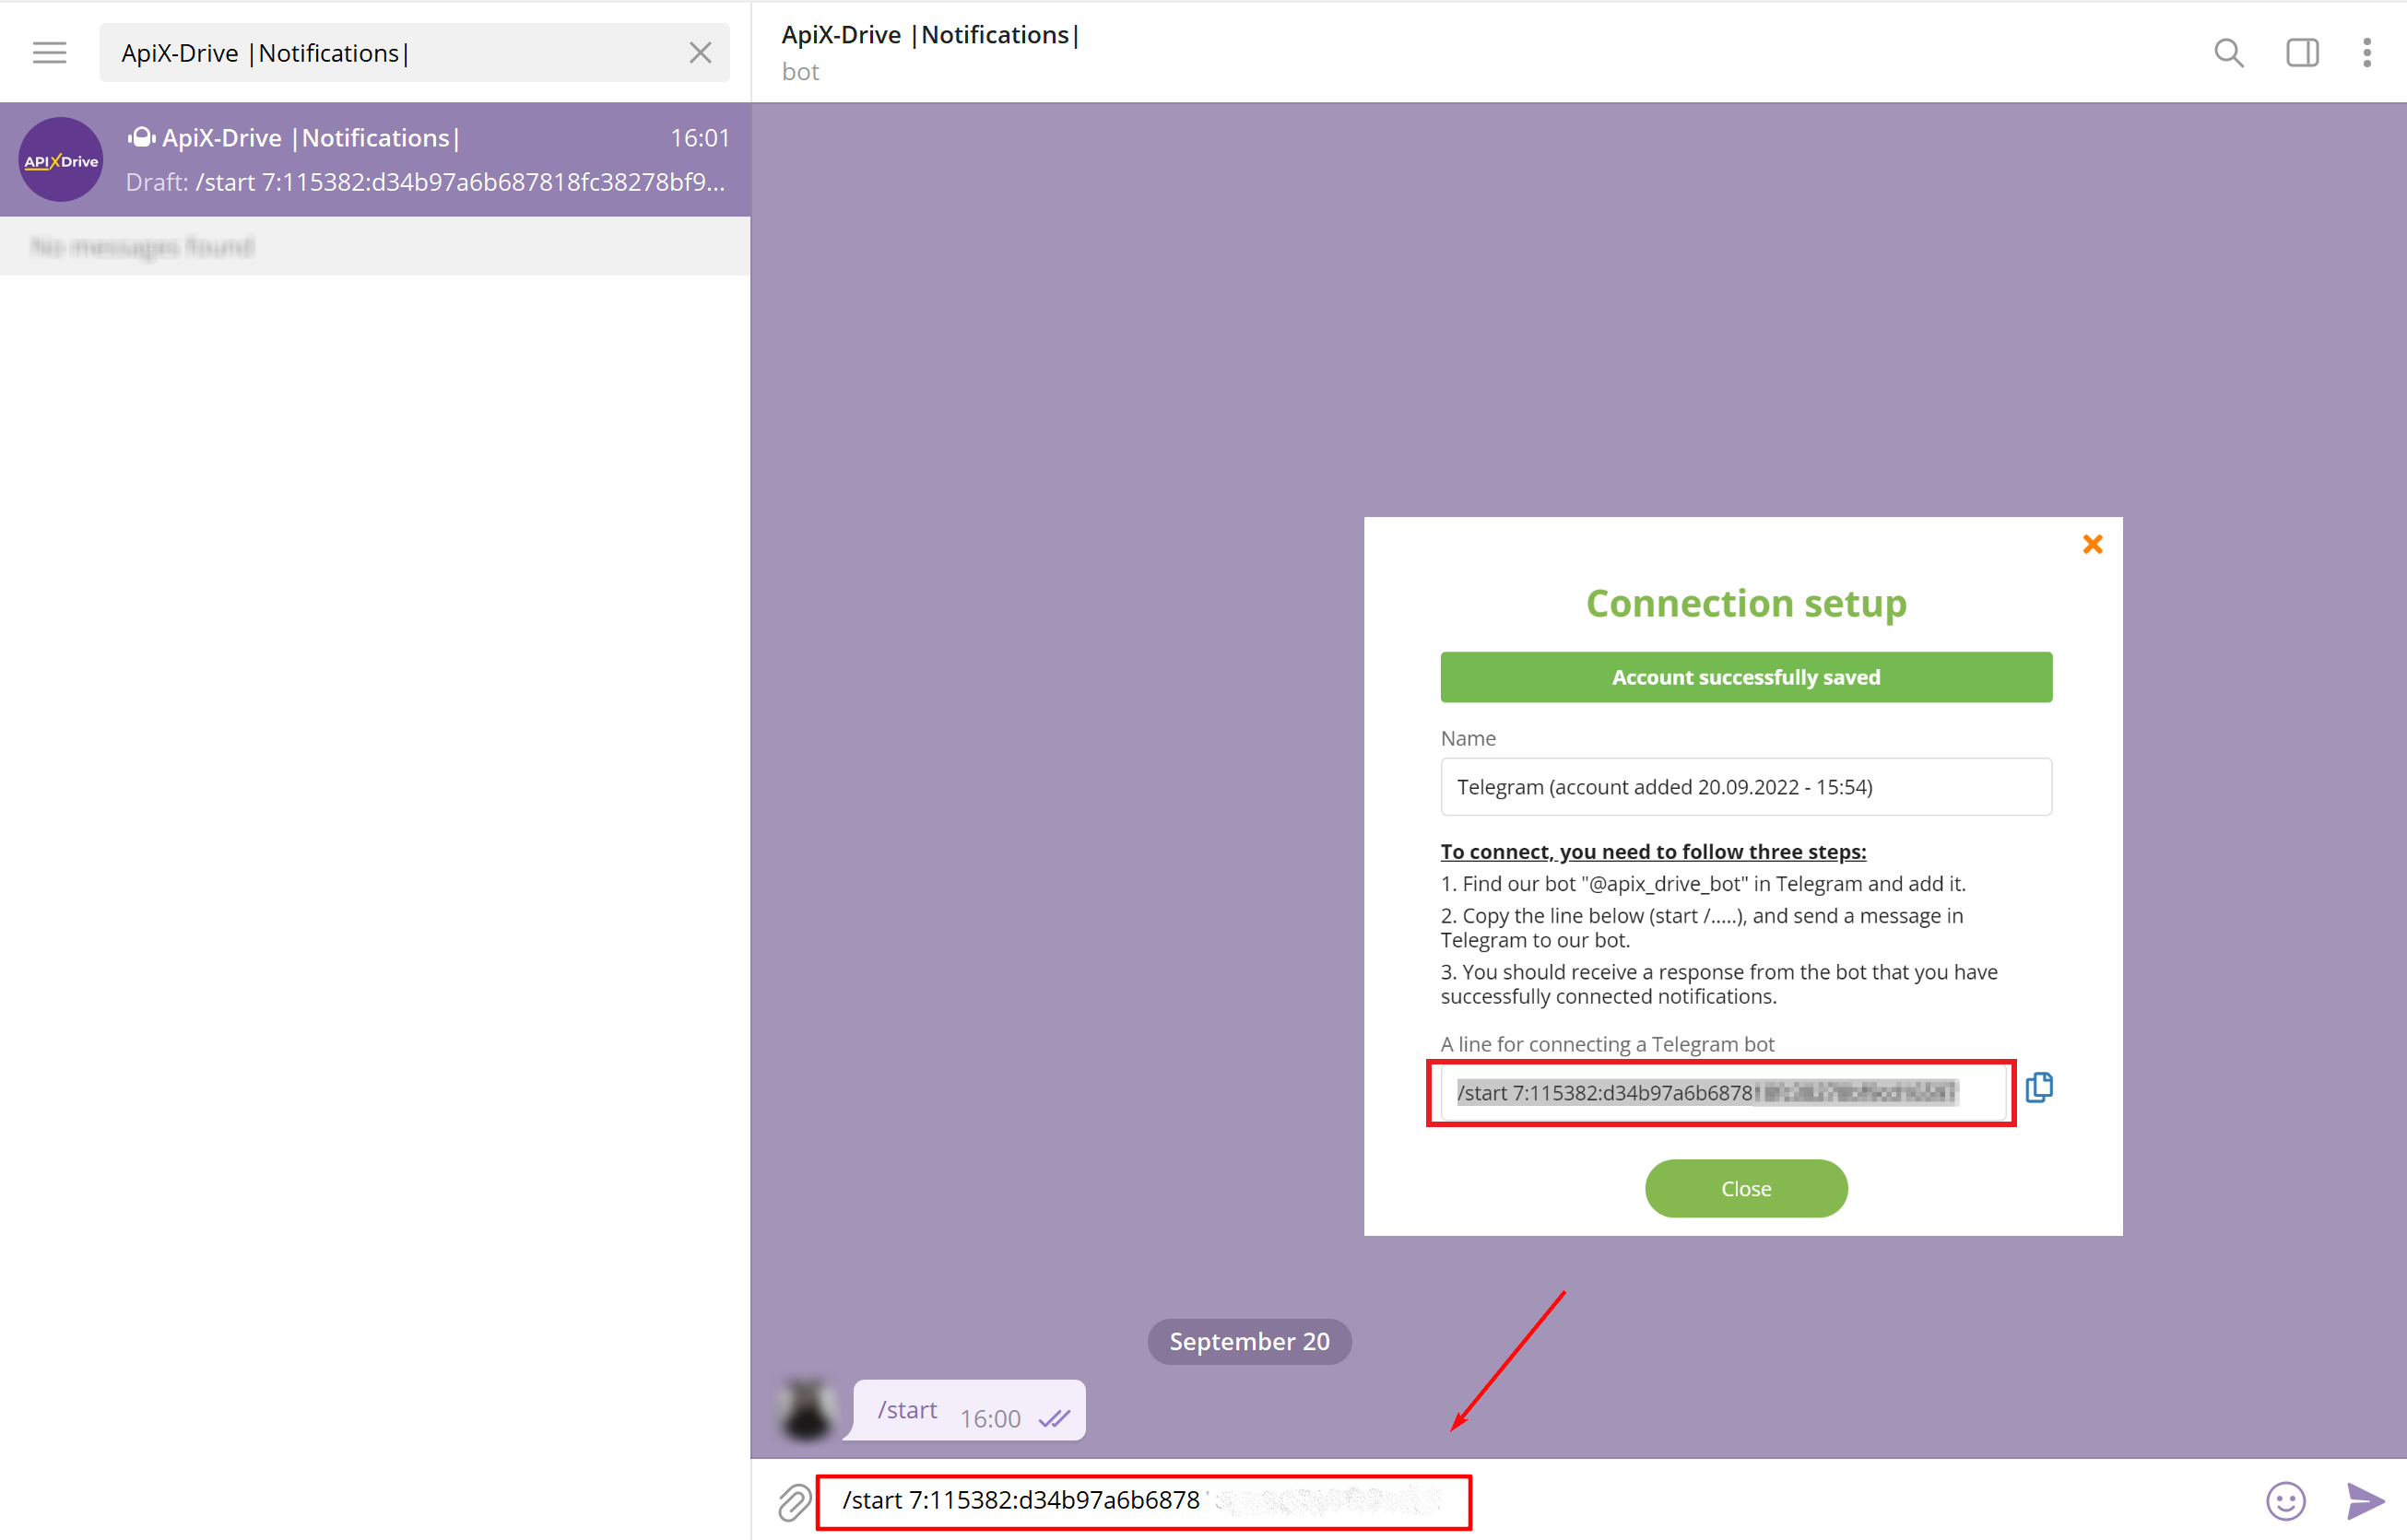
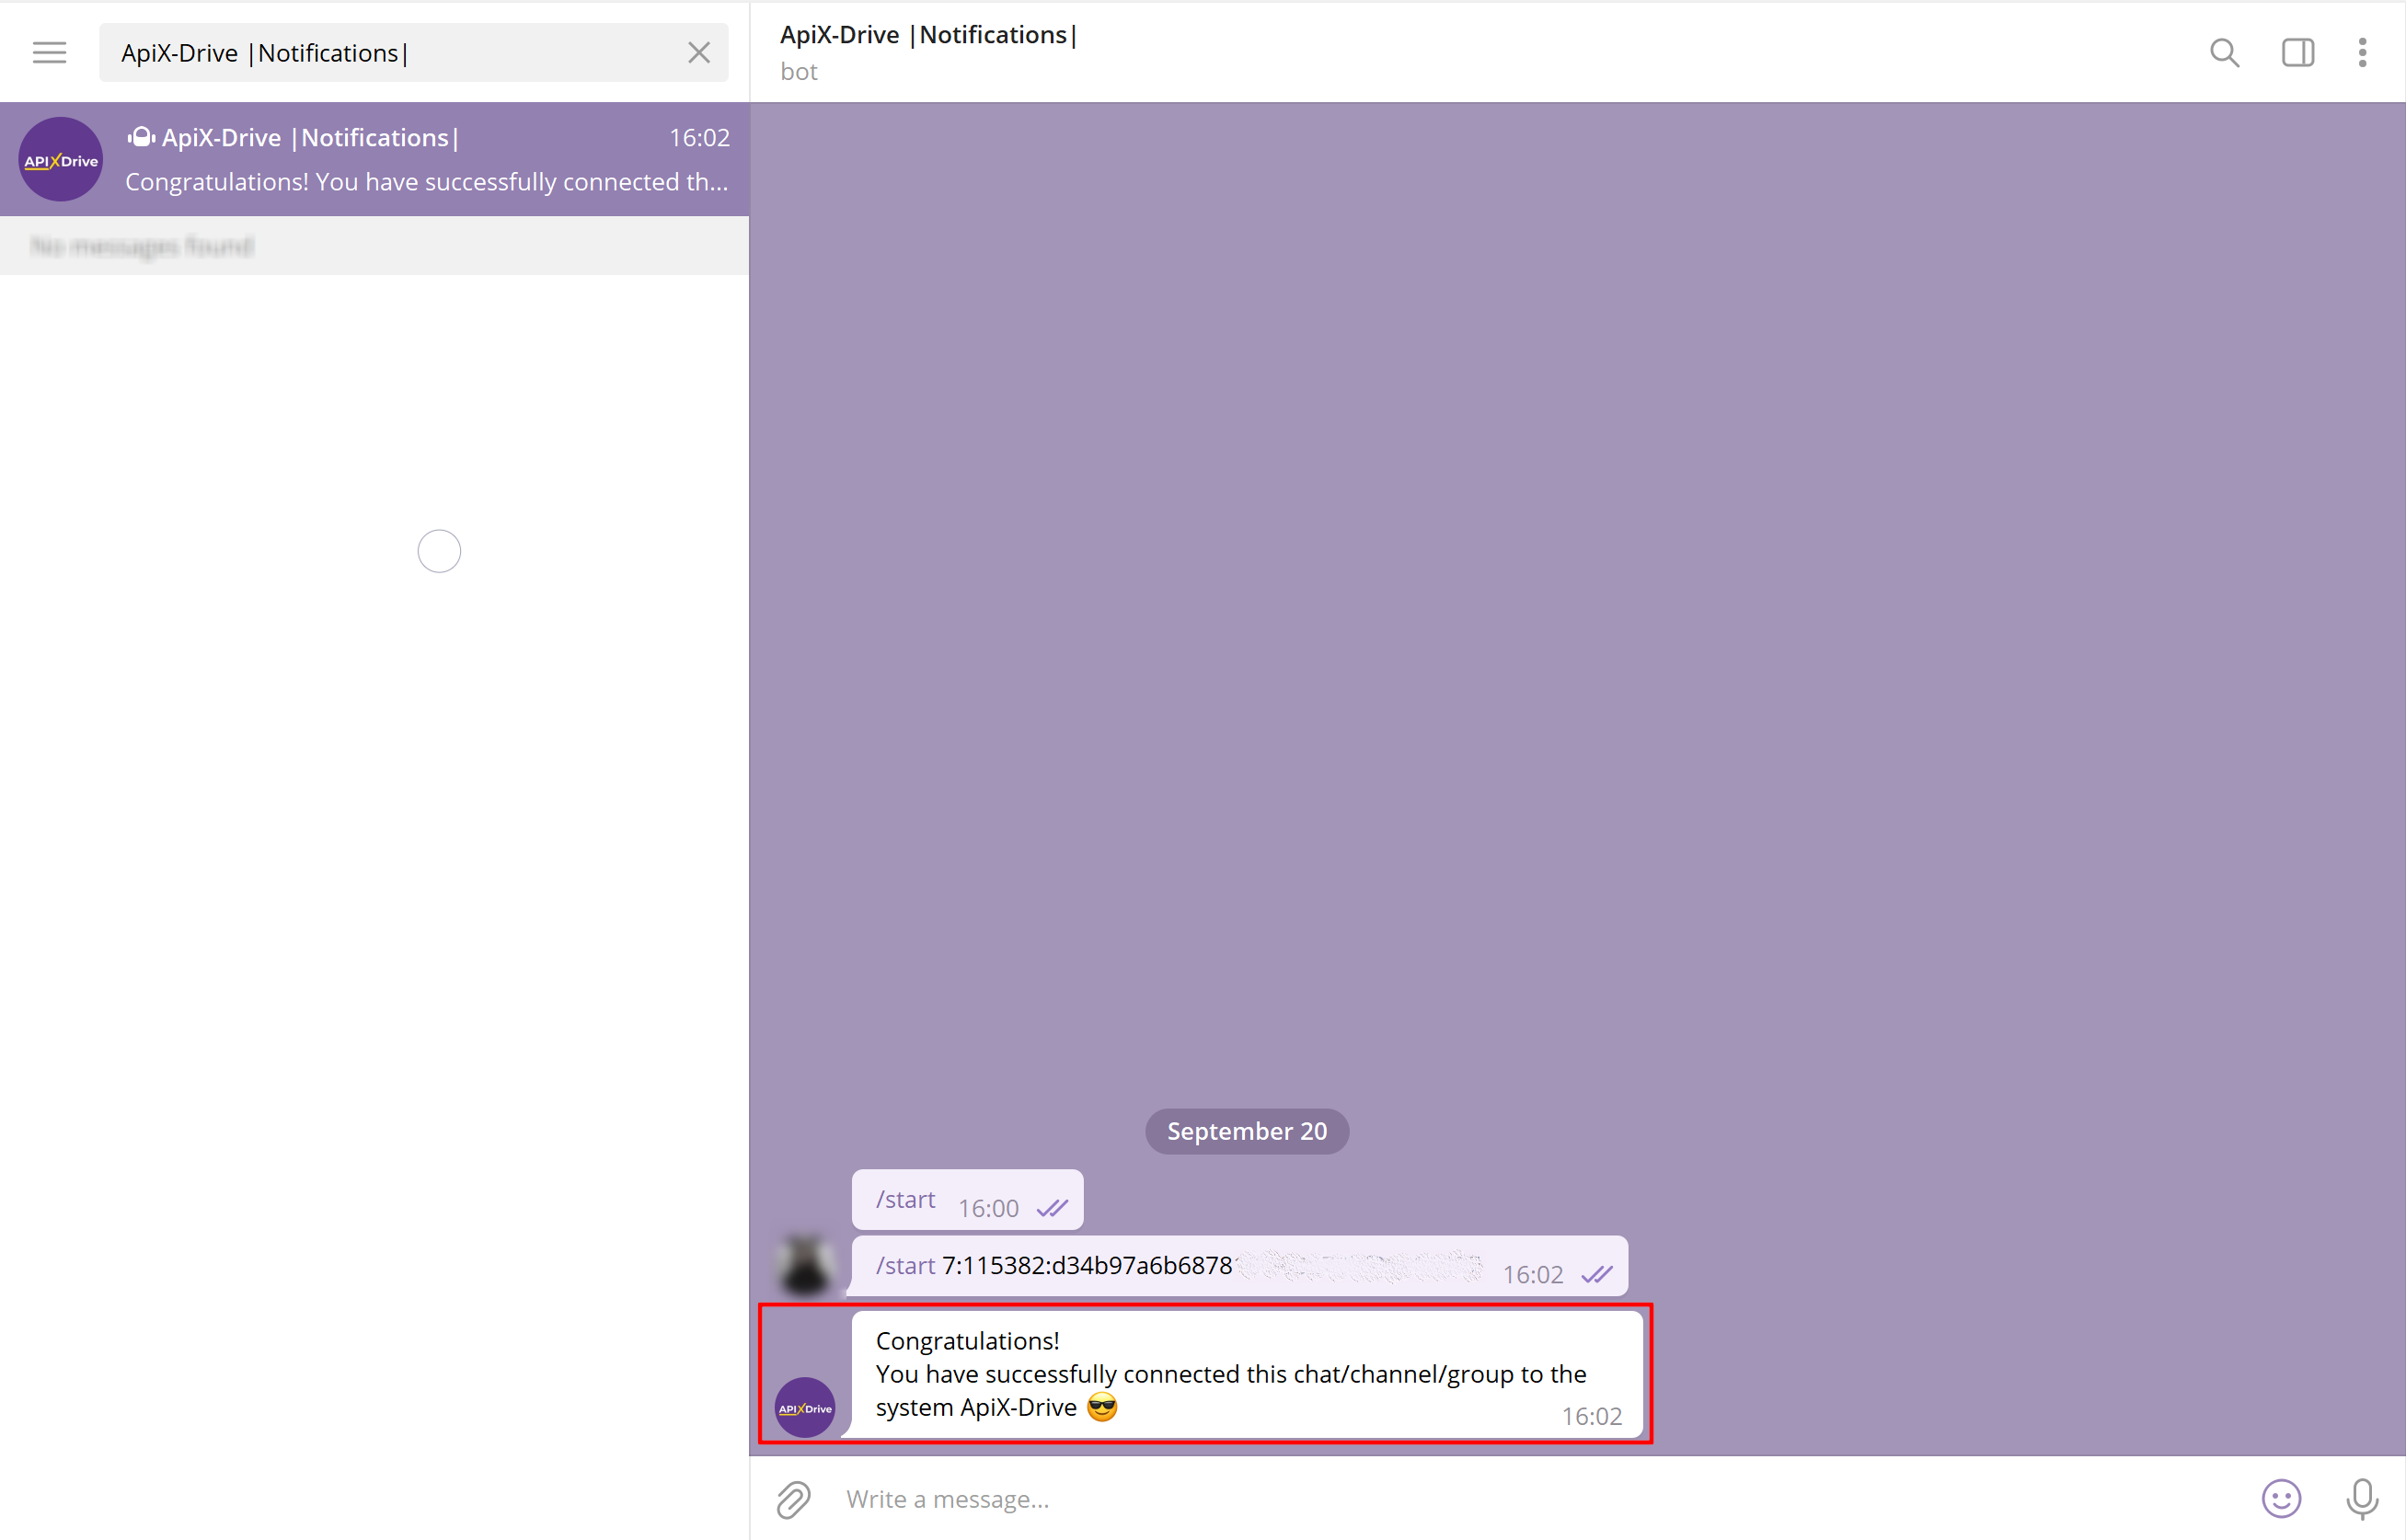
Close the connection window and select the connected Telegram account, then click “Continue”.
Example of connecting Telegram with the action "Send MESSAGE (your bot)"
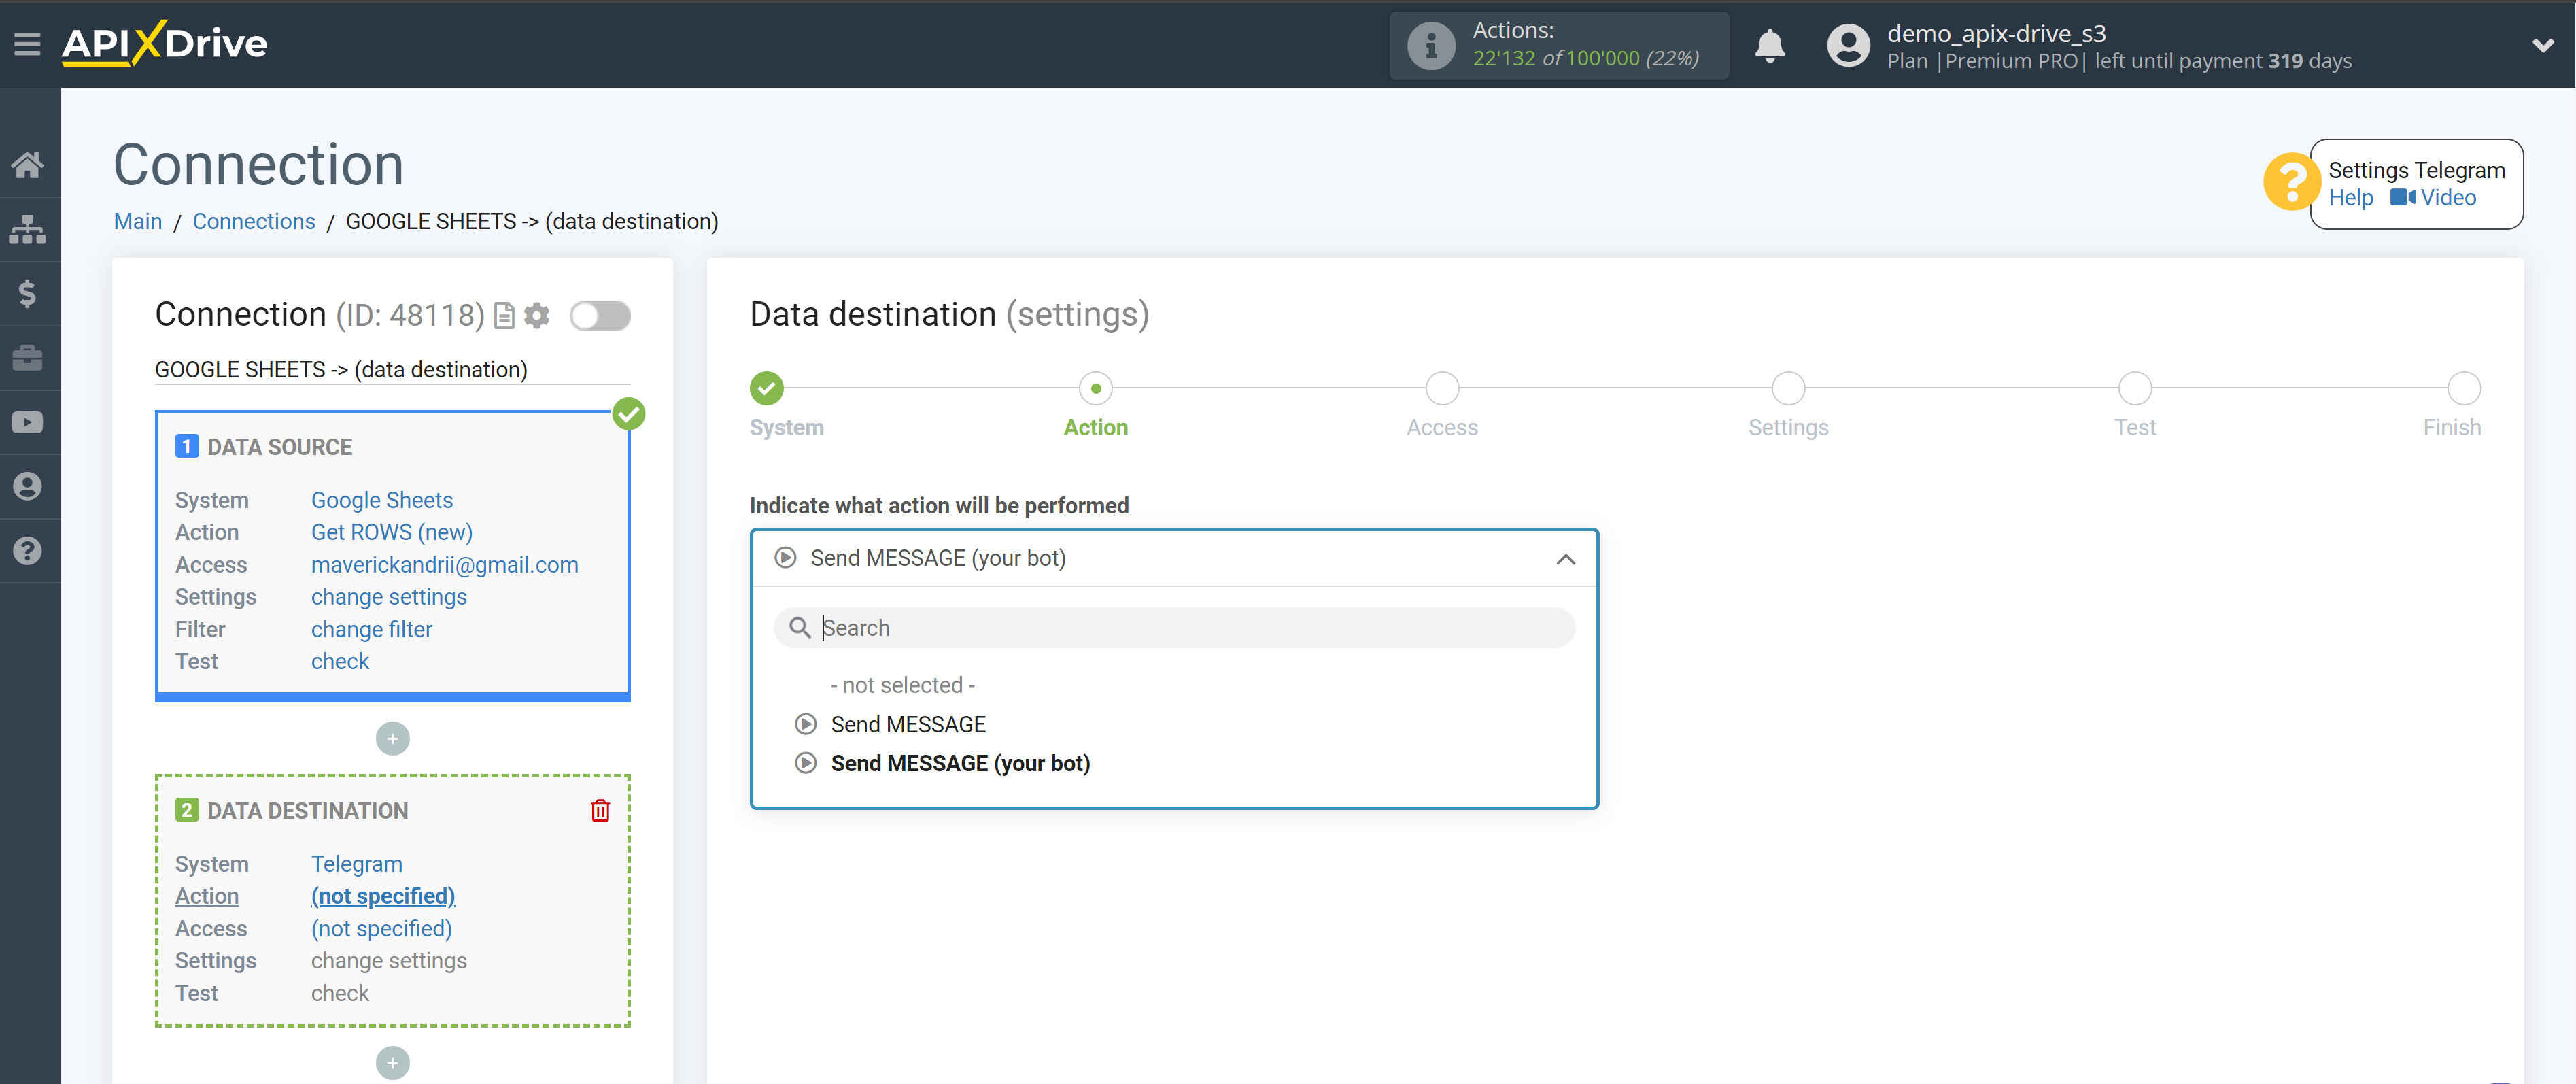
The next step is to select the Telegram account to which messages will be sent.
If there are no connected accounts to the ApiX-Drive system, click “Connect account”.
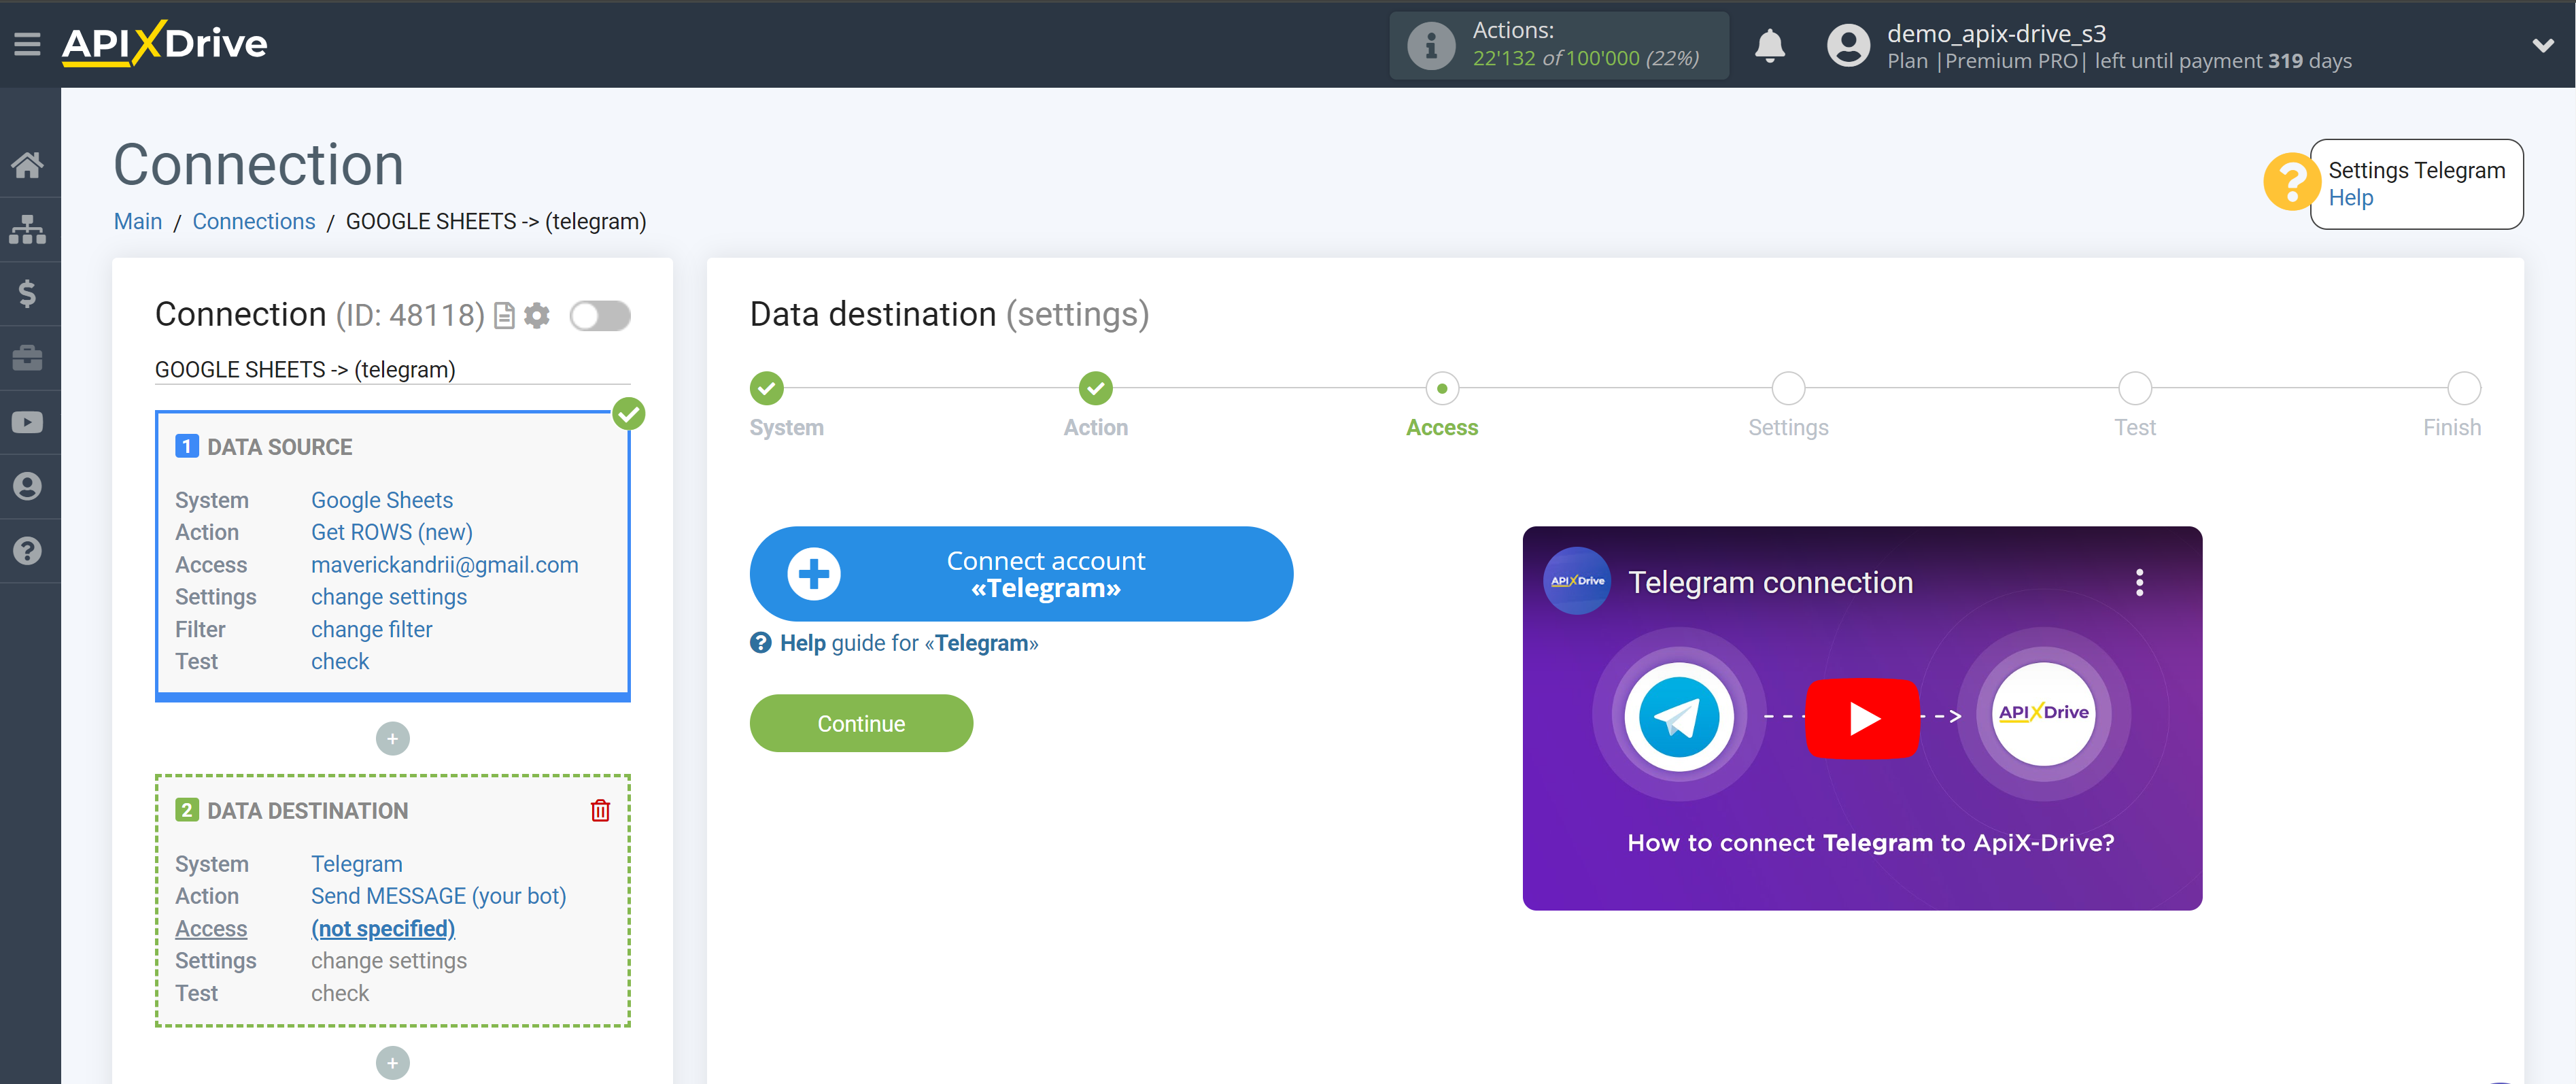
In the window that appears, in the “Bot token” field, enter the token of your bot, also indicate the name of the account, and click “Save”.
Note! In order to find the bot and its token, that you want to connect to ApiX-Drive, go to Telegram, enter @BotFather (https://t.me/BotFather) in the search bar. Next click Menu and select /mybots, click on the bot you want to connect and select API token, then copy the token and paste it into the appropriate field in ApiX-Drive.
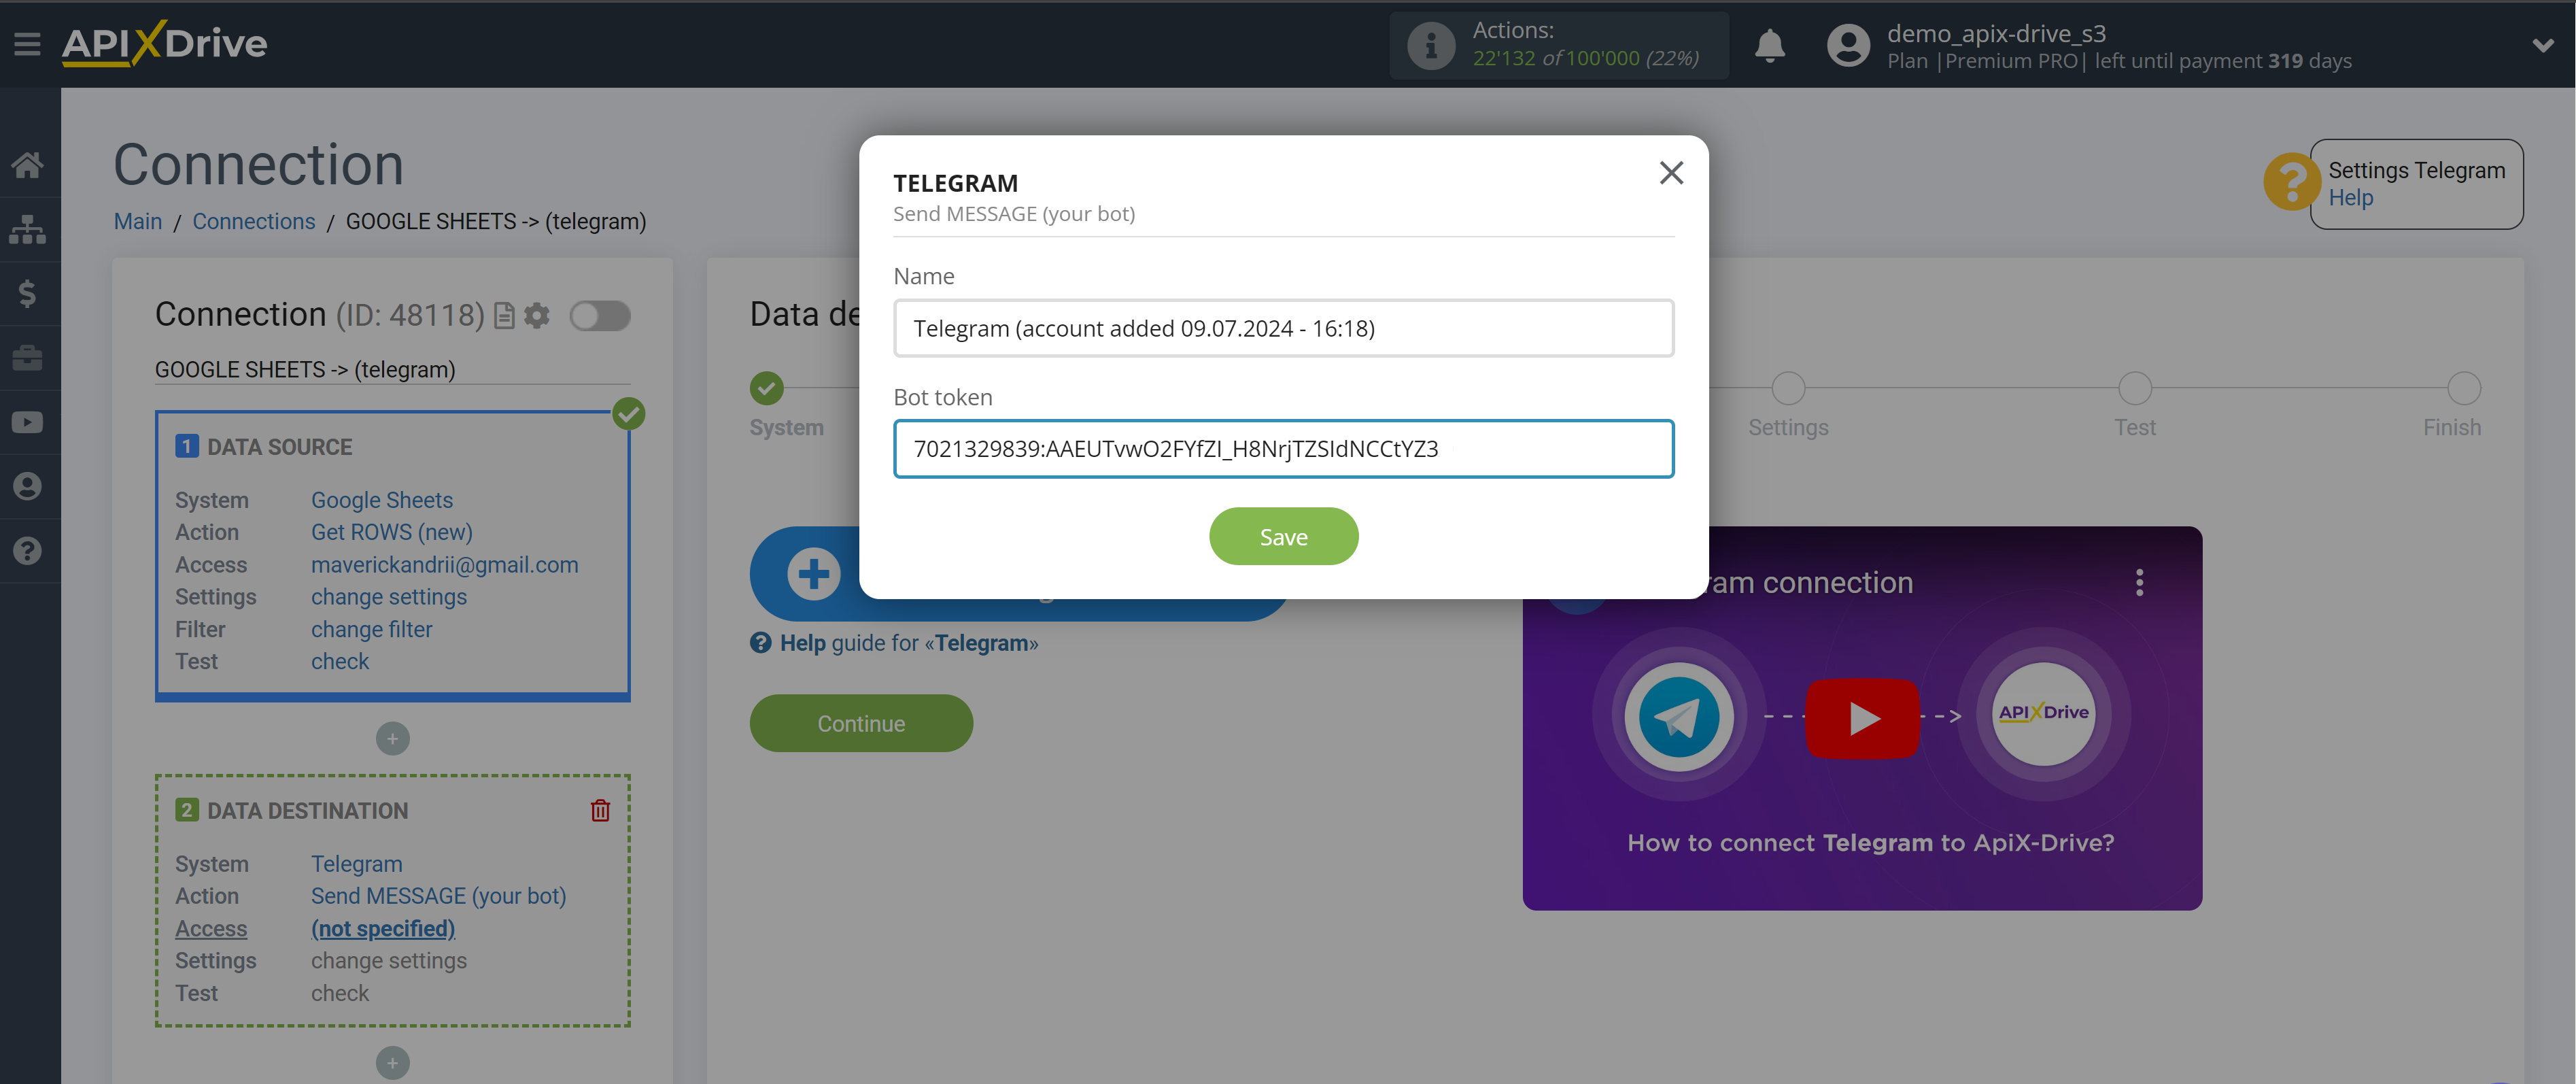
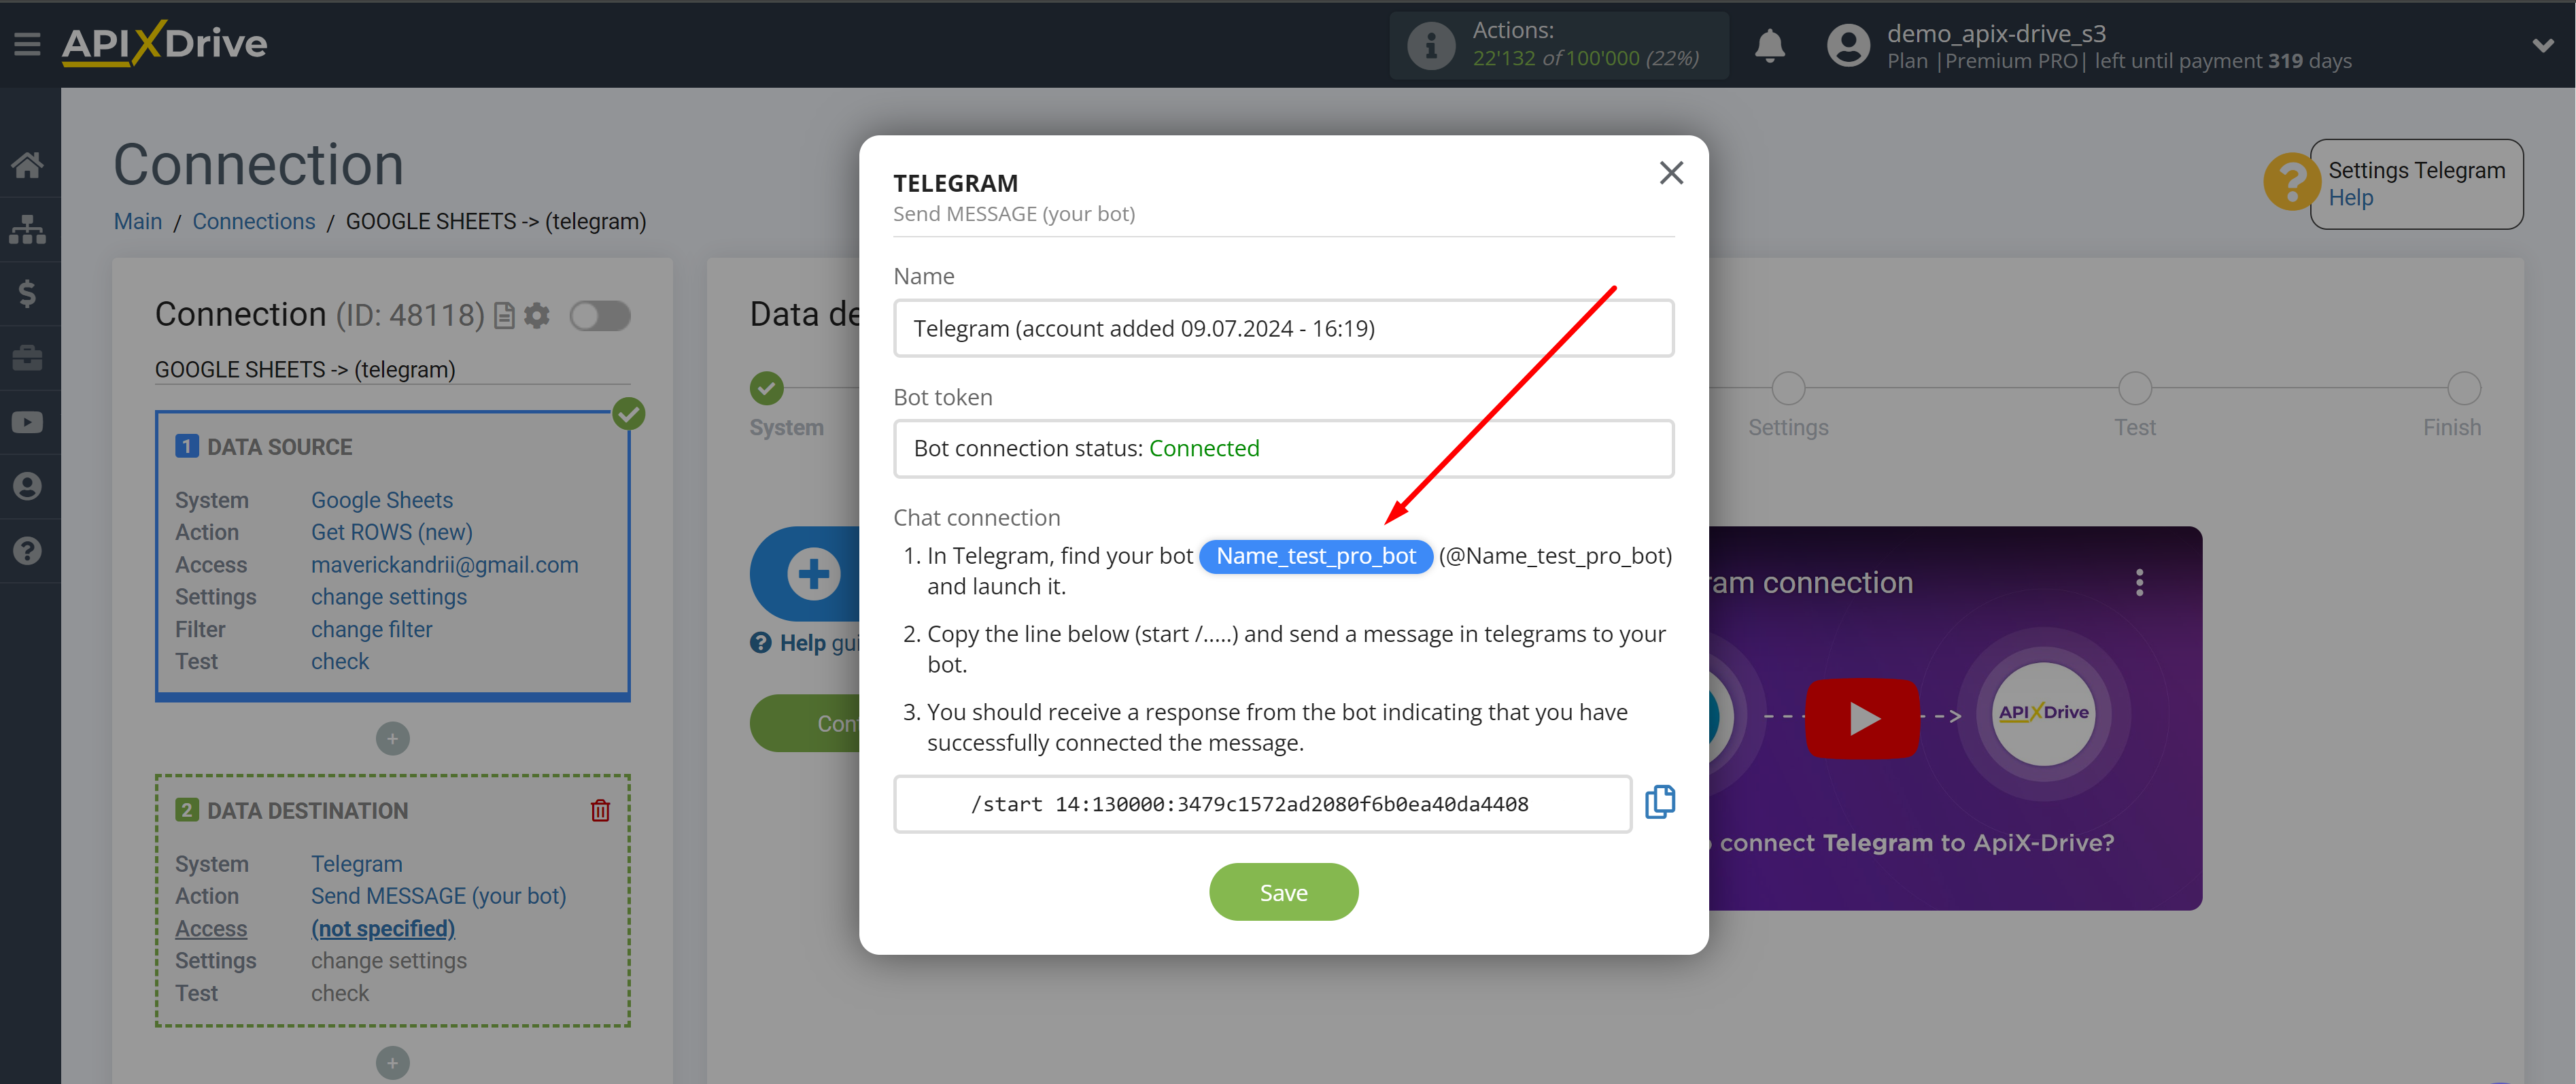
Next a new window will open in which you need to copy the data from the connection line below.
Then click on the button with the name of your bot and click Open Telegram, this will automatically open the Telegram application or you can not use the button, but simply manually go to your Telegram application.
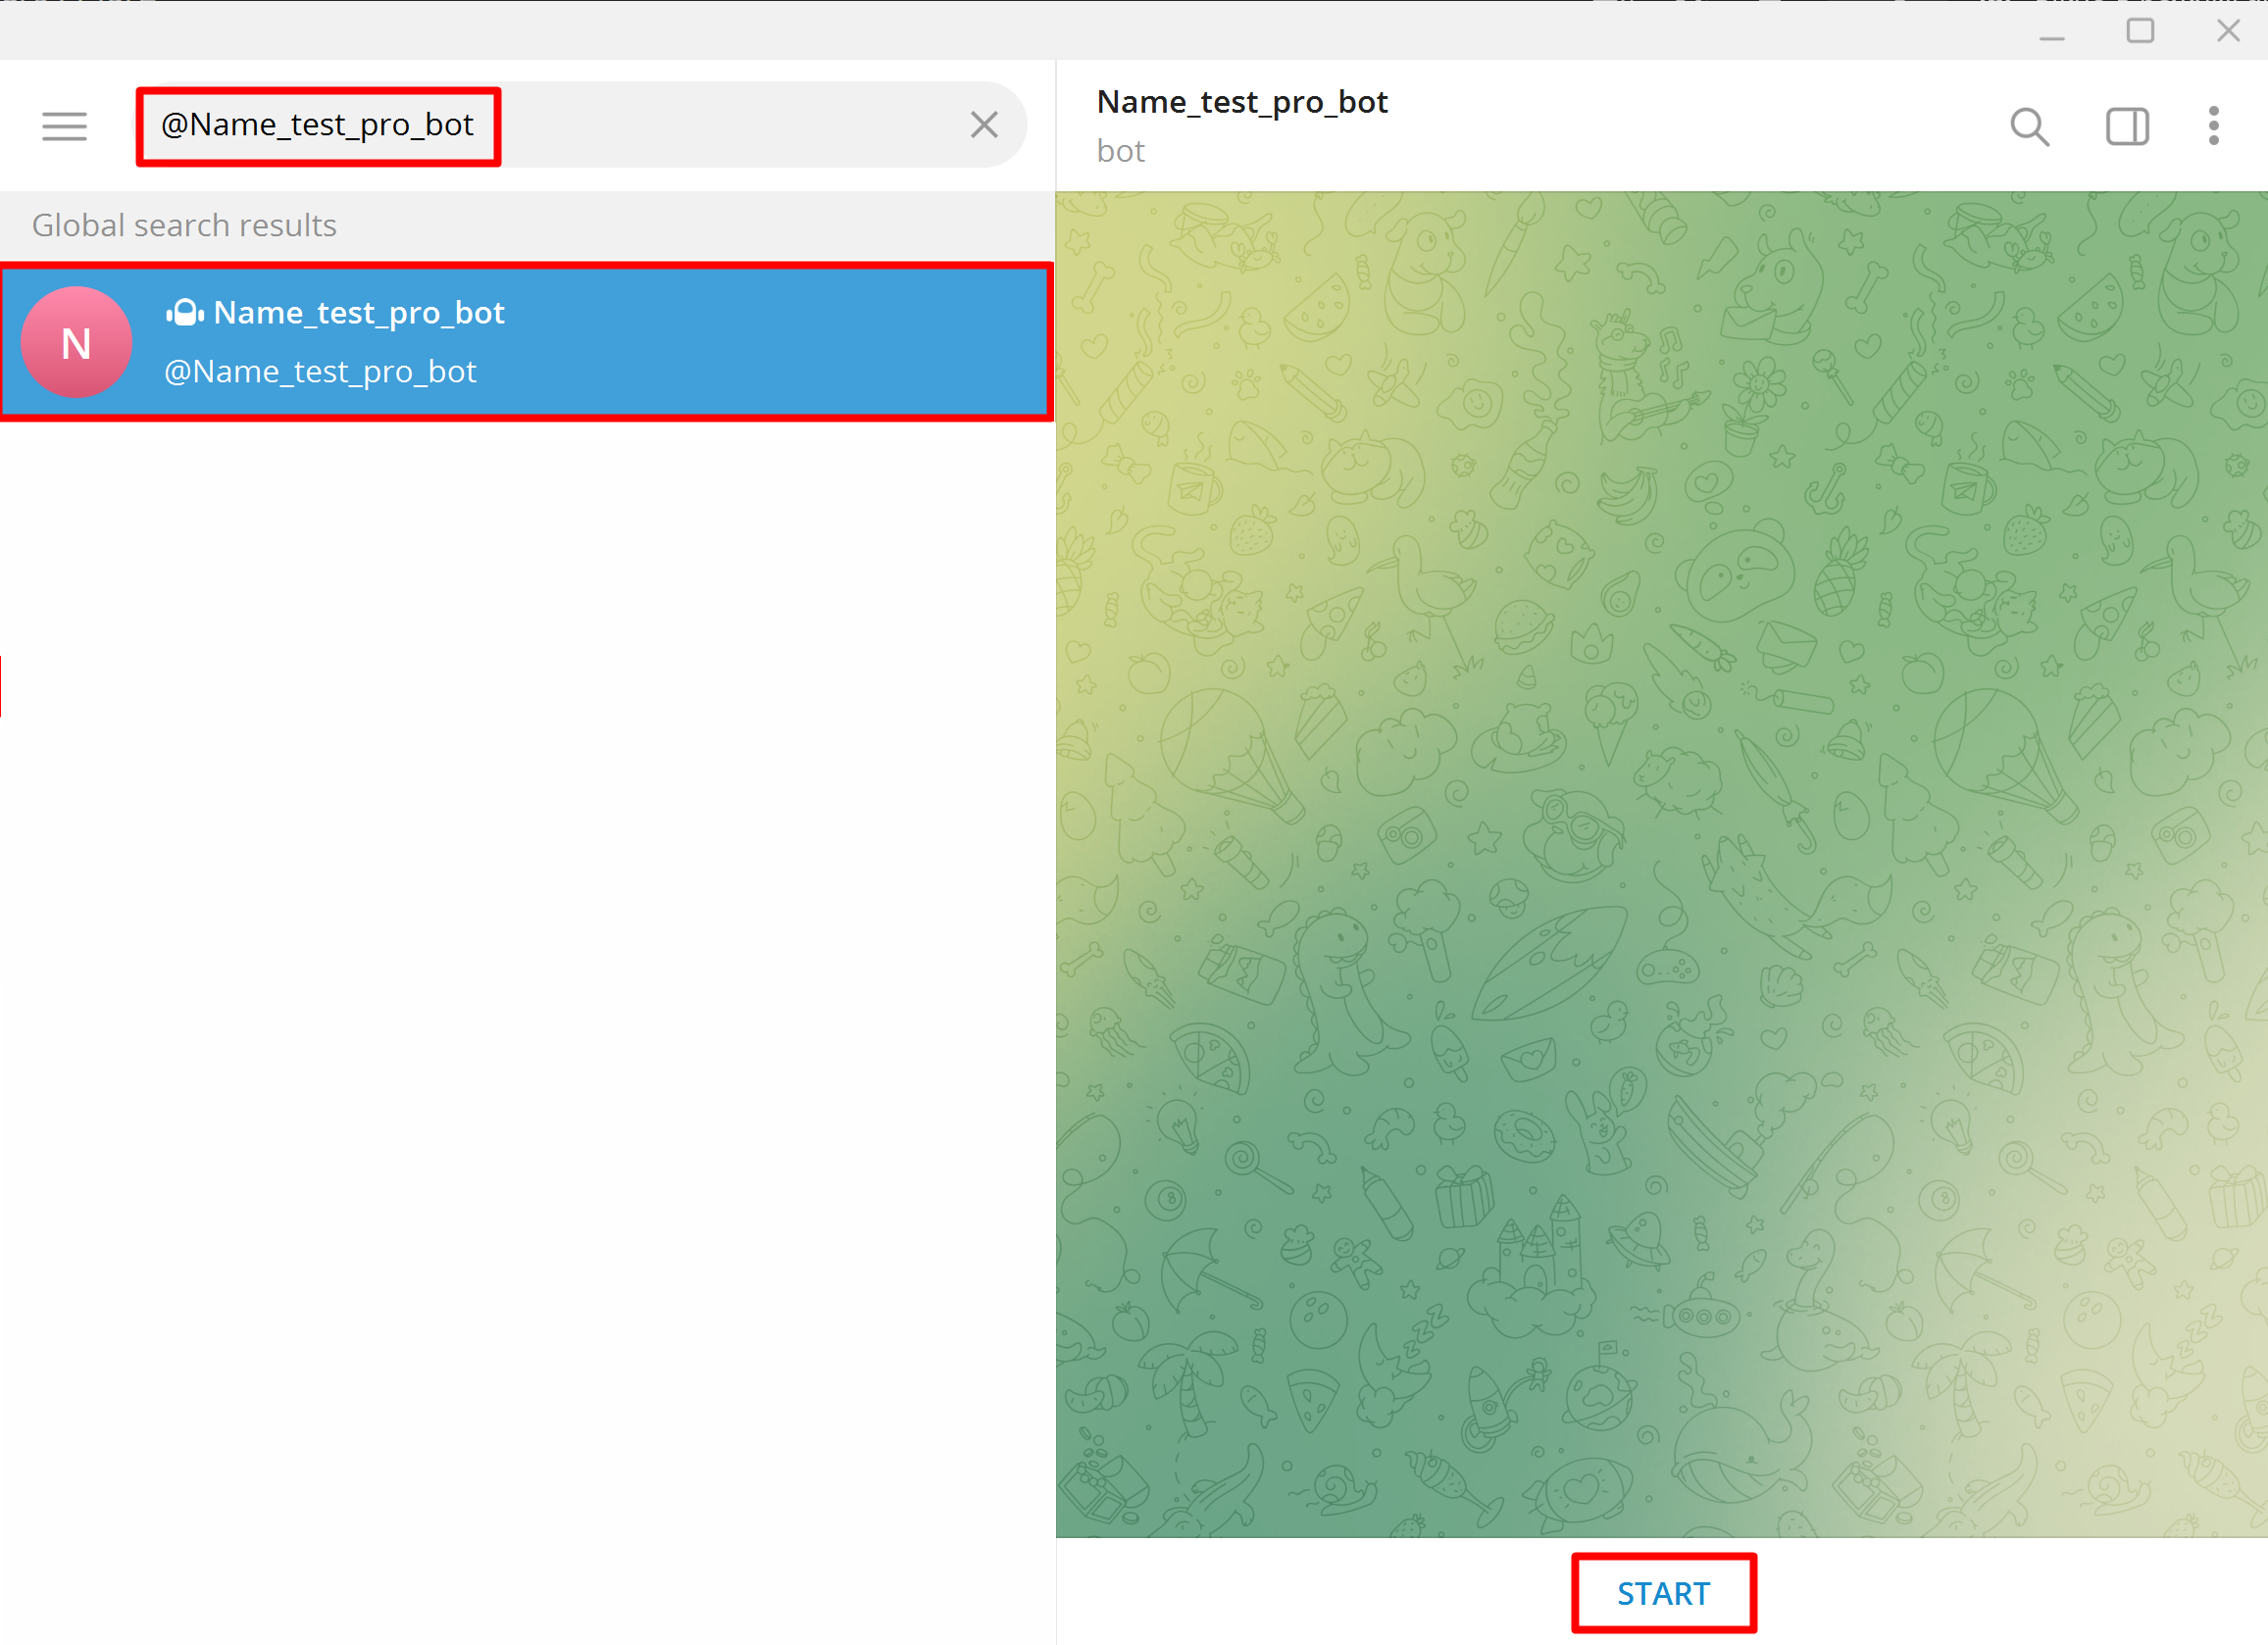
In your Telegram application, in the search bar, enter @indicate_your_bot_username here.
Click on the bot's profile and click "Start". If you have connected this bot before, you will see a “Restart” button, click it.
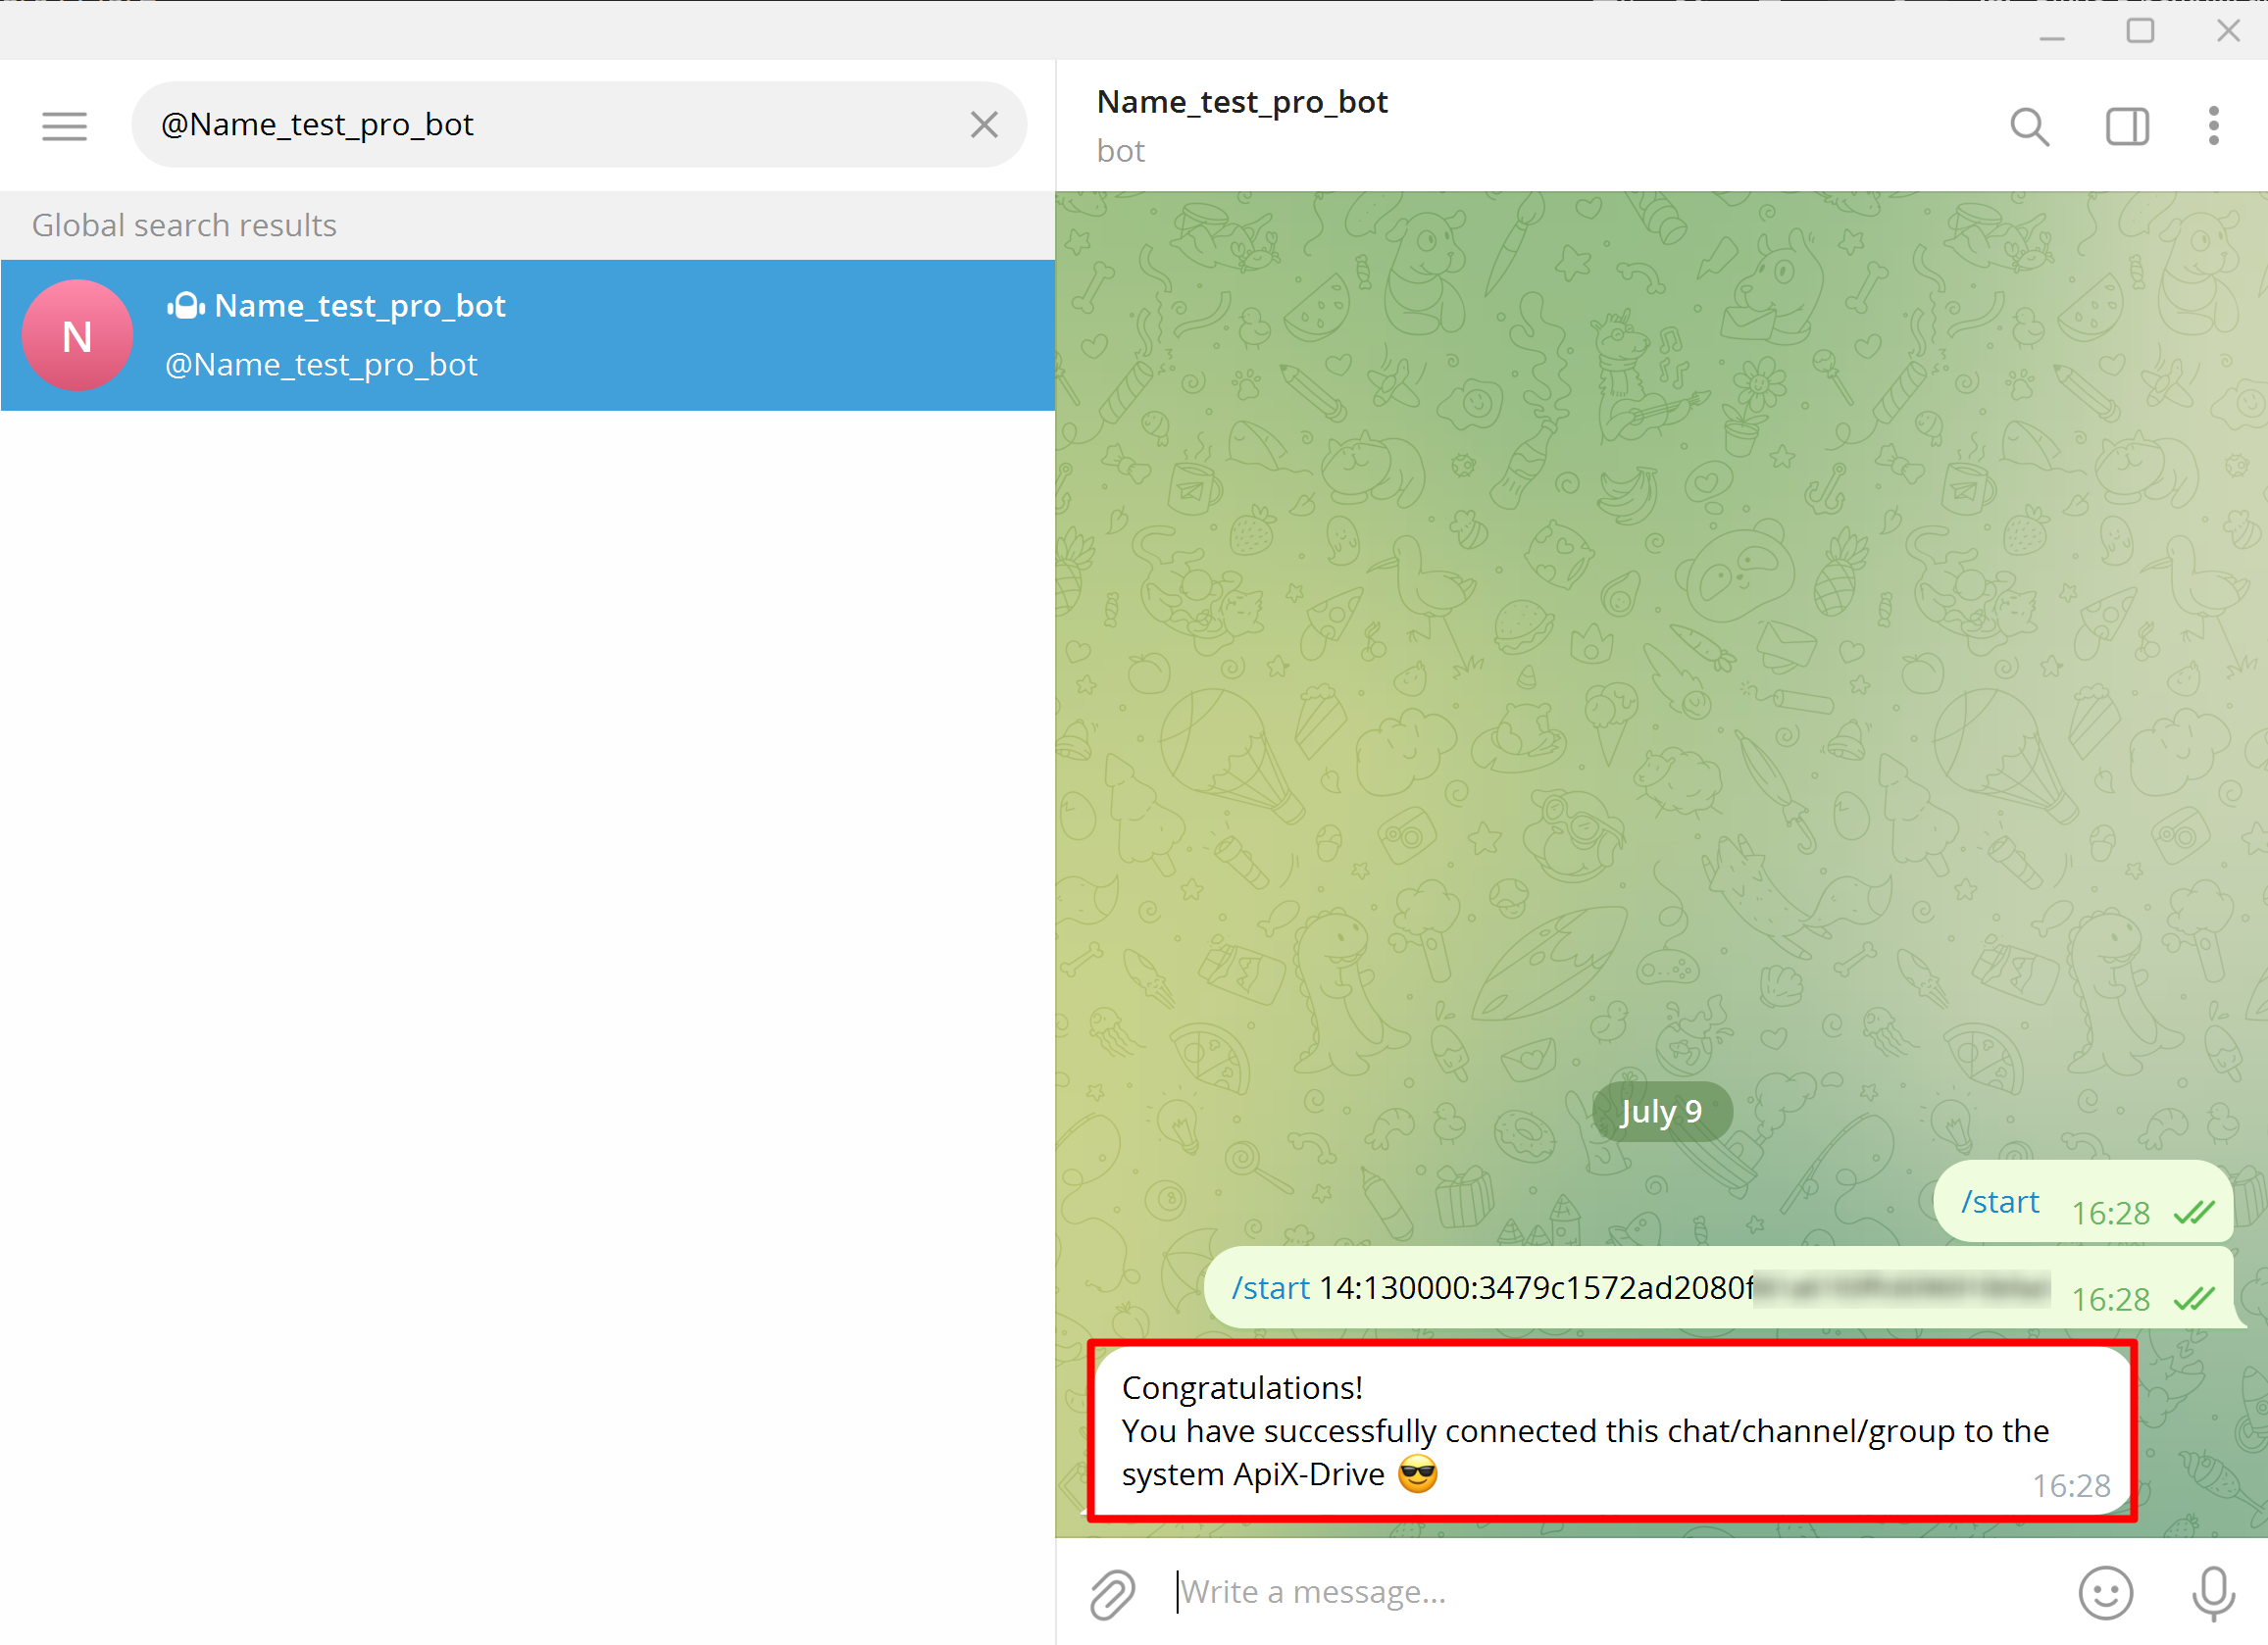
Send a message to the bot with the connection string, that was copied in the ApiX-Drive system.
Wait for a response message indicating a successful connection to the system.
After this return to the ApiX-Drive system and continue configuration.
Close the connection window and select the connected Telegram account, then click “Continue”.
Note!
If you want messages to come to the channel or group, you need to add our bot to the group or channel, run it there and configure it. As a result, the group or channel should receive an answer that the bot is connected successfully.
If you have previously connected our bot to yourself, and now you want to connect it to a group or channel, you need to perform the following algorithm:
1. You need to disable our bot, clear the entire history and completely delete the dialogue with the bot.
2. In our system, go to the Accounts - Messengers - Telegram and delete all created accounts.
3. Go to your connection in the Data Destination to the "Access" stage and create a new account.
4. According to the help you need to re-configure Telegram, only this time first you need to create a group or channel, add our bot, and send a string with a connection. After that, send the test data to Telegram and check that getting.
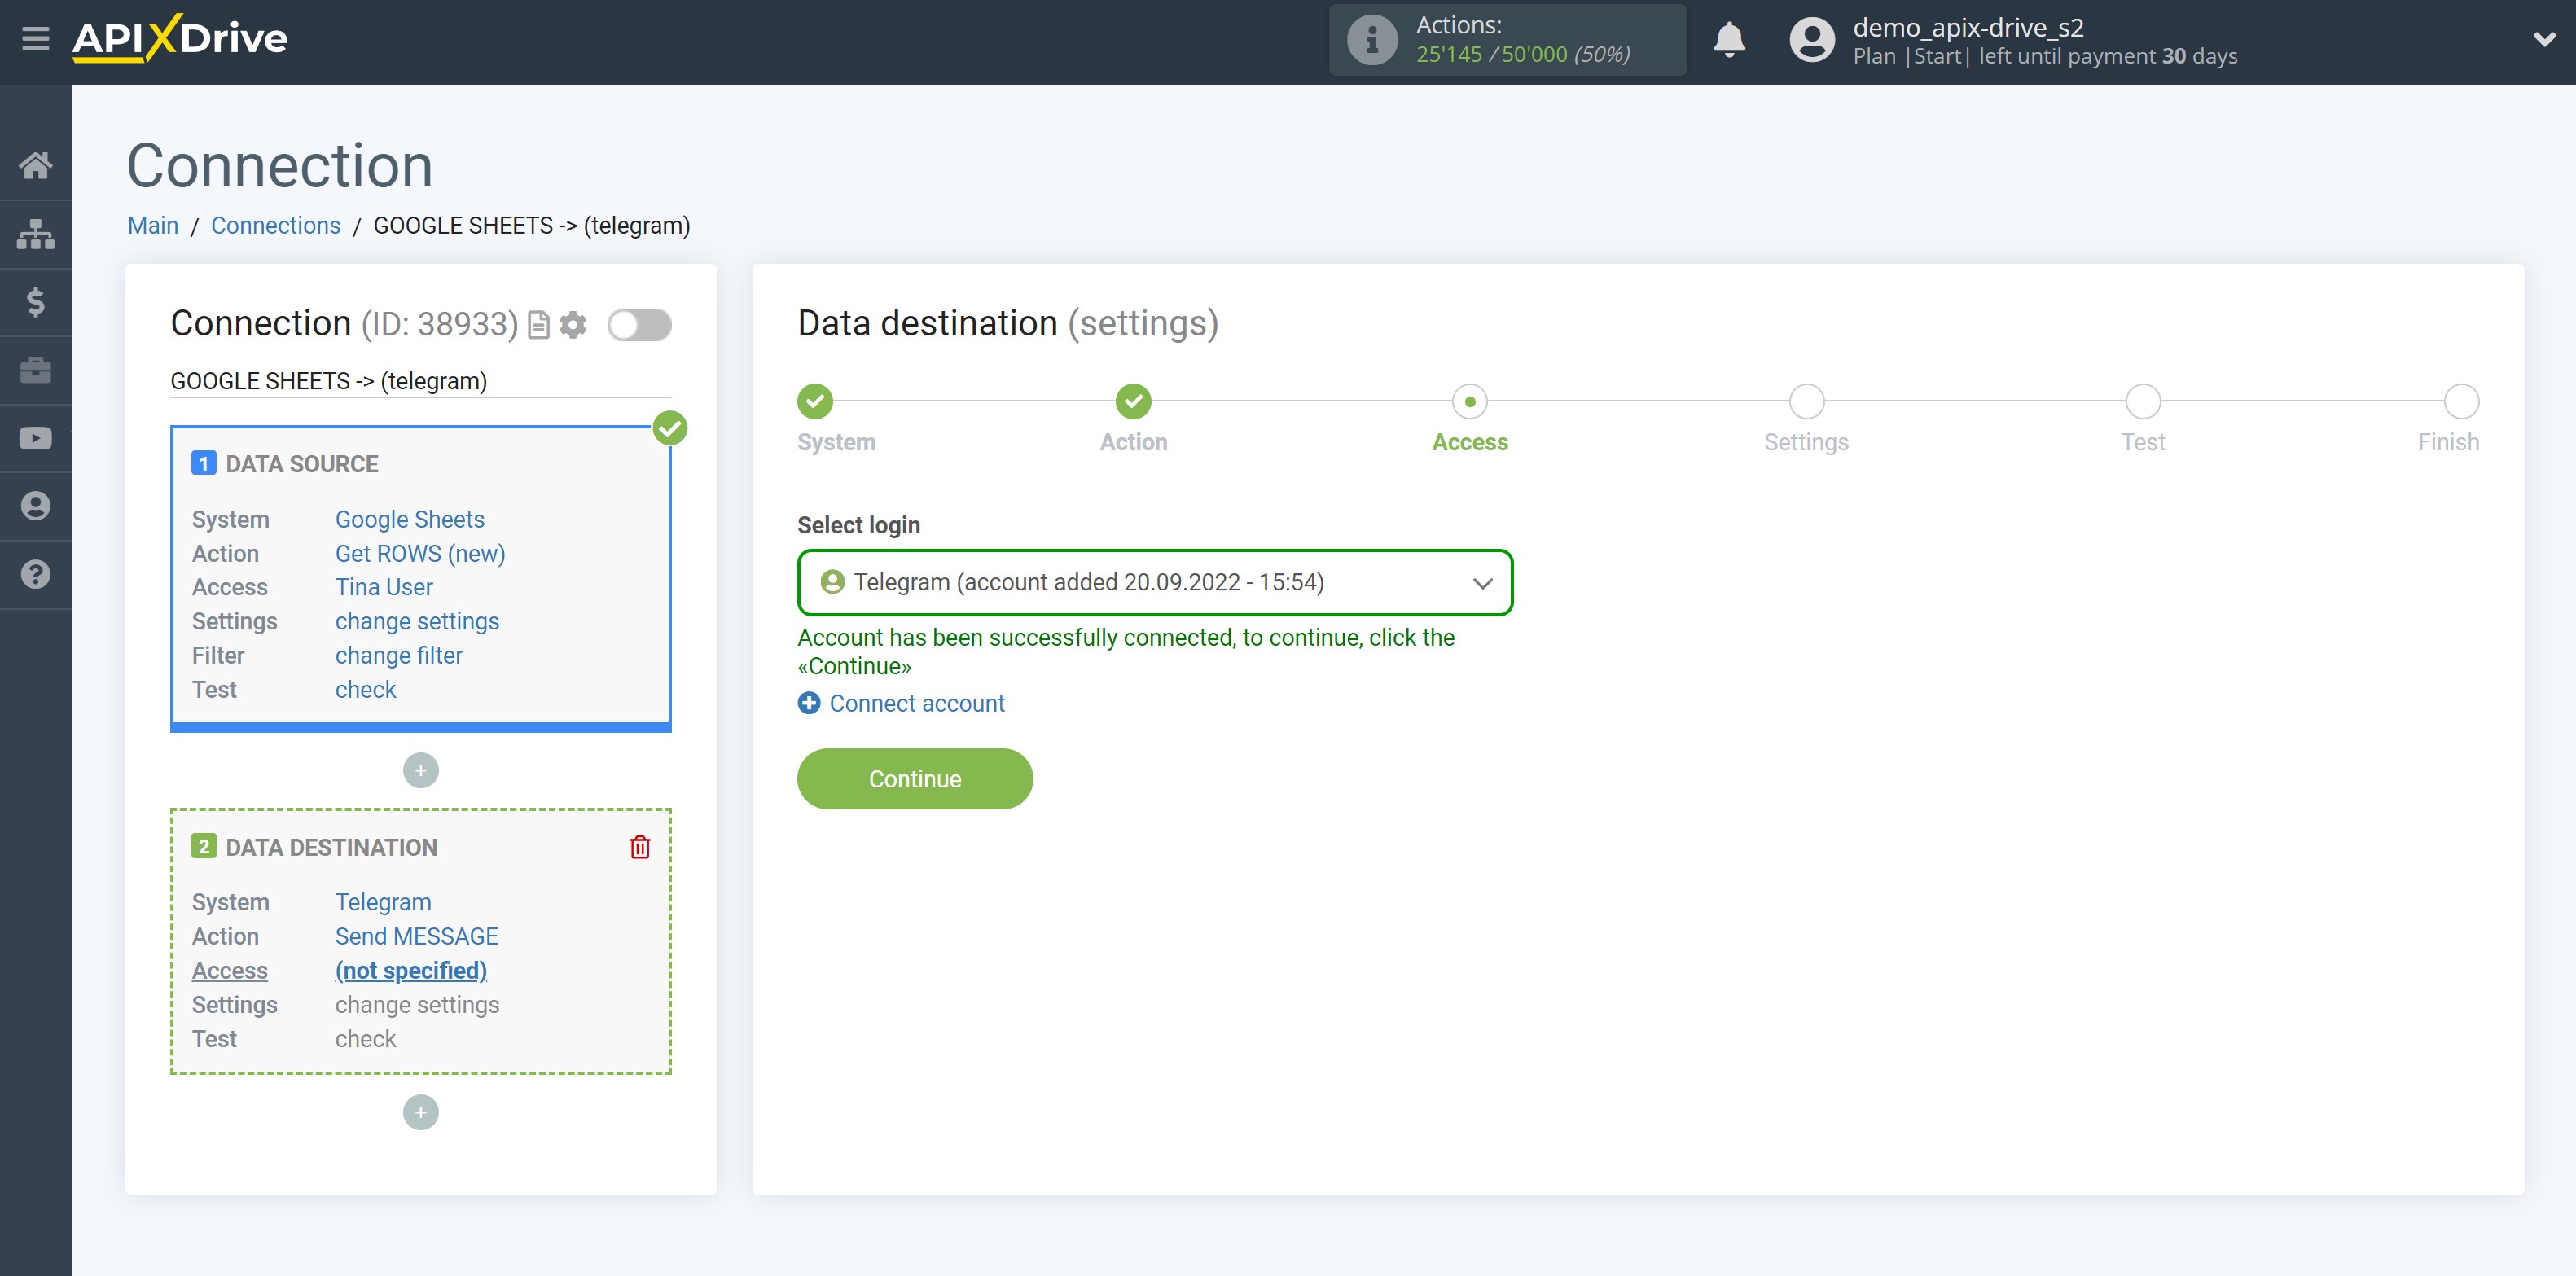
Select a Telegram account and click "Continue".
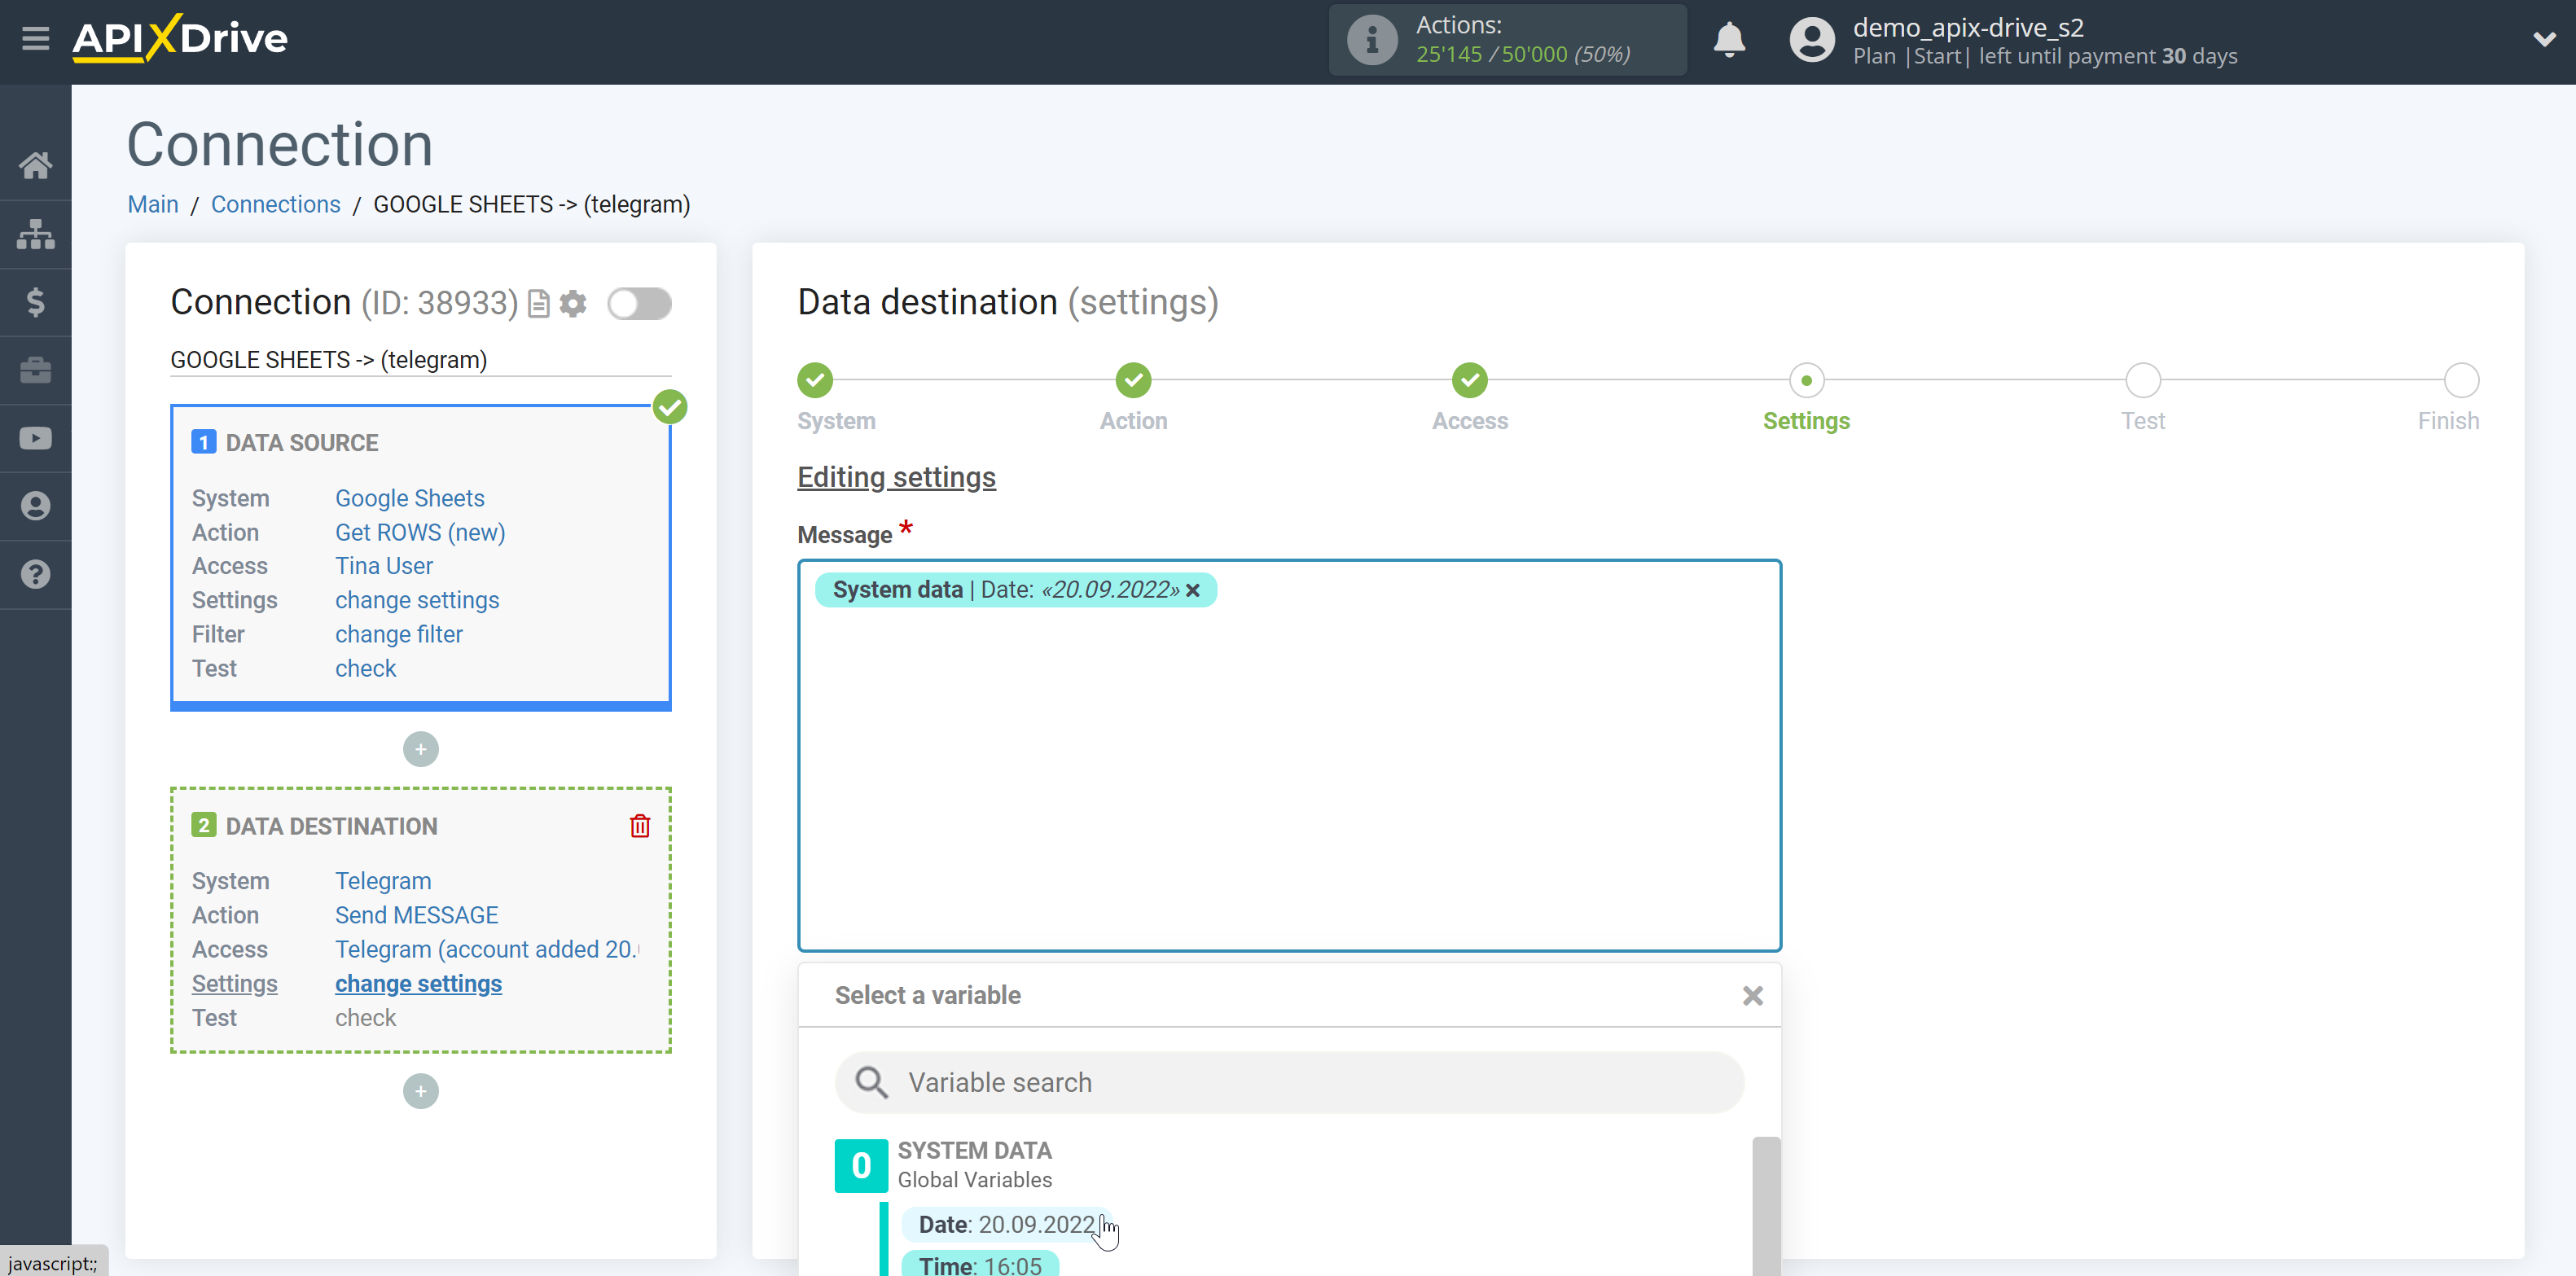
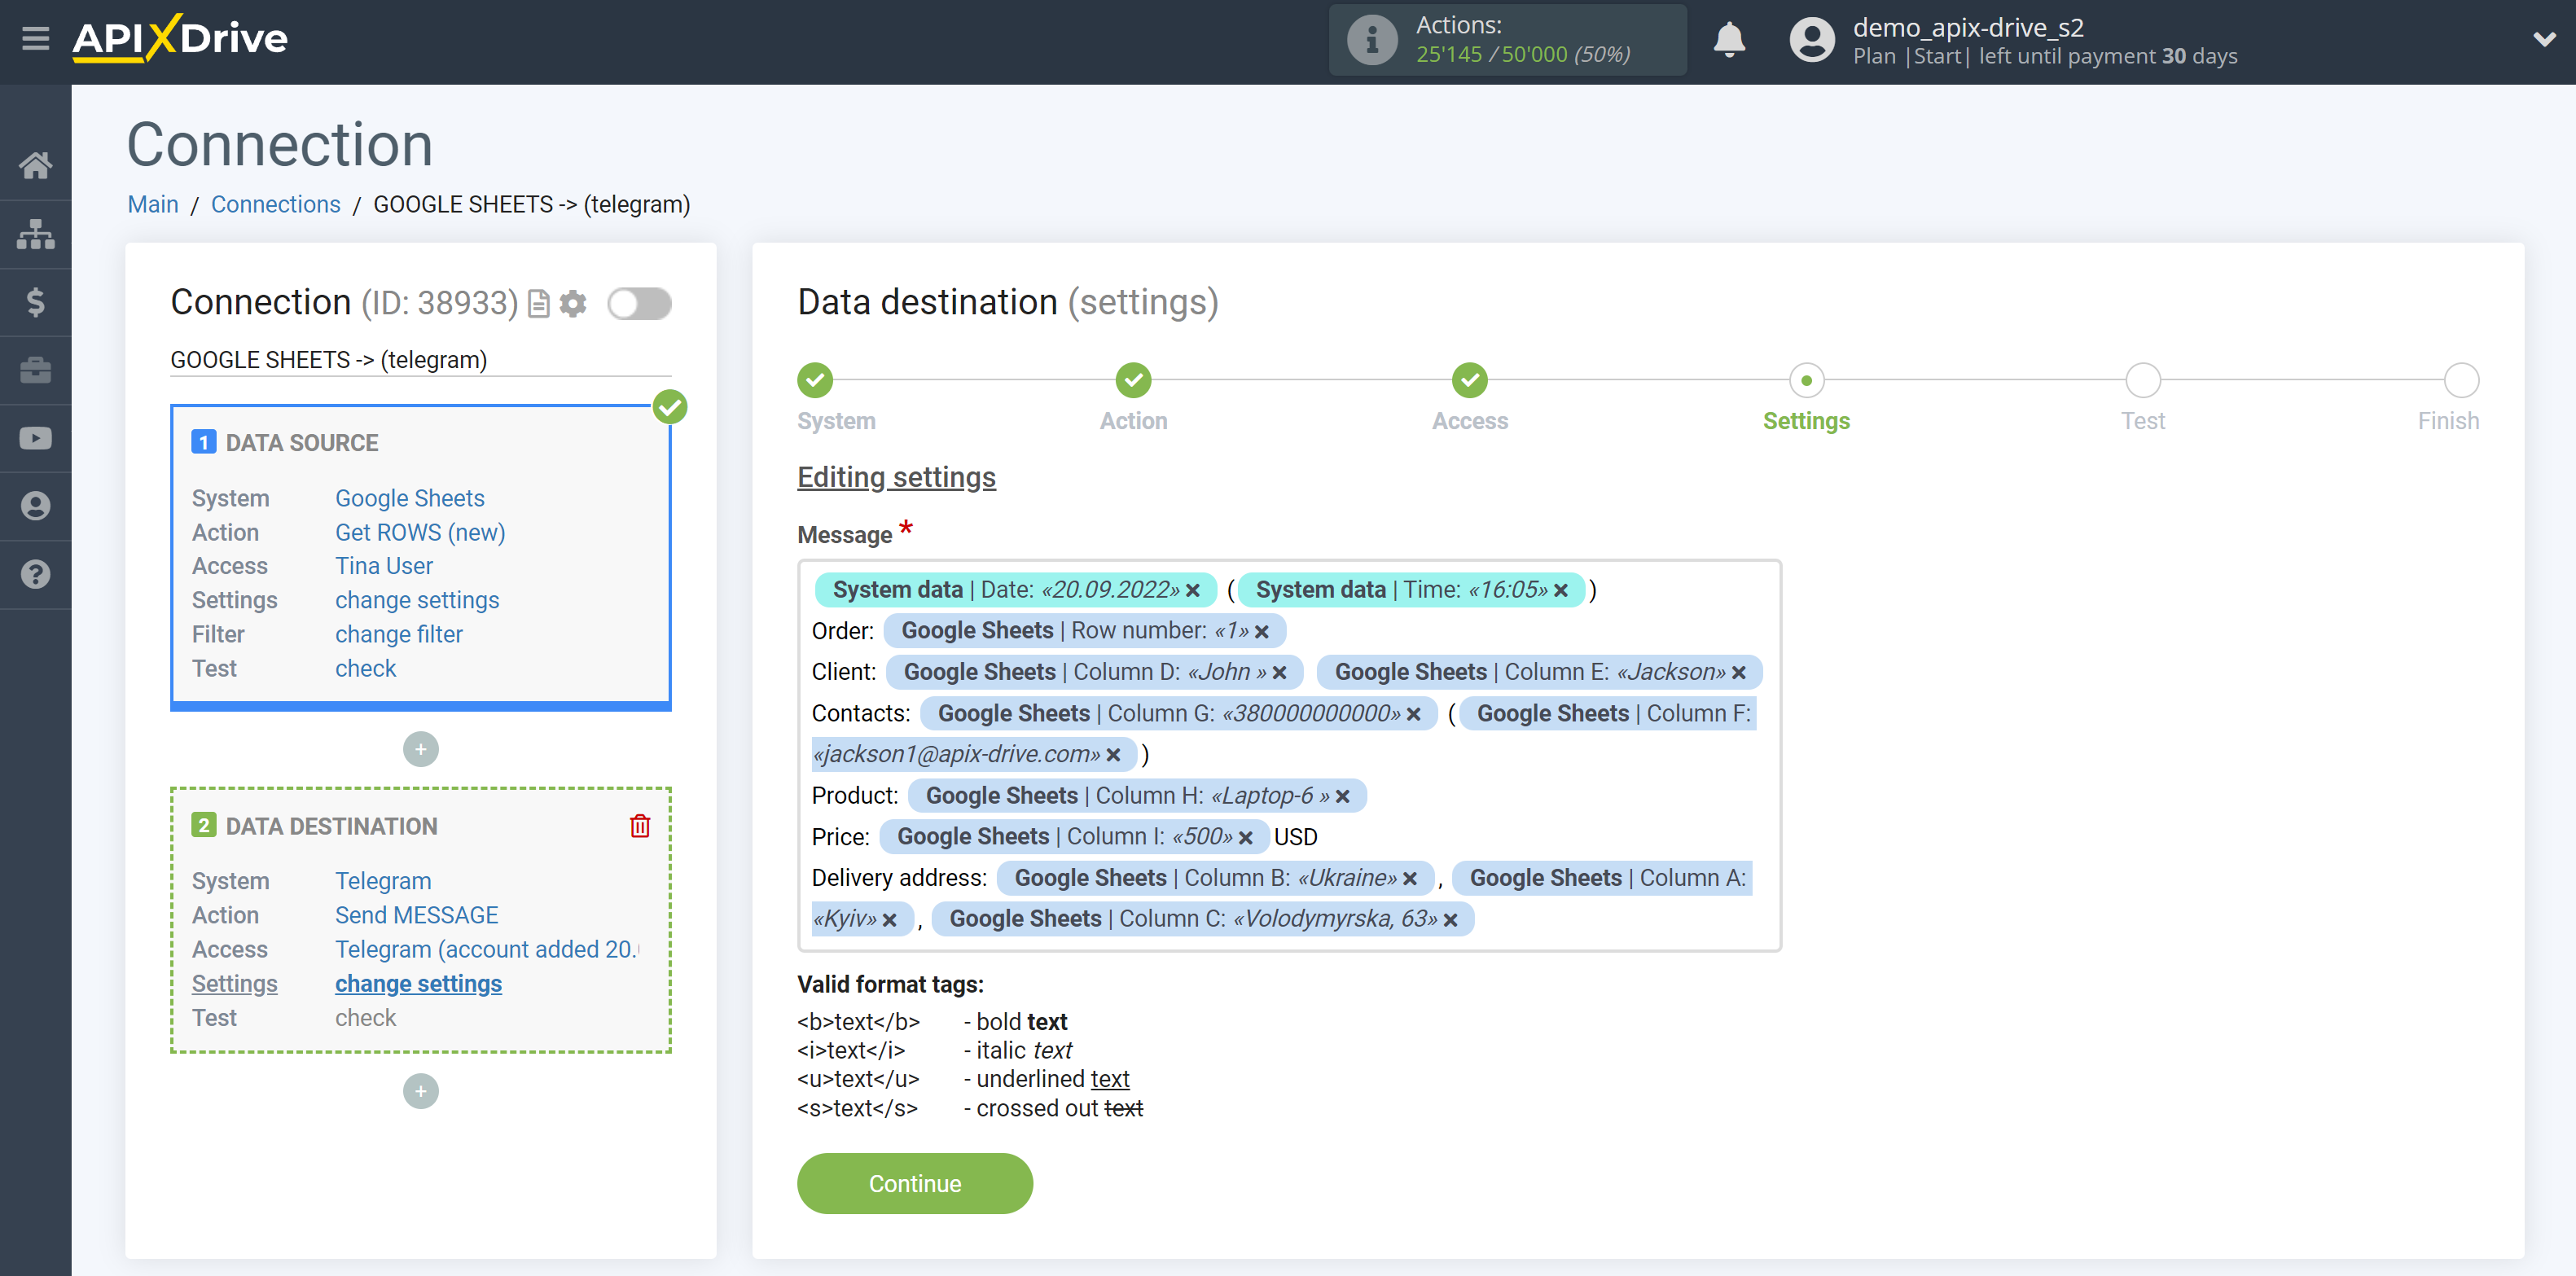
Now, you need to compose a message from the data that will be sent to the Telegram bot.
In order to add a variable, click on the field "Message" and select the desired variable from the drop-down list. If necessary, you can write the data manually.
When the message is generated, click "Continue".
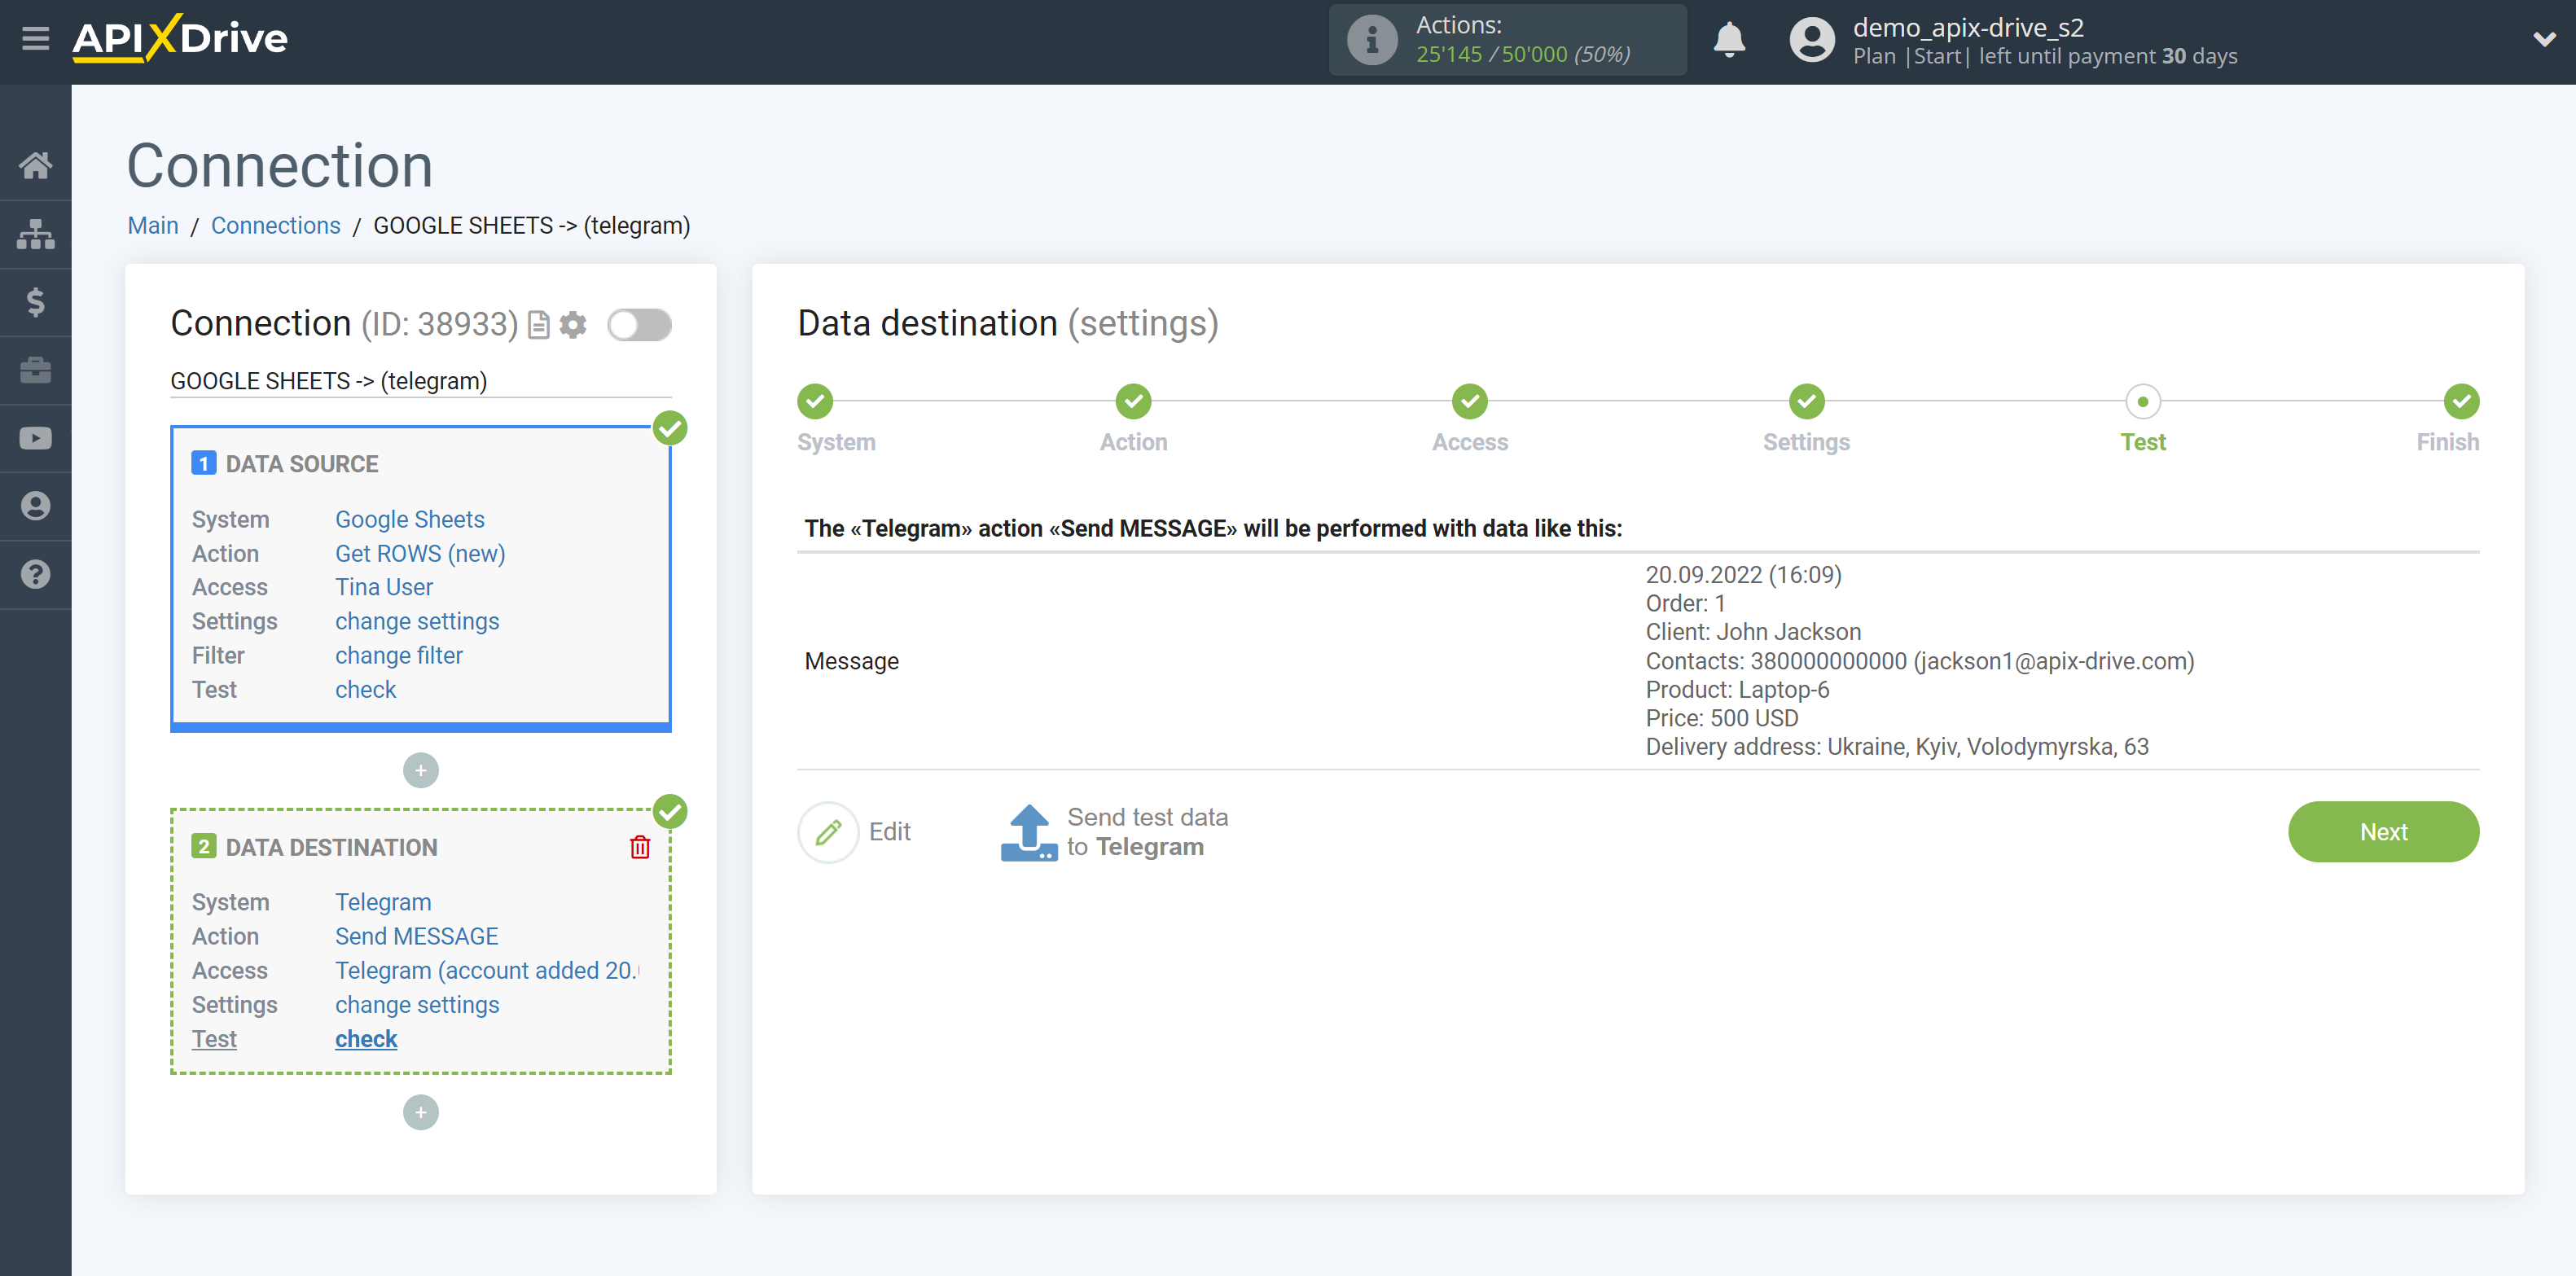
Now you can see the test data of what your message will look like.
To check the correctness of the settings - click "Send test data to Telegram" and go to your Telegram to check the result.
If everything suits you, click "Next" for further settings.
Note!
If the test message does not arrive or there is no response that the bot is successfully connected, check with what settings you launched the bot (Accounts - Messengers - Telegram), and which Telegram account (if there are several) is selected at the Access stage. If this does not help, perform the following algorithm of actions:
1. We need to disable our bot, clear the entire history and completely delete the dialogue with the bot.
2. In our system, go to the Accounts - Messengers - Telegram and delete all created accounts.
3. Go to your connection in the Data Destination on the Access stage and create a new account.
4. According to the help, re-configure Telegram and send test data to Telegram.
Attention! When transferring data to Telegram, there is a limit on sending messages to the bot - 1 message every 3 seconds. For example, if you want to transfer 10 rows from a table, it will take 30 seconds.
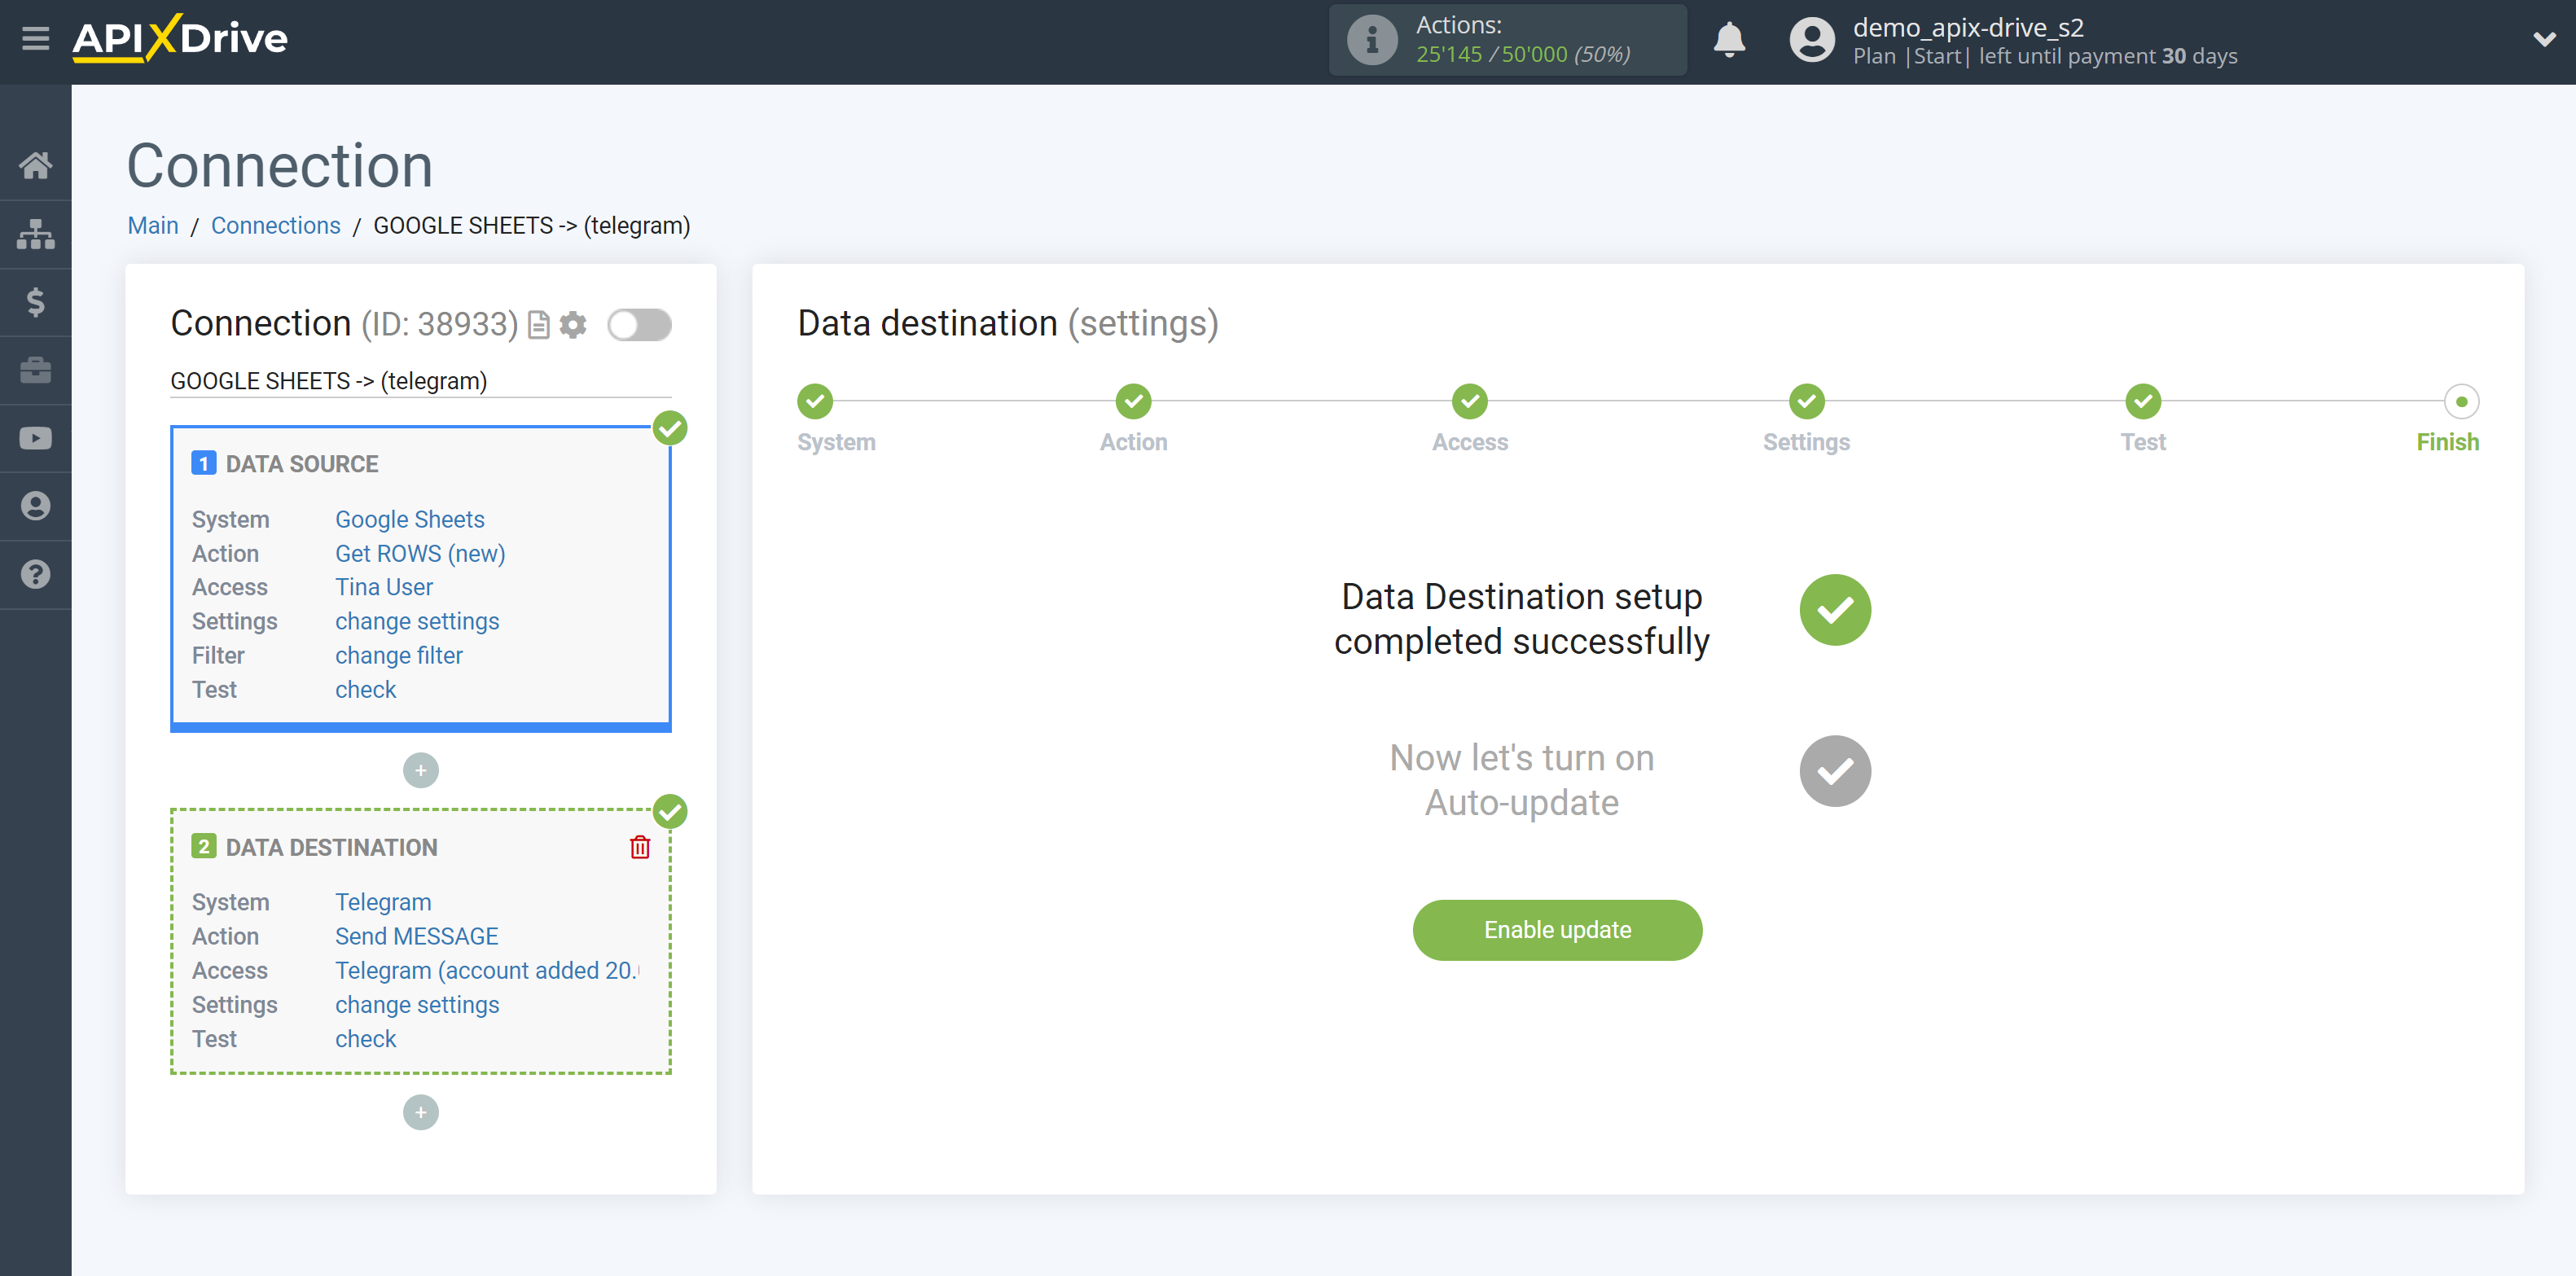
This completes the Data Destination system setup!
Now you can start choosing the update interval and enabling auto-update.
To do this, click "Enable update".
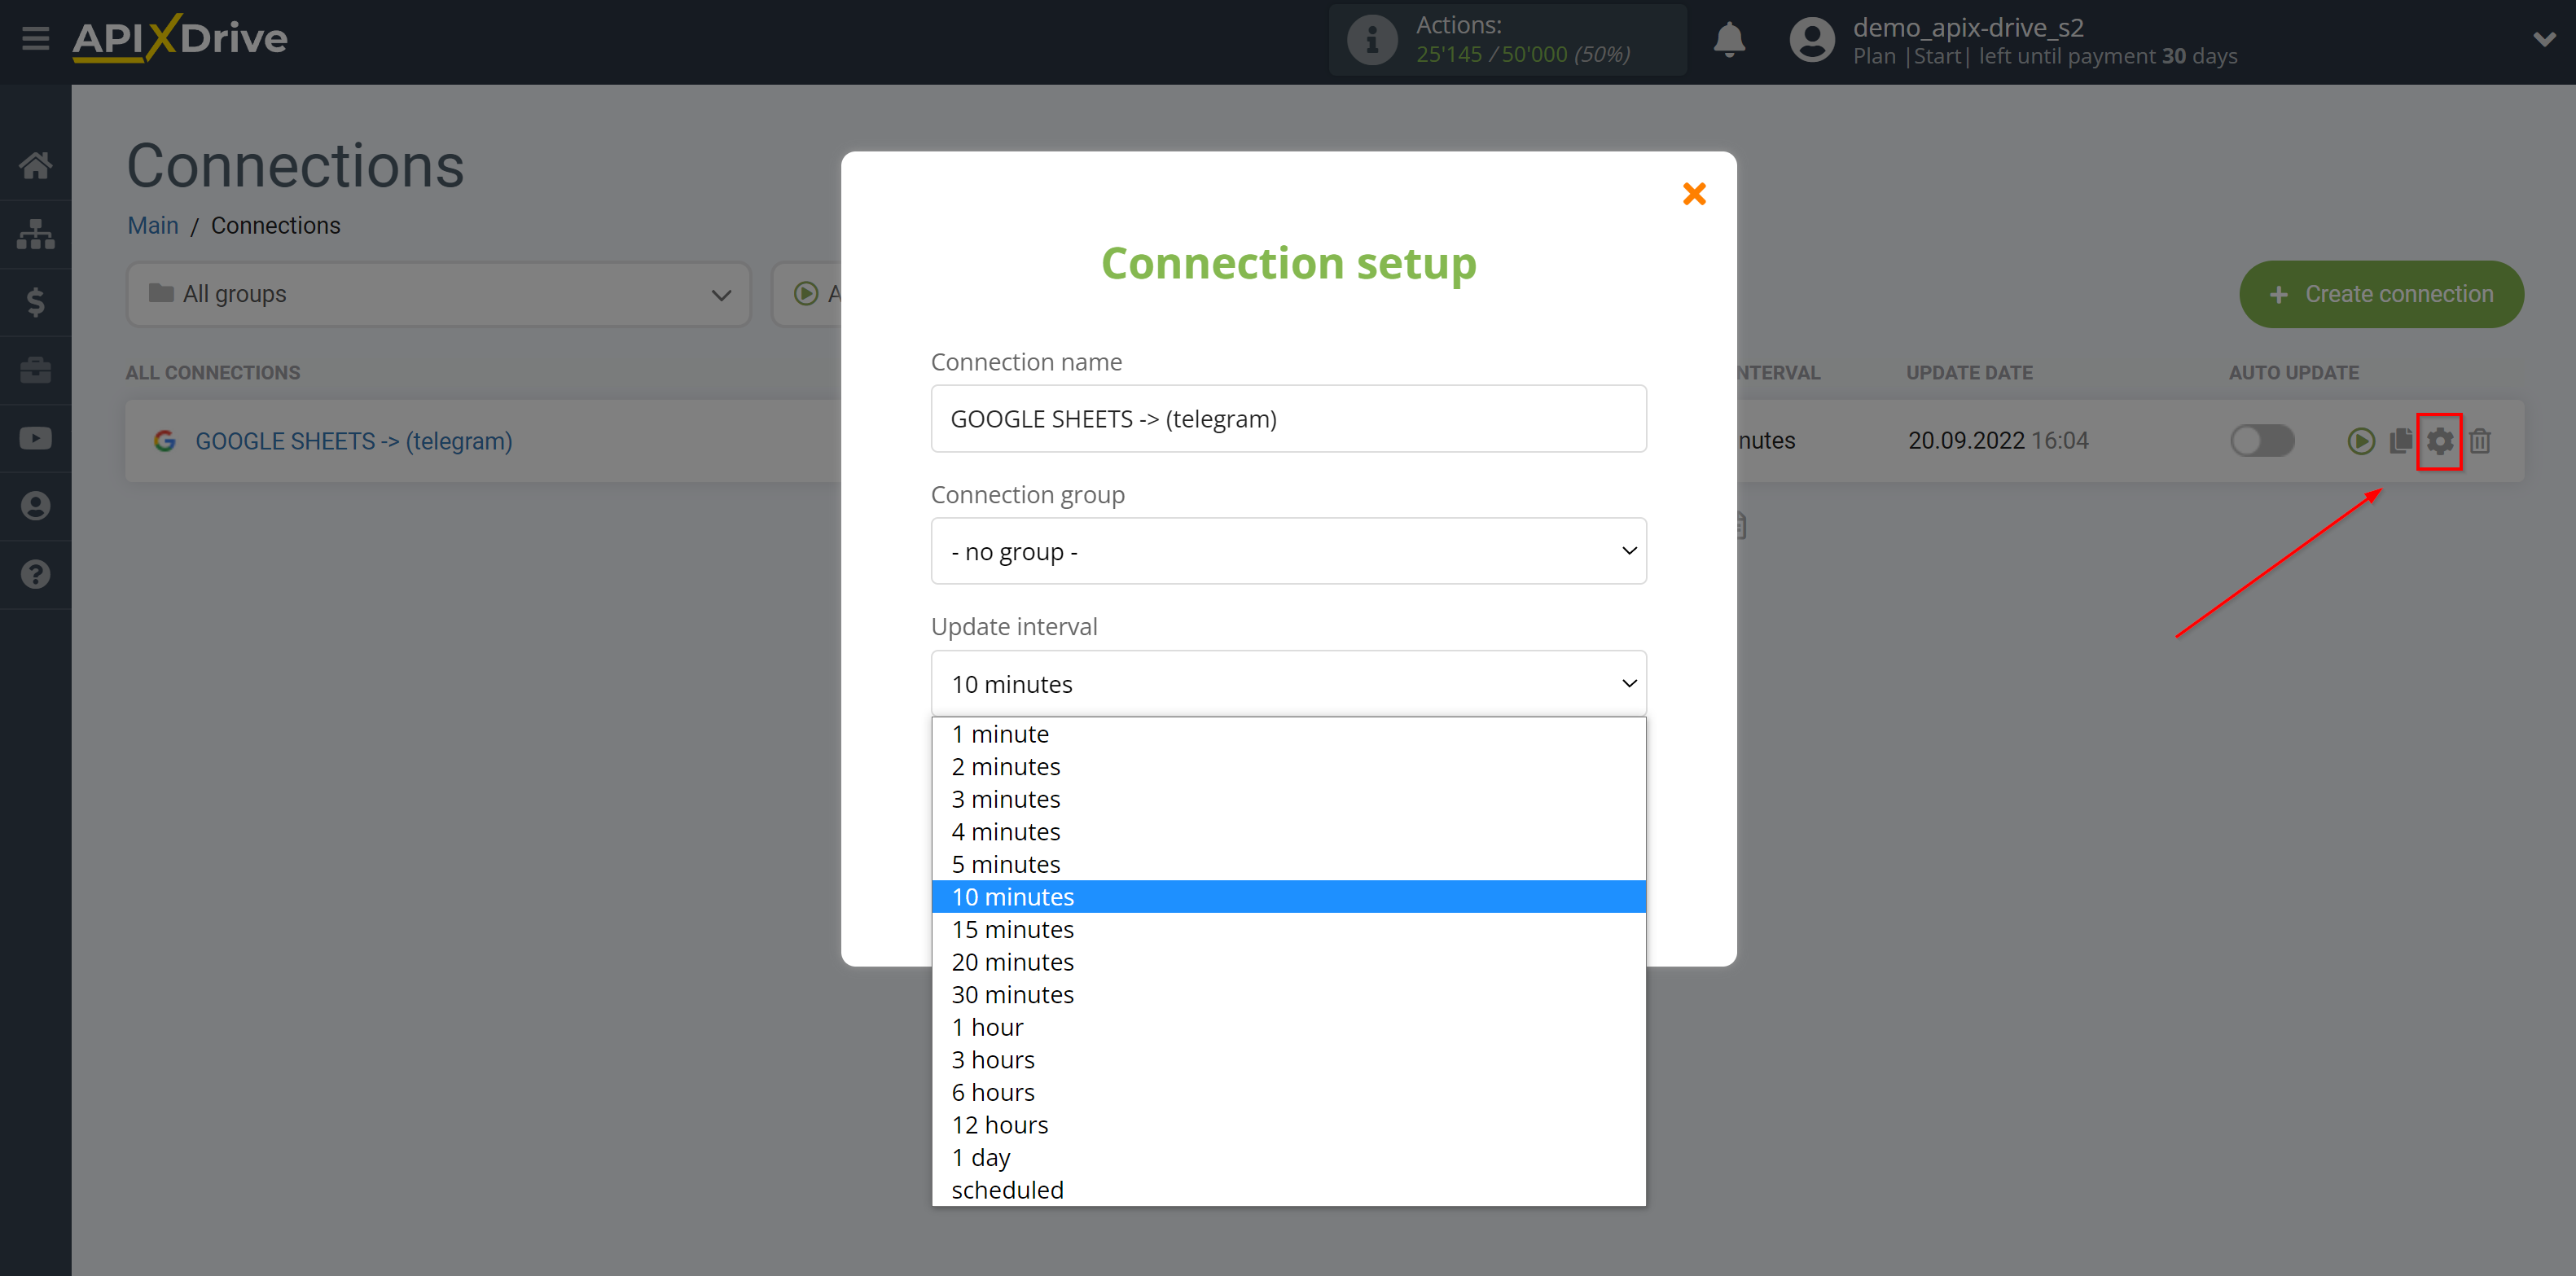
On the main screen, click on the gear icon to select the required update interval or setup scheduled launch. To start the connection by time, select scheduled start and specify the desired time for the connection update will be started, or add several options at once when you need the connection will be started.
Attention! In order for the scheduled launch to work at the specified time, the interval between the current time and the specified time must be more than 5 minutes. For example, you select the time 12:10 and the current time is 12:08 - in this case, the automatic update of the connection will occur at 12:10 the next day. If you select the time 12:20 and the current time is 12:13 - the auto-update of the connection will work today and then every day at 12:20.
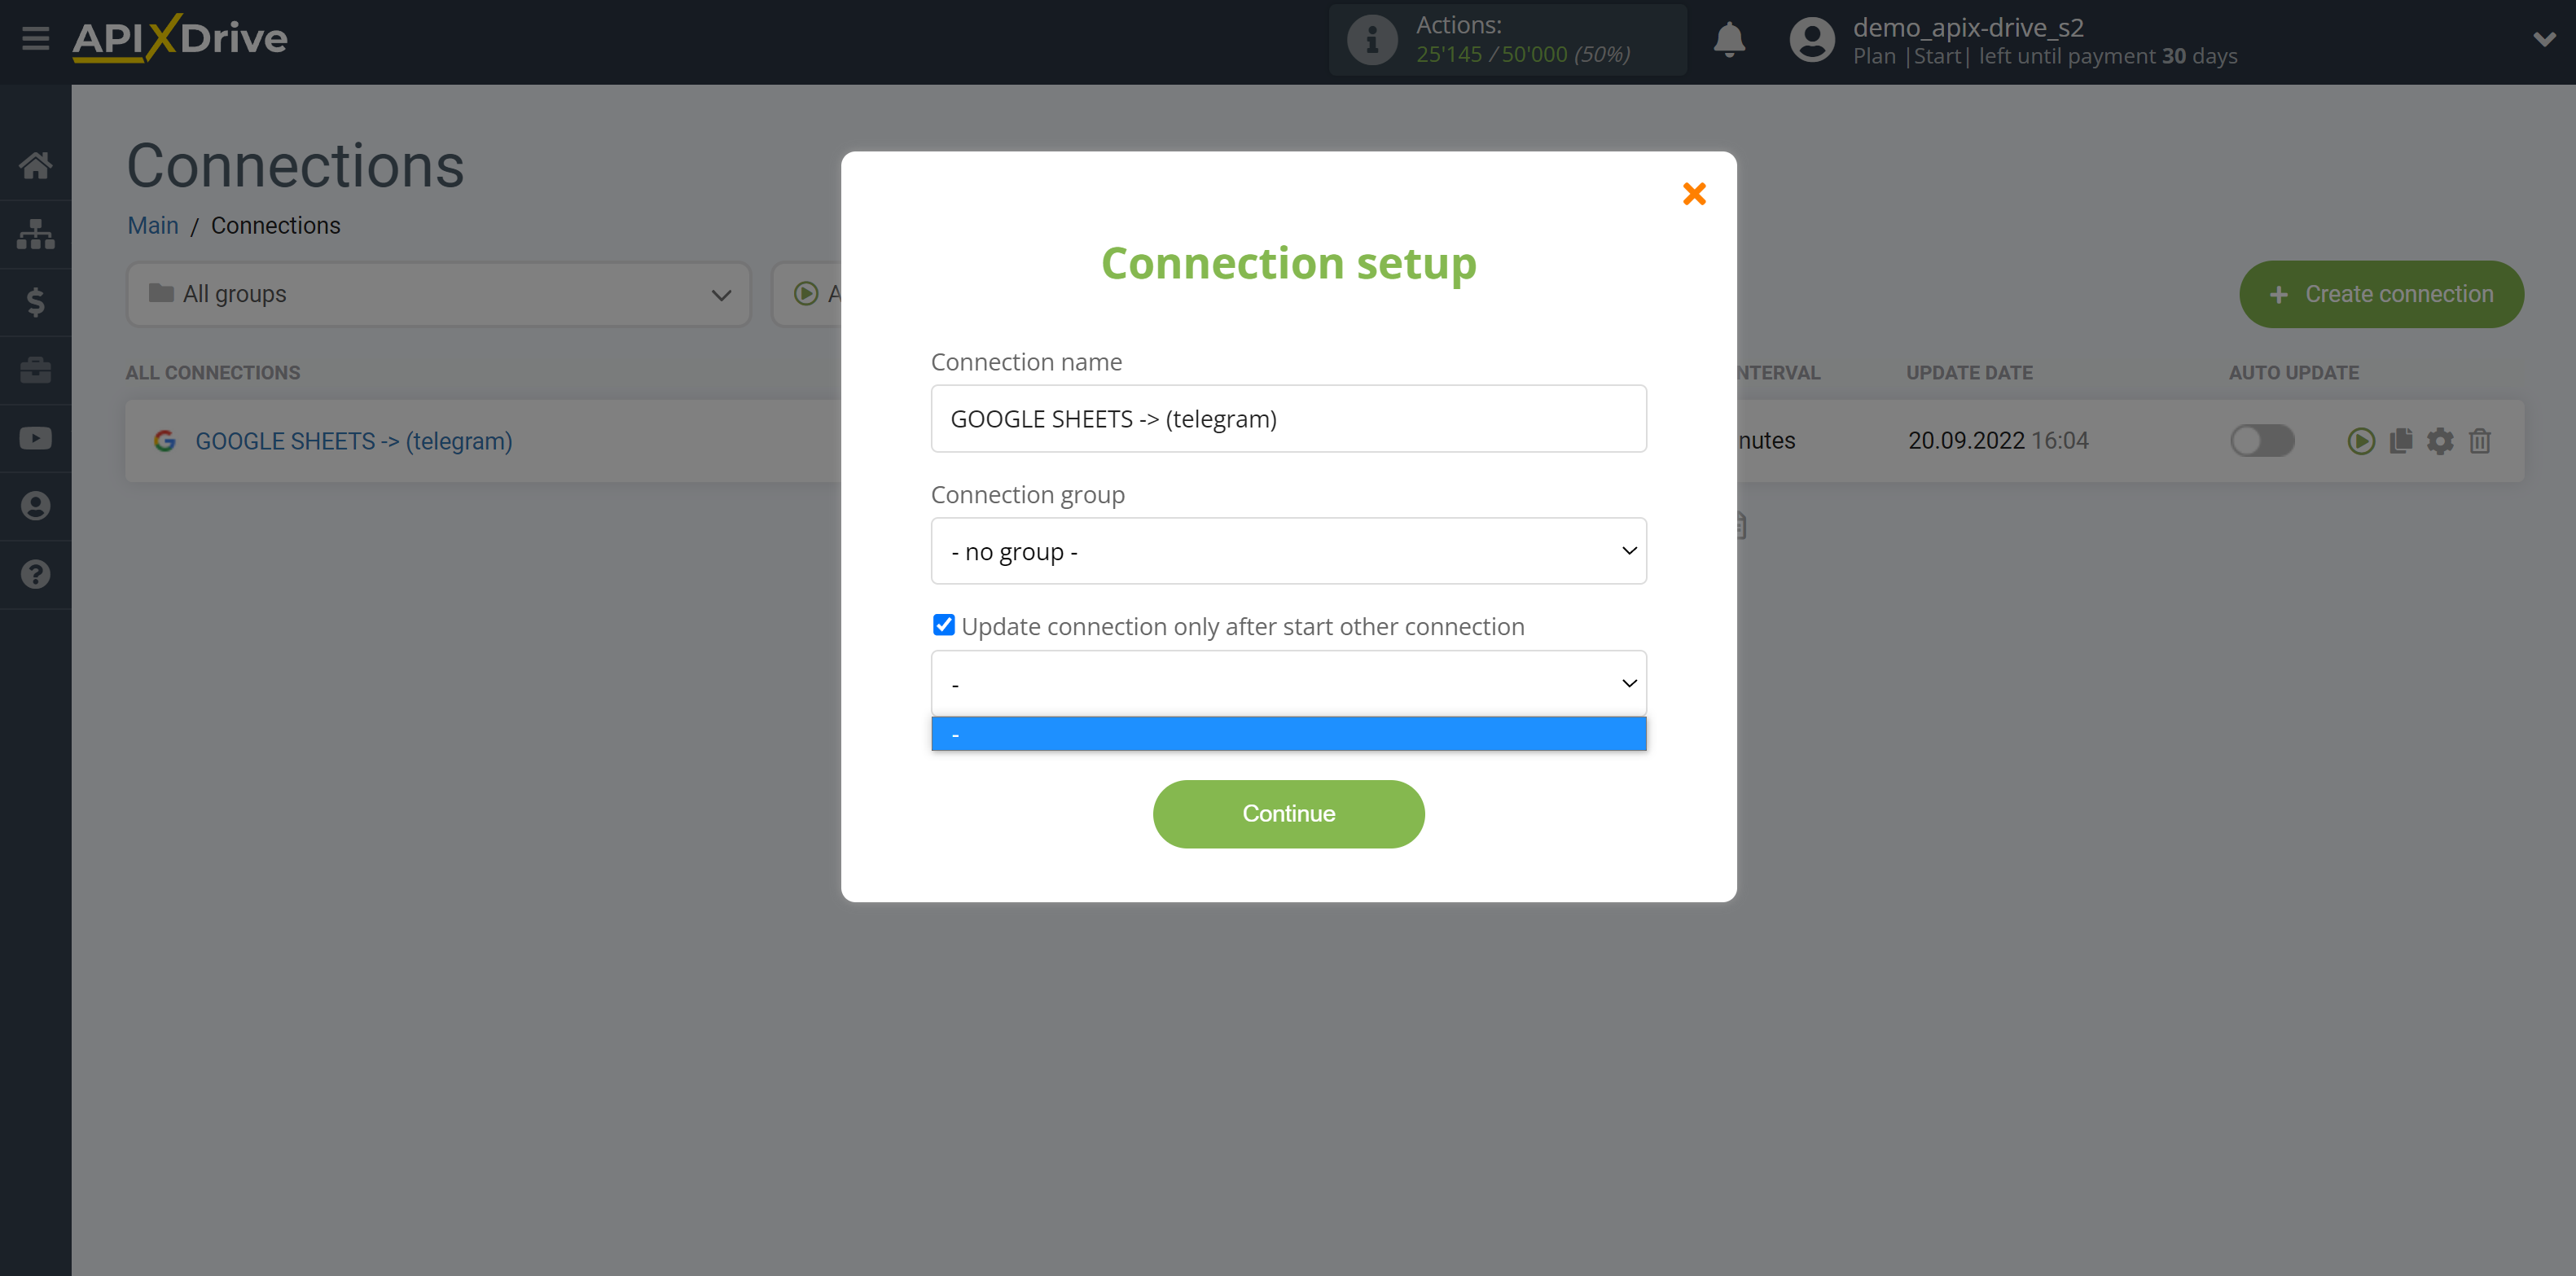
To make the current connection transmit data only after another connection, check the box "Update connection only after start other connection" and specify the connection after which the current connection will be started.
To enable auto-update, switch the slider to the position as shown in the picture.
To perform a one-time data transfer, click on the arrow icon.
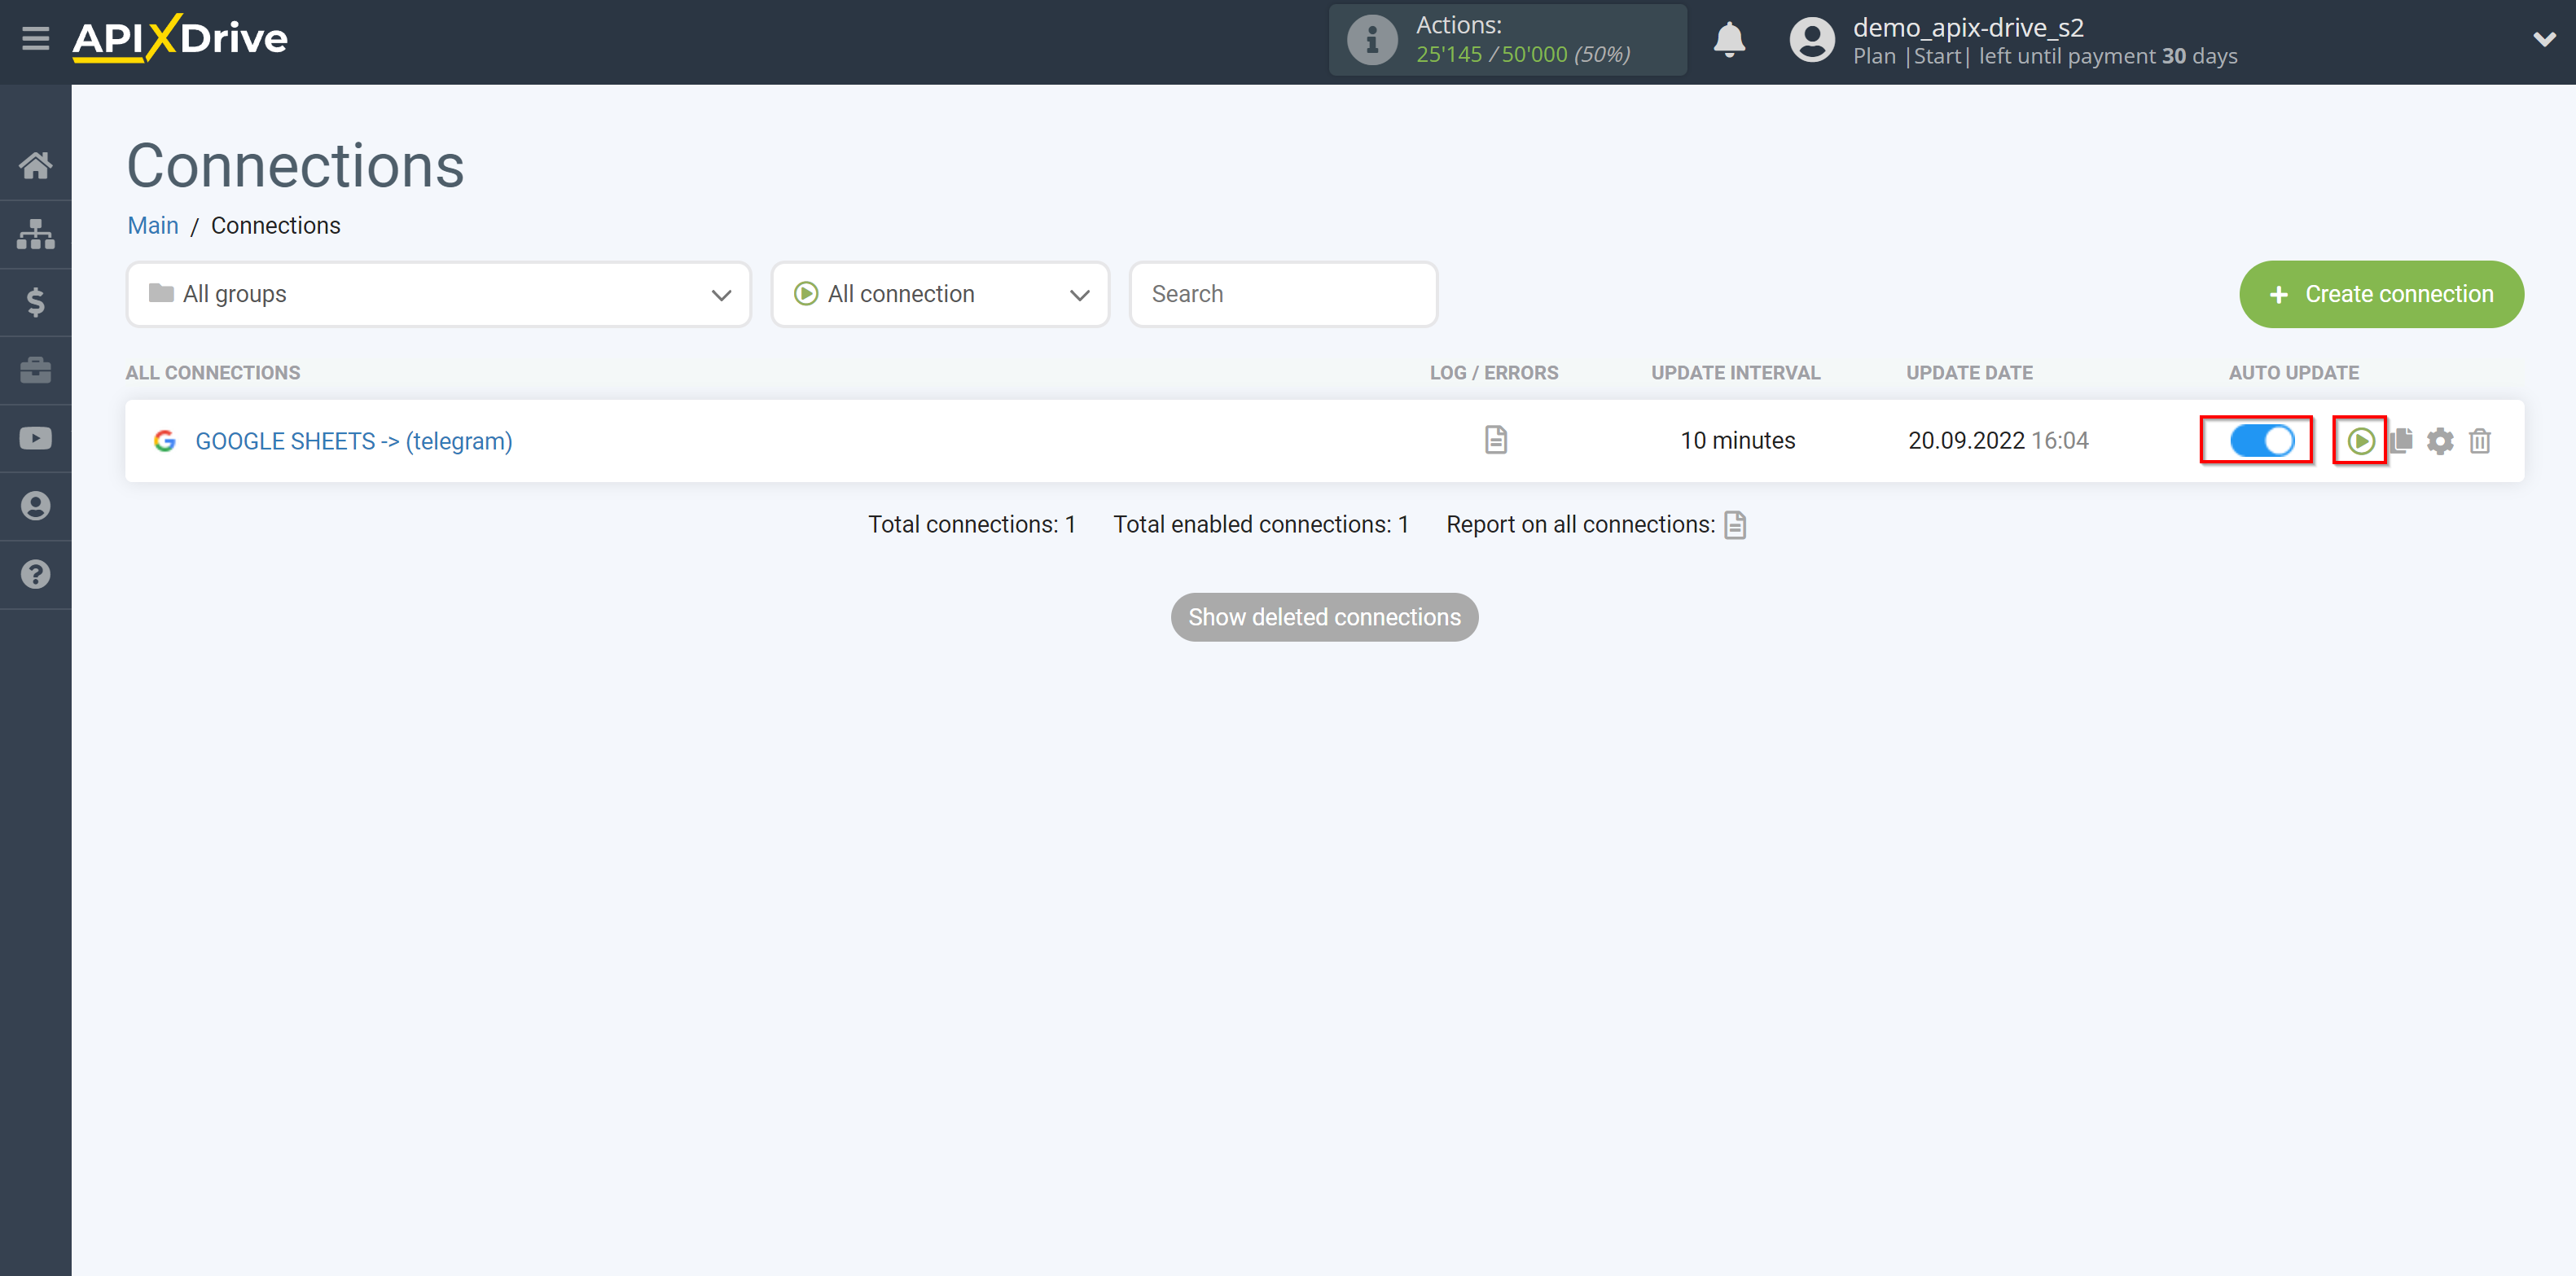
This completes the setup of Telegram as a Data Destination! See how easy it is!?
Now don't worry, ApiX-Drive will do everything on its own!