
How to Connect Google Drive to Google Sheets for Automatic File Tracking

For companies that work with files in Google Drive, it is important not only to store them but also to access the right documents quickly. Many teams solve this by keeping file links in spreadsheets. For example, managers may use Google Sheets to organize links to contracts, while recruiters can track resumes and candidate documents. Adding these links manually takes time and increases the risk of errors. In this guide, we’ll show you how to solve this problem by using ApiX-Drive to connect Google Drive to Google Sheets and automatically send data about new files to a spreadsheet.
Data Transfer Automation: How to Optimize File Management
Manually copying and pasting file links may seem like a quick task. But when dozens of files are added every day, this routine quickly starts taking more time than expected. One way to fix this is to track Google Drive files in Google Sheets automatically. By letting the integration handle this task, you can reduce manual work and keep file records more organized.
If you want to do everything as quickly and easily as possible, we recommend using the no-code ApiX-Drive connector. After the integration is set up, the system checks Google Drive at the selected interval and sends data about new files to Google Sheets.
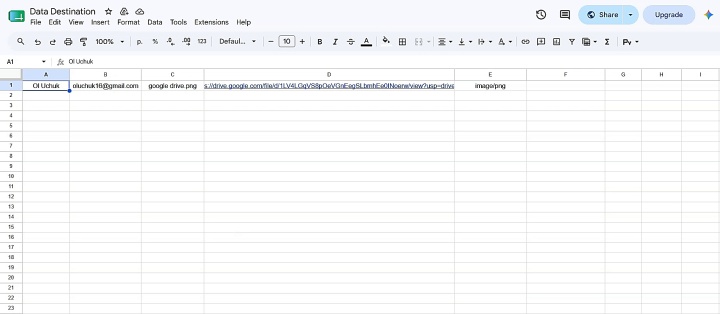
This way, you reduce manual work, lower the risk of file-tracking errors, and make daily operations faster and more organized.
How to Set Up Google Drive and Google Sheets Integration
Why should you choose ApiX-Drive to set up Google Drive and Google Sheets integration? First, it is a no-code tool, so you do not need to write or edit code to set up the integration. Second, the setup process is user-friendly and suitable for users without technical experience.
All you need to do is connect Google Drive and Google Sheets to the connector, select the new file trigger, and specify which file data should be added to Google Sheets. After that, all that remains is to test the system and enable automatic updates. All this will take you just a few minutes. After launch, the integration will work in the background and reduce the need for manual data entry.
As you can see, there is nothing complicated. So let's do it right now. Below is a step-by-step instruction with screenshots that will help you go through the entire process of setting up Google Drive to Google Sheets automation quickly and without errors.
Google Drive Data Source Settings
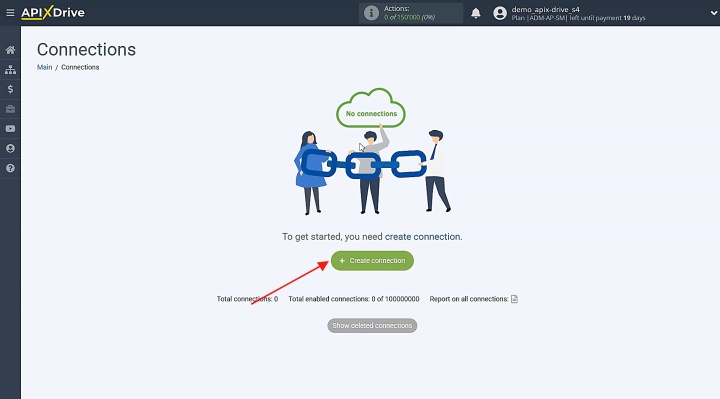
Start by creating a new connection.
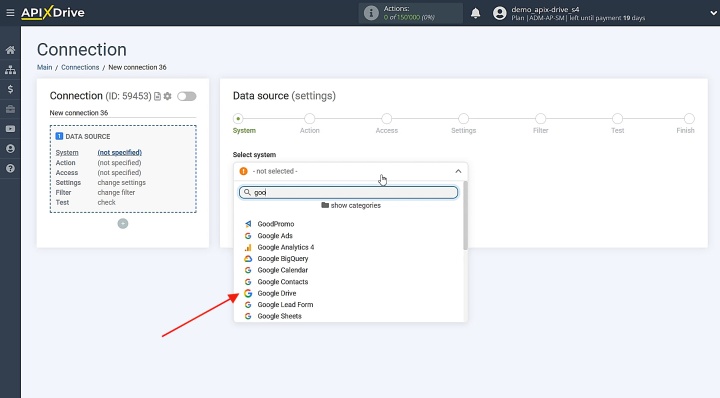
Pick the data source system. Here, you need to select Google Drive.
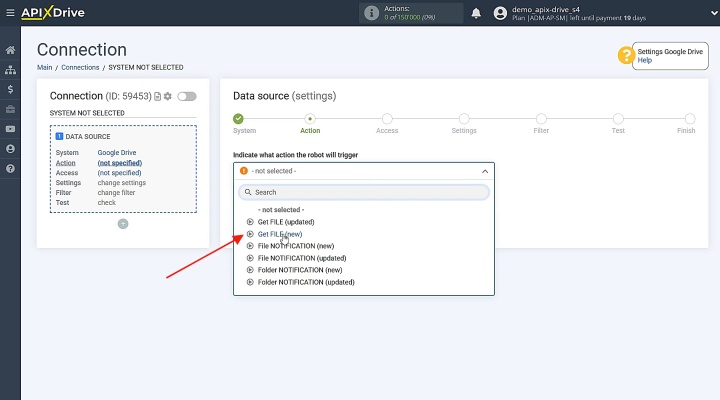
Choose the action from the list. For this scenario, select Get FILE (new).
The next step is to connect your Google Drive account to ApiX-Drive.
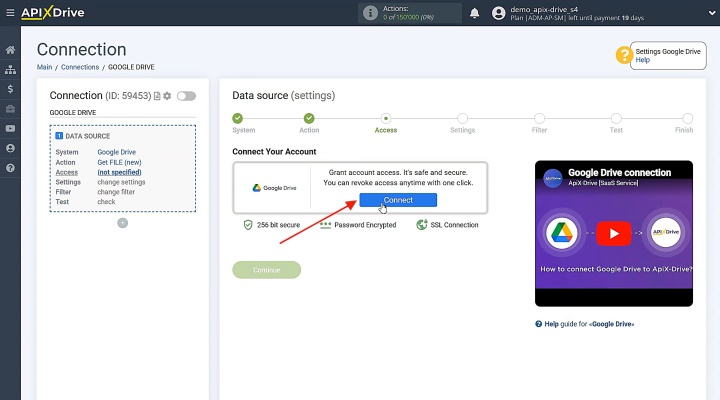
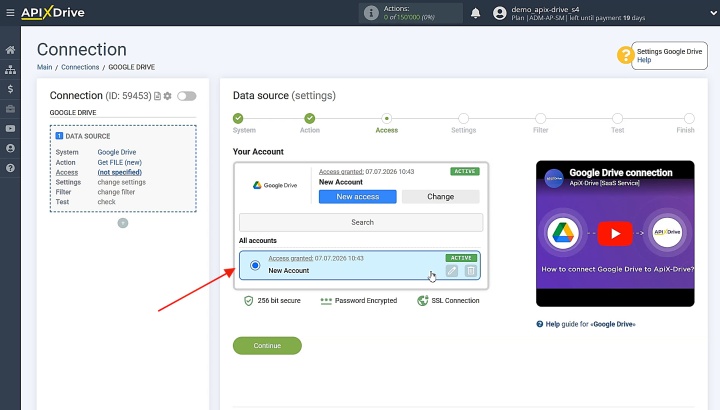
Sign in to your Google account and grant the required permissions. When you see the connected account among the active ones, click on it and then click Continue.
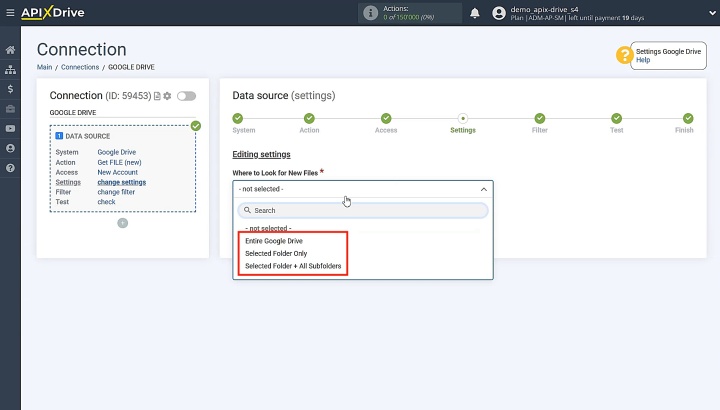
In the settings section, you need to choose where to search for new files in your Google Drive account. In the dropdown list, select the desired section. In this case, it is the Entire Google Drive.
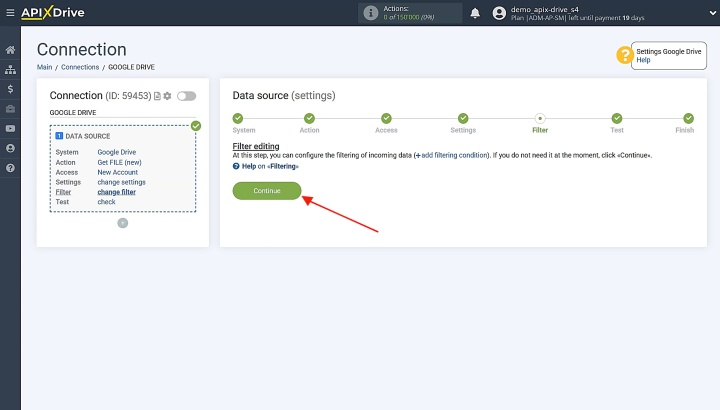
You can add a data filter at this stage if required. For now, we'll skip this option and click Continue.
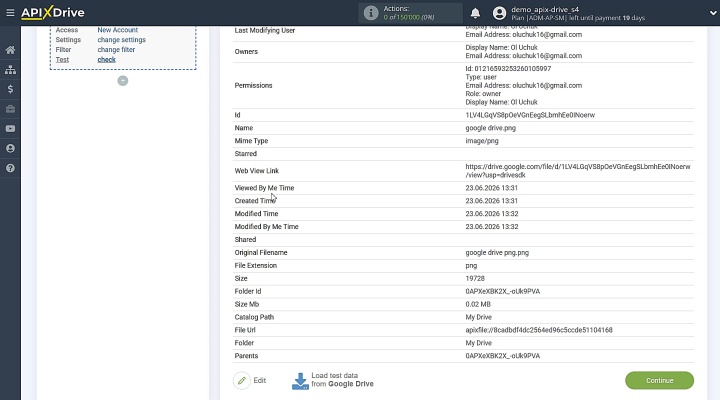
Now you see the test data that will be transferred to Google Sheets. If everything looks correct, click Continue.
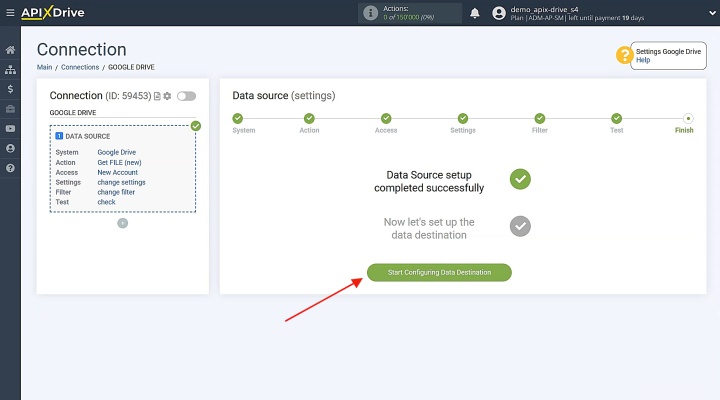
The Google Drive data source has been configured successfully.


Google Sheets Data Destination Settings
Now we need to proceed to setting up where the data will be sent.
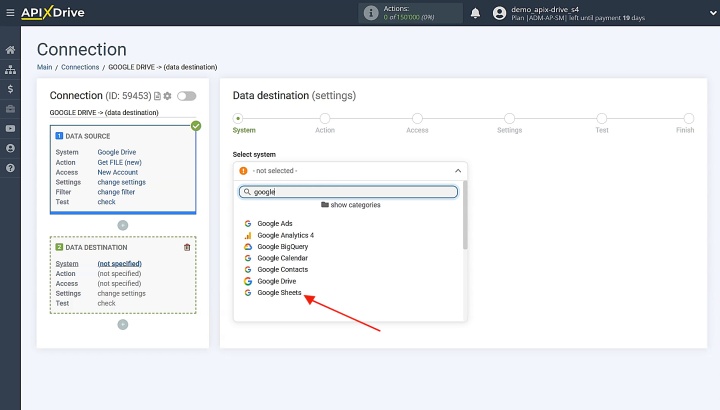
Pick the data destination system. For this integration, select Google Sheets.
Choose the action Add ROW from the list.
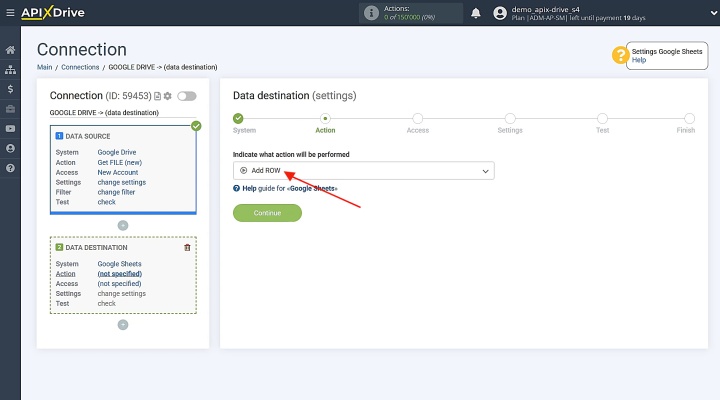
Connect your Google Sheets account with ApiX-Drive.
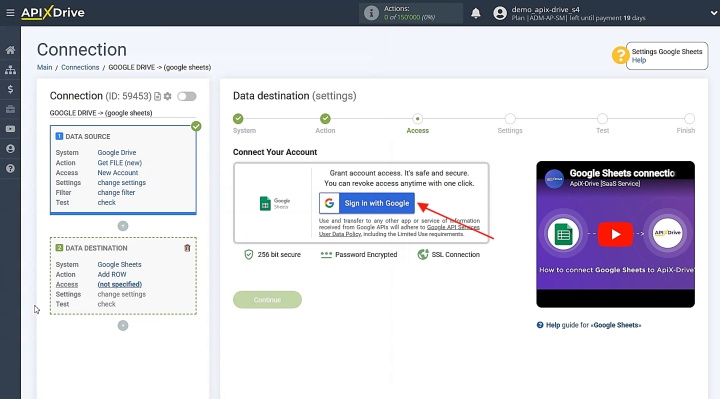
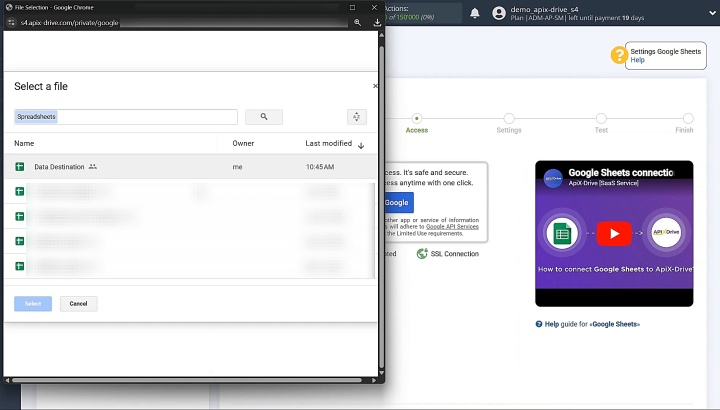
Sign in to your Google account and grant the required permissions. Select the spreadsheet where you want to send the file data.
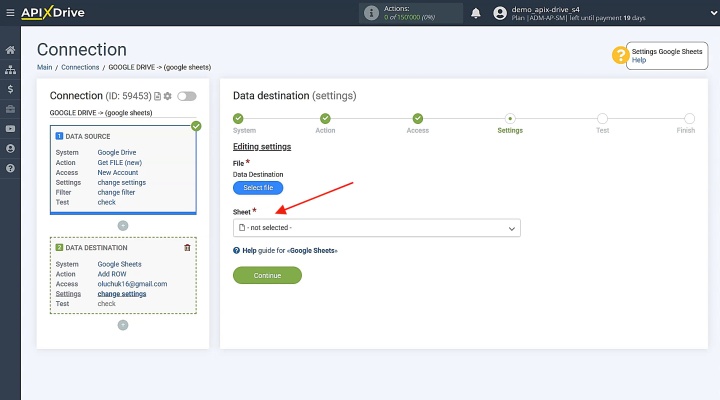
When you see the connected account displayed in the list, click on it and then press Continue. Now you need to select the sheet to which the new row will be added.
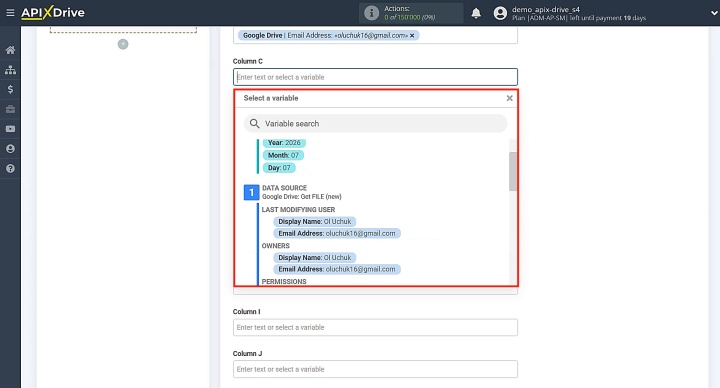
After selecting, you will see Google Sheets columns. To assign a variable, click in the desired field and select it from the dropdown list. In addition to variables, you can manually enter any text you want. When you're done configuring all the necessary variables, click Continue.
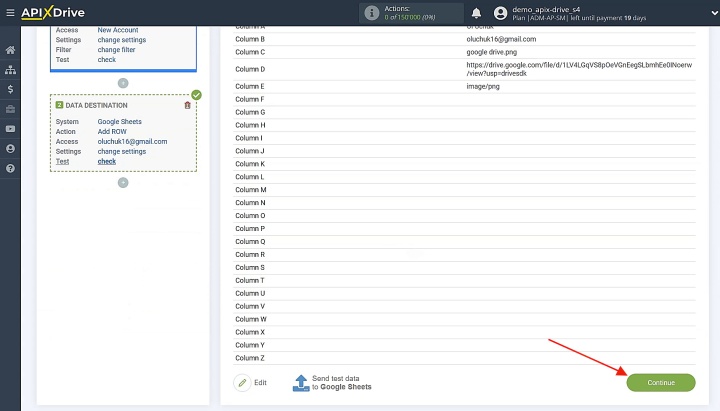
Send test data to Google Sheets. Go to the table and check the result. Return to ApiX-Drive to complete the remaining configuration steps.
Enable Auto-Update
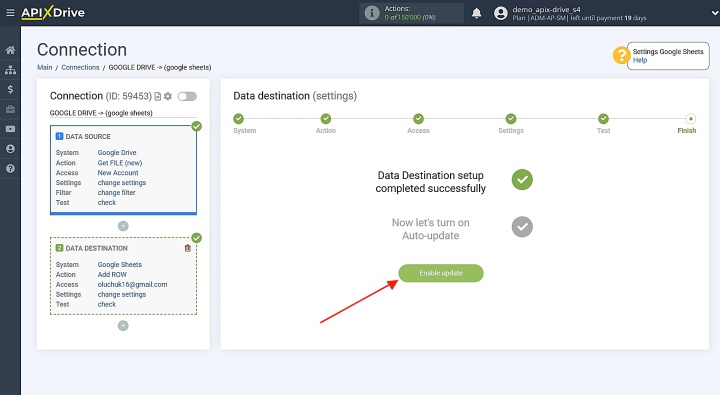
Configure auto-update for automatic data transfer from Google Drive to Google Sheets. Click Enable update to activate this feature.
You'll need to click on the gear icon to proceed.
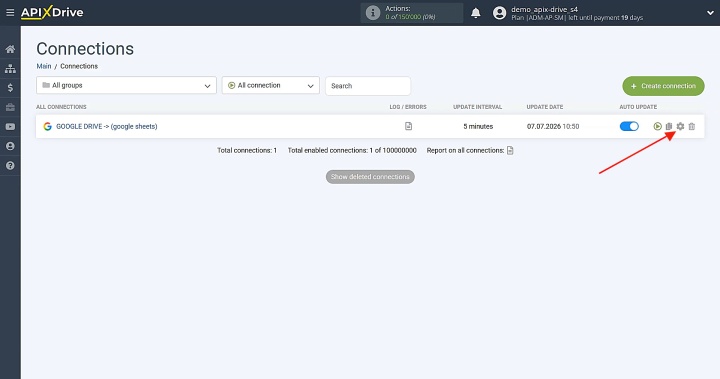
Specify the auto-update interval. You might choose 10 minutes, for example.
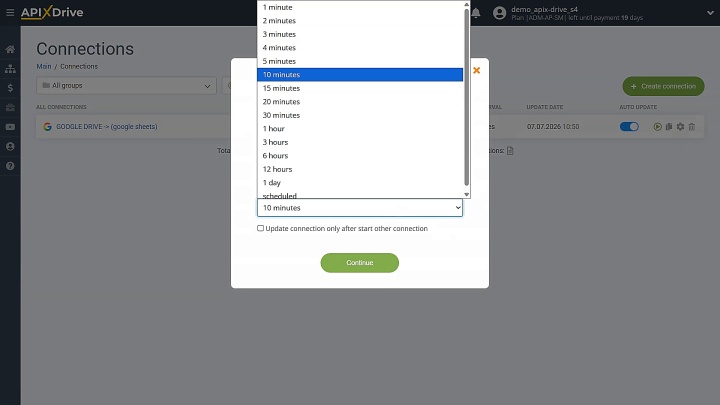
This is also where you can customize the connection name and assign it to a group. After making your selections, click Continue. The integration is now complete and ready to use.
Conclusion
If files in Google Drive are not only stored but also actively used in daily business processes, it is important to have quick and convenient access to them. In this article, we examined how to track Google Drive files in Google Sheets automatically.
ApiX-Drive allows you to set up Google Drive and Google Sheets integration quickly and without unnecessary complications. It is easily scaled and adapted to different needs: client files, company projects, internal organization documents, etc. By delegating part of your daily file management tasks to the connector, you reduce routine work, streamline operational processes, and save time.
Read also about other integrations:
- Google Contacts and Notion Integration: How to Set Up
- Webflow and Slack Integration: Setting Up Automatic Notifications
- Facebook and Airtable Integration: Automatic Transfer of New Leads
- Google Lead Form and Google Sheets Integration: Automatic Lead Transfer
- How to Get Data from Tally to Airtable: Step-by-Step Integration Setup