Google Lead Form and Google Sheets Integration: Automatic Lead Transfer
Google Lead Form is a tool of the Google Ads service to speed up and improve the convenience of completing a preliminary application or order. This lead form greatly simplifies the process of ordering a product or service: a potential buyer does not have to waste time going to the company’s web page, searching for its contacts, and communicating with it. If you use this tool, your best bet for collecting leads is Google Sheets. In our article, you will learn how to set up Google Lead Form integration with Google Sheets to automate the transfer of leads from forms to a table.
The first step in building effective communication with clients who come to you through a Google Lead Form is to form their base. If you're going to transfer lead contact information manually, keep in mind that you'll have to spend extra time doing it. Are you thinking of solving a problem by entrusting this task to the managers? They will, of course, cope, but this will interfere with their ability to carry out their current duties. The second serious drawback of this method of unloading leads is error. Haste and absent-mindedness may result in missing leads or incorrectly copying their personal data.
Manual data transfer also requires regular monitoring of new potential buyers or customers, which also entails time consumption and the involvement of human resources. You can automate this process using Google Ads integration with Google Sheets. After its launch, all new leads will be instantly transferred to your database table without any action on your part. Can't wait to try it yet? No problem! Our ApiX-Drive connector will help you implement the connection between these systems.
How to Set up Google Lead Form and Google Sheets Integration
The ApiX-Drive online connector quickly, smoothly and, most importantly, without errors, exchanges data between various services and applications, in particular between Google Lead Form and Google Sheets, which are precisely what you need. Once a connection has been established between them, the necessary settings have been made, and the auto-update mode has been launched, the system will independently maintain the data transfer in a stable working condition.
Why you should use ApiX-Drive for Google Sheets and Google Lead Form integration:
- High speed of setting up integrations. Even if you have never done anything like this, you will be able to set up a connection between the services you need without resorting to anyone’s help in literally 10 minutes.
- Intuitive interface. Good usability is an excellent assistant when working with the connector.
- Flexibility. ApiX-Drive builds reliable bridges between different services and gives you the opportunity to select and configure the type of interaction you need.
- Budget savings. The online connector provides hundreds of ready-made integrations made by its developers. You just need to customize them to suit your needs. This is easy to do. You can easily cope with this task yourself without involving third-party specialists, which means you will save on paying for their services.
You can make sure that all of the above is true right now. By the way, you do not need to pay immediately to use the connector. It provides a completely free TEST-DRIVE plan with limited features, as well as a 14-day trial period without payment on any tariff plan with full functionality. So let's start setting up Google Sheets integration with Google Lead Form.
Setting up the Data Source – Google Lead Form
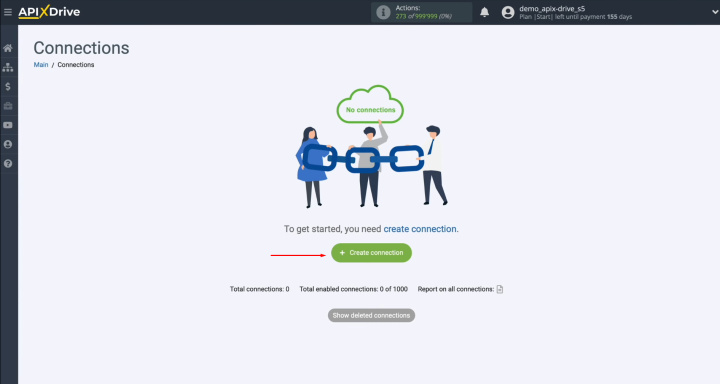
To set up Google Ads and Google Sheets integration, first you have to create a new connection.
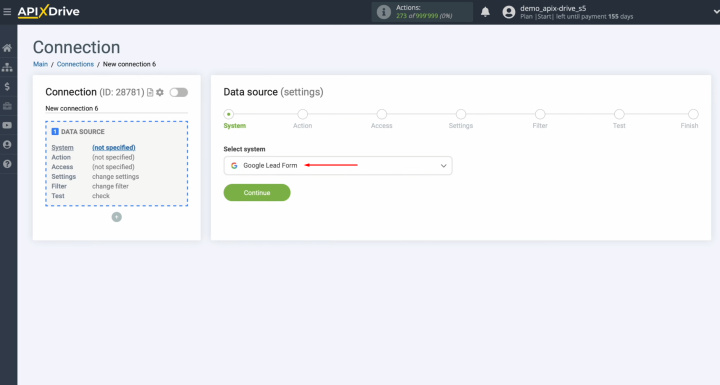
Next, you must select the data source system “Google Lead Form”. Click
“Continue”.
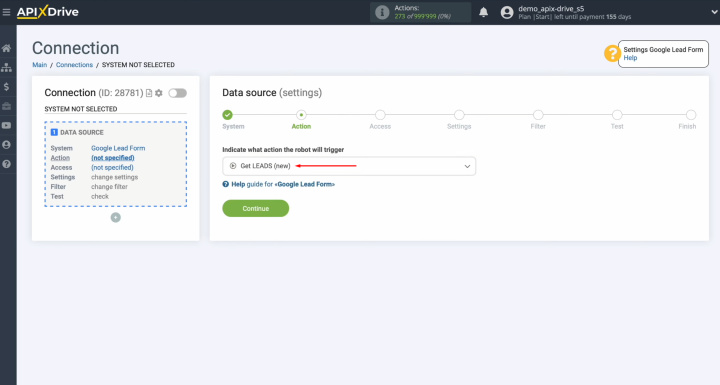
Now select an
action “Get LEADS (new)”. Click
“Continue”.
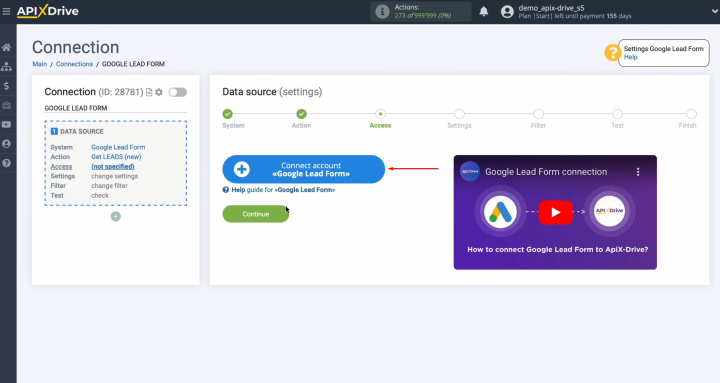
Connect a Google Lead Form account to the ApiX-Drive system. Click on
the blue button.
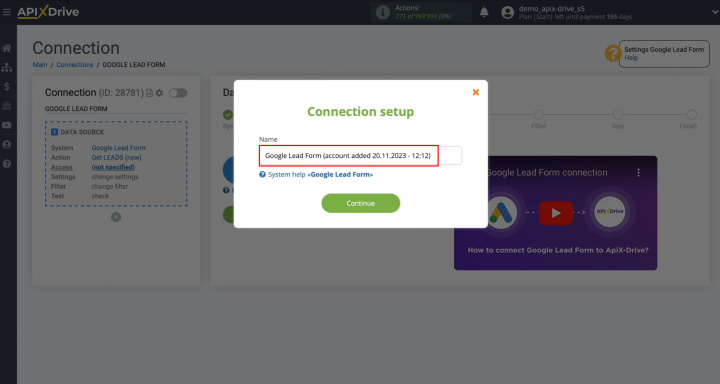
At this stage, give the connection a
name or just
click “Continue”.
When the
connected account appears in the list of active accounts, select it and click “Continue”.
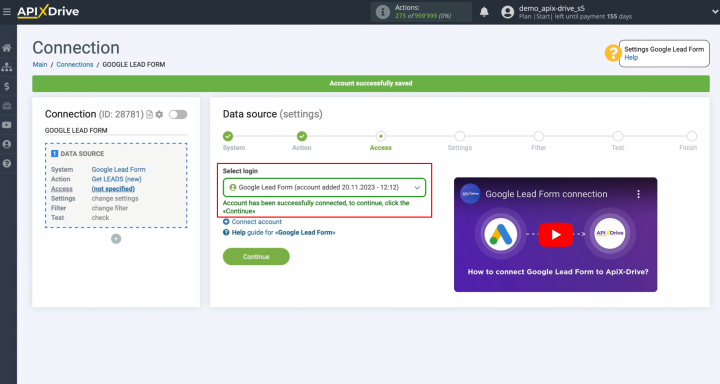
Here
you can see the URL.
This
is the link to which new
data from the Google Lead Form will be sent. To continue setting up, copy the URL and go to your Google Ads personal account.
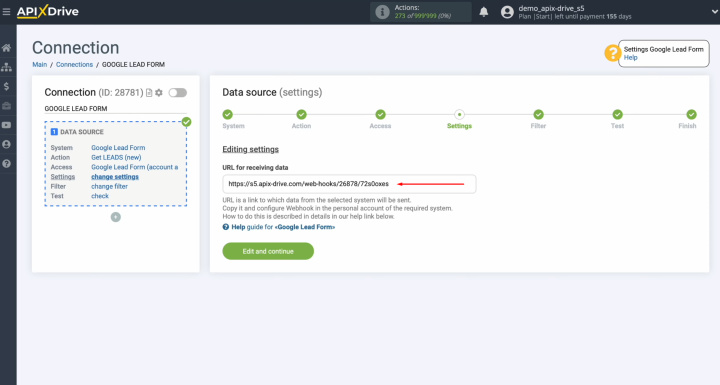
Next, go to
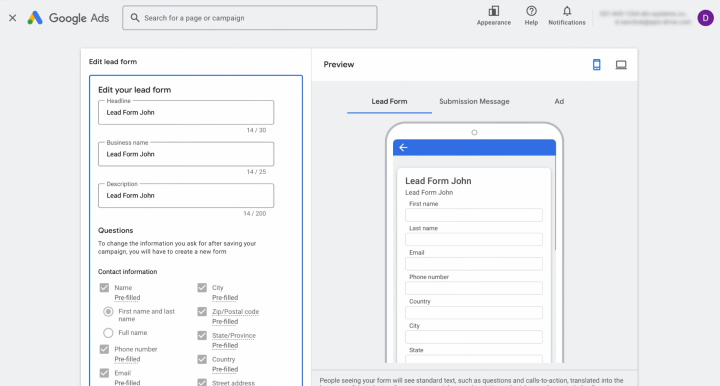
the “Assets” section and select “Lead form”.
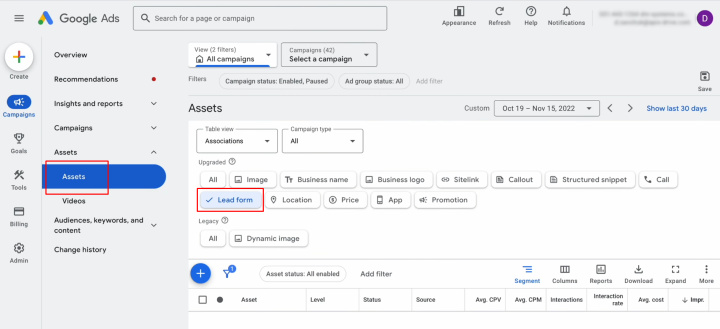
Select the
lead form from
which you want to receive new leads and go to its settings.
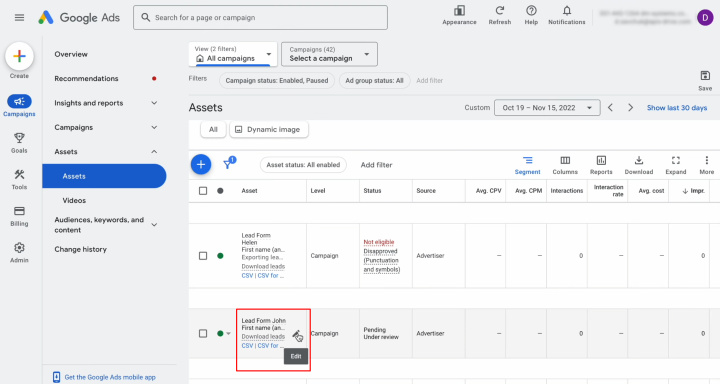
Find the
item “Other data integration options”.
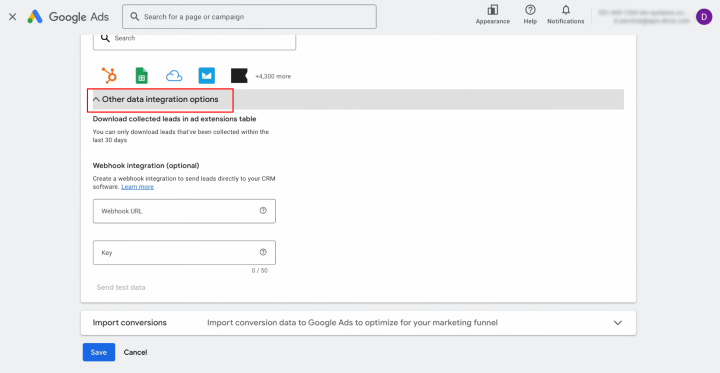
Paste the
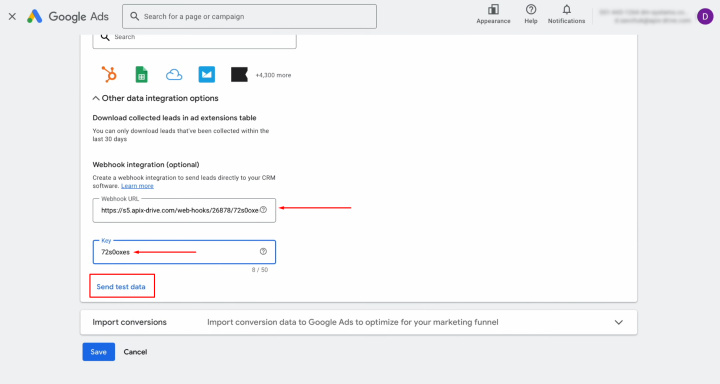
copied URL. Then copy the last part of the URL and paste it into the key field. After this, you need to send test data to the specified URL. To achieve this, click “Send test data”.
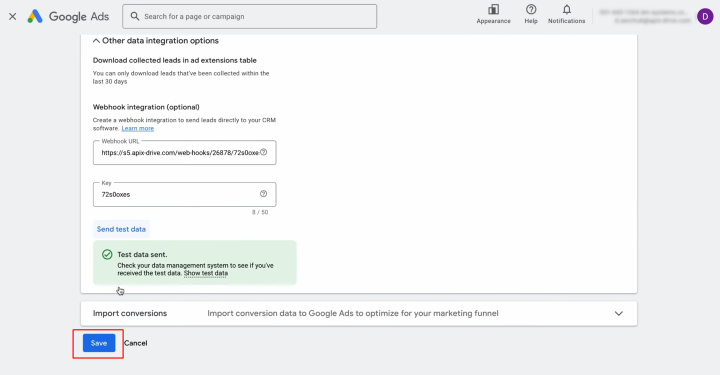
After
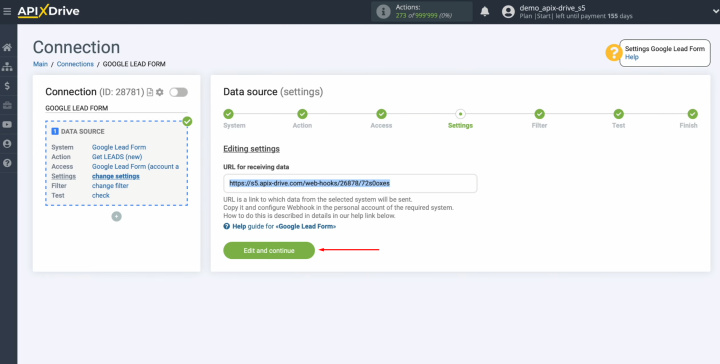
successful submission, click “Save” and return to the ApiX-Drive system.
Click “Edit and continue”.
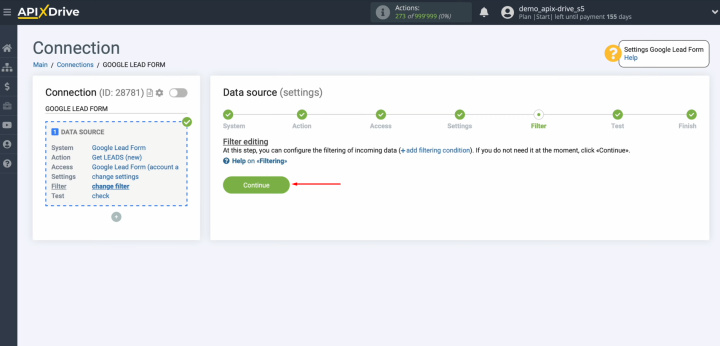
In this
window, you can set up a data filter. In this case, there is no need for this, so click “Continue”.
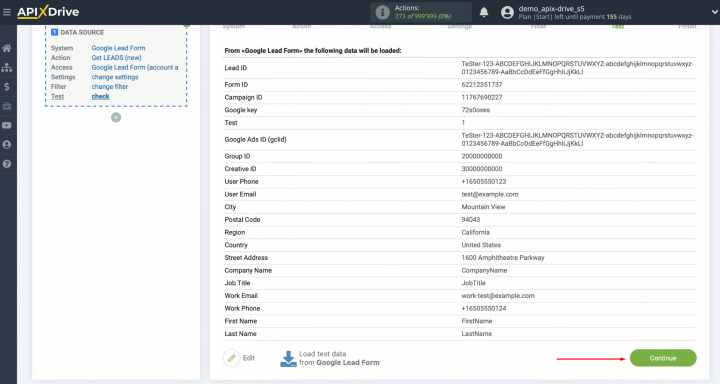
Here you can see
the test data you just sent to the specified URL. If you are satisfied with everything, click “Continue”.
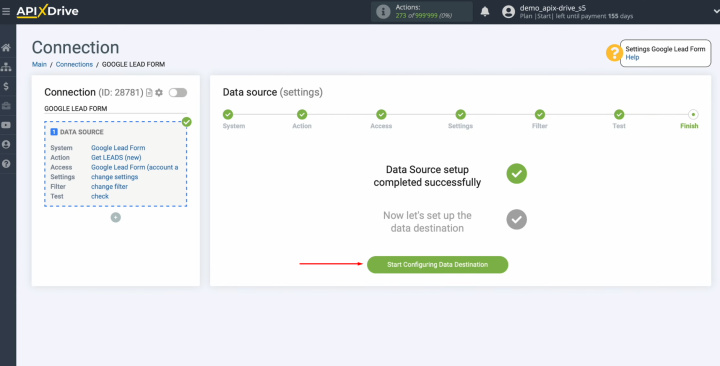
This
completes the Google Lead Form data source setup successfully.
Setting up the Data Receiver – Google Sheets
To set up Google Sheets and Google Ads integration, start setting up the data receiver. Click on the green button.
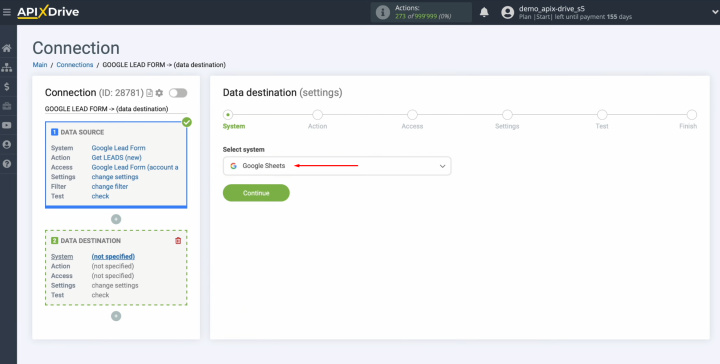
Choose the
system “Google Sheets”. Click
“Continue”.
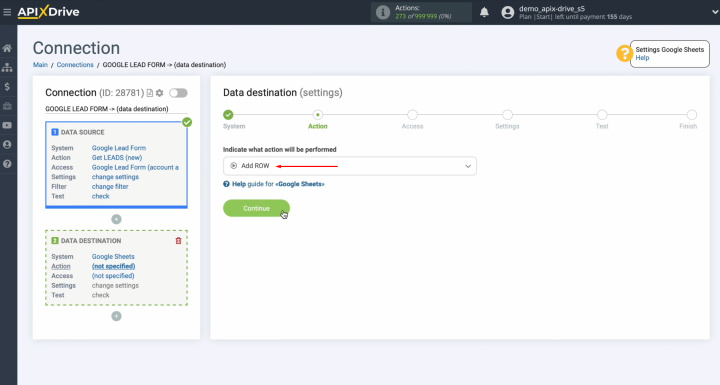
Next, you have to select the action “Add ROW”. Click
“Continue”.
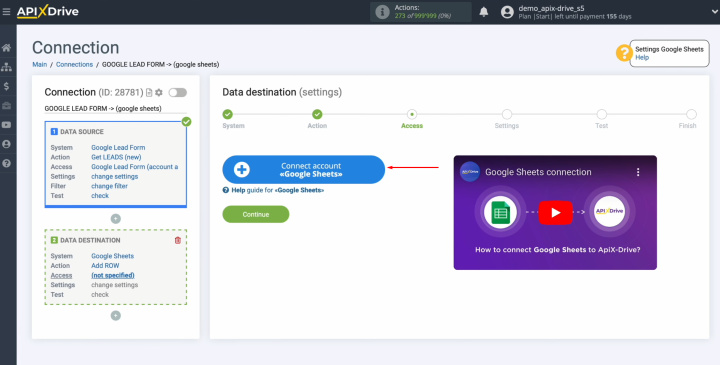
Connect your Google Sheets account to the ApiX-Drive system. Click on
the blue button.
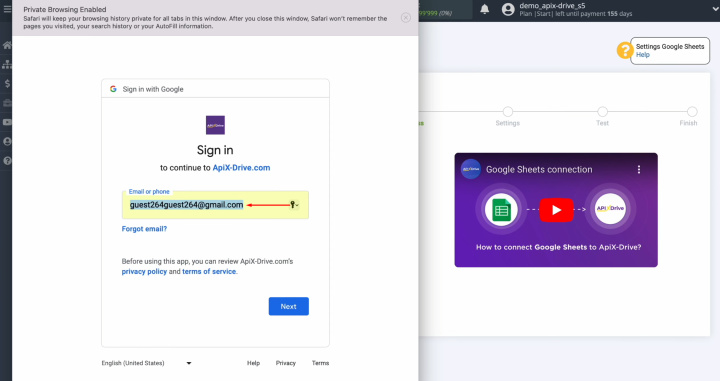
In this
window, you must specify the
login for your Google account. Click
“Next”.
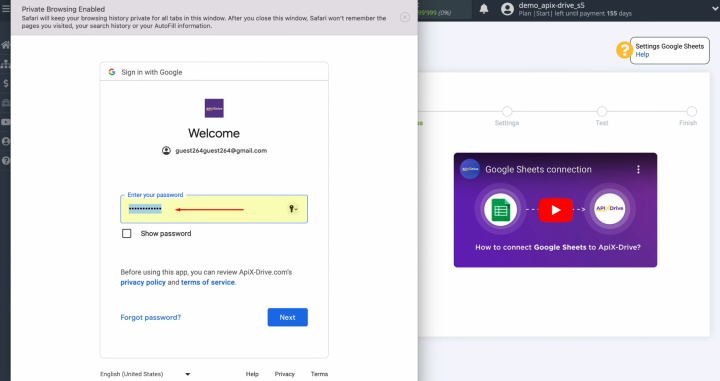
Here, specify the
password for your Google account. Click
“Next”.
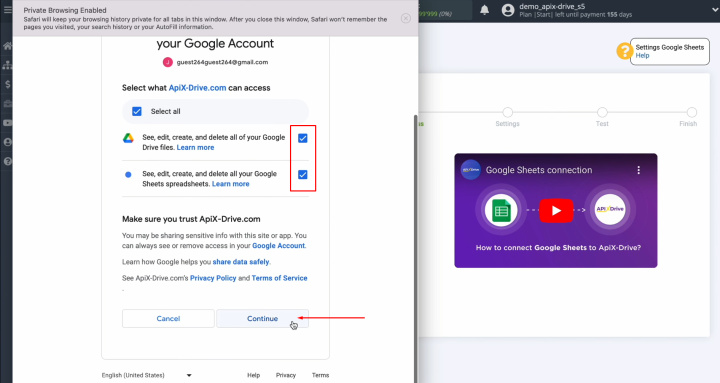
At this stage, be sure to check all the
access boxes. Click
“Continue”.
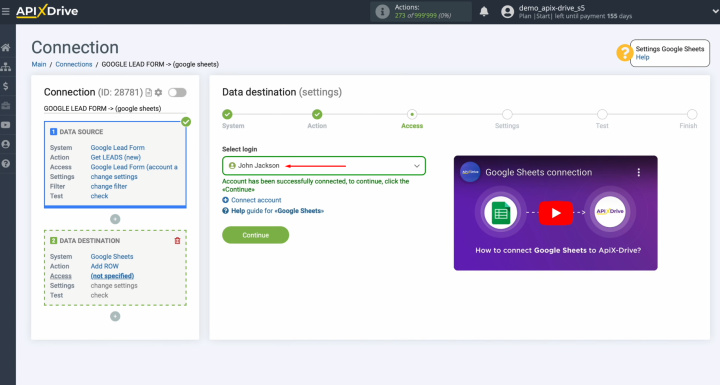
When the
connected login appears in the list
of active accounts, select it and click “Continue”.
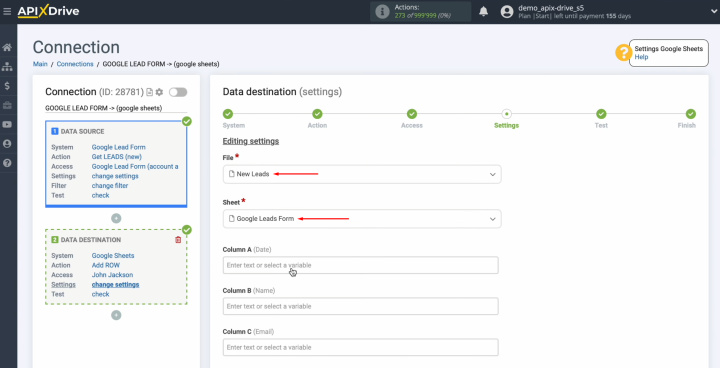
Select the
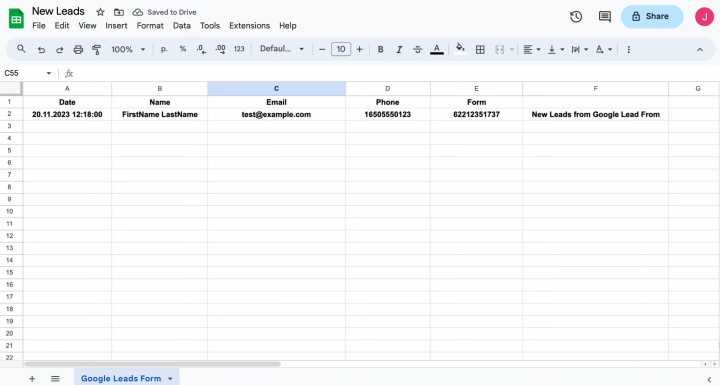
file and sheet to which new lines will be added with each new lead from the Google Lead form.
Now you see
Google Sheets columns to which you
can assign variables from the Google Lead
form. To achieve this, click in the field and select a
variable from the
drop-down list.
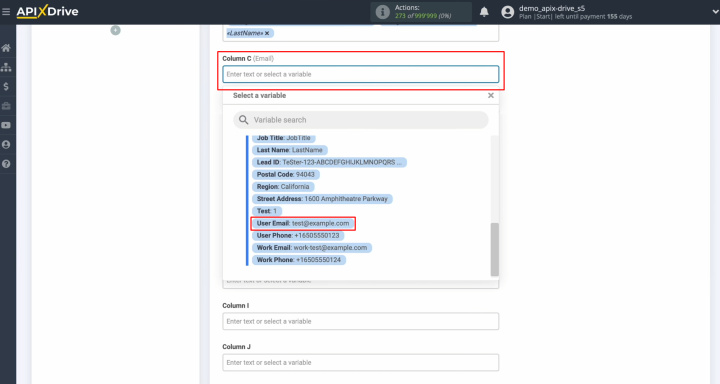
Please note
that you can use not only variables
from the drop-down list but also enter data manually.
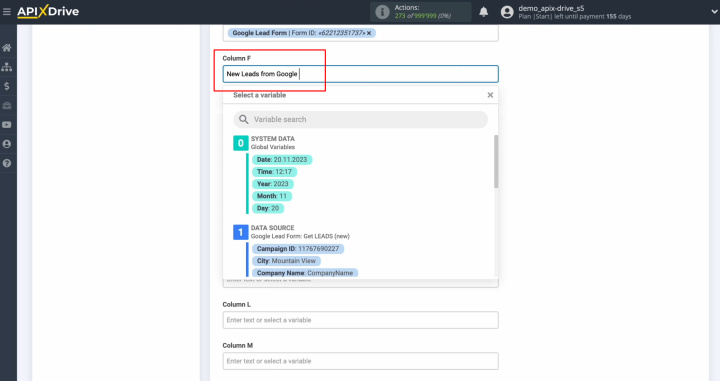
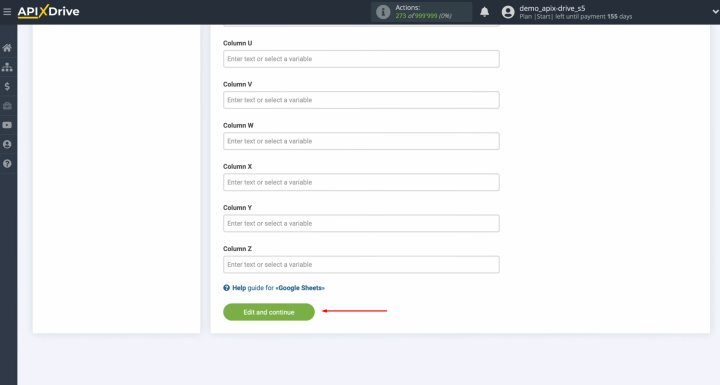
When all the
required columns are filled, click “Edit and continue”.
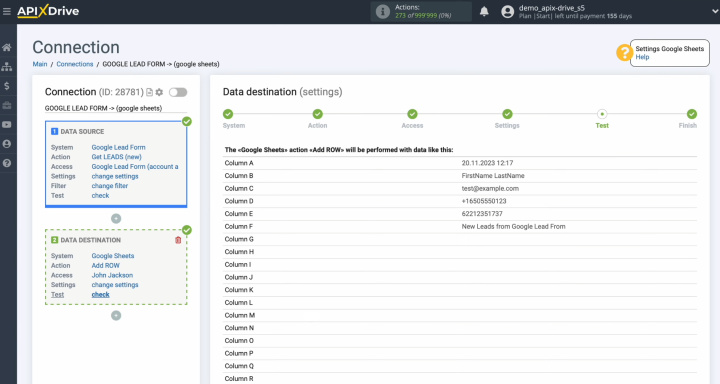
Here you see an example of the data that will be transferred to Google Sheets as new
rows for each new
lead from the Google Lead form.
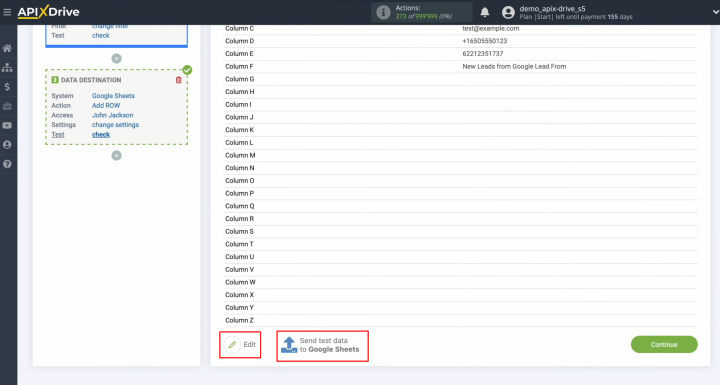
If you are
not satisfied with something, click “Edit”. Then you will go back a step. To check the correctness of the settings for Google Sheets + Google Lead Form integration, click “Send test data to Google Sheets”.
After
successful submission, go to Google Sheets and check the result.
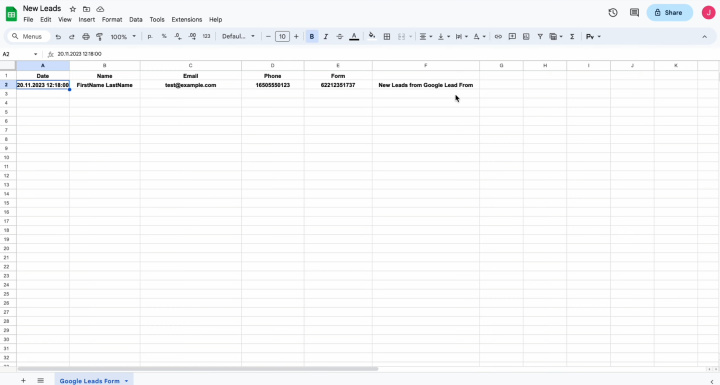
If you are
satisfied with everything, return to the ApiX-Drive system. Click
“Continue”.
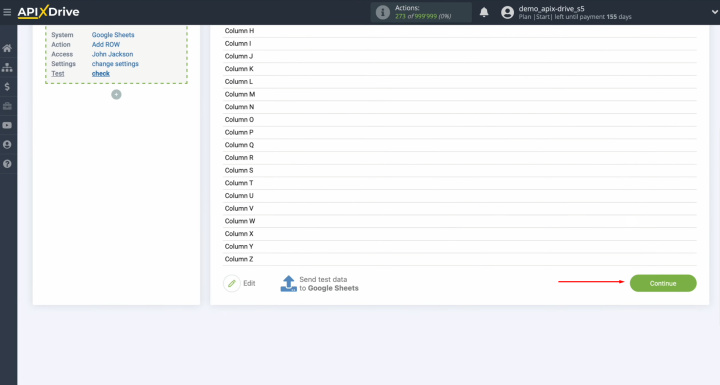
This
completes the setup of Google Sheets as a data receiver.
Setting up Auto-update
To ensure that every new lead from Google Lead Form instantly becomes a new row in Google Sheets, you need to enable auto-update. Click on the green button "Enable update".
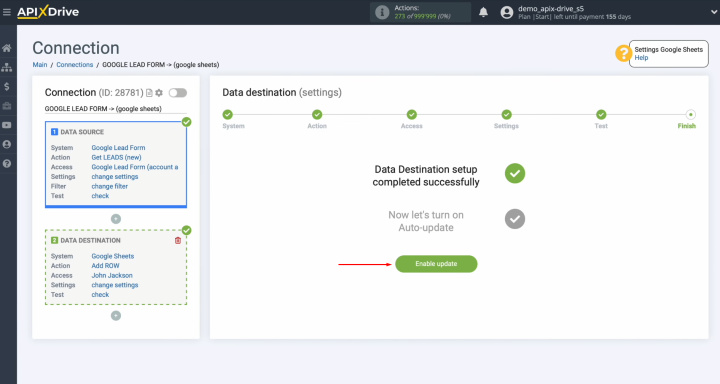
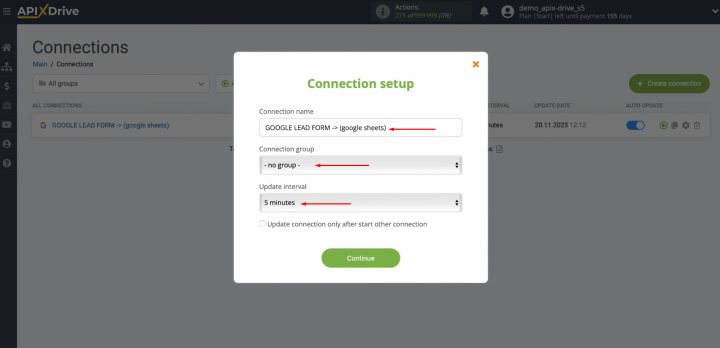
Click on the gear icon.
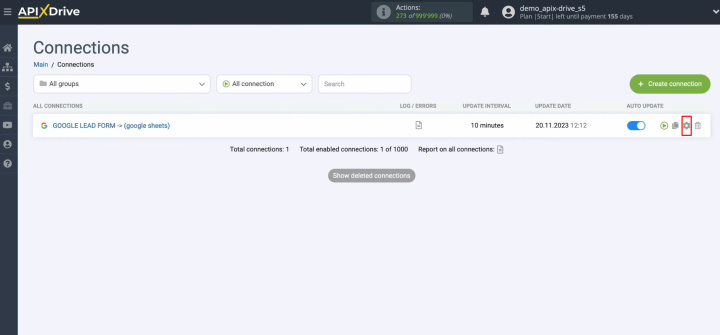
Here you can select an update interval.
For example, once every five minutes. Also, you can change the connection name and add your connection to a group. After
that, click “Continue”.
That's
all. The Google Ads + Google Sheets integration was completed.
Conclusion
As you can see, for a successful Google Lead Form + Google Sheets integration, you don’t need to be a programmer or call an IT specialist for help—neither a colleague nor someone from the outside. The ApiX-Drive developers have already thought through everything and done it in the best possible way for you. This online connector will help you easily and seamlessly configure Google Sheets + Google Ads integration to suit your individual needs, and our step-by-step instructions will accelerate this process and protect you from mistakes. We wish you success!
Strive to take your business to the next level, achieve your goals faster and more efficiently? Apix-Drive is your reliable assistant for these tasks. An online service and application connector will help you automate key business processes and get rid of the routine. You and your employees will free up time for important core tasks. Try Apix-Drive features for free to see the effectiveness of the online connector for yourself.
