Airtable and Brevo Integration: Step-by-Step Instruction
Companies are increasingly automating their workflows today. The search for an effective solution for fast and reliable data exchange between platforms is relevant. Airtable and Brevo integration provides automatic transfer of lead data from spreadsheets to the marketing platform without unnecessary manual actions. Thanks to it, businesses save time and increase conversion rates when communicating with potential customers.
Who Needs Airtable and Brevo Integration
Brevo and Airtable integration will be useful:
- Businesses that use Airtable to keep records of their potential clients (leads) and want to optimize marketing campaigns.
- Marketers who want to automate adding new contacts to mailing lists.
- Sales managers who receive new leads through forms or websites and want to transfer them in Brevo without delay.
If you manage requests and orders in Airtable, the integration allows you to automatically transfer this information to Brevo. There, the data promptly become new contacts and are added to email campaigns. This allows sending welcome messages and offers without delay. Also, leads can be added to automated email sequences.
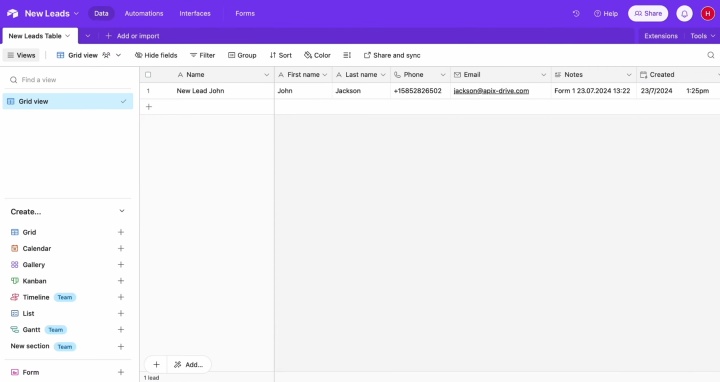
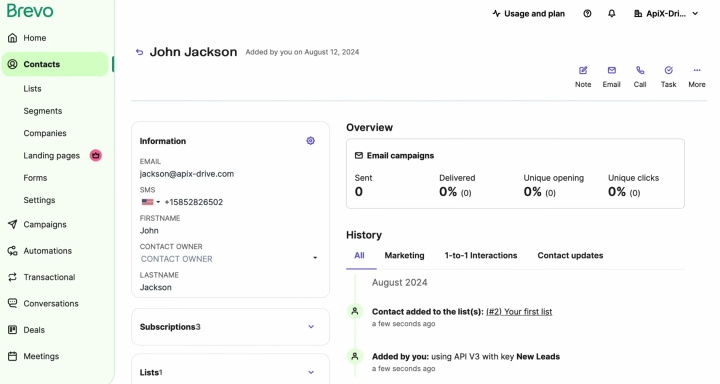
You no longer need to manually transfer contacts and other data. Once you integrate Airtable with Brevo, the process will run automatically around the clock without any further involvement on your part.
What other benefits does the business receive? Faster feedback, increased conversion, and improved communication with potential customers. All of this helps you strengthen your competitive position.
How to Connect Airtable to Brevo with ApiX-Drive
The advantage of modern automation platforms is their simplicity: no programming or complex settings are required. ApiX-Drive acts as a connector between Airtable and Brevo, providing:
- Intuitive interface where all steps are performed on a “click and connect” basis.
- Flexible settings (for example, you can choose which fields from Airtable will be included in Brevo, as well as additionally process or filter the data).
- Stability and reliability of information transfer—ApiX-Drive works in the background and does not require your intervention.
- Scalability: integration can be modified to suit the company's needs.
How to integrate Airtable and Brevo? Setting up communication between these platforms consists of 5 main steps:
- Registration of a personal account in ApiX-Drive.
- Connect Airtable as the system providing the data.
- Connect Brevo as the data destination.
- Setting up data fields (e.g., name, phone, email).
- Activate auto-update—from this moment, data will be transferred automatically.
We have prepared an Airtable and Brevo integration guide to help you go through all setup stages without errors. If you’ve already created an account in ApiX-Drive, move on to configuring the data source.
Data Source Settings—Airtable
Start by creating a new integration to connect Airtable to Brevo.
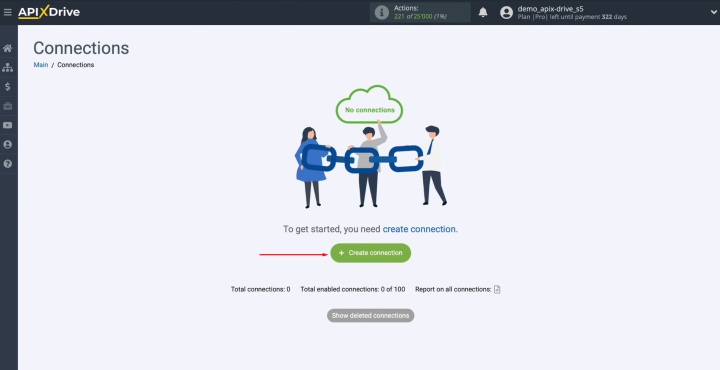
Choose the
system that will supply the data. This is Airtable.
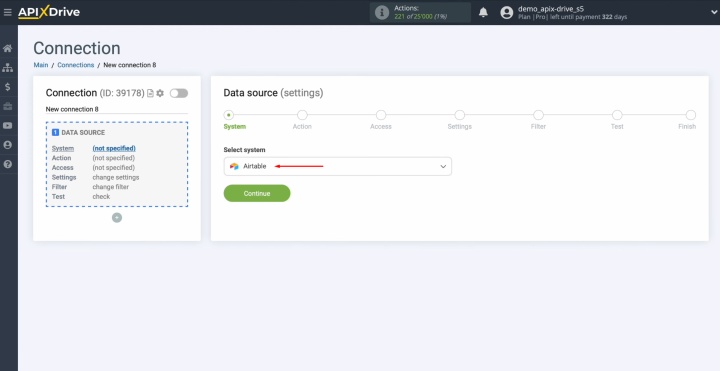
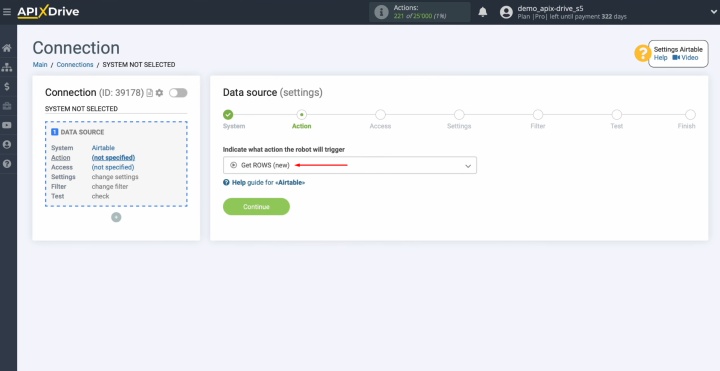
Select the
desired action—“Get ROWS (new).”
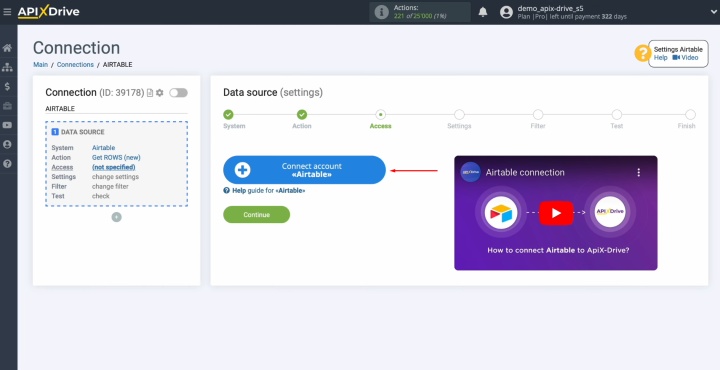
Connect your
Airtable account to the ApiX-Drive connector.
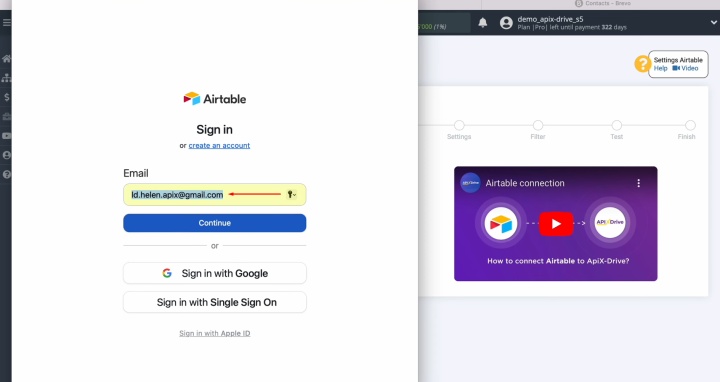
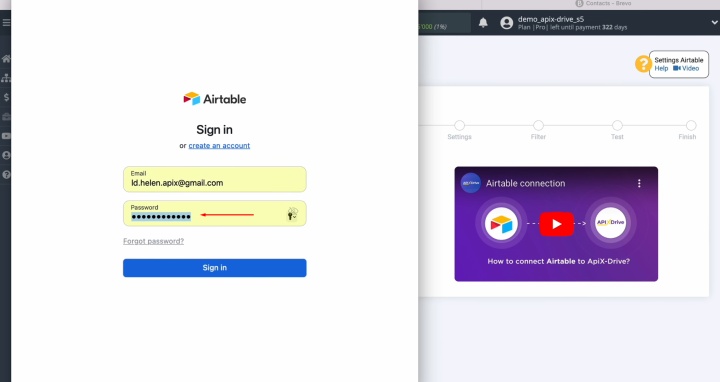
Enter your
Airtable login details—your username and password.
Give
ApiX-Drive access to your Airtable databases. To achieve this, click “Add a base.”
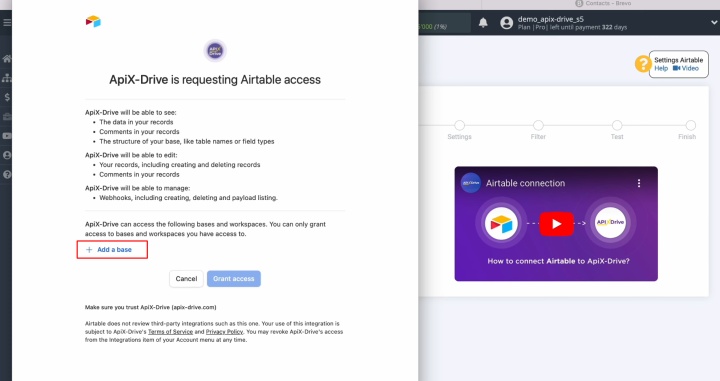
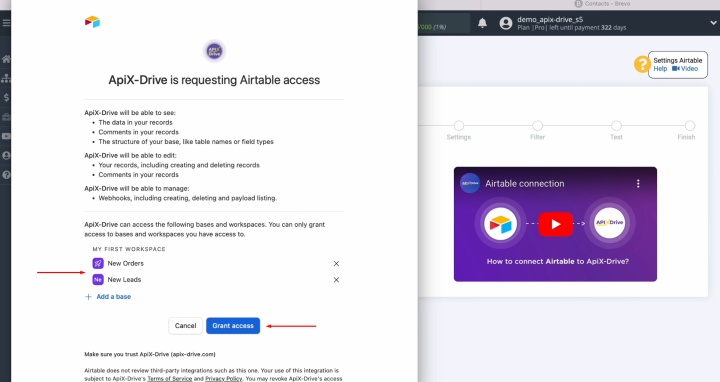
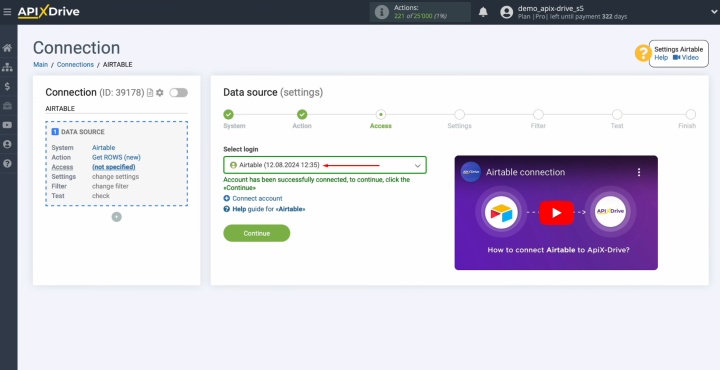
Choose the added account from the active accounts list and press "Continue."
Select the
database from which you plan to retrieve new rows and the table.
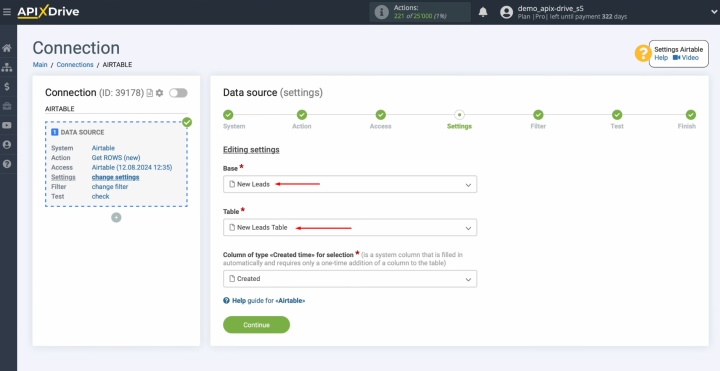
Select the
“Created time” column.
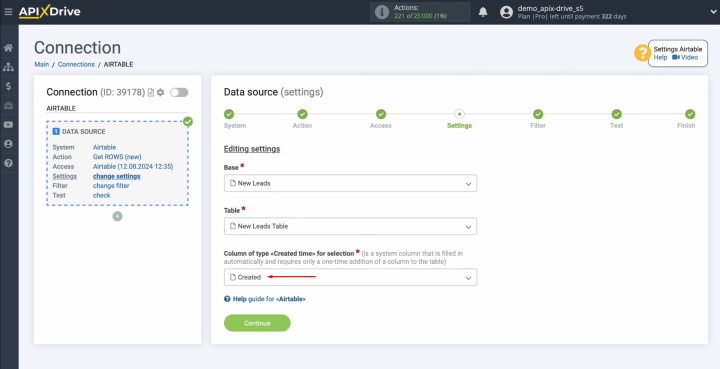
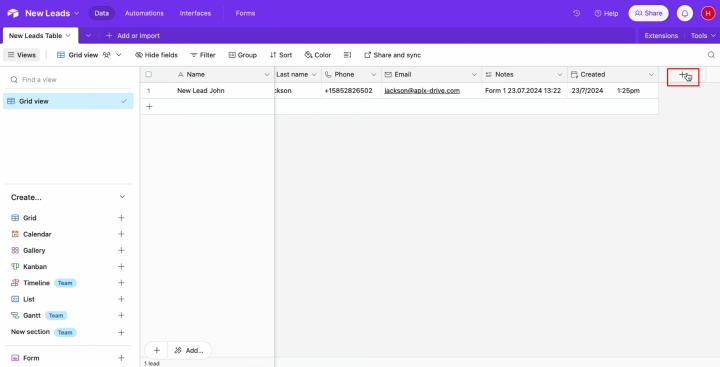
If the
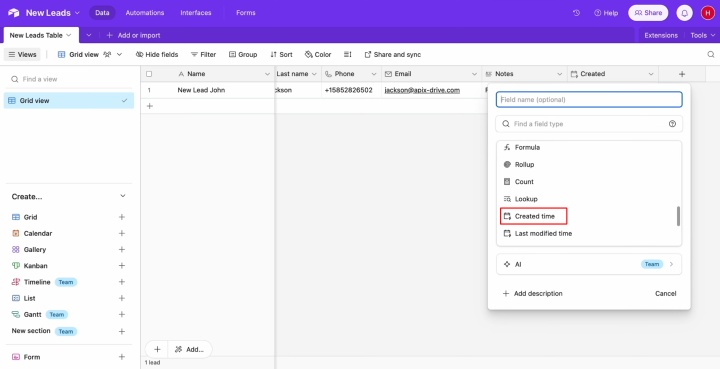
column is missing, add it to the table by clicking the “+” icon and choosing
“Created time.” Then refresh the ApiX-Drive page and pick it from the list.
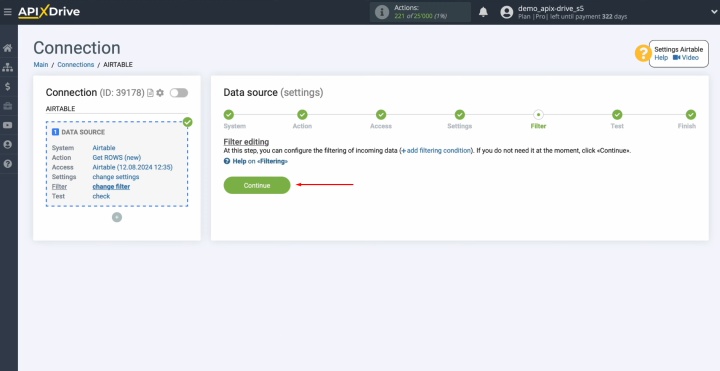
You can set
up a data filter if you want, but it's not required for our integration. Just
click "Continue" here.
At this
stage, you’ll see sample data from a row in the selected Airtable table. If everything looks good, click "Continue."
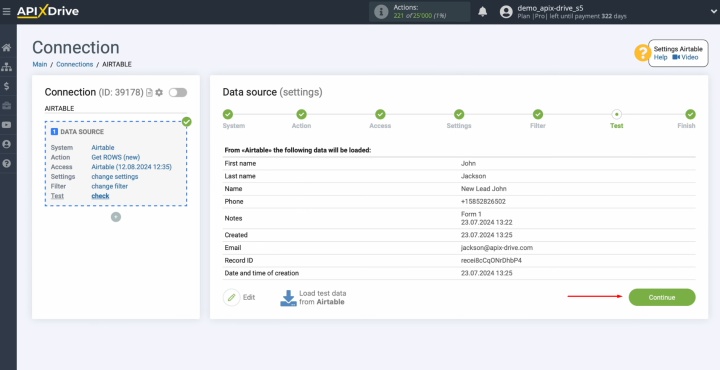
Now you need to integrate Brevo with Airtable.
Data Destination Settings—Brevo
Let’s move on to the next step—setting up the data receiver.
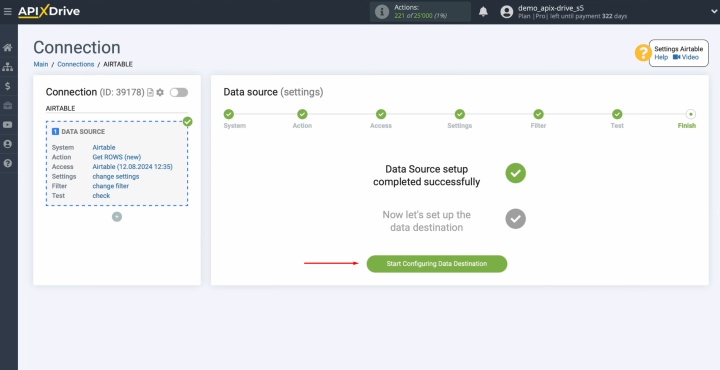
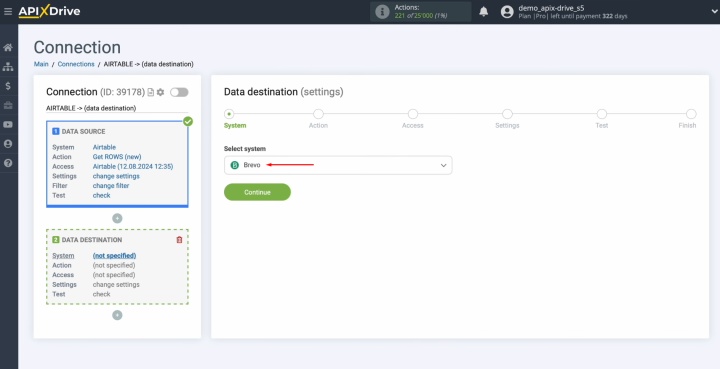
Select a
system. For this integration, the receiver is Brevo.
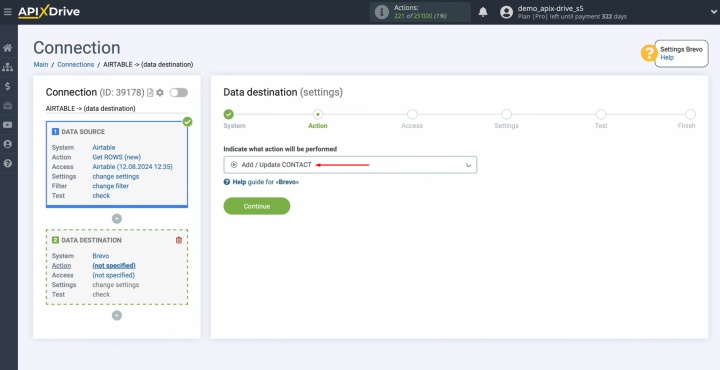
Select an
action. You need “Add/Update CONTACT.”
Connect your
Brevo account to the ApiX-Drive.
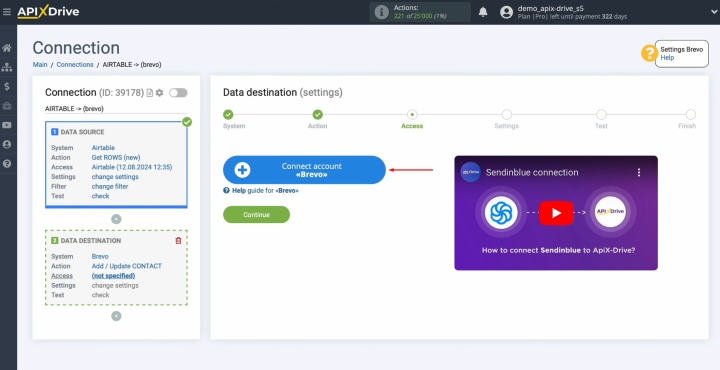
Paste the API key into the specified field. You can find it in your
personal Brevo account.
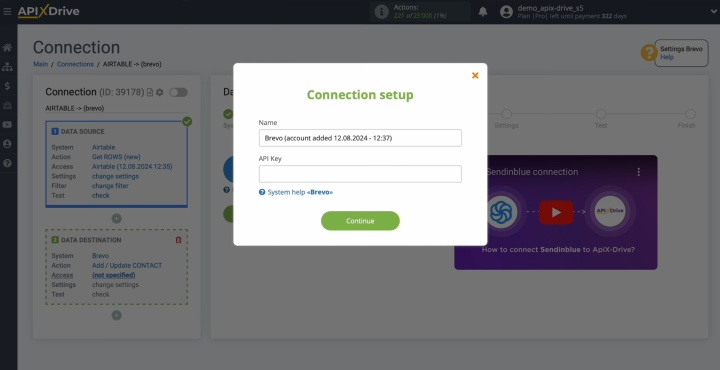
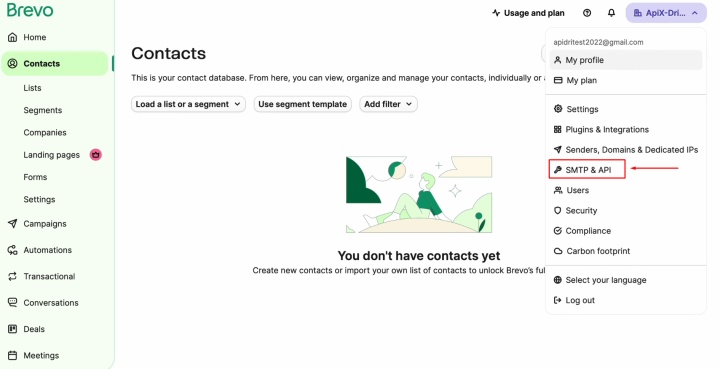
Go to your
account settings and select the SMTP & API section.
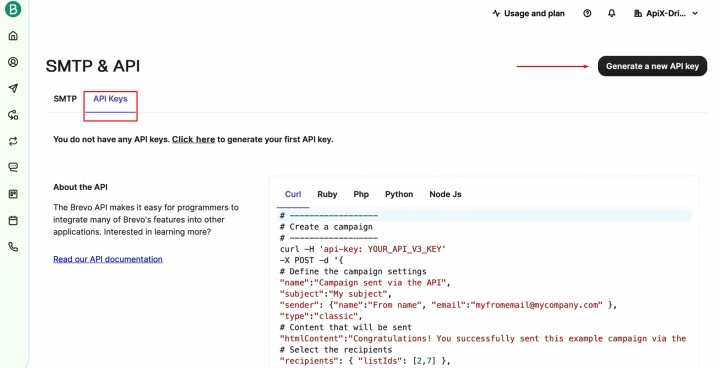
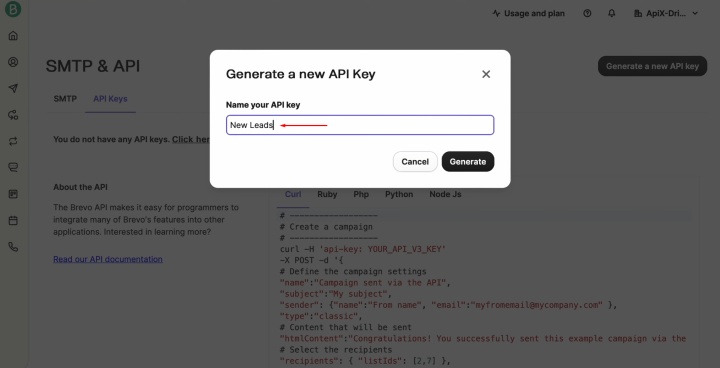
Open the
"API Keys" tab and press “Generate a new API key.”
Give the API
key a descriptive name and click “Generate.”
Copy the
generated API key.
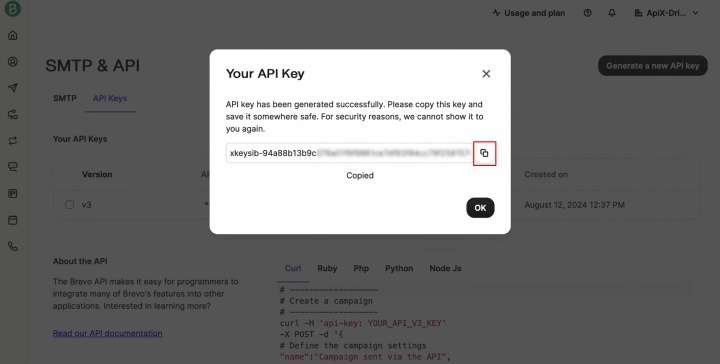
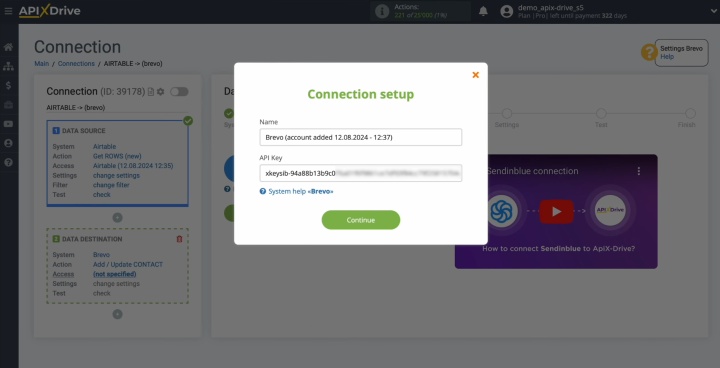
Paste the API
key into the appropriate field in ApiX-Drive, and click “Continue.”
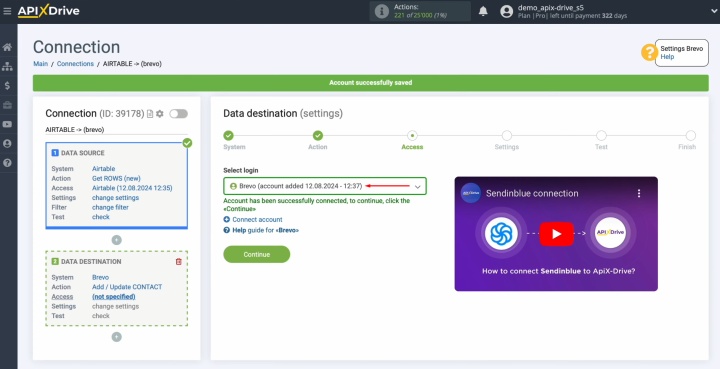
From the
list of active accounts, select the one you connected and click “Continue.”
Choose the
contact list that should be updated with the new entries.
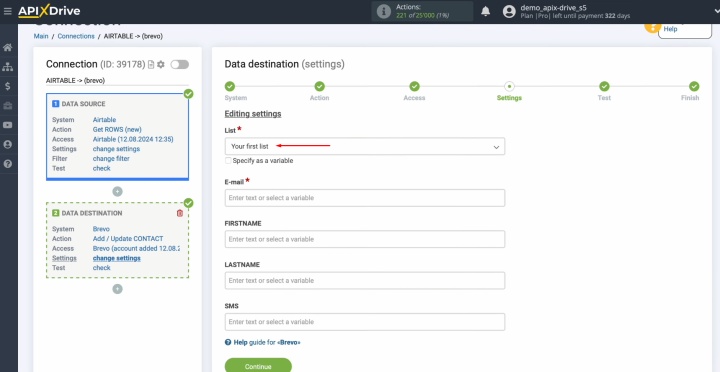
You should
now see Brevo fields that will be populated with new lead data. Assign
variables from Airtable to these fields. Hover over the input field and choose
the appropriate variable from the dropdown menu.
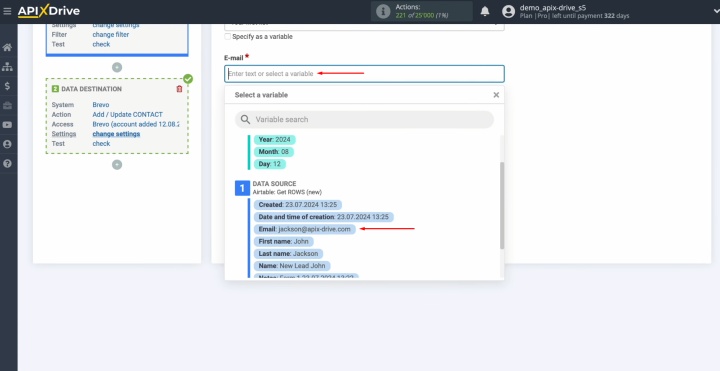
When you are
finished with this work, click "Continue."
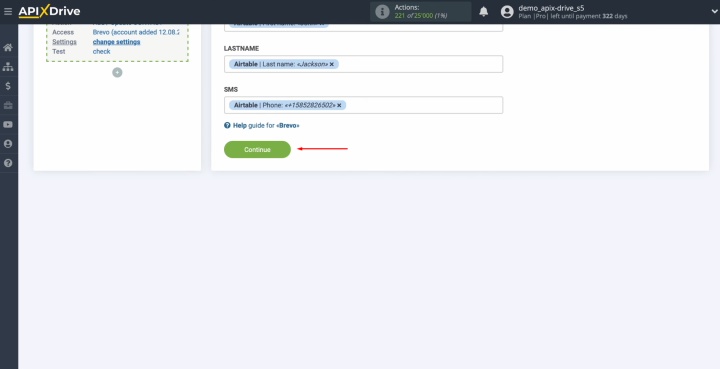
A preview of
the data that will be transmitted to Brevo will be displayed. If you need to
correct something, click "Edit", and the system will take you back
one step. To check if you did everything correctly, send test data to Brevo.
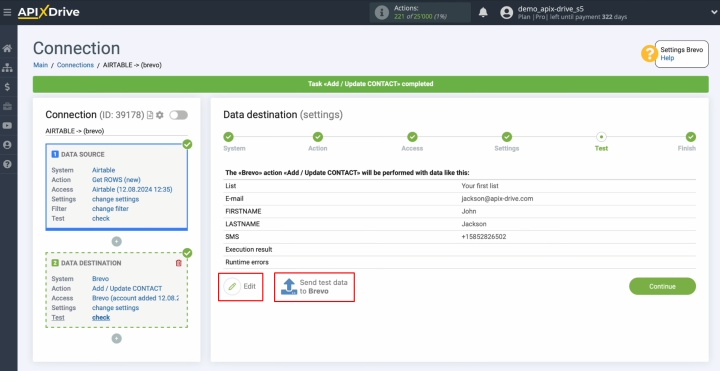
Go to
your Brevo account to review the outcome.
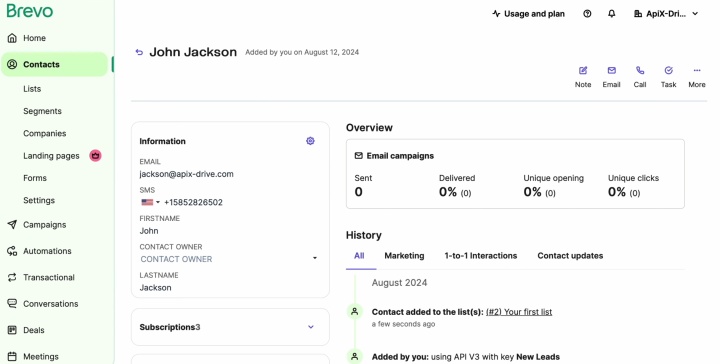
You have now completed the process to connect Brevo to Airtable.
Now return to ApiX-Drive.
Auto-Update Settings
To start automatic data transfer mode, you must enable updates.
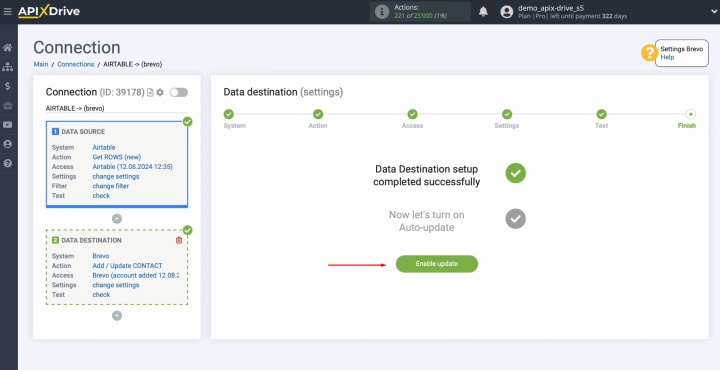
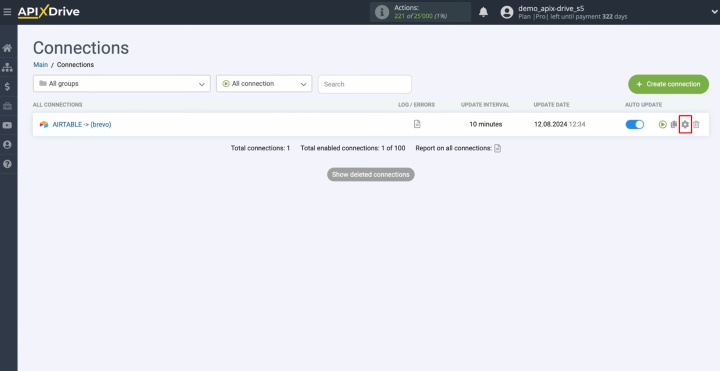
Enter
settings by clicking on the gear.
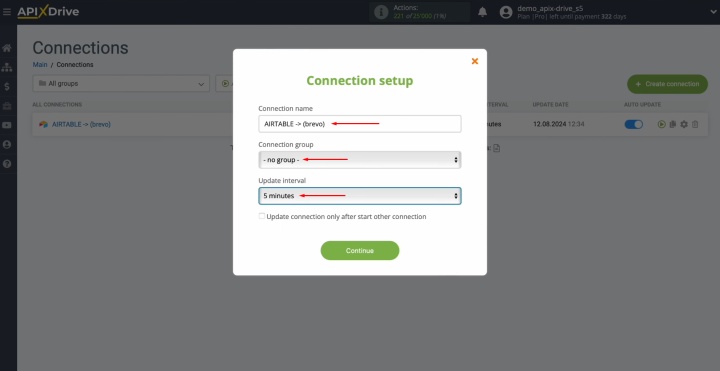
Choose
the optimal update interval. For example, every 5 minutes. If necessary, you
can give the integration a new name and add it to a group here.
Conclusion
The Airtable and Brevo integration effectively automates business processes in marketing. It enables companies to instantly process new leads, create contacts, and launch email campaigns without manual effort. With the ApiX-Drive service, setup takes just a few minutes and requires no technical expertise. We hope this guide has clearly explained how to connect Brevo to Airtable and helped you take the first step toward more efficient and automated communication with your potential customers.
Read also about other integrations:
- Smartsheet and Google Calendar Integration: Automatic Event Creation
- HubSpot and Airtable Integration: Automatic Data Transfer
- Tally and HubSpot Integration: Automatic Contact Creation
- Google Lead Form and Google Sheets Integration: Automatic Lead Transfer
- How to Integrate Webflow and Google Sheets: A Step-by-Step Guide

