How to Integrate Webflow and Google Sheets: A Step-by-Step Guide
Webflow is a cutting-edge cloud-based platform that equips users with all the tools needed to design and launch websites. Google Sheets is a highly popular online application for managing spreadsheets. If you rely on both of these services, you’ll likely be interested in finding ways to streamline and speed up your workflow. The most effective approach is to automate the data transfer process between them. With the help of our online connector, ApiX-Drive, this becomes an easy task. In our article, we’ll guide you through setting up Webflow and Google Sheets integration. This integration will take over the process of transferring lead data from your website to a spreadsheet, saving you time and effort.
Why You Should Automate Data Transfer from Webflow to Google Sheets
Top reasons to automate Webflow-to-Google Sheets data transfer:
- Say goodbye to errors. Mistakes in manual data transfer, like a missing digit in a phone number or an incorrect email address, can lead to losing potential clients. Automation ensures these errors are a thing of the past.
- Accelerate lead data handling. Automated transfers deliver all necessary information instantly and simultaneously, making it far more efficient than manual copying.
- Around-the-clock performance. Unlike manual processes, automated systems operate 24/7 without breaks, holidays, or downtime. They’re always ready to work for you.
- Free up your team’s time. Automating routine tasks like data transfer allows your team to focus on tasks that require human creativity and direct client interaction.
- Boost overall productivity. Automated data transfer empowers you to achieve more within the same timeframe, enhancing individual productivity and driving better results for your department and company.
By implementing Google Sheets and Webflow integration, you’ll unlock immediate benefits. New lead data submitted through Webflow forms will automatically populate your Google Sheets, eliminating the need to manually input customer information like names, phone numbers, and email addresses.
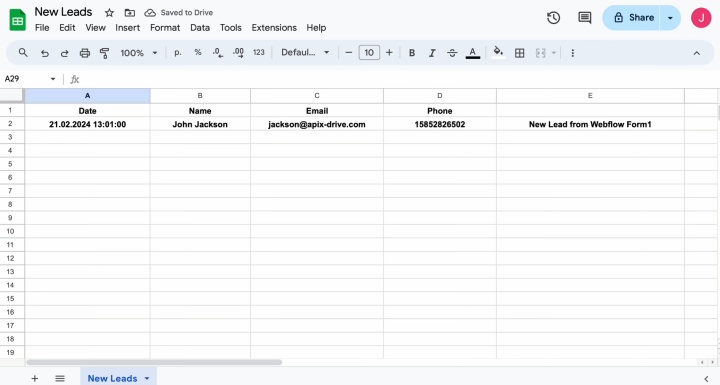
This optimized
workflow ensures a faster response for your clients and a more positive
experience overall. Additionally, the automated export of form data from Webflow
will position you ahead of competitors who are still stuck with time-consuming
manual processes.
How to Connect Webflow to Google Sheets
Setting up this integration doesn’t require any programming skills or deep knowledge of API requests. There’s also no need to seek external assistance. Our online connector, ApiX-Drive, simplifies the entire process for you. With its powerful capabilities, you can link systems seamlessly and without hassle. The intuitive interface and straightforward workflow ensure that the setup takes no more than 10 minutes. Comprehensive text and video tutorials will explain how to connect Google Sheets to Webflow.
To get started, simply register on the official website at apix-drive.com. After completing this step, you’re ready for the Google Sheets & Webflow integration.
Setting Up the Data Source – Webflow
Begin by creating a new connection to start the Webflow integration with Google Sheets.
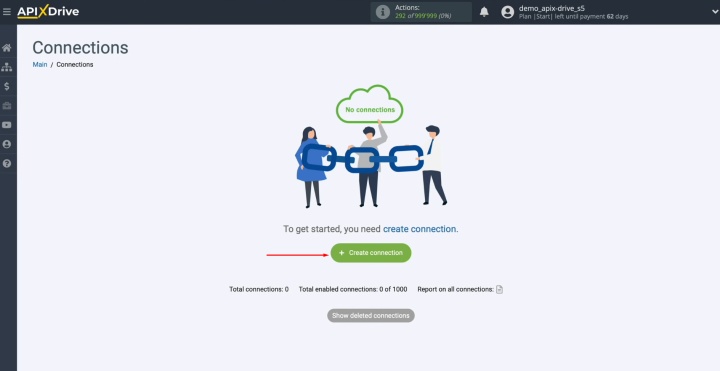
Choose the system that will serve as the data source. In this
case, select Webflow and click “Continue.”
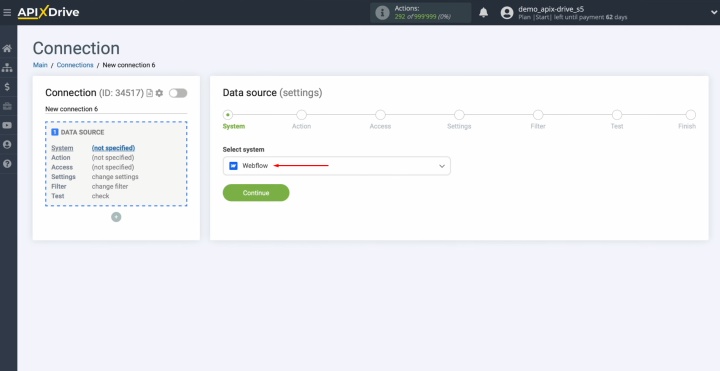
Next, specify the action you want to perform. Select “Get form
DATA (new)” and proceed by clicking “Continue.”
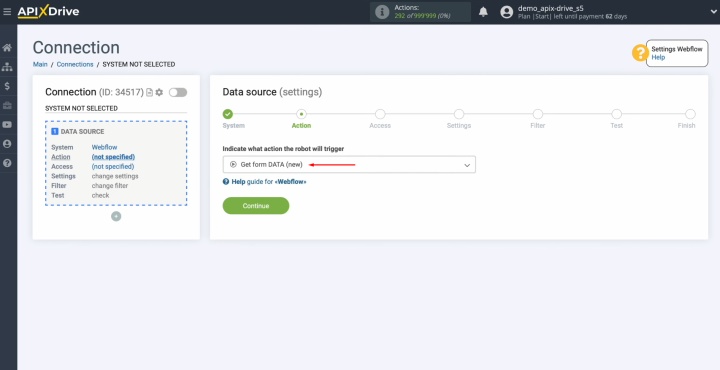
Connect your Webflow account to ApiX-Drive.
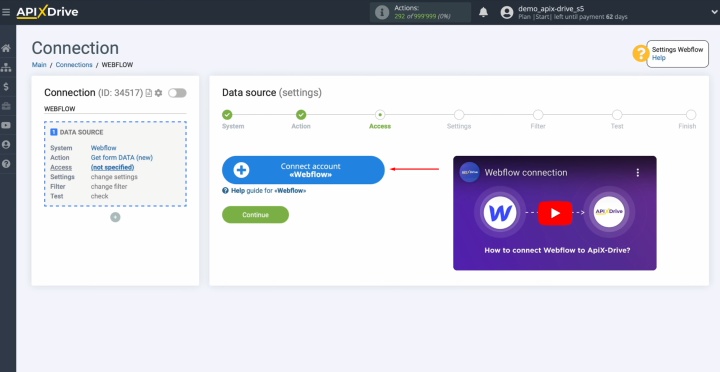
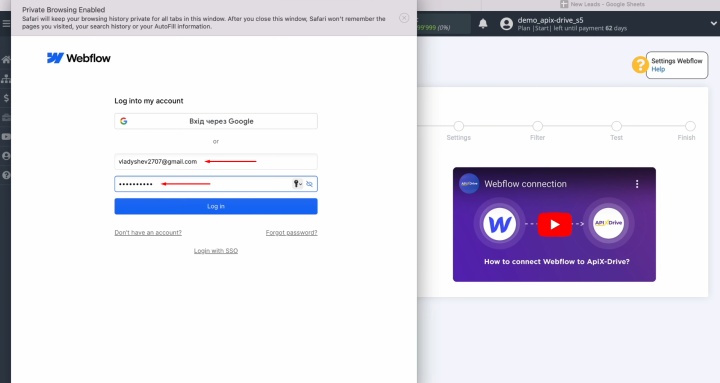
Enter your Webflow login credentials (email and password) and
click “Log in.”
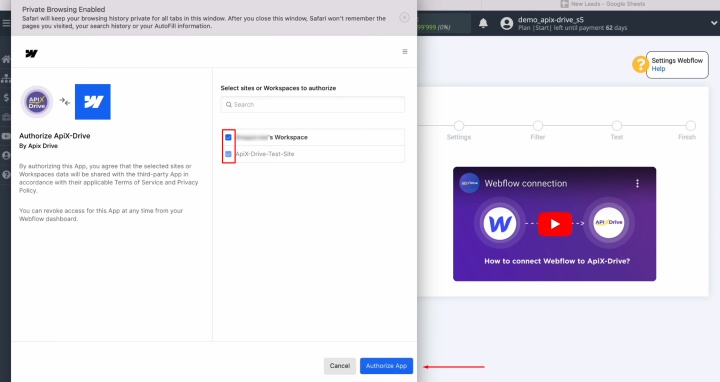
Grant access to your workspace by clicking “Authorize App.”
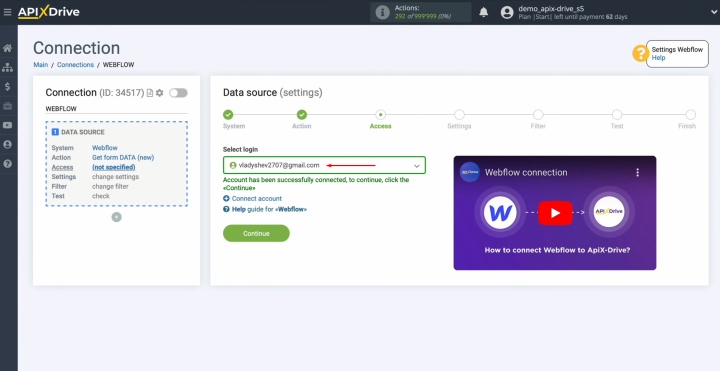
Once your connected login appears in the list of active accounts,
select it and press “Continue.”
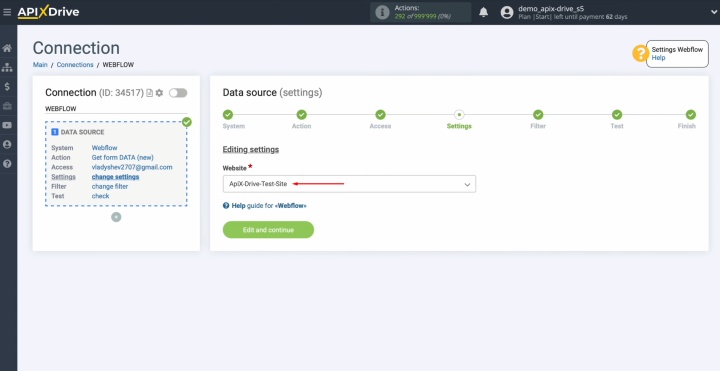
Choose the specific website where new data will be collected.
After selecting the site, click “Edit and continue.”
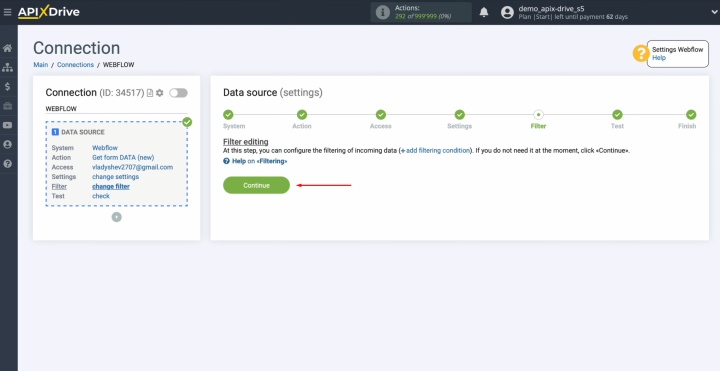
If needed, you can set up a data filter at this step. For this
example, no filtering is required, so simply click “Continue.”
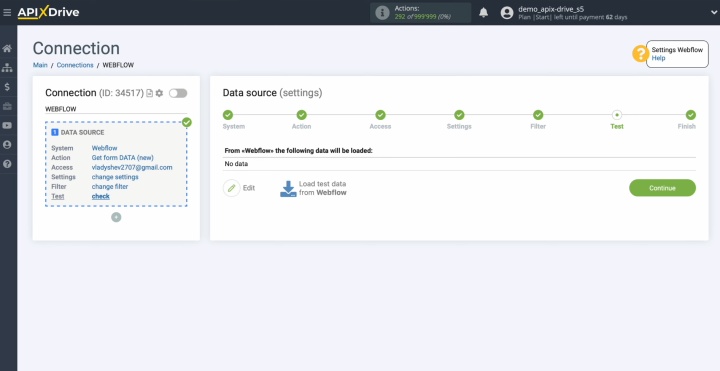
You will now
see test data from one of your Webflow leads. If no data is displayed, complete
a form on your website to generate a lead.
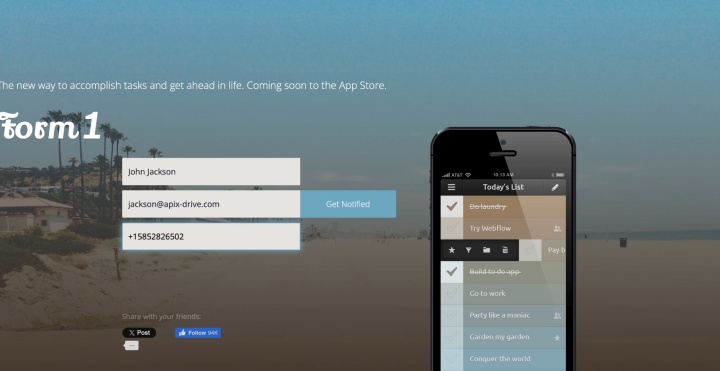
To do this,
log in to your Webflow account, navigate to the form you want to use for
collecting leads, fill it out, and submit it.
After
submitting the form, return to ApiX-Drive and click “Load test data from
Webflow.”
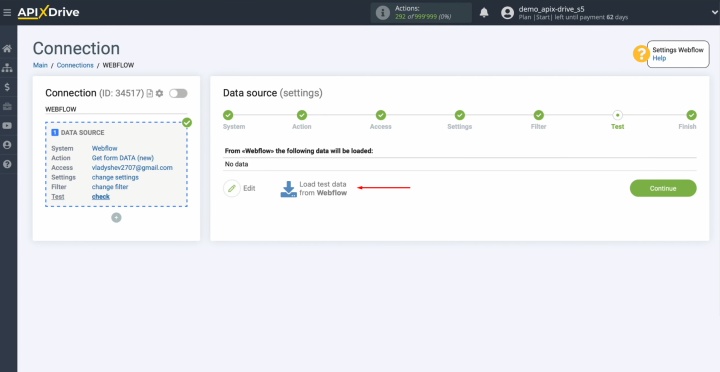
Once the test
data appears, click “Continue.”
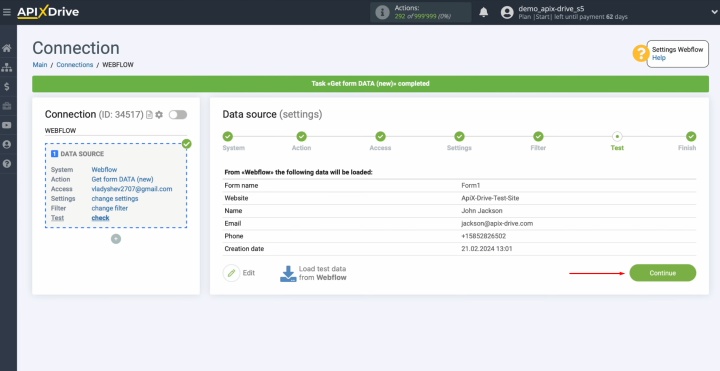
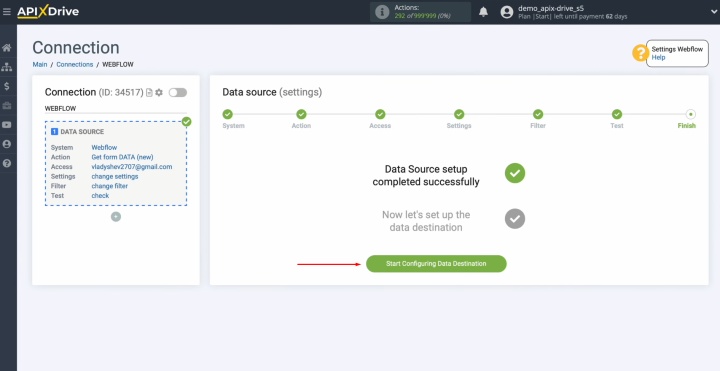
At this
point, the Webflow data source setup is complete, and you’re ready to proceed
with further configuration steps.
Configuring the Data Receiver – Google Sheets
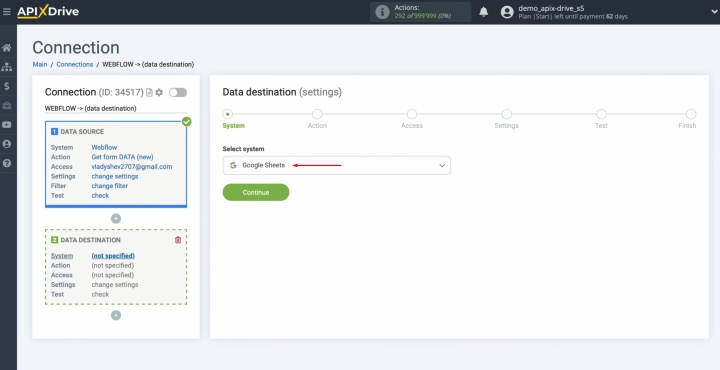
To set up the Google Sheets integration with Webflow, proceed to configure the data destination.
Select the destination system. In this case, choose Google Sheets
and click “Continue.”
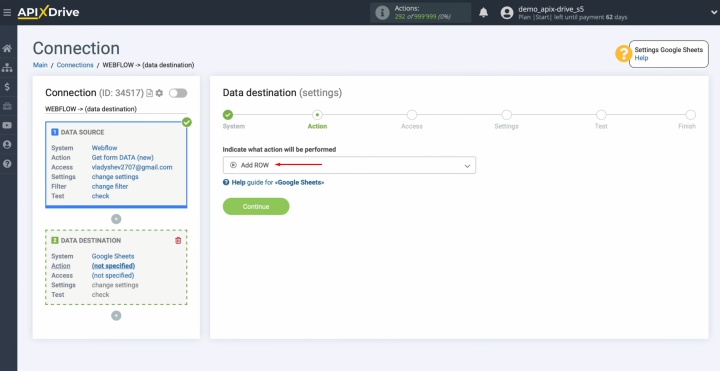
Specify the action by selecting “Add ROW,” then proceed by
clicking “Continue.”
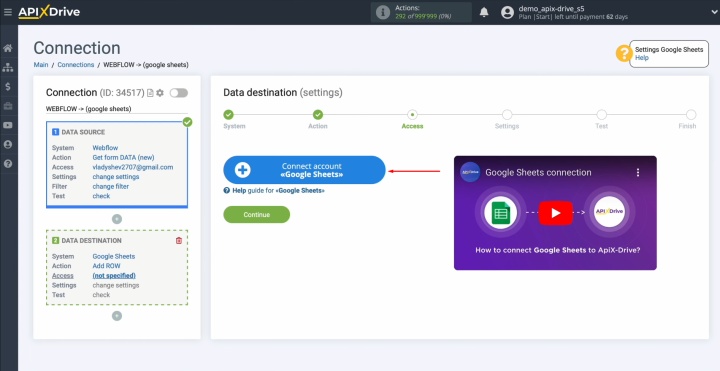
Connect your Google Sheets account to ApiX-Drive.
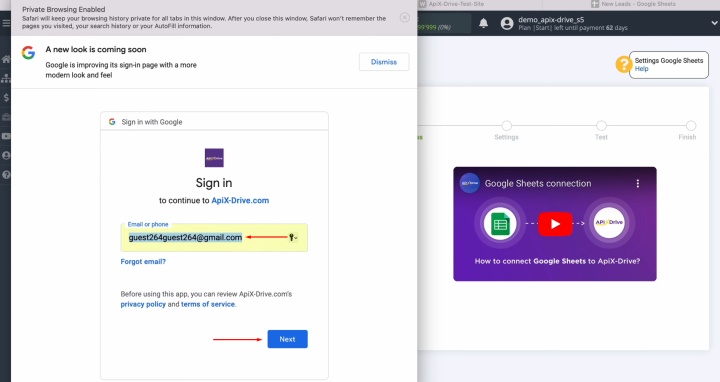
Enter your Google account login and click “Next.”
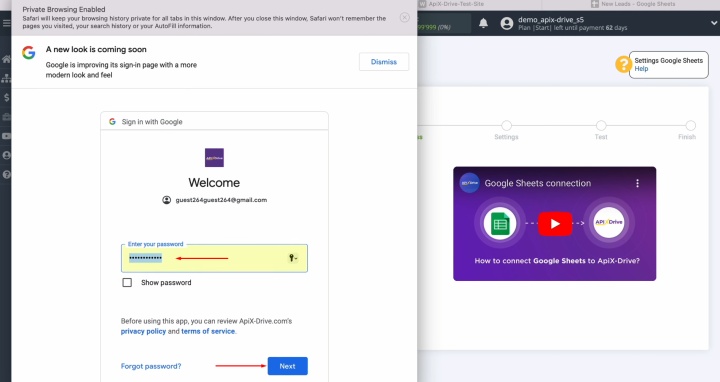
Provide your Google account password and click “Next” again.
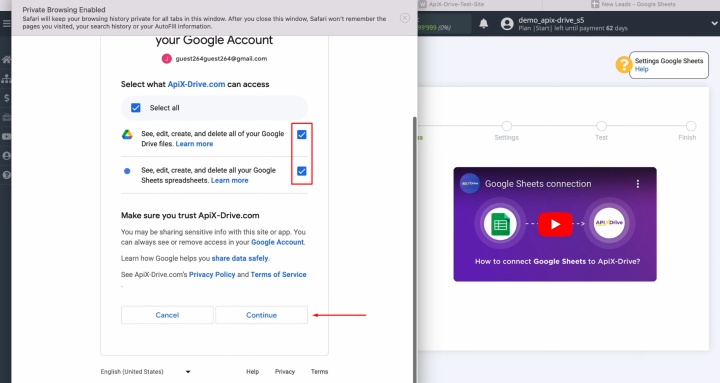
Ensure all required permissions are granted by checking the
necessary boxes. Click “Continue.”
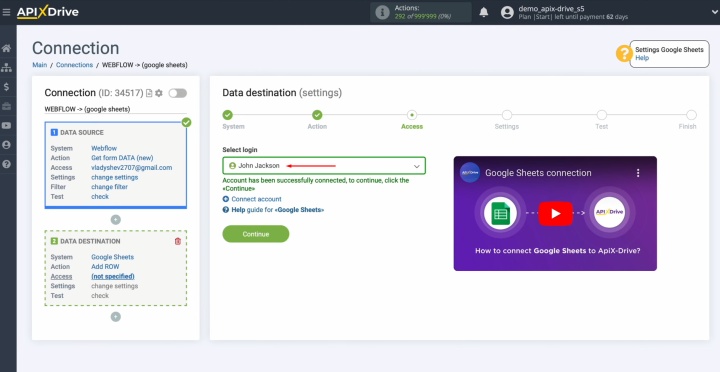
Once your account appears in the list of active connections,
select it and press “Continue.”
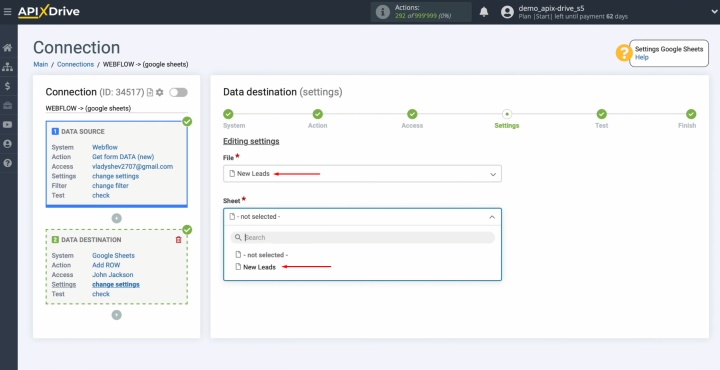
Choose the specific file and sheet where new rows will be added
for each lead received from Webflow.
You will now
see the columns of your Google Sheets file. Assign variables from Webflow to
these columns by clicking on a field and selecting a variable from the
drop-down menu.
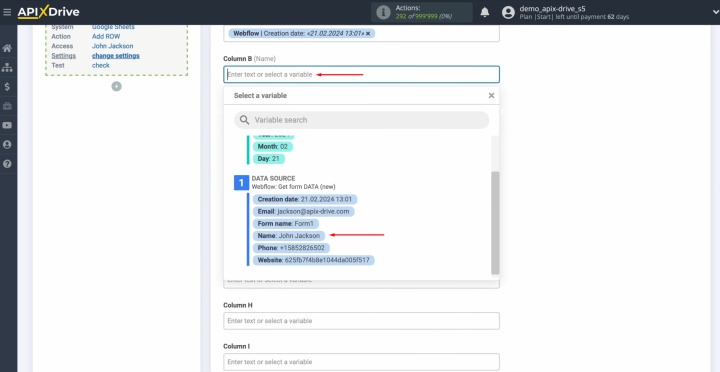
Keep in mind
that you can not only select variables from the drop-down list but also
manually input data into the fields if needed.
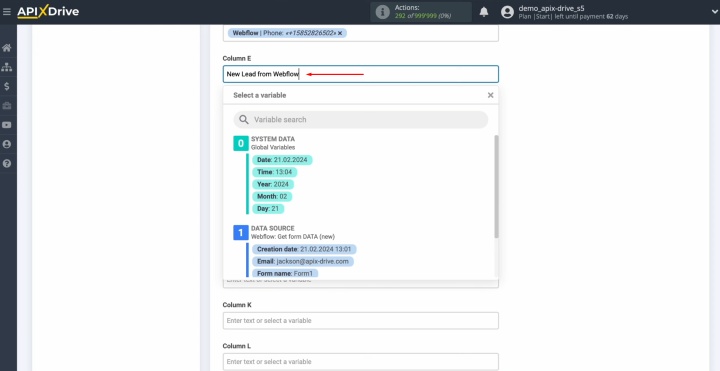
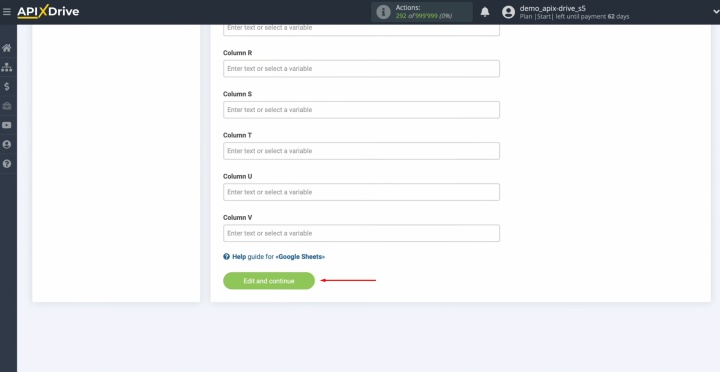
After
populating all the required fields, click “Edit and continue.”
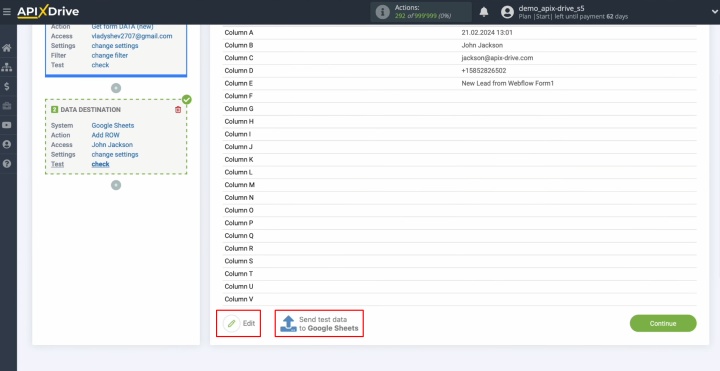
At this
stage, you’ll see a preview of the data that will be sent to Google Sheets as
new rows for each lead from Webflow. If anything looks incorrect, click “Edit”
to review and adjust the settings. When satisfied, click “Send test data to
Google Sheets.”
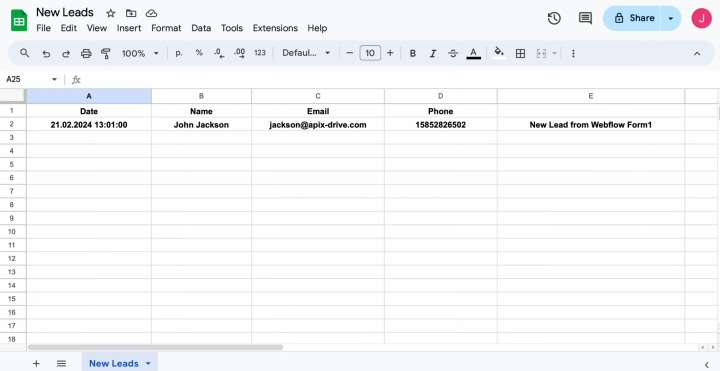
Open your
Google Sheets file to verify the result.
Return to
ApiX-Drive to finalize the setup and proceed with further configurations.
Configuring Auto-Updates
To ensure data transfers happen automatically, enable the auto-update feature for your Webflow & Google Sheets integration. Start by clicking “Enable update.”
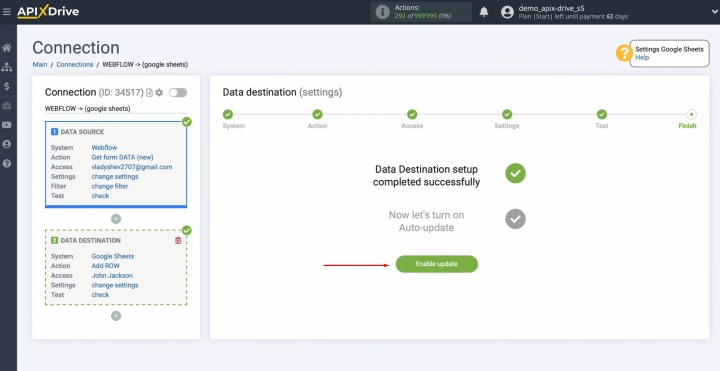
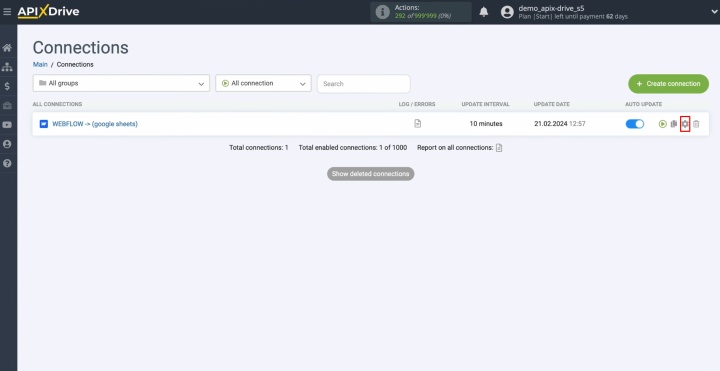
Next, click
the gear icon to access the settings.
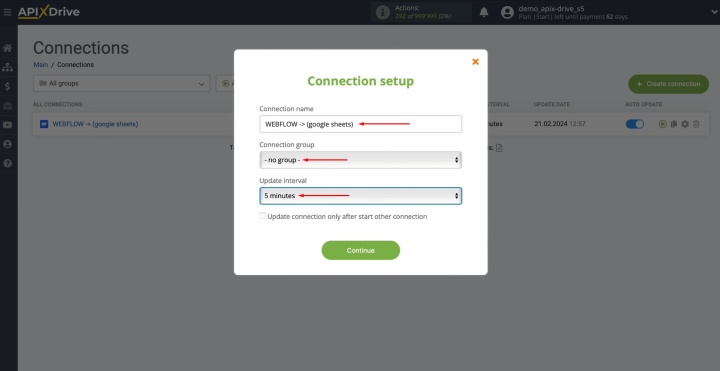
Choose the
desired update interval for the connection — for example, every 5 minutes. In
this section, you can also rename the connection and assign it to a specific
group for better organization. Once done, click “Continue.”
Your
integration is now complete! Data syncing between Webflow and Google
Sheets has been successfully set up. Congratulations — you’ve
done it!
What You Gain
Automating lead data transfers with ApiX-Drive, a no-code tool, brings a fresh and efficient approach to managing workflows. Even users with minimal technical skills can set up robust automated solutions without any programming knowledge. Our detailed instructions clearly explain how to integrate Webflow with Google Sheets. Once you complete all the steps, you’ll have a stable integration that operates without interruptions. Best of all, you’ll immediately see the results: easy automated lead data transfers.
The process to sync Webflow and Google Sheets eliminates the need for tedious manual work. With this solution, you won’t have to transfer lead data by hand anymore — everything is fully automated. ApiX-Drive handles the routine tasks for you, allowing you to focus on enhancing client interactions, developing new marketing strategies, and exploring other important areas that can drive your business to the next level.
Read also about other integrations:
- Smartsheet and Airtable Integration: Automated Data Transfer
- Google Sheets and Airtable Integration: Automatic Transfer of New Rows
- Webflow and Brevo Integration: Automatic Data Transfer
- Google Lead Form and Google Sheets Integration: Automatic Lead Transfer
- Google Lead Form and Notion Integration: Automatic Lead Transfer
