Google Lead Form and Notion Integration: Automatic Lead Transfer
The Google Lead Form extension for Google Ads enables businesses to gather leads directly, without requiring potential clients to visit the company’s website. At the same time, Notion serves as a powerful, all-in-one platform for organizing workflows. To maximize the efficiency and speed of using these tools, automating the data transfer process is essential. With the help of our online connector, ApiX-Drive, you can seamlessly link these two systems. In this article, we’ll guide you through setting up Google Ads Lead Form and Notion integration, making it easy to automate the transfer of new lead data from forms directly into your Notion workspace.
Automatic Lead Transfer from Google Ads to Notion
Automating manual data transfers can save significant time and effort, freeing you from one of the most labor-intensive tasks in your workflow. This automation not only streamlines processes but also reduces the risk of human errors, enabling you to focus on more strategic priorities. The seamless connection between lead forms and a robust organizational platform significantly accelerates data management, boosting productivity at both individual and company-wide levels.
With Notion and Google Ads Lead Form integration, set up through our no-code solution ApiX-Drive, you will immediately see and appreciate its results. Lead details submitted via forms, including names, phone numbers, and email addresses, are automatically transferred to your project and database management system as structured entries. This removes the burden of manual data entry, optimizing your operations and ensuring a faster, more professional response to clients.
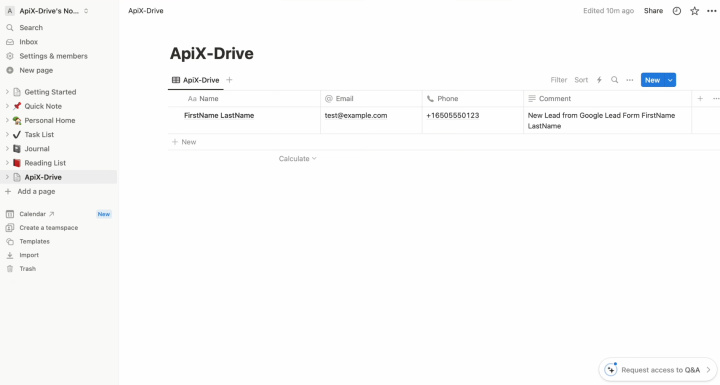
By
leveraging Notion
integration for Google Ads Leads, you’ll gain the ability to
organize and manage leads effortlessly within a single, unified platform. This
not only enhances your workflow but also positions your business ahead of
competitors who haven’t embraced sales automation.
How to Connect Google Ads Lead Form to Notion
Setting up Notion and Google Lead Form integration doesn’t require any programming skills or deep knowledge of API requests. You also won’t need external help to get the job done. Our powerful online tool, ApiX-Drive, simplifies the entire process, making it quick and hassle-free. Its intuitive interface and seamless functionality allow you to connect the systems in under 10 minutes. Comprehensive text and video guides created by the ApiX-Drive team ensure you can easily handle account linking and configuration without any technical difficulties.


To get started, simply register on the official website, apix-drive.com. After completing this step, you’ll be ready to initiate the Google Lead Form and Notion integration.
Setting Up the Data Source – Google Lead Form
To start configuring the Google Leads and Notion integration, begin by creating a new connection.
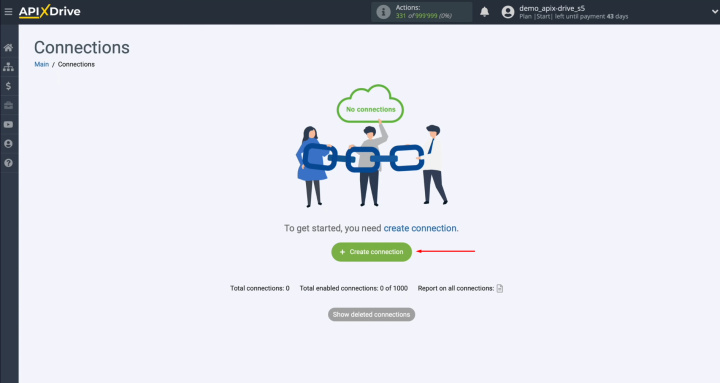
Select your data source system. In this case, it's Google Lead Form.
Click “Continue.”
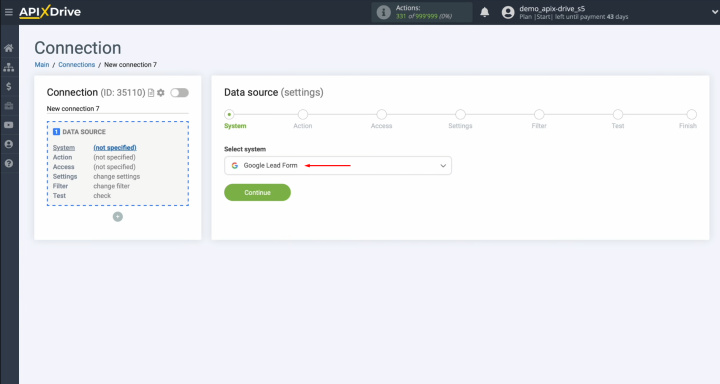
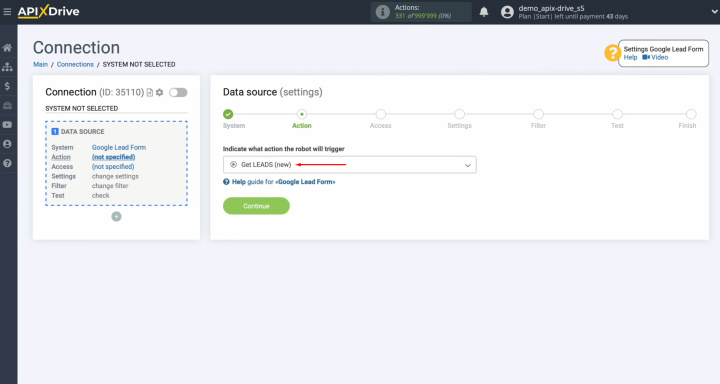
Select the "Get LEADS (new)" action and click
"Continue" to move forward.
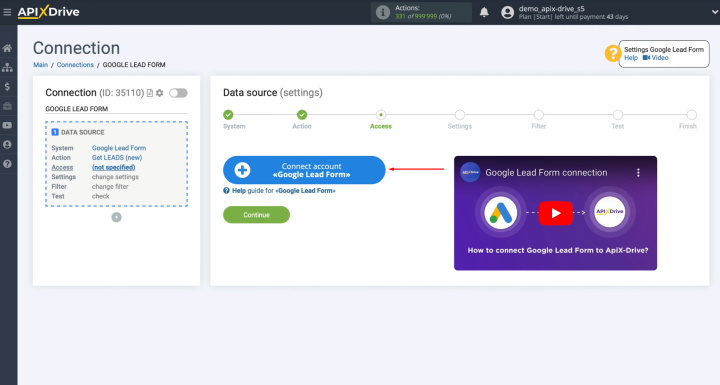
Link your Google Lead Form account to ApiX-Drive by following the
on-screen instructions.
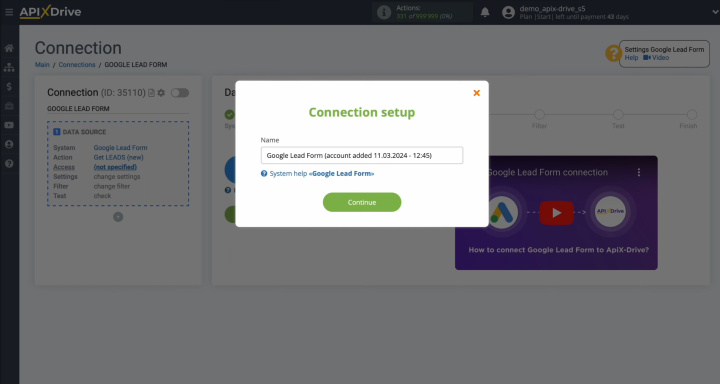
You can rename the connection for clarity or simply click “Continue” to
proceed.
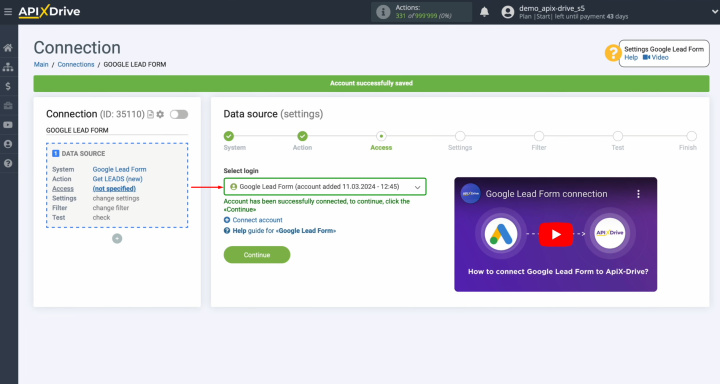
Once your account appears in the list of connected accounts, select it
and hit “Continue.”
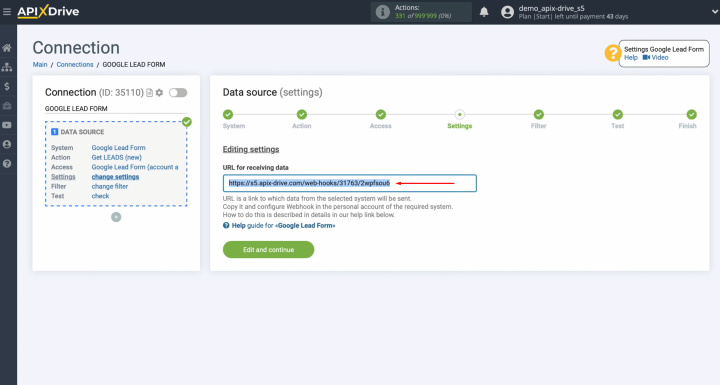
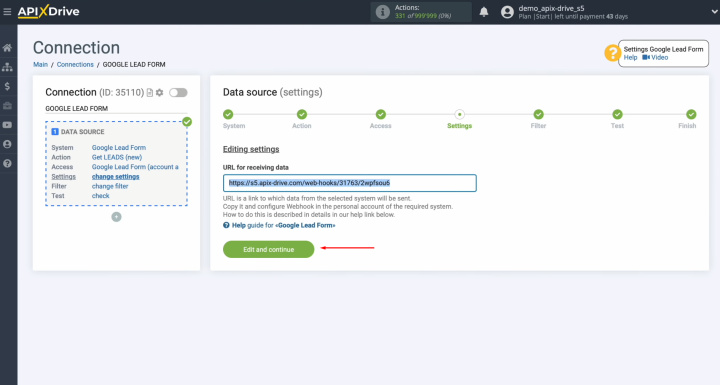
At this point, you'll see a URL generated for receiving data. New lead
data from Google Lead Forms will be sent to this URL. Copy the URL and move forward.
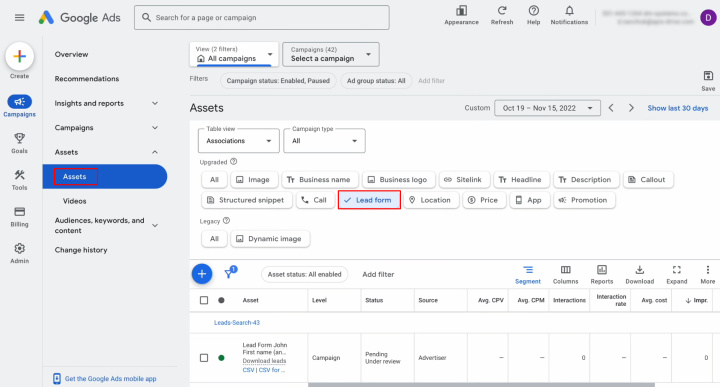
Open your Google Ads account and navigate to the Assets section. Find and
select the Lead form.
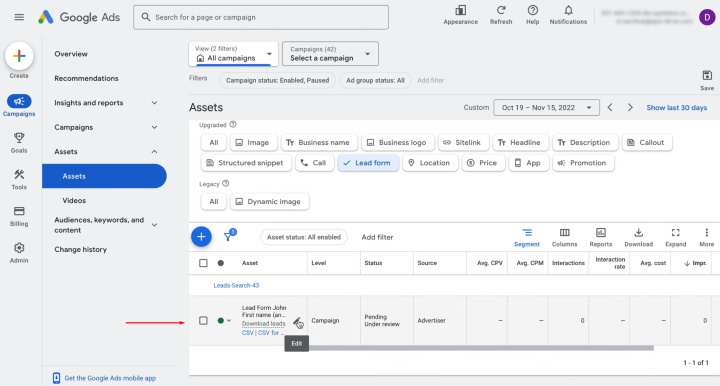
Go to the settings of the form that will collect new leads.
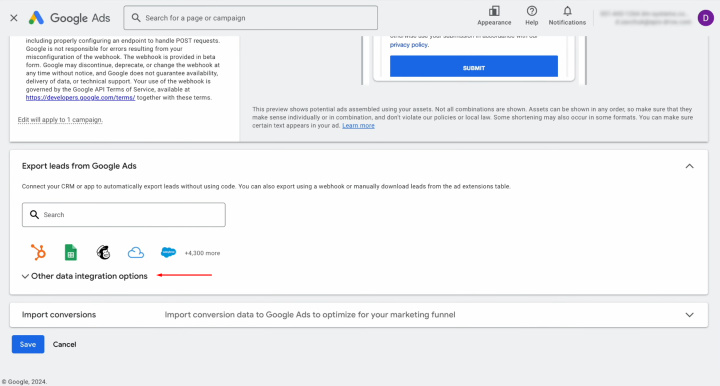
Locate the section labeled “Other data integration options.”
Paste the previously copied URL into the Webhook URL field.
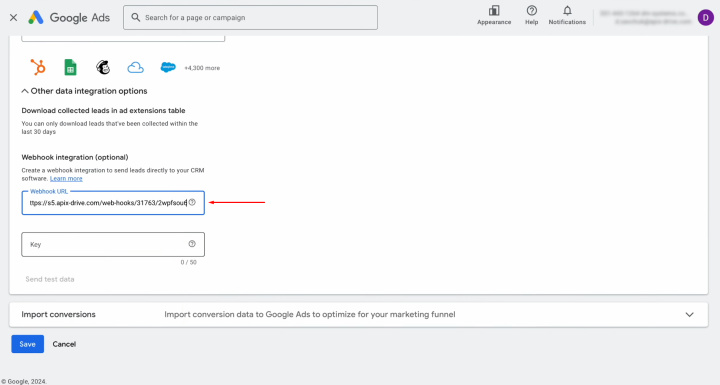
Extract the final segment of the URL.
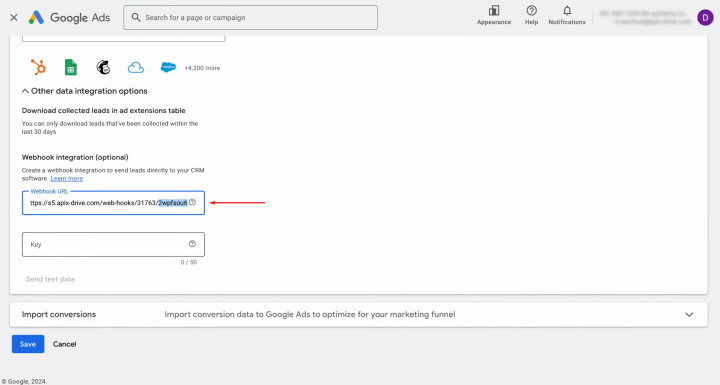
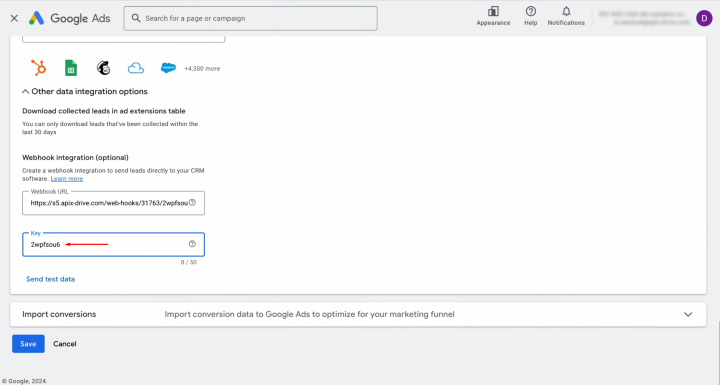
Insert this segment into the Key field in the form settings.
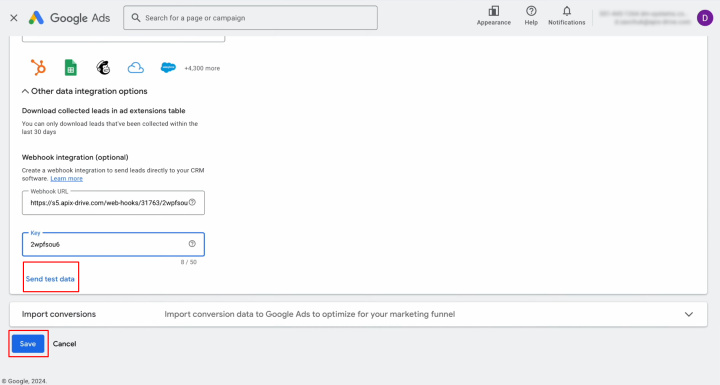
Send test data to the URL provided. Once the test data is successfully
delivered, save the changes.
Go back to your ApiX-Drive dashboard and click on "Edit and
continue."
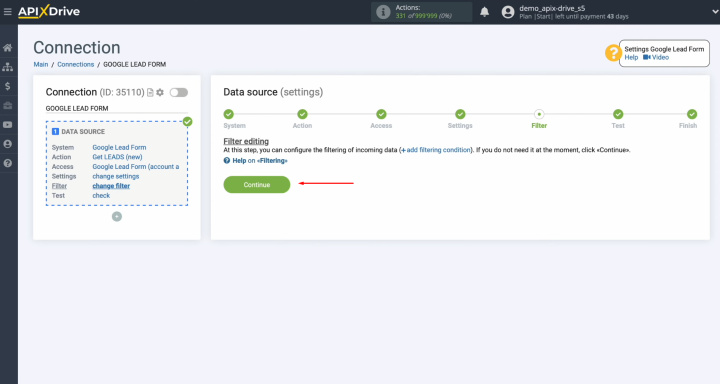
At this step, you have the option to configure a data filter. However,
for this example, it’s not necessary, so click “Continue.”
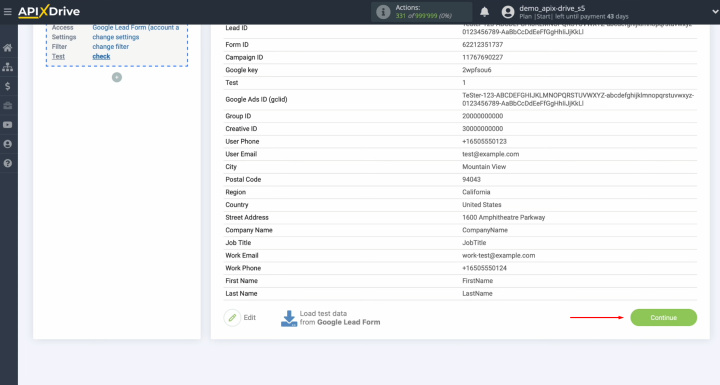
You’ll now see the data that was just sent to the specified URL. If no
data is displayed, revisit the earlier steps to ensure all settings are correct.
If everything looks good, click “Continue.”
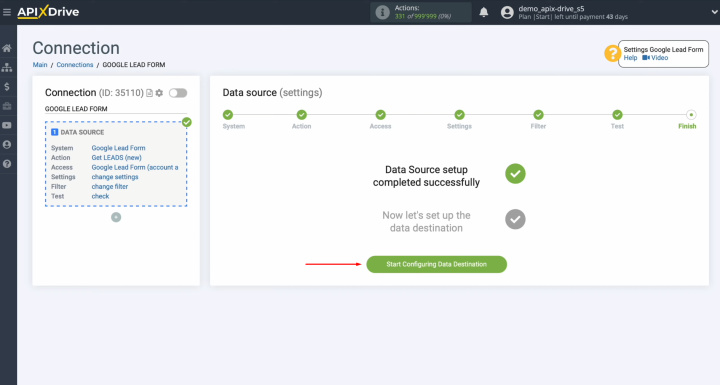
Configuring the Data Destination – Notion
To continue setting up the Notion and Google Leads integration, navigate to the data destination settings.
Choose Notion as the receiving system and click “Continue.”
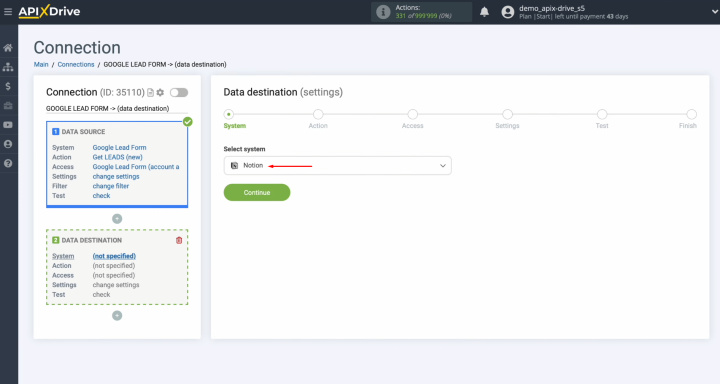
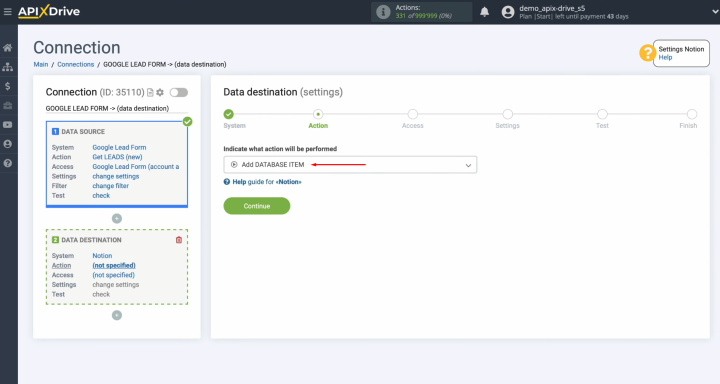
Select the action “Add Database Item”
and proceed by clicking “Continue.”
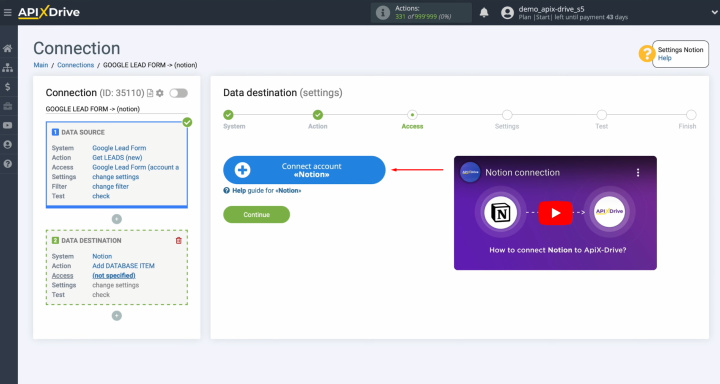
Link your Notion account to ApiX-Drive by following the
provided instructions.
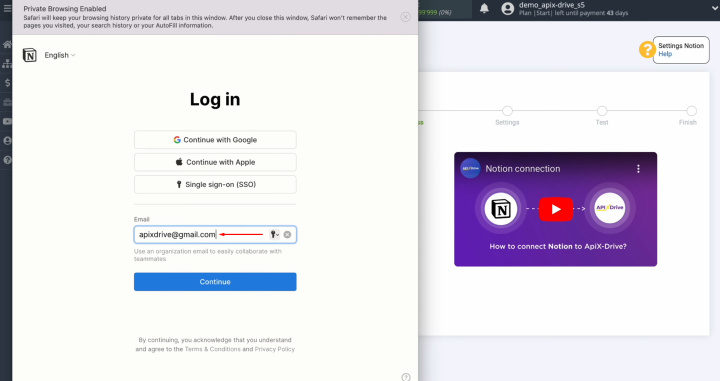
Enter the login (email) for your Notion personal
account and click “Continue.”
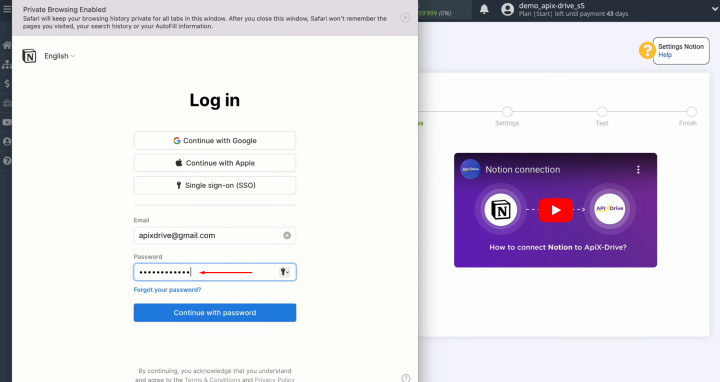
Input your Notion account password and press
"Continue with password."
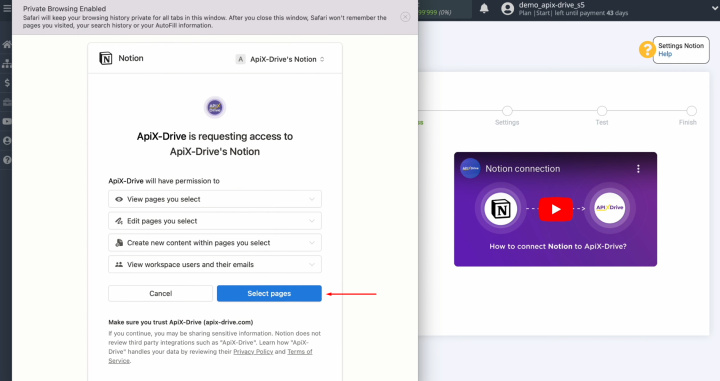
Grant access to your Notion databases by clicking “Select pages.”
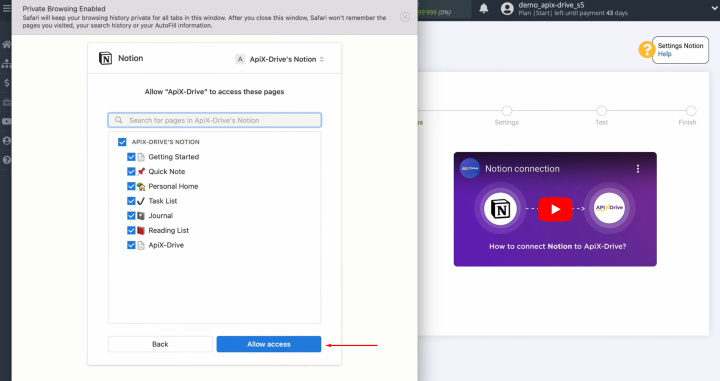
For seamless operation, it’s recommended to grant access to
all databases at once. Ensure all checkboxes are selected and click “Allow access.”
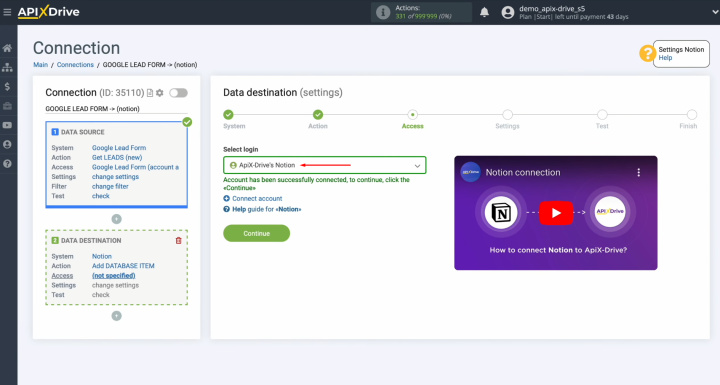
Once your Notion account appears in the list of active
connections, select it and click “Continue.”
Choose the database where new items will be created for
each lead received from Google Lead Form.
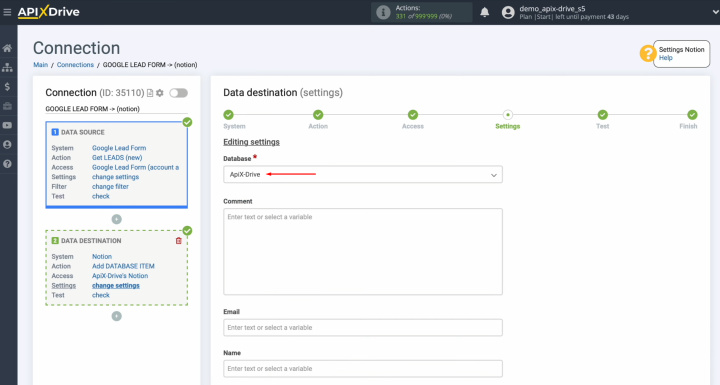
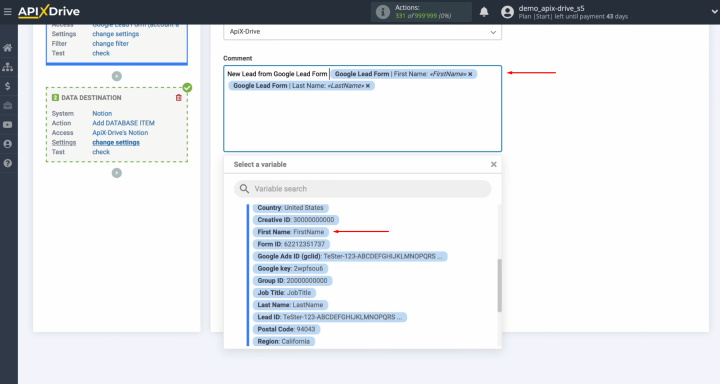
You will now see Notion fields available for creating new
database items. Map these fields to the corresponding variables from Google
Lead Form.
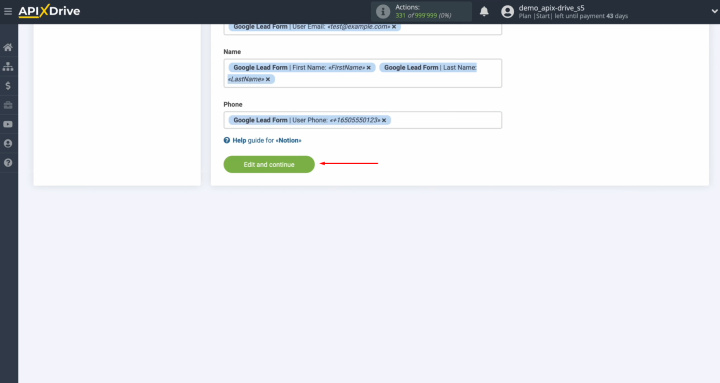
Once all mandatory fields are filled in, click "Edit and continue."
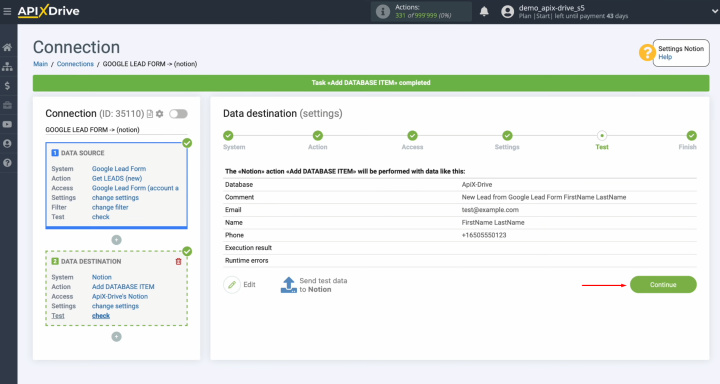
At this point, you’ll see a preview of the data that will
be sent to Notion as new database items for each lead. If any adjustments are
needed, click “Edit” to return to the previous step. To
verify your settings, click “Send test data to Notion.”
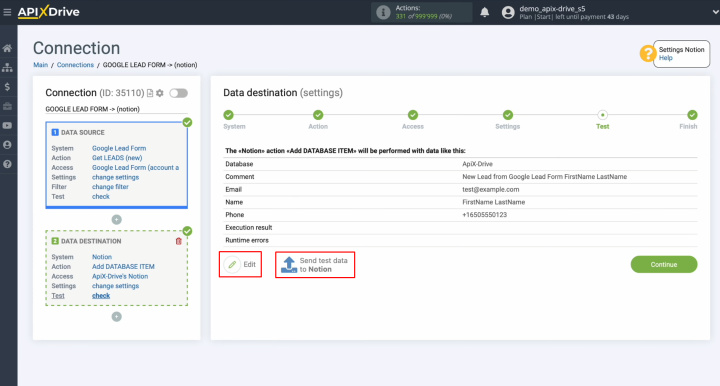
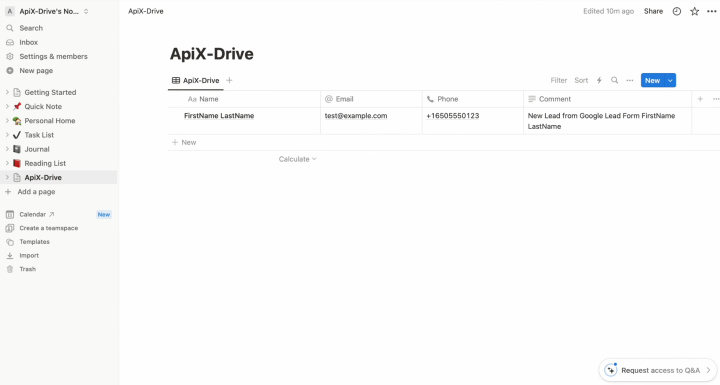
Once the test data is successfully sent, open Notion to
check the results.
Return to ApiX-Drive and finalize the configuration
process.
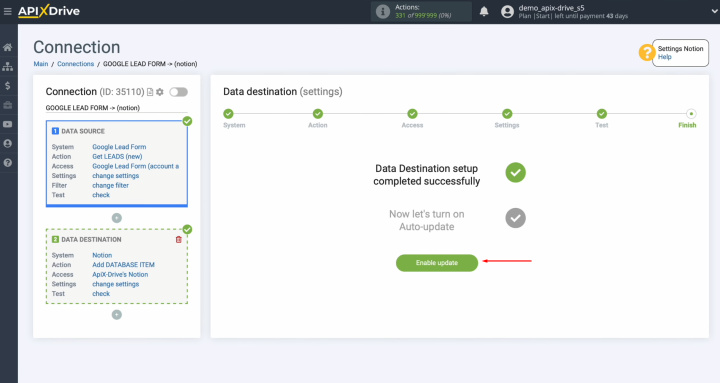
Configuring Auto-Update
To ensure seamless data transfer, enable auto-update for the Google Lead Form and Notion integration. Start by clicking “Enable update.”
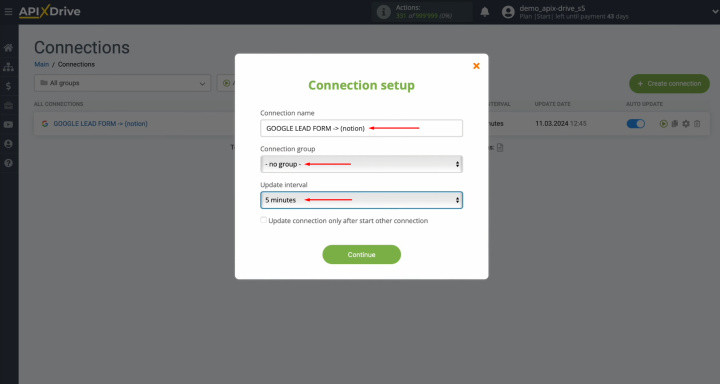
Next, click on the gear icon to access the settings.
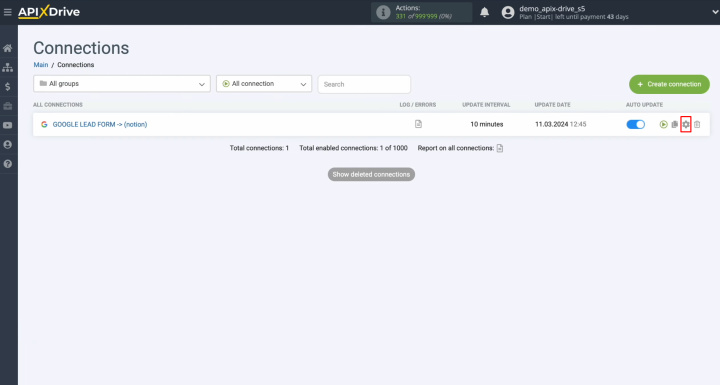
Set the desired interval for the connection to operate,
such as every 5 minutes. In this section, you can also rename the connection or
assign it to a specific group for better organization. Once everything is configured,
click “Continue.”
Congratulations! The integration process is now complete, and
Notion and Google Leads
automation is up and
running. Well done!
What’s the Outcome?
By successfully completing the sync of Google Ads Leads with Notion as outlined in our guide and activating auto-update, you’ve established a robust and uninterrupted connection between these systems. Chances are, you’ve already seen the results firsthand — an automated lead data transfer process that allows you to centralize leads in Notion for streamlined and hassle-free management.
This integration eliminates the need for time-consuming manual data entry. With the help of our ApiX-Drive online connector, the entire process is fully automated, freeing you from routine tasks. This not only saves valuable time but also allows you to focus on building stronger customer relationships. Additionally, it helps you develop innovative marketing strategies and concentrate on other key priorities that can drive your business to greater success.
Read also about other integrations:
