Airtable and Mailchimp Integration: Automatic Creation of Contacts Based on New Rows
Airtable is a universal cloud service for collaborating with information, combining the functionality of databases and spreadsheets. Mailchimp is one of the largest and most popular email marketing automation platforms. If you use both programs, you'll probably be interested in learning how to increase the speed and efficiency of working with them. You can achieve your goal by automating the transfer of data from one system to another. To do this, you need to integrate both platforms. To connect them, we recommend using our online connector, ApiX-Drive. In this article, you will learn how to set up Airtable and Mailchimp integration. This way, you can automatically transfer new data from the cloud databases into the email marketing platform.
Why Automate Data Transfer from Airtable to Mailchimp
Key benefits of automating data transfer from Airtable to Mailchimp:
- Eliminate the risk of errors. When transferring manually, copying errors sometimes occur that cost an entire client (for example, a missing number in a phone number or a letter in an email address). With automatic transfer, such mistakes are excluded.
- Accelerate processing of lead data. All necessary data is sent automatically and simultaneously. Naturally, this is much faster than transferring everything manually.
- 24/7 operation without interruptions. The automated transfer system does not require a lunch break, weekends, or vacations. It doesn't sleep, doesn't get sick, and doesn't get tired.
- Optimization of manager's work. Since routine data transfer will no longer be necessary, the specialist will be able to switch to other tasks aimed at “live” work with clients and requiring a non-standard approach.
- Save time. The time that you had to manually transfer information about potential clients from the database to the mailing service is now completely freed up. Given the rather intense pace of work, the prospect of getting such a break looks very tempting.
- Increased productivity. Since data will be transferred from one system to another without your participation, you will be able to do more. In this way, you will increase your personal effectiveness, as well as the effectiveness of your department and the company as a whole.
You will begin to receive practical benefits from Mailchimp and Airtable integration through the ApiX-Drive online connector immediately. Data entered into the system to collect information (for example, new potential customers) will be automatically sent to the email marketing service as new contacts for mailings. Now you don't have to manually enter the first name, last name, phone number, or email of leads. This will greatly simplify your work, improve the quality of your interactions with your customers, speed up the time they receive feedback, and help you stay ahead of competitors who do not use automation.
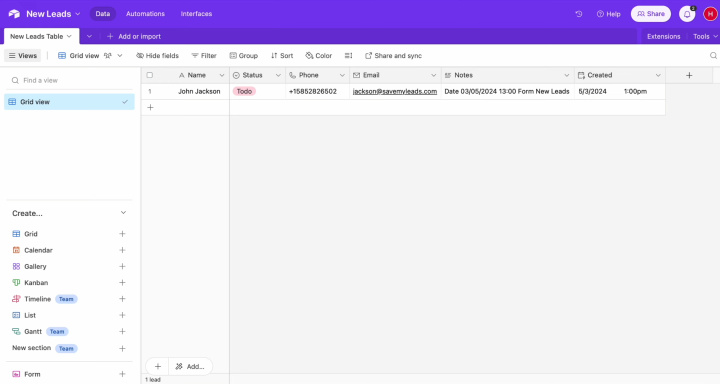
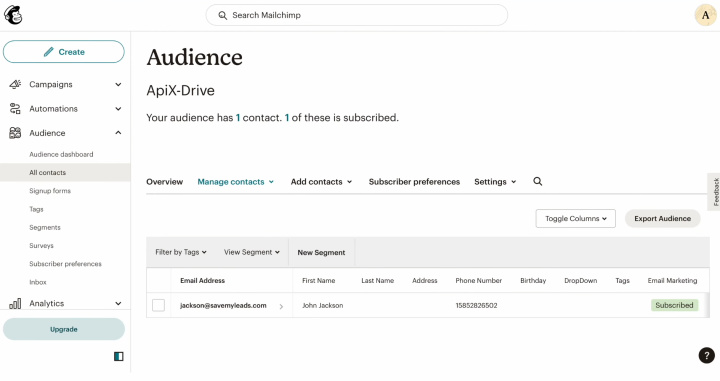
How to Set up Airtable and Mailchimp Integration
To set up Airtable + Mailchimp integration, you don't need to learn programming or understand the intricacies of the API. The ApiX-Drive online connector will do all the work for you. This tool offers quick and easy creation of connections between systems, and its simple and intuitive interface allows you to complete setup in just 10 minutes. The detailed instructions we have prepared in text and video formats will help you not to get confused and do everything without errors.
First, you will need to register on the official website, apix-drive.com. Ready? Great! Now you can begin the integration itself.
Setting up the Data Source – Airtable
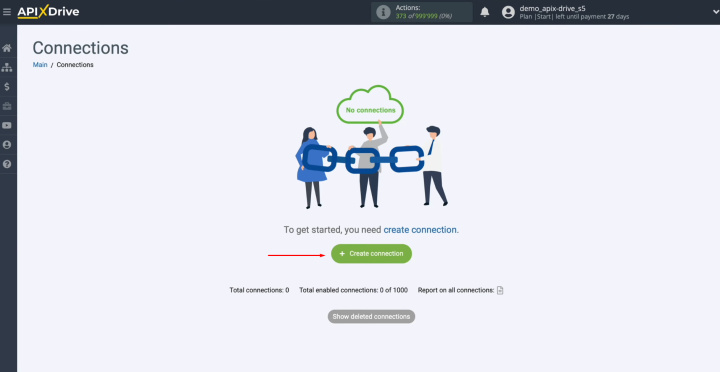
To set up the Airtable integration with Mailchimp, create a new connection. For this, click on the green button.
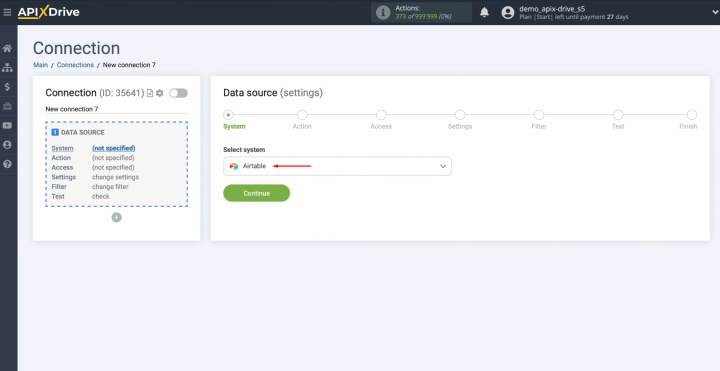
Select the data source system. In this case, you need Airtable. Click “Continue”.
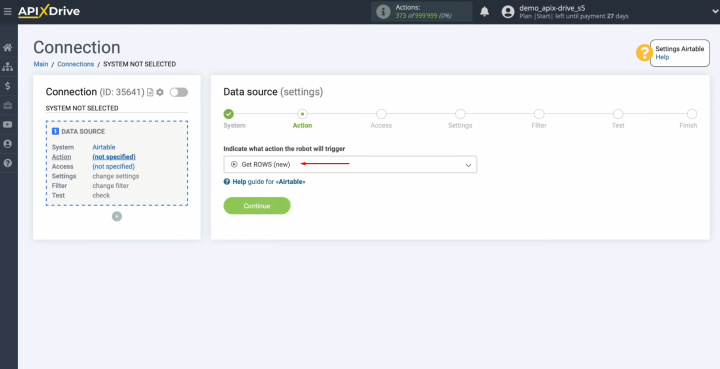
Select the action "Get ROWS (new)". Click “Continue”.
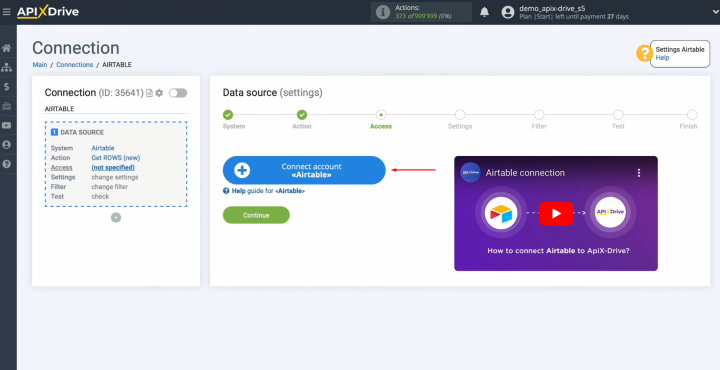
Connect your Airtable account to
the ApiX-Drive. For this, click on
the blue button.
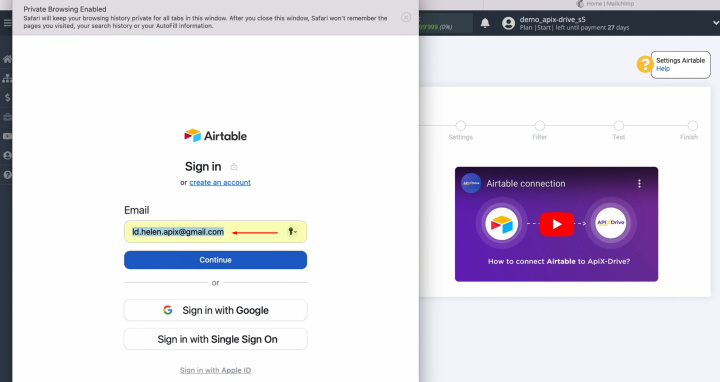
Specify the login of your
Airtable personal account. Click
“Continue”.
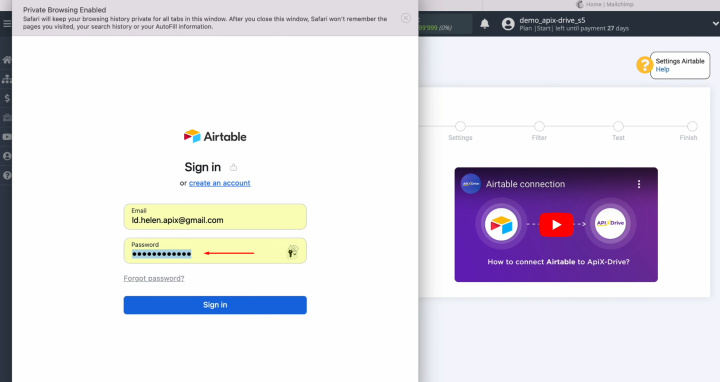
Specify the password of your
Airtable personal account. Click “Sign
in”.
Provide ApiX-Drive access to
work with your Airtable databases. To do this, click "Add a base". We recommend providing access to all
databases at once so that in the future you will be able to work with
them.
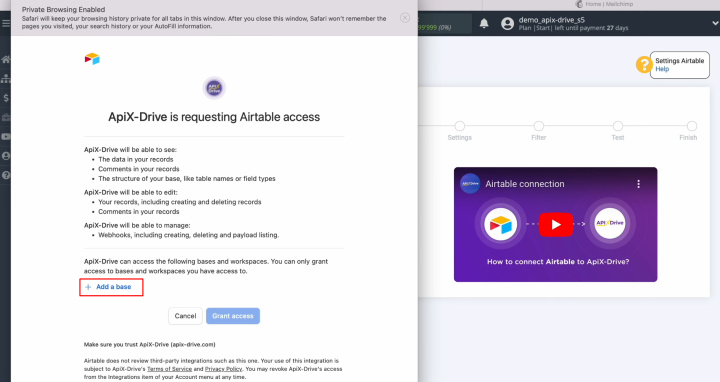
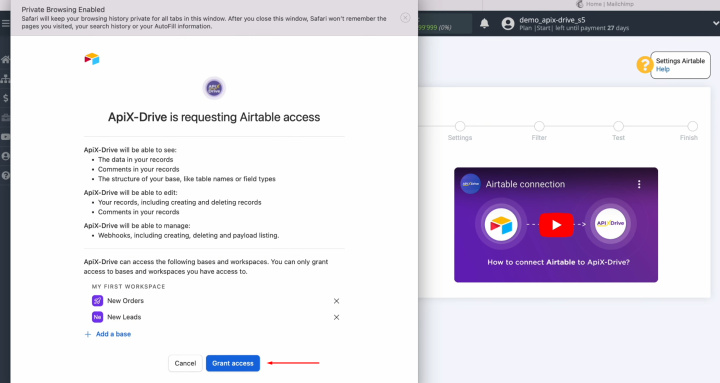
Once all bases added, click “Grant access”.
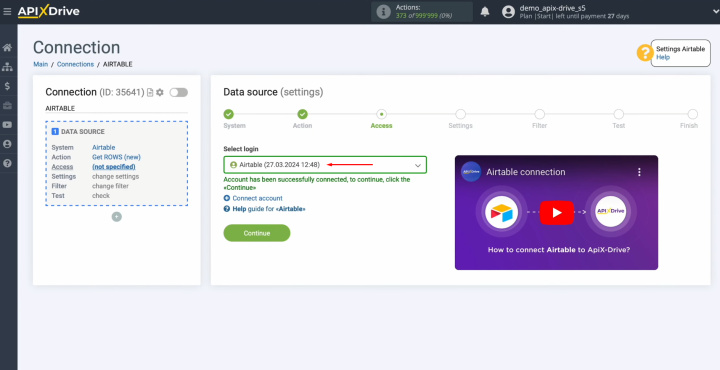
When the connected login
appears in the list of active accounts, select it and click “Continue”.
Select the base from which
we will receive new rows and choose the
table.
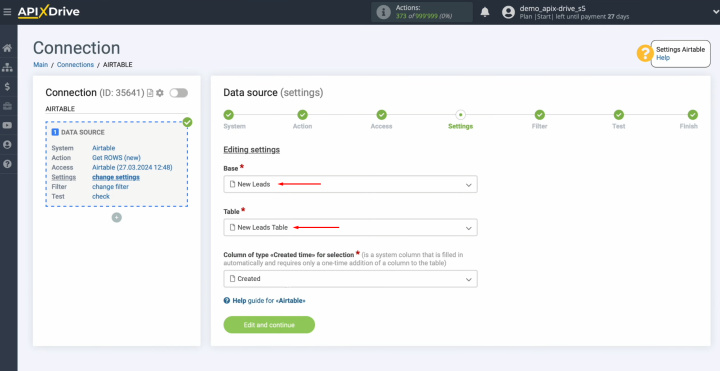
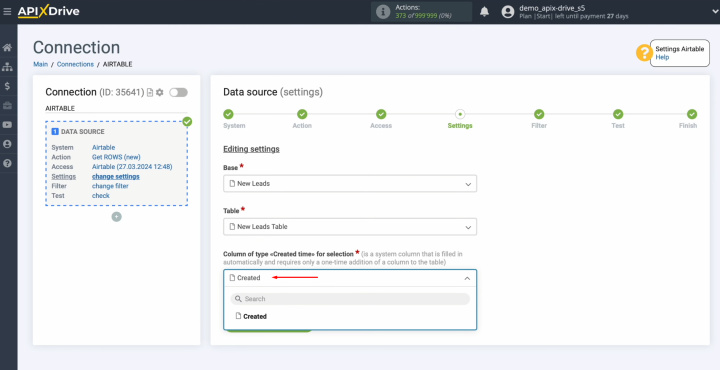
Select a column of type
"Created time". If you don't have anything in this list,
you need to add a new column to your table.
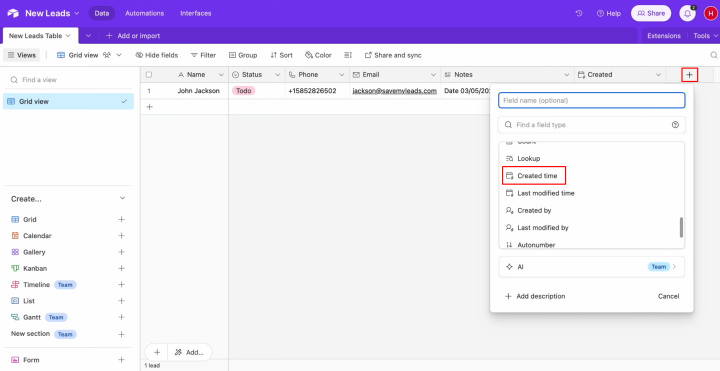
To do this, go to your Airtable account, press "plus" and
select the column "Created
time".
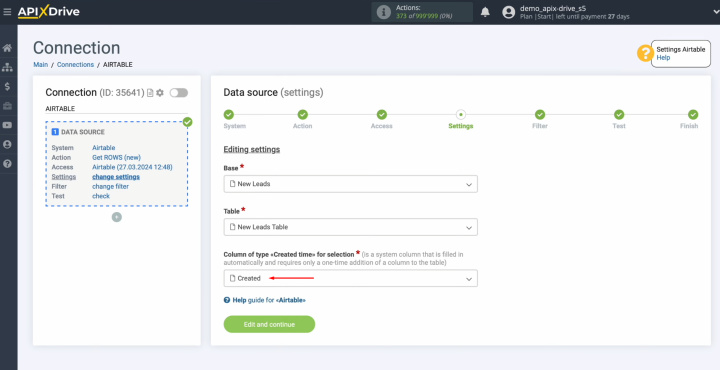
Refresh the ApiX-Drive page and
select a column from the list. Click
“Edit and continue”.
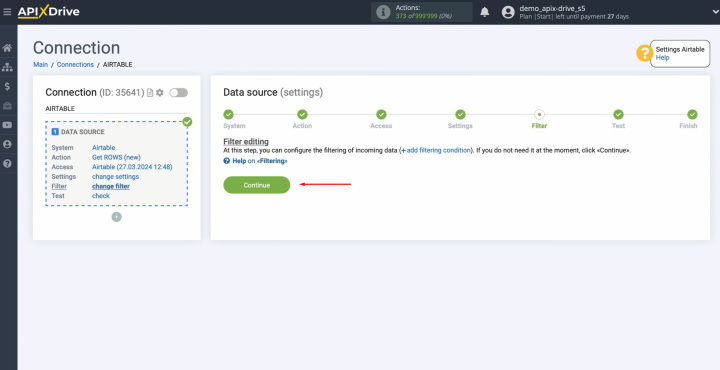
Set up a data
filter. In this case, there is no need for this, so just click “Continue”.
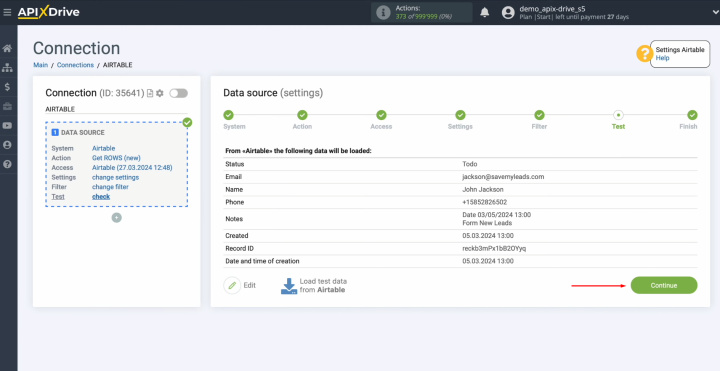
Here, you see the data that
is in the selected table in one of the rows. If you
are satisfied with everything, click “Continue”.
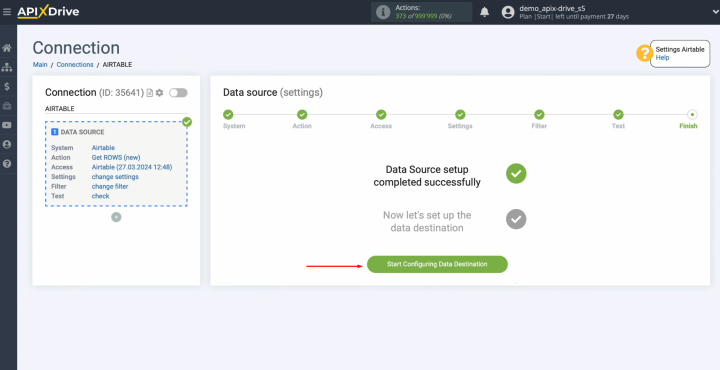
At this point, setting up the Airtable data source has been
successfully completed.
Setting up the Data Receiver – Mailchimp
To set up the Mailchimp integration with Airtable, click on the green button.
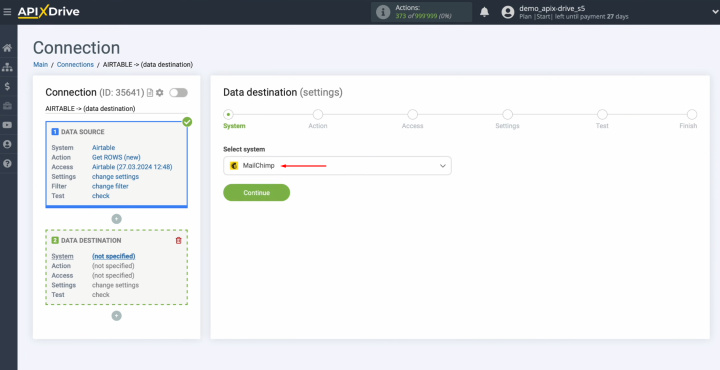
Select the system. This is Mailchimp. Click “Continue”.
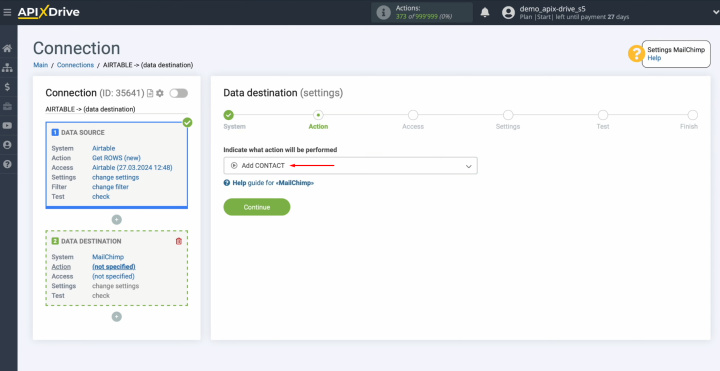
Select an action "Add CONTACT". Click “Continue”.
Connect your Mailchimp account
to the ApiX-Drive. For this, click on
the blue button.
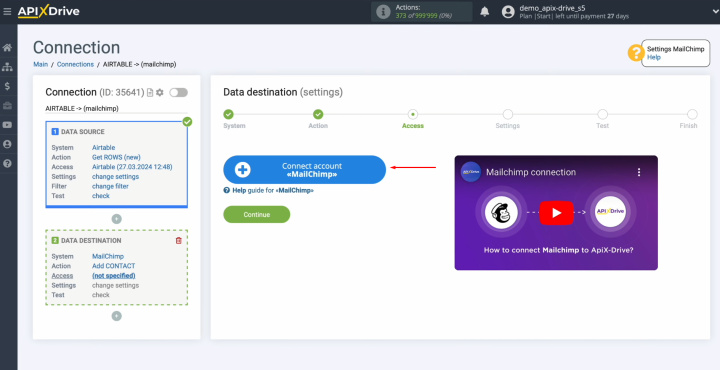
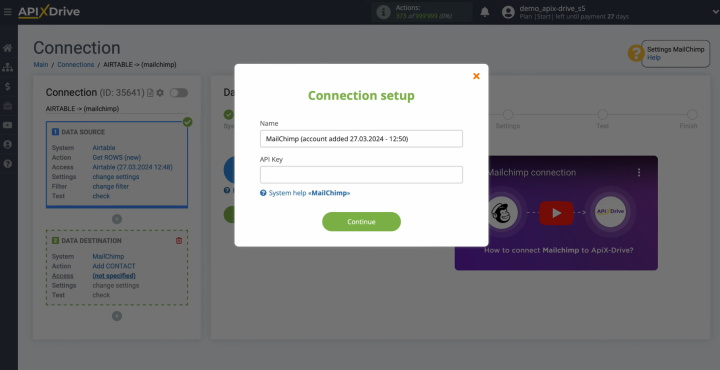
Specify the API key.
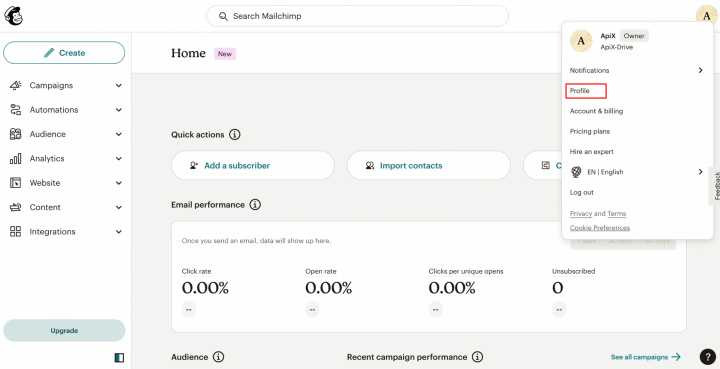
To receive it, go to your profile in Mailchimp personal account.
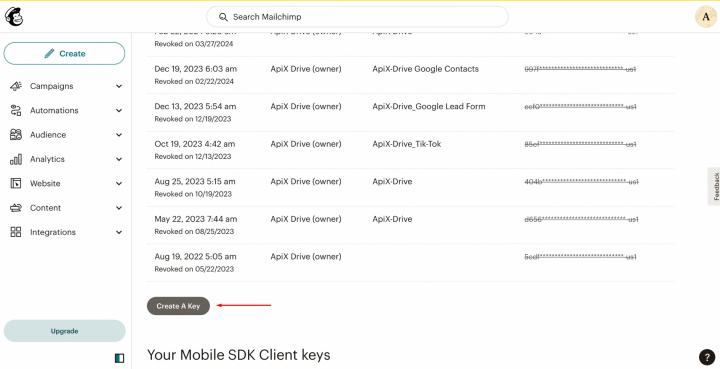
Find sections "Extras", and "API keys".
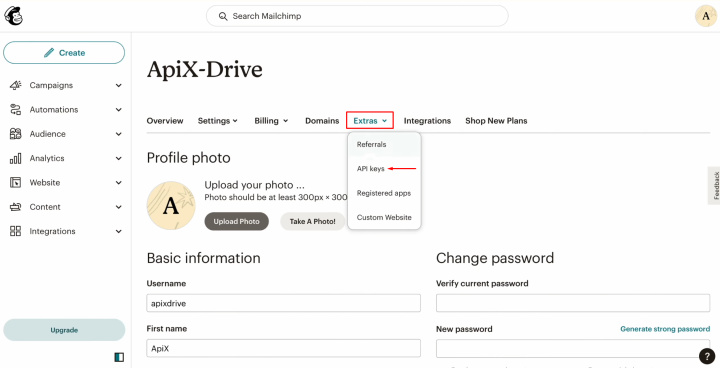
Click
"Create A Key".
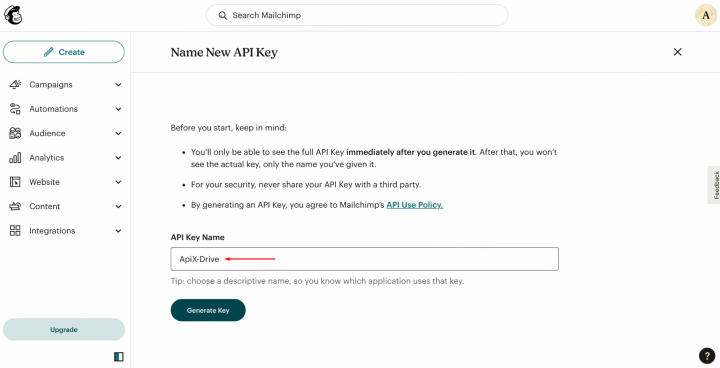
Specify a
name for the new key and click “Generate Key”.
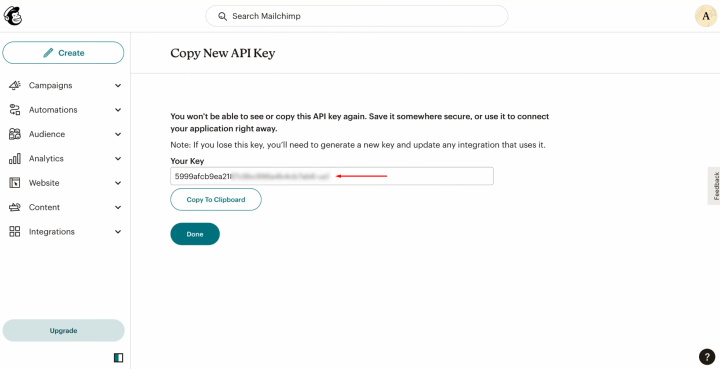
Copy the API
key and click “Done”.
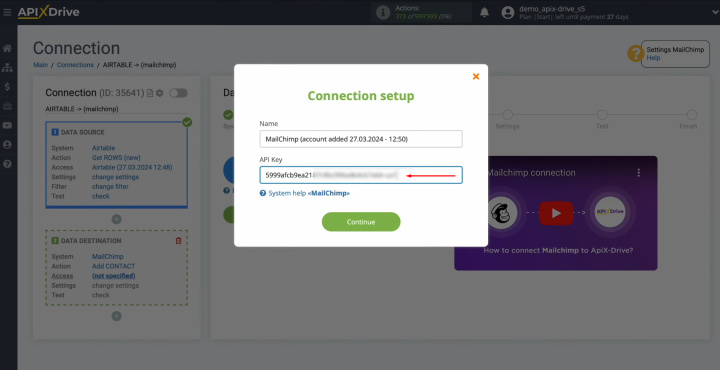
Paste the API
key into the appropriate field in the ApiX-Drive. When
the required field is filled in, click “Continue”.
When the connected account appears in the list of active
accounts, select it and click “Сontinue”.
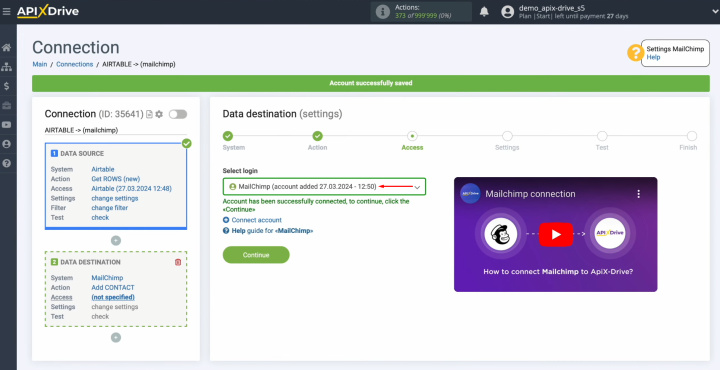
Select the list to which new contacts will be added.
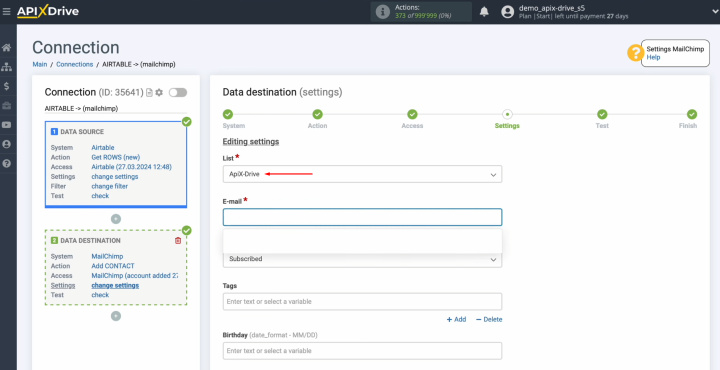
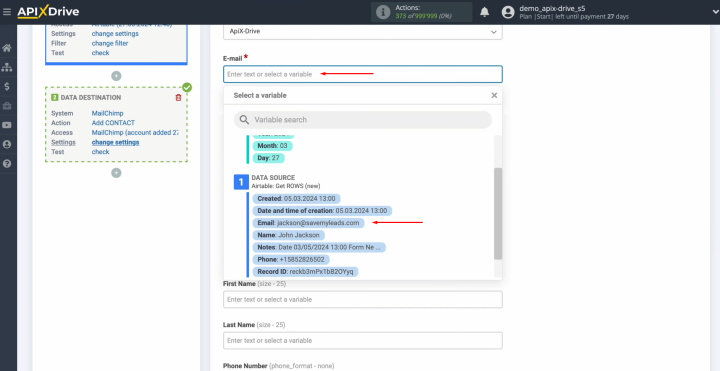
Now, you see Mailchimp fields for creating new contacts. You can assign
variables from Airtable to these fields. To do this, click in the field and select the appropriate variable from the drop-down list.


You can also use system variables and enter text manually.
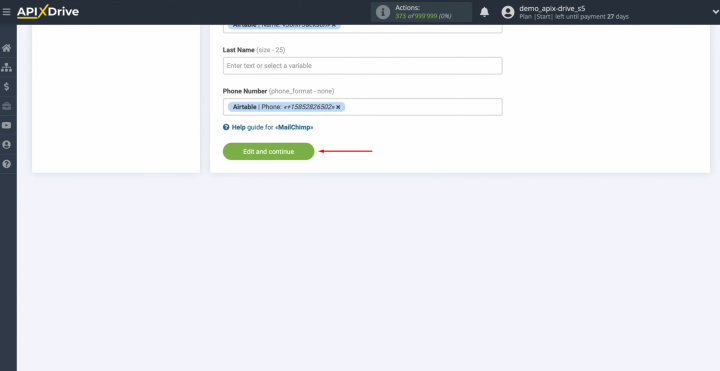
When all required fields
are filled in, click “Continue”.
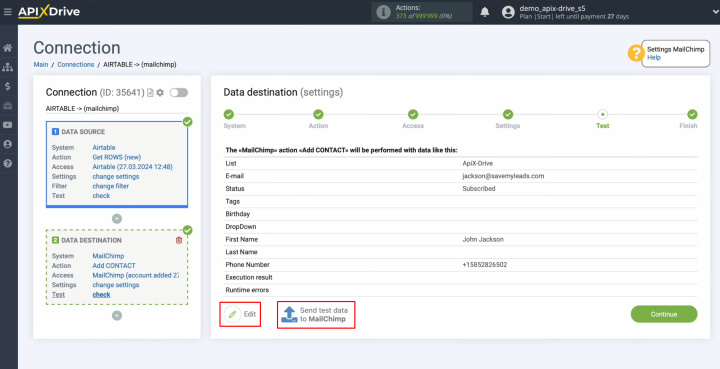
Here, you see an
example of the data that will be sent to Mailchimp in the form of new
contacts with each new row from Airtable. If you are not satisfied with
something, click “Edit” and you will go back a step. To check the correctness of the
settings, click “Send test data to Mailchimp”.
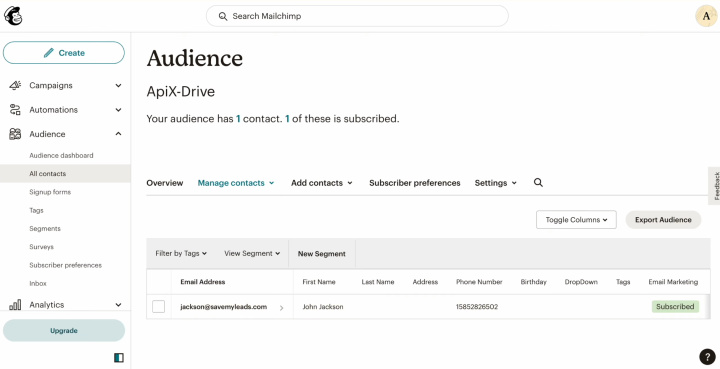
After successful sending, go to
Mailchimp and check the result.
If you are satisfied with
everything, return to the ApiX-Drive and continue setting up.
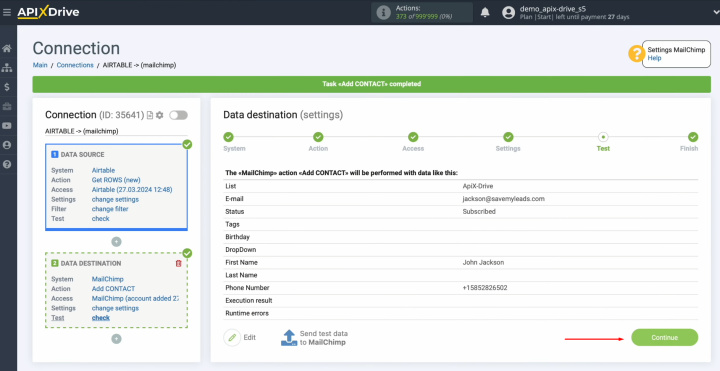
This completes the setup of Mailchimp as a data receiver.
Setting up Auto-update
In order for data transfer to occur automatically, configure auto-update. Click on the green button, “Enable update”.
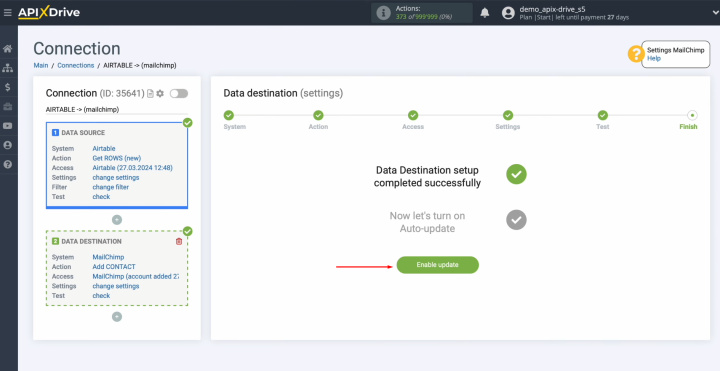
Click on the
gear button.
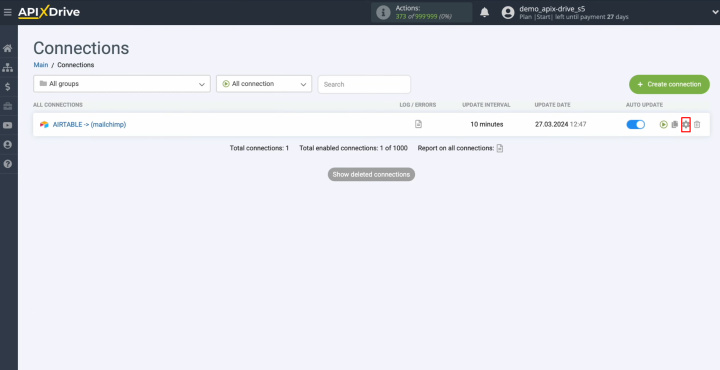
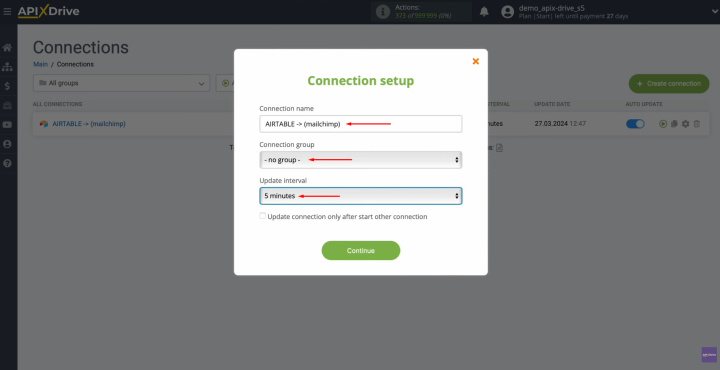
Select the
interval for the operation of the connection. For example, once every 5
minutes. Moreover, here you can give the connection a new name and assign it to the desired group. Click “Continue”.
That's all. Mailchimp +
Airtable integration was
completed. Congratulations!
What is the Result
Airtable Mailchimp integration via ApiX-Drive is a progressive method for optimizing work processes. Using our online connector, each of the users can create fully automated solutions without any programming knowledge. By correctly setting up the integration and activating auto-update, you will ensure stable interaction between systems. If you have already done this according to our instructions, then you have probably already appreciated the first results – the uninterrupted automatic transfer of data.
Mailchimp and Airtable integration will make your job easier by eliminating the time-consuming need to manually transfer data. Automating this process will not only allow you to get rid of the monotonous daily routine but also increase your productivity. You will be able to focus on improving customer service, developing new marketing strategies, and other activities that will contribute to the growth of your business.

