How to Send Dropbox Files to Google Drive Automatically

When employees of a company use Dropbox and Google Drive simultaneously, the need to transfer files from one cloud storage to another manually takes up working time. Beyond wasting valuable time, manual processes increase the risk of human error and workflow delays. Dropbox and Google Drive integration fully automates this process, minimizing risks and saving human resources. In this article, we will tell you how to set it up in a few minutes using a user-friendly online connector.
Why Automate Dropbox-to-Google Drive Transfers
If you have to transfer files from Dropbox to Google Drive often, this seemingly elementary operation makes you constantly distracted from work and waste time intended for other tasks. If the need to transfer files arises infrequently, in order not to miss the appearance of new materials, you have to constantly monitor the storage, also spending time and attention on it.
Without automated monitoring, file updates can easily go unnoticed for days, stalling dependent business processes. Automating this routine task eliminates these delays completely.
Google Drive and Dropbox integration allows you to fully automate the process of transferring files between the two platforms. Having set it up once, you will no longer have to monitor the repository and move materials manually. New files will be transferred by themselves shortly after they appear in the specified folder in Dropbox. As a result, the team working in Google Drive will receive the relevant materials they need to work on in a timely manner.
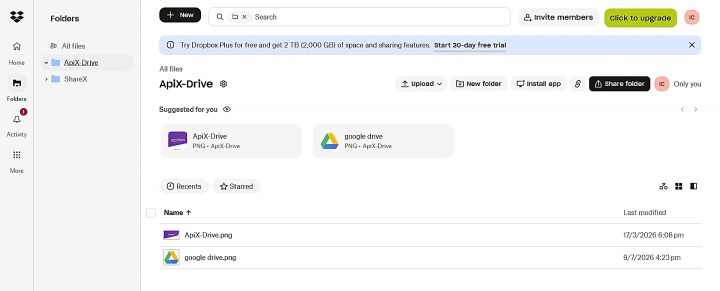
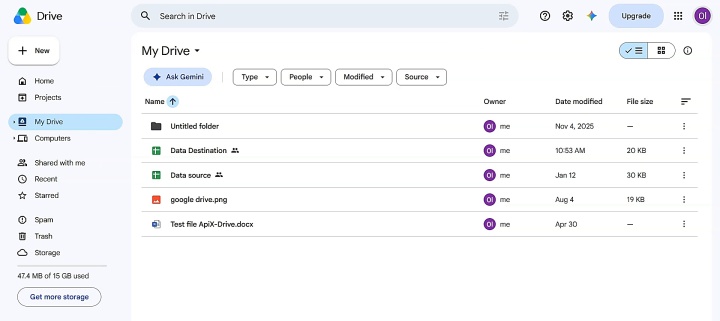
What does this mean for business? First, it optimizes the use of time by reducing unnecessary operational costs. By directing the saved hours to strengthen marketing or product development, you can gain new opportunities to increase revenue. The team will also benefit from automation: employees will have fewer routine tasks and will no longer have to monitor the appearance of new files.
How to Connect Dropbox to Google Drive
To set up an integration that will allow you to move files from Dropbox to Google Drive automatically, we use the no-code ApiX-Drive connector. The platform is so intuitive that anyone with basic computer skills can connect both cloud storage services. In fact, the integration itself is already ready. You just need to configure it for yourself. It will only take a few minutes.

Before you start setting up, make sure you have access to both storage accounts, determine which Dropbox folder the files will be transferred from and which Google Drive folder they should go to. Here is a step-by-step guide on how to connect Dropbox to Google Drive.
Data Source Settings: Dropbox
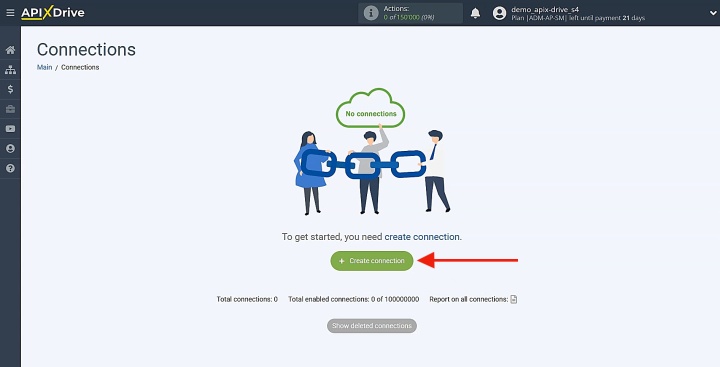
Start by creating a new connection.
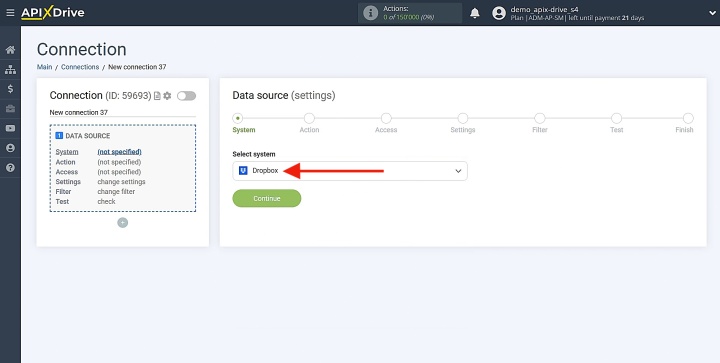
Select the data source system. In this case, it will be Dropbox.
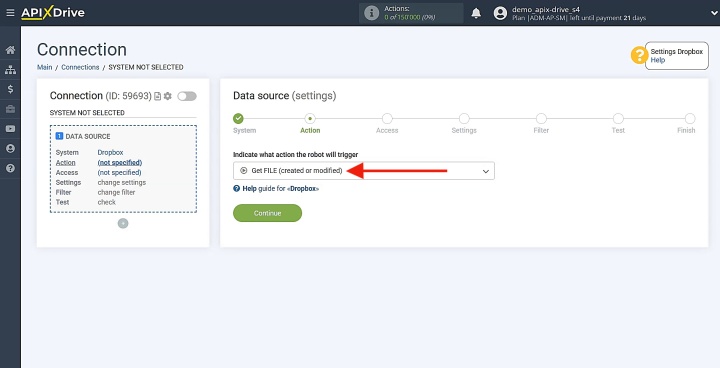
Select the action: Get FILE (created or modified).
Now connect your Dropbox account to ApiX-Drive.
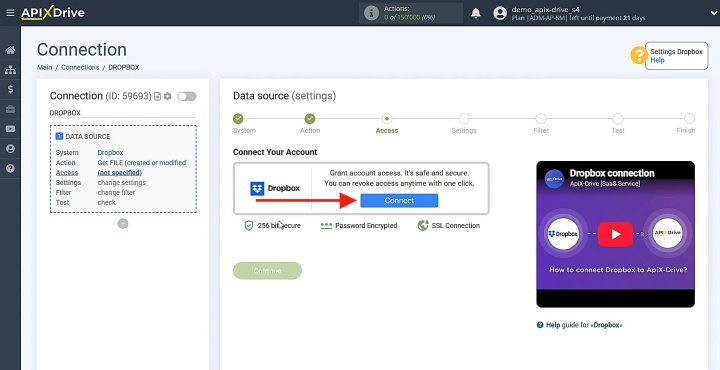
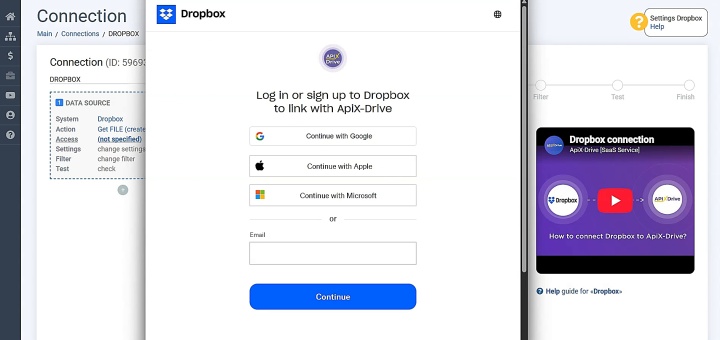
Enter the login credentials for your Dropbox account.
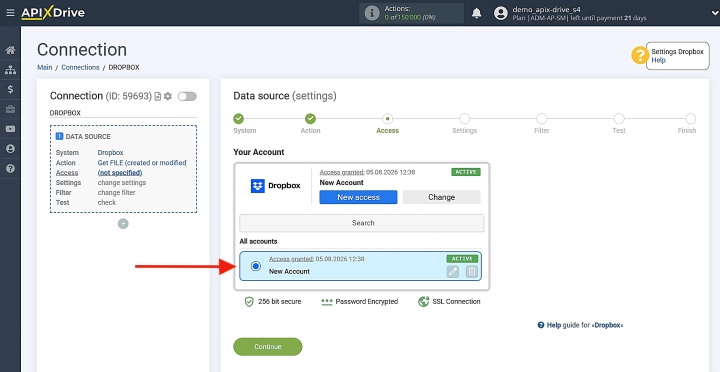
Once the account appears in the list of active accounts, select it and click Continue.
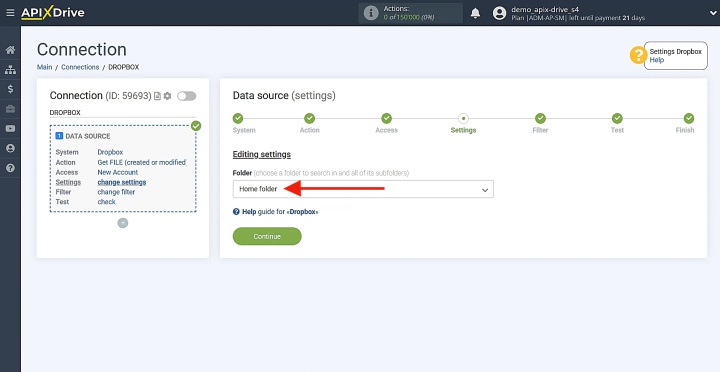
In the settings section, you need to choose which folder in your Dropbox account to monitor for new files. In the dropdown list, select the desired folder and then click Continue.
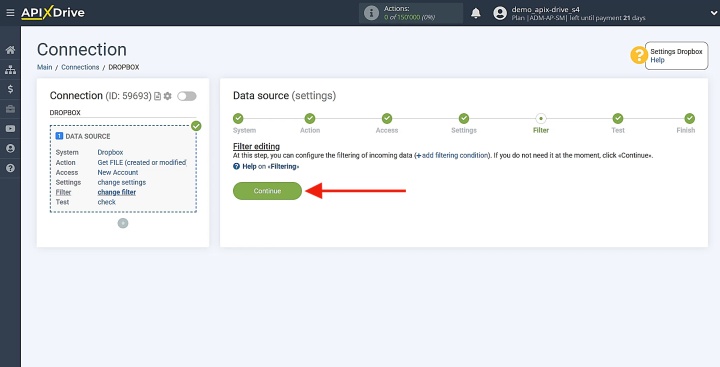
At this point, you have the option to configure a data filter. However, it's not necessary for this setup, so simply click Continue.
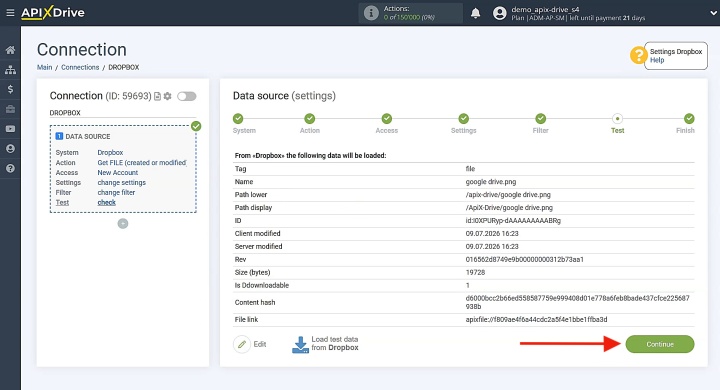
At this point, you should see test data that will be transferred to Google Drive. If everything looks correct, click Continue to proceed.
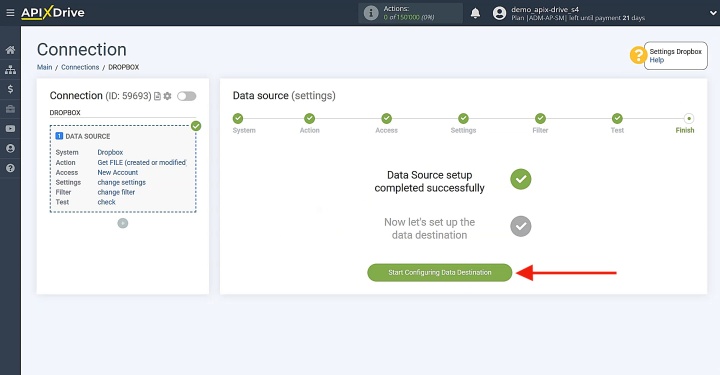
The configuration of the Dropbox data source is now complete.
Data Destination Settings: Google Drive
Now let's move on to configuring the data receiver.
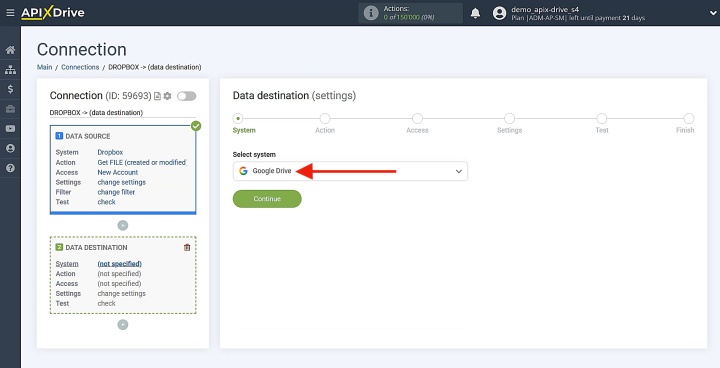
Select the data destination system. In this case, it will be Google Drive.
Select the action: Upload FILE.
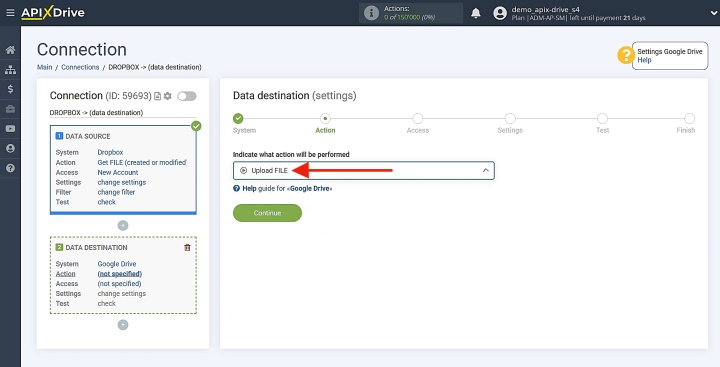
Now you need to connect your Google Drive account to ApiX-Drive.
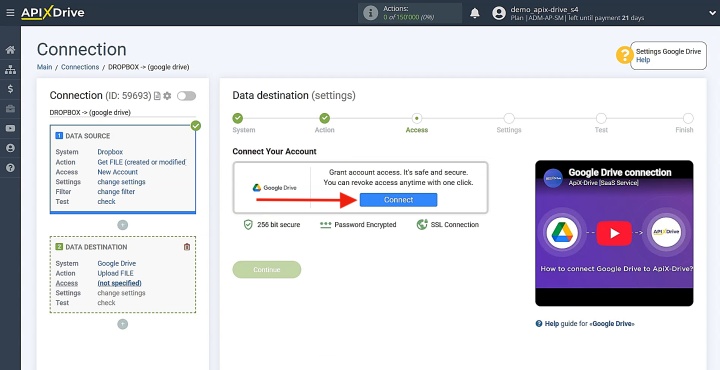
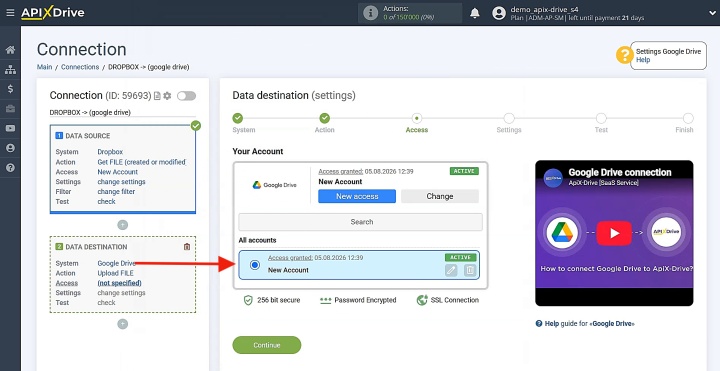
Allow ApiX-Drive to access and work with your Google Drive account. Once the account appears in the list of active accounts, select it and click Continue.
Next, specify the destination folder, file link, file name, and, if needed, the MIME type for the files you want to transfer.
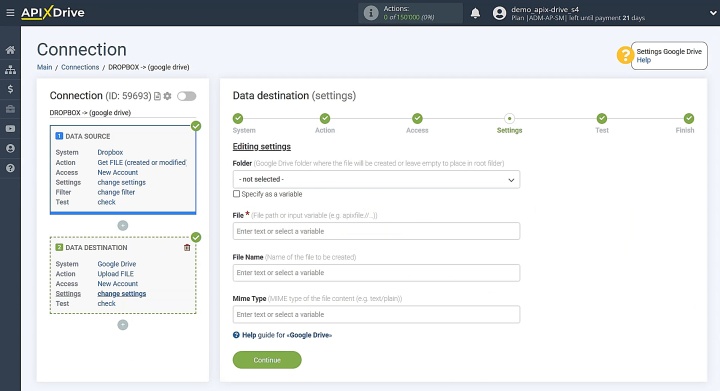
You can select the appropriate options from the dropdown menu or enter the values manually rather than using variables. After that, click Continue to proceed.
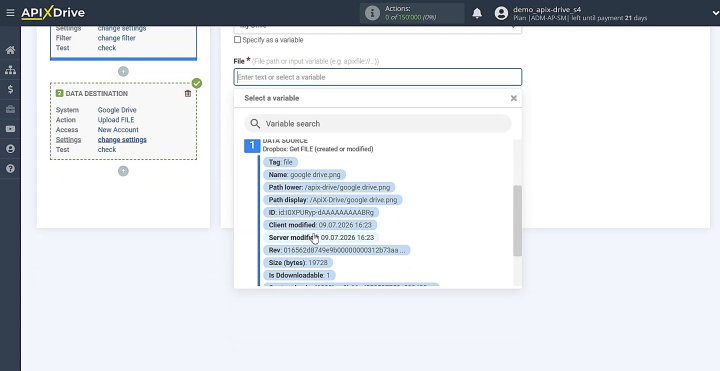
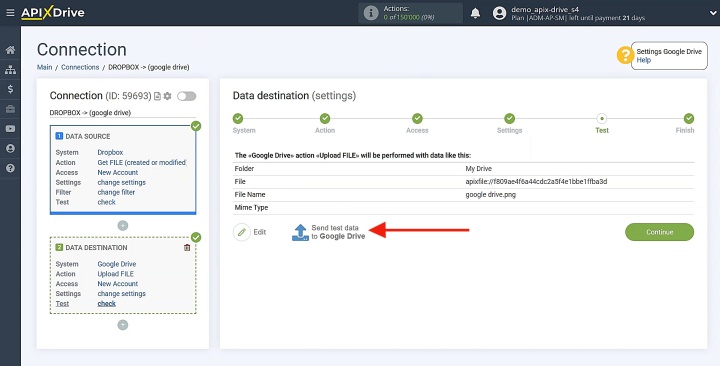
At this stage, you should see the test data that will be transferred to Google Drive. To verify that the settings are correct, click Send test data to Google Drive.
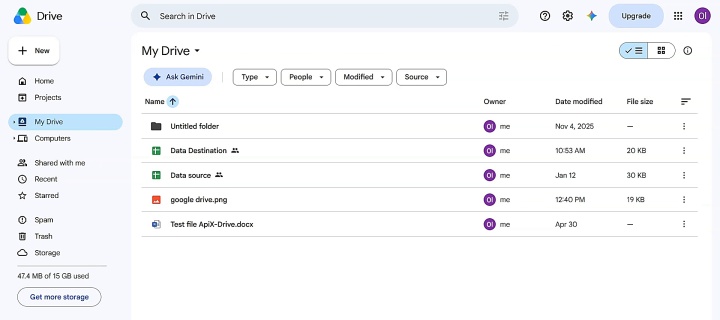
Go to Google Drive and check the result.
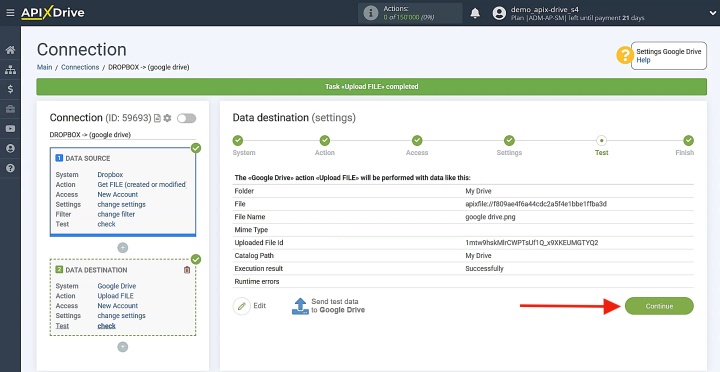
Then, go back to ApiX-Drive to continue with the configuration.
Enable Auto-Update
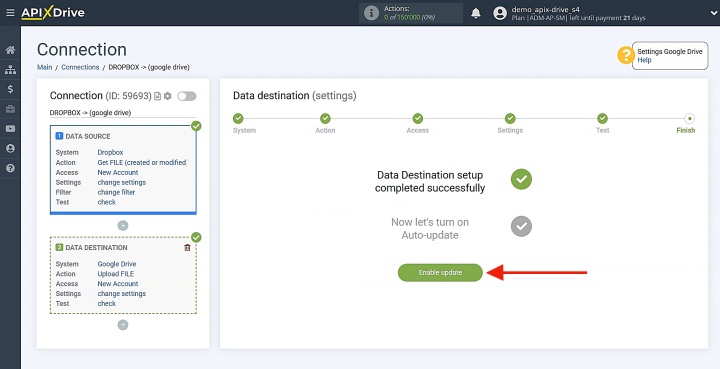
Now configure the auto-update settings for transferring files from Dropbox to Google Drive. To achieve this, click the Enable update button.
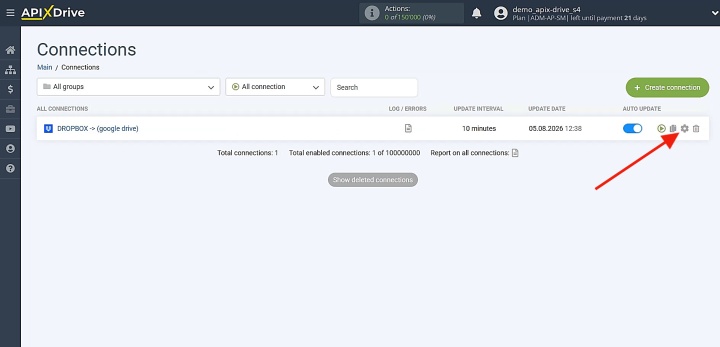
Next, click on the gear icon to access additional settings.
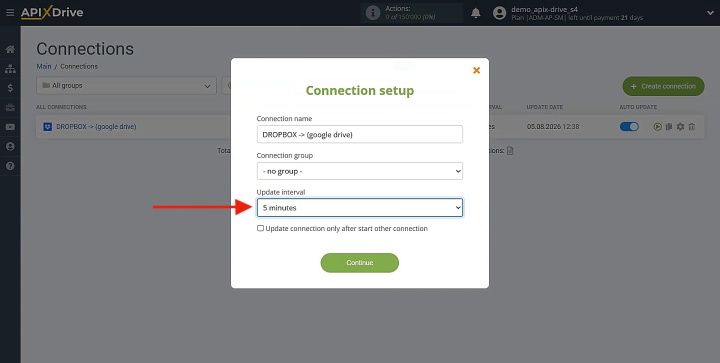
Choose how often the system should check for updates. For example, you can set it to 5 minutes. In this window, you can also rename the connection and assign it to a specific group if needed. When you're done, click Continue.
The integration has been set up successfully. The system starts the Dropbox to Google Drive file transfer.
Bottom Line
Automating routine operations is no longer just a trend, but a business necessity for remaining competitive. Transferring files from Dropbox to Google Drive is a prime example of a process that should be automated. It eliminates manual delays and human error, helping teams boost productivity and focus their resources on high-value tasks.
Read also about other integrations:
- How to Connect Google Drive to Google Sheets for Automatic File Tracking
- Webflow and Slack Integration: Setting Up Automatic Notifications
- Facebook and Airtable Integration: Automatic Transfer of New Leads
- Google Lead Form and Google Sheets Integration: Automatic Lead Transfer
- Google Drive and Box Integration: How to Transfer Files Automatically