How to Integrate Google Contacts and SendGrid: Step-by-Step Instruction
Google Contacts is a popular tool for collecting and managing contacts. SendGrid is a cloud platform for automating email communications. If you use both services, you likely want to optimize work with them. This can be achieved through their integration using the ApiX-Drive online connector. In our article, you will learn how to perform Google Contacts and SendGrid integration. This will automate the transfer of new contacts for emails.
Why Automate Data Transfer from Google Contacts to SendGrid
Important benefits of automating data transfer from Google Contacts to SendGrid:
- Minimize errors. Manual data transfer is prone to errors, such as missing a digit in a phone number or a letter in an email address. These can easily cost you a customer. Automation eliminates these problems.
- Fast processing of lead information. Automatic data transfer occurs instantly, which significantly speeds up the process compared to the manual method.
- Continuous operation of the system. The automated process does not require lunch breaks, weekends, sick leave, or rest. It works around the clock without losing quality.
- Optimization of managers' time. Automation frees specialists from routine data transfer, giving them the opportunity to engage in more complex and important tasks.
- Increased productivity. Automating the data transfer process allows you to do more work in the same amount of time, increasing the efficiency of your department and your company.
SendGrid and Google Contacts integration allows you to automatically transfer new contacts to the email marketing system. There, they will be immediately processed as new contacts for mailing. You will no longer need to manually copy every detail of customer info (name, surname, phone numbers, emails, etc.). This will help you optimize workflows and improve customer service. It will speed up feedback. Also, you will gain an edge over competitors who don't use automation.
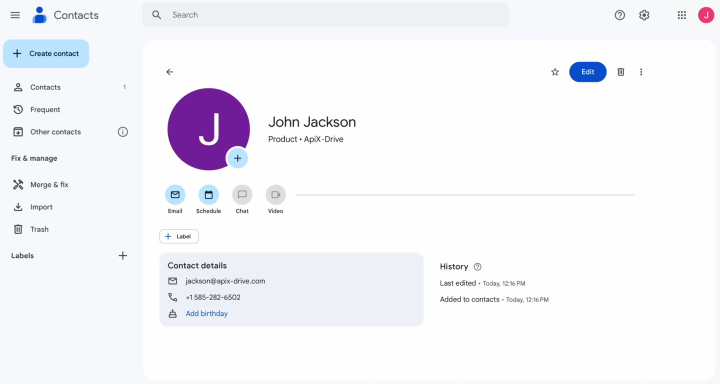
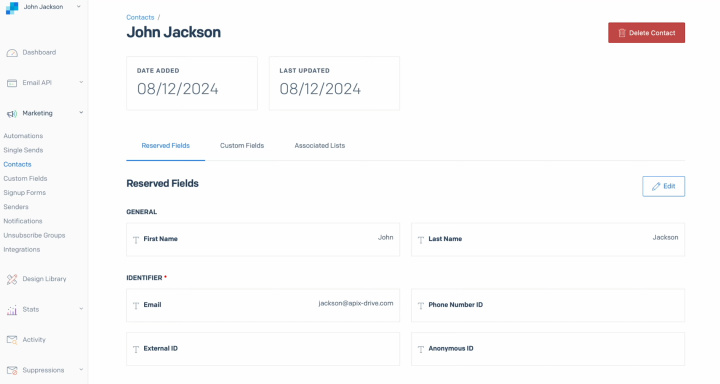
How to Set Up Google Contacts Integration with SendGrid
To perform Google Contacts + SendGrid integration, you don’t need to learn the basics of programming or understand the details of the API. All the necessary tech actions will be performed for you by our online connector ApiX-Drive. This tool is designed specifically for quick and easy integration of systems. With its intuitive interface and clear instructions, you can set everything up in just 10 minutes. Moreover, you will have access to detailed video and text guides that will facilitate the process of connecting your accounts.
So, let's take the first step. Register on the website apix-drive.com. Once your personal account is created, you can proceed to the SendGrid + Google Contacts integration.
Setting Up the Data Source – Google Contacts
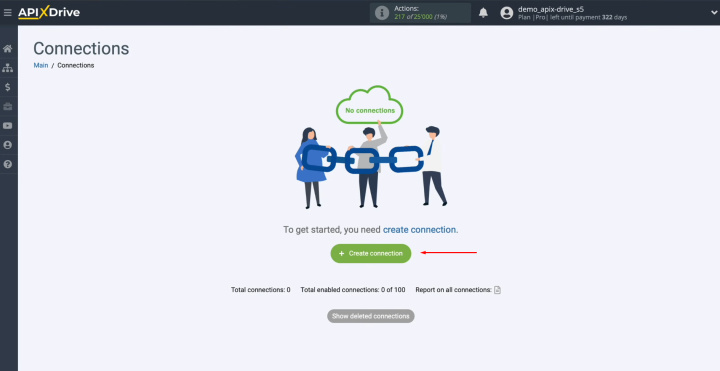
To set up the Google Contacts integration with SendGrid, first, create a new connection.
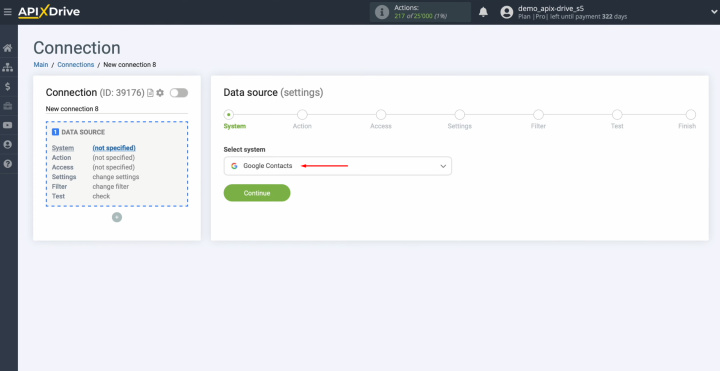
Select the
data source system. You need Google Contacts. Click
“Continue.”
Choose the action “Get CONTACTS (new/modified).” Click
“Continue.”
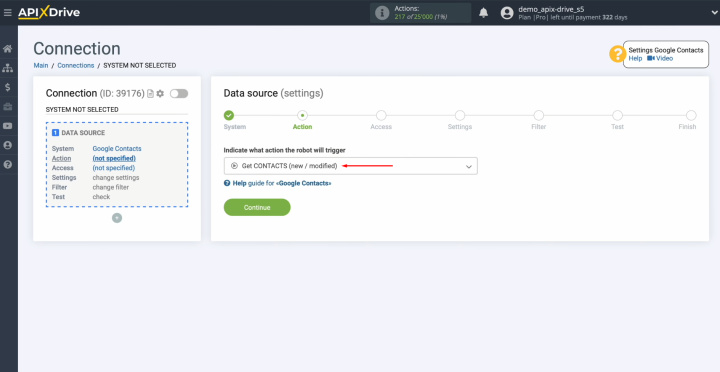
Connect
your Google account to ApiX-Drive.
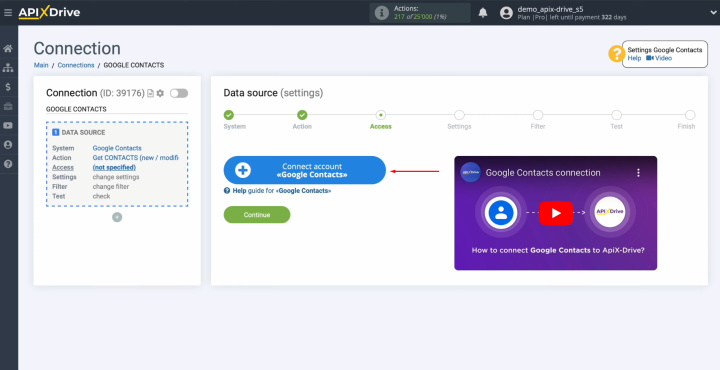
Specify the
login of your Google personal account. Click “Next.”
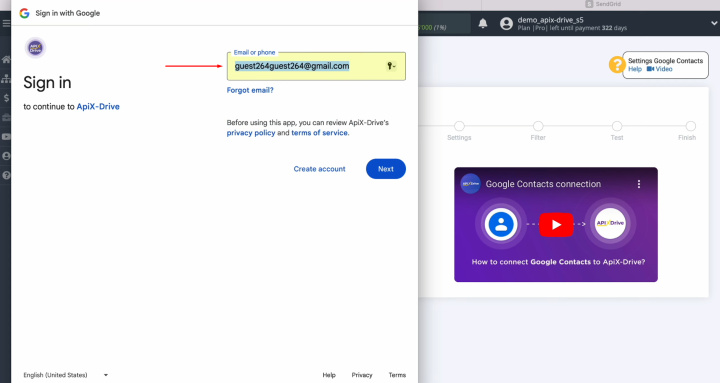
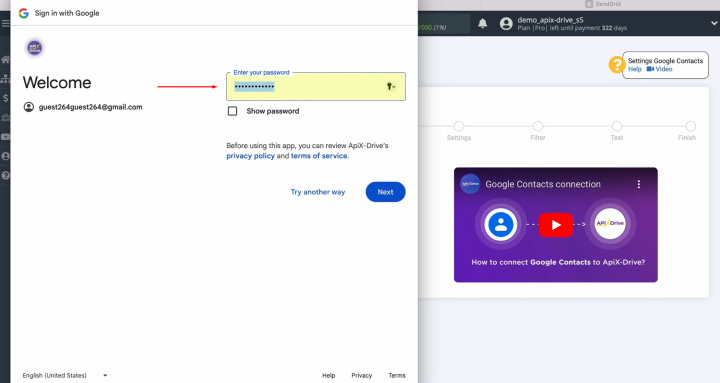
Specify the password
of your Google personal account. Click “Next.”
Provide ApiX-Drive access to work with your
Google account. For this, click
“Continue.”
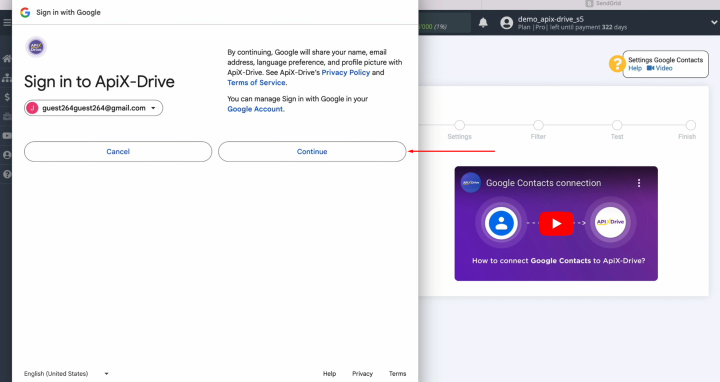
Then, be sure to
check all the boxes and click “Continue” again.
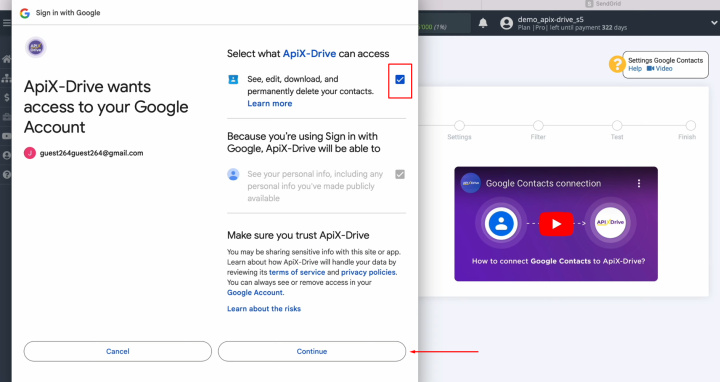
When the
connected account appears in the list of active accounts, select it and
click “Continue.”
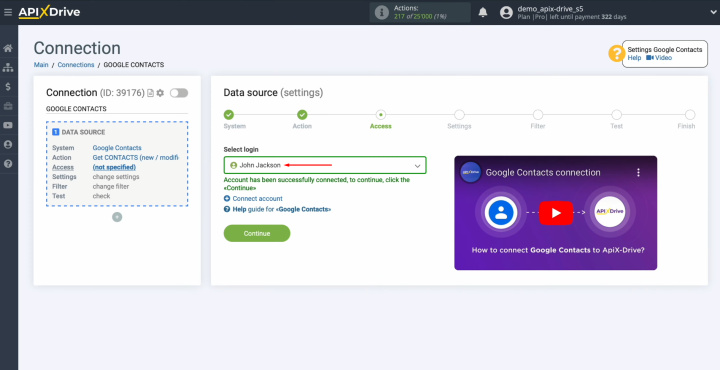
There are no
additional settings for the Google Contacts system, so just click “Continue.”
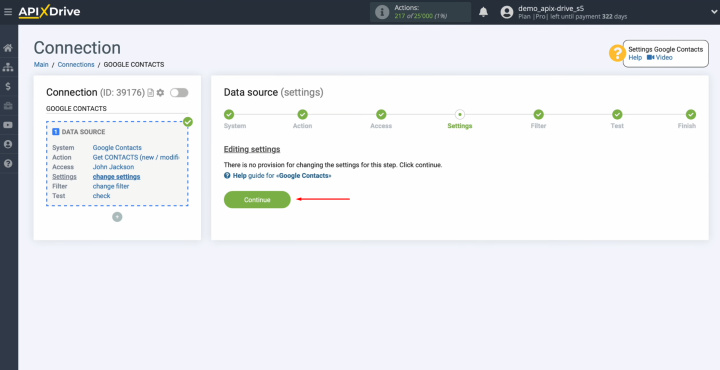
Here, you can
set up a data filter. For our task, we can skip this step. Click “Continue.”
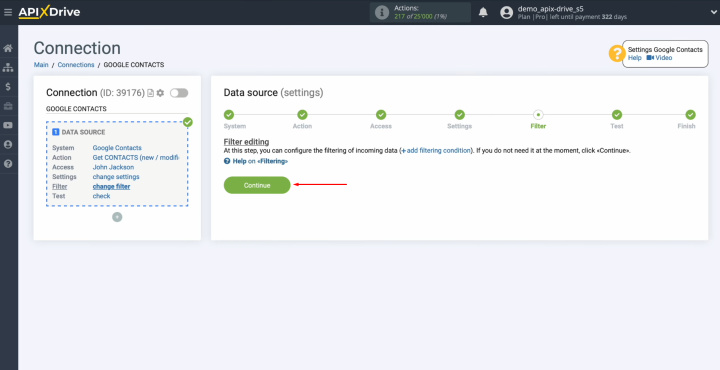
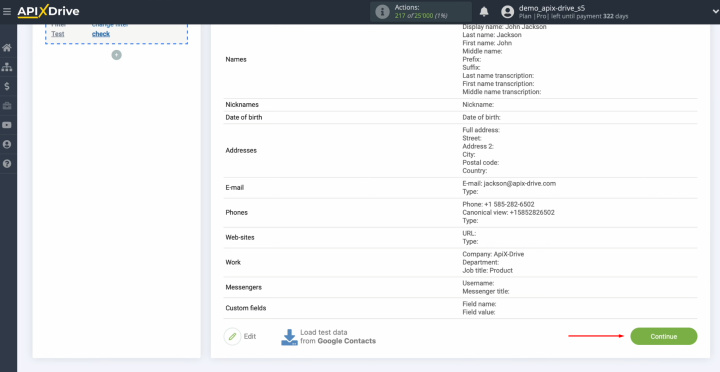
Now, you
see an example of data for one of your contacts in Google
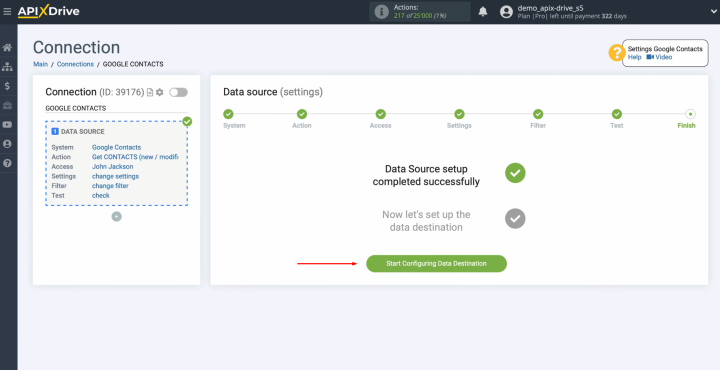
Contacts. Click “Continue.” This completes the setup of Google Contacts as the
data source.
Setting Up the Data Receiver – SendGrid
Now, you can proceed to setting up the data receiver.
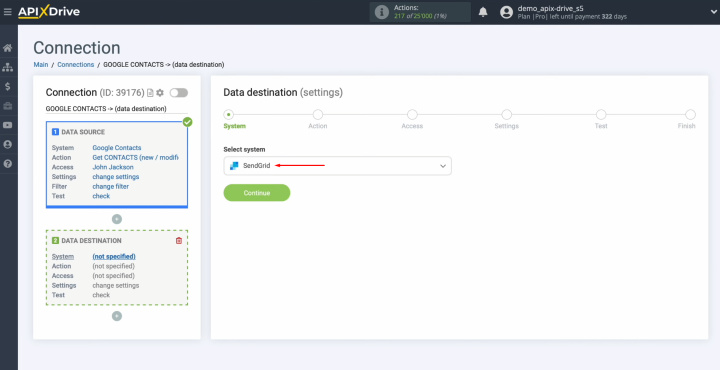
To set up
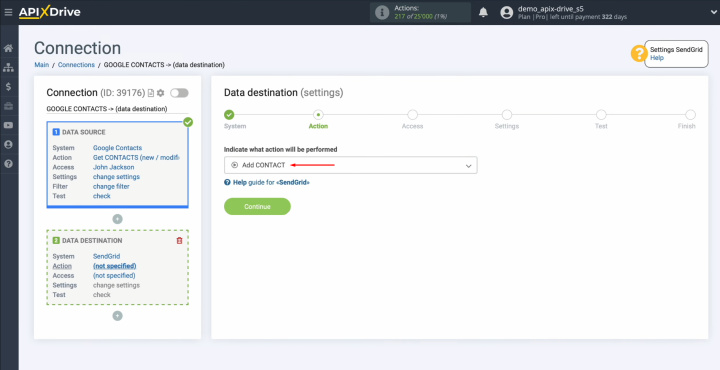
the SendGrid integration with Google Contacts, select the data receiver system. You need SendGrid. Click “Continue.”
Choose the action “Add CONTACT.” Click “Continue.”
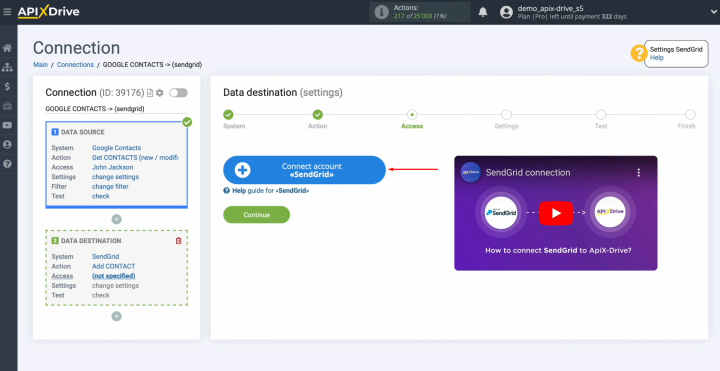
Connect your
SendGrid account
to ApiX-Drive.
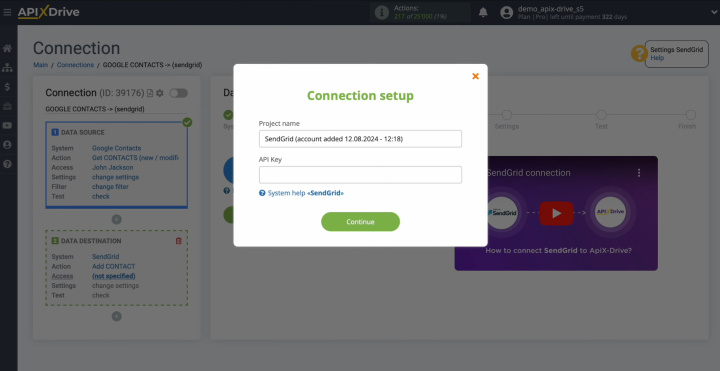
In this
window, you must specify
the API key.
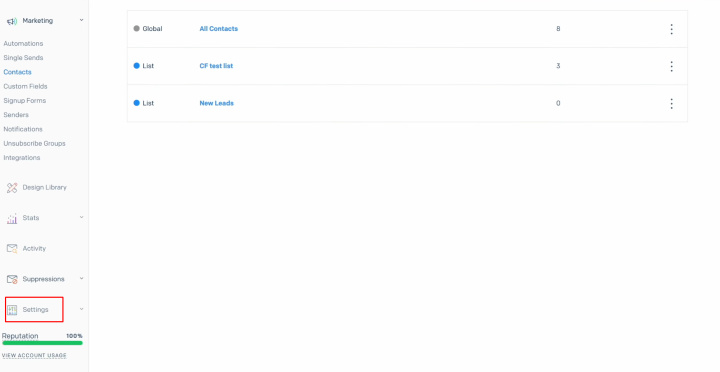
To get the
API key, go to the settings of your SendGrid personal account.
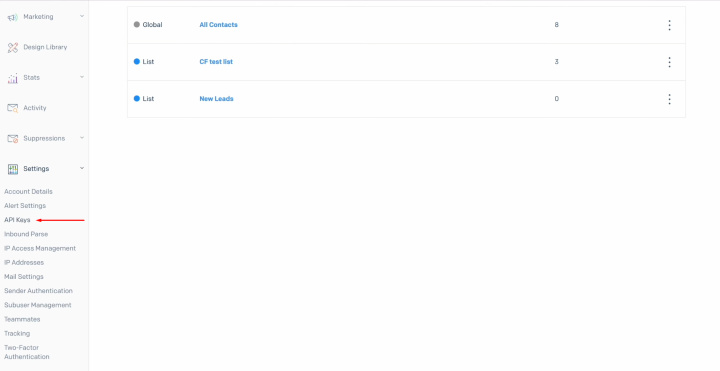
Go to the API Keys section.
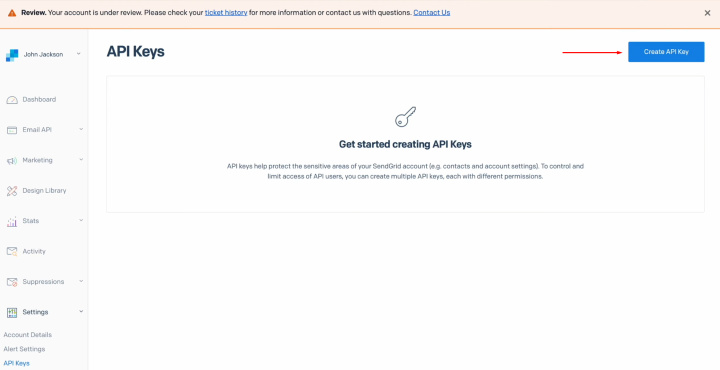
Click “Create API Key.”
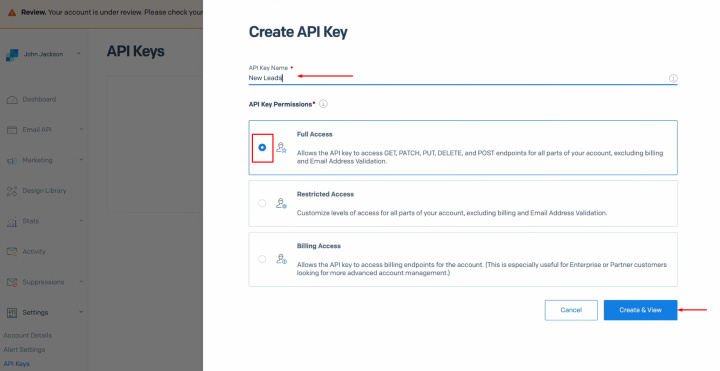
Specify a
name for the new key. Then, grant full access and click
“Create & View.”
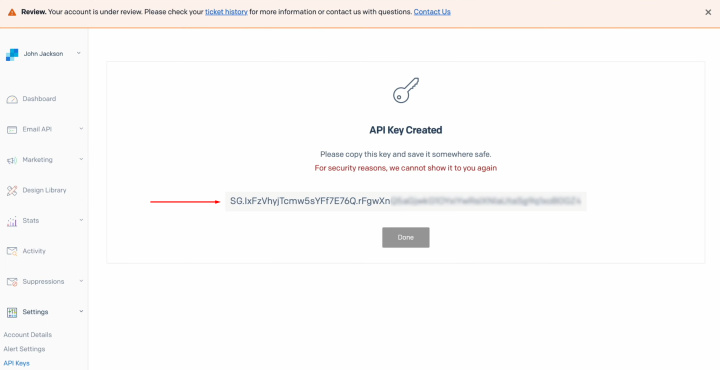
Copy the API
key and click “Done.”
Paste the API
key into the appropriate field in ApiX-Drive and click “Continue.”
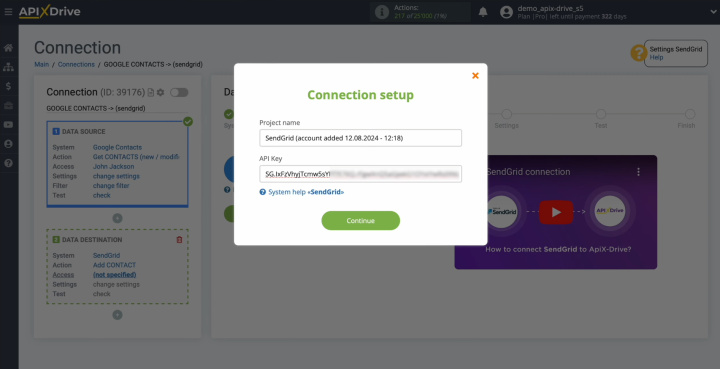
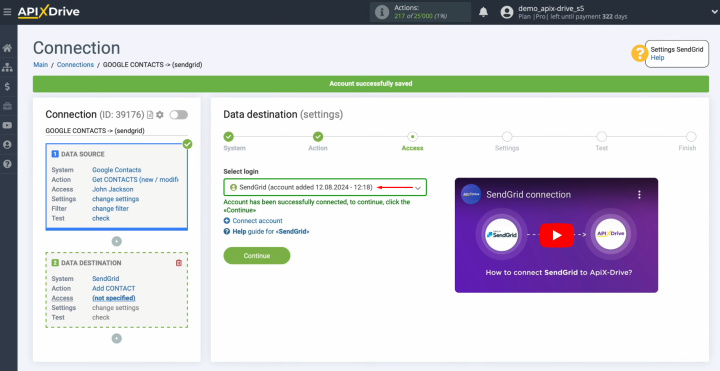
When the
connected login appears in the list of active accounts, select it and click “Continue.”
Select the
List to which new contacts will be added.
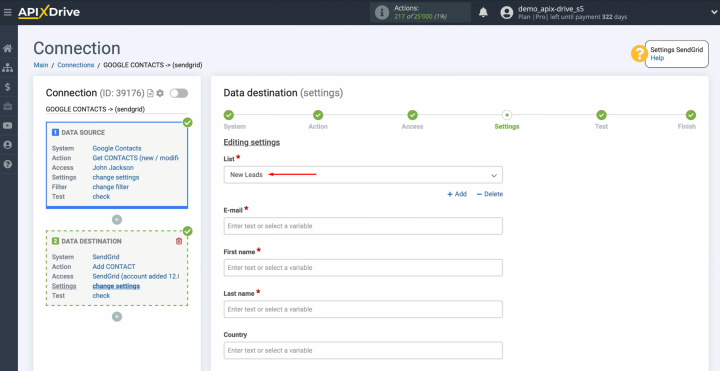
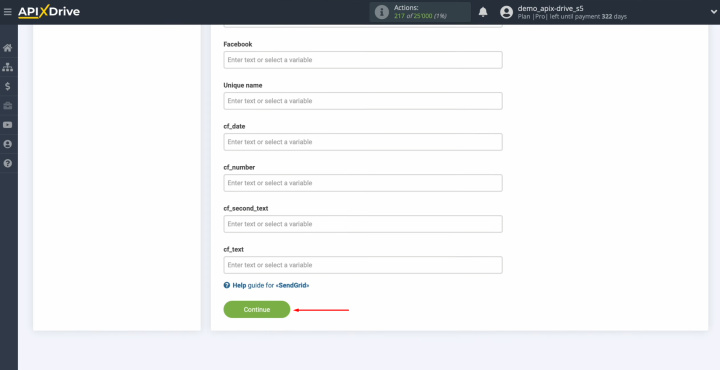
Now, you see the SendGrid fields for creating new
contacts. You can assign variables from Google Contacts to these fields. To
do this, click in the field and select a variable from the drop-down list.
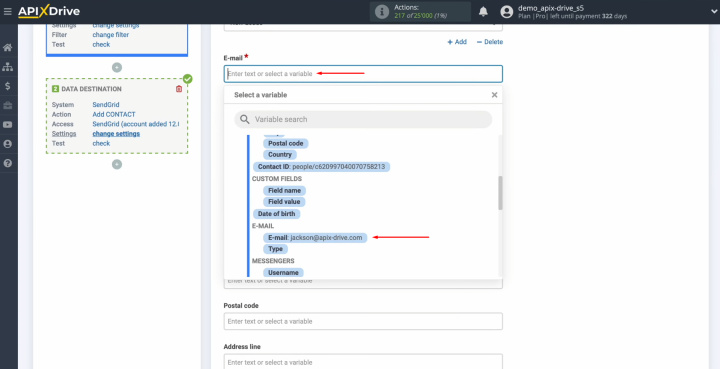
When all the
necessary fields are filled in, click “Continue.”
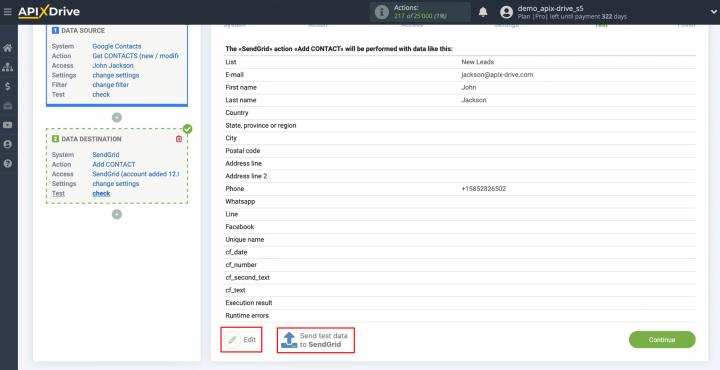
At this
stage, you see an example of the data that will be sent to SendGrid. If you are not satisfied with
something, click “Edit,” and you will go back one step. To check the correctness of the
settings, click “Send test data to SendGrid.”
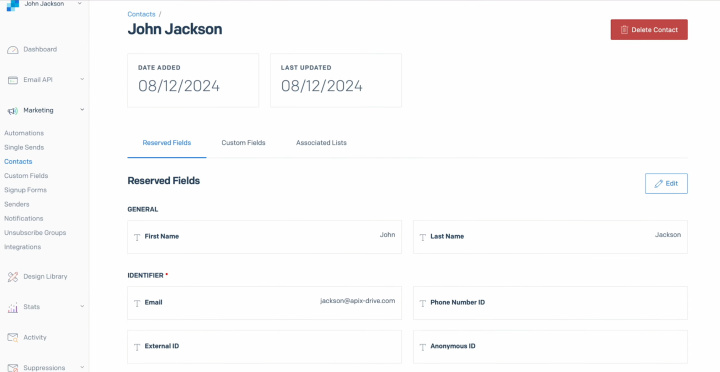
After
successful sending, go to SendGrid and check the result.
Then, return
to ApiX-Drive and continue setting up.
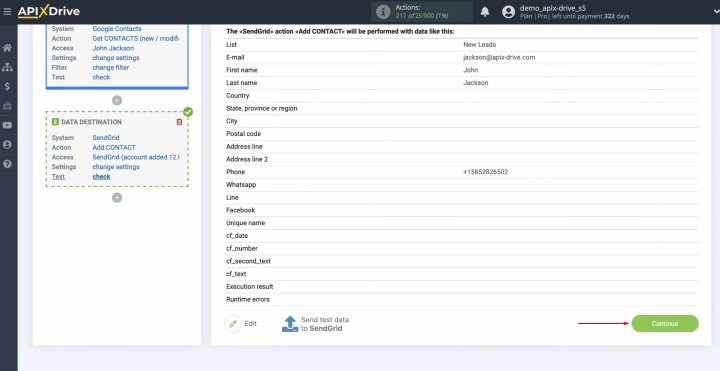
At this point, the SendGrid setup
as the data
receiver is successfully completed.


Setting Up Auto-Update
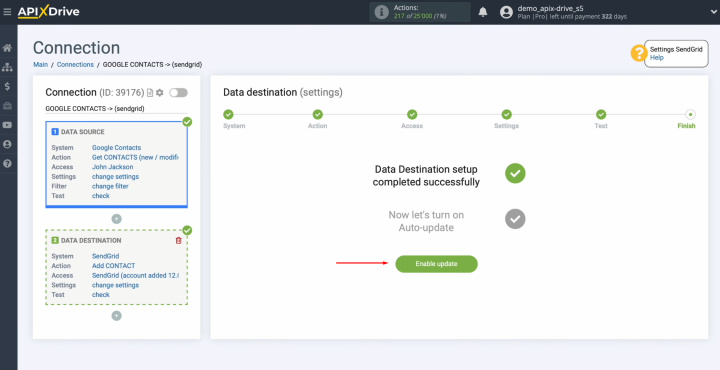
In order for data transfer to occur automatically, configure auto-update. Click “Enable update.”
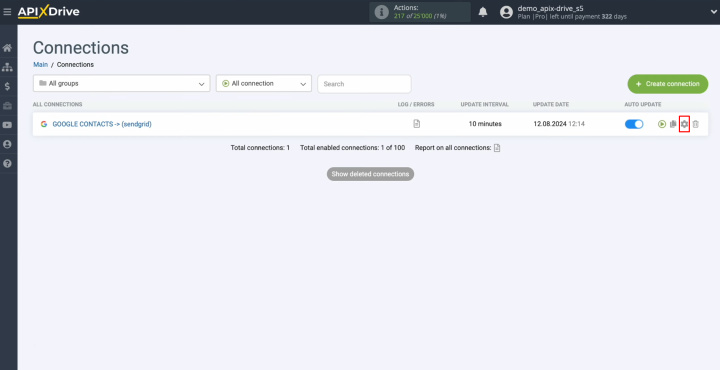
Click on the
gear button.
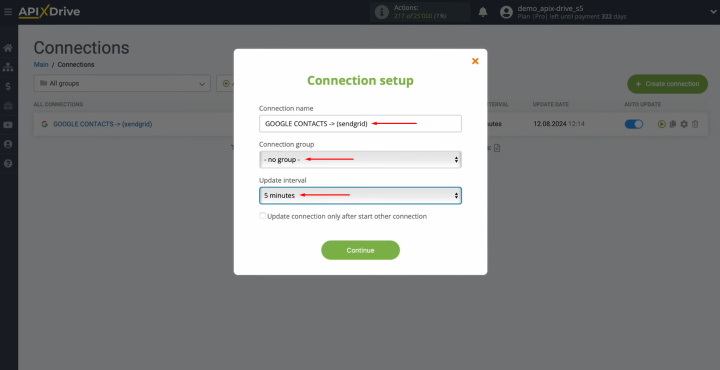
Select the
interval for the data update. For example, once every 5
minutes. Moreover, here you
can change the name of the connection and assign it to the required group.
Click “Continue.”
SendGrid & Google Contacts
integration was completed. Congratulations!
Bottom Line
Using the ApiX-Drive connector to automate data transfer will optimize work processes. It will open up new opportunities. Its interface and operating principle are so clear. You can easily integrate the systems you need, even without programming experience. After you complete the Google Contacts & SendGrid integration according to our instructions and activate automatic updates, the “magic” of interaction will begin. Soon, you will see new contacts automatically coming from one service to another.
SendGrid integration with Google Contacts will save you from having to do monotonous manual work. The ApiX-Drive online connector automates this process. It allows you to focus on more important aspects: improving customer interactions and learning new marketing strategies. This way, you can increase the efficiency of your business and get ahead of your competitors.
Read also about other integrations:

