Automatic Data Transfer From Pipedrive to Slack
Pipedrive is a sales management CRM system that helps small and medium-sized businesses manage complex or time-consuming sales processes while focusing on the tasks that matter most. In this article, we will tell you how to set up automatic data transfer from it to the corporate messenger Slack.
Pipedrive is a cloud-based system for effective sales management. It provides users with the ability to plan and track transactions, interact with potential and existing clients, set up sales funnels, and order analytics. One of its advantages is simplicity. This platform is easily customized for a specific business. Slack is a corporate messenger with an intuitive interface, designed specifically for work communication between employees in teams of any size. It supports private messages, voice and video calls, and also allows you to organize group chats. This service increases the efficiency of solving business problems and, accordingly, the productivity of the team. Here they discuss work issues, organize and store various data, and manage projects.
If you use Pipedrive to manage sales and communicate with colleagues in Slack, most likely you periodically look into the CRM to track new deals, after which you write instructions to your employees regarding orders made by clients in the messenger or save them to yourself in Slack so that you do not forget. Synchronizing data in both systems will greatly simplify your work and save valuable time. By automating the transfer of information from one to another, you will increase efficiency, not only for yourself but for the entire team. Our online connector, ApiX-Drive, will help you with this. If you successfully set up the Slack and Pipedrive integration, when a new deal is added to CRM, information about this will be immediately sent to you in the messenger, where it can be conveniently stored, processed, transferred to other team members, or interacted with in some other way. And all this without your direct participation.
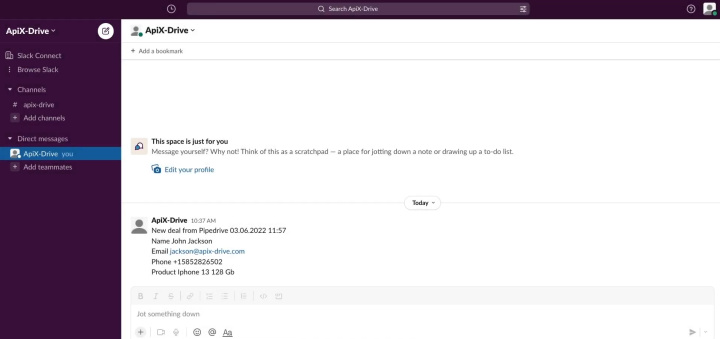
How to Set up Pipedrive and Slack Integration
IT professionals can do a Slack Pipedrive integration via the API. Here you have two options: ask a staff member about it or bring in someone from the outside. Both have their drawbacks. A colleague may not complete this task right away, and you will have to wait, and the invited programmer may present a considerable bill for services. But why complicate everything so much if there is already a ready-made solution that will help you set up the connection between these platforms yourself, quickly and economically – the ApiX-Drive online connector? Thanks to the intuitive interface and operating algorithm of this no-code service, even a completely inexperienced user can handle the settings.
Schematically, Pipedrive and Slack integration can be represented as follows: “source-connector-sink”. The ApiX-Drive system monitors the appearance of new deals in CRM Pipedrive and, as soon as it records them, sends information about this event to the Slack messenger. To automate this process, you only need to take a few simple steps.
Setting up the Data Source – Pipedrive
To set up Slack and Pipedrive integration, first, you need to create a new connection.
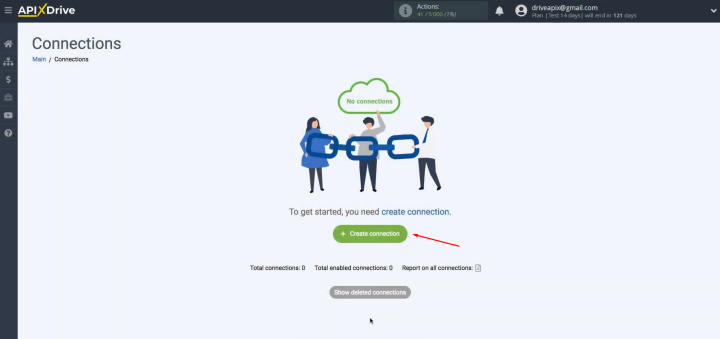
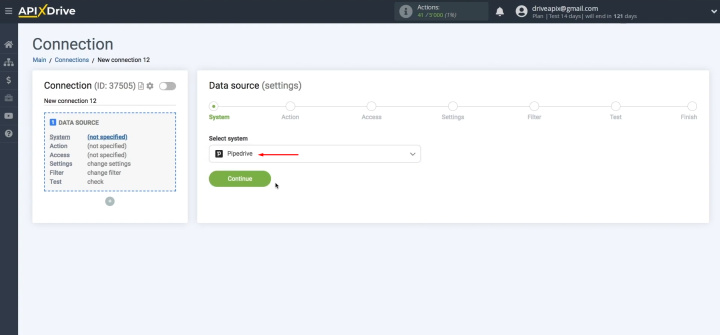
The next step is
to select Pipedrive as a data source system. Click “Continue”.
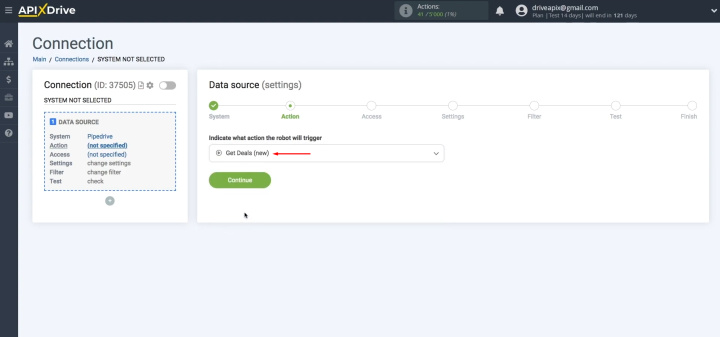
Next, you have to
select the action "Get deals (new)". Click “Continue”.
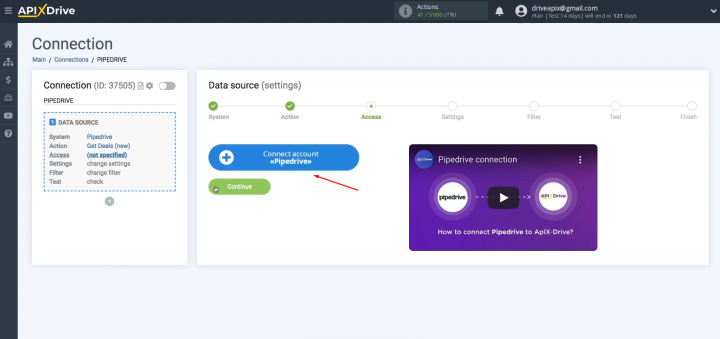
At this point, you
have to connect your Pipedrive account to the ApiX-Drive service. Click on the blue button.
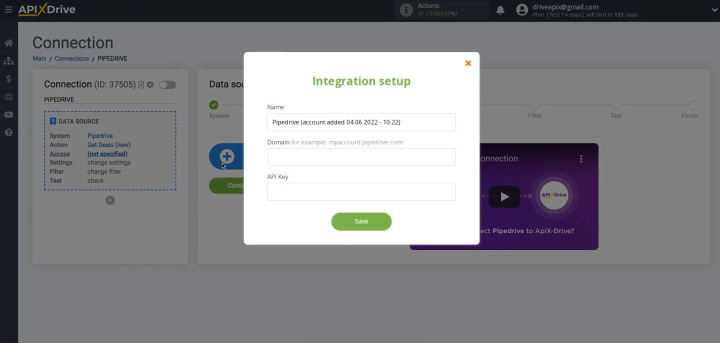
In this window,
you must specify the domain and API key.
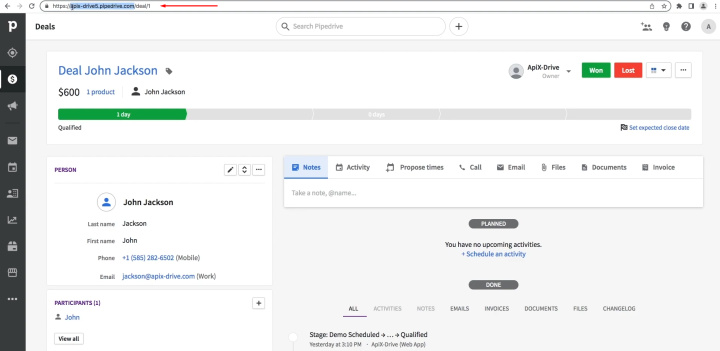
To get this data,
you have to go to your Pipedrive account. You need to copy the domain from the address bar. Please note that the domain must be
copied without additional characters.
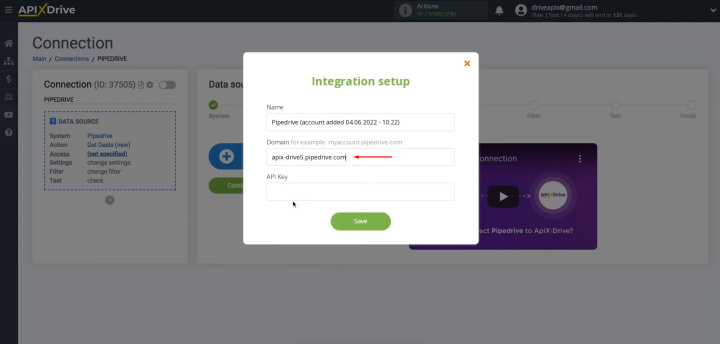
Next, return to
the ApiX-Drive service and paste the domain into the required field.
Now you have to
specify the API key. For this, go to Pipedrive and click on the “Personal preferences”
section.
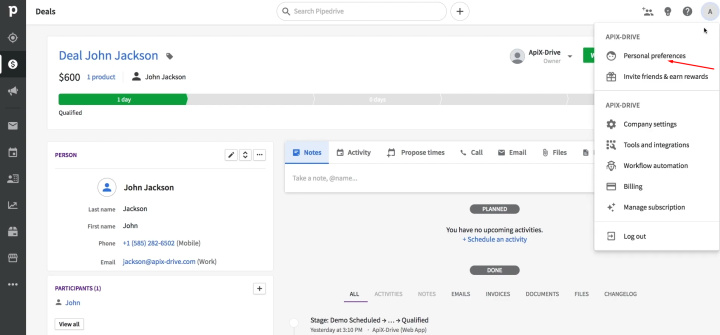
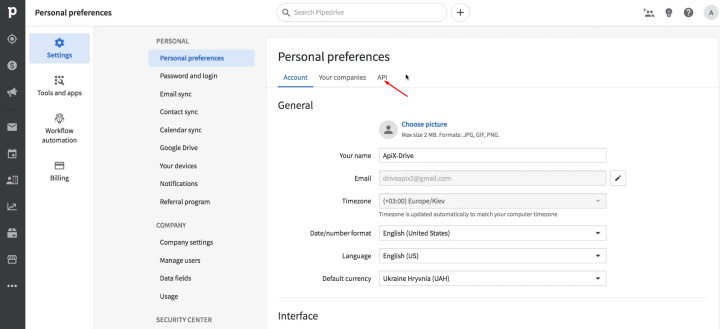
Go to the item
“API”.
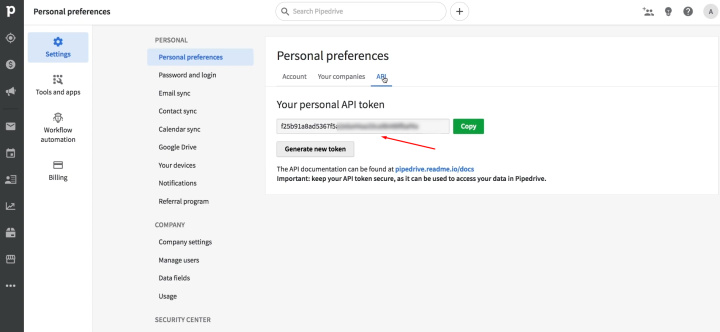
Copy the API key.
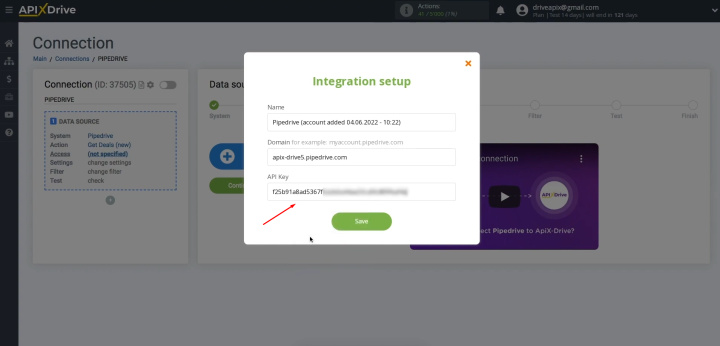
Paste the API key
into the appropriate field in the ApiX-Drive service. When the required fields are filled in, click "Save".
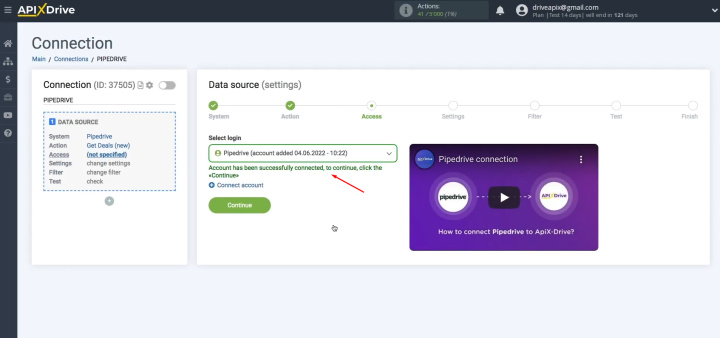
When the connected
login is displayed in the list, select it and click "Continue".
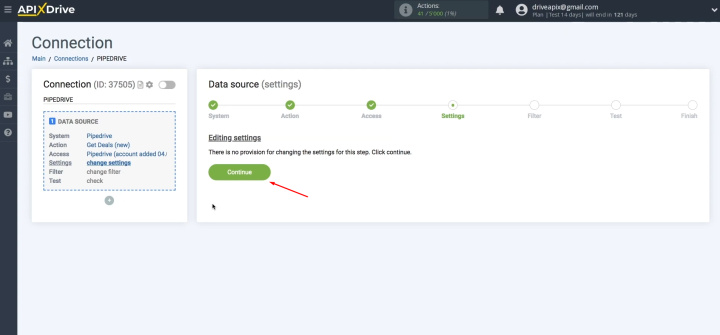
In this case,
there are no additional settings, so just click "Continue".
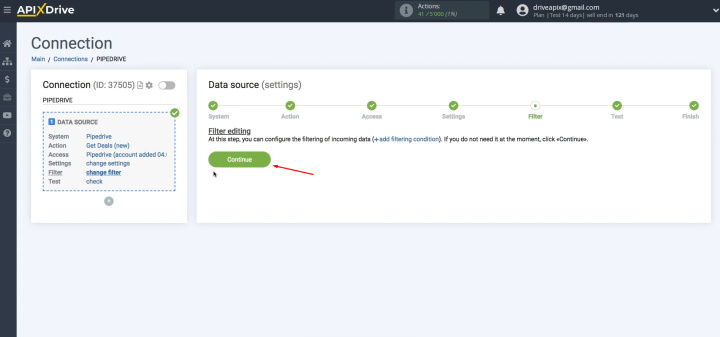
At this stage,
you can set up a data filter. In this case, this is not necessary, so we also
click "Continue".
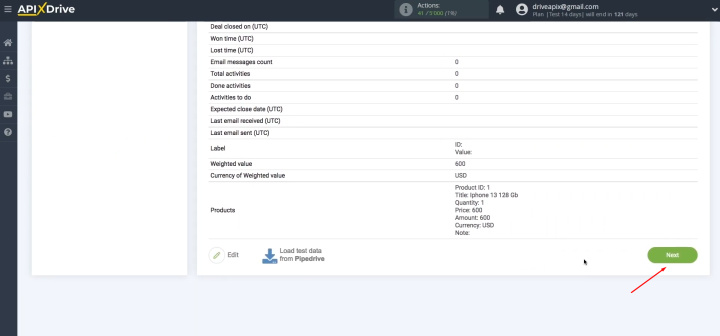
At this stage,
you see the test data for your transaction from Pipedrive. If everything suits
you, click "Next".
This completes the Pipedrive ("Data Source")
setup successfully.
Setting up the Receiver – Slack
Now you need to go to the "Data receiving" setting.
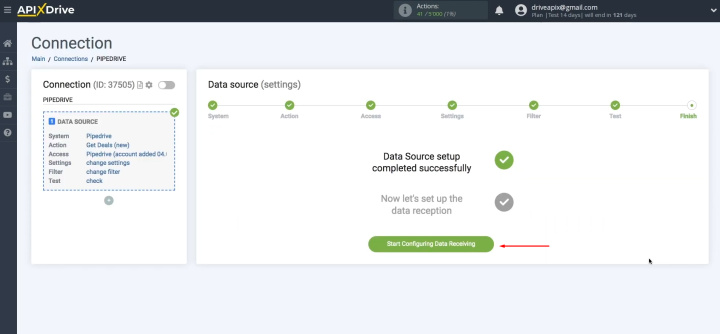
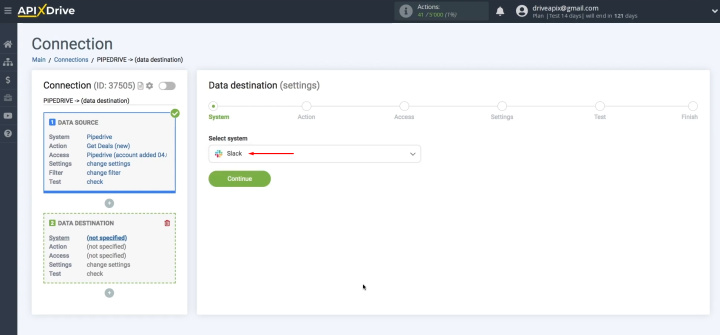
We chose Slack as
the "Data destination"
system. Click “Continue”.
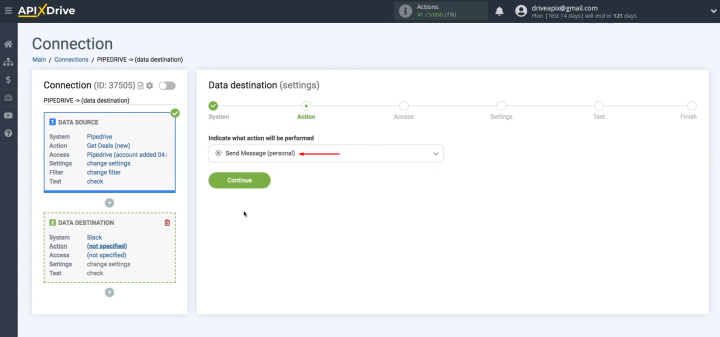
Next, you need to
select the action “Send Message (personal)”. Click “Continue”.
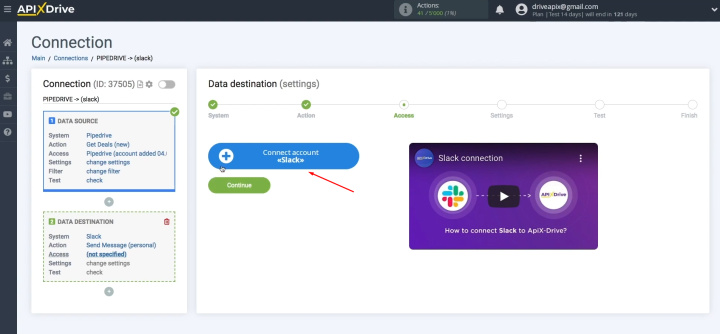
At this point, you
have to connect your Slack account to the ApiX-Drive service.
First, you must
specify your workspace. To achieve this, go to your personal Slack account.
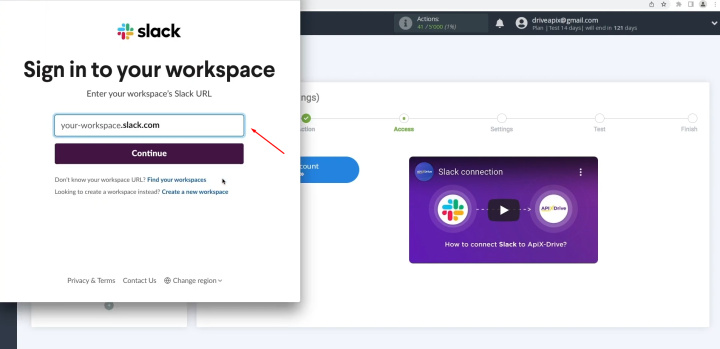
Click on your
workspace’s name.
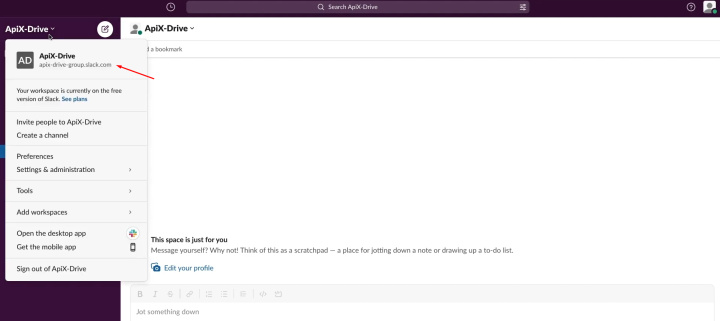
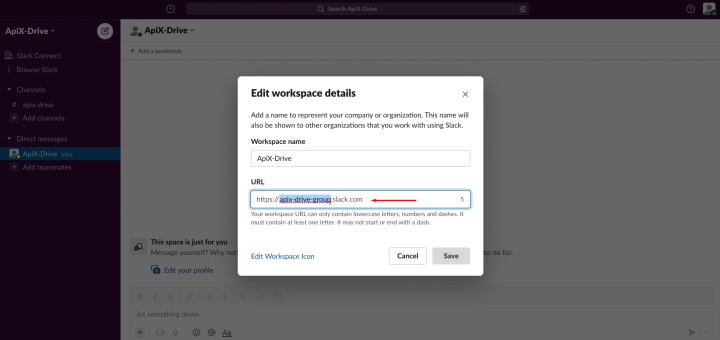
Copy the URL. Note that the URL must be copied up to
Slack dot com.
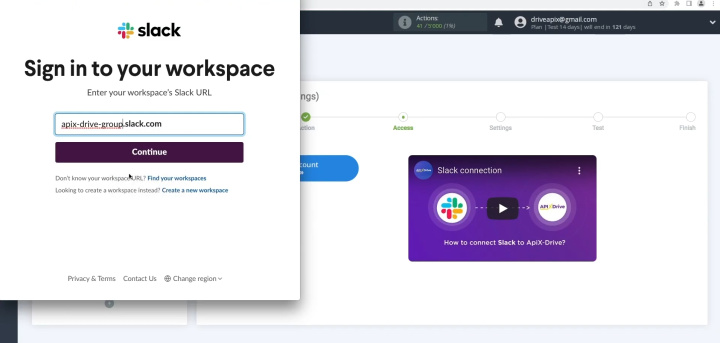
Paste the URL into
the appropriate field in the ApiX-Drive service and click “Continue”.
Next, you have to
enter your Slack username and password. Click “Sign in”.
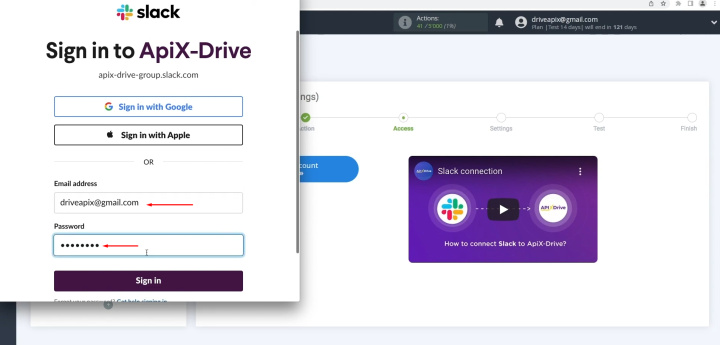
Give ApiX-Drive
permission to work with your account. Click “Allow”.
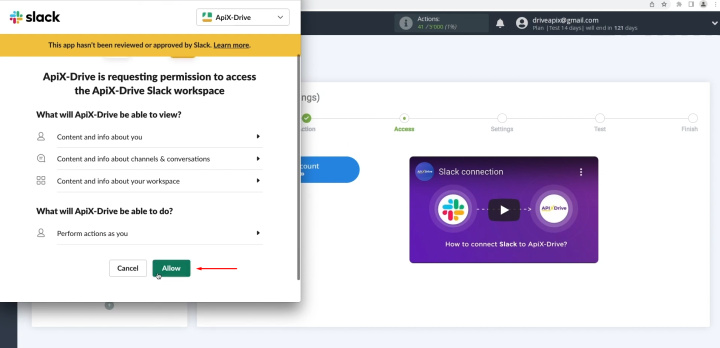
When the
connected account is displayed in the list, select it and click
"Continue".
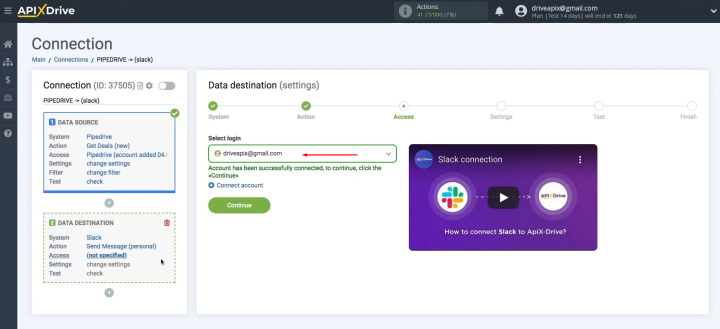
At this stage,
you have to select the user to whom the data from Pipedrive will be
transferred.
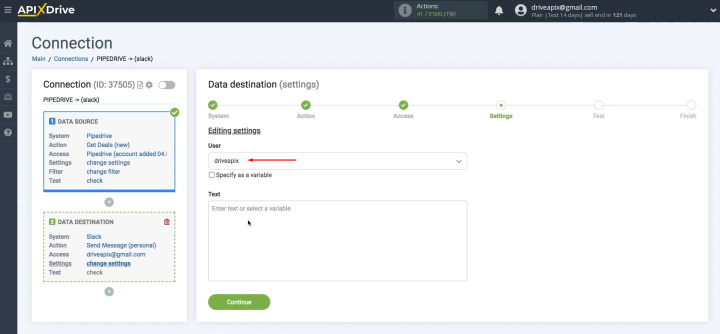
And also, fill in
the fields with variables from Pipedrive that will be transferred to the Slack
system. To assign a variable,
click on the field to which you need to transfer data and select the required
variable from the dropdown list.
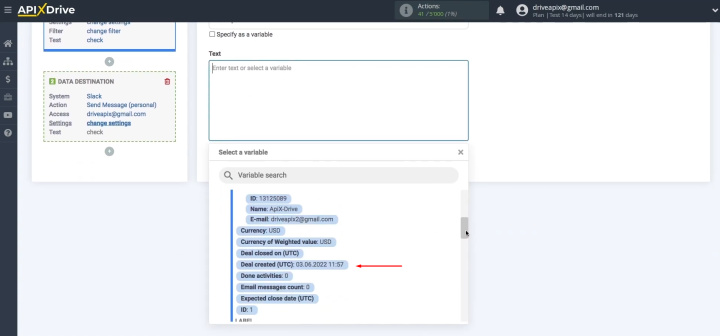
Please note that
you can not only add variables but also enter values manually. To move to the next line, press
“Enter”.
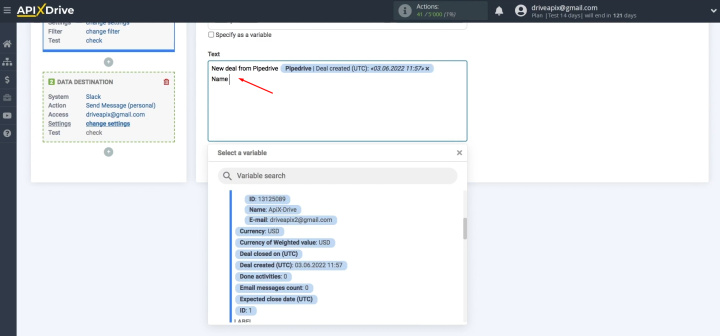
When all the
necessary data is assigned, click "Continue".
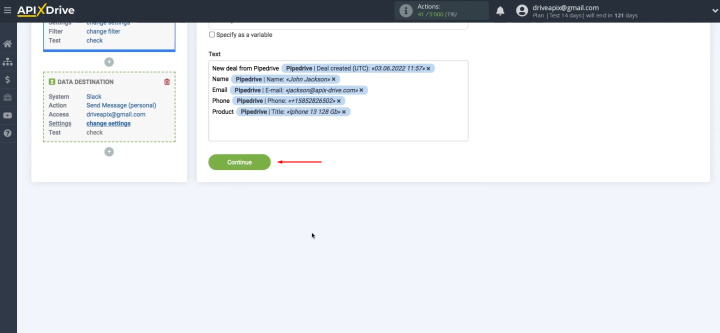
At this point, we
see the test data that will be sent to Slack. To check the correctness of the settings, click "Send test
data to Slack".
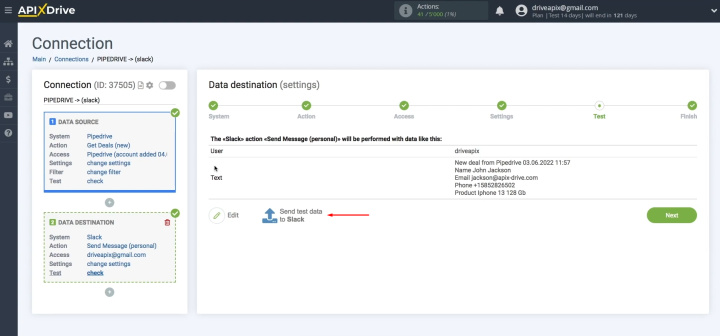
This is
what you will see in your Slack.
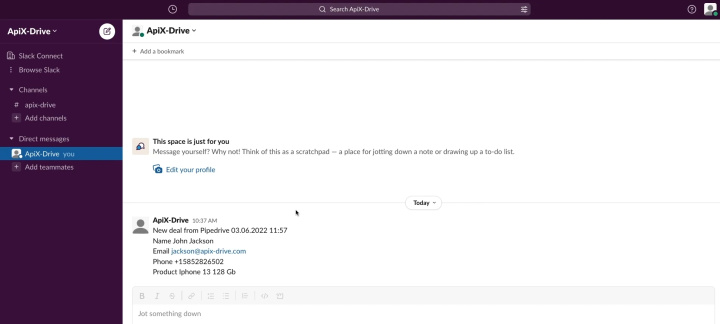
If everything
suits you, return to the ApiX-Drive service and continue the configuration. For this, click “Next”.
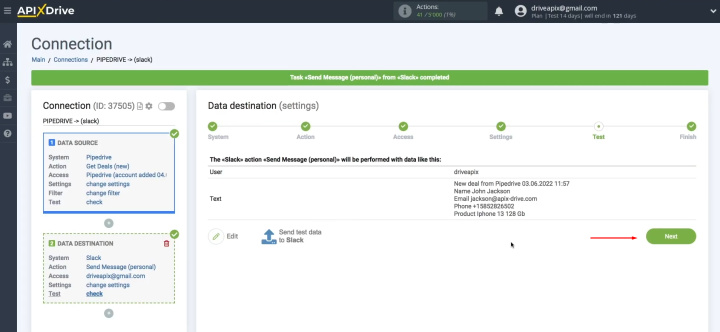
On this, the "Receiving data" setting has
been successfully completed.
Setting up Auto-update
In order for data transfer for Pipedrive Slack integration to occur automatically, you need to configure auto-update. Click on the green button, “Enable update”.
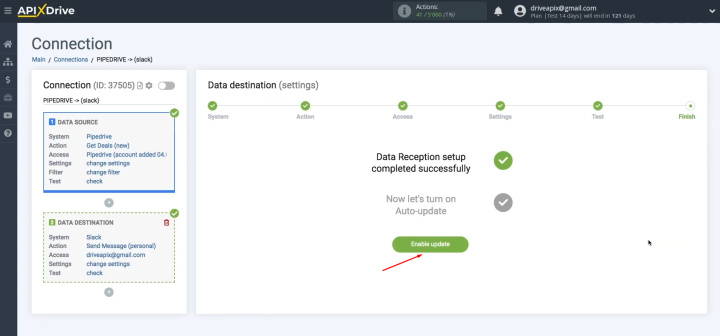
Click on the gear
button.
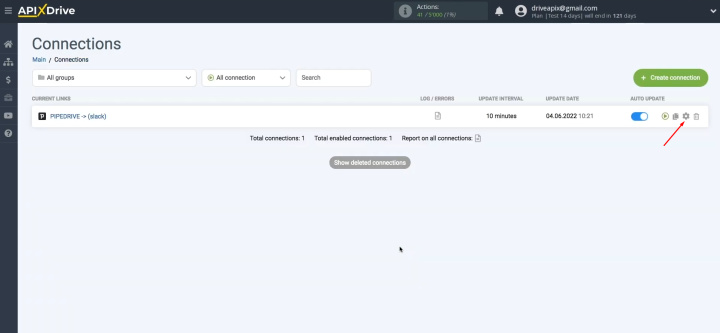
Select the
interval for the operation of the connection. For example, once every 10 minutes. In addition, you can change the name of the
connection and assign it to the required group.
Result of Pipedrive + Slack Integration
If you have consistently and clearly followed all the steps according to our instructions, then the process of automatically transferring new data on deals from the CRM system to the corporate messenger has been successfully configured. Slack + Pipedrive integration, on which you will spend only up to 10 minutes, will save you a long time from routine manual work – independently transferring data from one system to another. You can spend the freed time on other tasks that cannot be automated, or on rest if you need it. In any case, it's up to you to decide. Good luck!
Apix-Drive is a simple and efficient system connector that will help you automate routine tasks and optimize business processes. You can save time and money, direct these resources to more important purposes. Test ApiX-Drive and make sure that this tool will relieve your employees and after 5 minutes of settings your business will start working faster.
