
Gmail and Google Drive Integration: How to Save Attachments Automatically

Saving email attachments manually often means opening messages, sending files to Drive, and selecting target folders one by one. Repeating these steps takes time, and it is easy to miss an attachment or save it in the wrong place. An automated Gmail-to-Google Drive integration eliminates this manual routine. In this guide, we'll show you how to set it up with ApiX-Drive.
Why Save Gmail Attachments Automatically
Businesses rely heavily on Gmail to send catalogs, presentations, design files, technical documentation, and reports. These files are typically stored and processed in Google Drive.
At first glance, transferring attachments from emails is a simple task. However, this routine takes time and is distracting. An employee may miss an important file, forget to save it, or accidentally download it to another folder. The result may be a missed deadline, a canceled presentation, a delayed release, or other problems.
A Google Drive and Gmail integration fully automates how you transfer Gmail attachments to Google Drive, eliminating human error. Once configured, incoming attachments go straight to your selected folder, keeping cloud storage organized and reducing the risk of missing critical files.
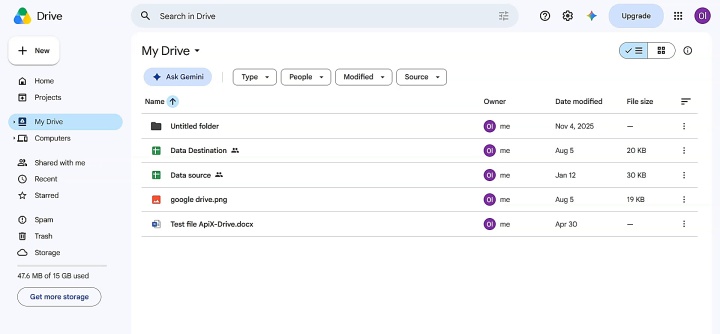
Learning how to automatically save Gmail attachments to Google Drive is especially useful for teams that regularly receive work files via email:
- managers who receive product catalogs and presentations from existing and new partners;
- marketers who receive mockups of advertising materials from contractors;
- content department managers who receive briefs with requirements for guest articles from partner sites.
How to Connect Gmail to Google Drive
To set up Gmail and Google Drive integration, we recommend the no-code online connector ApiX-Drive. It is one of the easiest to use and allows you to link Gmail and Google Drive in minutes, even for those with only basic computer skills.
What you will need:
- A Gmail account.
- A Google Drive account.
- A folder in Google Drive where the attached files will be saved.
- An ApiX-Drive account where the integration will be configured.
If you don't have an ApiX-Drive account yet, you can sign up for free and connect Gmail to Google Drive in just a few minutes. Below is a step-by-step guide that walks you through the entire setup.
Data Source Settings: Gmail
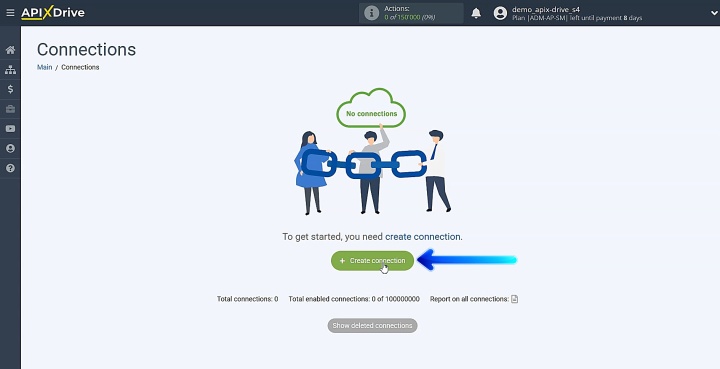
First, create a new connection.
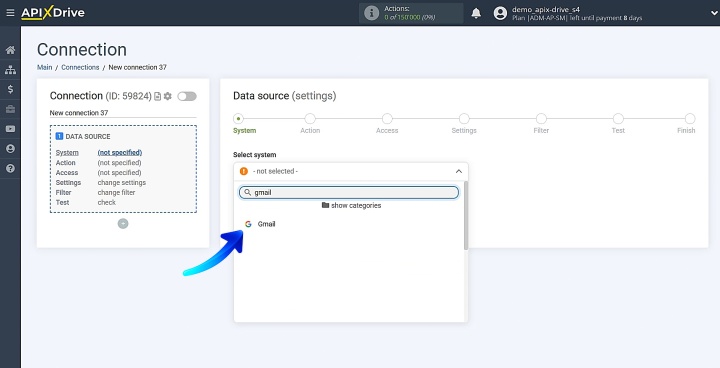
Choose the data source system. For this integration, select Gmail.
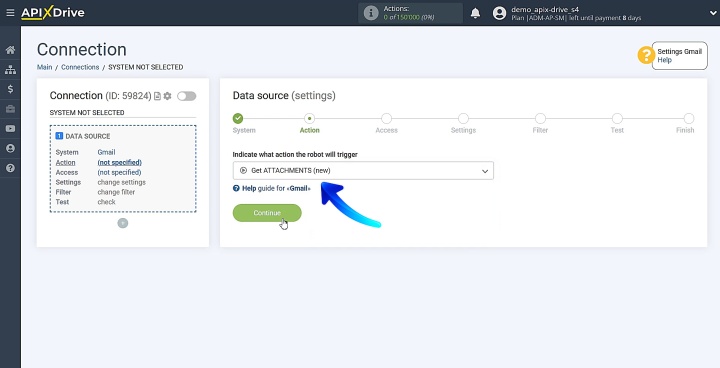
Select action: Get ATTACHMENTS (new).
Link your Gmail account to ApiX-Drive.
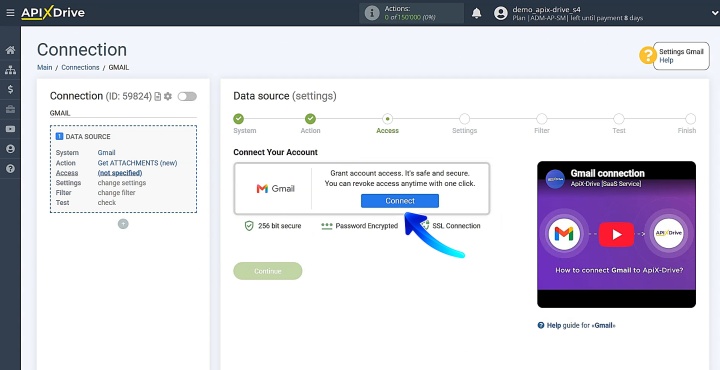
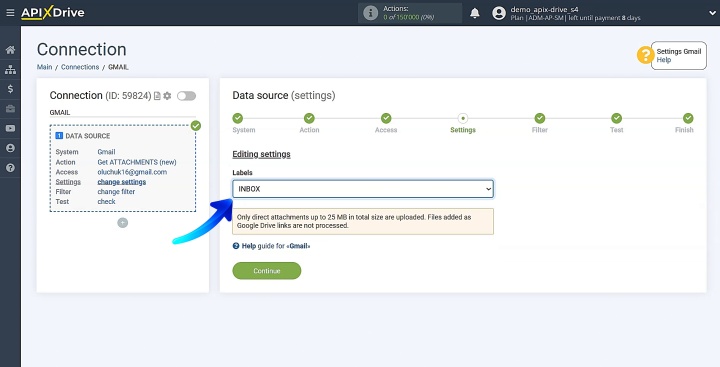
Sign in to your Gmail account. Allow ApiX-Drive to access your workspace. Once your account appears in the active accounts list, choose it and press Continue. Then, specify where the connector should retrieve attachments from. For example, Inbox.
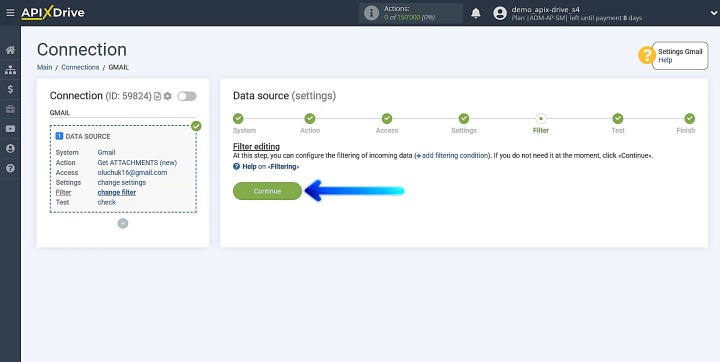
This step allows you to set up data filtering if needed.
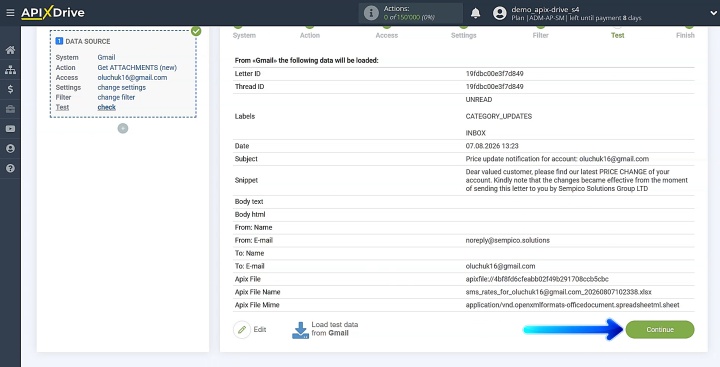
The system will display sample data ready to upload Gmail attachment to Google Drive. If everything looks good, click Continue.
Data Destination Settings: Google Drive
The next step is to configure the data destination.
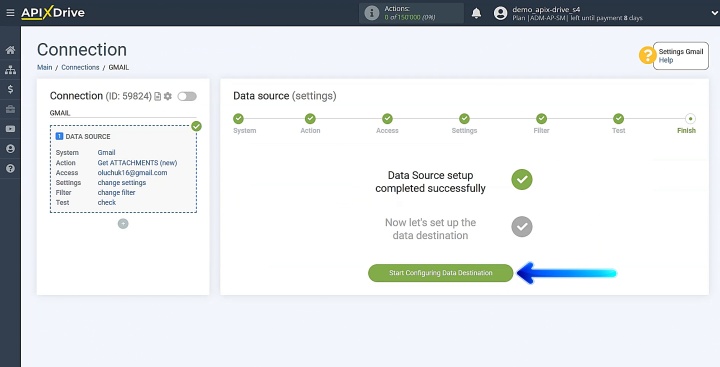
Select Google Drive as the destination system where your files will be stored.
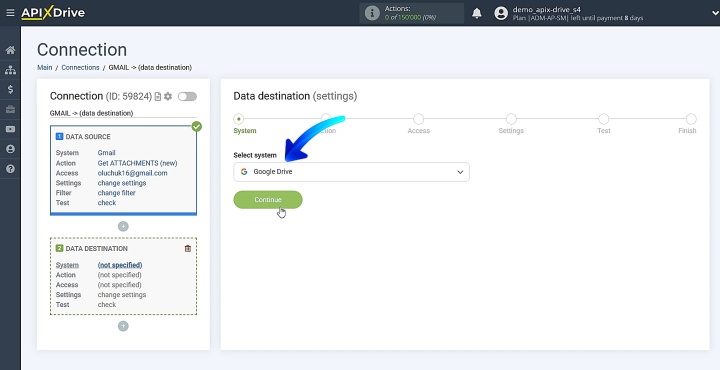
Select action: Upload FILE.
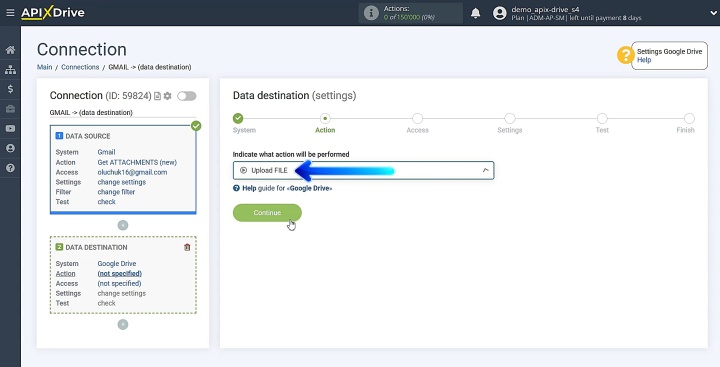
The next step is linking your Google Drive account to ApiX-Drive.
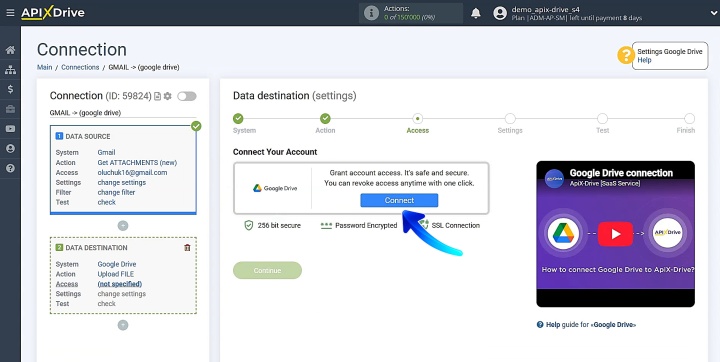
Now you need to sign in to Google Drive using your Google account credentials. Provide ApiX-Drive with the necessary permissions. After your account shows up in the active accounts section, choose it and click Continue.
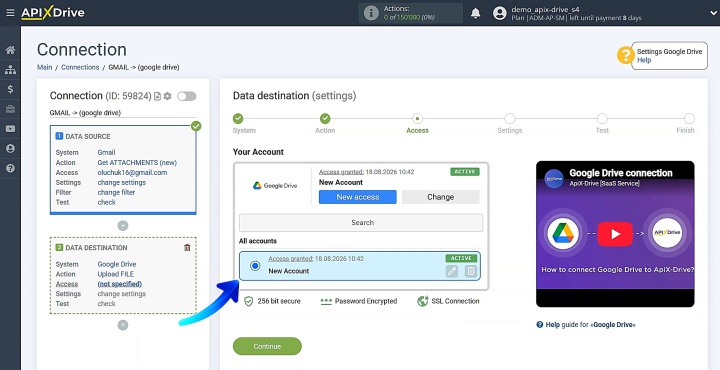
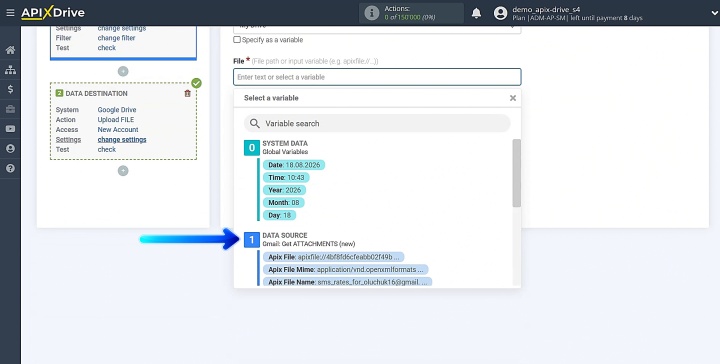
Next, define the destination folder and specify the file link and file name. If necessary, you can also set the MIME type. The required values can be selected from the dropdown list.
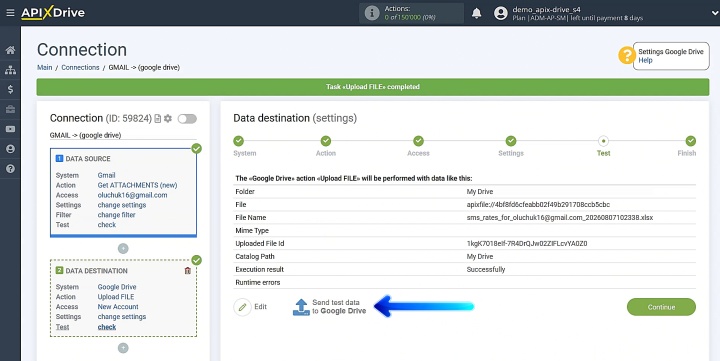
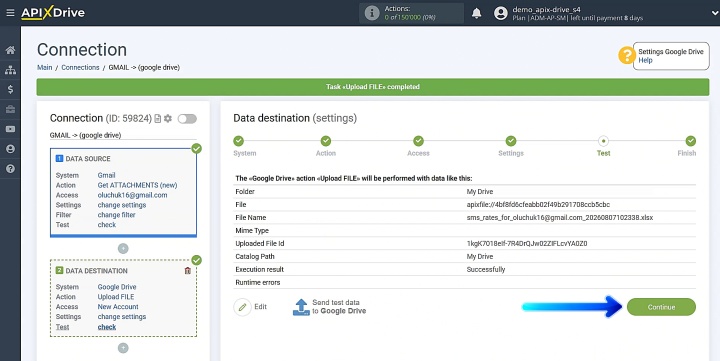
Then, you will see the test data prepared for transfer to Google Drive. To verify that everything is set up correctly, click Send test data to Google Drive.
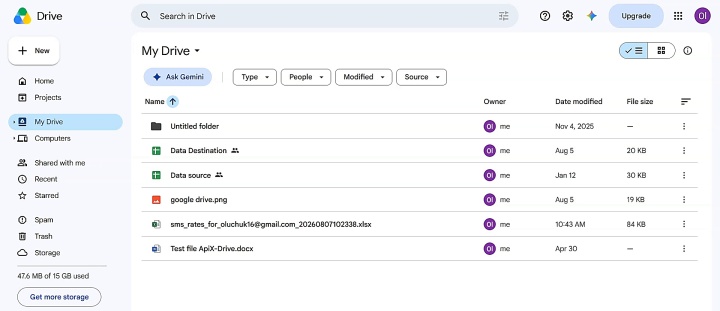
Go to Google Drive and check the result.
Switch back to ApiX-Drive and proceed with the setup.
Auto-Update Settings
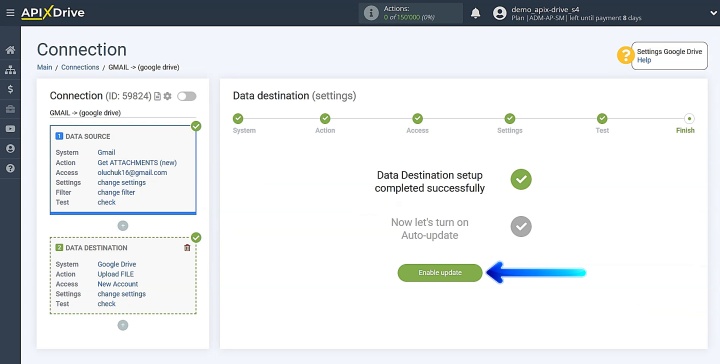
Set up automatic updates for your Gmail and Google Drive integration. Click the Enable update button to proceed.
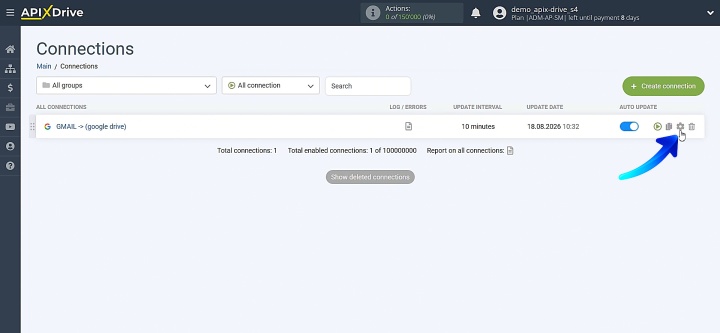
Click the gear icon to open the configuration options.
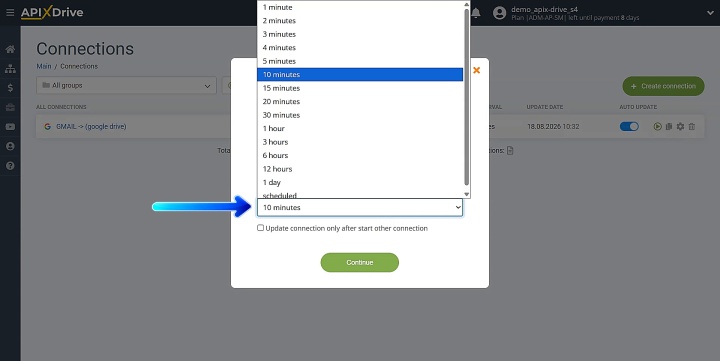
Set the update interval. For instance, 10 minutes. Additionally, you can change the connection name and organize it into the appropriate group. Click Continue once you're finished.
Bottom Line
Processing email files by hand wastes time and often leads to lost documents. Setting up a simple workflow with ApiX-Drive helps you save Gmail attachments to Google Drive automatically. Your files arrive in cloud storage on time, eliminating routine admin work so your team can focus on higher-value tasks.
Recommended reads:
- How to Connect Google Drive to Google Sheets for Automatic File Tracking
- Automating Employee Onboarding: Practical Use Case for HR
- Facebook and Airtable Integration: Automatic Transfer of New Leads
- Use Case: Connecting Google Drive to Task Manager
- Google Drive to Gmail: How to Send File Attachments Automatically