Pipedrive and Airtable Integration: Step-by-Step Guide
Automation is a modern way to optimize business processes. It significantly increases the efficiency of the company and reduces the costs of performing routine operations. In the field of customer relationship management, automation simplifies database maintenance, speeds up the processing of requests, and helps maintain a high level of customer loyalty due to quick responses and automatic actions. In the area of information management and database work, the organization of data storage and processing is simplified. Moreover, the accuracy of their use is increased and access to important information is improved, which contributes to more efficient resource management and decision-making.
How Pipedrive and Airtable Help Automate Workflows
Pipedrive is a powerful CRM platform for managing sales and customer interactions. It allows you to set up automatic tasks for managers, track deal stages, and send personalized emails to clients at every stage of interaction. Airtable is a universal tool for managing information and databases. It implements automation through triggers and scenarios that can automatically update records, move data between tables, and notify the team of important changes. This allows you to simplify data organization, increase the accuracy and efficiency of work, and improve coordination within the team.
Both Pipedrive and Airtable do a great job of performing their functions. By using them in your work, you can automate a number of business processes, which brings tangible results. Want to achieve an even greater effect and maximize automation? This is possible if you connect both services and set up data exchange between them. In this article, we will explain in detail how to easily, quickly, and reliably make Pipedrive and Airtable integration using our online connector ApiX-Drive.
Integration of Services to Achieve Maximum Automation
Airtable and Pipedrive integration, as part of automation, significantly increases the efficiency of data management and optimizes business processes in the field of sales and information management. When these platforms work together, each new contact added to Pipedrive is automatically transferred to Airtable, where it is immediately added as a new row in the database. For example, if a sales manager creates a new contact in Pipedrive, this data immediately appears in Airtable. This simplifies further work with client information and ensures its more structured storage.
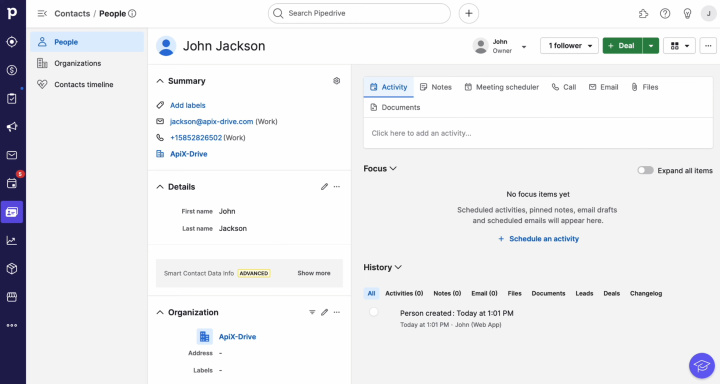
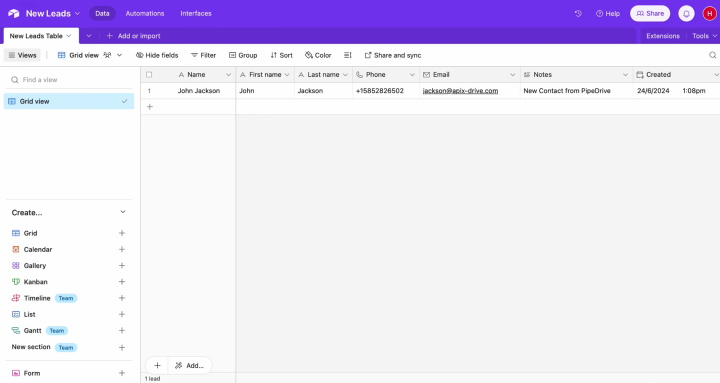
For companies looking to streamline their customer data and information assets, Airtable integration with Pipedrive offers a convenient solution for automatic synchronization. For example, when a deal is updated in Pipedrive, the information can be automatically transferred to Airtable, where the analytics team can immediately see the updated information and take appropriate action.
How to Set Up Pipedrive and Airtable Integration
To set up the integration of Pipedrive and Airtable, you don’t need to learn programming or understand complex API requests. You also don’t need to ask for help from third-party specialists. Our online connector ApiX-Drive will do all the hard work for you. It allows you to quickly and easily connect the systems. Thanks to the convenient and clear interface, the entire process will take no more than 10 minutes. Detailed text and video instructions from the ApiX-Drive team will help you connect accounts and set up the integration without any problems.
So, let's take the first step. Register on the official website, apix-drive.com. If you have already done this, you can immediately proceed to the integration of Pipedrive and Airtable.
Set Up the Data Source – Pipedrive
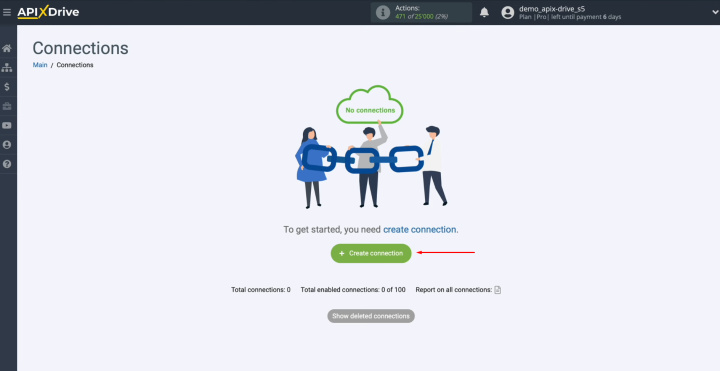
To set up the Pipedrive integration with Airtable, first create a new connection.
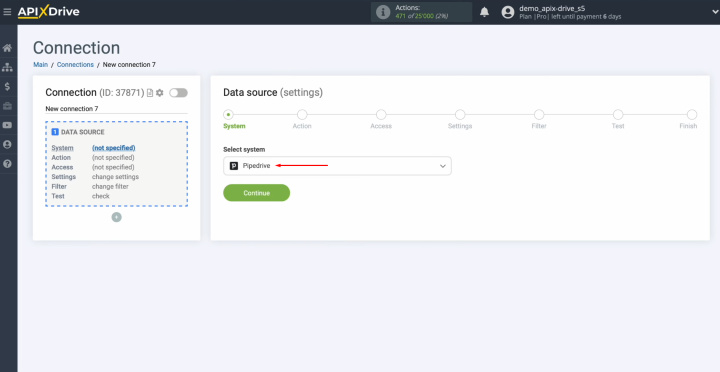
Select the data source system. You need Pipedrive.
Choose the action "Get CONTACTS (new)."
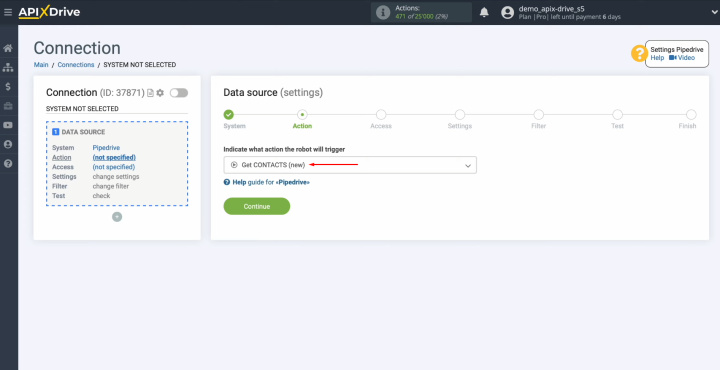
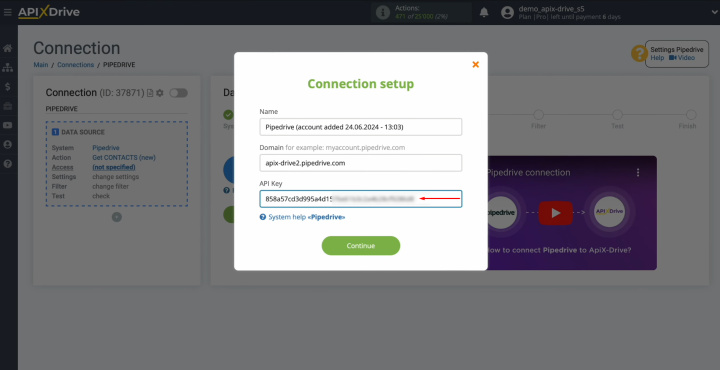
Connect your
Pipedrive account to ApiX-Drive.
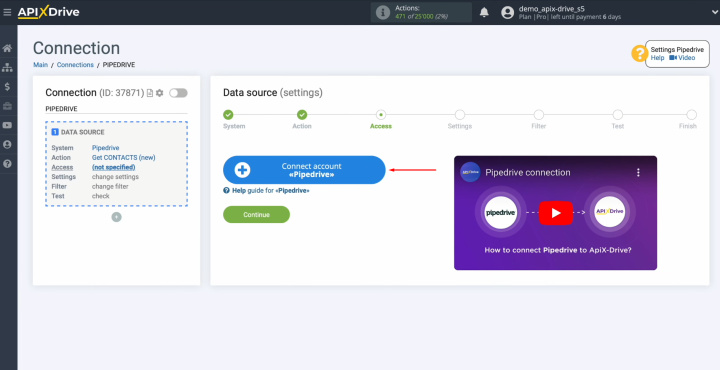
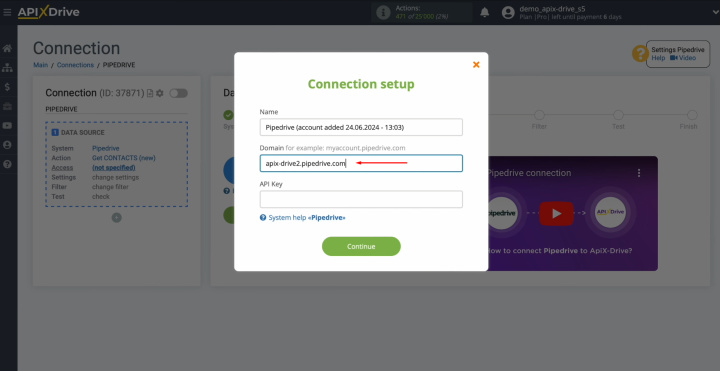
In this
window, you must specify the domain and API key.
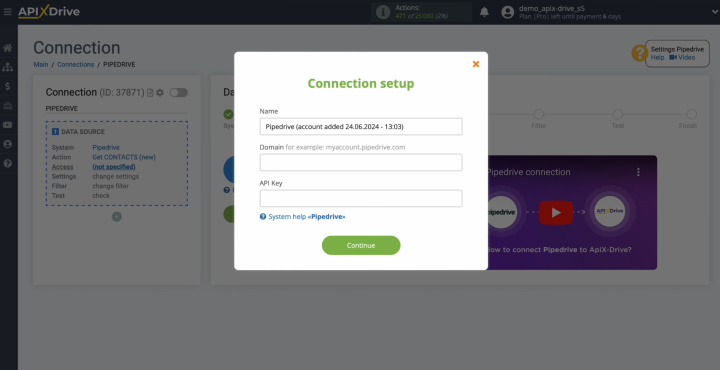
To get this
data, go to your Pipedrive personal account and copy the domain from the address bar
without additional characters.
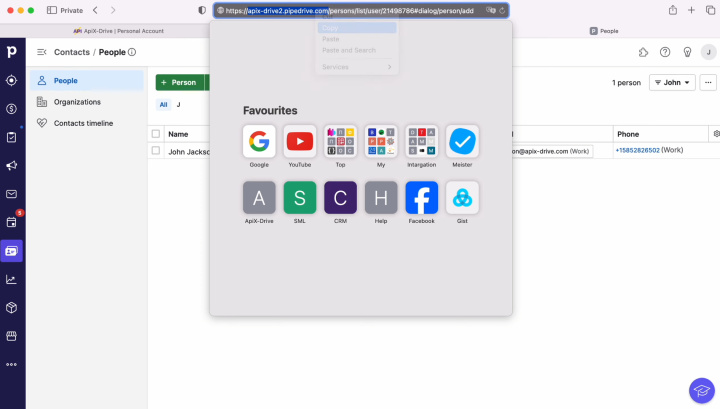
Paste the domain into the appropriate field in ApiX-Drive.
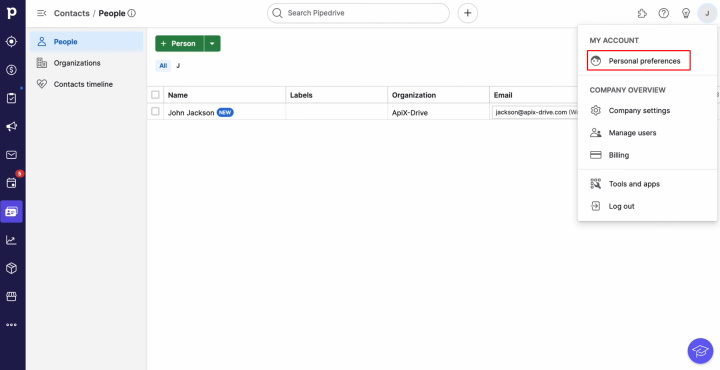
Go to your
account settings.
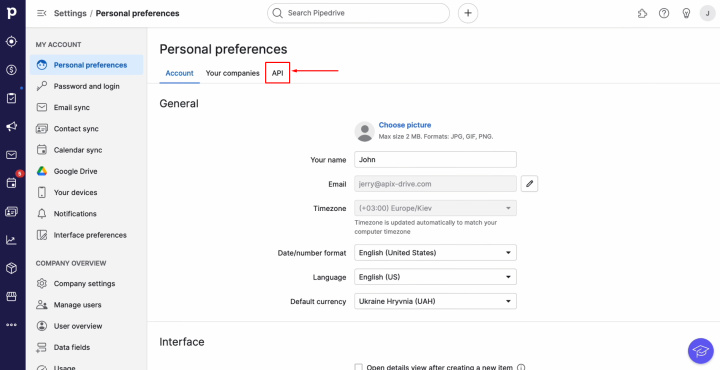
Go to the API
tab.
Copy the API
token.
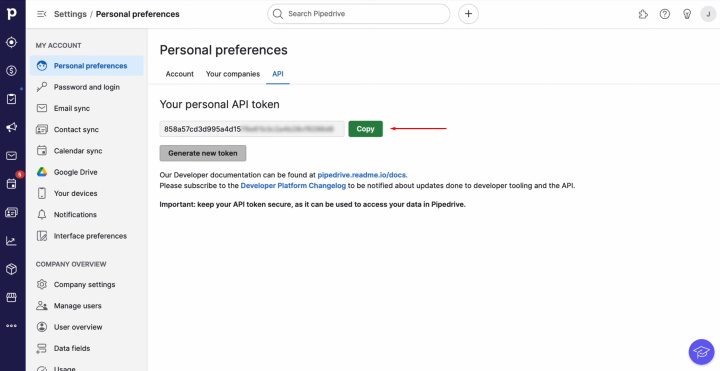
Paste the API
token into the appropriate field in ApiX-Drive. When the required fields are filled
in, click "Continue."
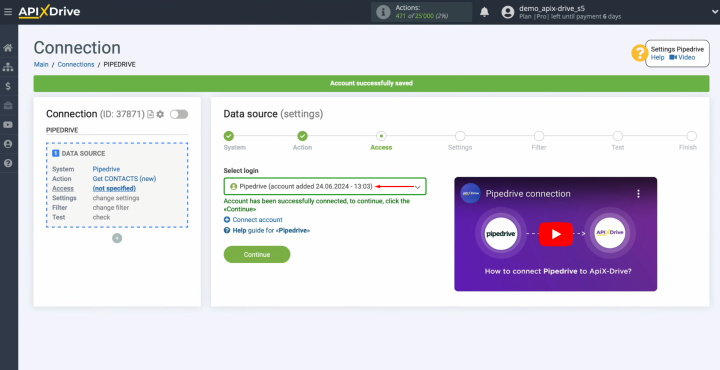
When the
connected login appears in the list of active accounts, select it and click
"Continue."
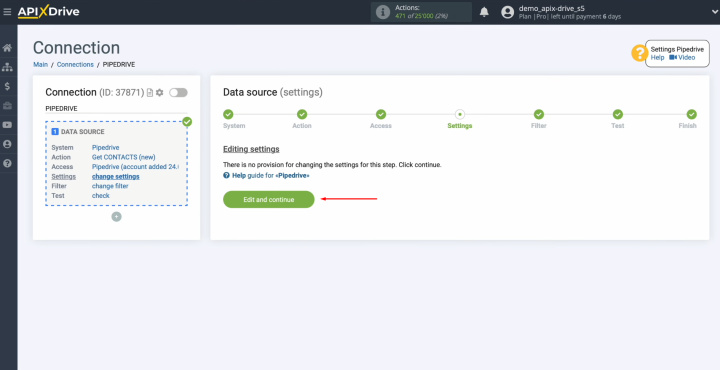
There are no
additional settings for the Pipedrive system, so just click "Edit and continue."
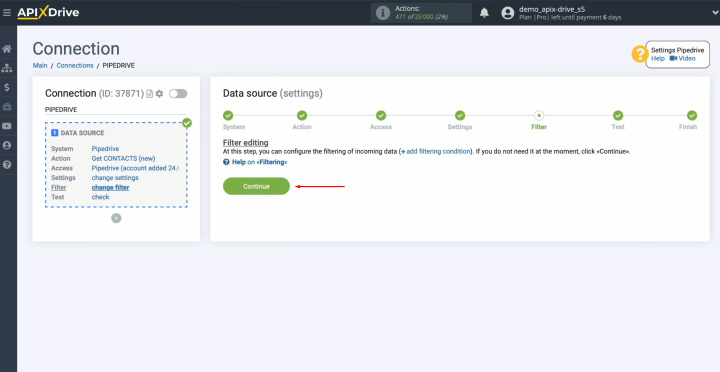
Now, you can
set up a data filter. In our case, there is no need for this, so we also click
"Continue."
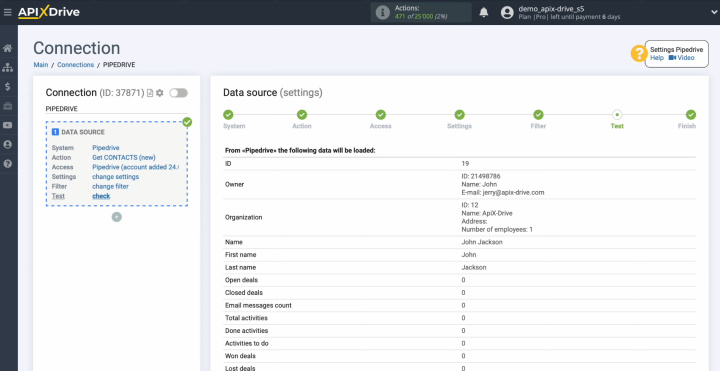
Here, you see an
example of data for one of your Pipedrive contacts.
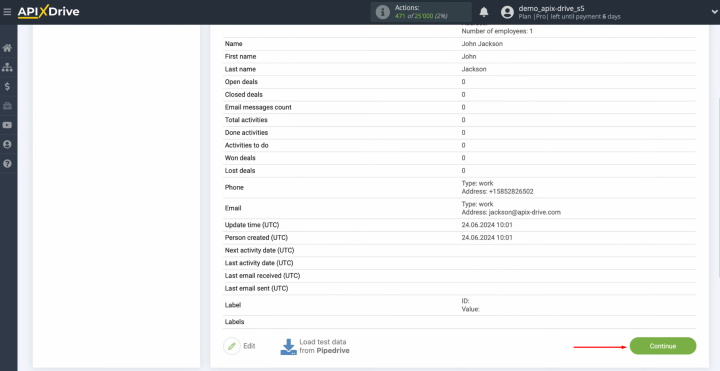
Click "Continue."
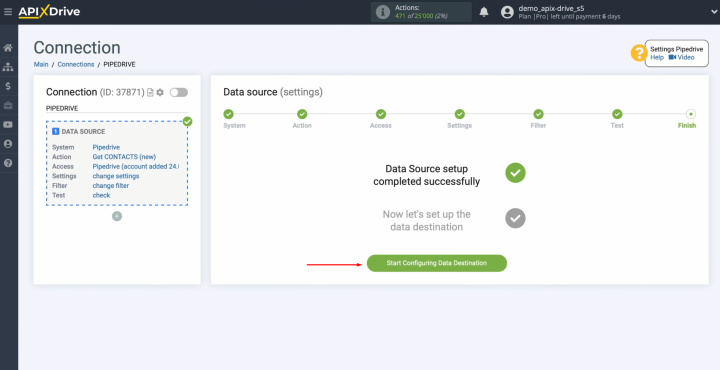
At this point, setting up the Pipedrive data source
has been successfully completed.
- Automate the work of an online store or landing
- Empower through integration
- Don't spend money on programmers and integrators
- Save time by automating routine tasks
Set Up the Data Receiver – Airtable
To set up the Airtable integration with Pipedrive, click "Start Configuring Data Destination."
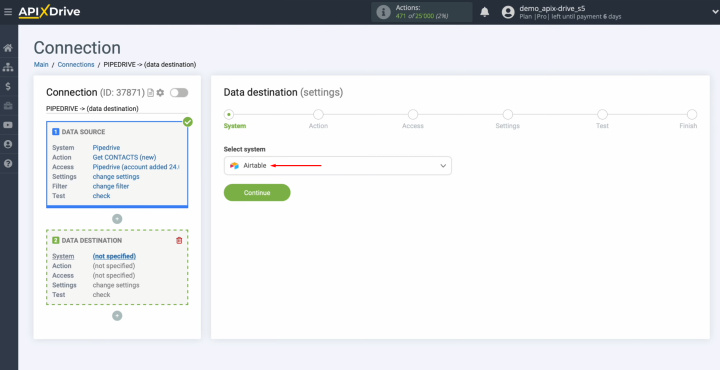
Select the data receiver system. You need Airtable.
Choose the action
"Add ROW."
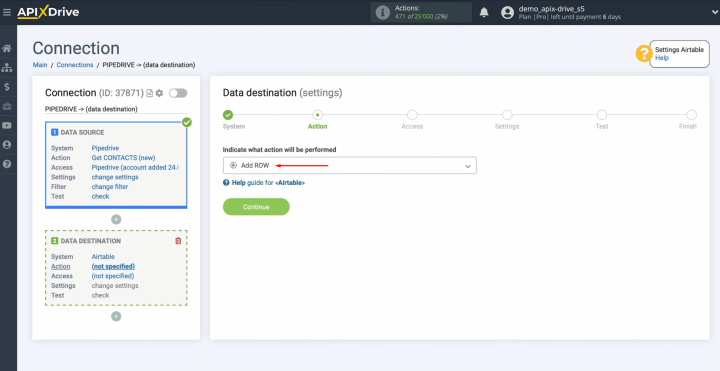
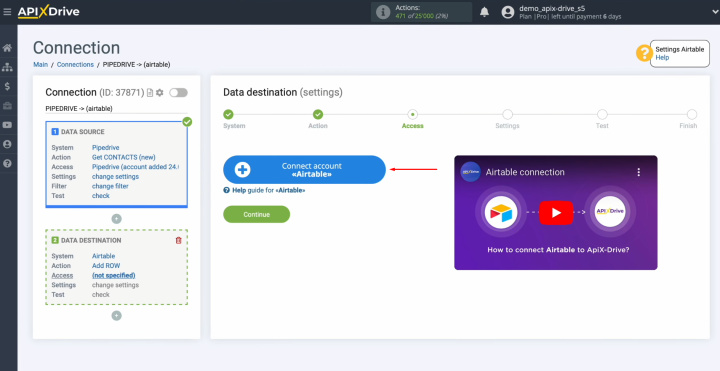
Connect your
Airtable account to ApiX-Drive.
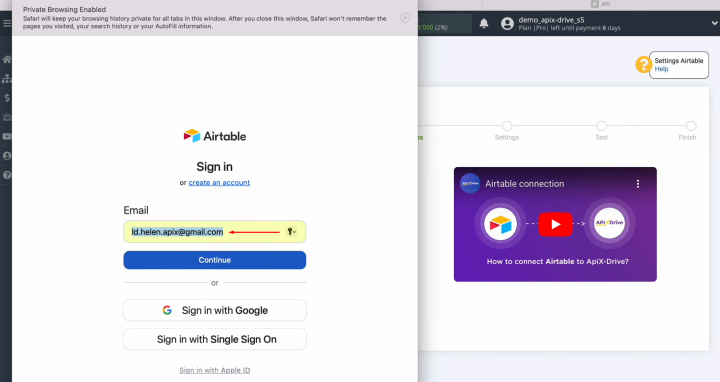
Specify the
login of your Airtable personal account.
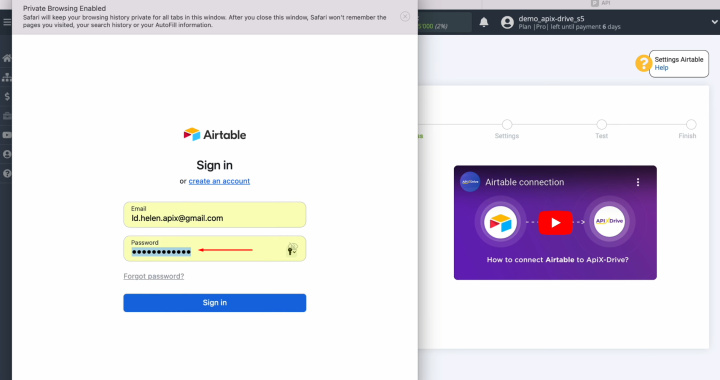
Specify the password
of your Airtable personal account. Click "Sign in."
Provide
ApiX-Drive access to work with your Airtable databases. To do this, click "Add a base."
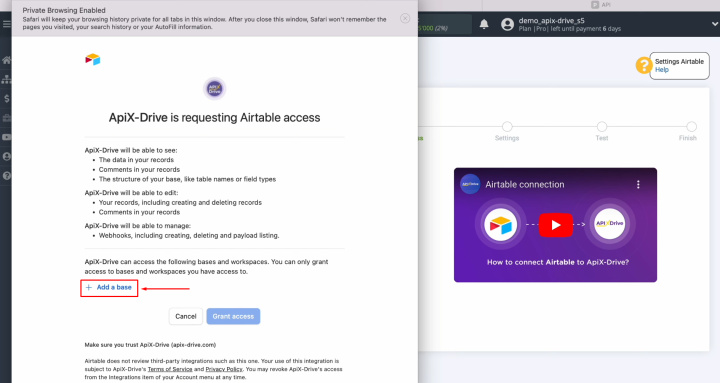
We recommend
providing access to all databases at once to be able to work with them in the
future. Then, click "Grant access."
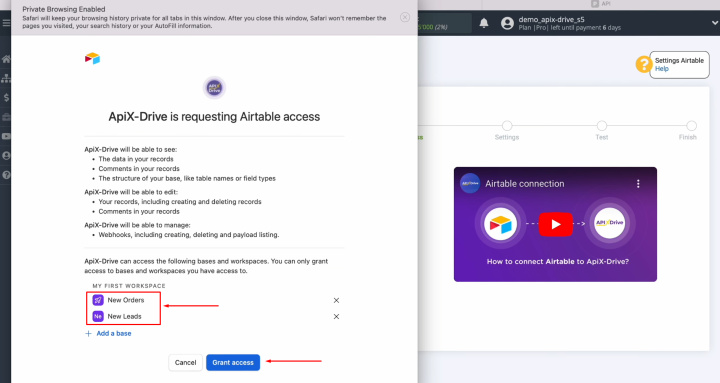
When the
connected login appears in the list of active accounts, select it and click
"Continue."
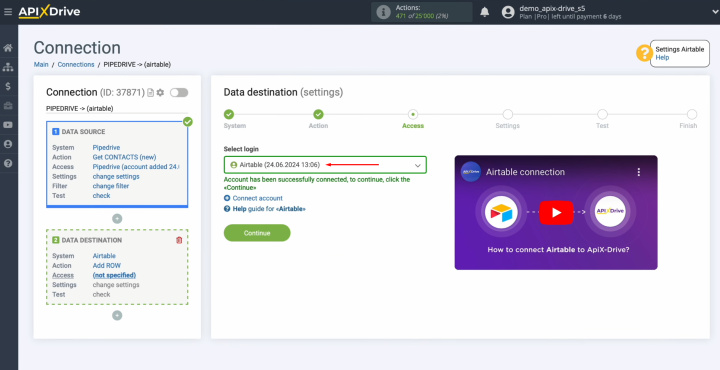
Select the
base in which new rows will be created. After that,
select the
table.
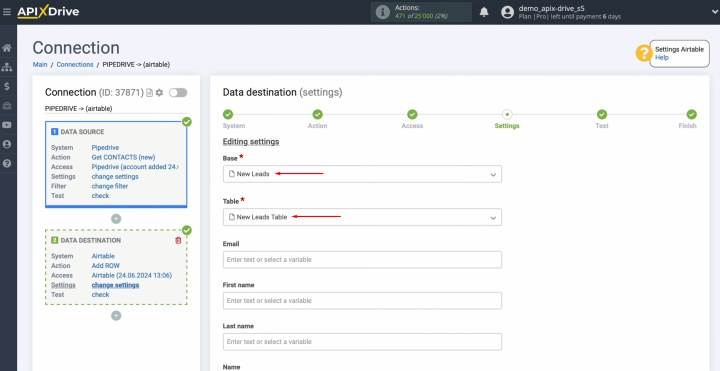
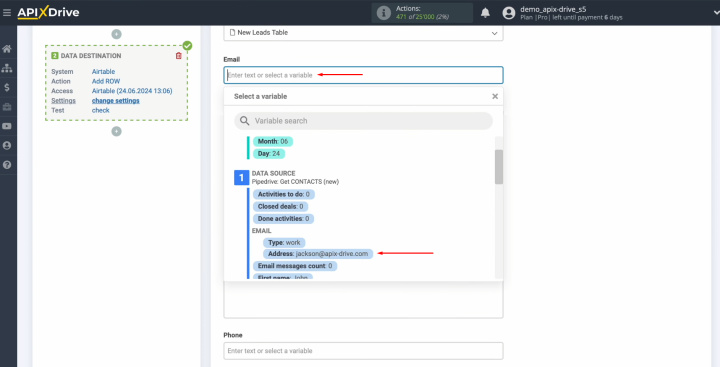
Now, you see
the Airtable fields for creating new rows. You can assign variables from
Pipedrive to these fields. To do this, click in the field and
select a variable from the drop-down list.
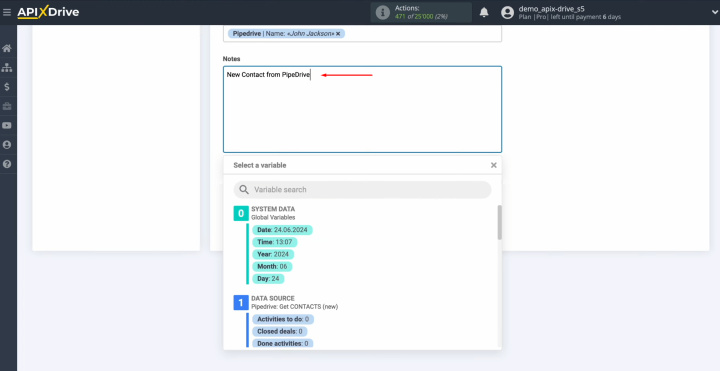
Please note
that you can use not only variables from the drop-down list but also
enter data manually.
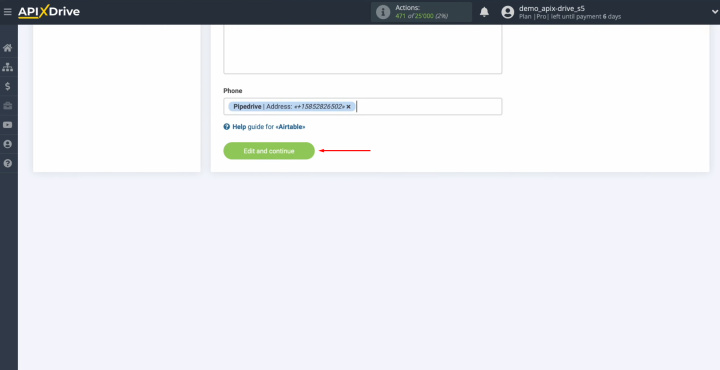
When all
required fields are filled in, click "Edit and continue."
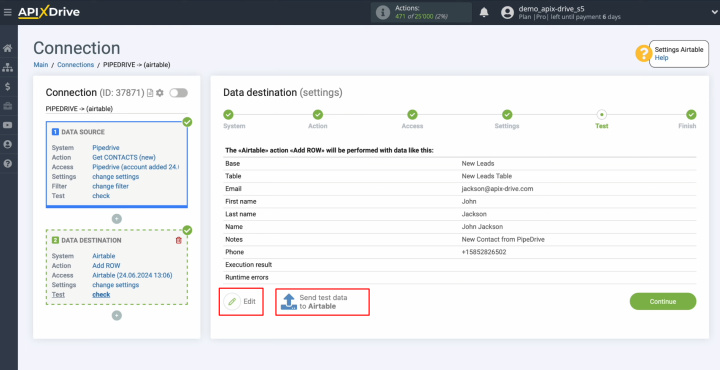
You see an
example of the data that will be transferred to Airtable as new rows with each new contact from
Pipedrive. If you are
not satisfied with something, click "Edit", and you will go back a
step. To check the
correctness of the settings, click "Send Test Data to Airtable."
After
successful sending, go to Airtable and check the result.
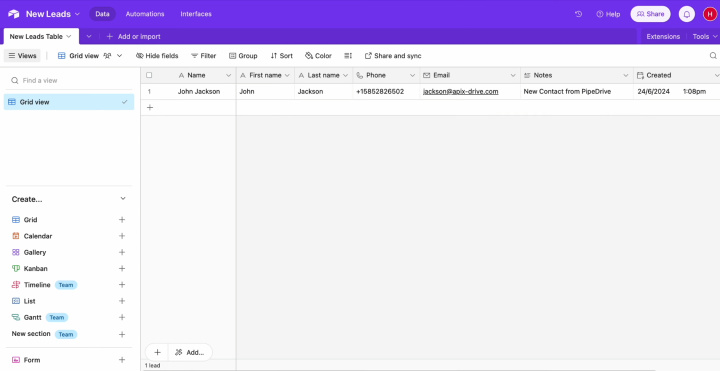
Then, return
to ApiX-Drive and continue setting up.
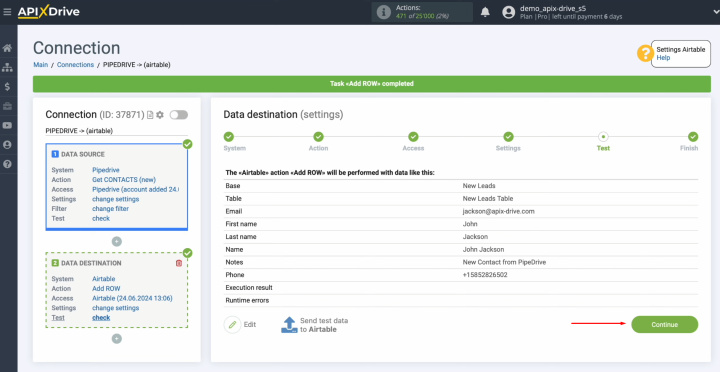
At this point, setting up Airtable as the data
destination has been successfully completed.
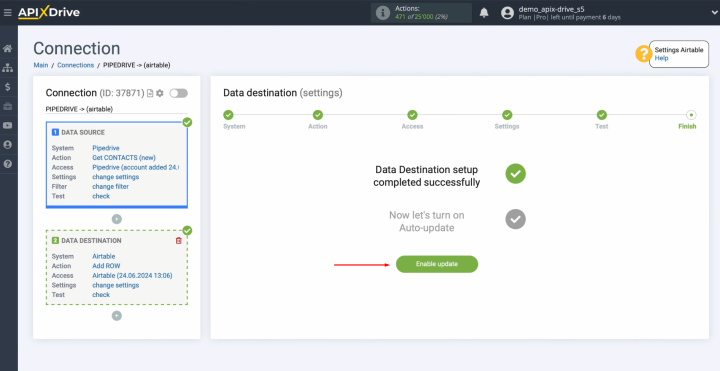
Set Up Auto-Update
In order for data transfer to occur automatically, configure auto-update. Click "Enable update."
Click on the
gear button.
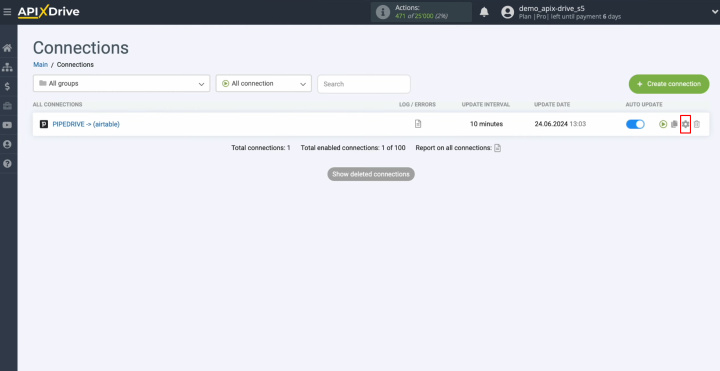
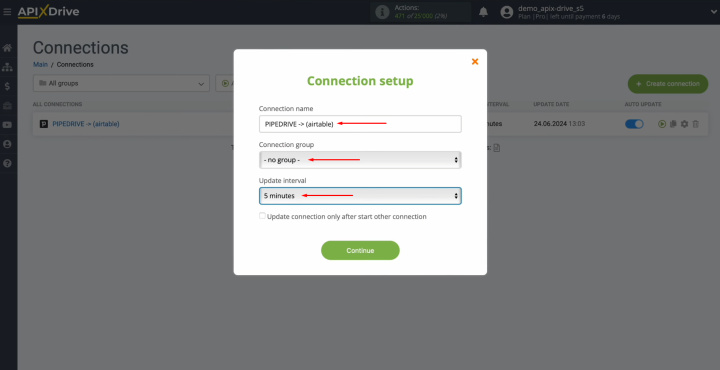
Select the
interval for the operation of the connection. For example, once every 5
minutes. Moreover, here you
can change the name of the connection and assign it to the required group.
Pipedrive & Airtable integration has been completed. Congratulations!
Let's Sum It Up
We hope that you have successfully set up the Airtable & Pipedrive integration according to our instructions and activated the automatic update function. Now a reliable connection has been established between these systems. Most likely, you have already experienced its main advantage – automatic data transfer without your participation.
The Pipedrive integration with Airtable will save you from having to do tedious manual work. Now the data transfer will be fully automated, and this process will be done with the help of our online connector ApiX-Drive. While it deals with your routine tasks, you can focus on improving customer interactions, developing new business strategies, and other aspects that will help your business grow and develop.
Read also about other integrations:


