HelpCrunch and Discord Integration: Automatic Data Transfer
Automation is a progressive method of optimizing business processes. Thanks to it, a company can significantly improve its efficiency and reduce the costs of routine tasks. In the area of customer service, it simplifies the processing of requests, ensures quick responses, and provides automatic answers to frequently asked questions. As a result, the level of customer satisfaction increases. In the area of internal communication and team coordination, automation optimizes the organization of work processes and task management. This allows for a more rational distribution of resources, improved communication, and increased overall team productivity.
HelpCrunch and Discord for Workflow
HelpCrunch is a powerful service for working with clients. With its help, you can set up automatic responses to frequently asked questions, create scenarios for distributing user requests, and use chatbots to collect information from clients. Discord is a great platform for coordinating employees. Automation of this process is implemented with the help of bots that can assign roles to participants, manage access to channels, set up notifications, and coordinate various aspects of internal workflows. This simplifies communication between colleagues and increases the efficiency of the team.
Separately, HelpCrunch and Discord do a pretty good job of their tasks. By using them in your work, you automate at least several business processes. This is a good result. Do you want to get even more from them and maximize automation? You can achieve this by linking both services and setting up data transfer from one to the other. In this article, we will tell you how to easily, quickly, and reliably set up HelpCrunch and Discord integration using the ApiX-Drive online connector.
Integration of Services is the Key to the Most Efficient Automation
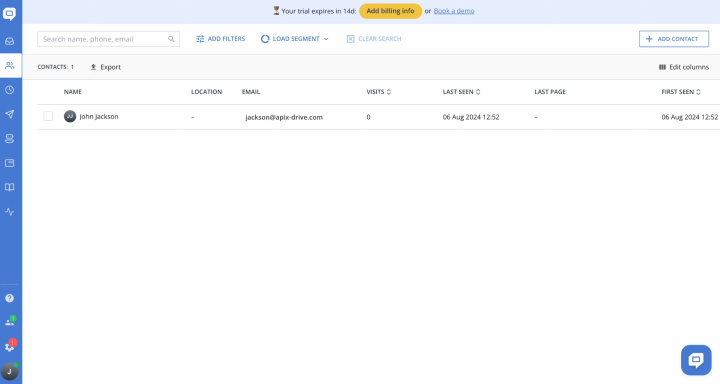
Discord and HelpCrunch integration helps significantly improve the speed and accuracy of business processes in the areas of customer support and team collaboration. When these platforms work together, each new message from a customer that comes into HelpCrunch can automatically create a notification or task in the corresponding Discord channel. For example, if a customer has submitted a request for technical support, a notification about the new contact can immediately appear in the channel that the support specialists monitor. This allows the team to respond to requests instantly, speeding up the process of resolving issues.
For teams working remotely or in a hybrid format, HelpCrunch + Discord integration
provides a convenient way to instantly share information and coordinate
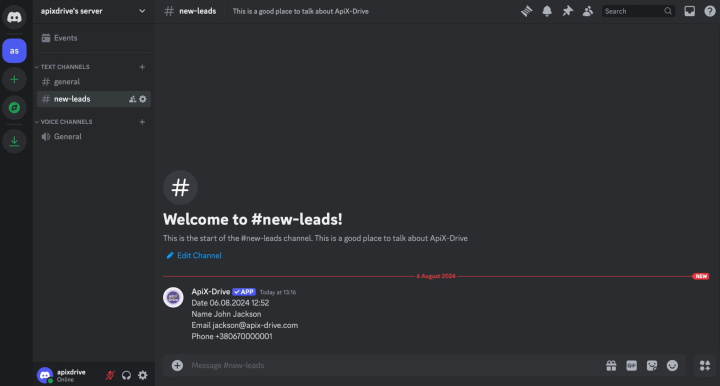
activities. For example, some employees may not work with the HelpCrunch service, but receive the data they need (contacts, messages) in a convenient format in the Discord channel.
How to Set Up HelpCrunch and Discord Integration
To set up Discord + HelpCrunch integration, you don’t have to urgently master programming or delve into the intricacies of API requests. You won’t need outside help either. Our online connector ApiX-Drive will do the hard work for you. Its functionality allows you to quickly and easily connect systems. Thanks to a simple and intuitive interface, the entire process will take no more than 10 minutes. Detailed text and video instructions from ApiX-Drive employees will help you easily connect accounts and set up the integration.
The first step is to register on the official website, ApiX-Drive.com. After that, you can proceed directly to HelpCrunch & Discord integration. We offer step-by-step instructions with an example of one of three possible options – transferring new contacts from a customer service to a communication platform.
Set Up the Data Source – HelpCrunch
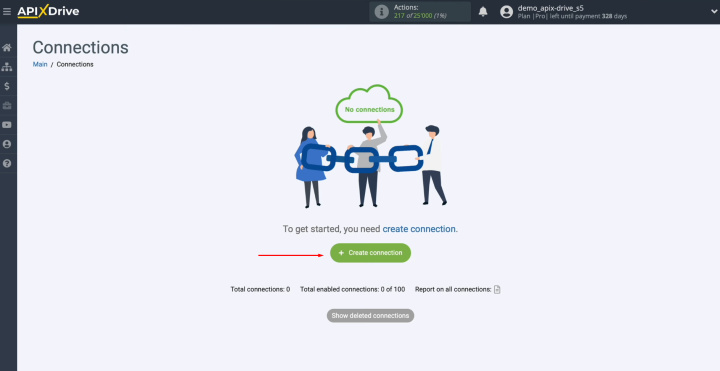
To set up the HelpCrunch integration with Discord, first create a new connection. To achieve this, click on the green button.
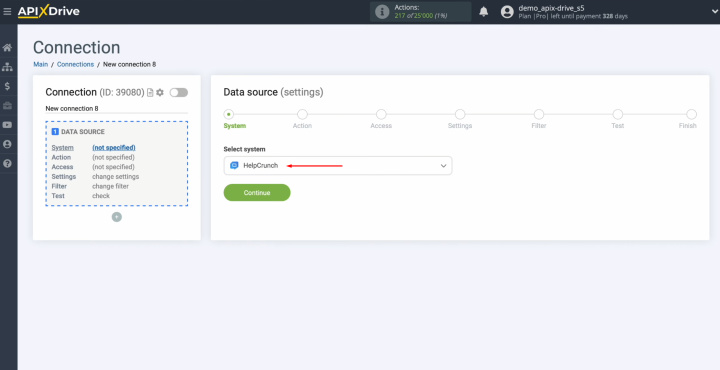
Select the
data source system. You need HelpCrunch. Click “Continue”.
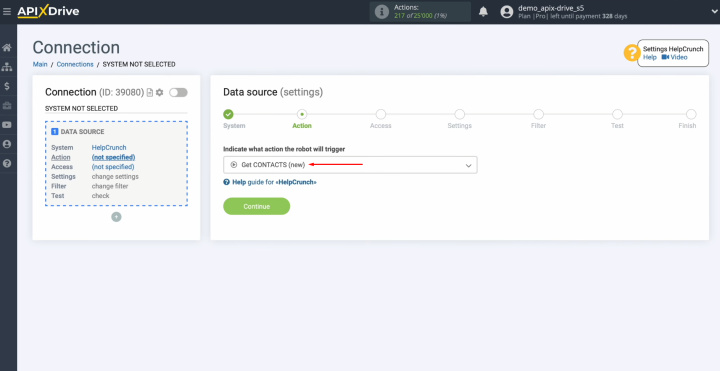
Choose the action “Get CONTACTS (new)”. Click
“Continue”.
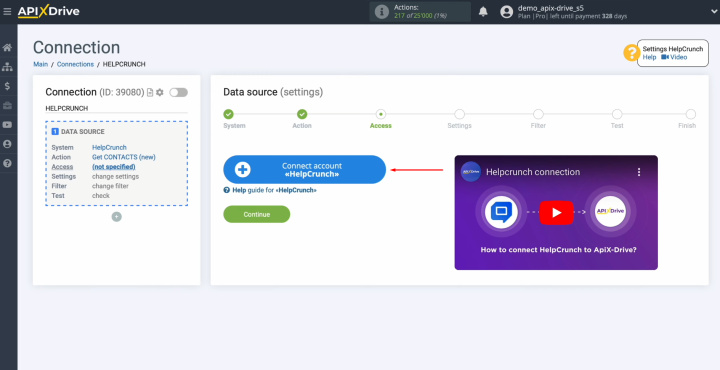
Connect your
HelpCrunch account to ApiX-Drive. For this, click on the blue
button.
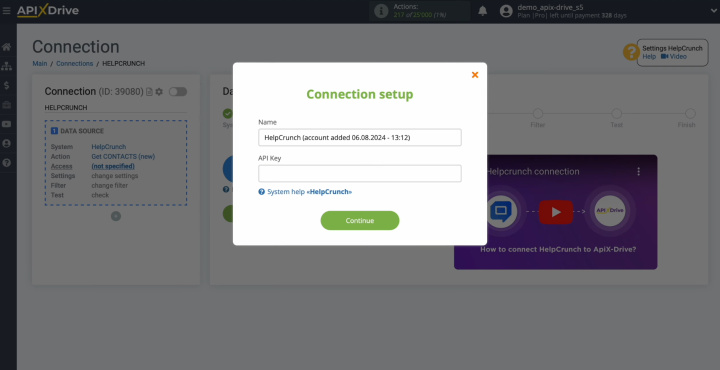
In this
window, you need to specify the API key.
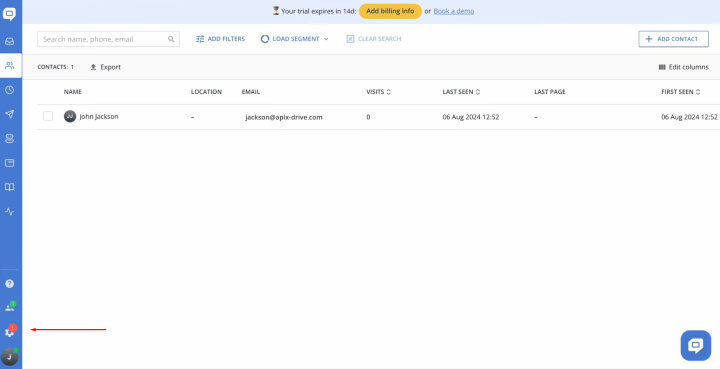
To get the
API key, go to settings on your HelpCrunch personal account.
Go to the
developers section. Click “Public API” item.
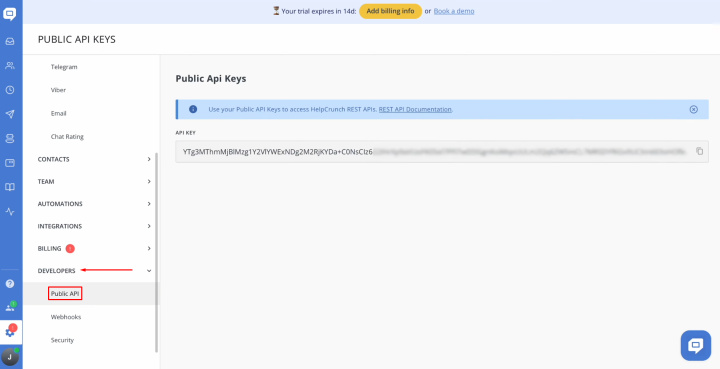
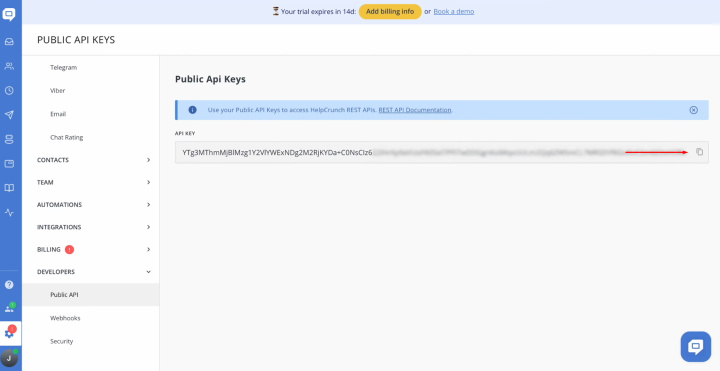
Copy the API
key.
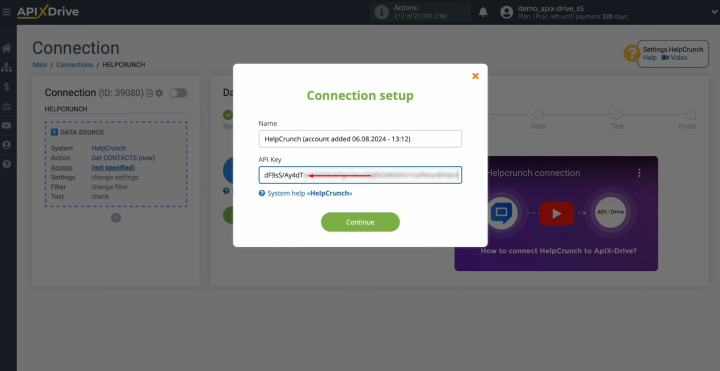
Paste the API
key into the appropriate field in ApiX-Drive. When the required field is filled
in, click “Continue”.
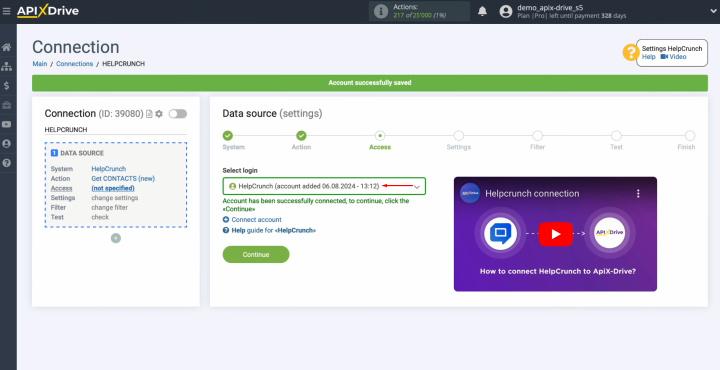
When the
connected login is displayed in the list of active accounts, select it and
click “Continue”.
There are no
additional settings for the HelpCrunch system, so just click “Continue”.
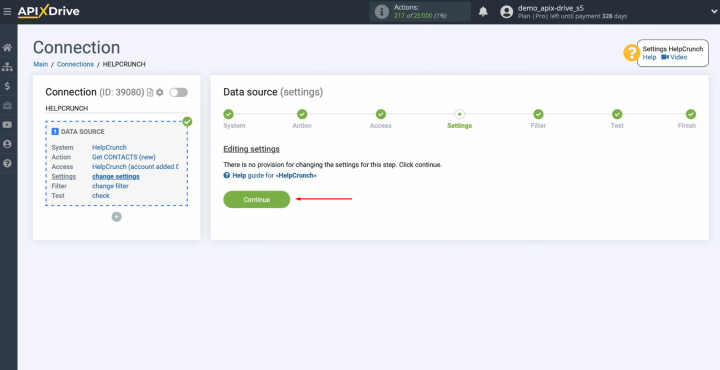
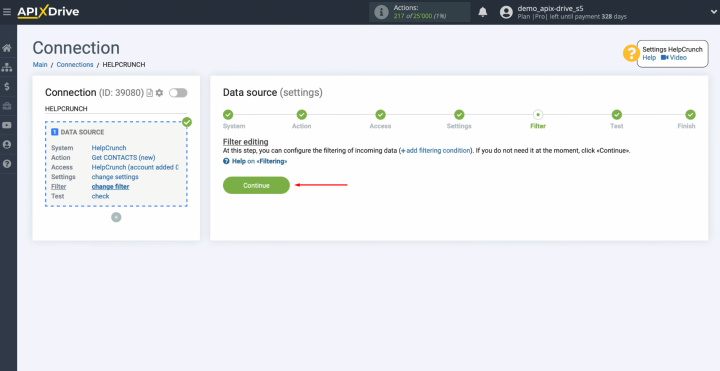
Here, you can
set up a data filter. In this case, there is no need for this, so also
click “Continue”.
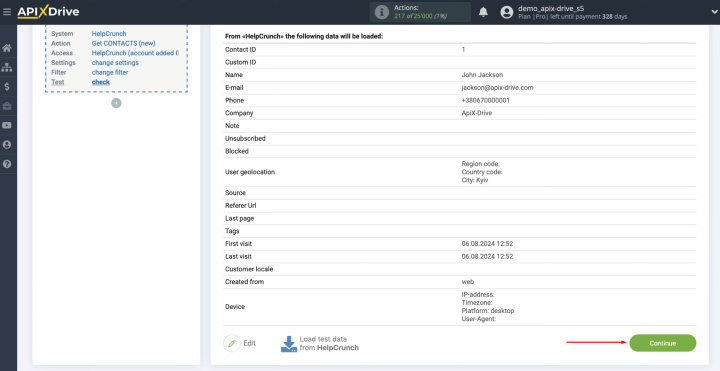
Now, you see an
example of data for one of your HelpCrunch contacts. If everything suits you, click “Continue”.
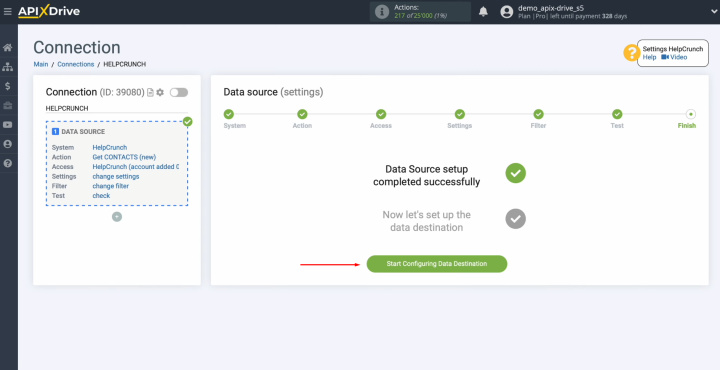
The
HelpCrunch data source setup is successfully completed.


Set Up the Data Receiver – Discord
Now, you can proceed to set up the data receiver. For this, click on the green button.
Select the data receiver system. You need Discord. Click
“Continue”.
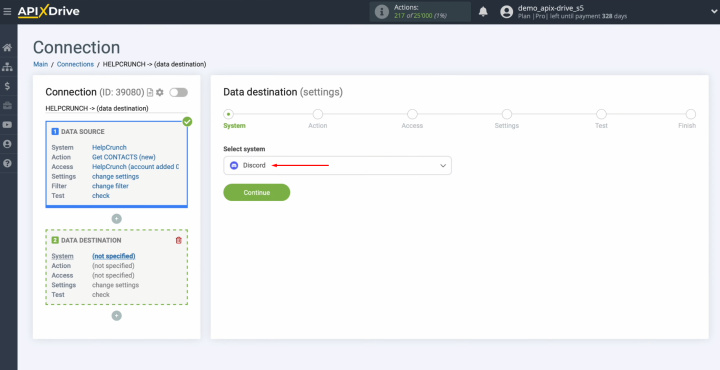
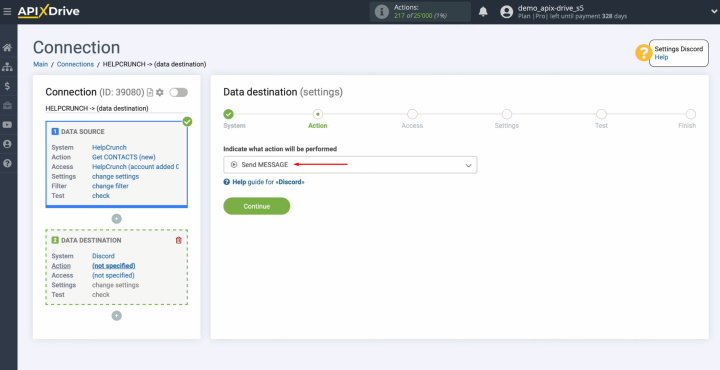
Choose the action “Send MESSAGE”. Click
“Continue”.
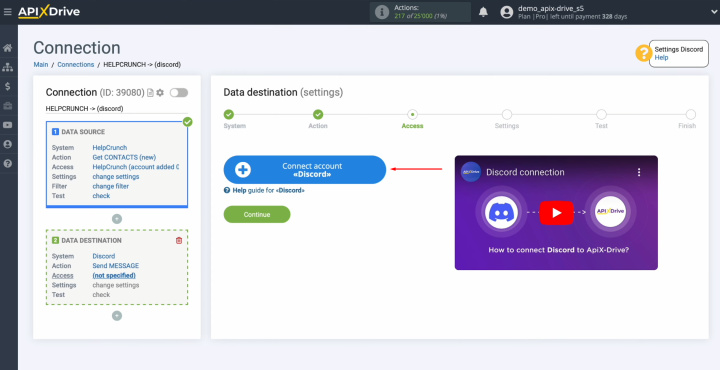
Сonnect your
Discord account to ApiX-Drive. For this, click on the blue
button.
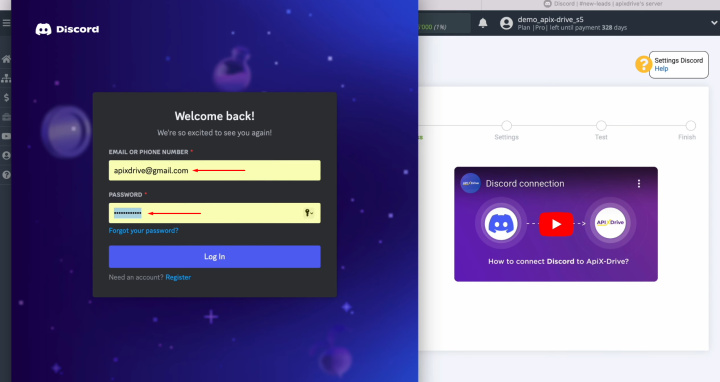
Specify the
login and password of your Discord personal account. Click “Log
in”.
Grant ApiX-Drive
access to work with your Discord account. For this, select the server and click “Continue”.
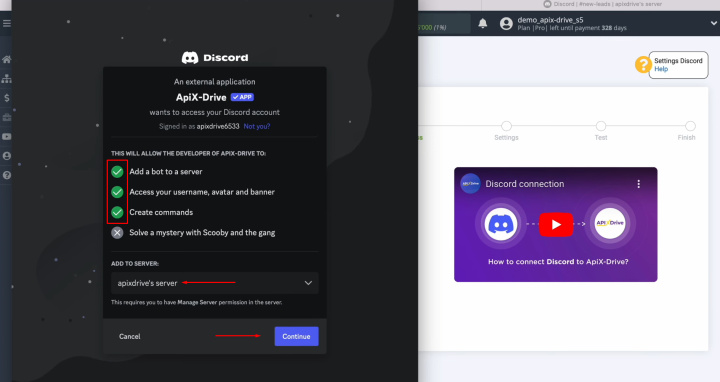
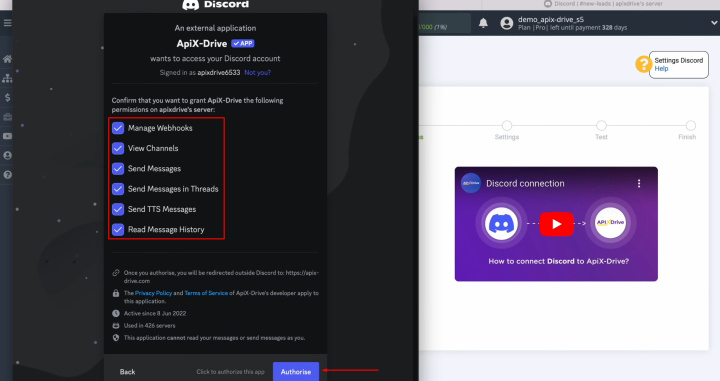
Check that
all checkboxes are enabled. After that, click
“Authorize”.
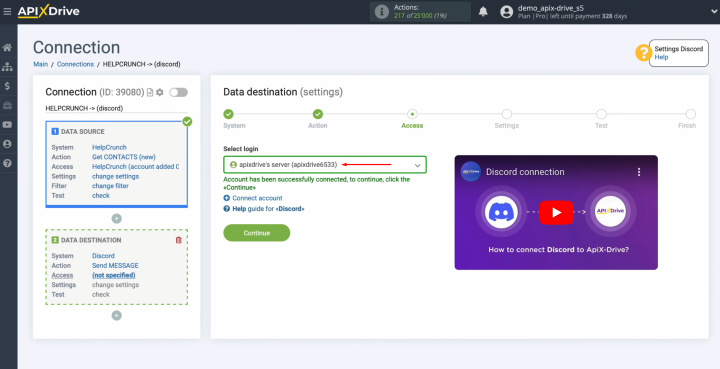
When the
connected login appears in the list of active accounts, select it and click “Continue”.
Now, you see
the Discord fields for sending messages. First, select the channel.
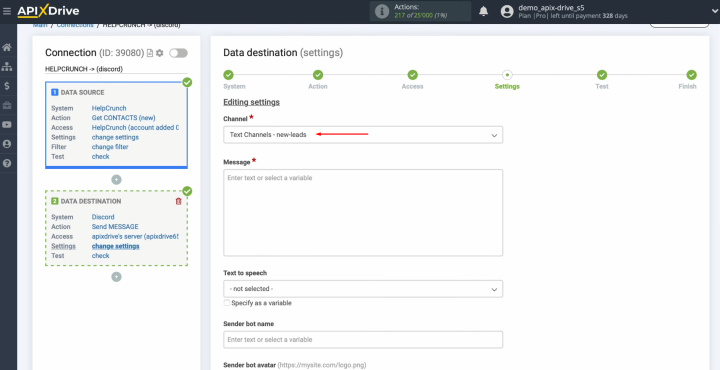
In the
Message field, you can assign variables from HelpCrunch. To achieve this, click in the field and
select the variable from the drop-down list.
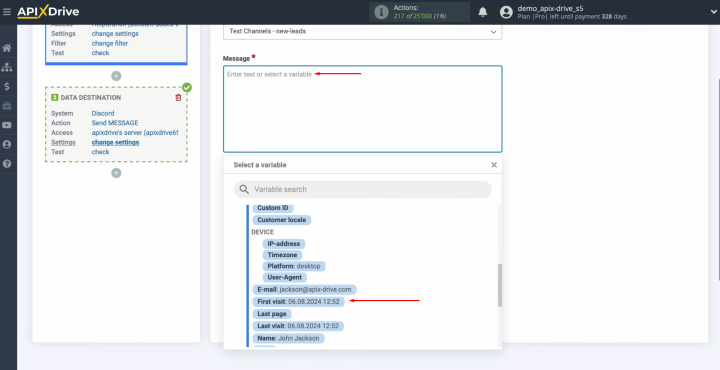
You can use
not only variables but also enter values manually. Use “Enter” to go to the next line.
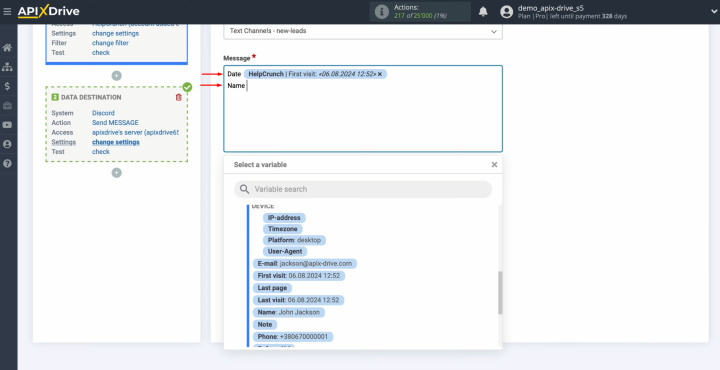
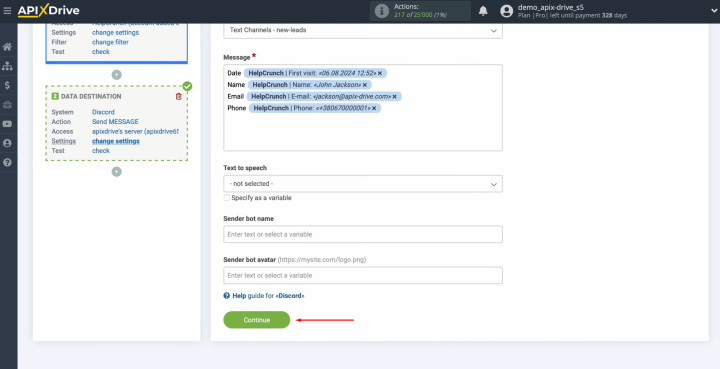
When all the
necessary fields are filled in, click “Continue”.
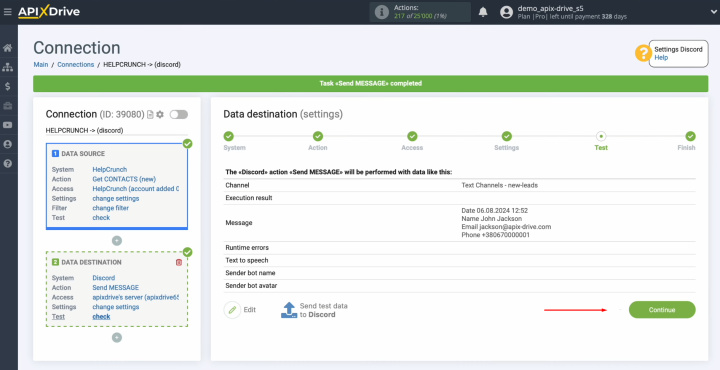
Here, you see an
example of the data that will be sent to Discord as messages to the
selected channel, with each new contact from HelpCrunch. If you are
not satisfied with something, click “Edit” and you will go back a step. To check if your settings are correct, click "Send test data to Discord".
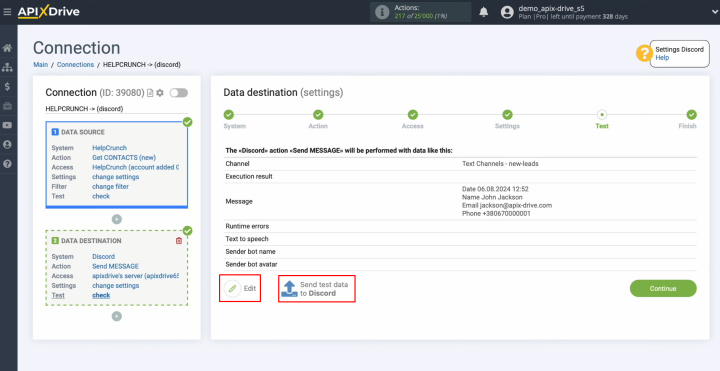
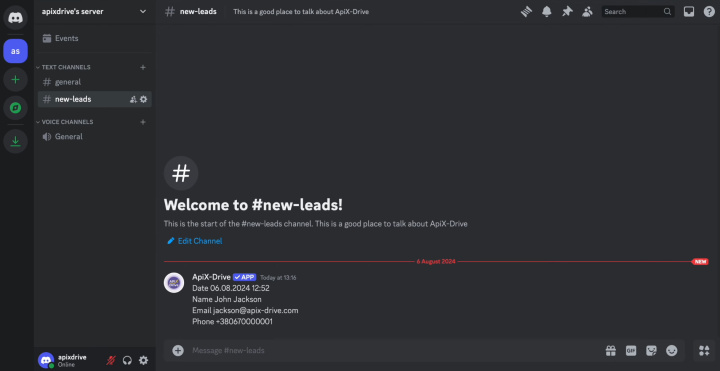
After
successful sending, go to Discord and check the result.
Return to ApiX-Drive and continue setting up.
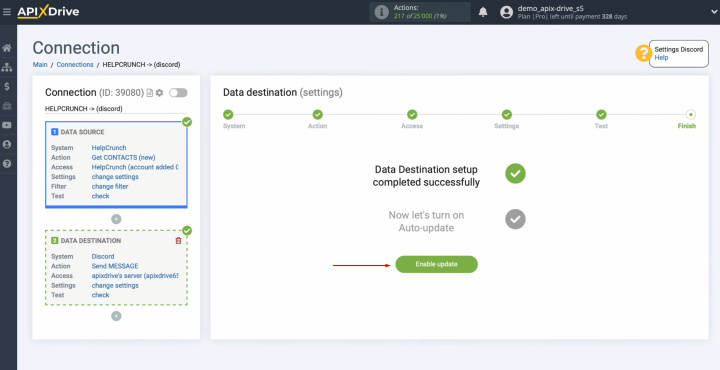
This successfully
completes the setting of Discord as a data receiver.
Set Up Auto-update
In order for data transfer to occur automatically, configure auto-update. Click “Enable update”.
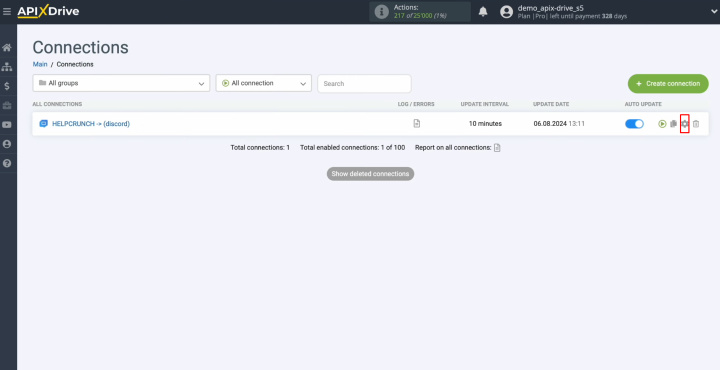
Click on the
gear button.
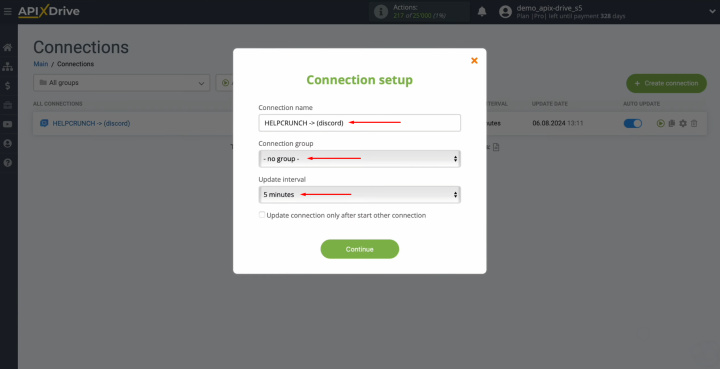
Select the
interval for the operation of the connection. For example, once every 5
minutes. Moreover, here you
can change the name of the connection and assign it to the required group.
Click “Continue”.
That's all. Discord & HelpCrunch integration was completed. You did it.
Congratulations!
Conclusion
After successfully setting up the integration of HelpCrunch and Discord according to our instructions and activating the auto-update mode, you have received a reliably working connection between these systems. Moreover, you have probably already been able to evaluate its result – automatic data transfer without errors and delays.
HelpCrunch and Discord integration will save you from tedious manual work. Now you don’t have to transfer data yourself – this process will be fully automated. Our online connector ApiX-Drive will be responsible for the routine. At this time, you can focus on improving the quality of interaction with clients, learning new business strategies, and other important areas that will help your company reach a new level.
