How to Set Up Tally and Mailchimp Integration: Complete Step-by-Step Tutorial
In today's business, fast and error-free processing of lead data is the key to effective work. If you use online forms and marketing platforms to interact with prospects, implementing automation is an effective solution to increase productivity. In this article, we will look at how to set up Tally and Mailchimp integration using our online connector ApiX-Drive.
Tally and Mailchimp Integration—Higher Level Automation
There are four levels of automation of internal business processes:
- Zero level. No automation. All data processing is done manually. Example: After receiving lead data from a Tally form, a marketer enters it manually in Mailchimp. This is a time-consuming process that also carries the risk of errors and data loss.
- First level. Partial automation. Only individual business processes are automated. There is no synchronization. Example: Data is automatically entered into a CRM or spreadsheet but must be manually transferred to Mailchimp.
- Second level. Integration automation. All new contacts from Tally forms automatically transfer to the Mailchimp mailing list. Example: After filling out a Tally form to register for an announced event, customers receive a series of email notifications. First, they receive a confirmation of registration, then a reminder about the event and special offers, if available.
- Third level. Intelligent automation. Lead data is transmitted and processed automatically. Contacts are grouped and segmented and included in trigger-based personalized mailings, the results of which are analyzed for optimization. At this level, the pre-built integration becomes the basis for implementing marketing strategies.
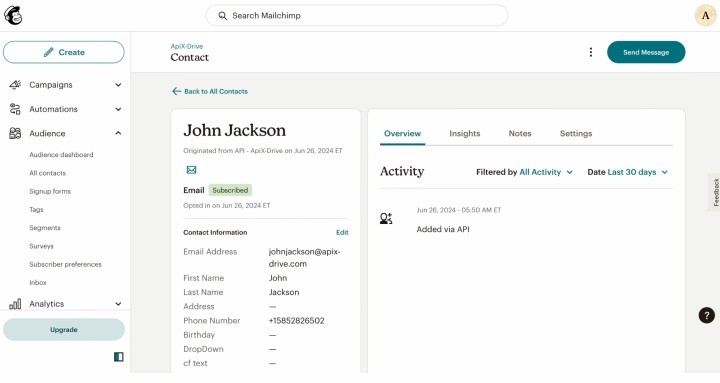
Mailchimp and Tally integration provides stable automatic data transfer from web forms directly to the marketing platform. Lead contact details are sent to the mailing list shortly after submission for further sending of reminders, special offers, or materials. This approach is especially important for companies that generate leads regularly. It allows them to quickly launch marketing campaigns without delays or data loss.
How to Connect Tally to Mailchimp
Setting up Tally and Mailchimp integration via ApiX-Drive requires no programming knowledge. The online connector allows even users without technical experience to automate data exchange between both services quickly and without unnecessary complications.
We have prepared a guide for you that explains in detail how to connect Mailchimp to Tally. The whole procedure takes a few minutes and consists of the following steps:
- Creating a personal account on the ApiX-Drive platform.
- Connecting Tally as a data source.
- Connecting Mailchimp as a data destination.
- Configure the data that will be sent to Mailchimp (for example, name, email, and phone).
- Checking the integration functionality and starting the auto-update mode.
- Automate the work of an online store or landing
- Empower through integration
- Don't spend money on programmers and integrators
- Save time by automating routine tasks
If you're ready to set up an automation workflow, you should start with the data source. We suggest you do this right now using our step-by-step Tally and Mailchimp integration guide.
Data Source Settings—Tally
To integrate Tally with Mailchimp, first create a new connection.
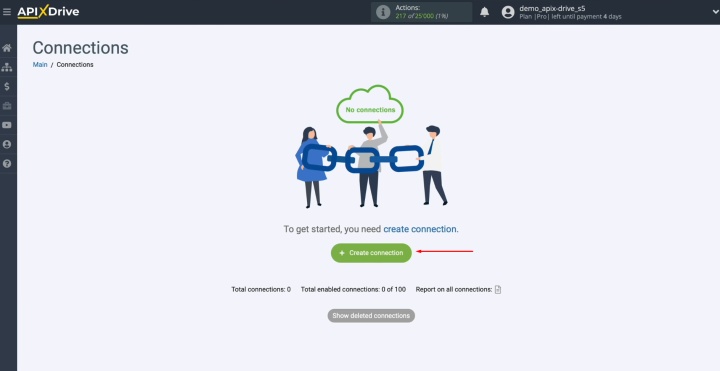
Select the
data source system, Tally.
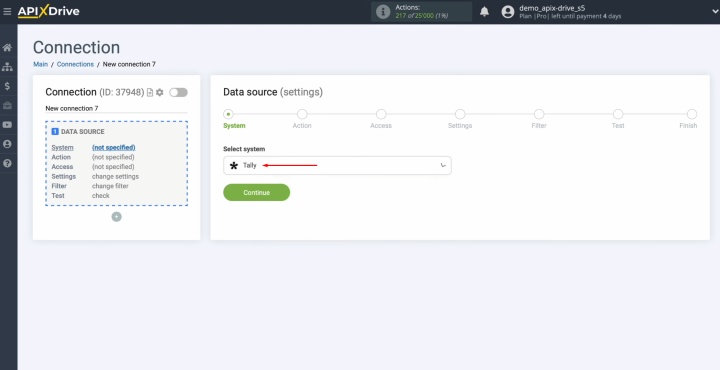
Choose the action Get DATA.
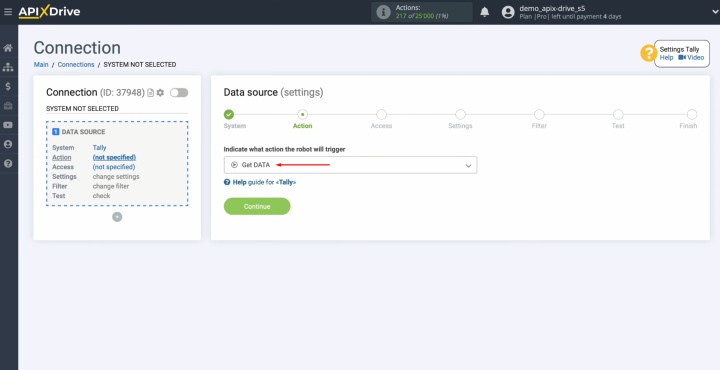
Connect your Tally
account to ApiX-Drive.
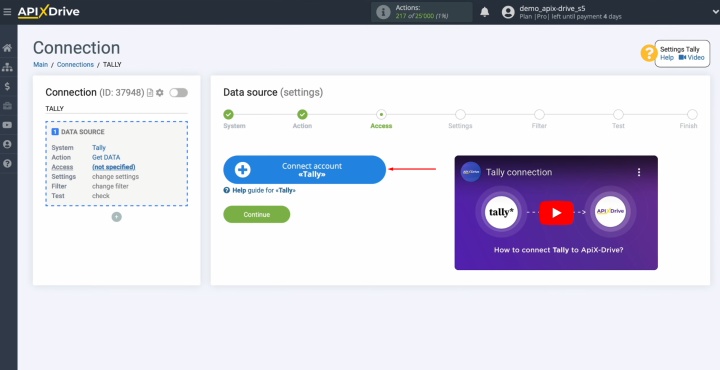
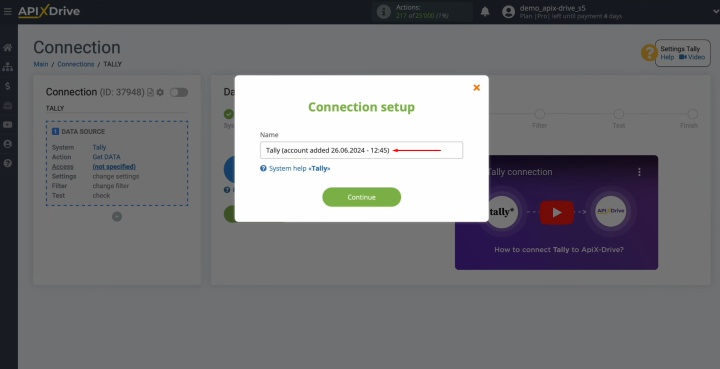
You can rename the connection here or simply click Continue.
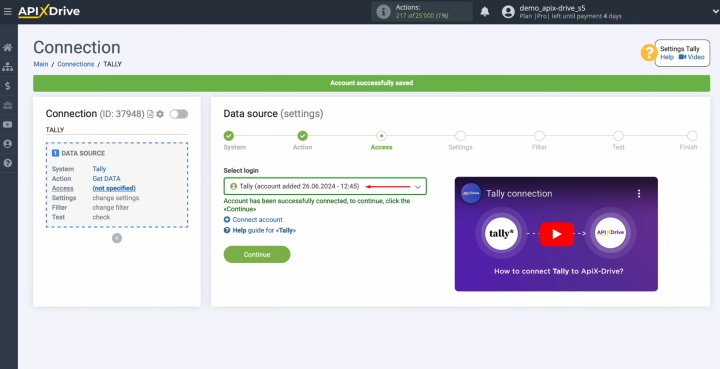
When you see the connected account listed, select it and press Continue to proceed.
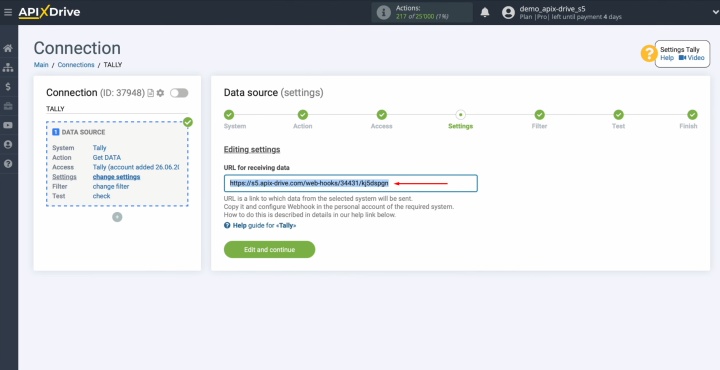
The system
will display the URL for receiving data—this is where leads from Tally will
be sent. Copy it and switch to your Tally account to proceed with the setup.
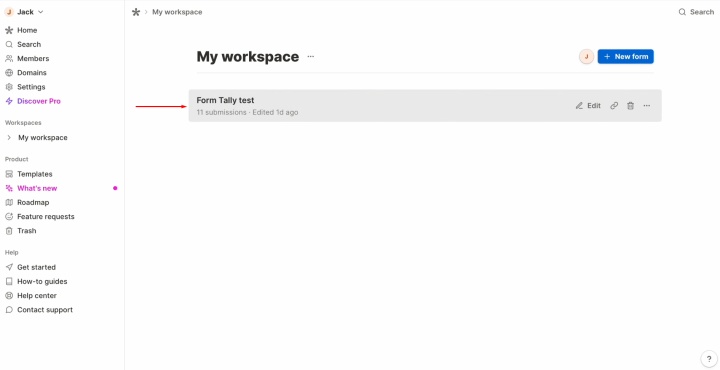
Pick the form that will be used to gather new leads.
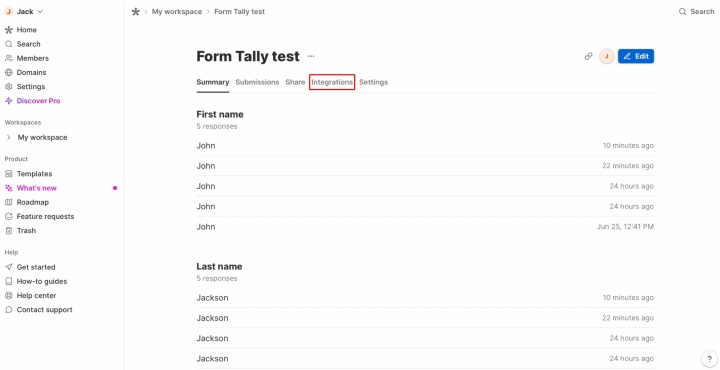
Go to the Integration section.
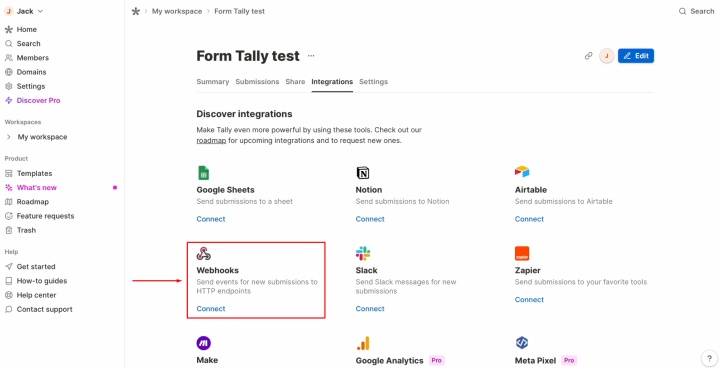
Find
the Webhooks section and click Connect.
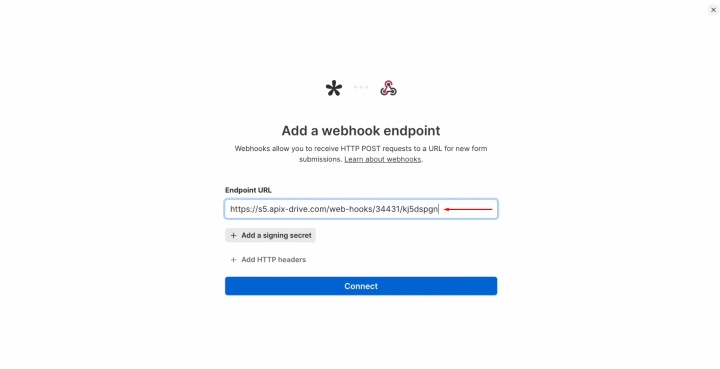
Paste the copied URL and click Connect again.
Check that
the Webhook is
turned on.
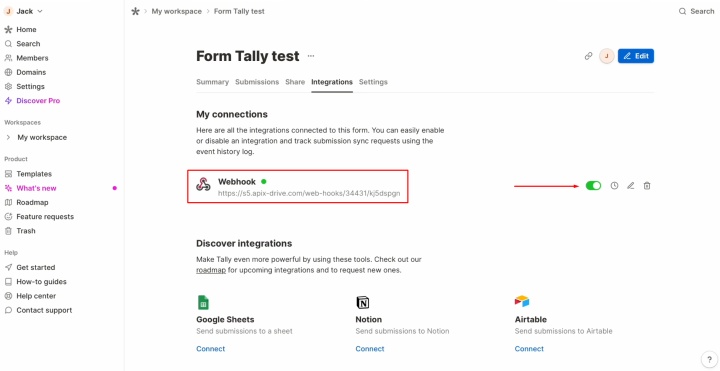
Copy the link and go to the form.
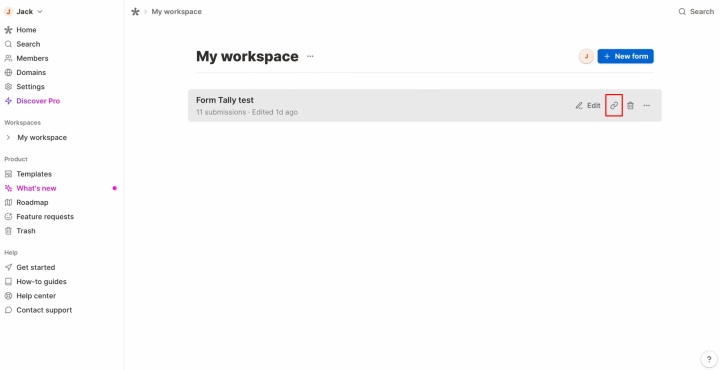
Now, create test data through the form to submit to the specified URL.
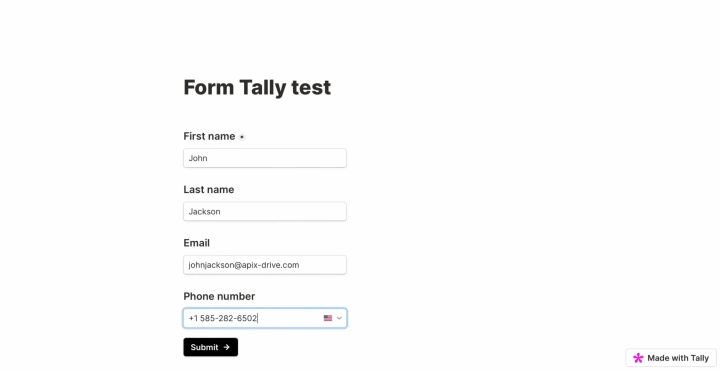
Once the form is submitted, navigate back to ApiX-Drive and continue setting up the configuration.
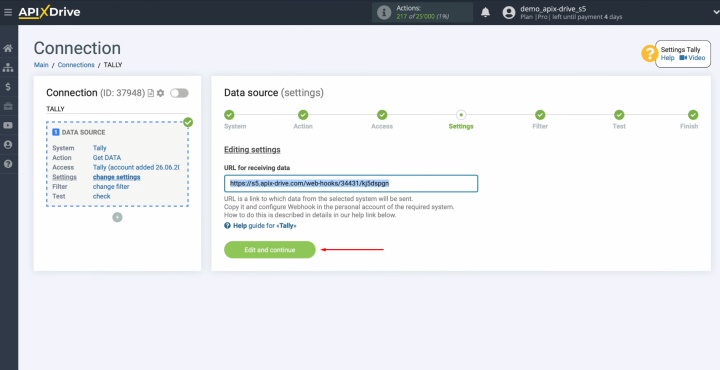
At this
stage, you can apply a data filter. Since it’s unnecessary for this
integration, simply click Continue.
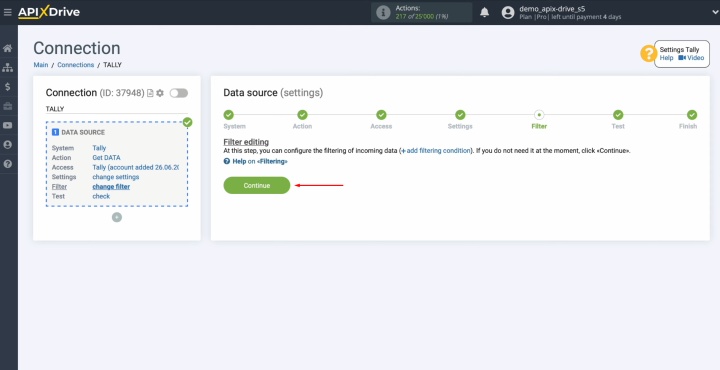
You should
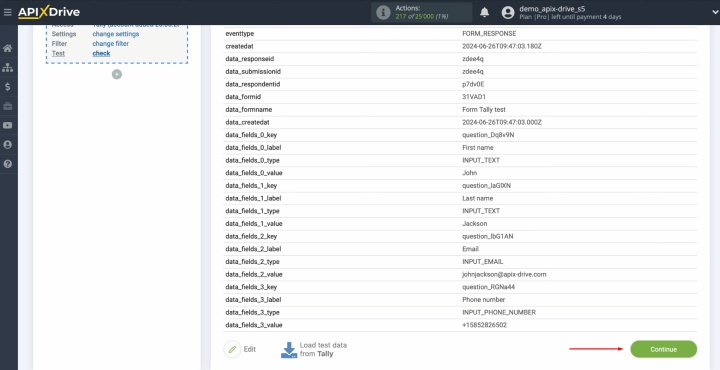
now see the data submitted via the form. If no data appears, repeat the
previous steps.
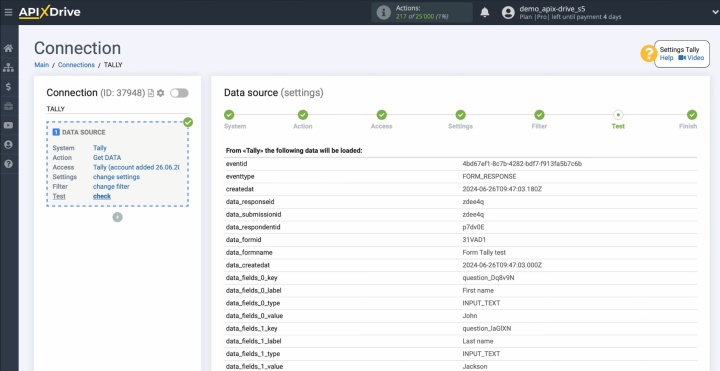
If you are
satisfied with everything, click Continue.
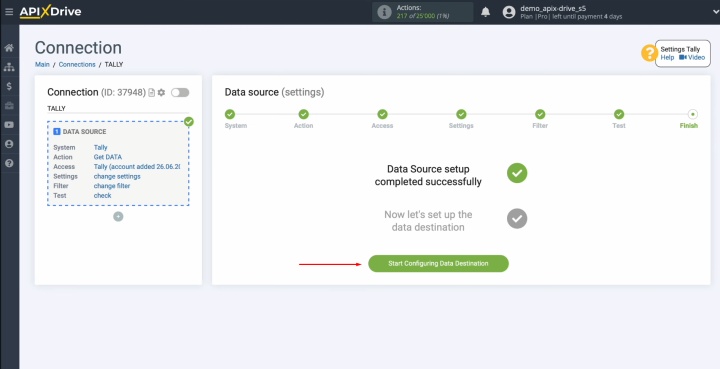
Data Destination Settings—Mailchimp
To integrate Mailchimp with Tally, move on to setting up the data destination.
Choose Mailchimp as the data receiver.
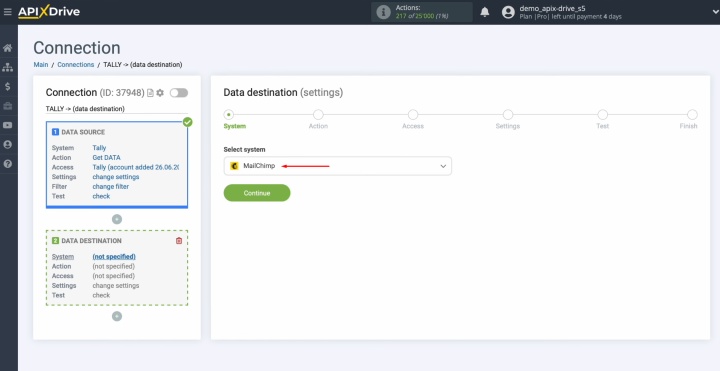
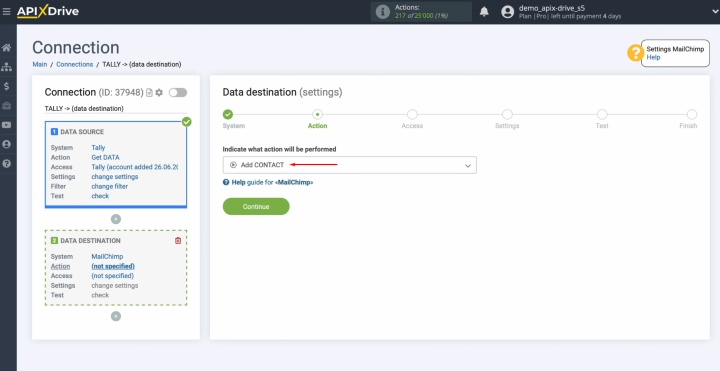
Select the
action Add CONTACT.
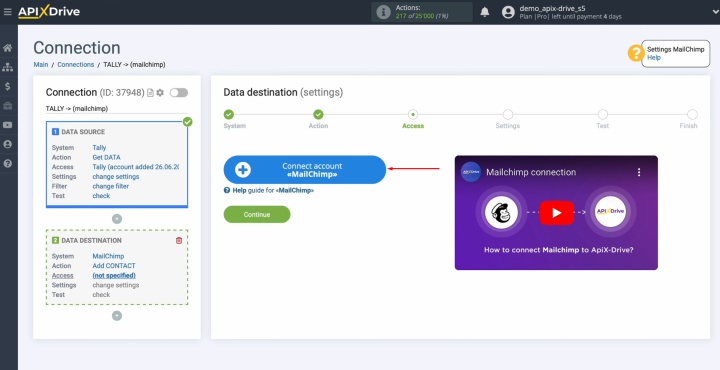
Connect your
Mailchimp account to ApiX-Drive.
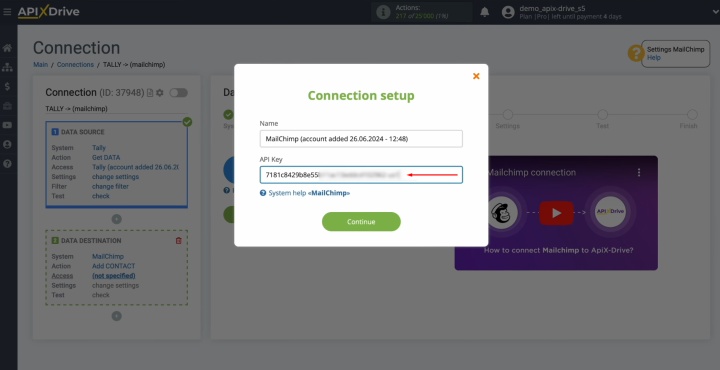
Next, enter the API key in the designated ApiX-Drive field.
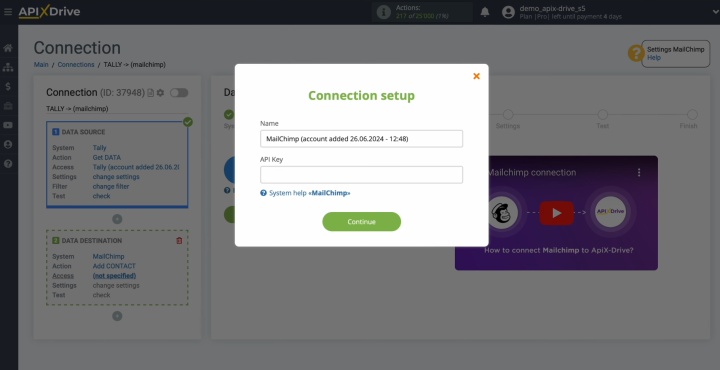
To get the
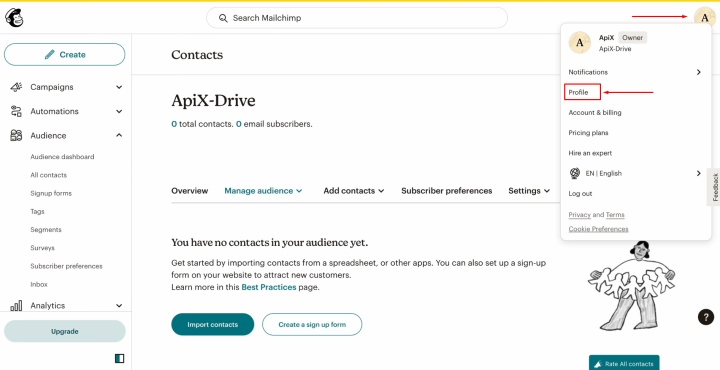
API key, go to the Profile settings section on your Mailchimp personal account.
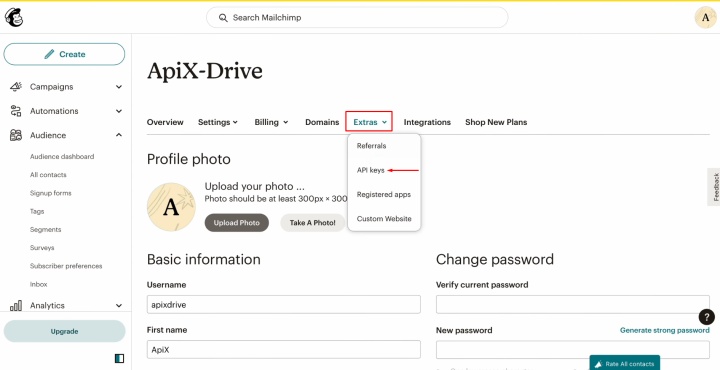
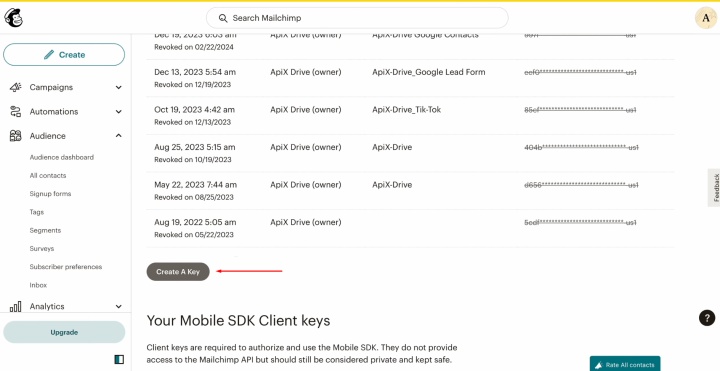
Find the Extras section (API keys option) and click Create a Key.
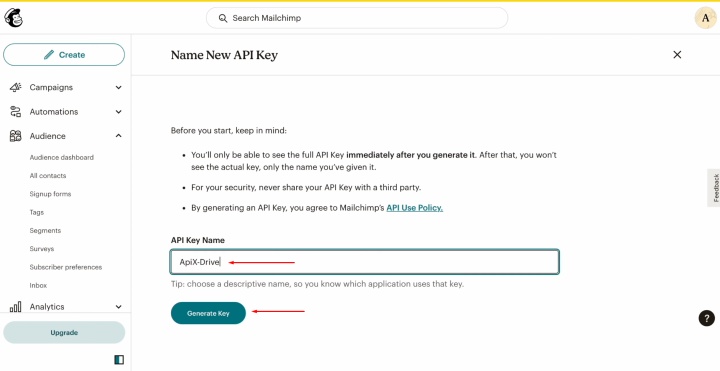
Specify a name for the new key and click Generate Key.
Copy the API
key.
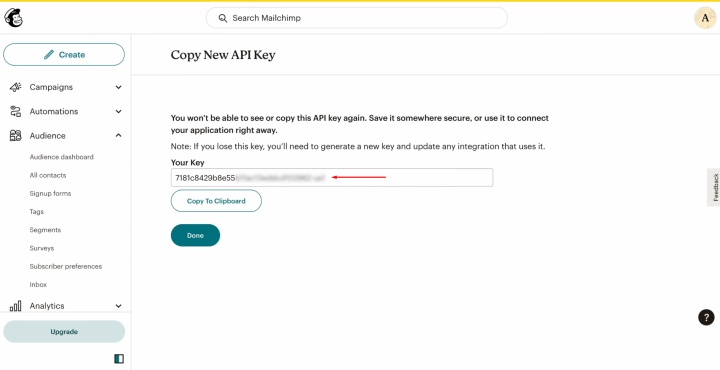
Paste the API key into the appropriate ApiX-Drive field. Once entered, click Continue.
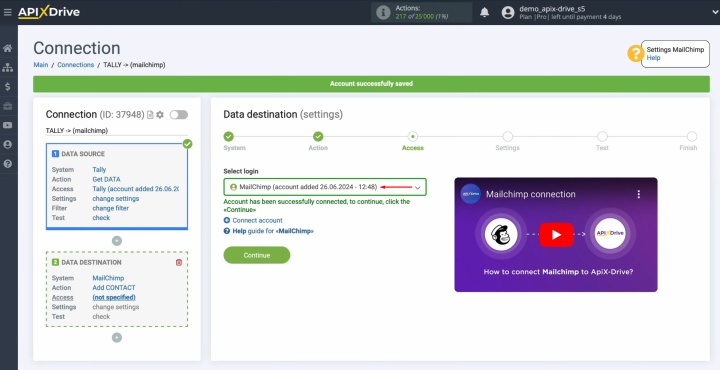
When the account shows up in the active accounts list, select it and hit Continue.
Pick the list that will receive the new contacts.
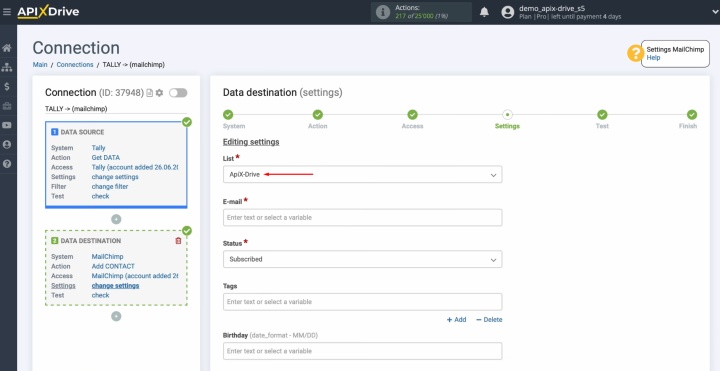
Mailchimp
fields for creating new contacts will be displayed. Map variables from Tally to
these fields by selecting the appropriate value from the dropdown menu.
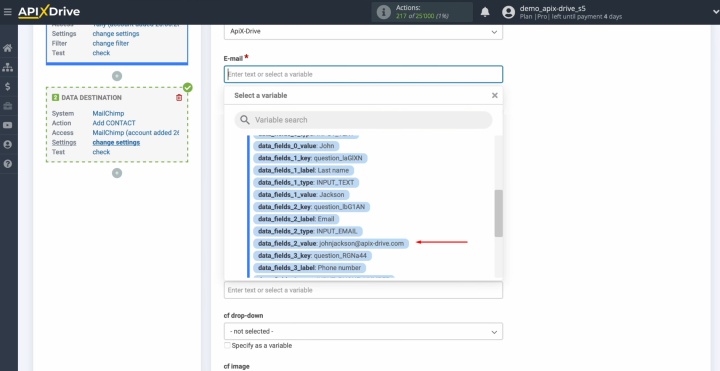
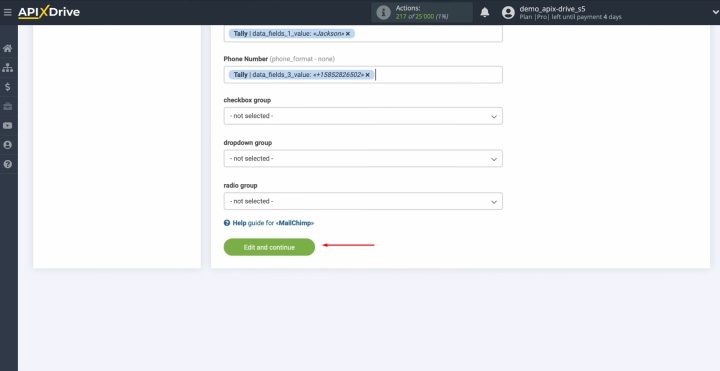
Complete all necessary fields, then click Edit and continue.
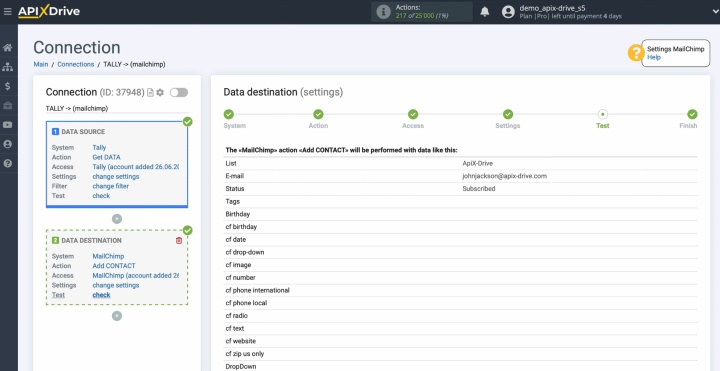
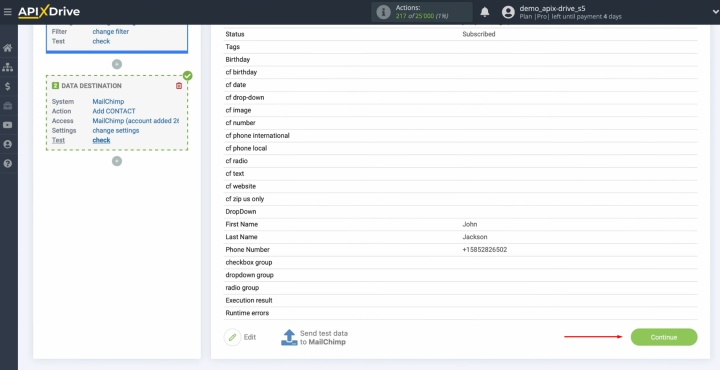
Now, you can
see an example of the data that will be sent to Mailchimp in the form of
new contacts for every new lead from Tally.
If you are not satisfied with
something, click Edit to return to the previous step. To verify the accuracy of the settings, send test data to Mailchimp.
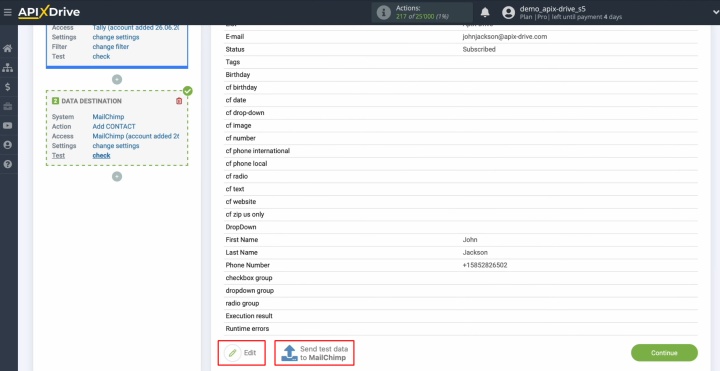
After
successful sending, go to Mailchimp and check the result.
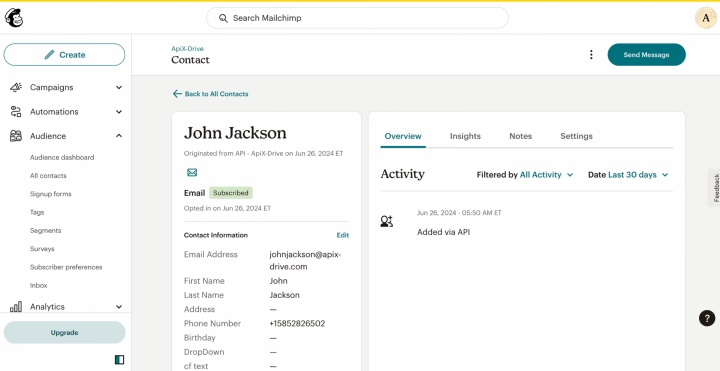
You’ve managed to connect Tally to Mailchimp, but there’s more to do. Return to ApiX-Drive and continue the setup.
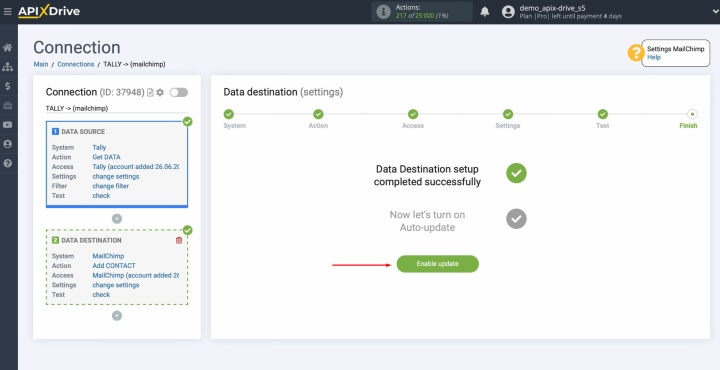
Auto-Update
After you connect Mailchimp to Tally, you need to configure auto-update. For this, click Enable update.
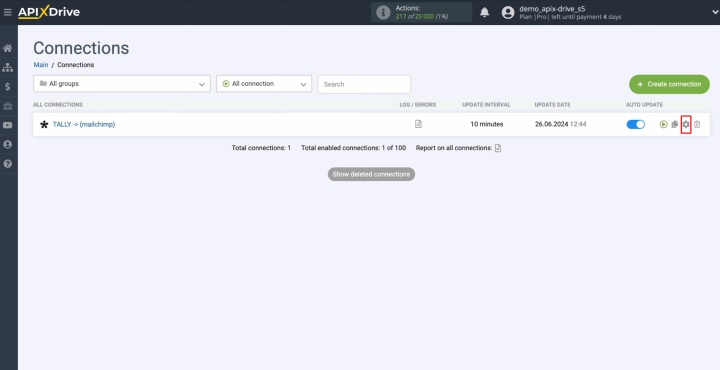
Click on the
gear icon.
Select the auto-update interval, such as 5 minutes. Additionally, you can rename the connection and assign it to the desired group here. Finally, click Continue.
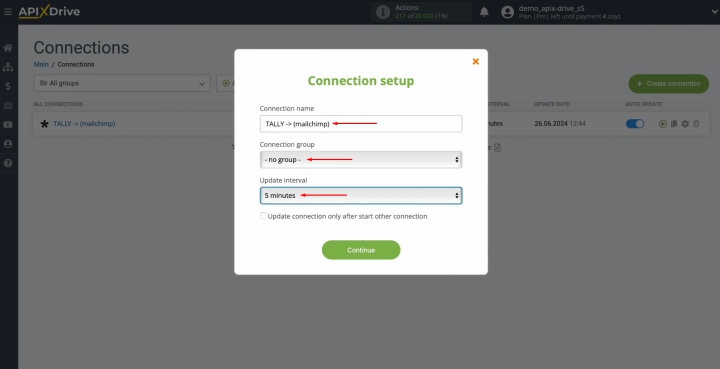
Congratulations! The integration is complete.
Expected Result
Tally and Mailchimp integration is a progressive method of business process automation that makes manual data transfer a thing of the past. Once set up, new contacts from forms are delivered to Mailchimp swiftly. This allows you to quickly launch mailings, prevent errors and data loss, save your team time, and work with leads more efficiently. Such automation allows you to communicate with customers in a timely manner and increases the effectiveness of marketing campaigns.
Read also about other integrations:
- Smartsheet and Google Calendar Integration: Automatic Event Creation
- Airtable and Brevo Integration: Step-by-Step Instruction
- Tally and HubSpot Integration: Automatic Contact Creation
- Google Lead Form and Google Sheets Integration: Automatic Lead Transfer
- Google Contacts and Airtable Integration: Step-by-Step Setup Guide
