Perplexity AI
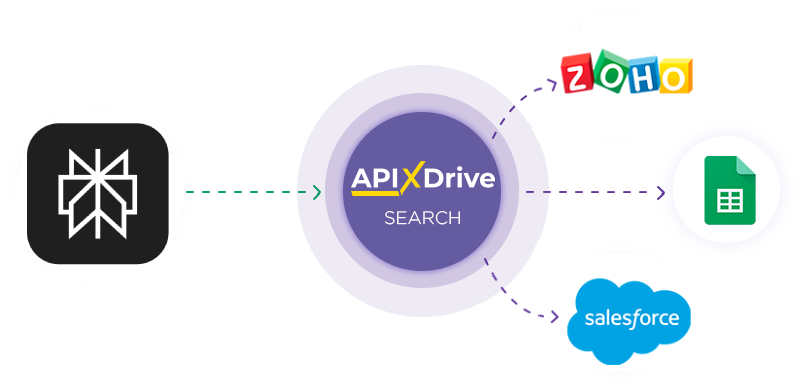
Integration with Perplexity AI is implemented as a separate Perplexity AI block, which can be placed between the Source and the Data Destination. This will allow you to create a query based on data from the Data Source and transfer data from Perplexity AI to the Data Destination fields. This way, you can automatically receive data from Perplexity AI and transfer it to the services and systems you use.
The function allows you to analyze data from the Data Source using Perplexity AI and pass the query result to the Data Destination.
Navigation:
Connecting Google Sheets as a Data Source:
1. What data can you get from Google Sheets?
2. How to connect Google Sheets account to ApiX-Drive?
3. Select the table and sheet from which the rows will be unloaded.
4. An example of data that will be transferred from Google Sheets.
Connecting Perplexity AI:
1. What data can be obtained from Perplexity AI?
2. How to connect Perplexity AI account to ApiX-Drive?
3. How do I set up a data search in Perplexity AI in a selected action?
Sonar
Sonar PRO
Sonar Reasoning PRO
4. An example of the data that will be transmitted from Perplexity AI.
Setting up row updates in Google Sheets:
1. What will the Google Sheets integration do?
2. How to connect Google Sheets account to ApiX-Drive?
3. How do I configure the selected action to transfer data to Google Sheets?
4. An example of the data that will be sent to your Google Sheets.
5. Auto-update and communication response interval.
Setting up DATA SOURCE: Google Sheets
Let's take a look at how the function queries Perplexity AI for data and sends the result to Google Sheets.
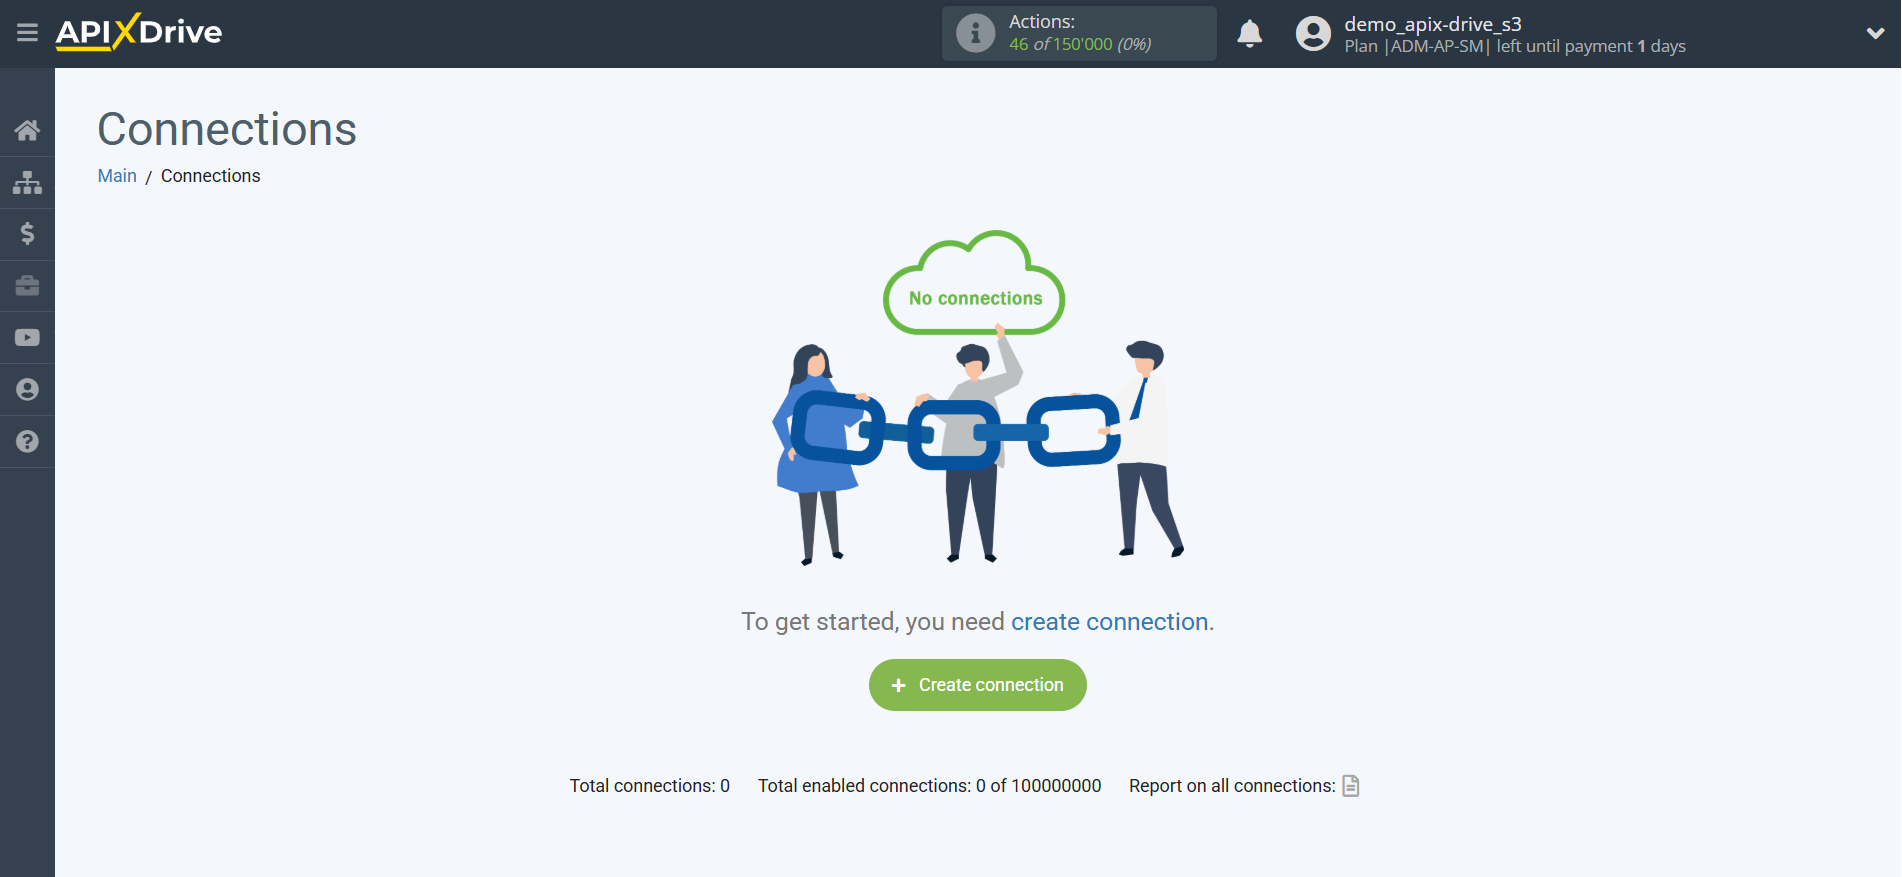
First, you need to create a new connection.
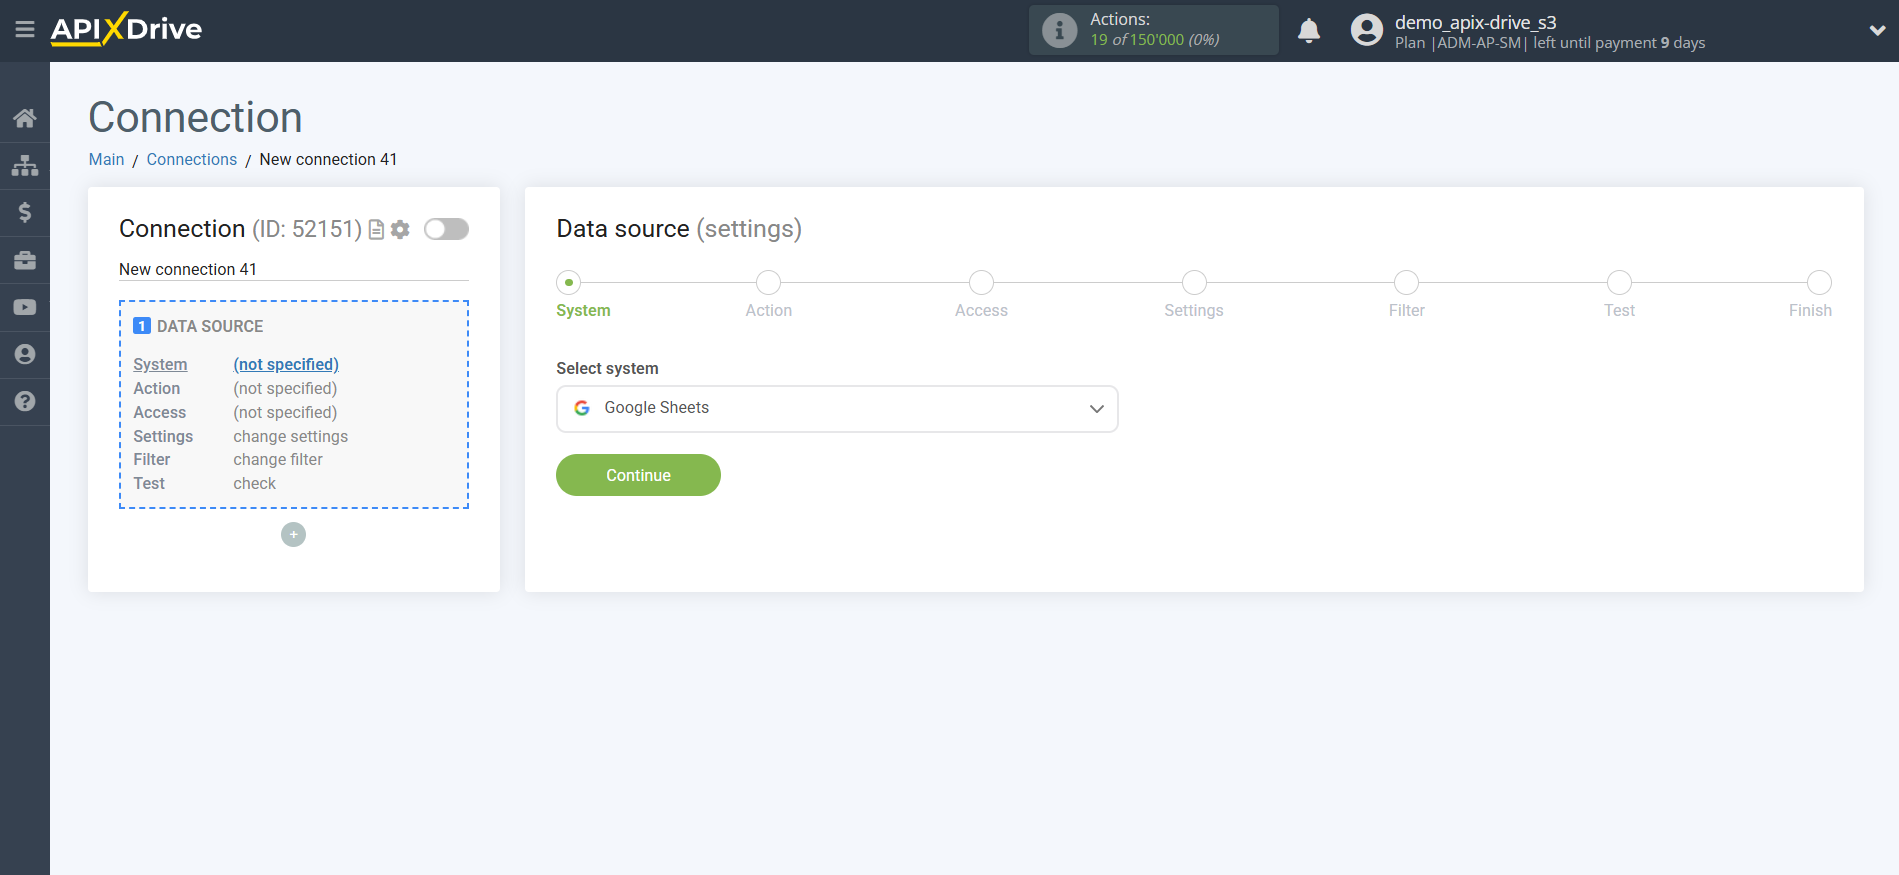
Select the system as the Data Source. In this case, you need to specify Google Sheets.
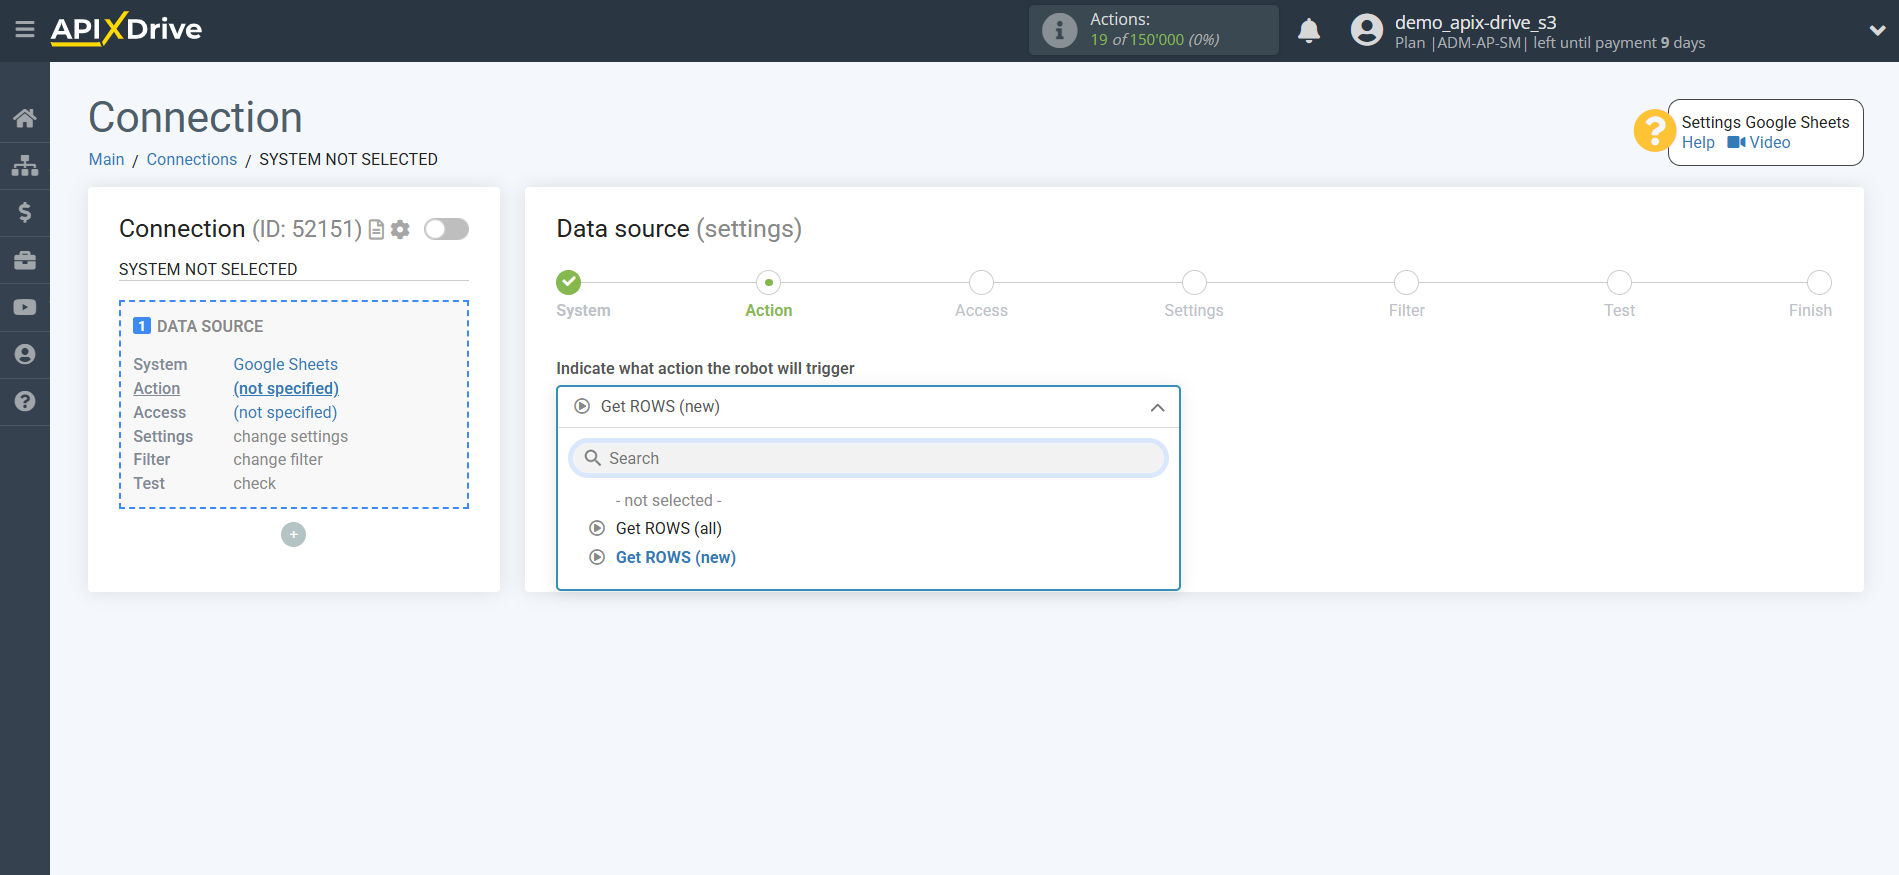
Next, you need to specify the action "Get ROWS (new)".
The next step is to select the Google Sheets account from which the data will be downloaded.
If there are no logins connected to the system, click "Connect account".
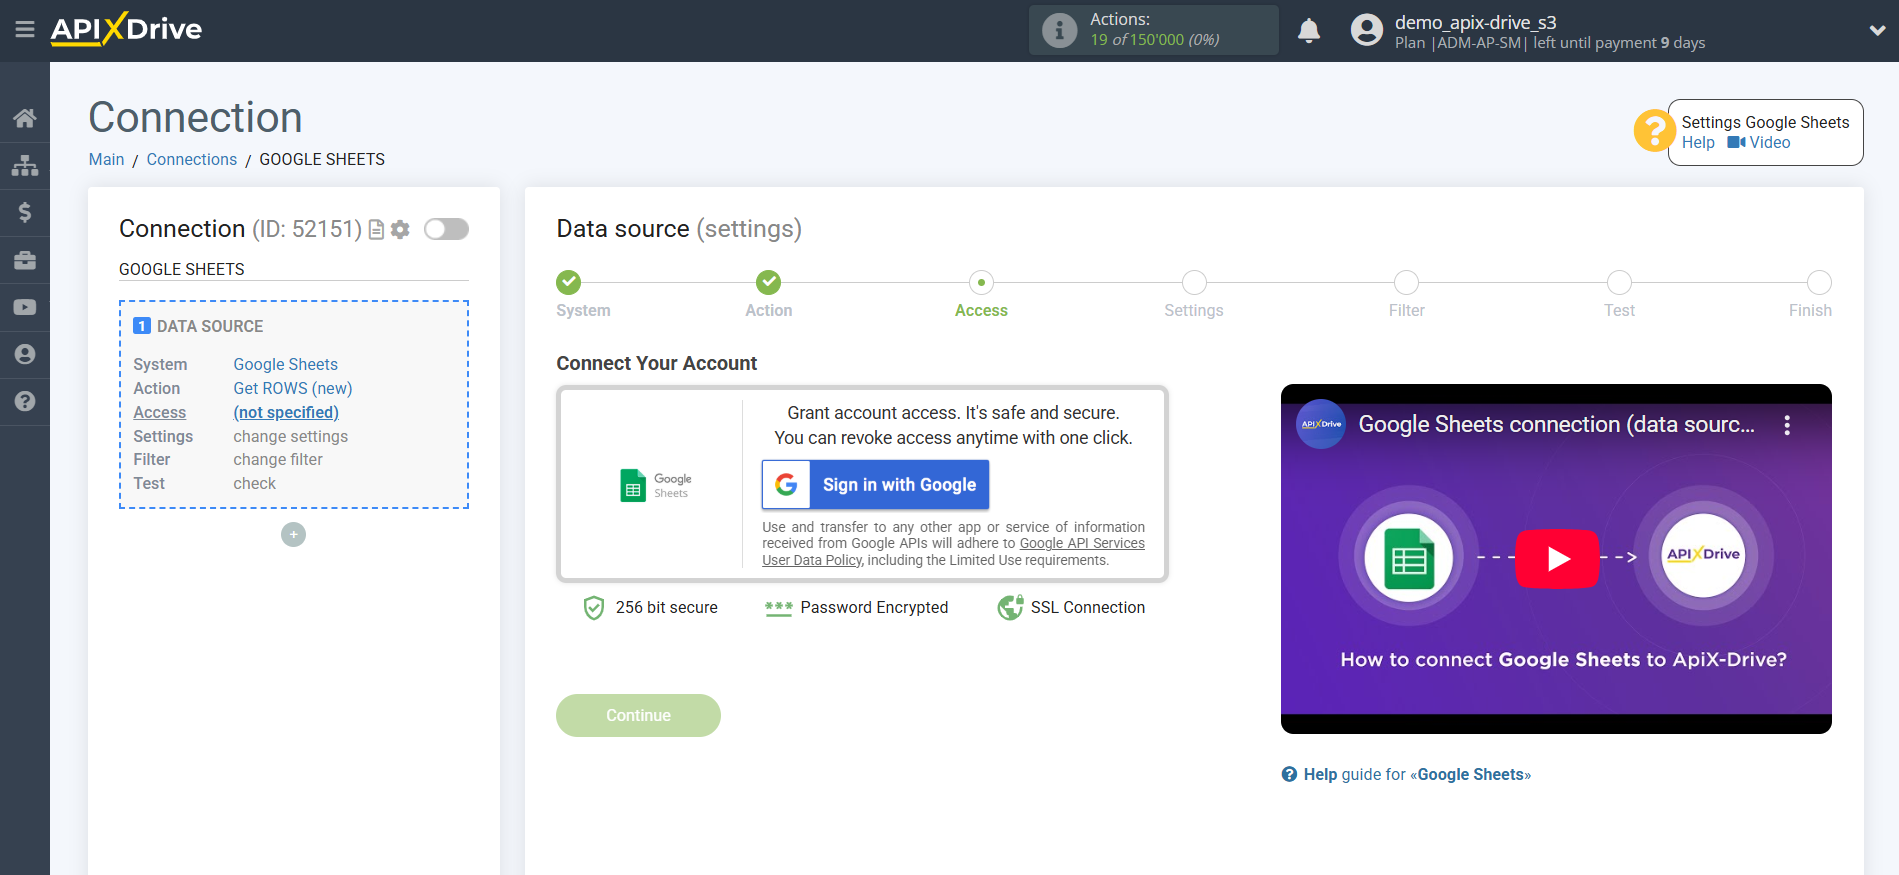
Select which account you want to connect to ApiX-Drive and provide all permissions to work with this account.
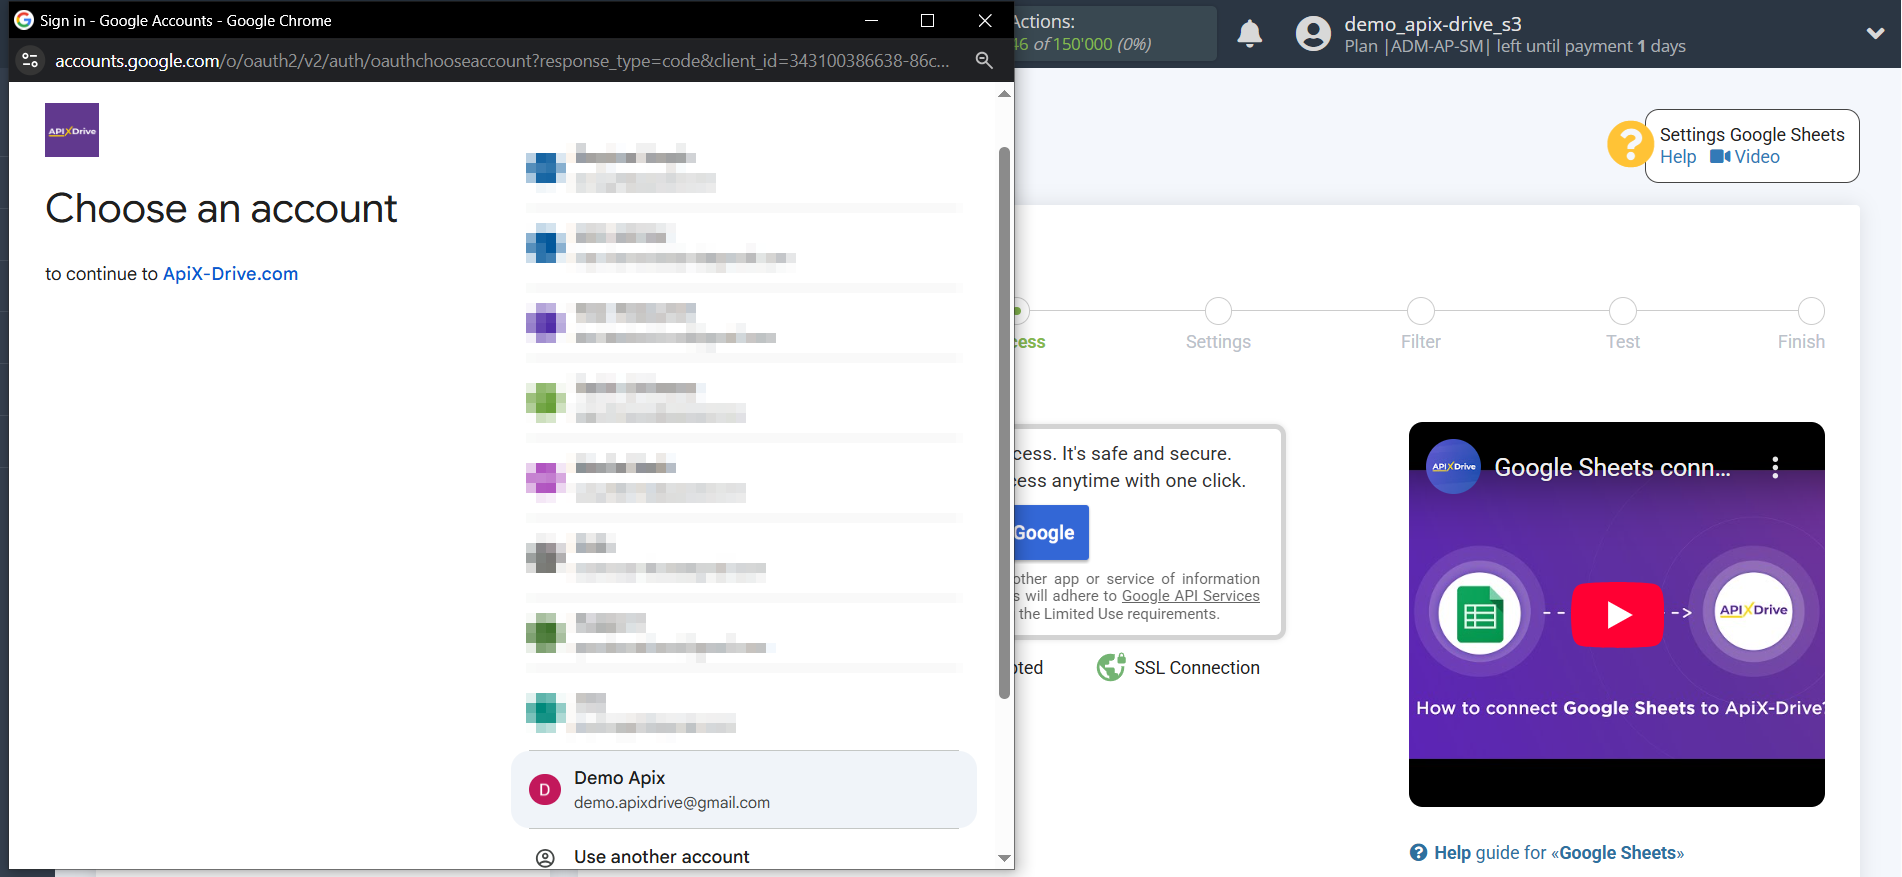
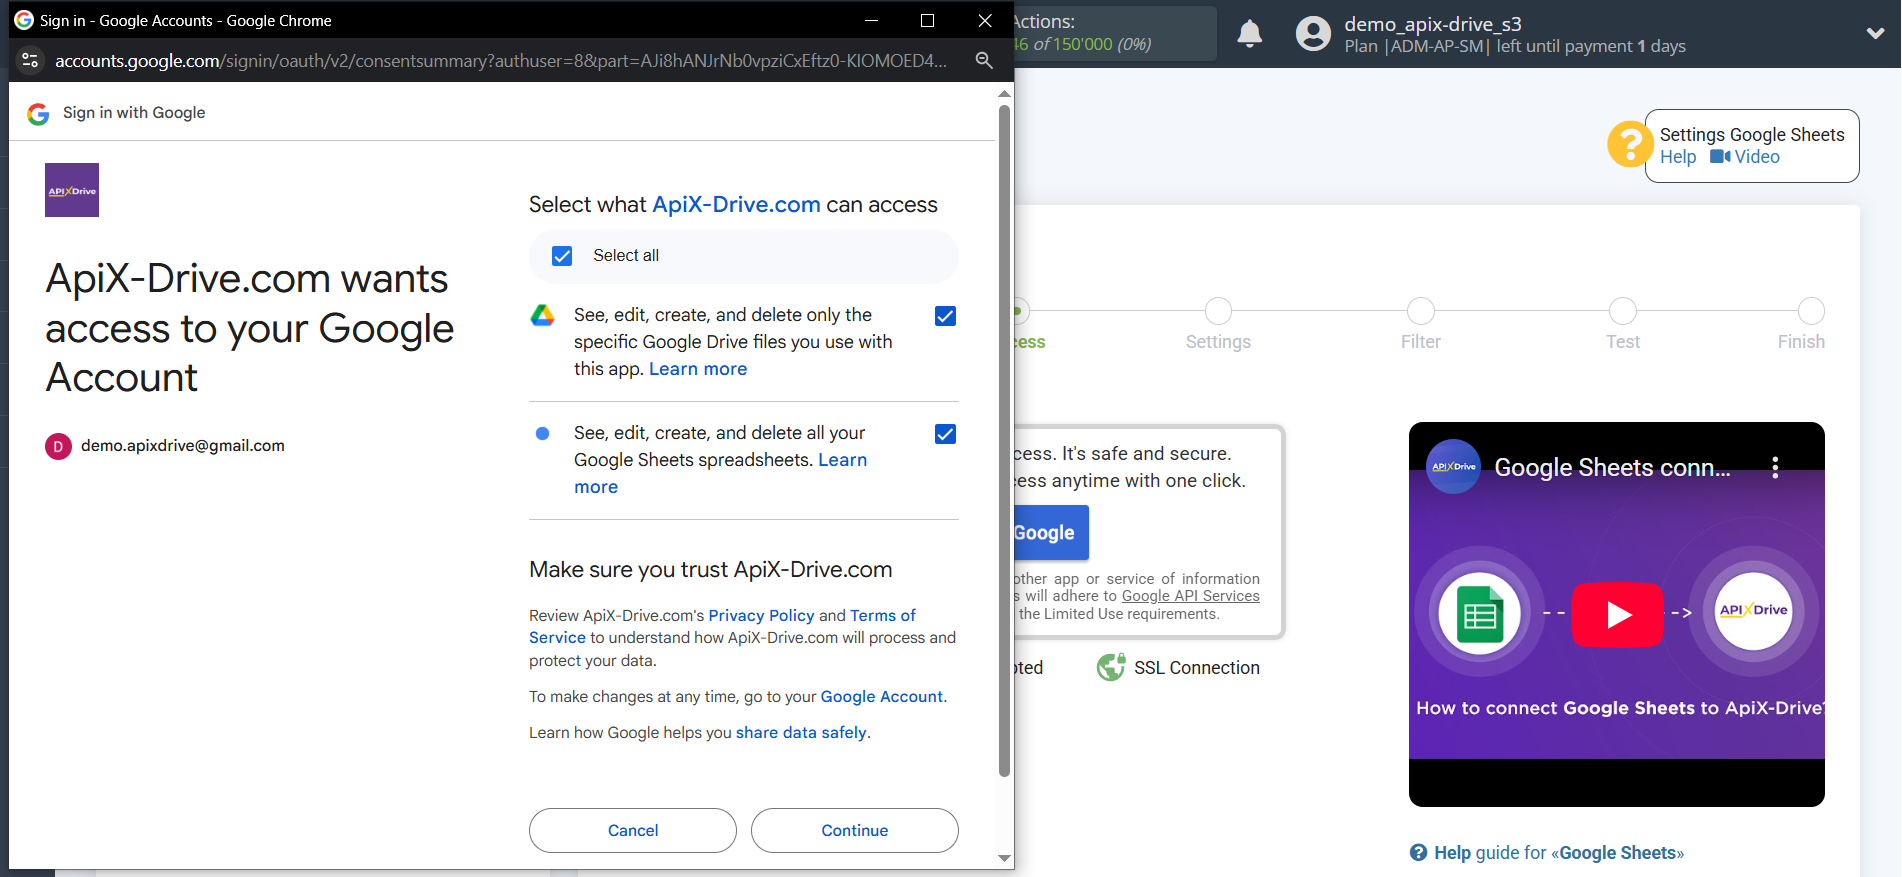
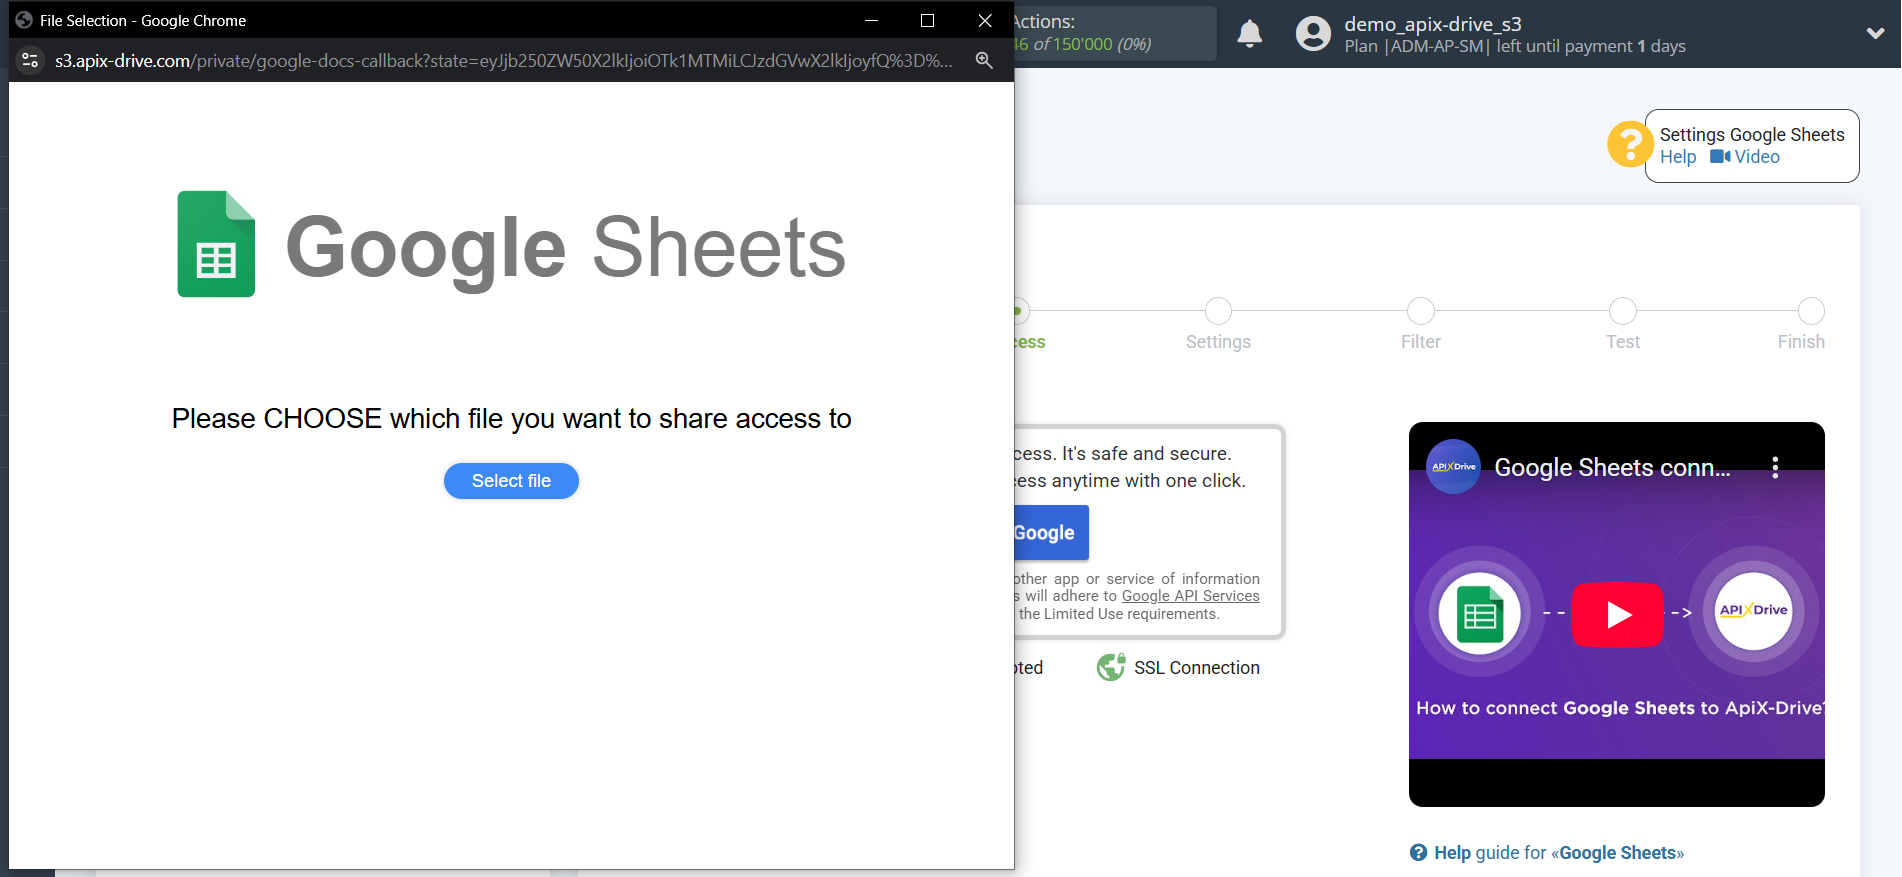
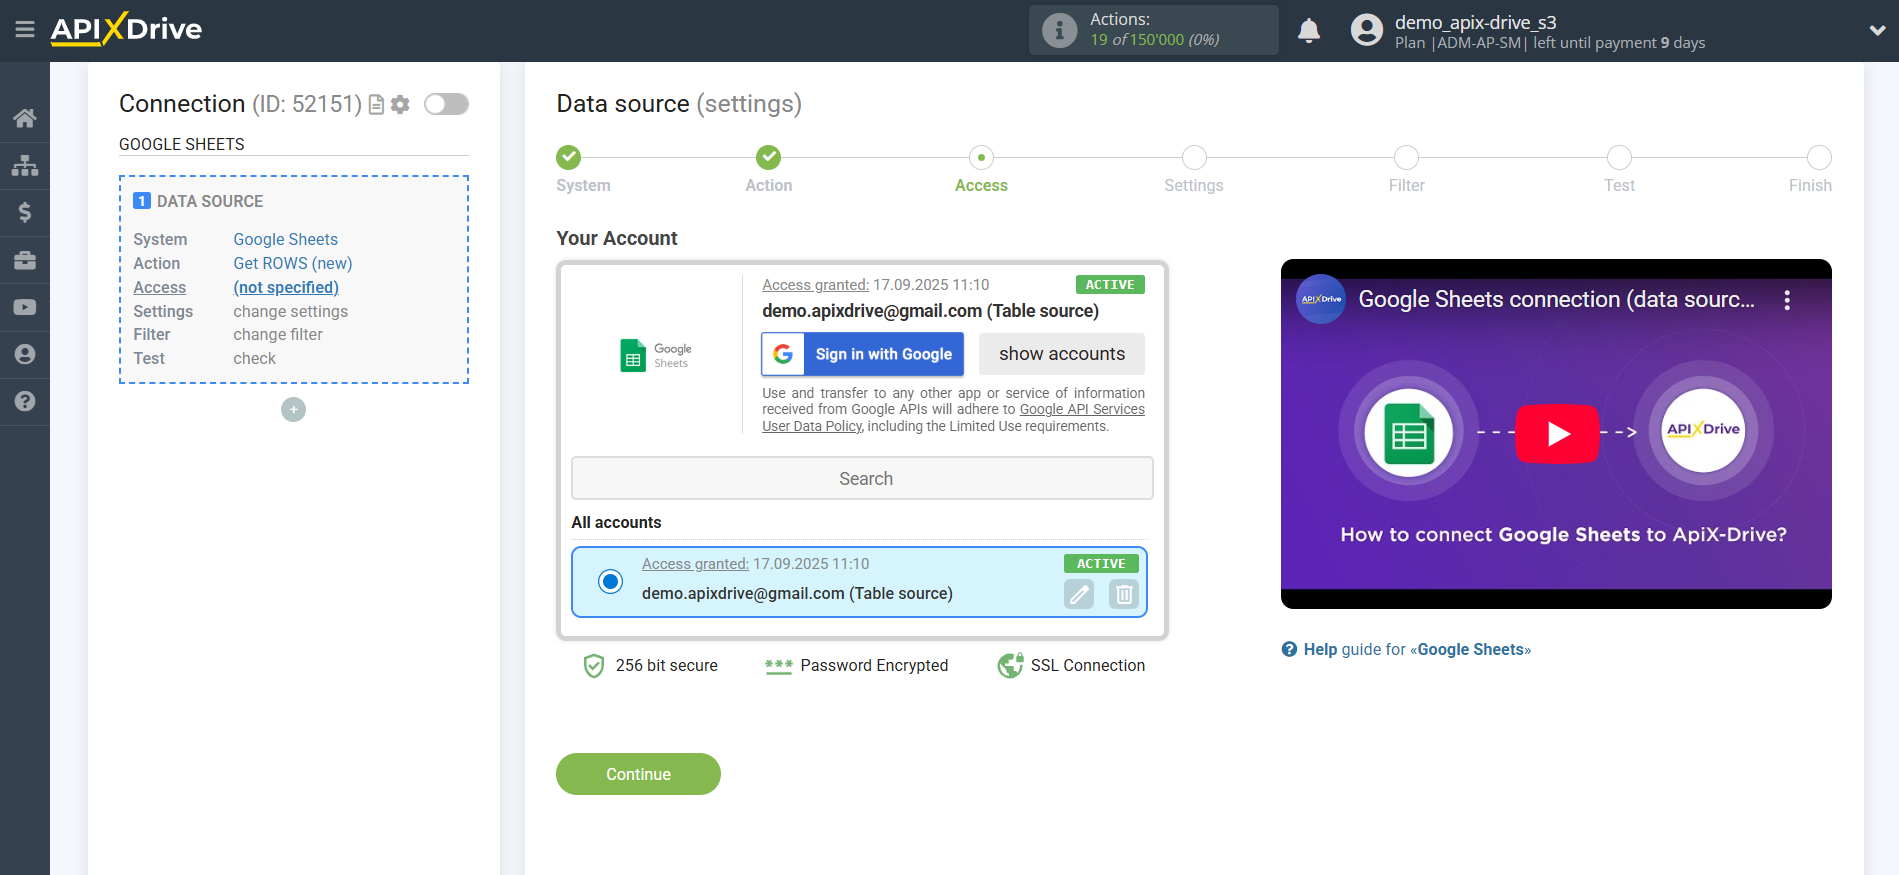
When the connected account appears in the list of "active accounts", select it for further work.
Attention! If your account is in the list of "inactive accounts" check your access to this account!
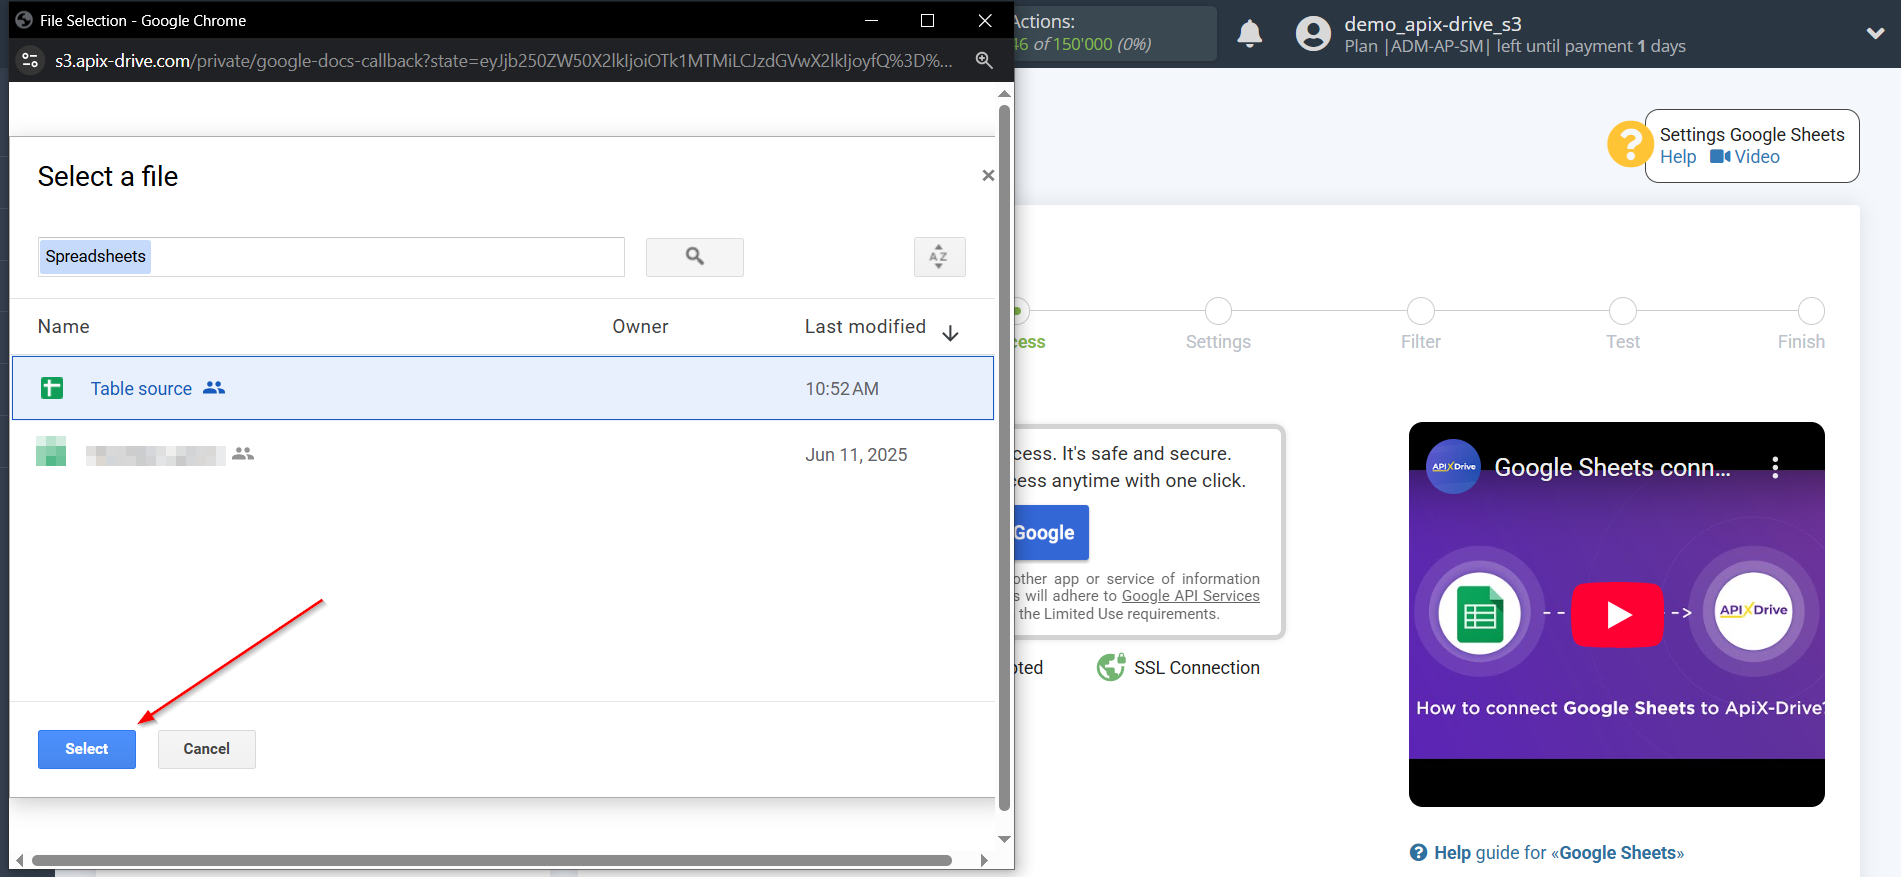
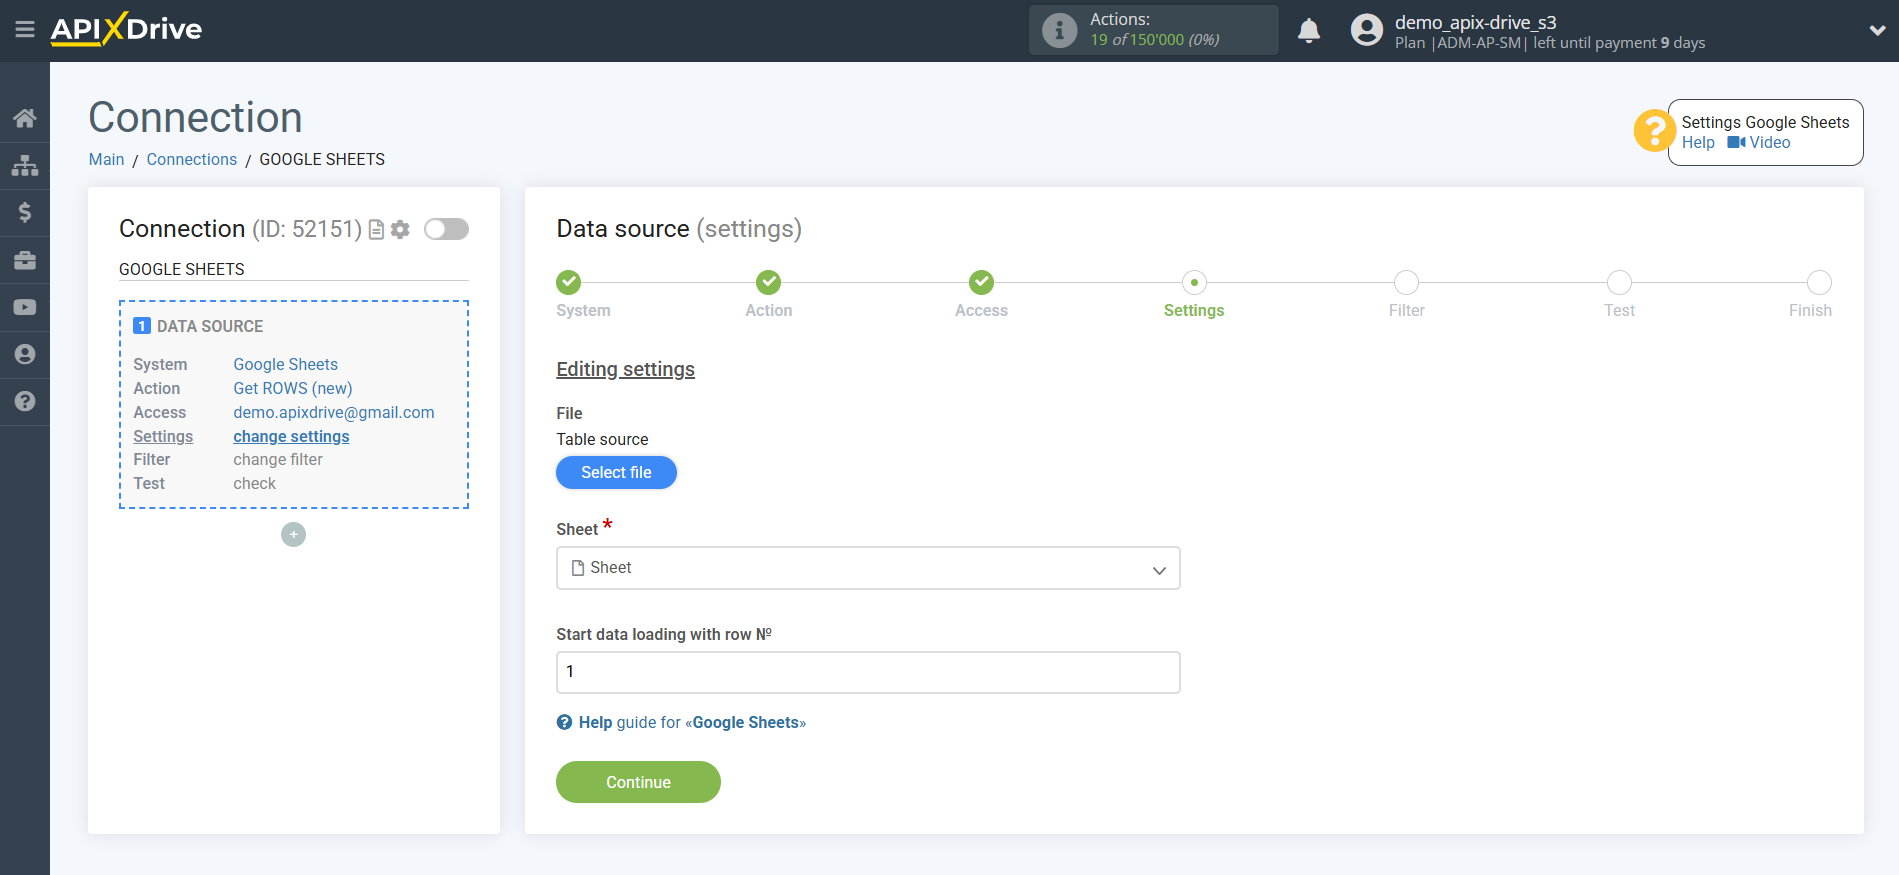
Select the Google Sheets table and sheet where the data you need is located.
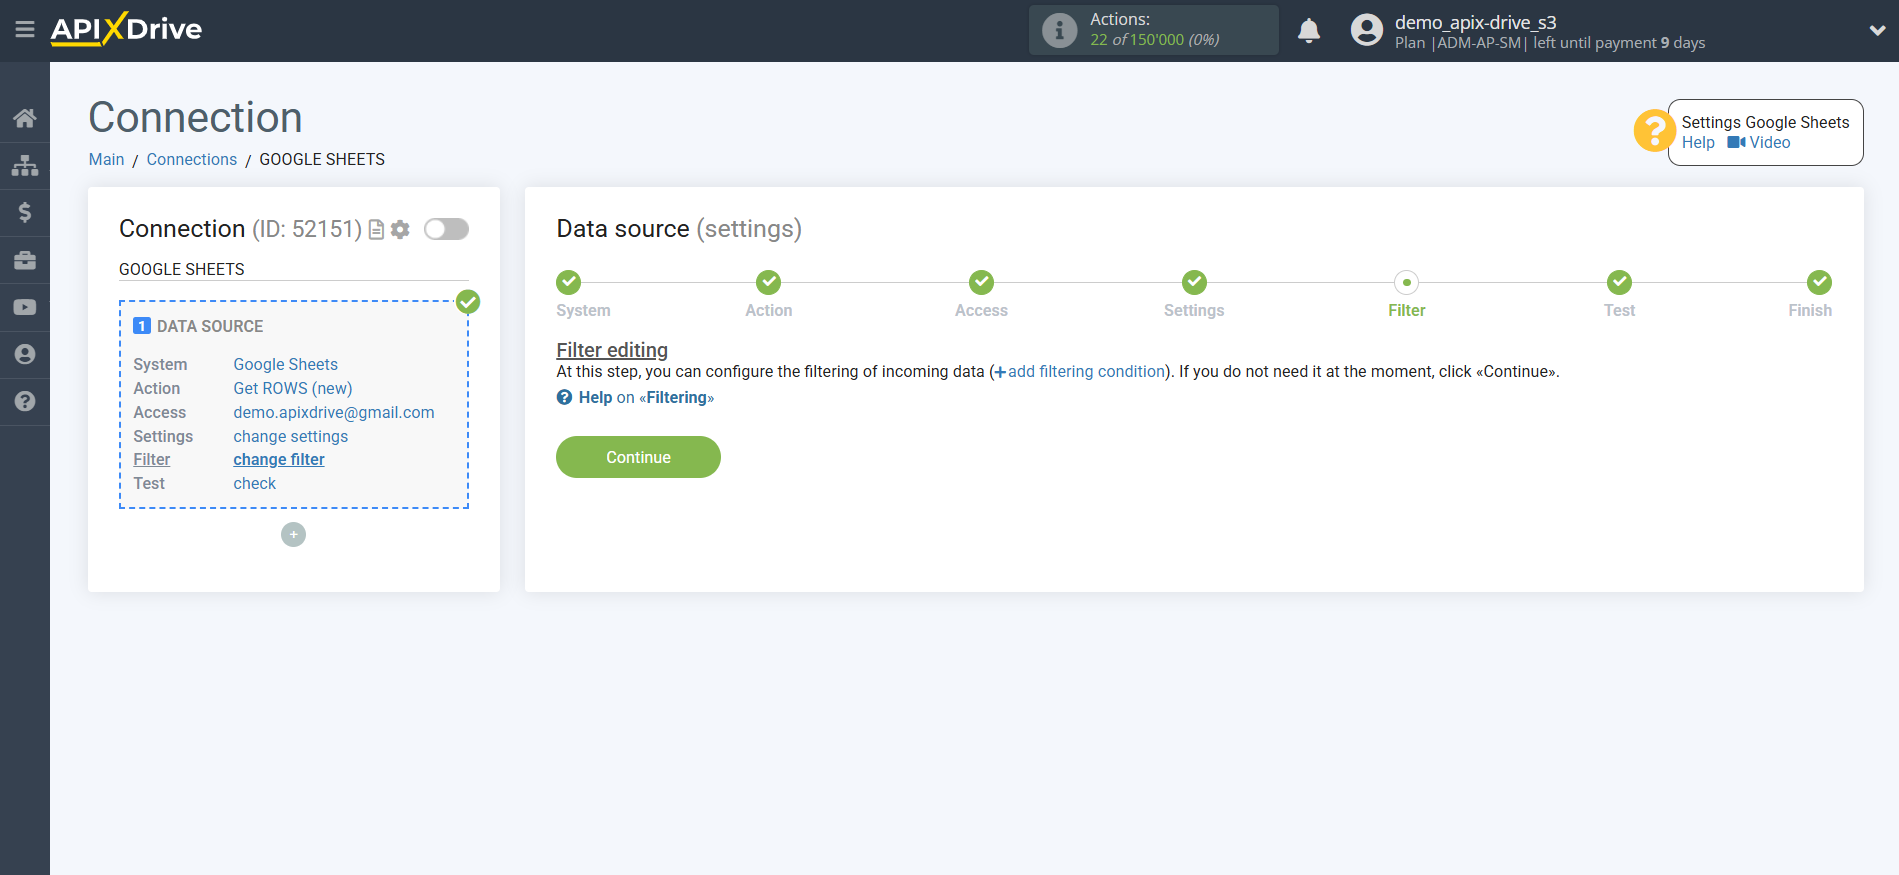
If necessary, you can adjust the Data Filter, or click "Continue" to skip this step.
To find out how to configure the Data Filter, follow the link: https://apix-drive.com/en/help/data-filter
Now you can see the test data for one of the rows in your Google Sheets spreadsheet.
If you want to update the test data, click "Download test data from Google Sheets".
If you want to change the settings, click "Edit" and you will go back one step.
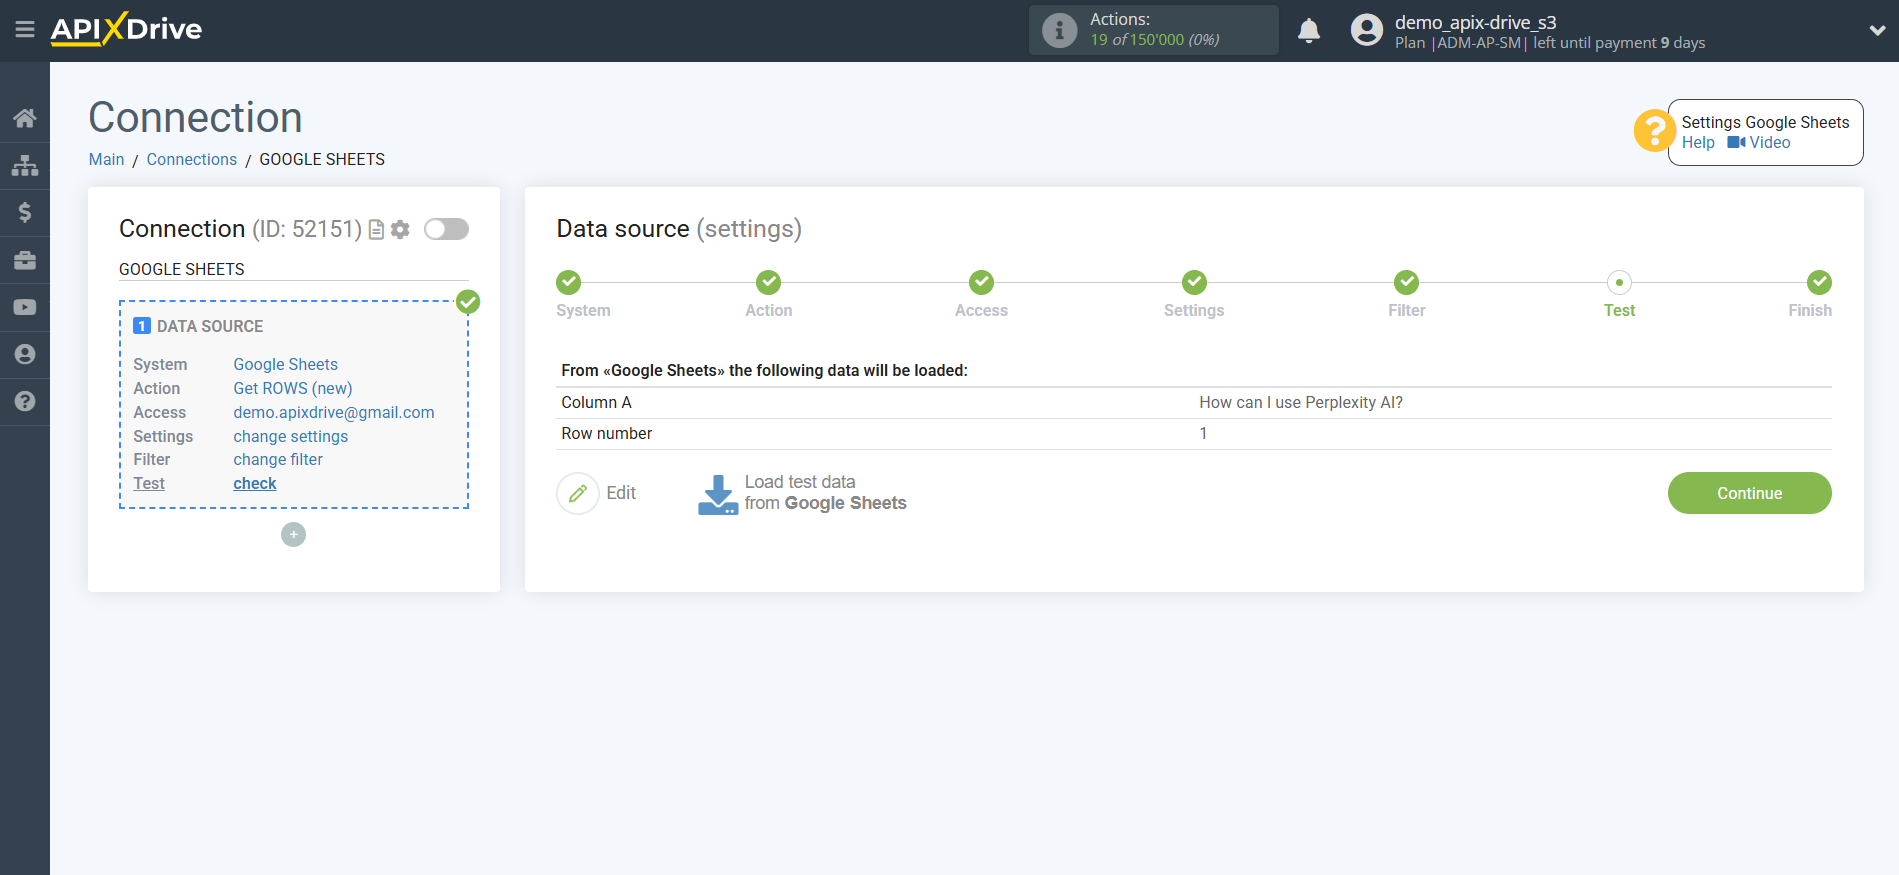
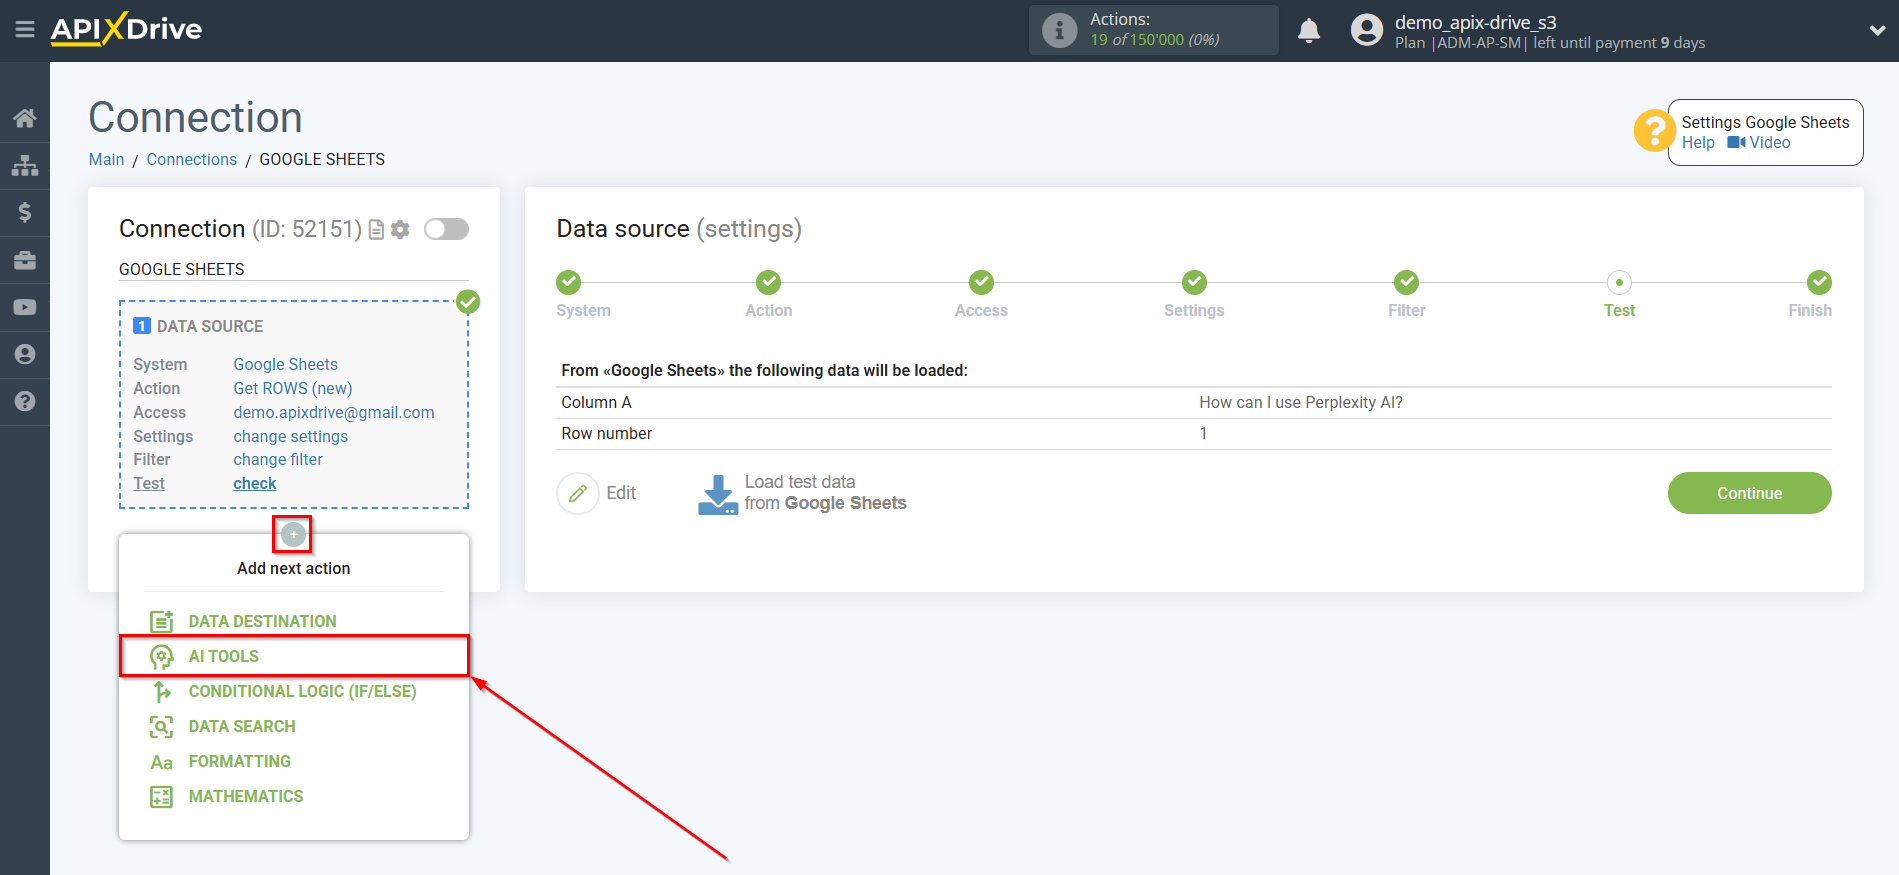
Now we connect the additional Perplexity AI block. To do this, click on "+" and select "AI TOOLS" from the list.
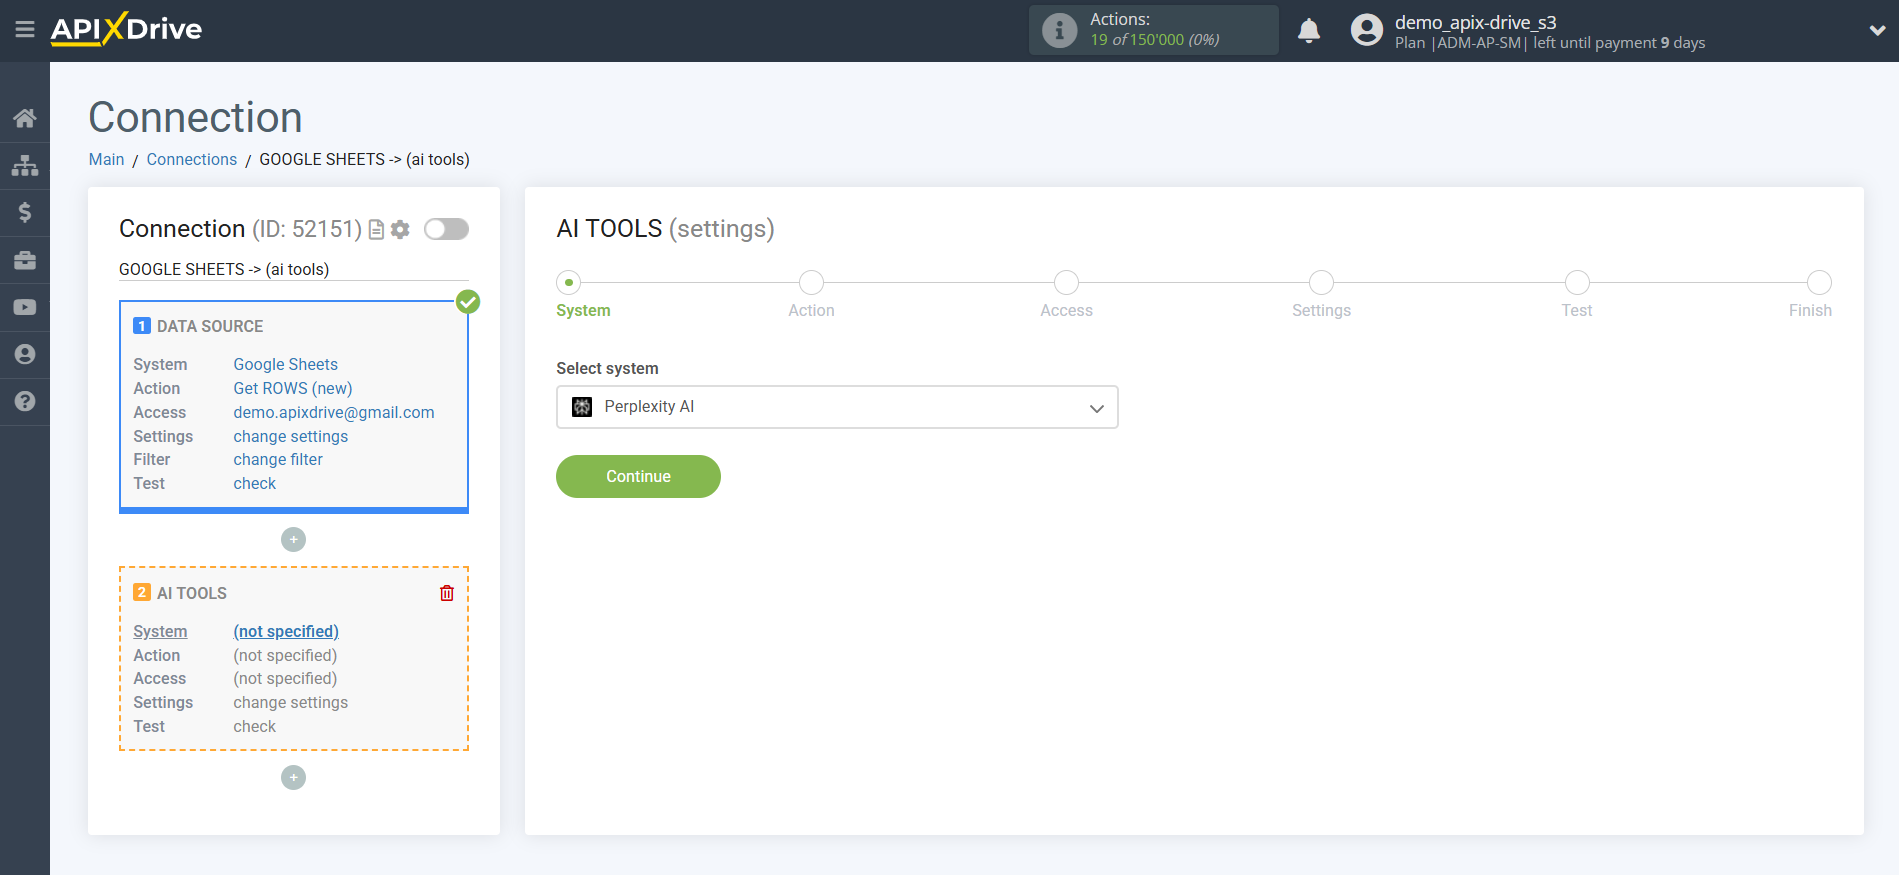
Perplexity AI setup
As the system in which the search will be performed, we select "Perplexity AI".
Next, you need to specify the action "Send PROMPT".
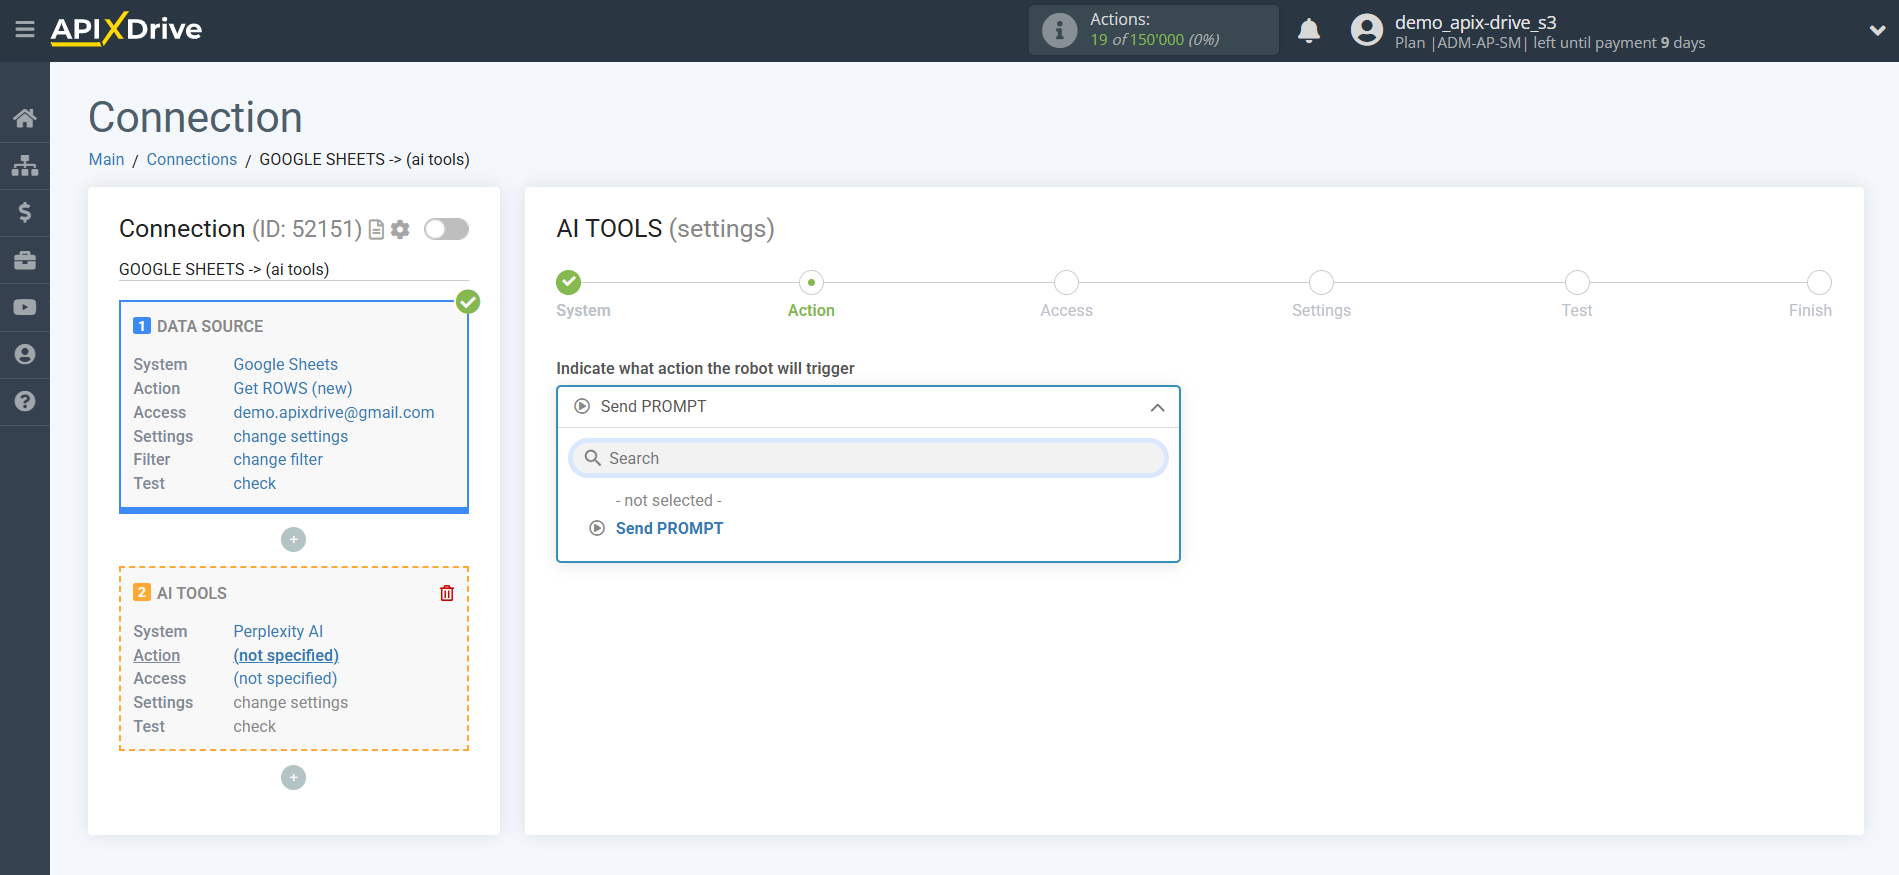
- Send PROMPT - allows you to send a request to Perplexity AI to generate, edit and translate data.
The next step is to select a Perplexity AI account.
If there are no logins connected to the ApiX-Drive system, click "Connect account".
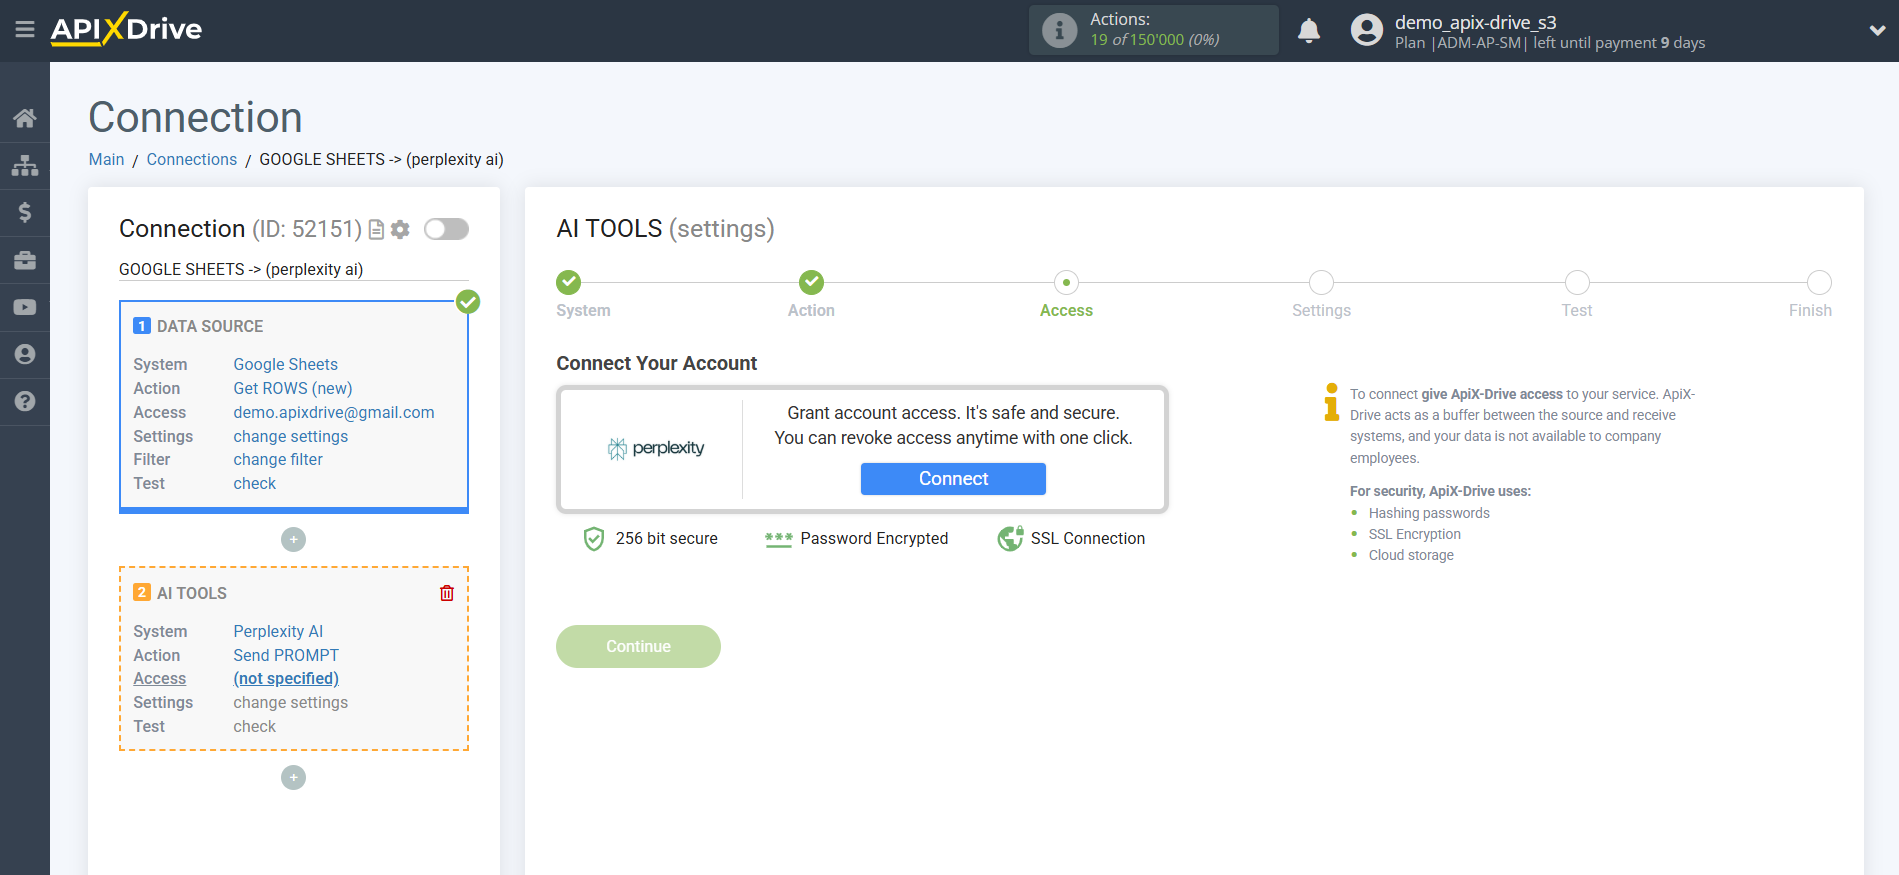
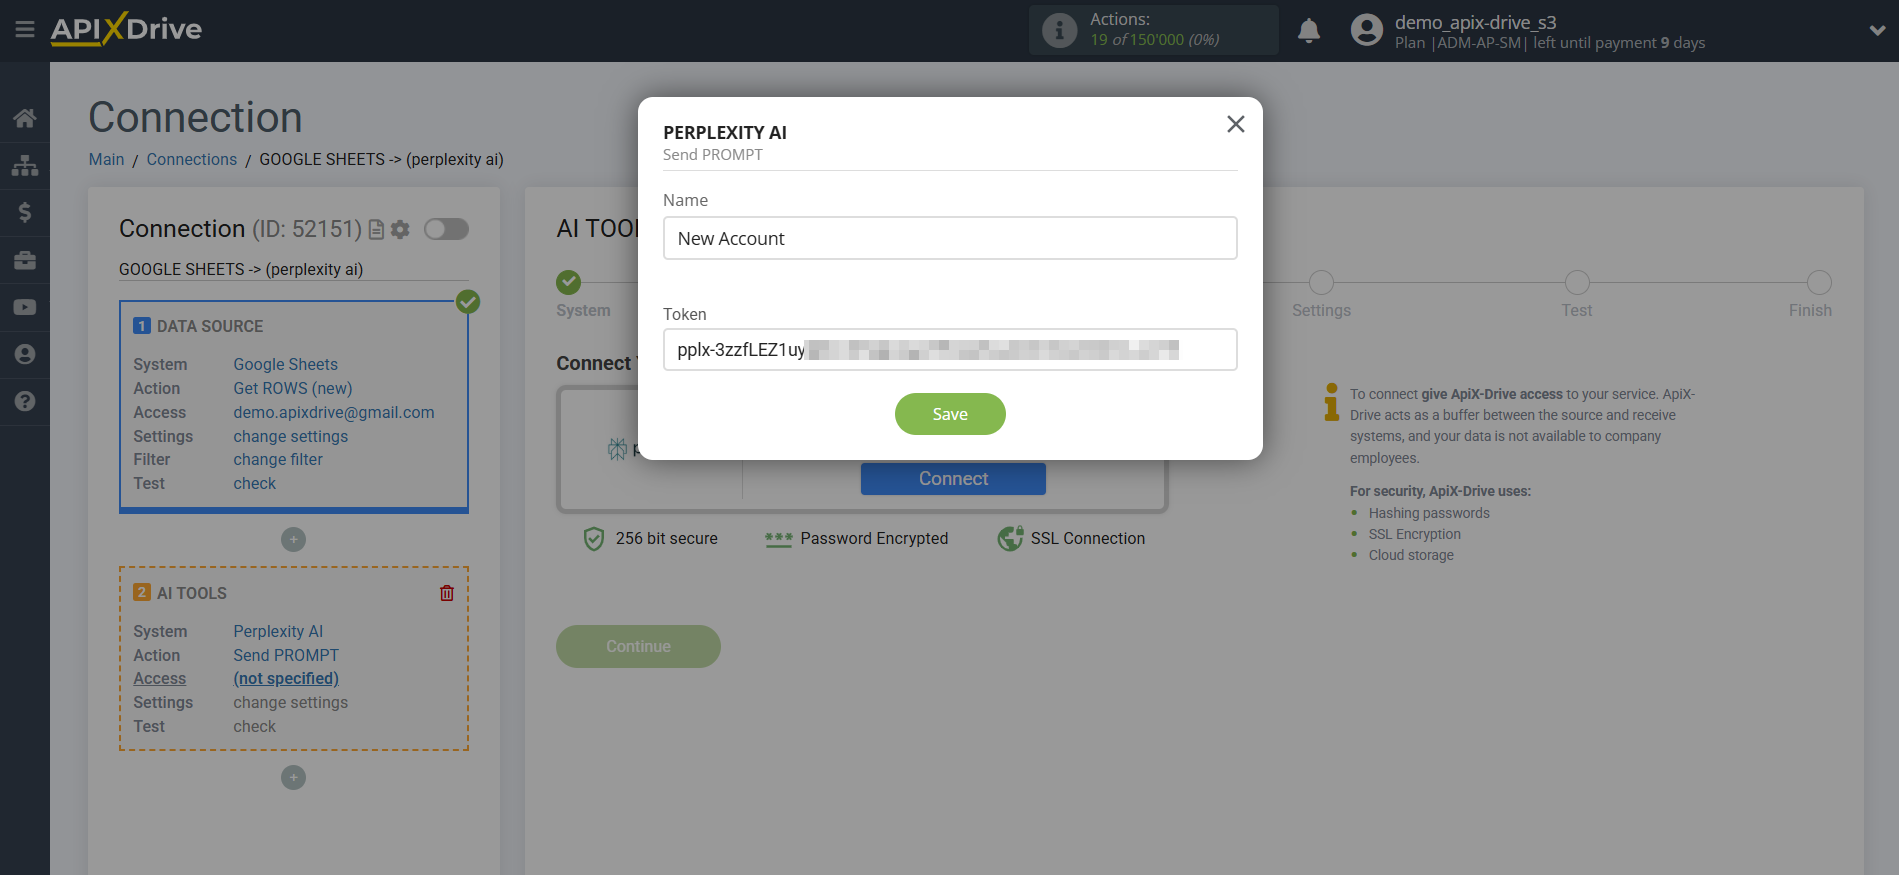
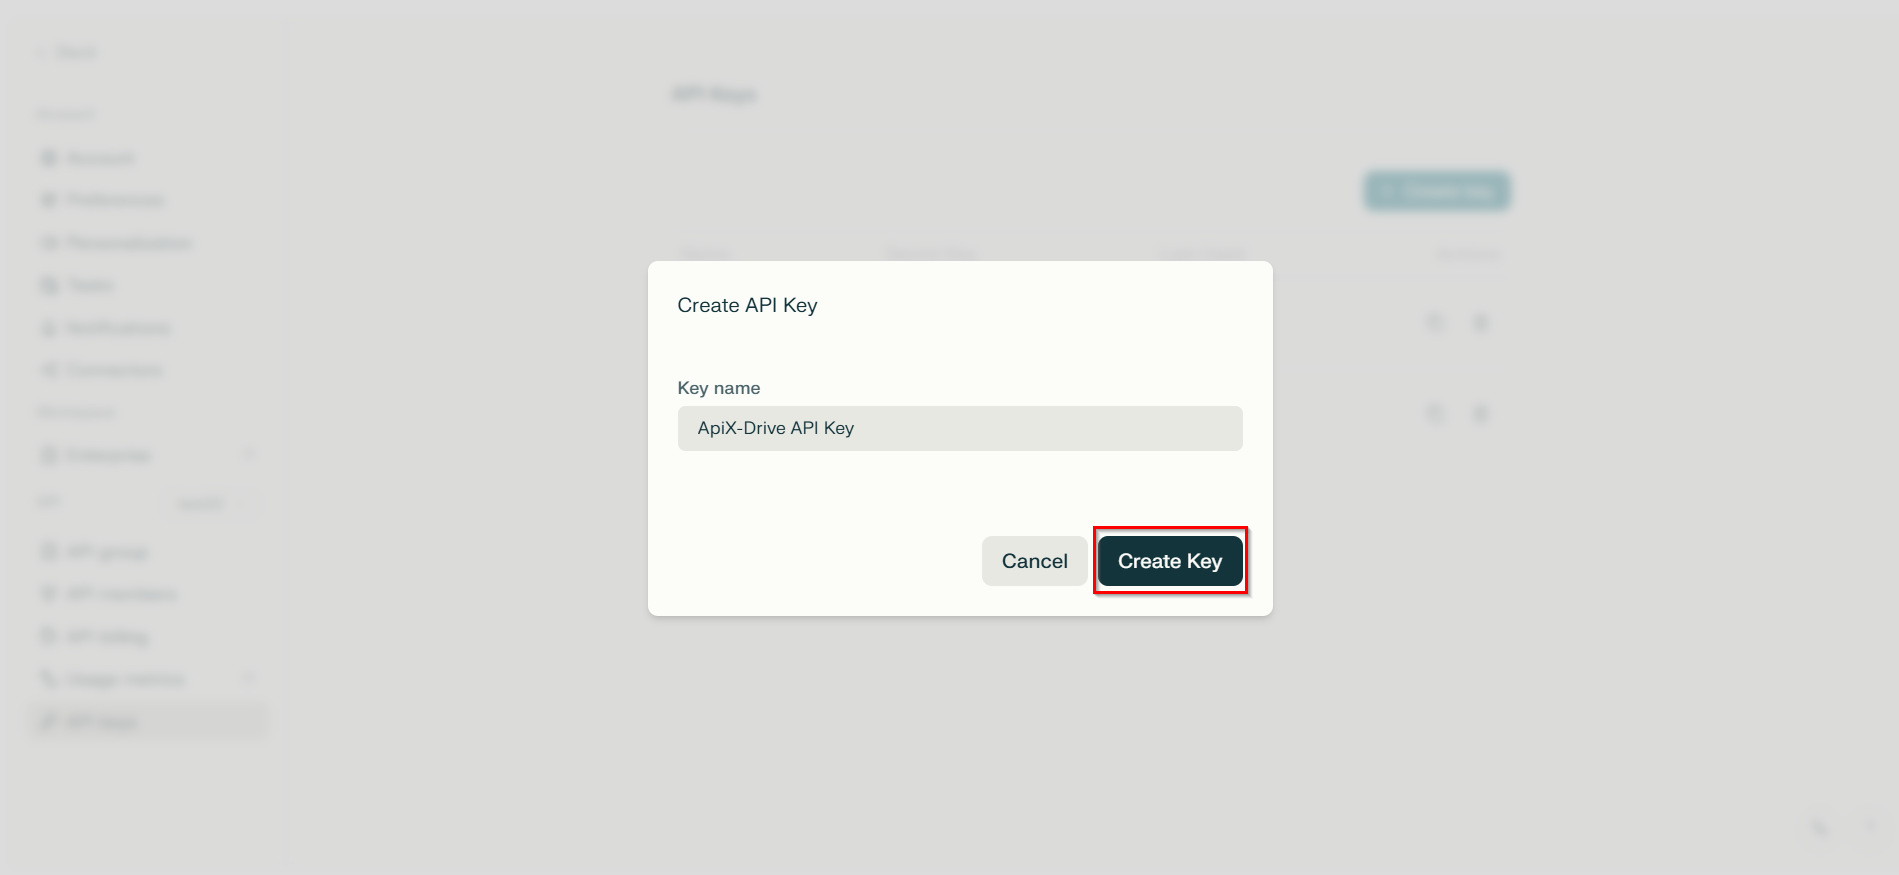
Enter the API key, which is located in the settings of your Perplexity AI personal account.
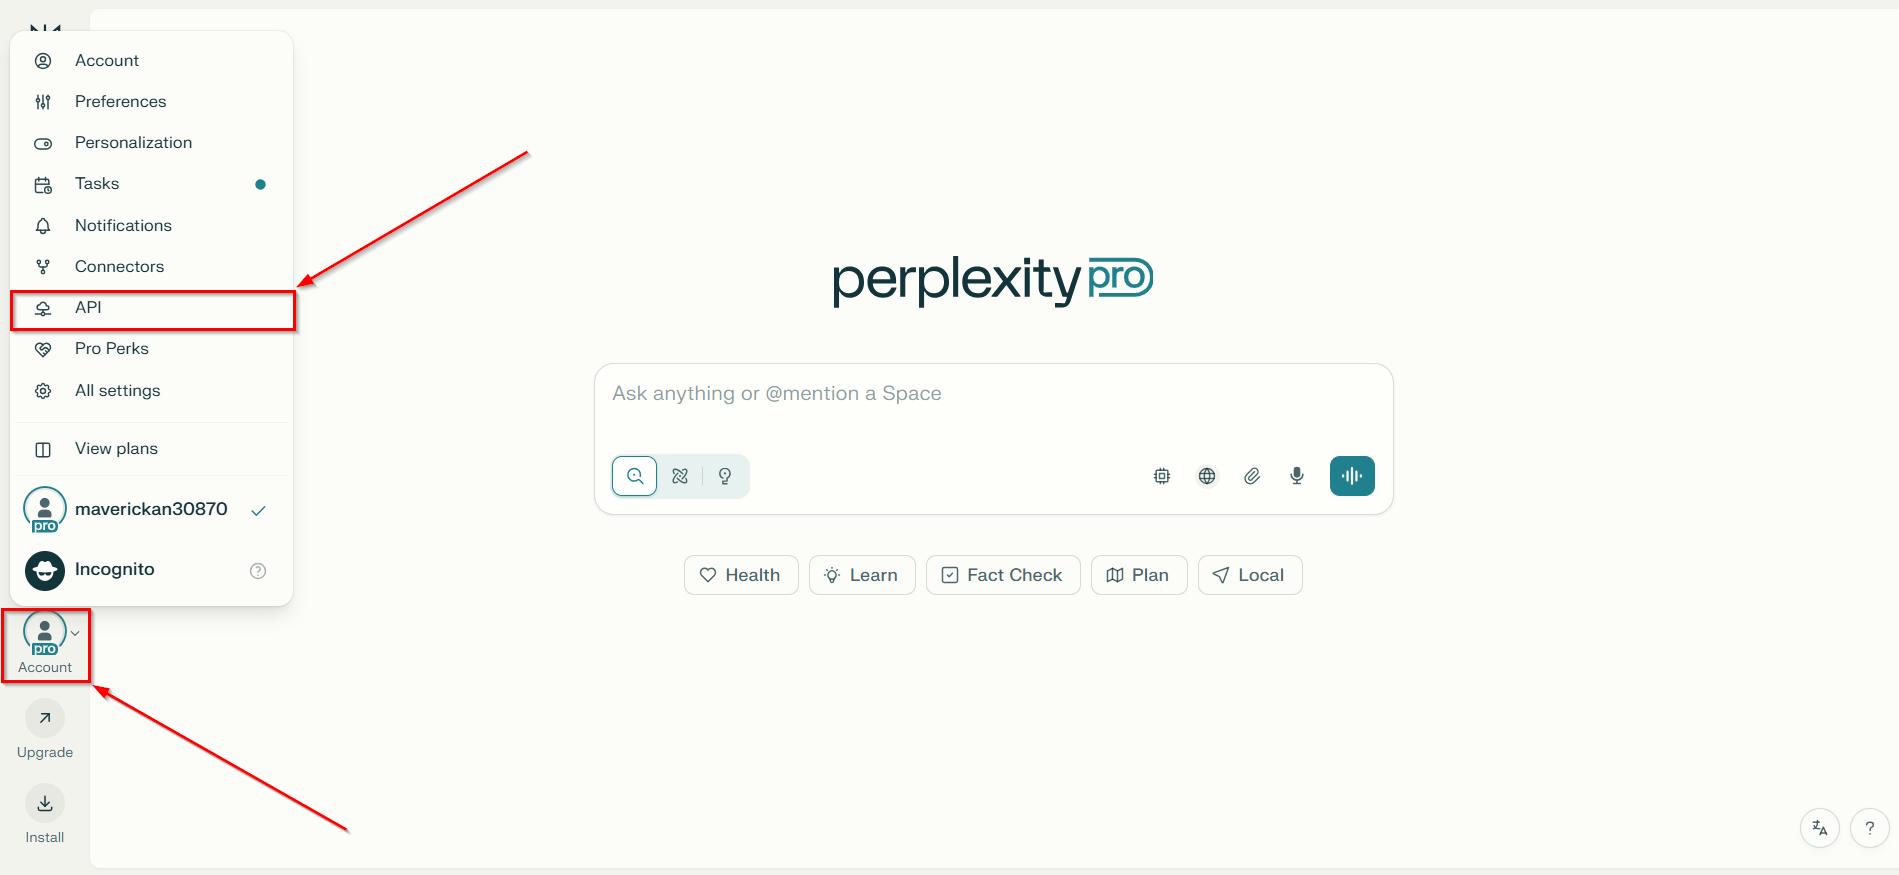
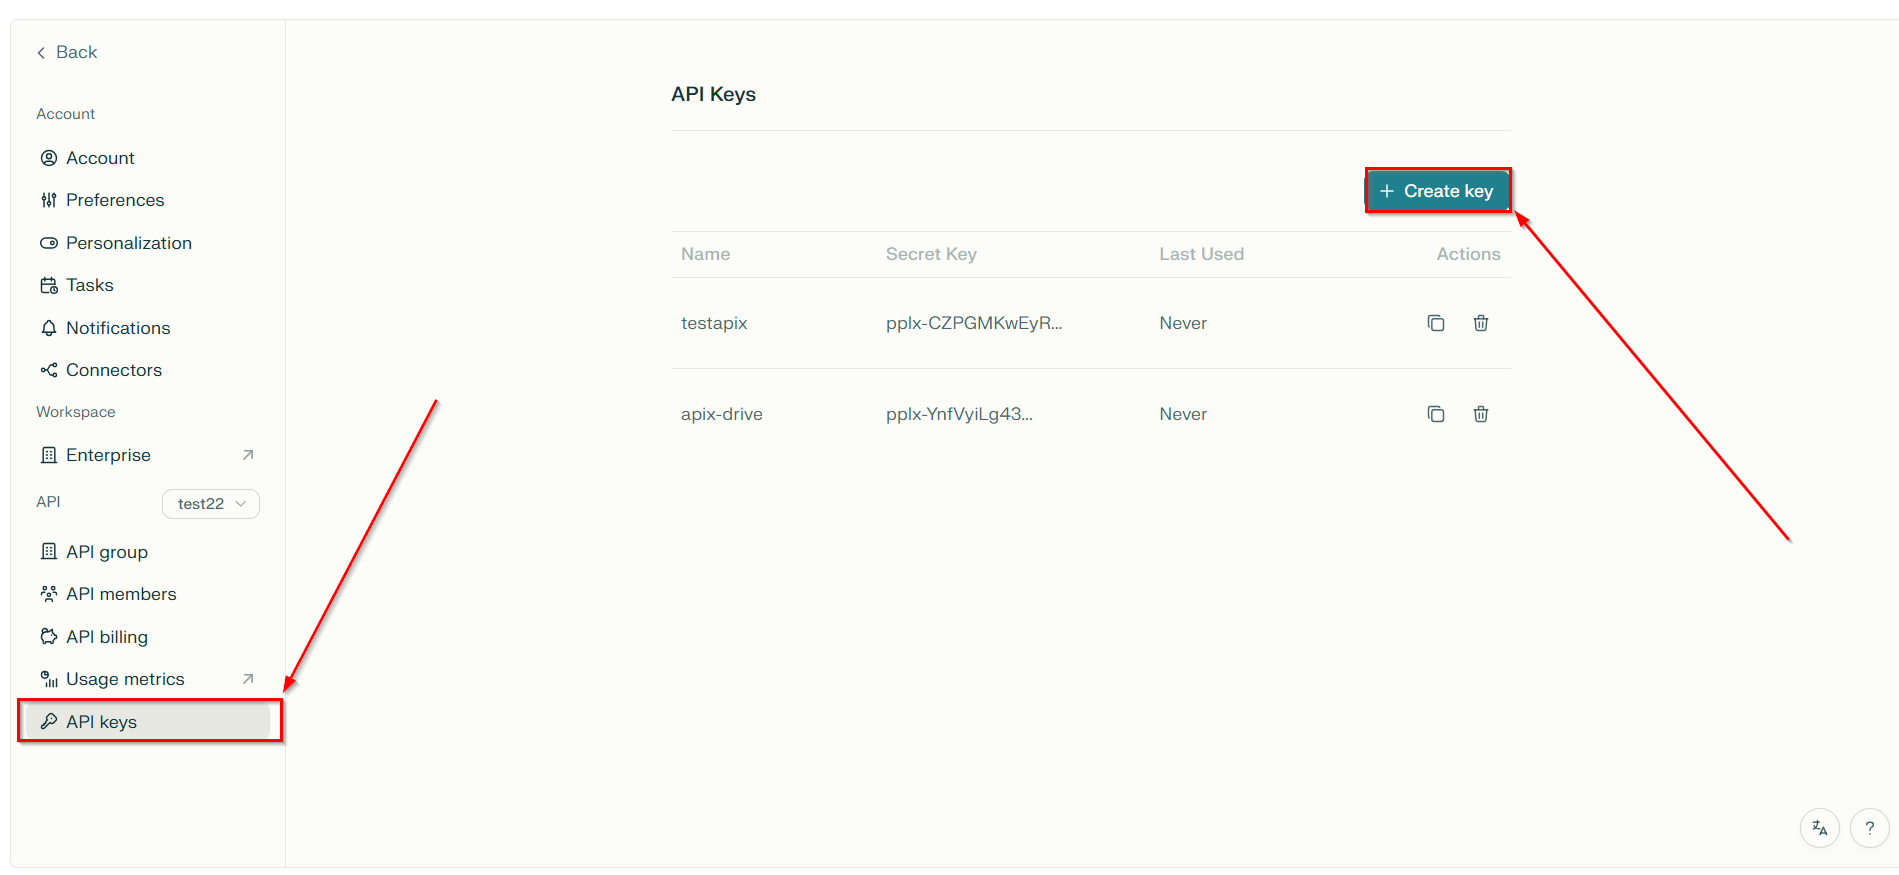
Go to your Perplexity AI account, in the left panel click on "Account", then "API", then in the "API keys" section click "Create key" and enter a name for your key. Copy the API key and paste it into the corresponding field of the account connection window in the ApiX-Drive system.
Click "Save" and select your connected Perplexity AI account from the drop-down list.
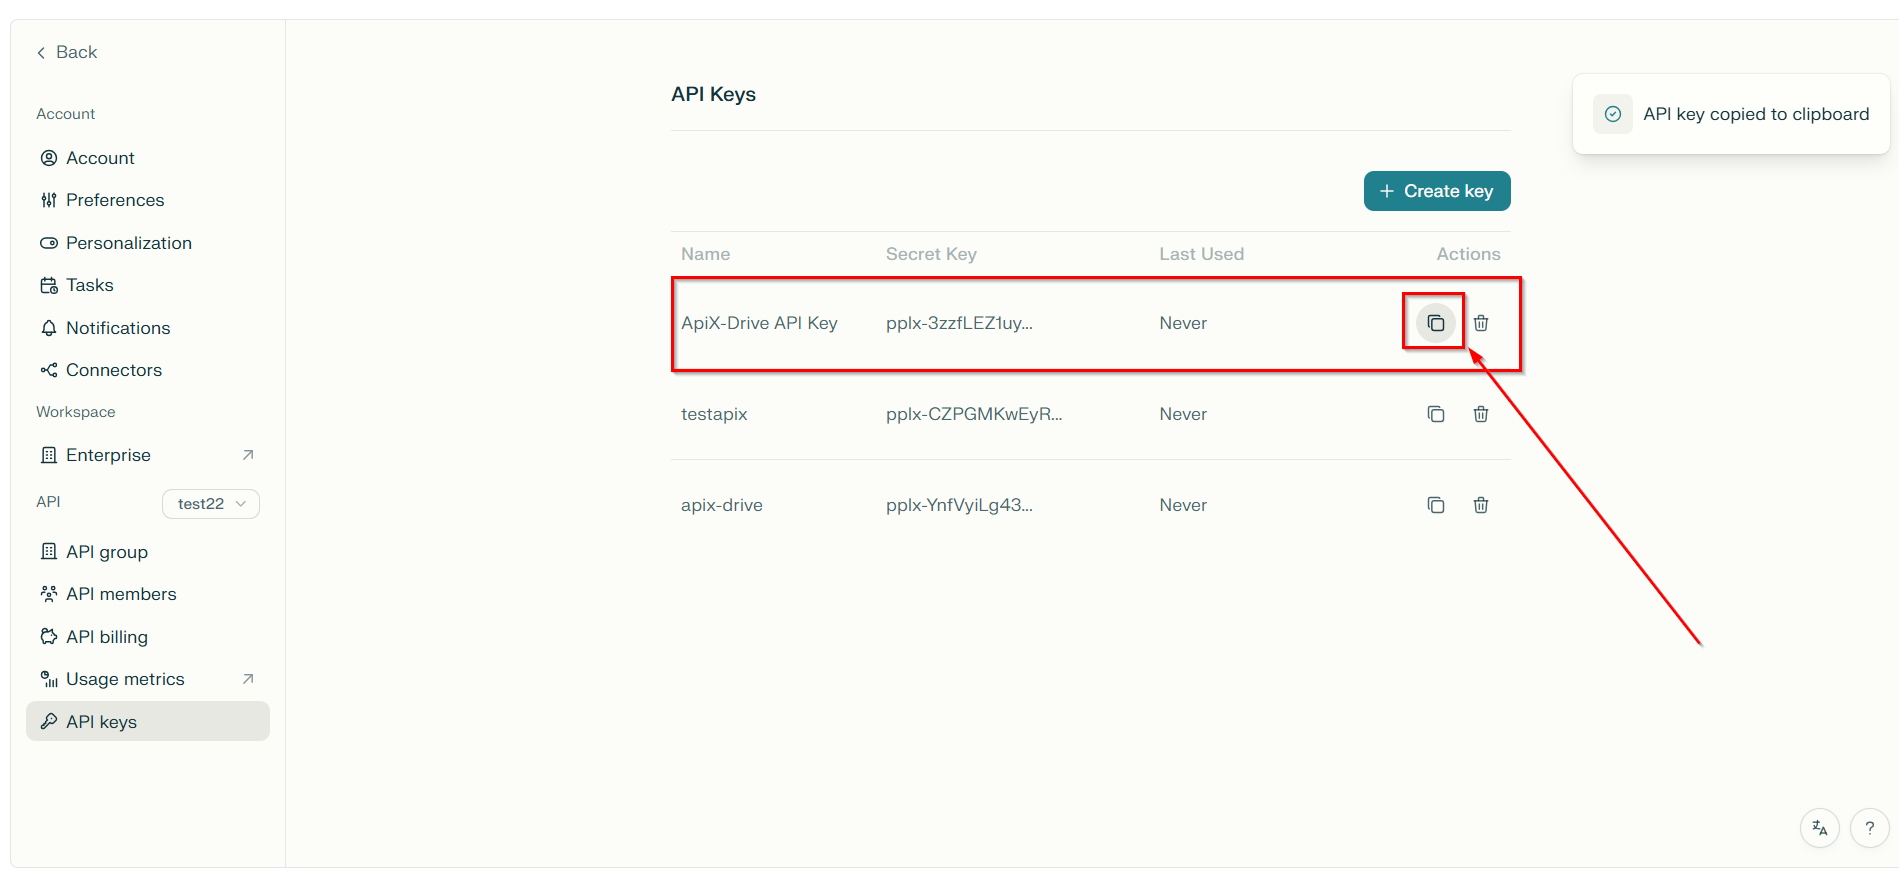
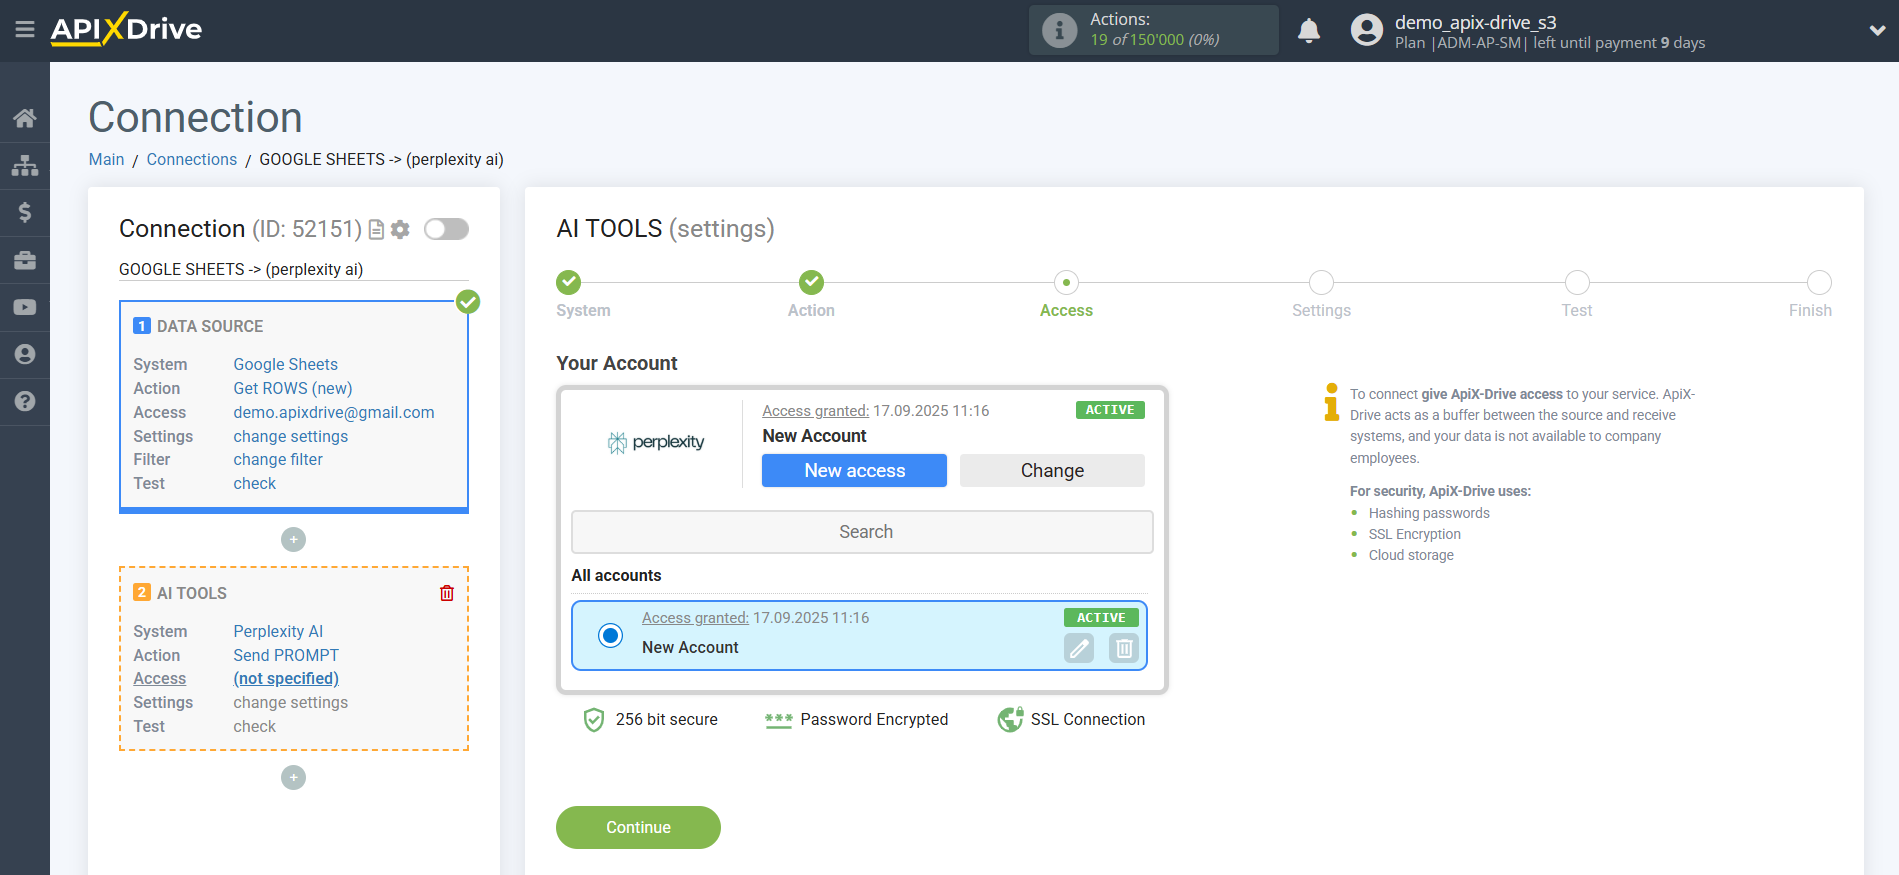
When the connected account appears in the list of "active accounts", select it for further work.
Attention! If your account is in the list of "inactive accounts" check your access to this account!
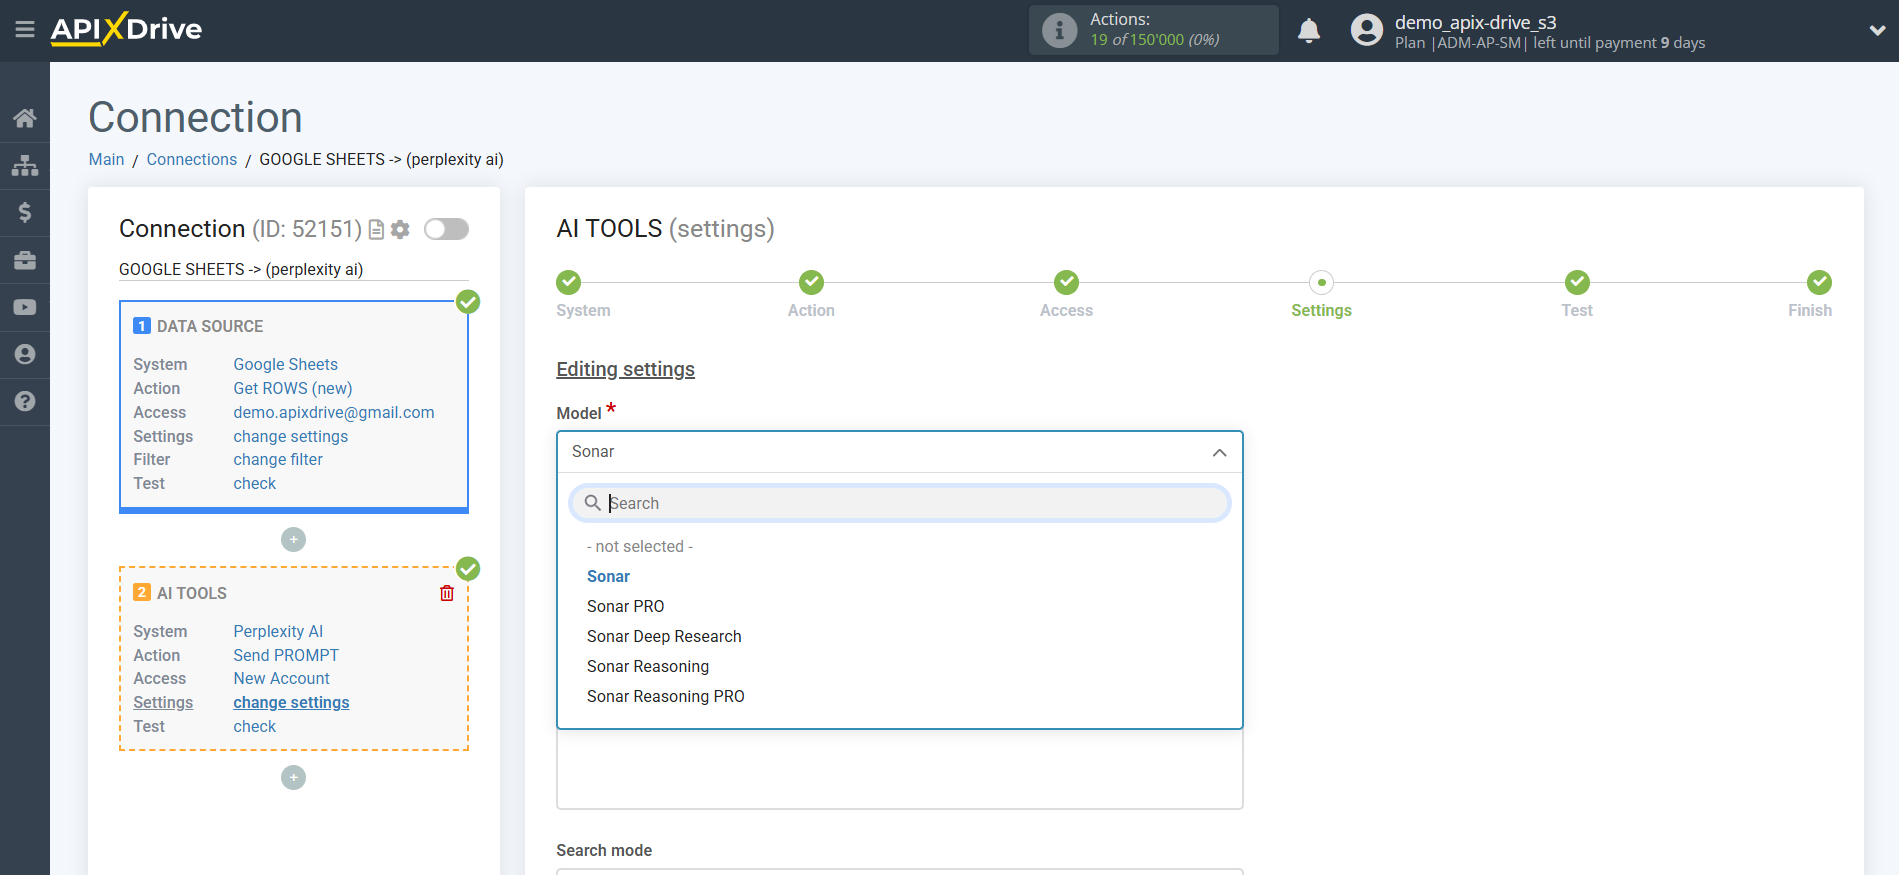
Now you need to select the Perplexity AI Model. The choice of model depends on your task.
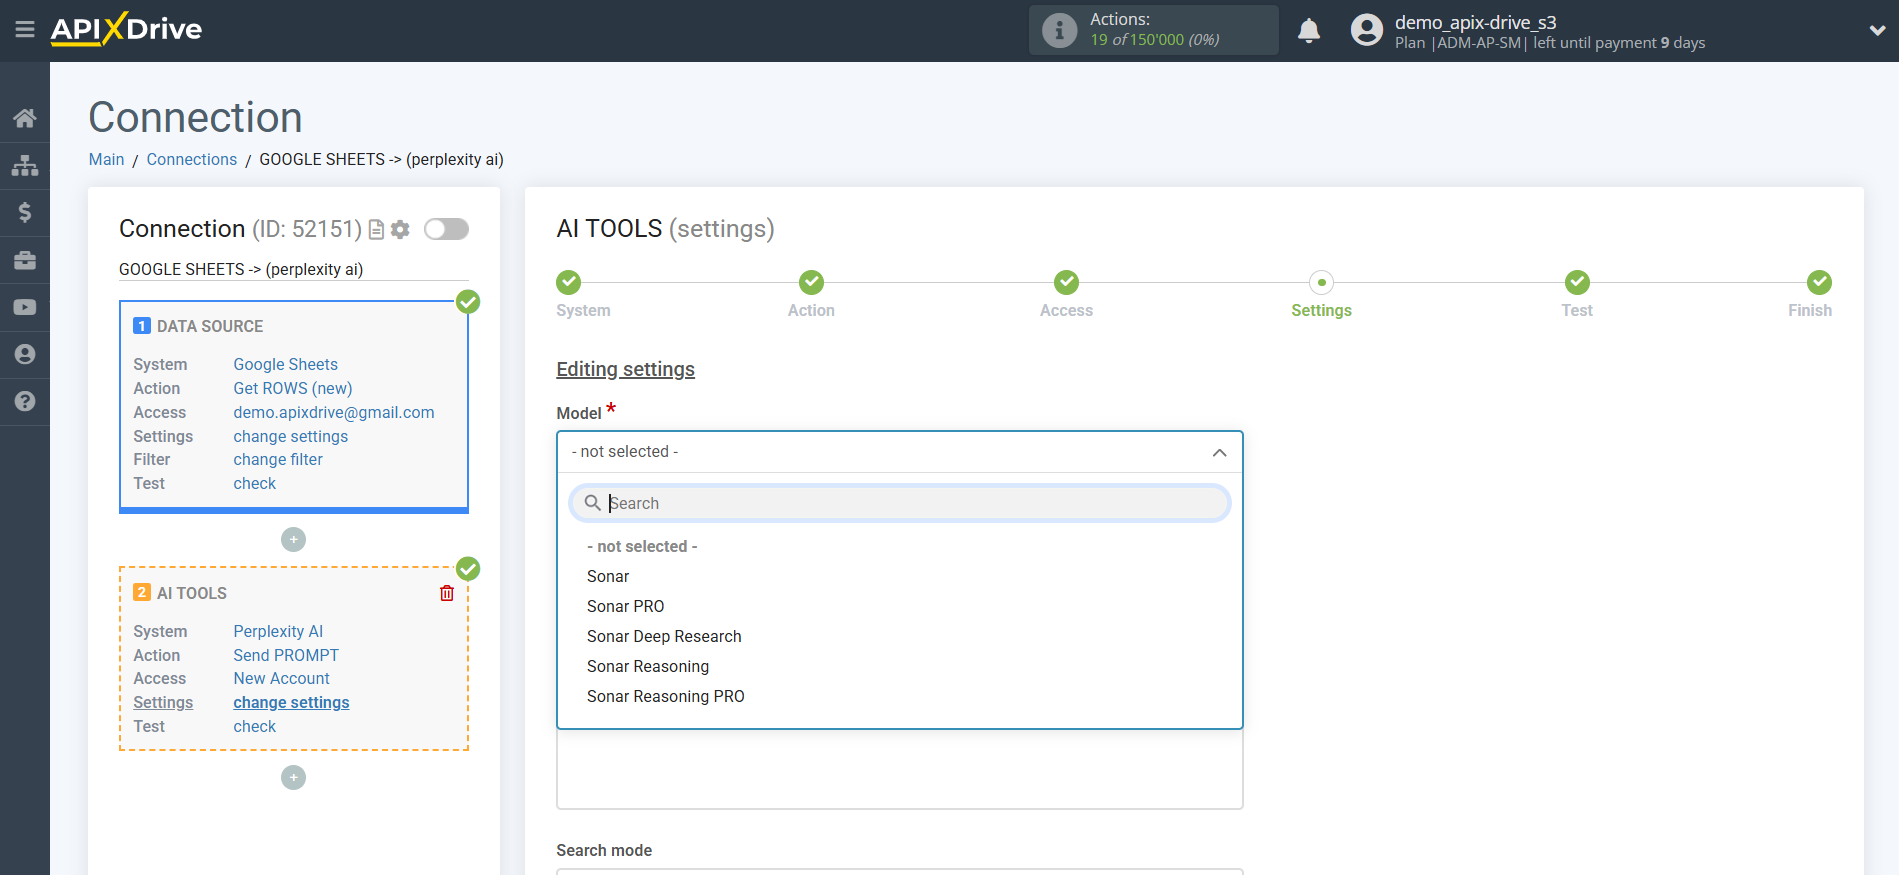
Sonar is a basic universal model for searching and generating quick answers with relevant quotes from the Internet in real time. Optimally suited for general queries, provides high issuance speed (up to 1200 tokens/sec).
Sonar PRO is an advanced version of Sonar with increased accuracy, support for complex, multi-step questions, double the number of links and more context. Effective for business analytics, complex research, integration into corporate services.
Sonar Deep Research is a specialized research model for deep analysis and synthesis, conducts dozens of searches, “reads” hundreds of sources and generates complex analytical reports. It can plan searches, structure information, identify contradictions and create expert reviews on any topic.
Sonar Reasoning is a logical inference model for chain reasoning and real-time fact-checking. Works well with multi-part, analytical and comparative queries, combined with fast source search.
Sonar Reasoning PRO is the most powerful version for experts, designed for complex, strategic tasks: support for up to 200,000 tokens, multi-stage output, multiple quotes and in-depth analysis. It is used for scientific, medical, financial research and solution design.
Answering Perplexity AI Knowledge Base Questions and Generating Text
In this case, select "Sonar".
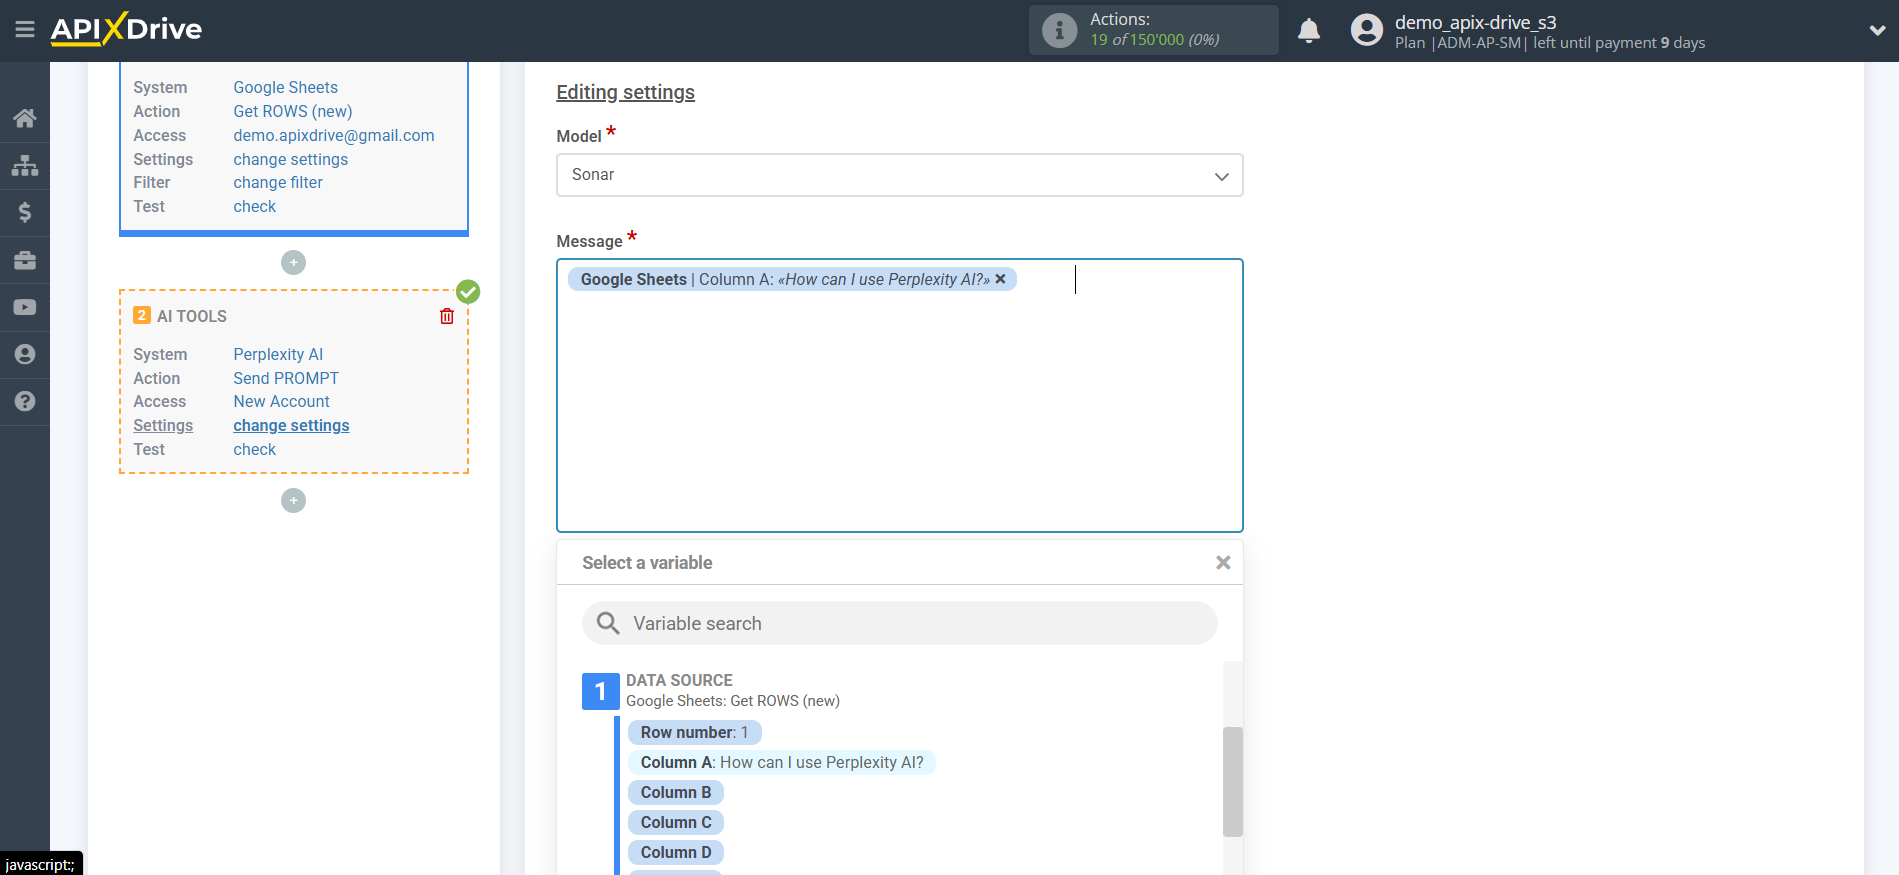
- Message - in this field you need to assign in which variable of the Data Source table the data is located, according to which the query will be made on the Perplexity AI server, in our case, this is column "A".
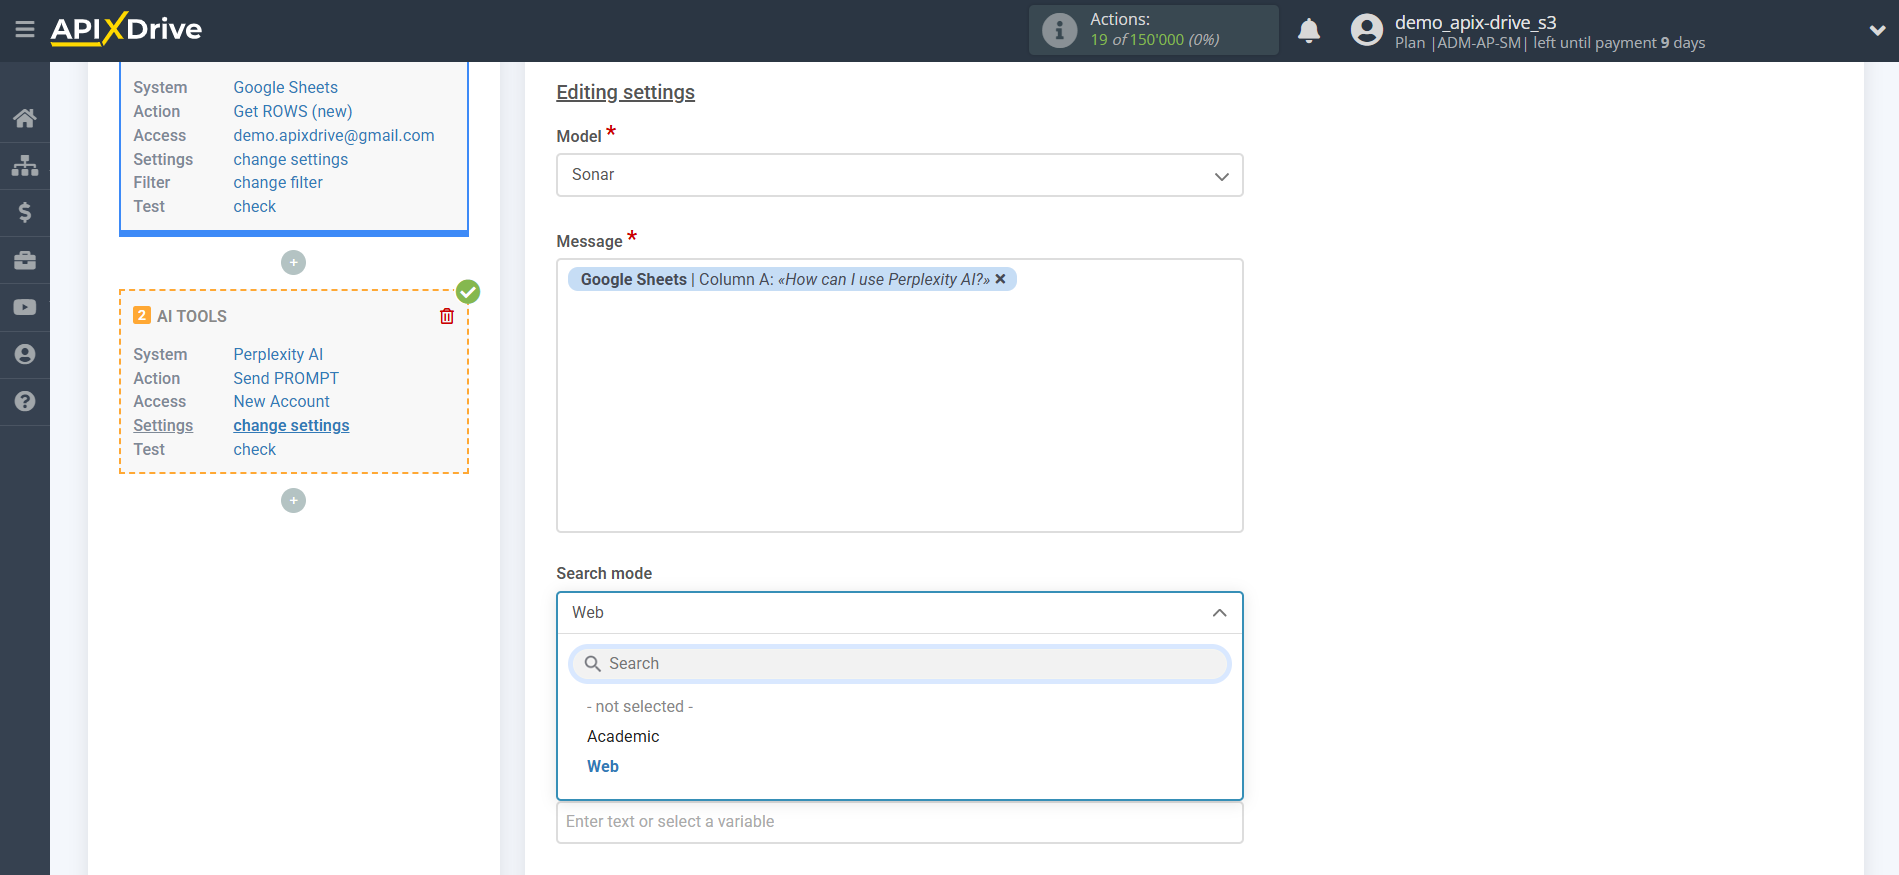
- Search mode - 2 modes available: Academic and Web.
Academic searches and analyzes only scientific publications, journals, articles, dissertations, and preprints. Useful for deep fact-checking, finding cited studies, and preparing scientific reviews.
Web — standard search mode for all open sources on the Internet: news, blogs, forums, documents, social networks. Suitable for quick reference, general questions and current data.
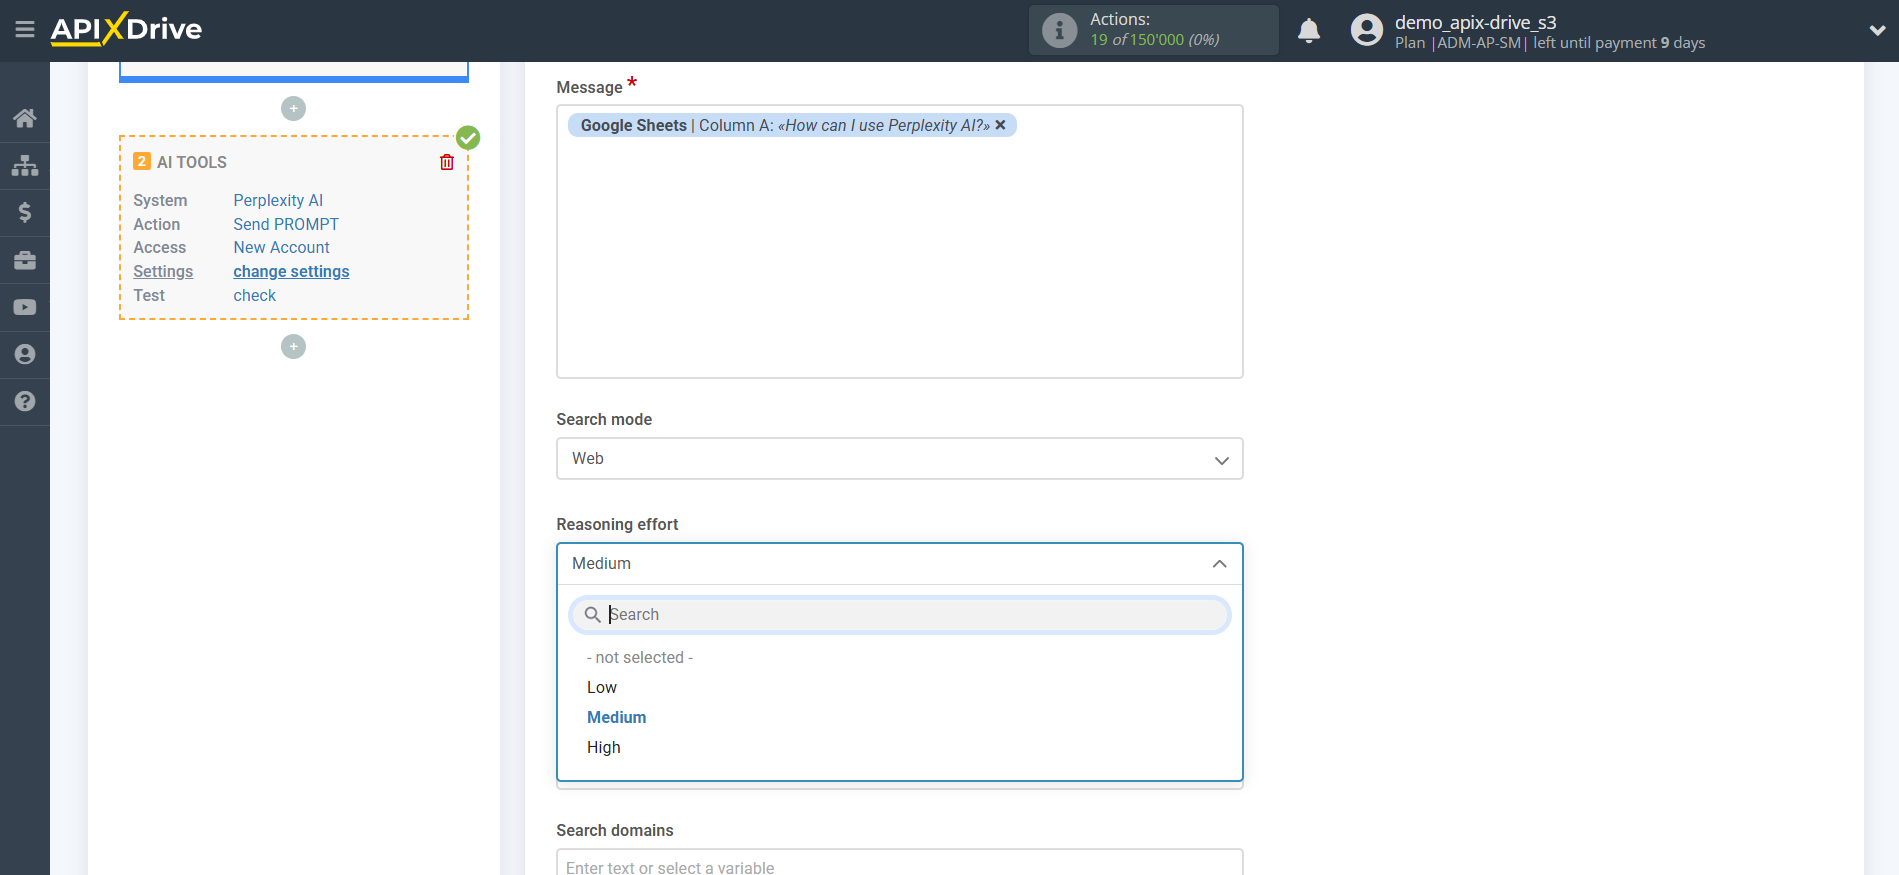
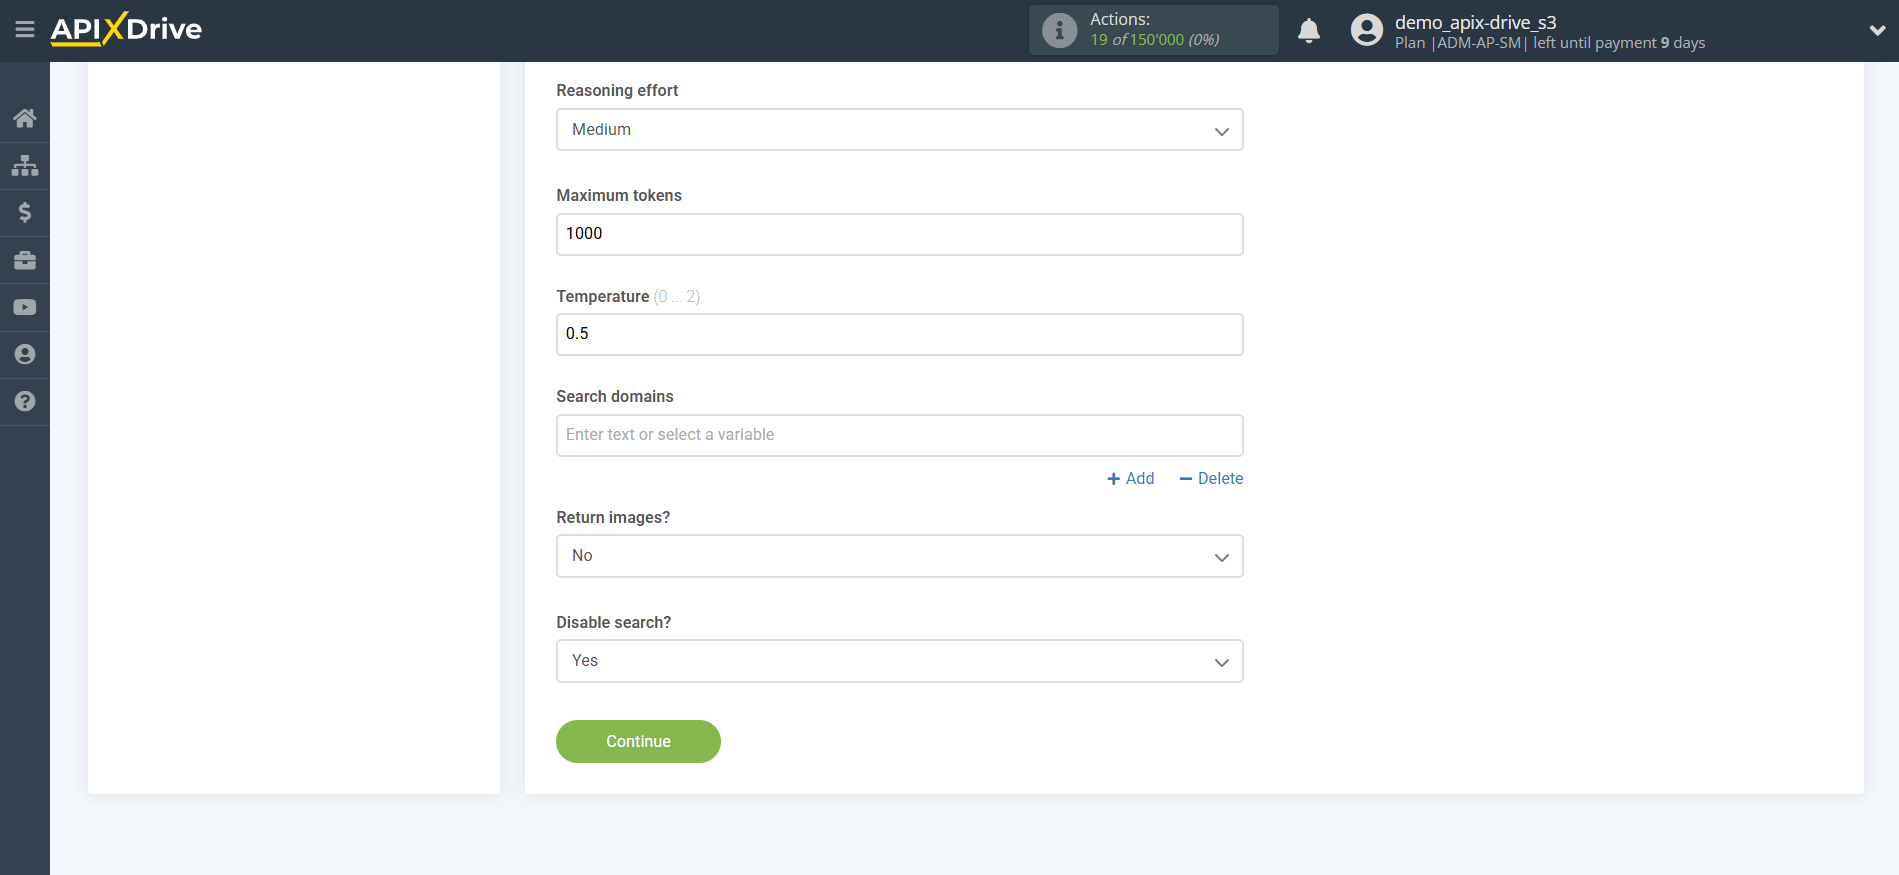
- Reasoning effort - controls the depth of analysis: you can choose "Low" for quick answers or "High" for multi-stage logical reasoning and detailed conclusions. The higher the level, the more the AI interprets sources, builds a chain of thoughts and arguments in the answer.
- Maximum tokens - this is the number of words up to which generation in Perplexity AI will continue. 1,000 tokens - 750 words.
- Temperature - can take values from 0 to 2. Higher values, such as 0.8, will make the output more random, while lower values, such as 0.2, will make it more focused and deterministic.
- Search domains - this is a feature that allows you to specify specific websites or internet domains from which Perplexity will search for information to answer a question. Typically, the user can specify one or more domains to get results only from the selected resources.
• Used to search through trusted, specialized or corporate sources.
• Allows you to eliminate the “noise” of the Internet and obtain the most relevant, focused data.
• Used in APIs and many advanced modes, especially for business intelligence, scientific and legal purposes.
This helps to quickly analyze documents, news and publications strictly on the required sites and trusted platforms.
- Return images - includes images found during the search in the result: diagrams, photos, infographics, schemes. Suitable for visual context and illustration of answers to topics where appearance or clarity is important.
- Disable search - disables online search. AI generates an answer only based on internal knowledge without access to the Internet. Used for private or offline modes when maximum speed is needed and there is no need for up-to-date data.
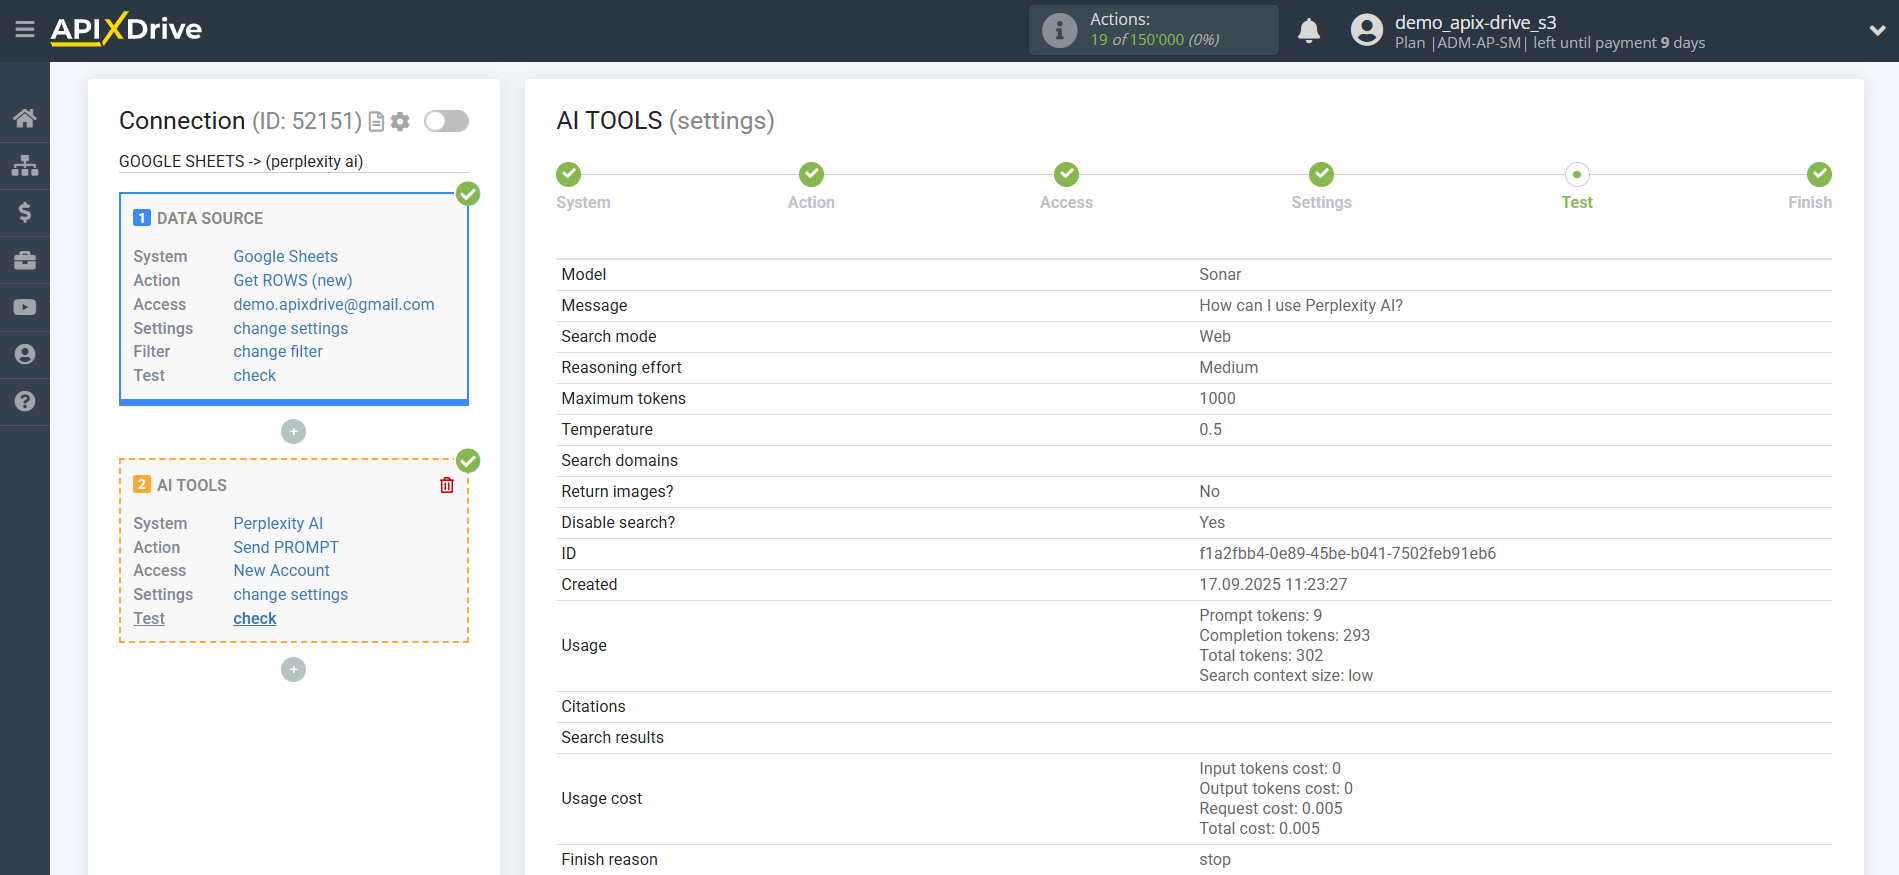
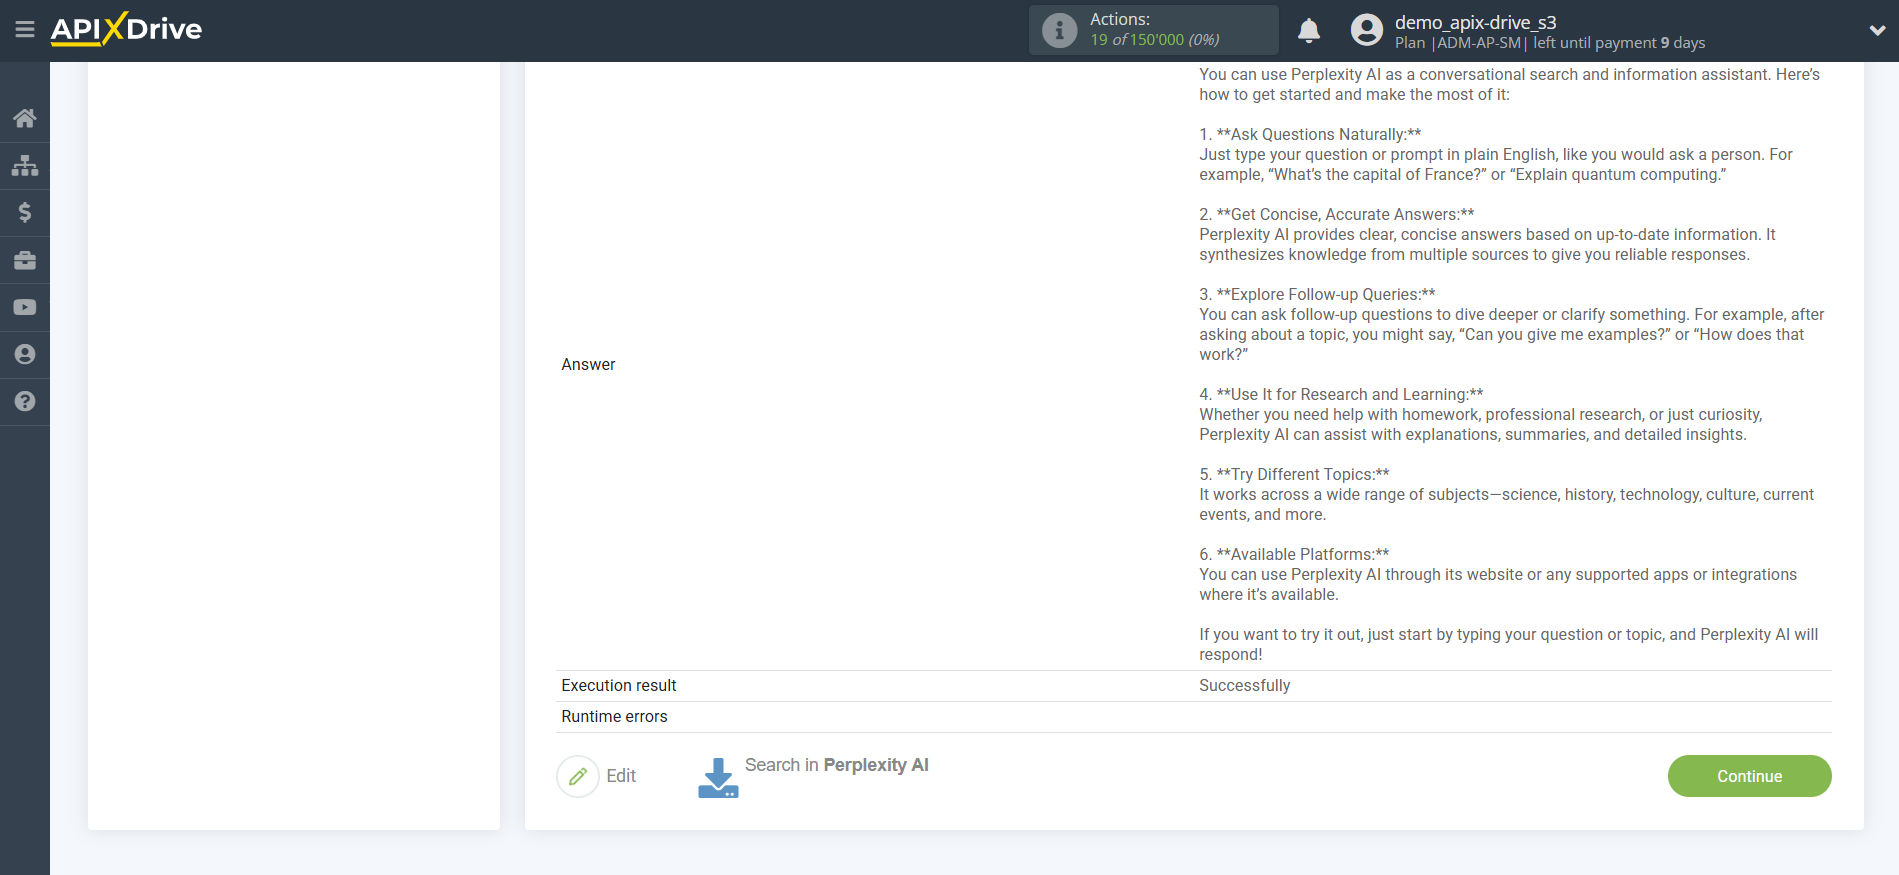
Now you see test data for your request. You can transfer this data to your receiving table.
If the test data does not appear automatically, click "Search Perplexity AI".
If you are not satisfied with something, click "Edit", go back one step and change the search field settings.
Generate and edit text according to request
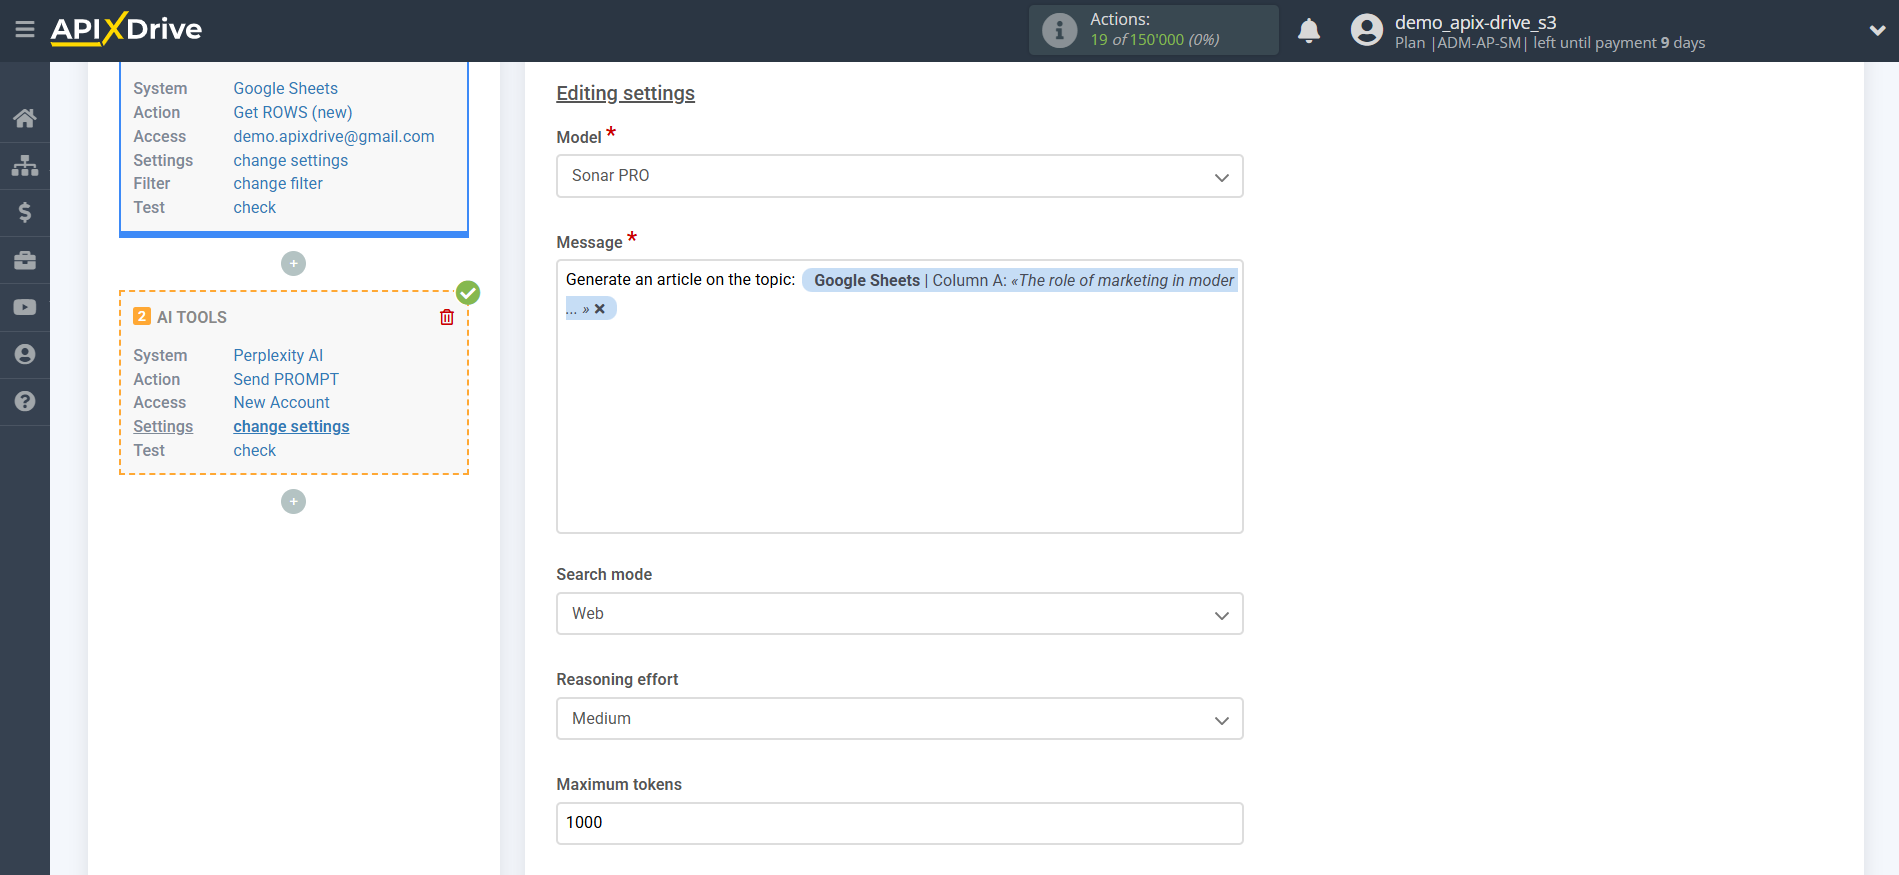
In this case, select "Sonar PRO".
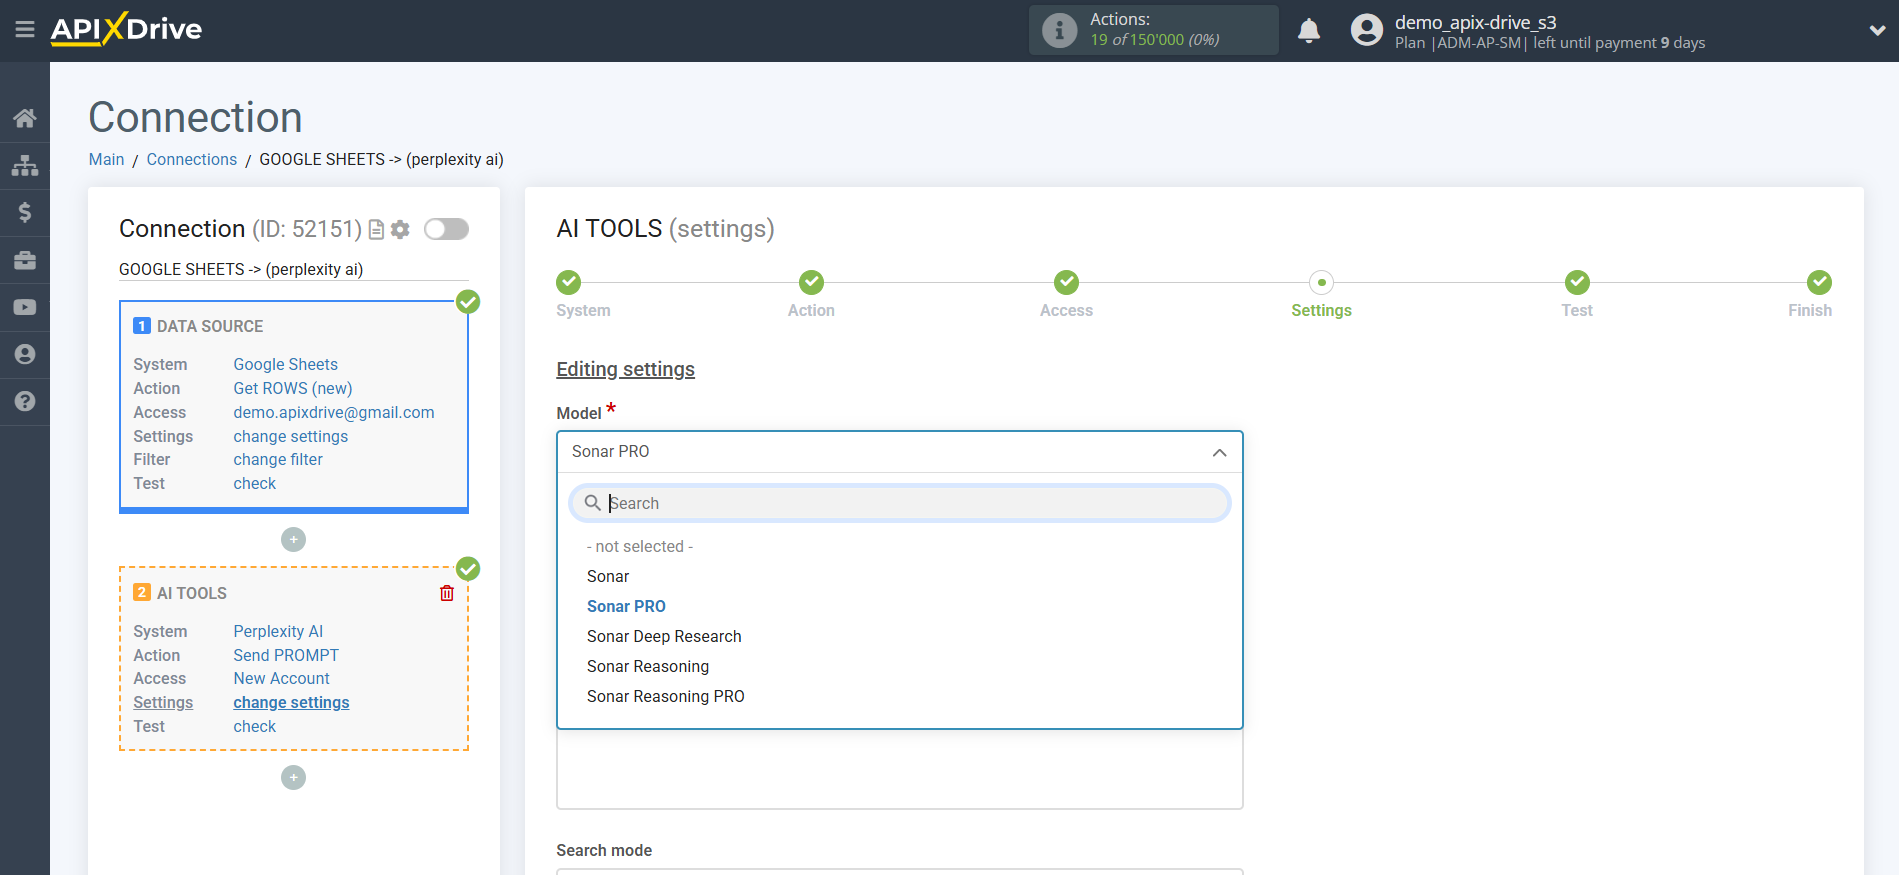
- Message - in this field you need to assign in which variable of the Data Source table the data is located, according to which the query will be made on the Perplexity AI server, in our case, this is column "A".
- Search mode - 2 modes available: Academic and Web.
Academic searches and analyzes only scientific publications, journals, articles, dissertations, and preprints. Useful for deep fact-checking, finding cited studies, and preparing scientific reviews.
Web — standard search mode for all open sources on the Internet: news, blogs, forums, documents, social networks. Suitable for quick reference, general questions and current data.
- Reasoning effort - controls the depth of analysis: you can choose "Low" for quick answers or "High" for multi-stage logical reasoning and detailed conclusions. The higher the level, the more the AI interprets sources, builds a chain of thoughts and arguments in the answer.
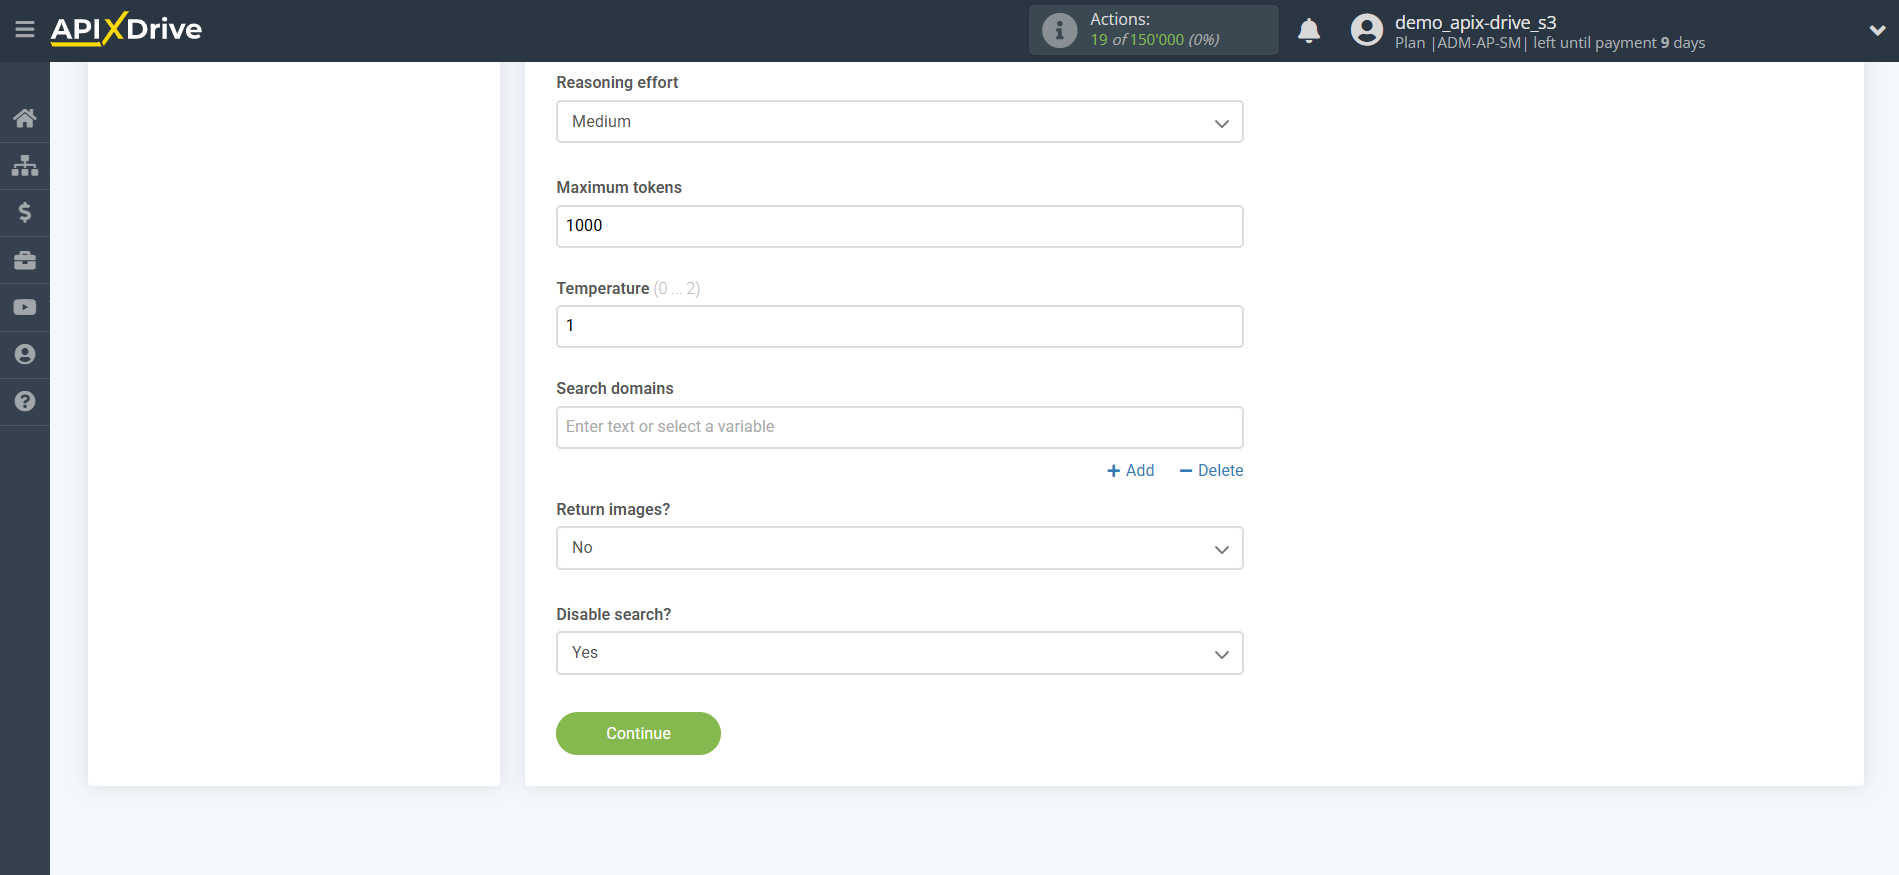
- Maximum tokens - this is the number of words up to which generation in Perplexity AI will continue. 1,000 tokens - 750 words.
- Temperature - can take values from 0 to 2. Higher values, such as 0.8, will make the output more random, while lower values, such as 0.2, will make it more focused and deterministic.
- Search domains - this is a feature that allows you to specify specific websites or internet domains from which Perplexity will search for information to answer a question. Typically, the user can specify one or more domains to get results only from the selected resources.
• Used to search through trusted, specialized or corporate sources.
• Allows you to eliminate the “noise” of the Internet and obtain the most relevant, focused data.
• Used in APIs and many advanced modes, especially for business intelligence, scientific and legal purposes.
This helps to quickly analyze documents, news and publications strictly on the required sites and trusted platforms.
- Return images - includes images found during the search in the result: diagrams, photos, infographics, schemes. Suitable for visual context and illustration of answers to topics where appearance or clarity is important.
- Disable search - disables online search. AI generates an answer only based on internal knowledge without access to the Internet. Used for private or offline modes when maximum speed is needed and there is no need for up-to-date data.
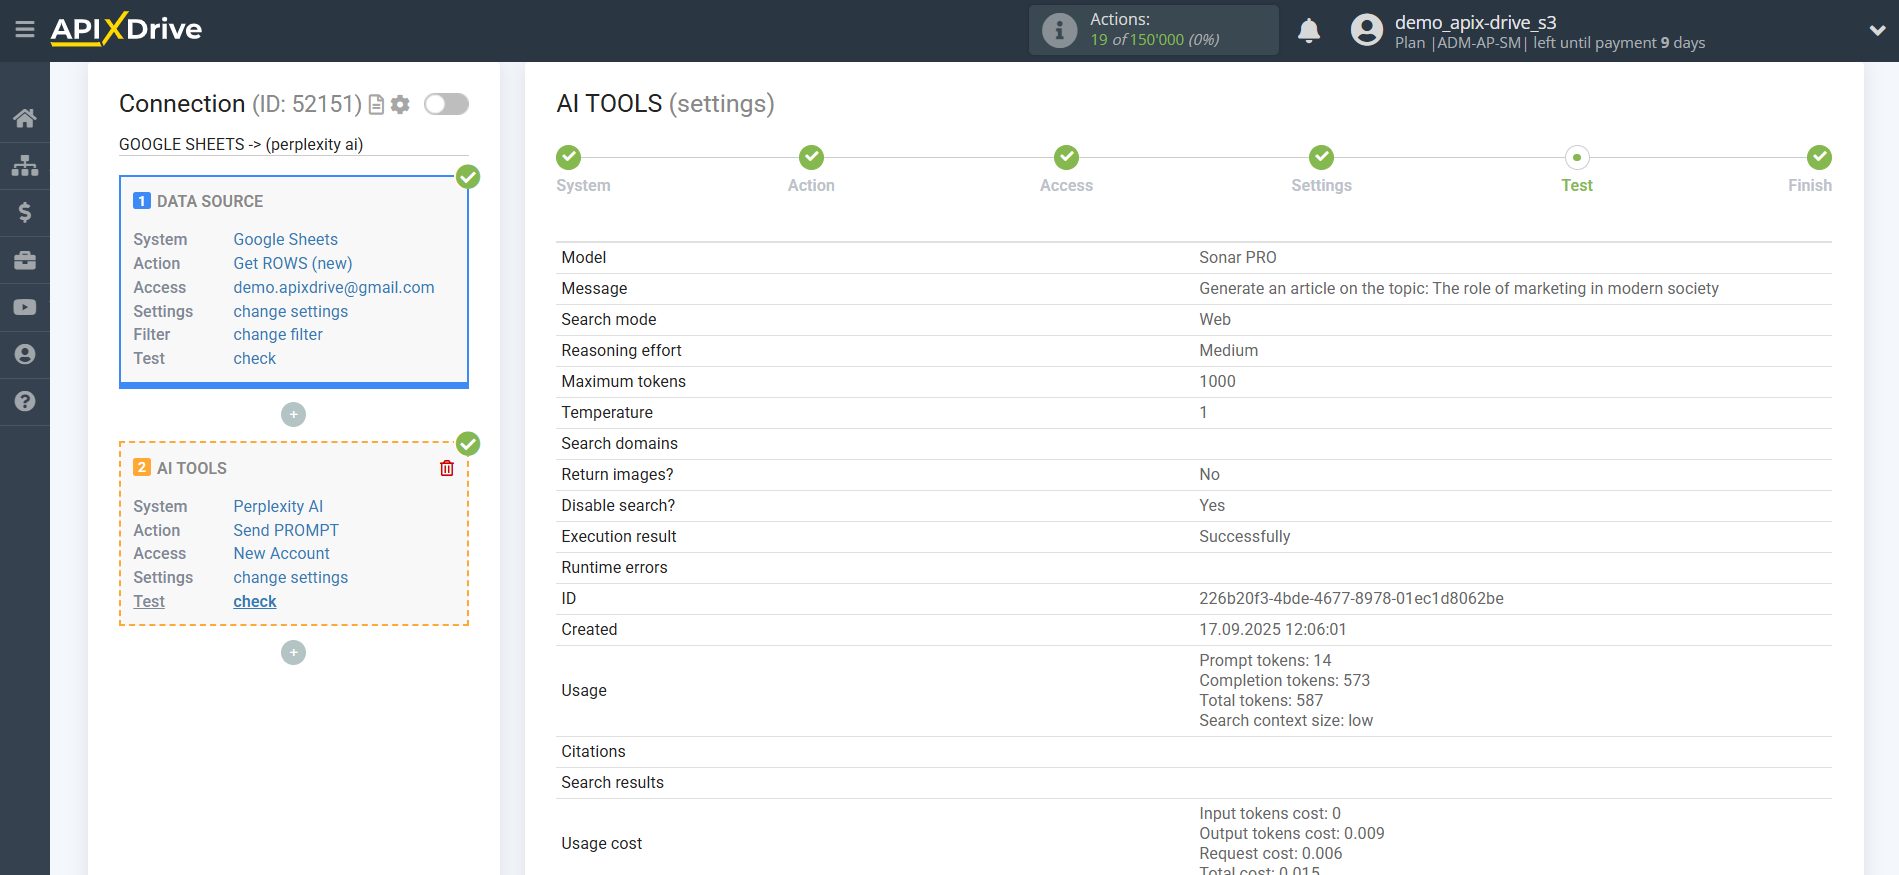
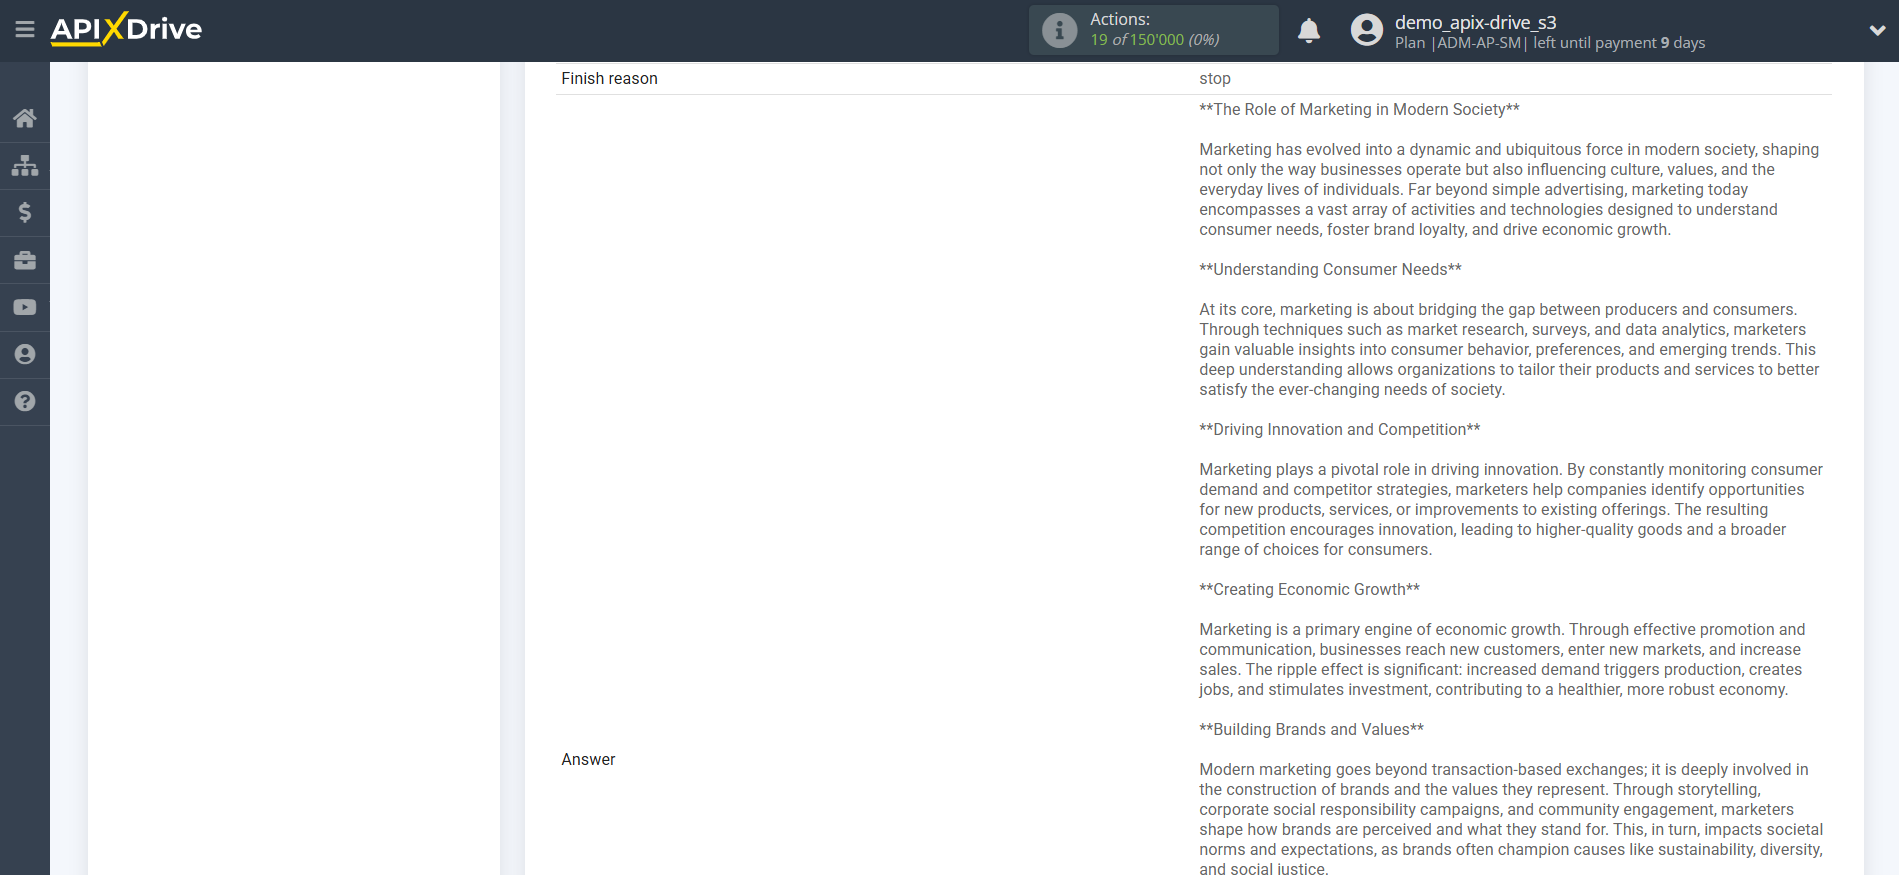
Now you see test data for your request. You can transfer this data to your receiving table.
If the test data does not appear automatically, click "Search Perplexity AI".
If you are not satisfied with something, click "Edit", go back one step and change the search field settings.
Data analysis and structuring
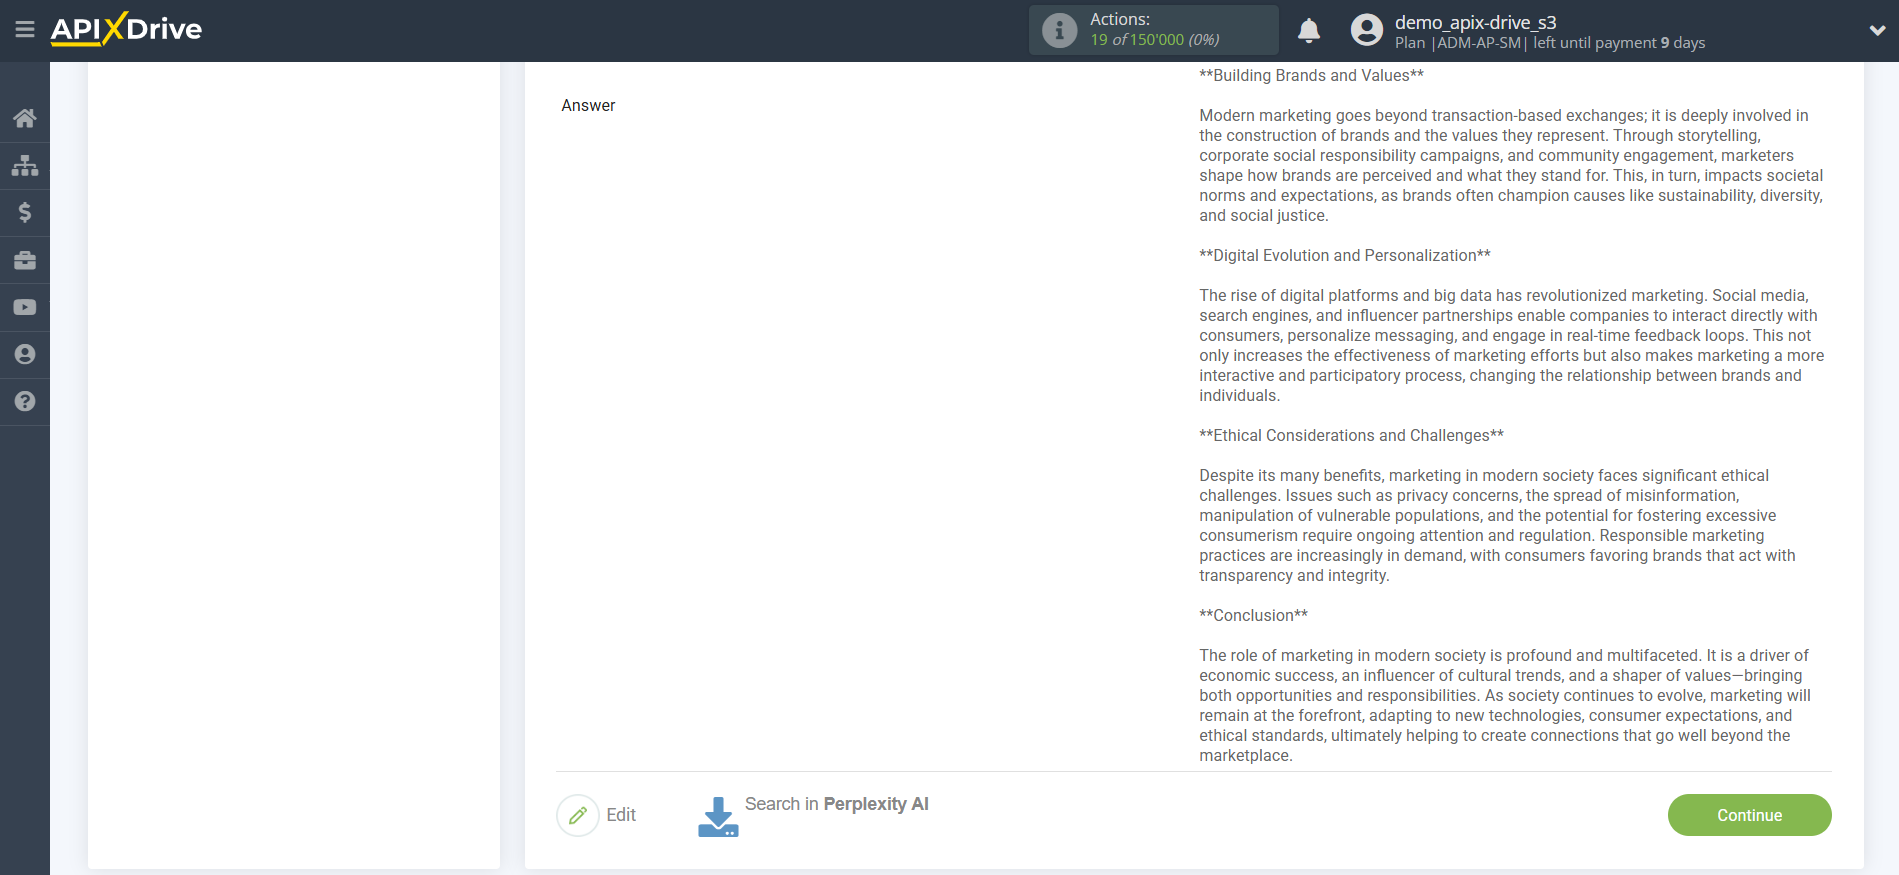
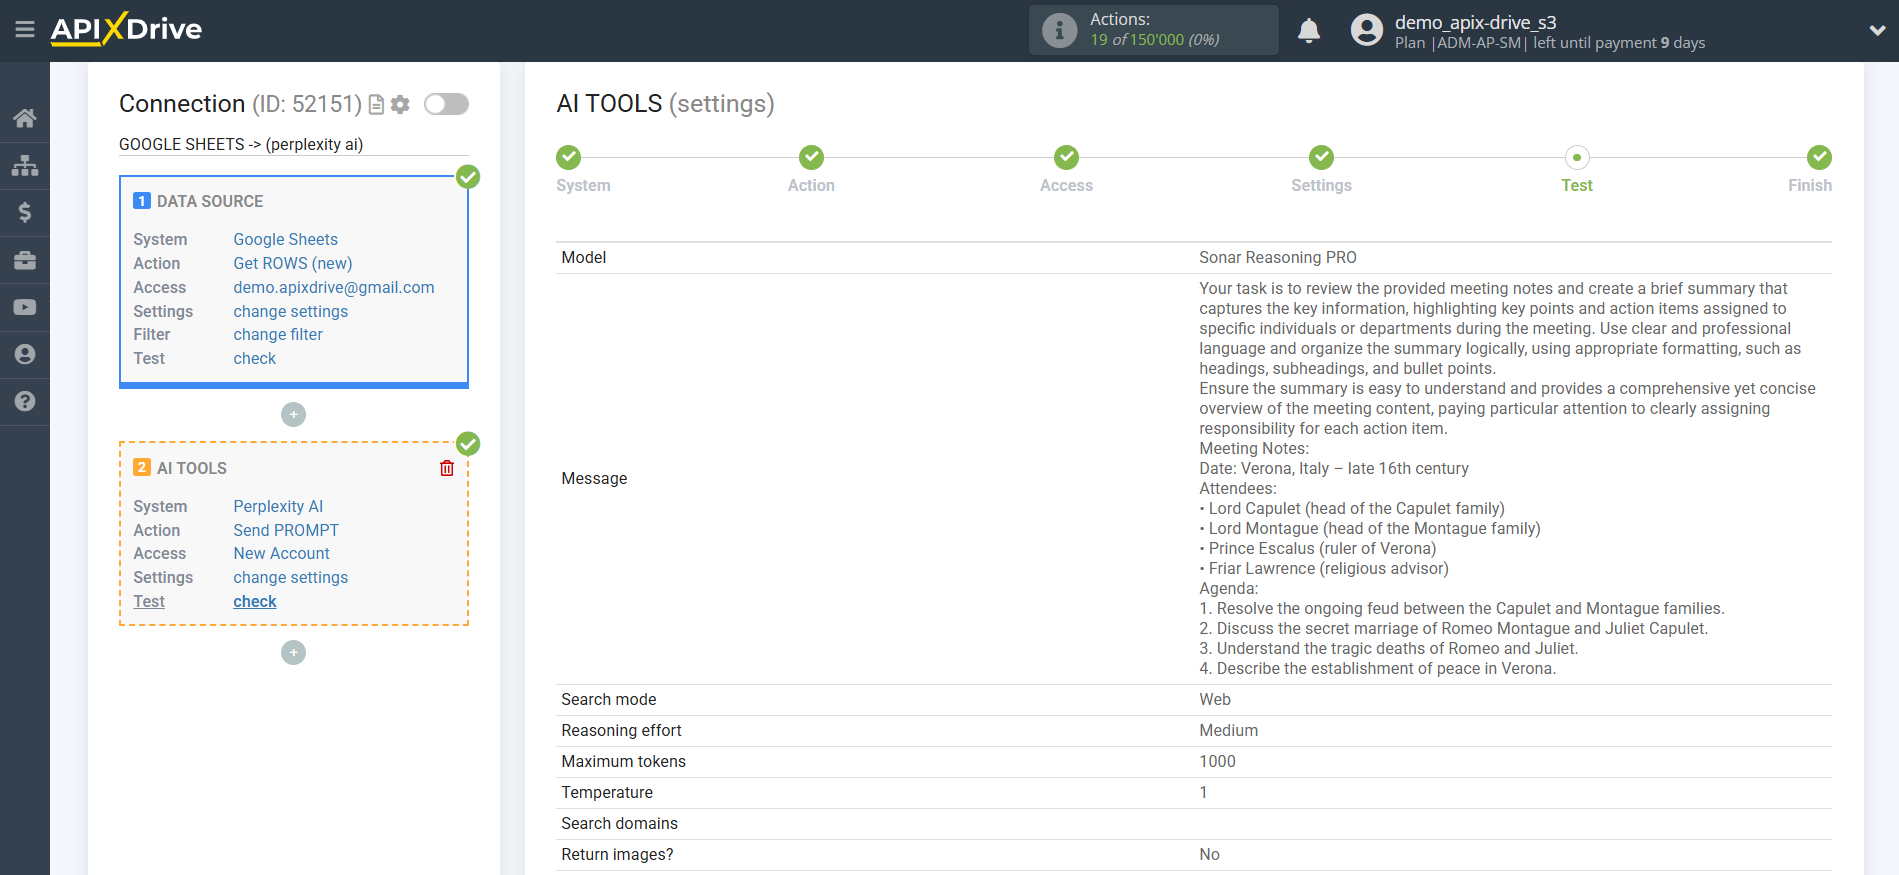
In this case, select "Sonar Reasoning PRO".
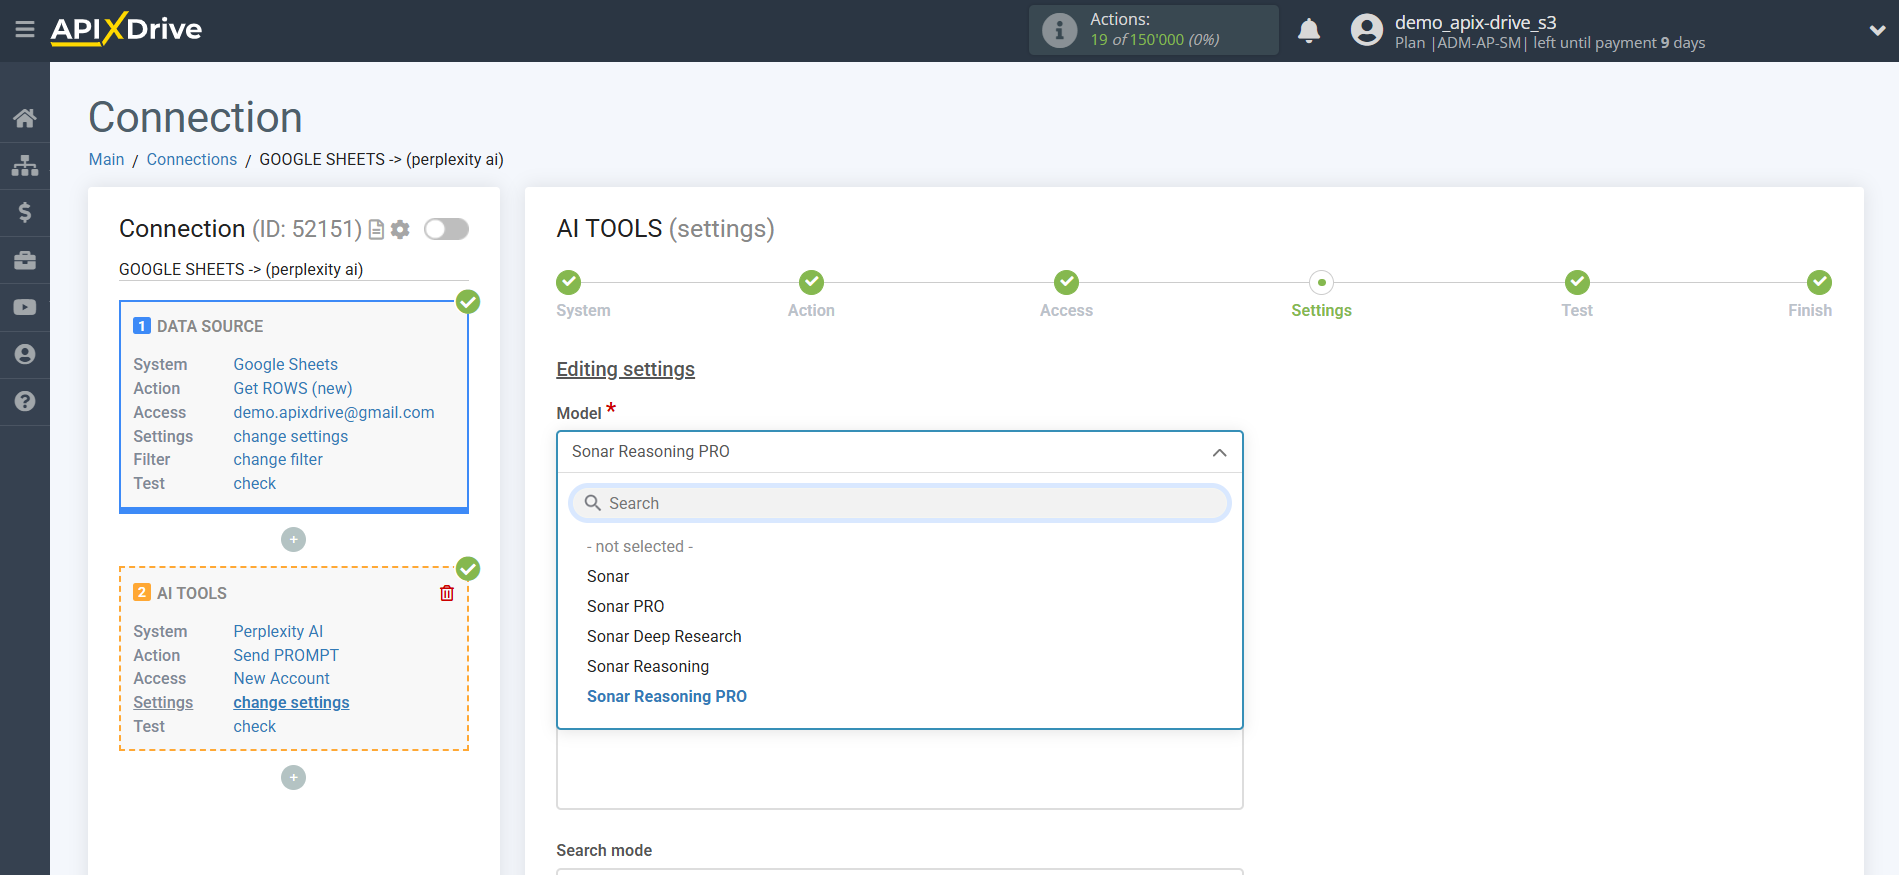
- Message - in this field you need to assign in which variable of the Data Source table the data is located, according to which the query will be made on the Perplexity AI server, in our case, this is column "A".
- Search mode - 2 modes available: Academic and Web.
Academic searches and analyzes only scientific publications, journals, articles, dissertations, and preprints. Useful for deep fact-checking, finding cited studies, and preparing scientific reviews.
Web — standard search mode for all open sources on the Internet: news, blogs, forums, documents, social networks. Suitable for quick reference, general questions and current data.
- Reasoning effort - controls the depth of analysis: you can choose "Low" for quick answers or "High" for multi-stage logical reasoning and detailed conclusions. The higher the level, the more the AI interprets sources, builds a chain of thoughts and arguments in the answer.
- Maximum tokens - this is the number of words up to which generation in Perplexity AI will continue. 1,000 tokens - 750 words.
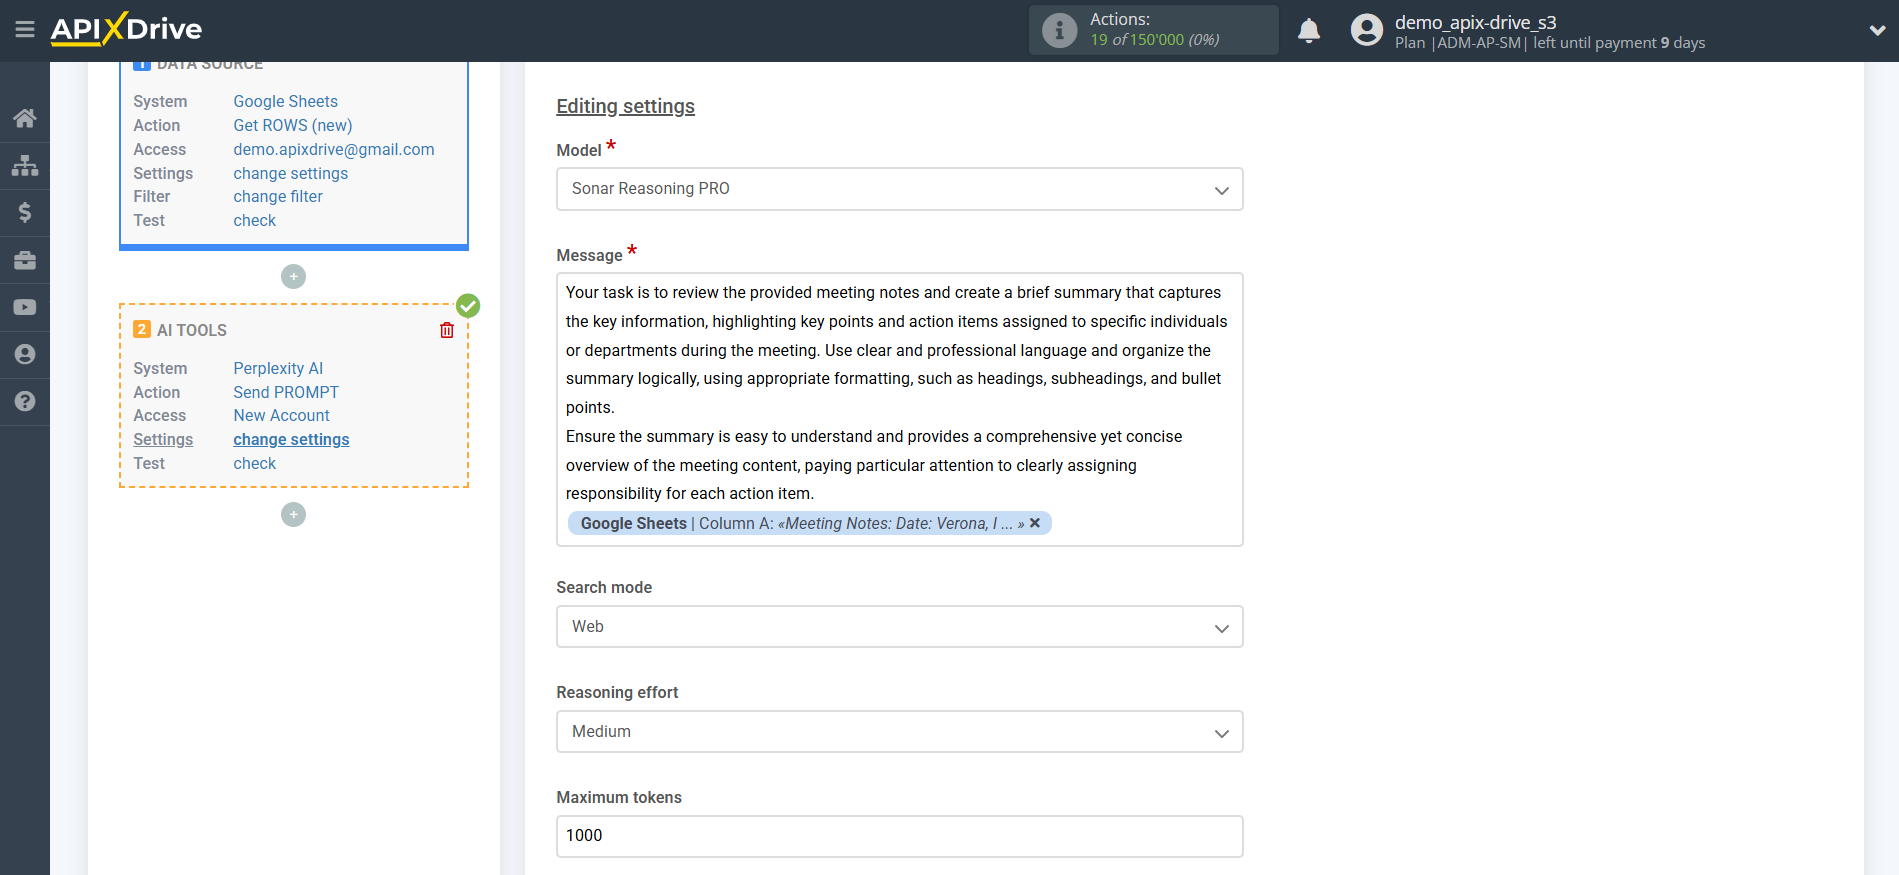
- Temperature - can take values from 0 to 2. Higher values, such as 0.8, will make the output more random, while lower values, such as 0.2, will make it more focused and deterministic.
- Search domains - this is a feature that allows you to specify specific websites or internet domains from which Perplexity will search for information to answer a question. Typically, the user can specify one or more domains to get results only from the selected resources.
• Used to search through trusted, specialized or corporate sources.
• Allows you to eliminate the “noise” of the Internet and obtain the most relevant, focused data.
• Used in APIs and many advanced modes, especially for business intelligence, scientific and legal purposes.
This helps to quickly analyze documents, news and publications strictly on the required sites and trusted platforms.
- Return images - includes images found during the search in the result: diagrams, photos, infographics, schemes. Suitable for visual context and illustration of answers to topics where appearance or clarity is important.
- Disable search - disables online search. AI generates an answer only based on internal knowledge without access to the Internet. Used for private or offline modes when maximum speed is needed and there is no need for up-to-date data.
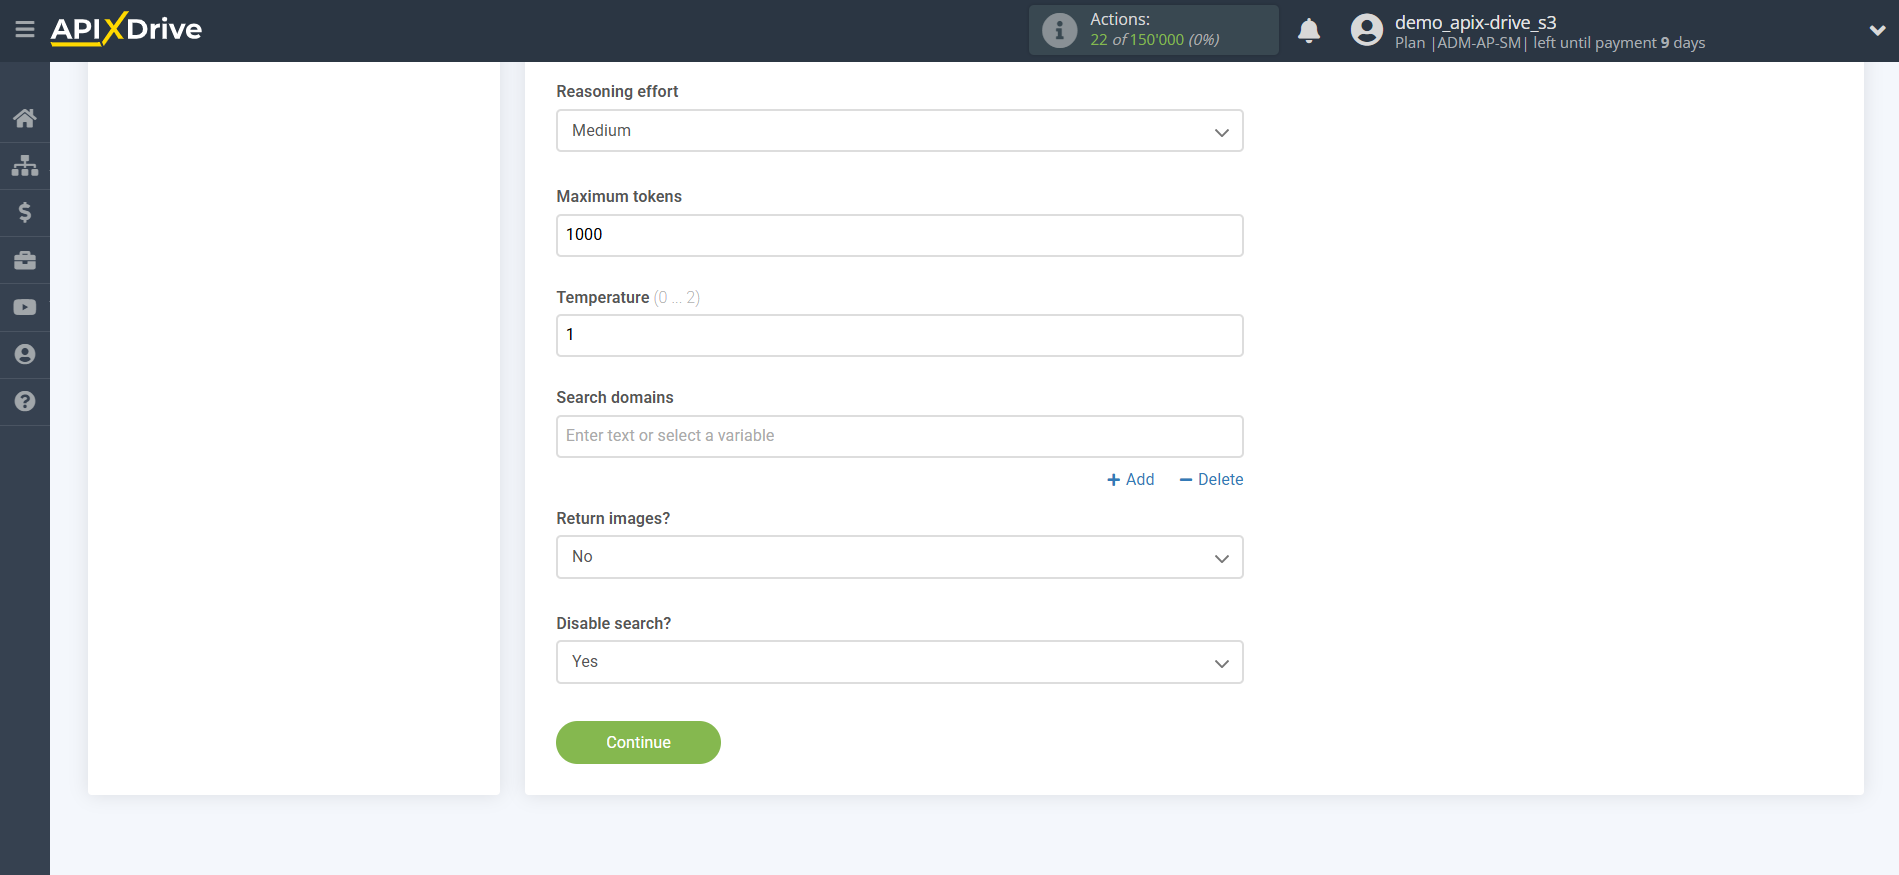
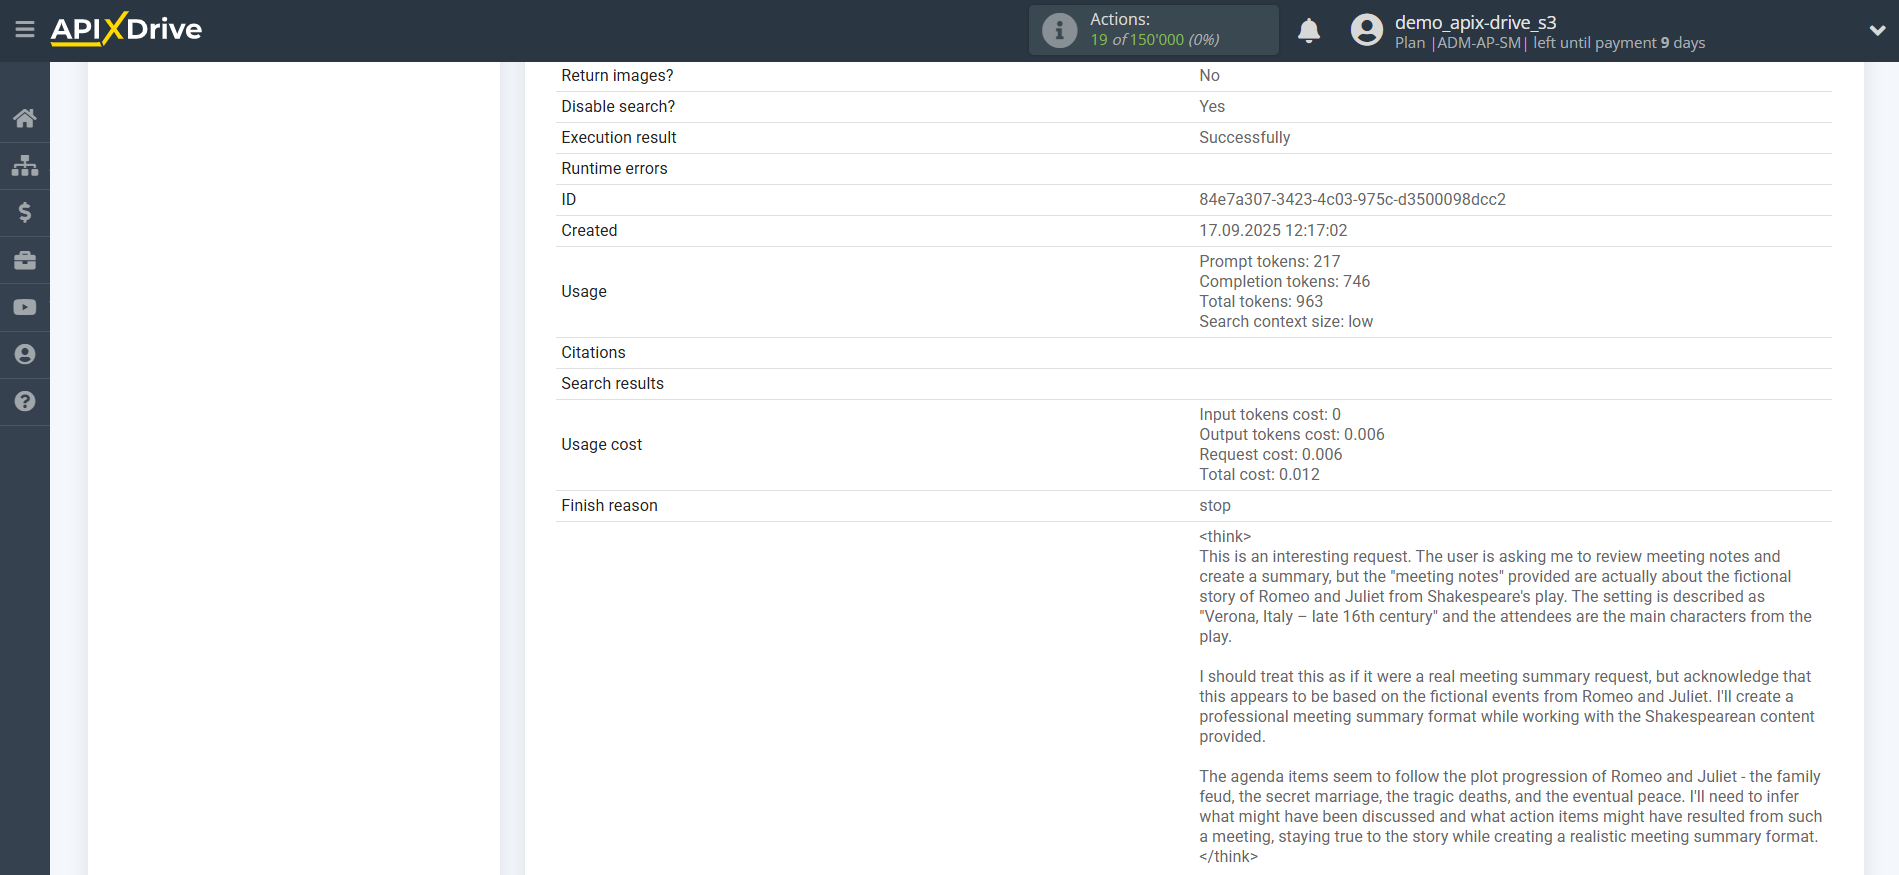
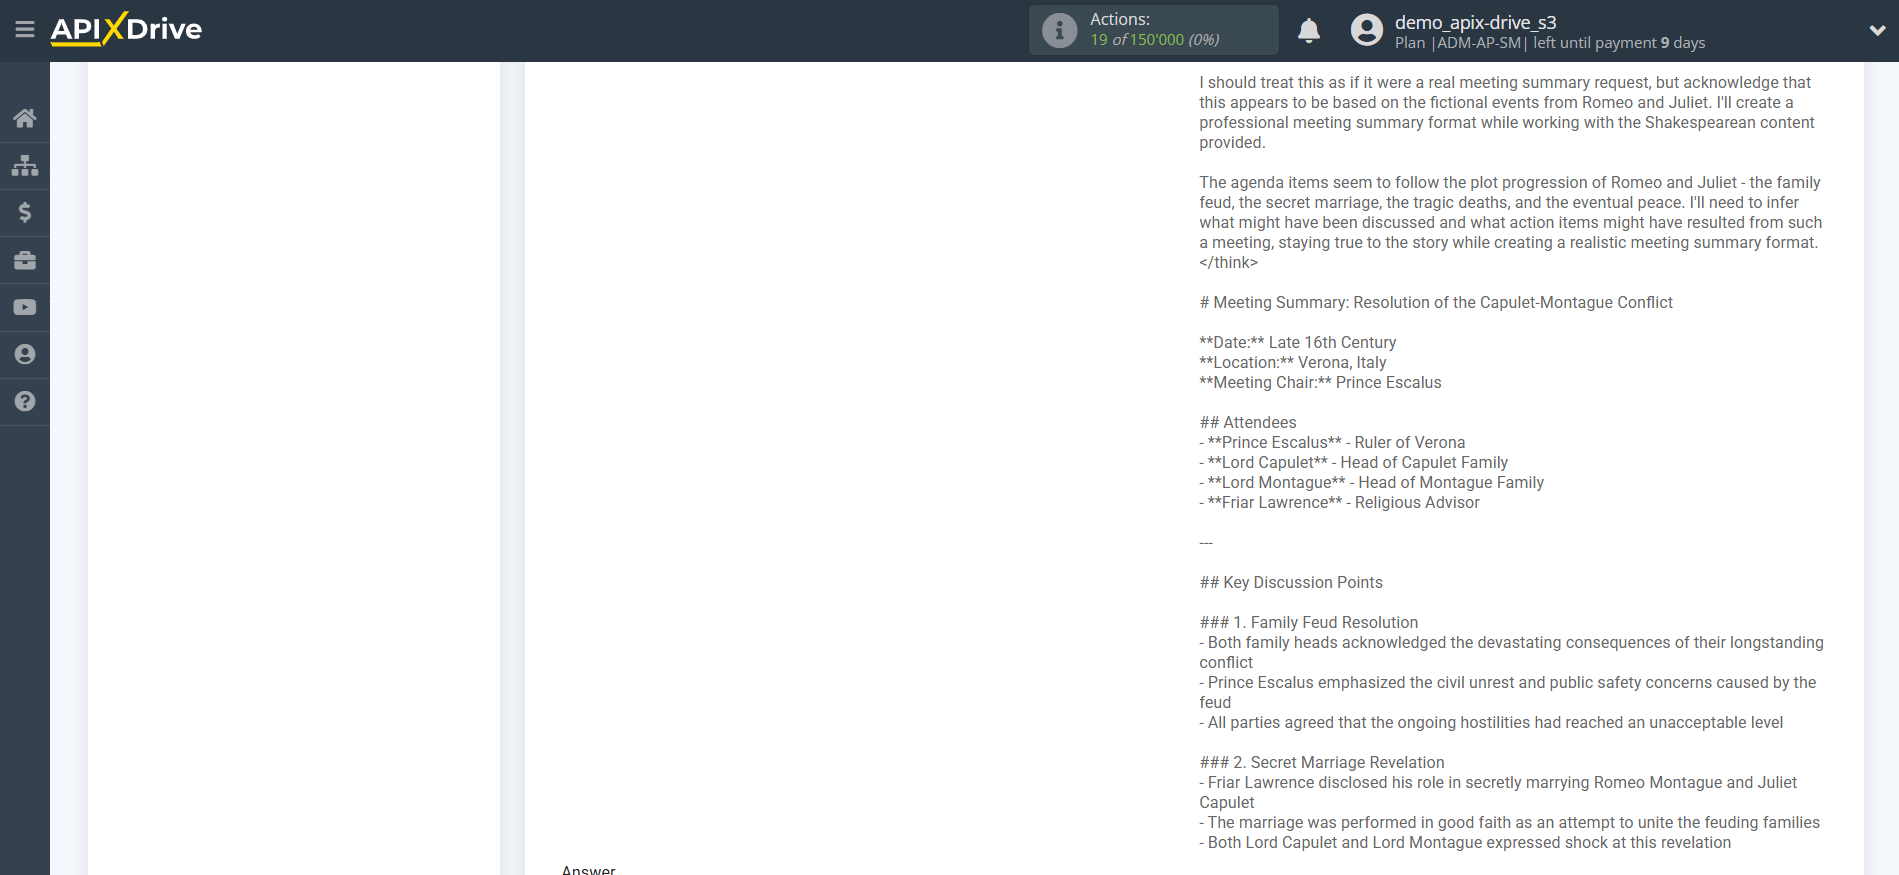
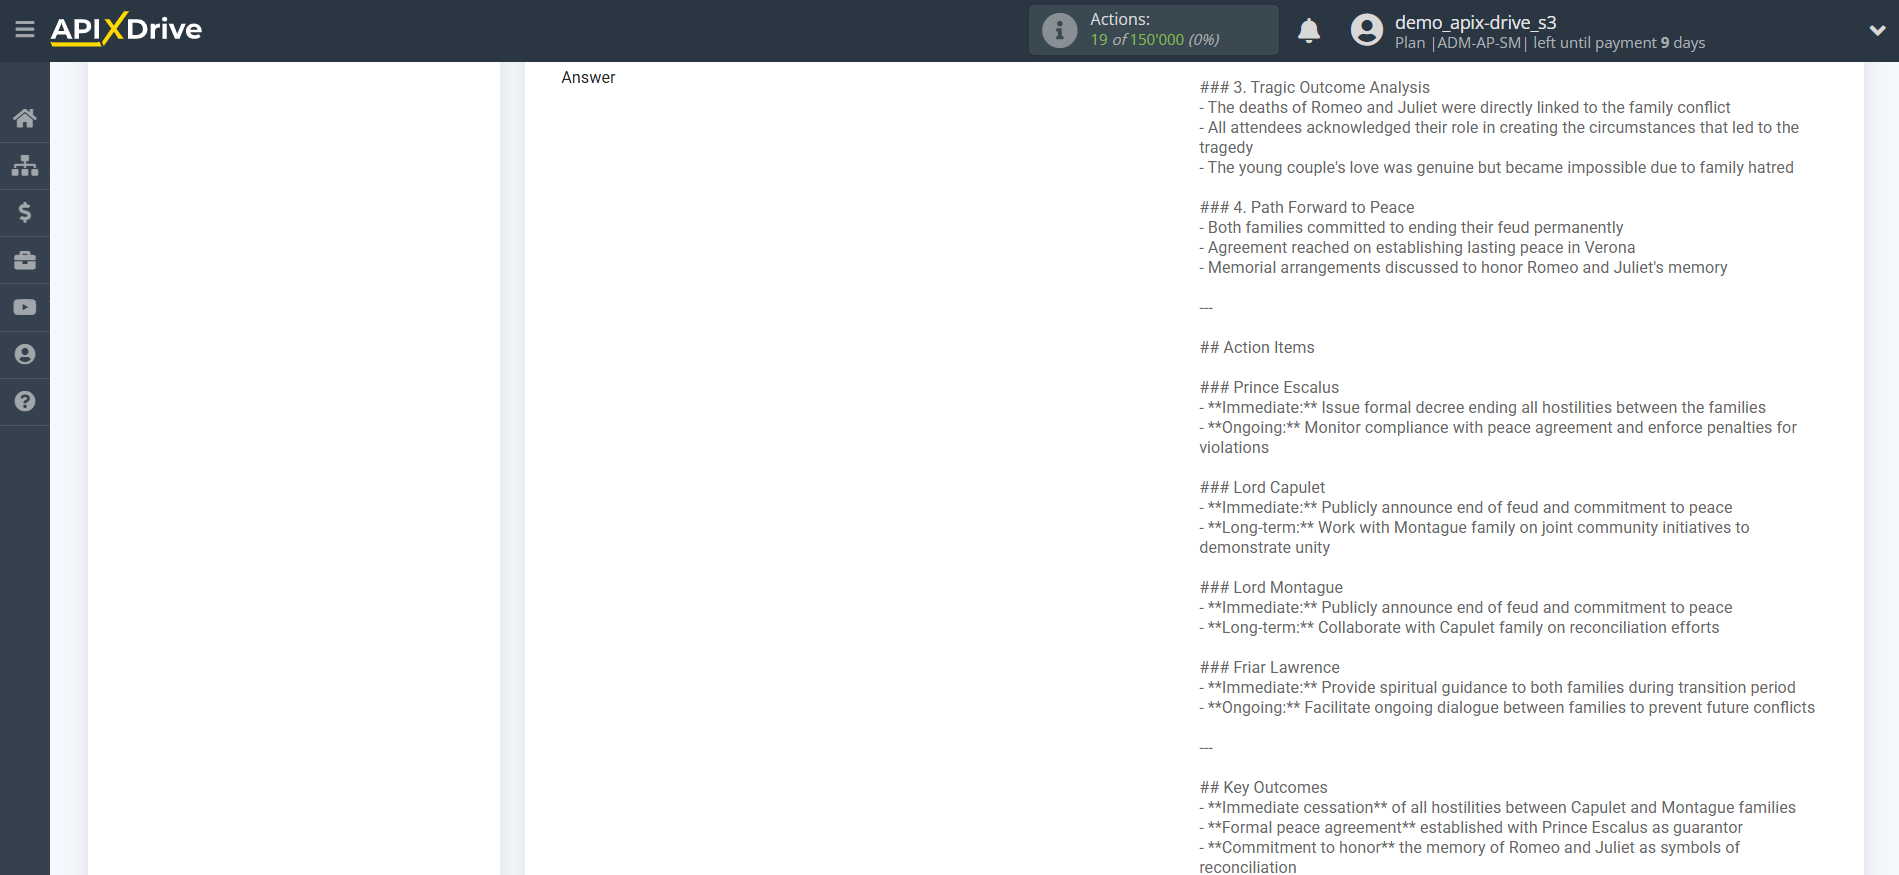
Now you see test data for your request. You can transfer this data to your receiving table.
If the test data does not appear automatically, click "Search Perplexity AI".
If you are not satisfied with something, click "Edit", go back one step and change the search field settings.
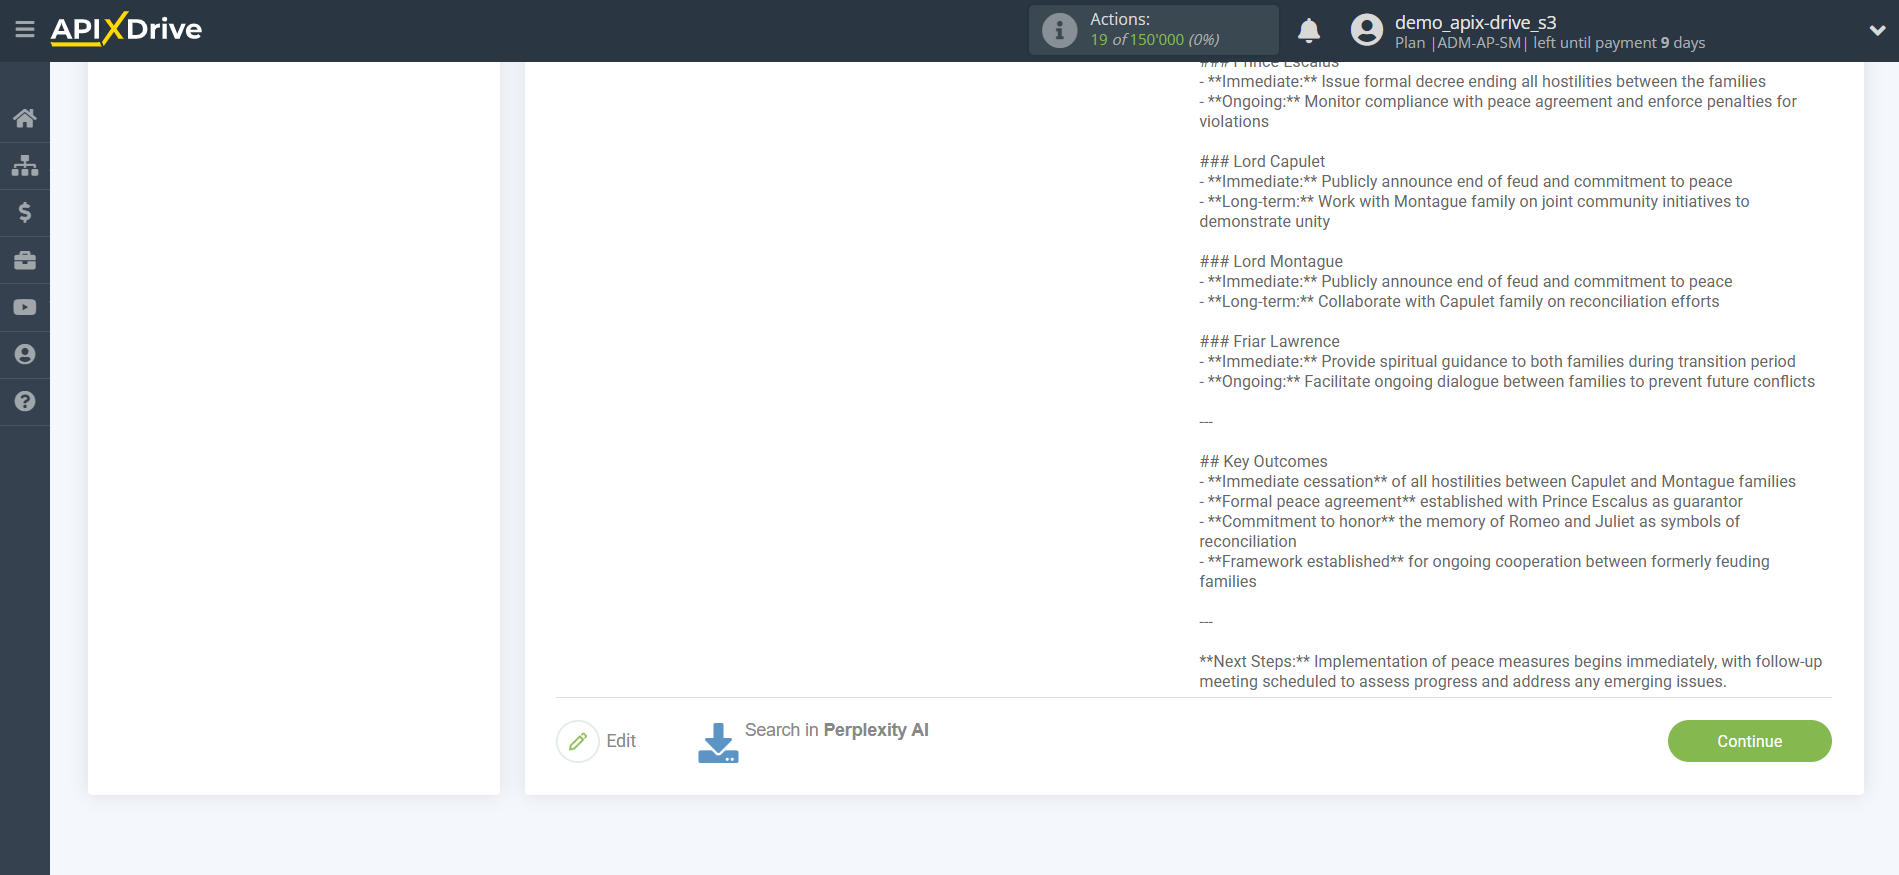
This completes the setup of Perplexity AI data!
Now we can start setting up Google Sheets as a Data Destination system.
To do this, click "Add Data Destination".
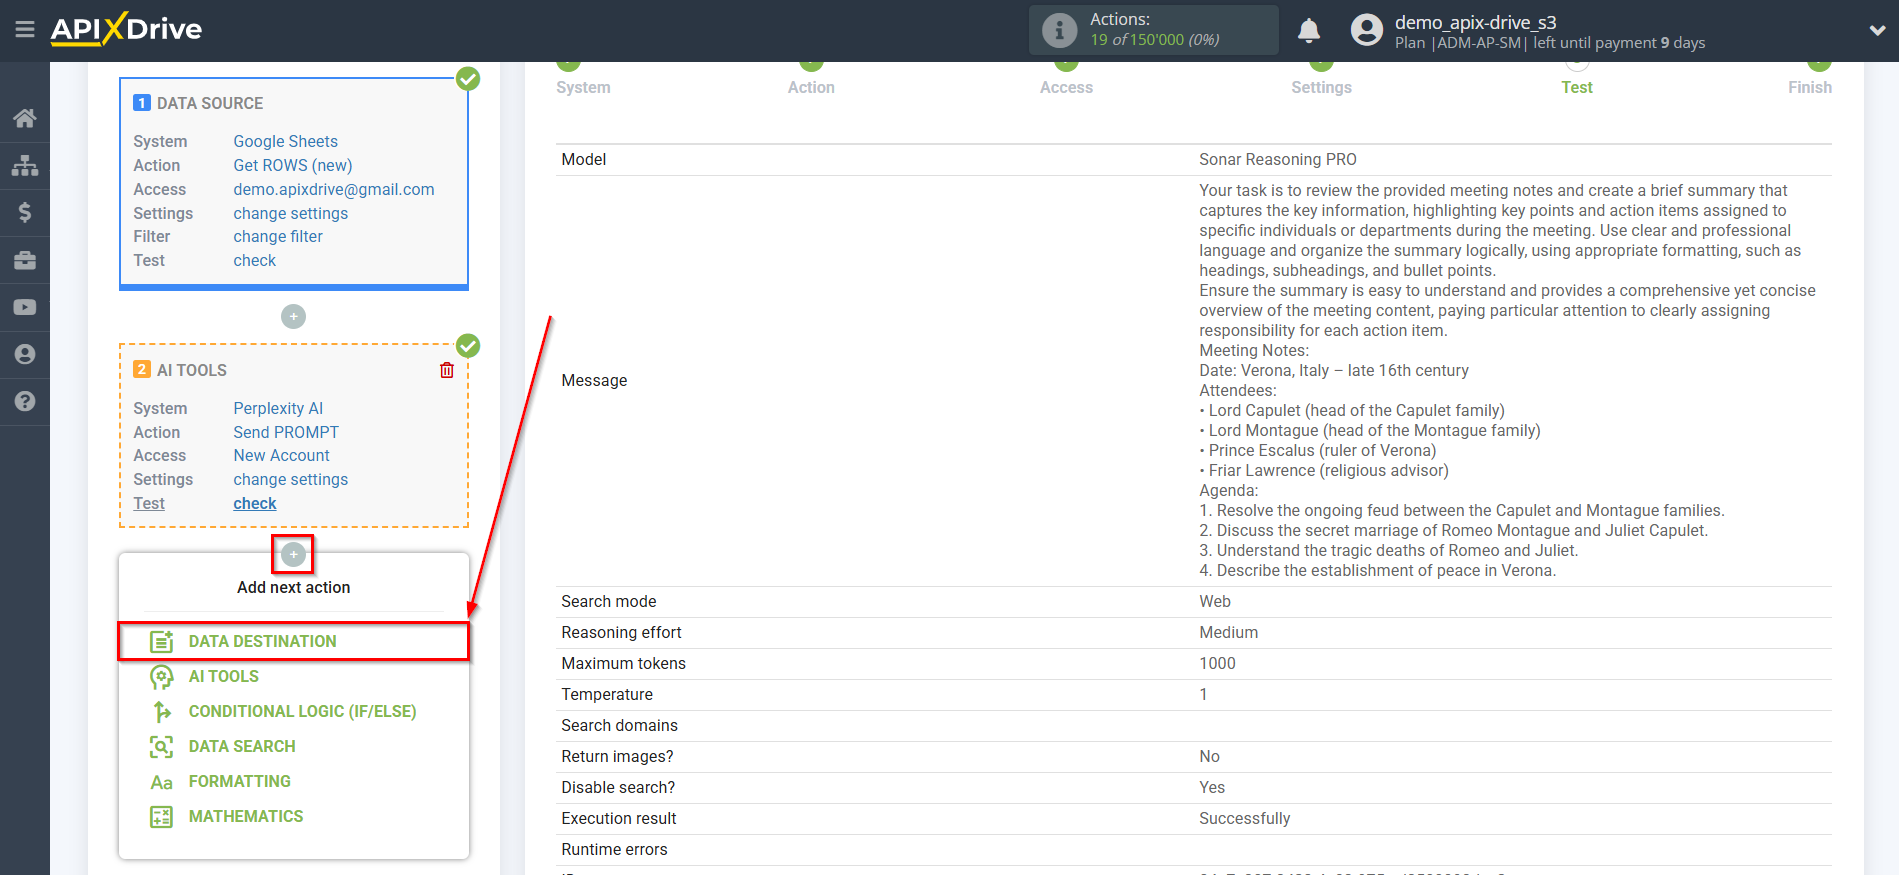
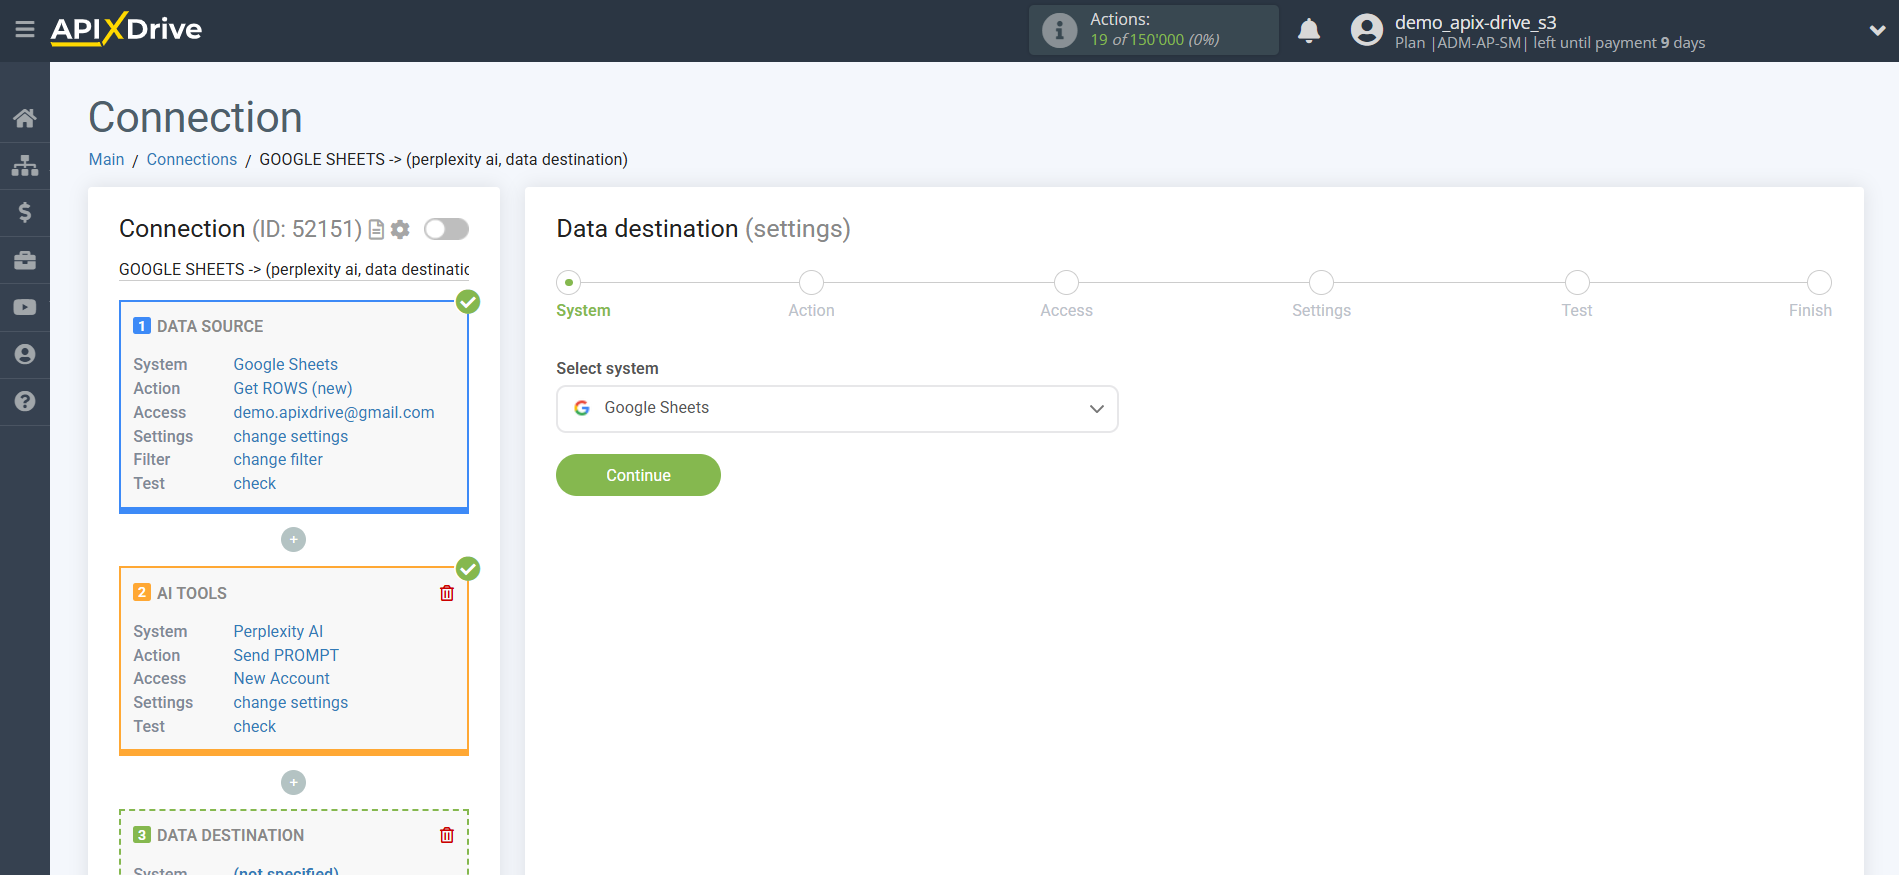
Setting up DATA DESTINATION: Google Sheets
Select the system as the Data Destination. In this case, you need to specify Google Sheets.
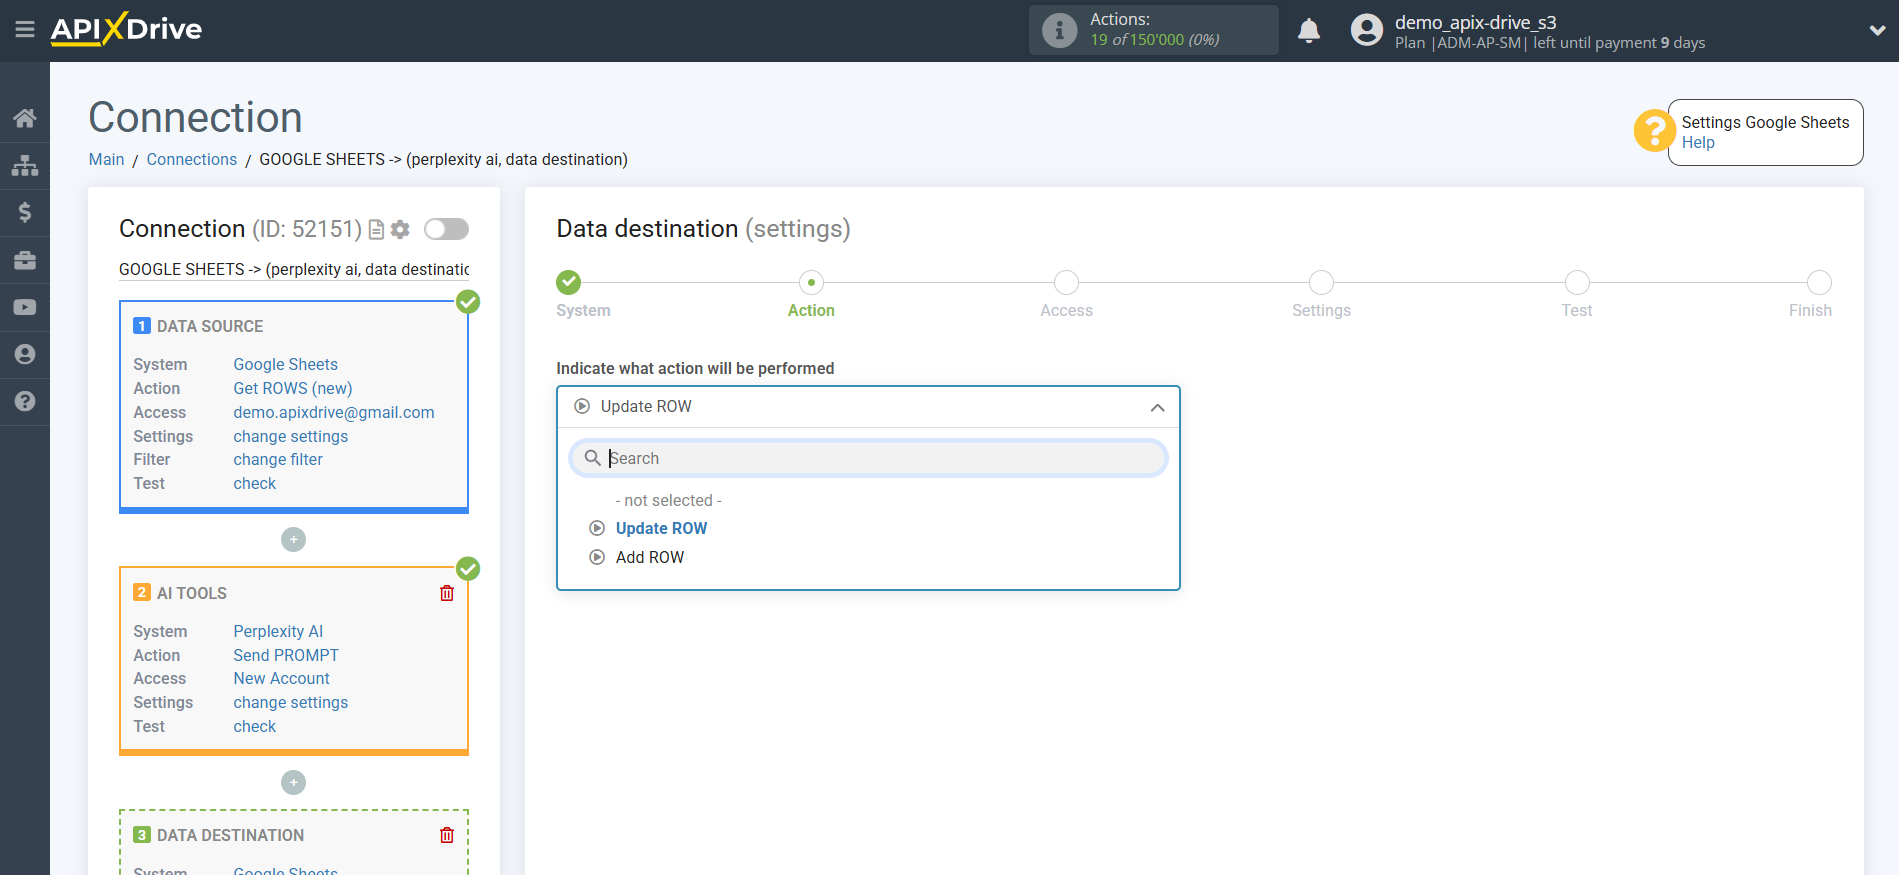
Next, you need to specify the action "Update ROW".
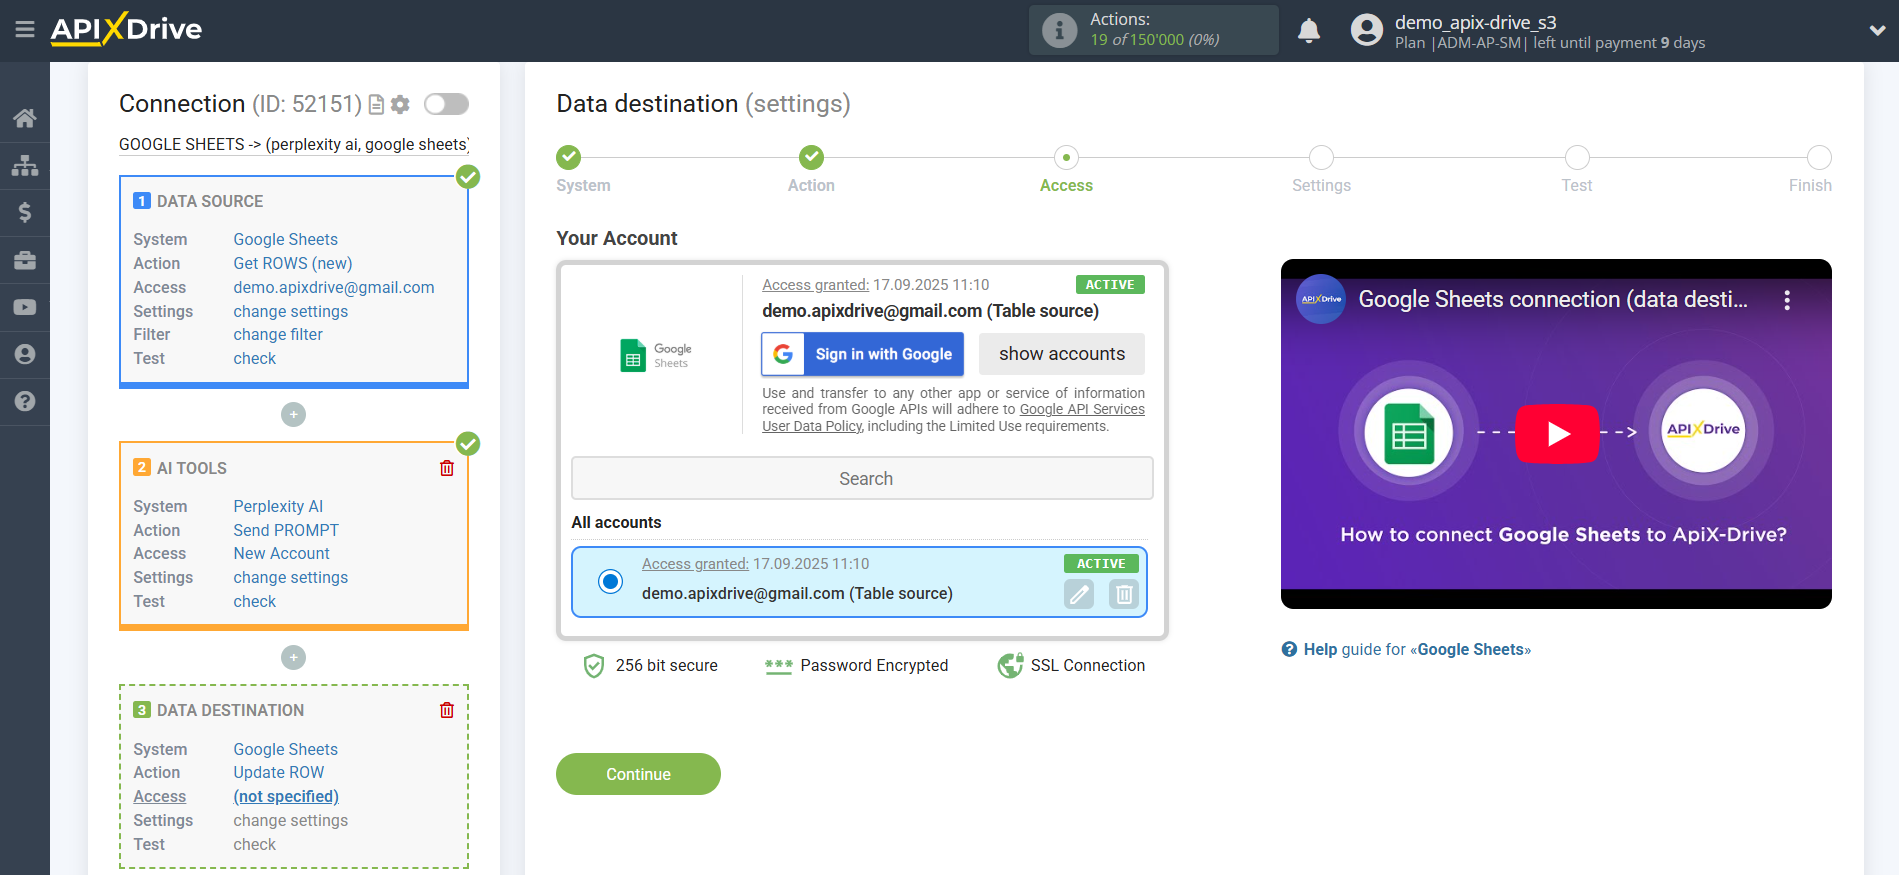
The next step is to select the Google Sheets account to which the Perplexity AI query result will be transferred. If this is the same account, then select it.
If you need to connect another login to the system, click "Connect account" and repeat the same steps, description when connecting Google Sheets as a Data Source.
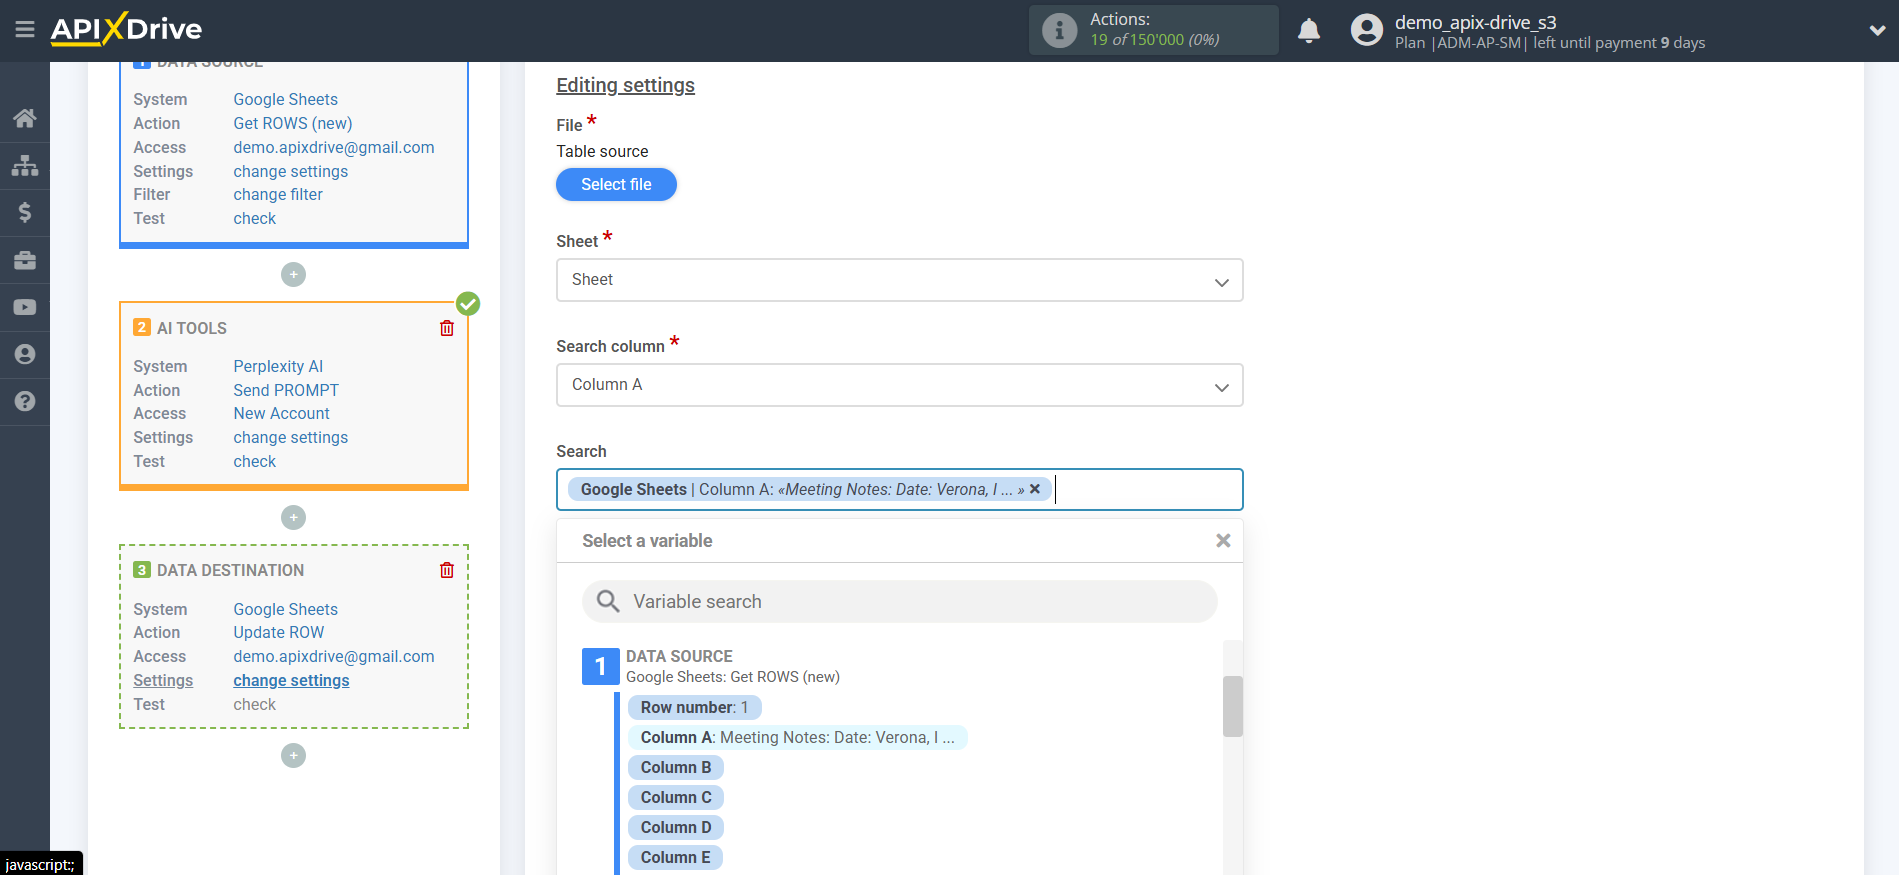
Now you need to select the File (Table) and Sheet in which the Perplexity AI status will be updated.
In the "Search Column" field, you need to select the column by which the data search will occur. That is, where to look for data in the table.
Next, in the "What to search for" field, you need to select a variable from the drop-down list or enter the data manually, by which value the system will search for data to update the row you need. In our case, we select column "A", which contains the request data. The system will update the data in the required row only if the requested data matches.
Also, you need to specify the Search Type, in case multiple lines with the same query are found:
"Take the first found row" - search and update of data will occur in the first found row that satisfies the search conditions.
"Take the last found row" - search and update of data will occur in the last found row that satisfies the search conditions.
"Take all found lines" - search and update of data will occur for all found lines that satisfy the search conditions.
Now you need to assign a variable with the query result, which we take from the Data Search block, to the empty column. In the future, this column will be updated with data according to your query.
After setting up, click "Continue".
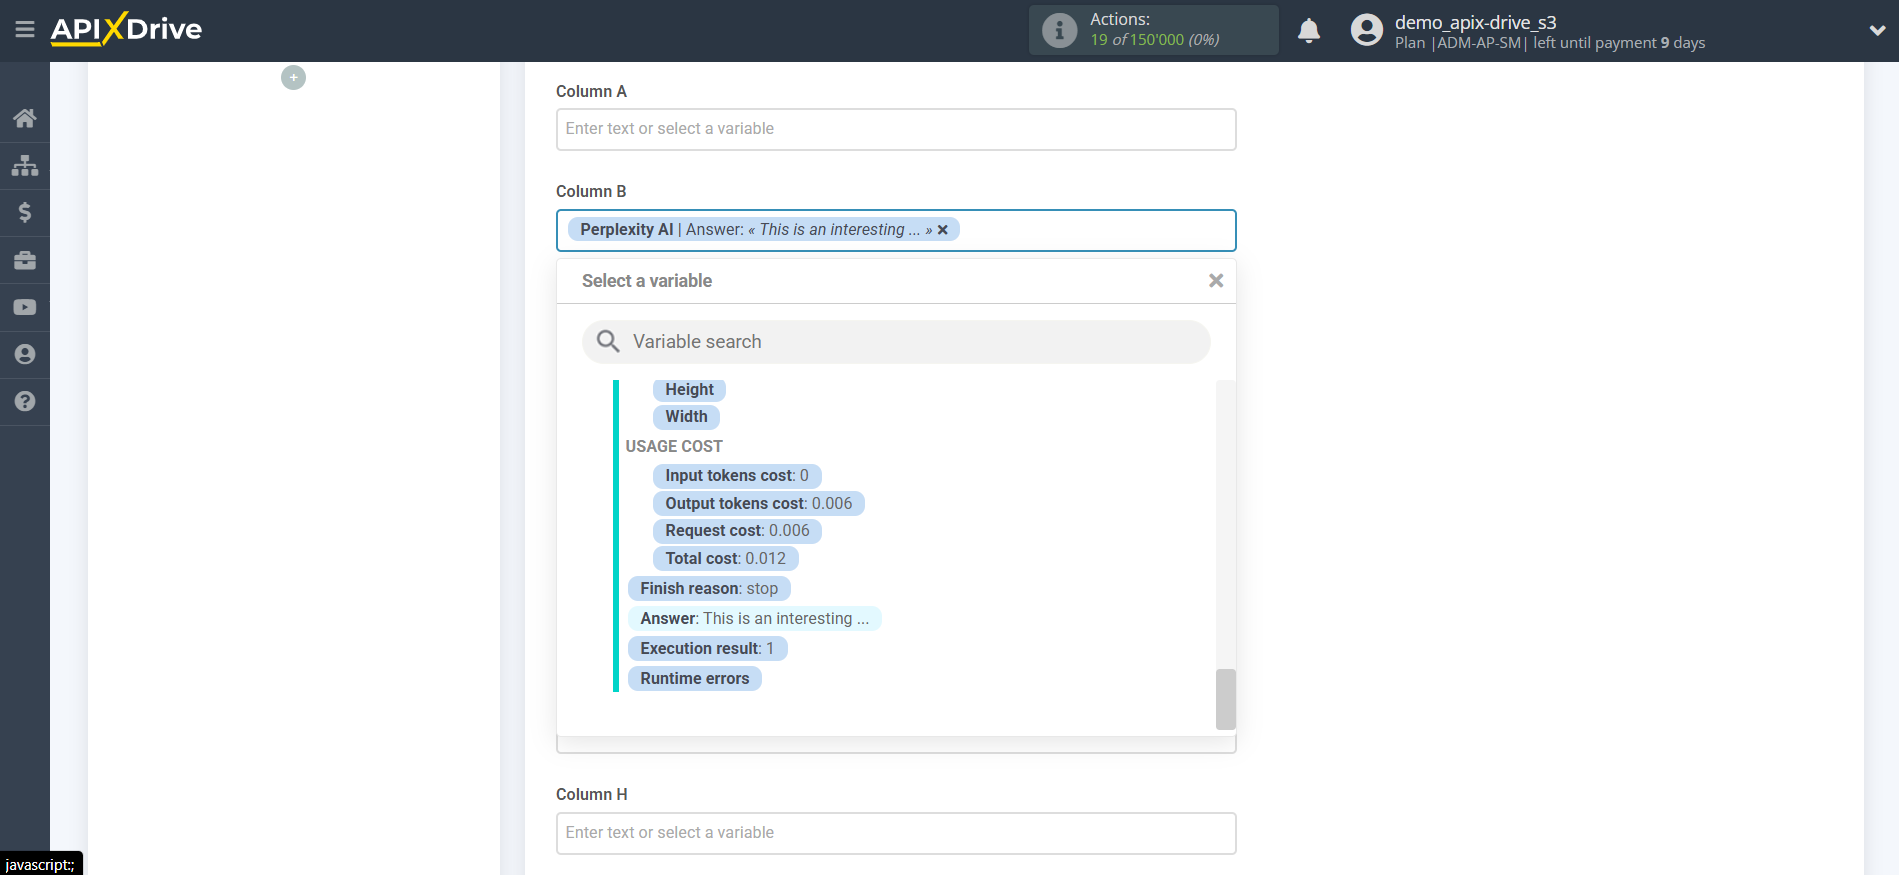
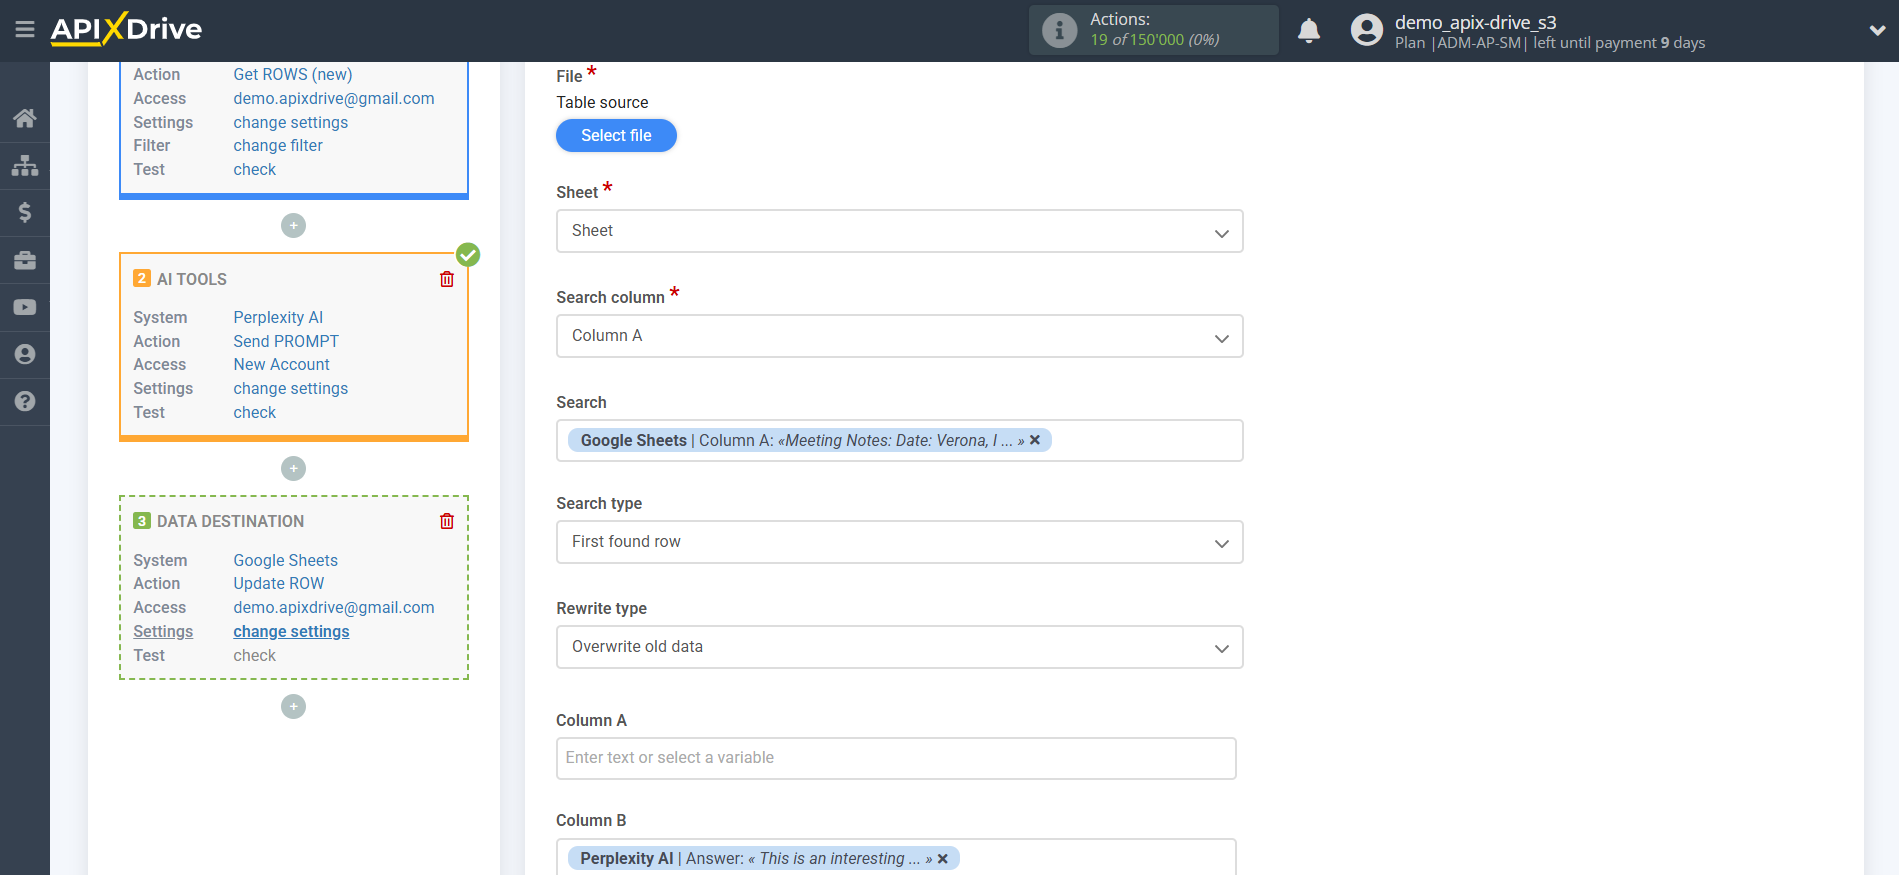
Thus, the Perplexity AI block takes the field in the Data Source in which you have written the query text, queries the Perplexity AI server for the result of this query and transfers this data to the Data Destination field, for example, to column "B".
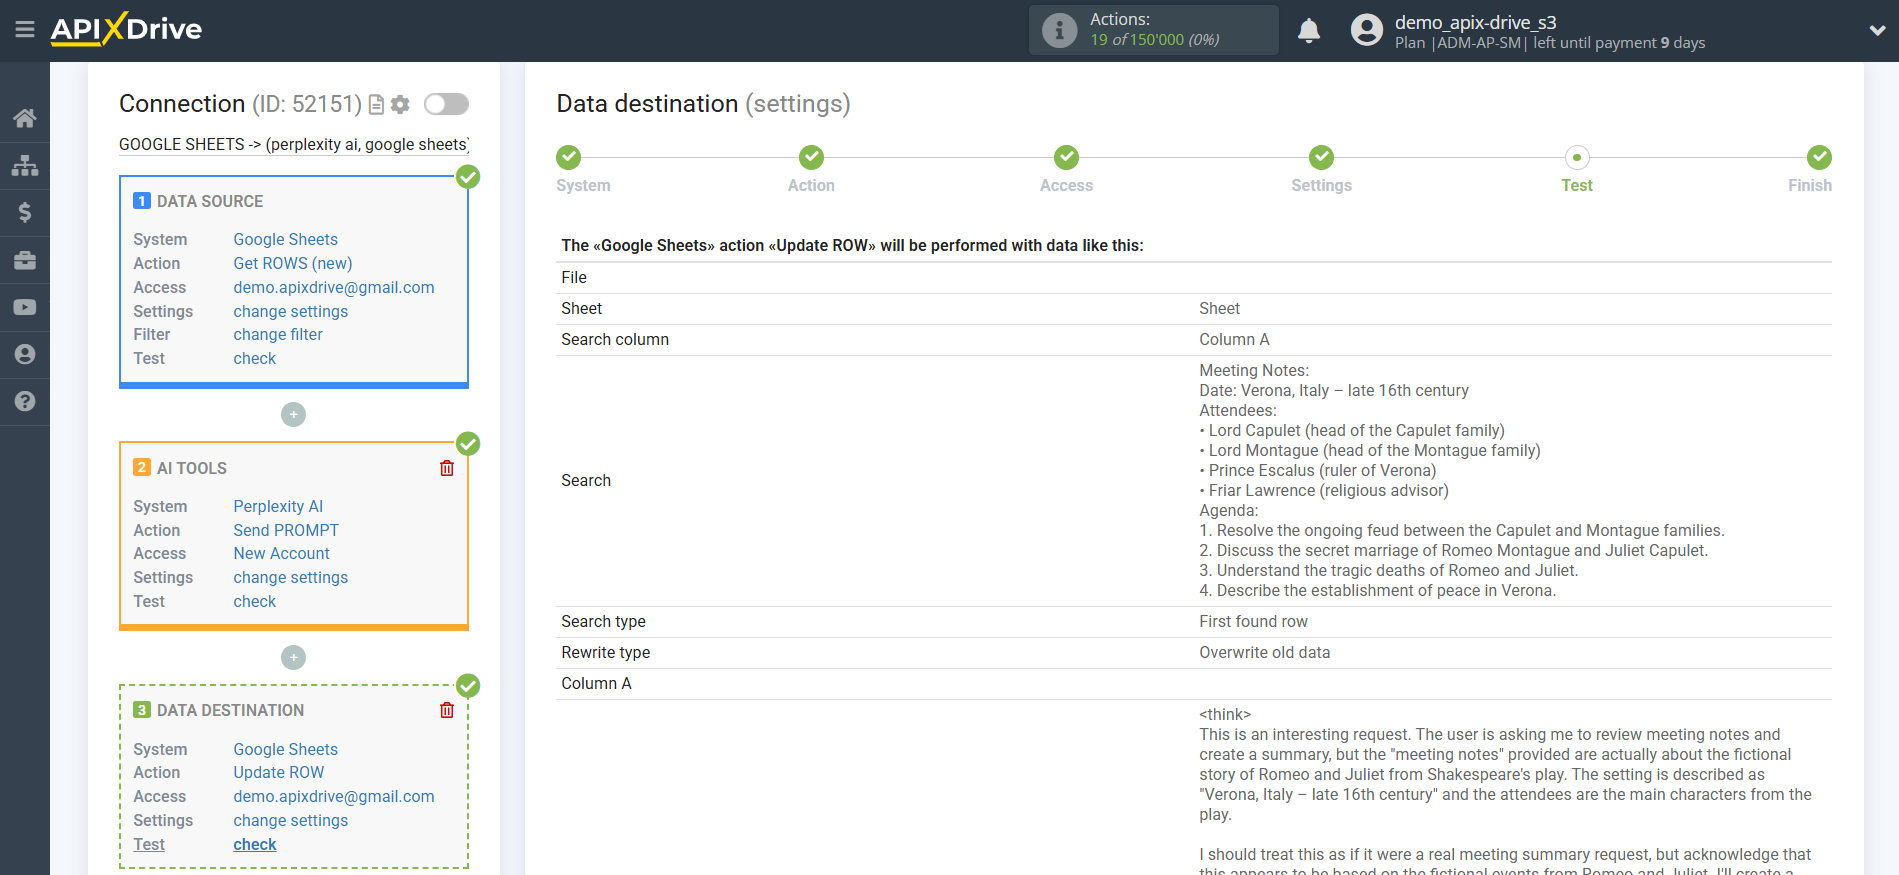
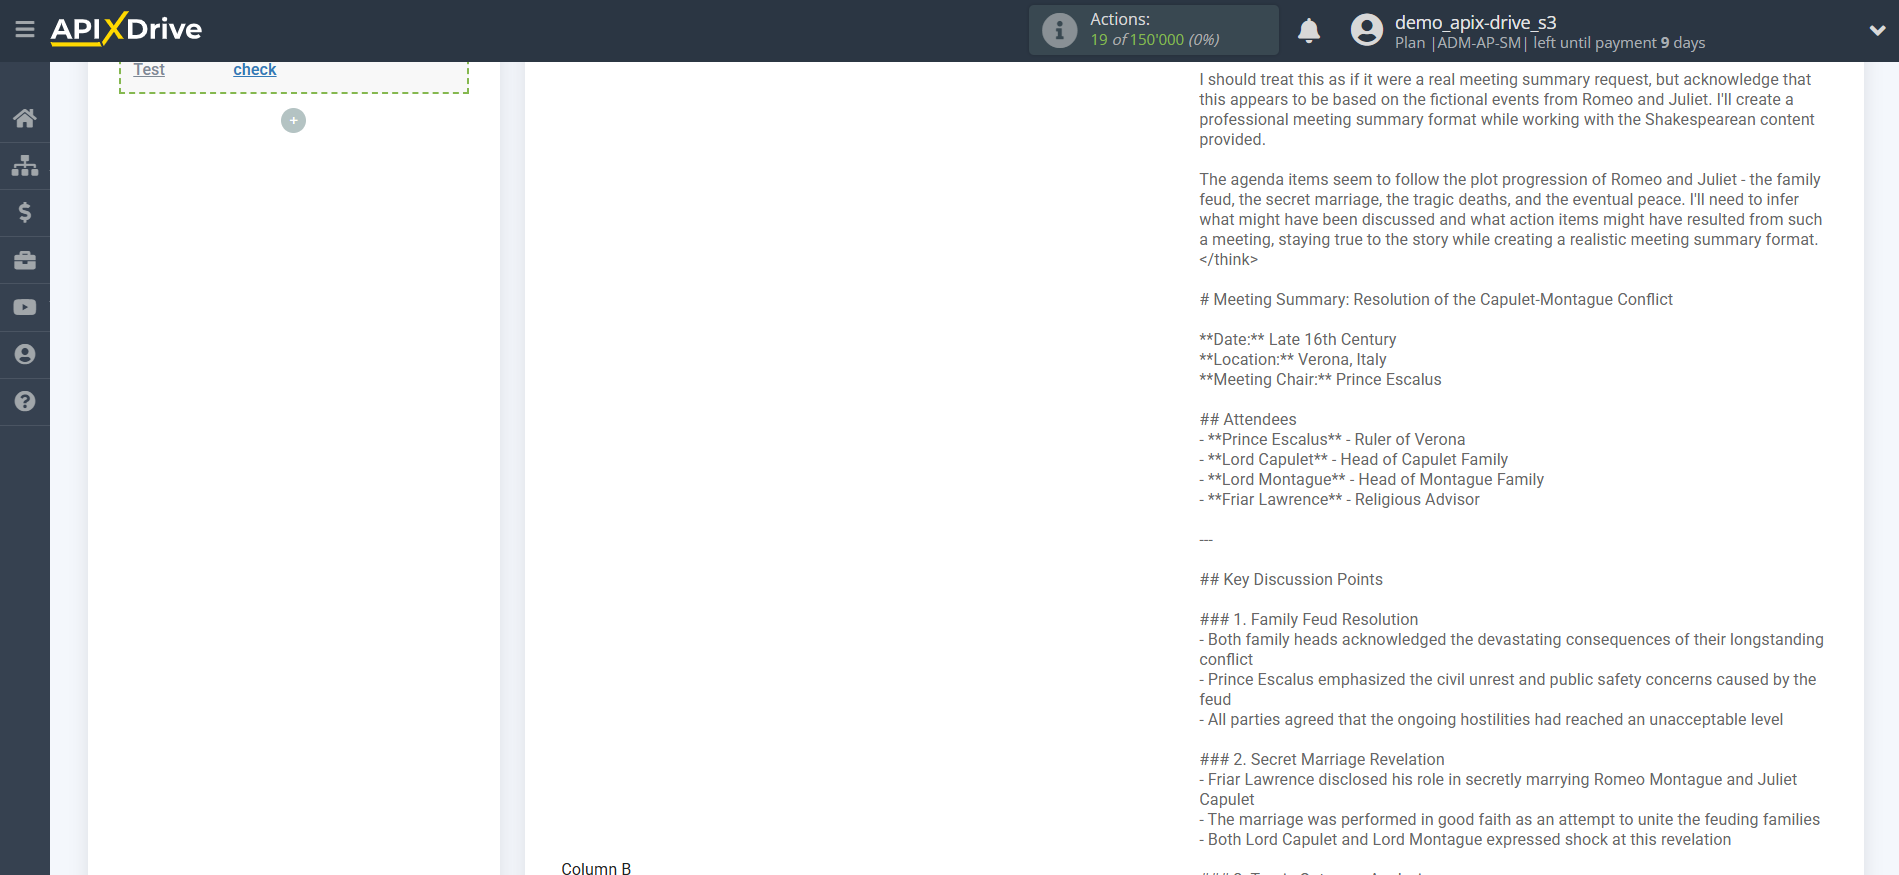
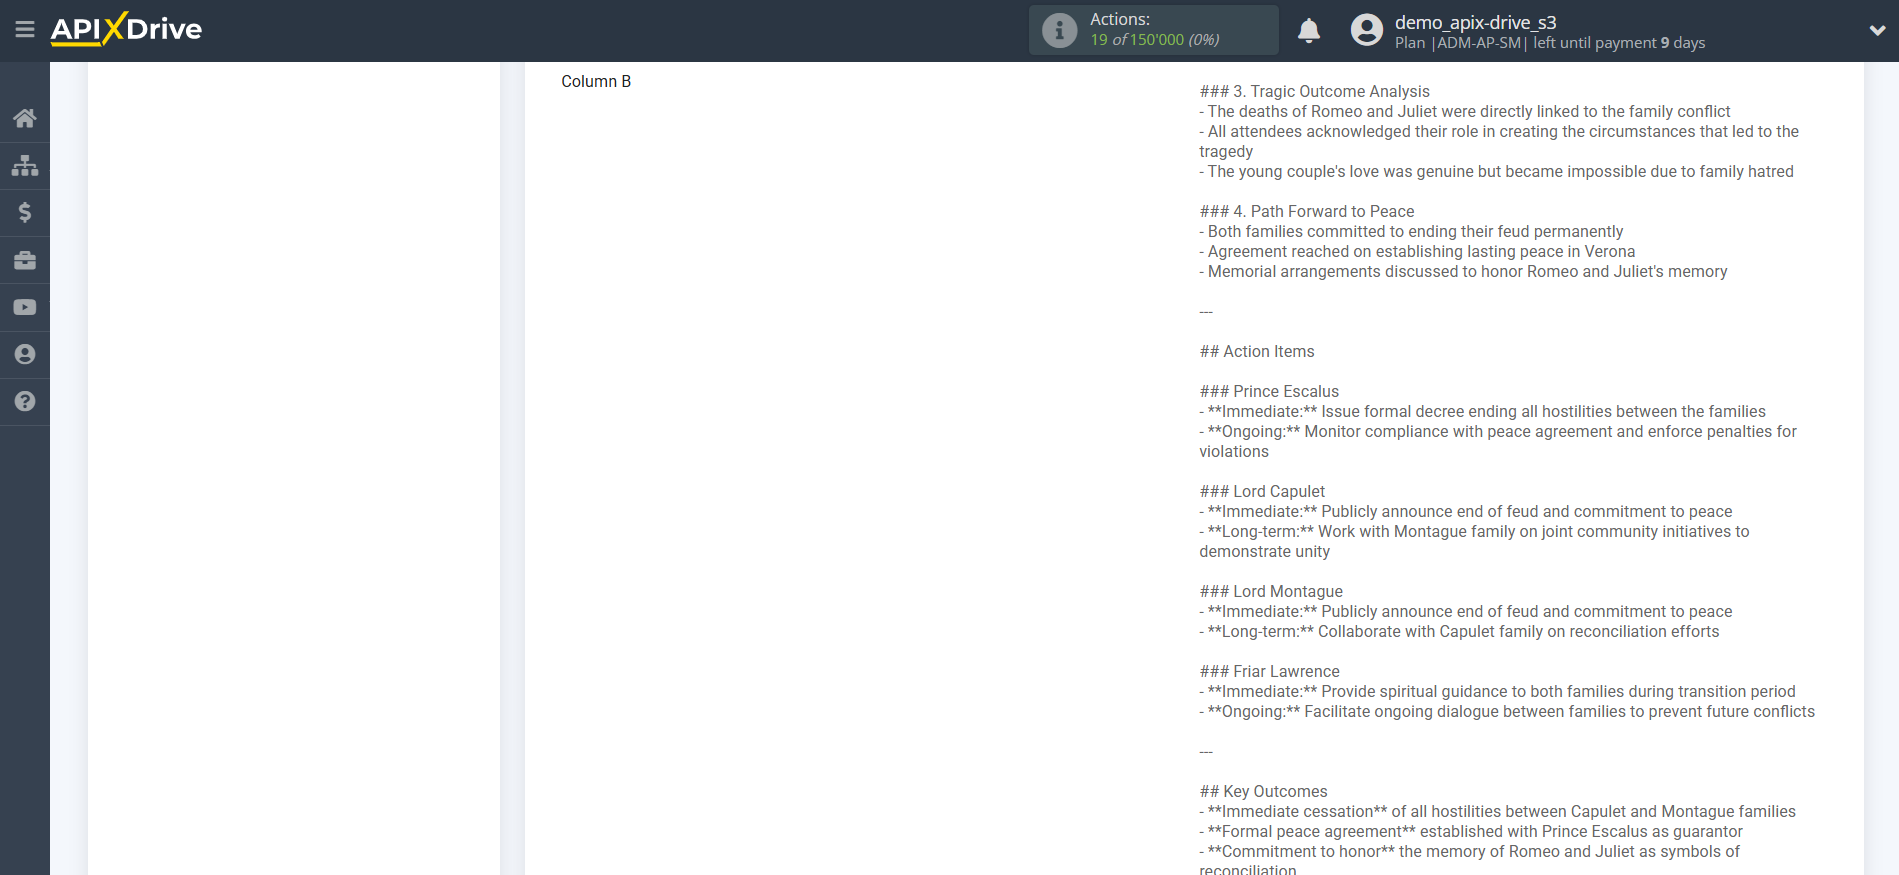
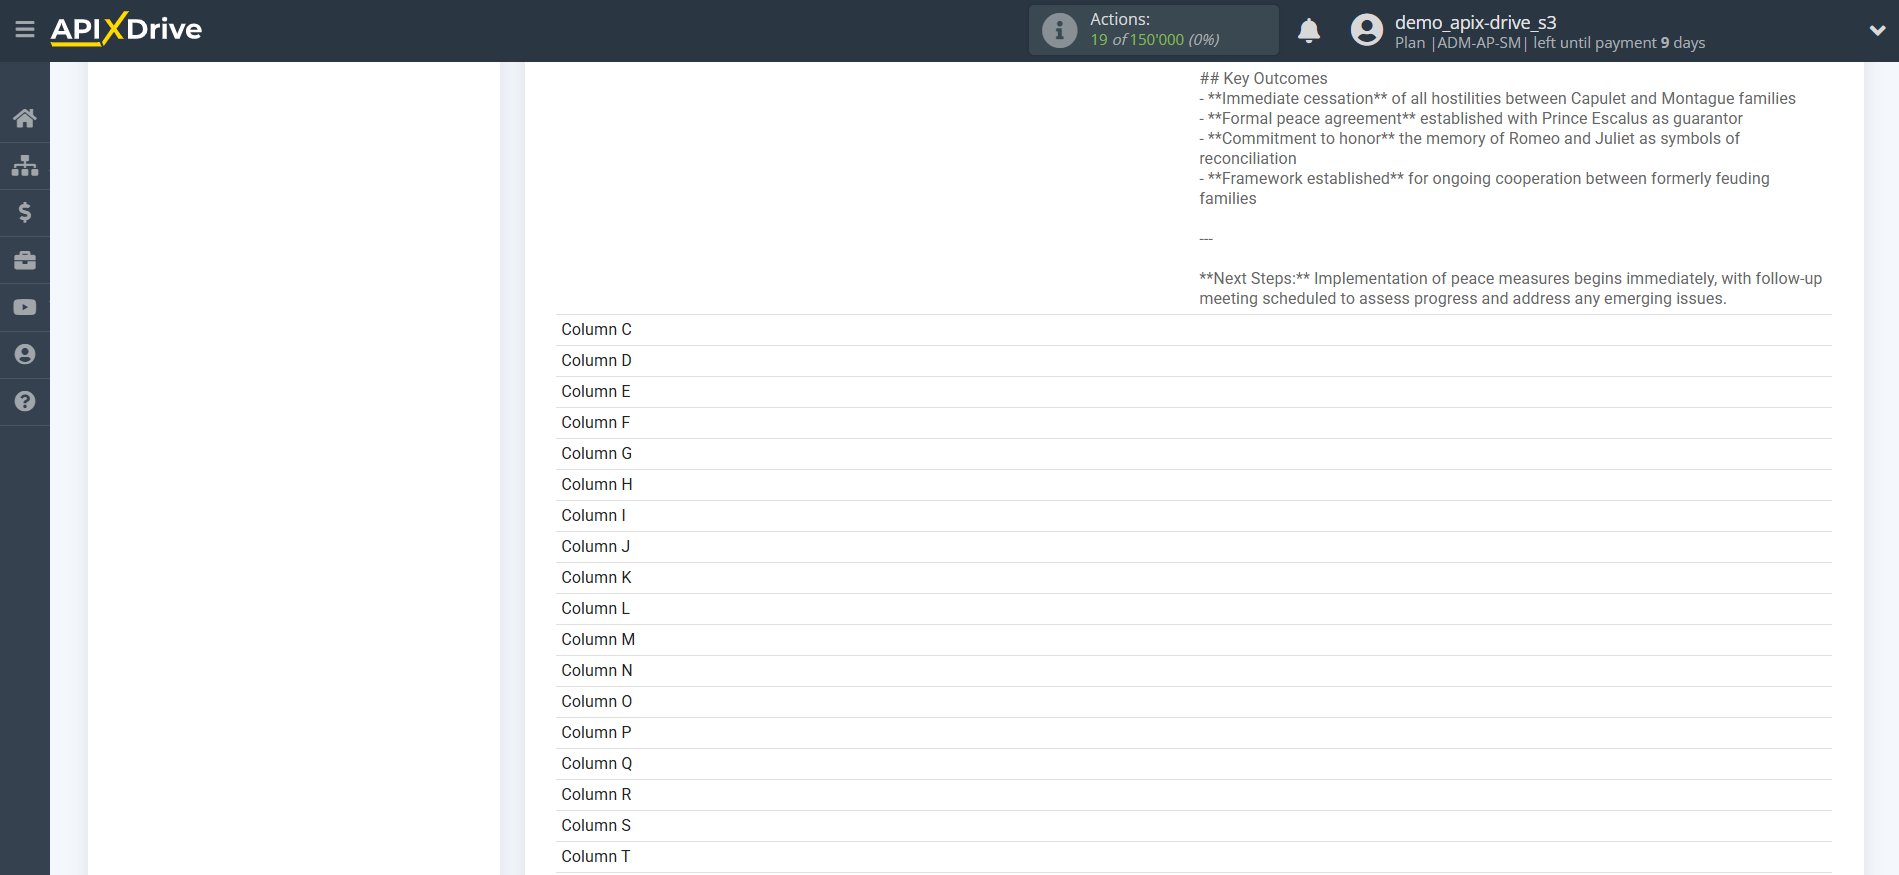
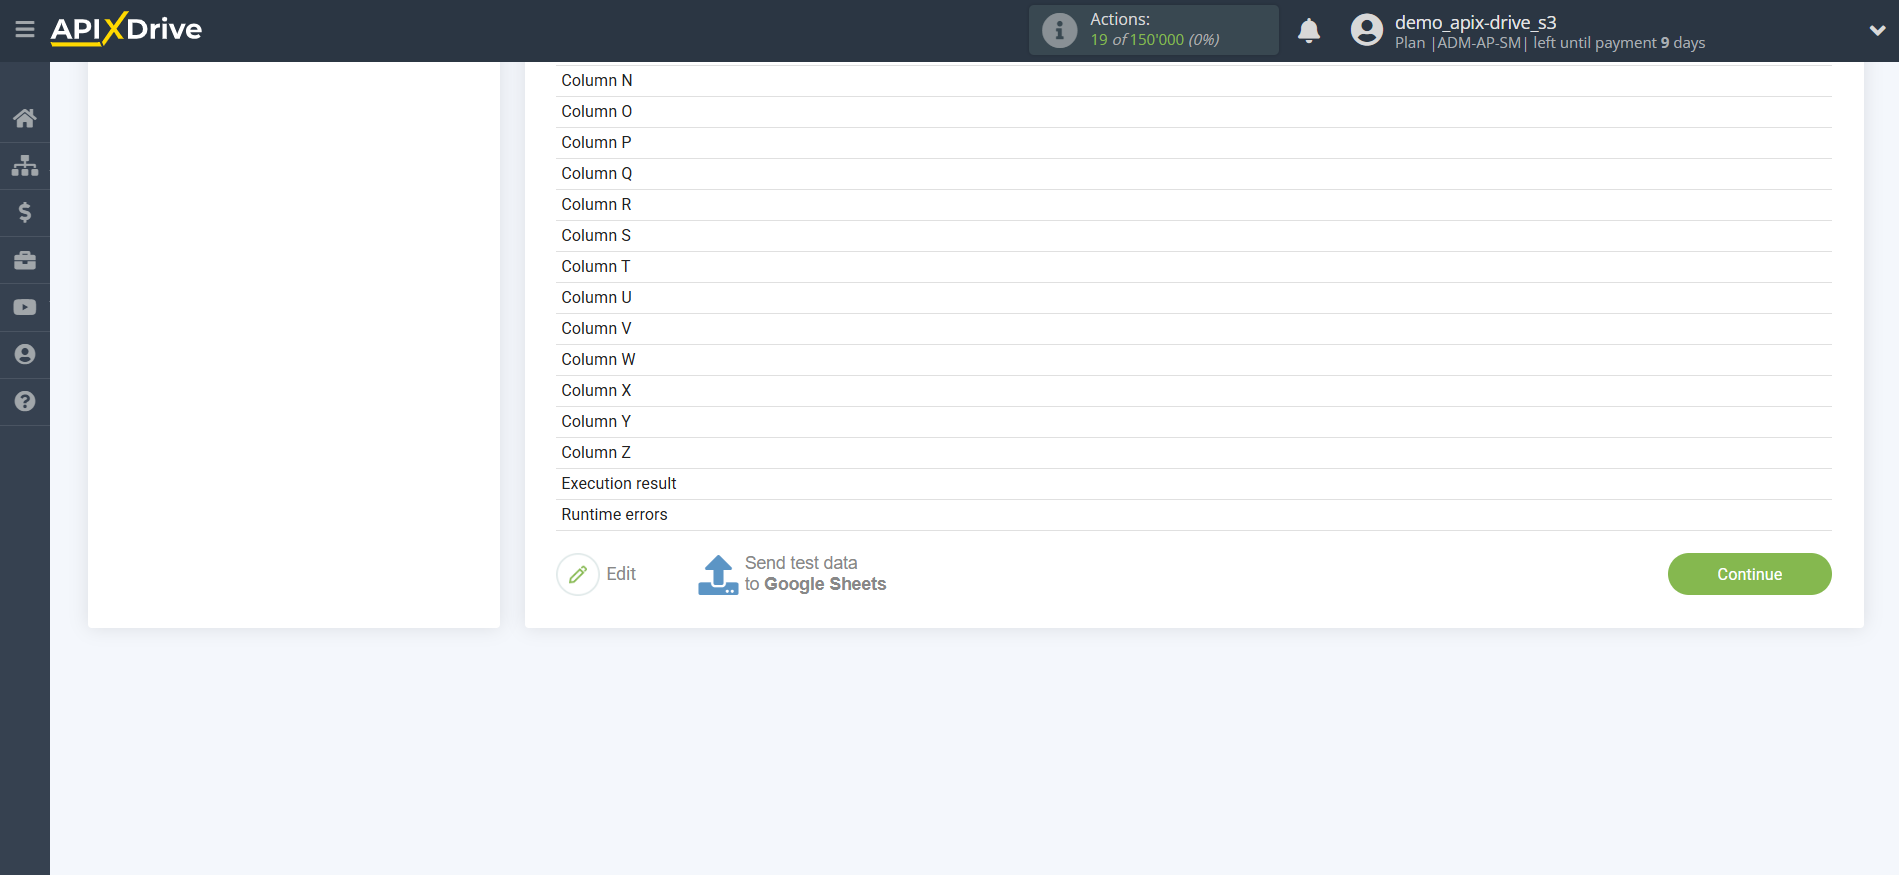
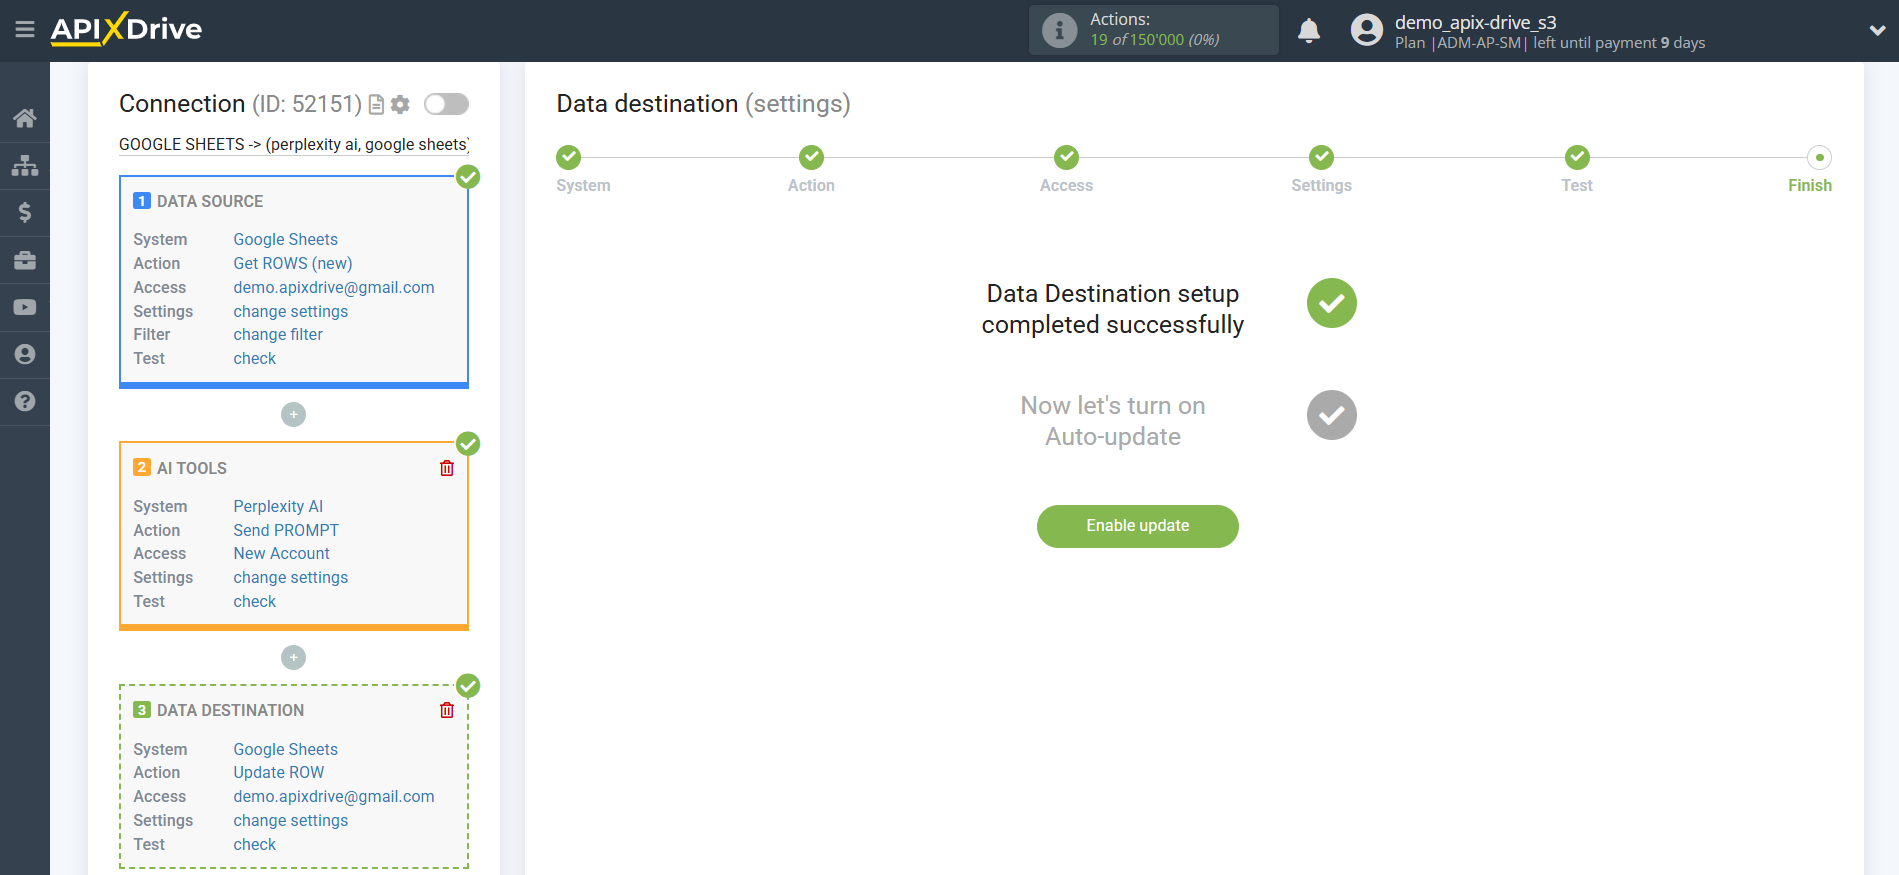
At this point, the setup is complete!
Now you can proceed to choosing the update interval and enabling auto-update.
To do this, click "Enable auto-update".
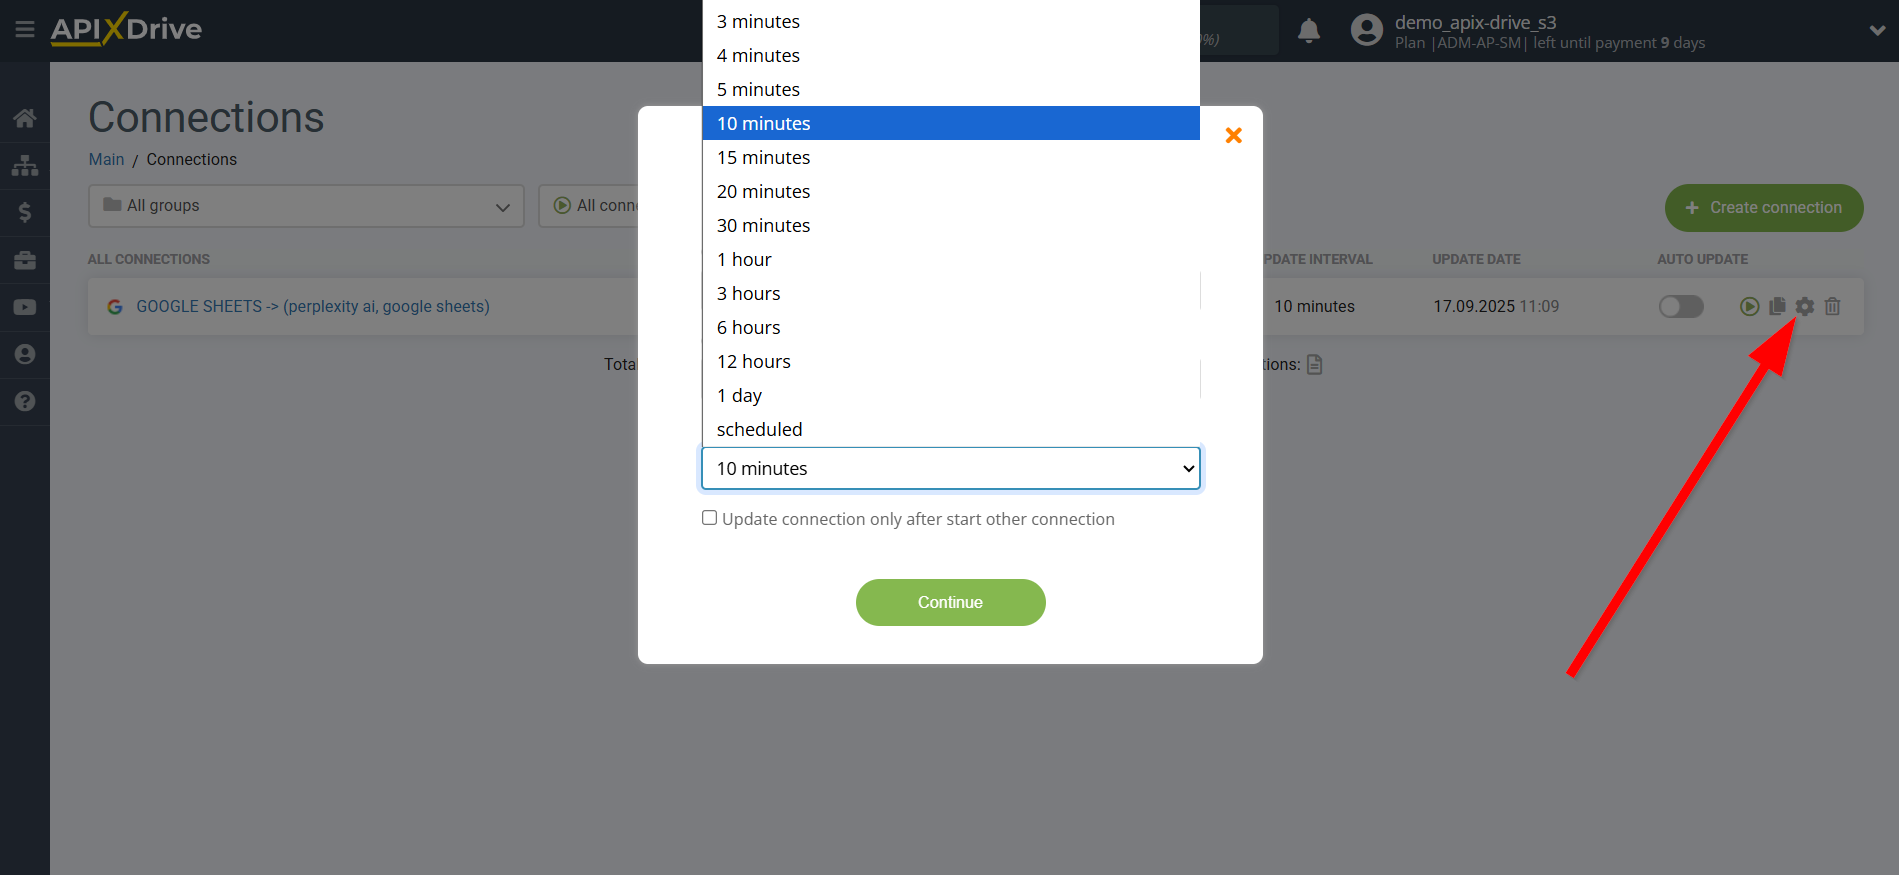
On the main screen, click the gear icon to select the required update interval or set up Scheduled launch. To launch the connection by time, select Scheduled launch and specify the desired time for the connection update to trigger, or add several time options at once when you want the connection to trigger.
Attention! For Scheduled Start to work at the specified time, the interval between the current time and the specified time must be more than 5 minutes. For example, you select the time 12:10 and the current time is 12:08 - in this case, the automatic connection update will occur at 12:10 the next day. If you select the time 12:20 and the current time is 12:13 - the automatic connection update will work today and then every day at 12:20.
To make the current connection trigger after another connection, check the box "Update only after connection" and specify the connection after which the current one will trigger.
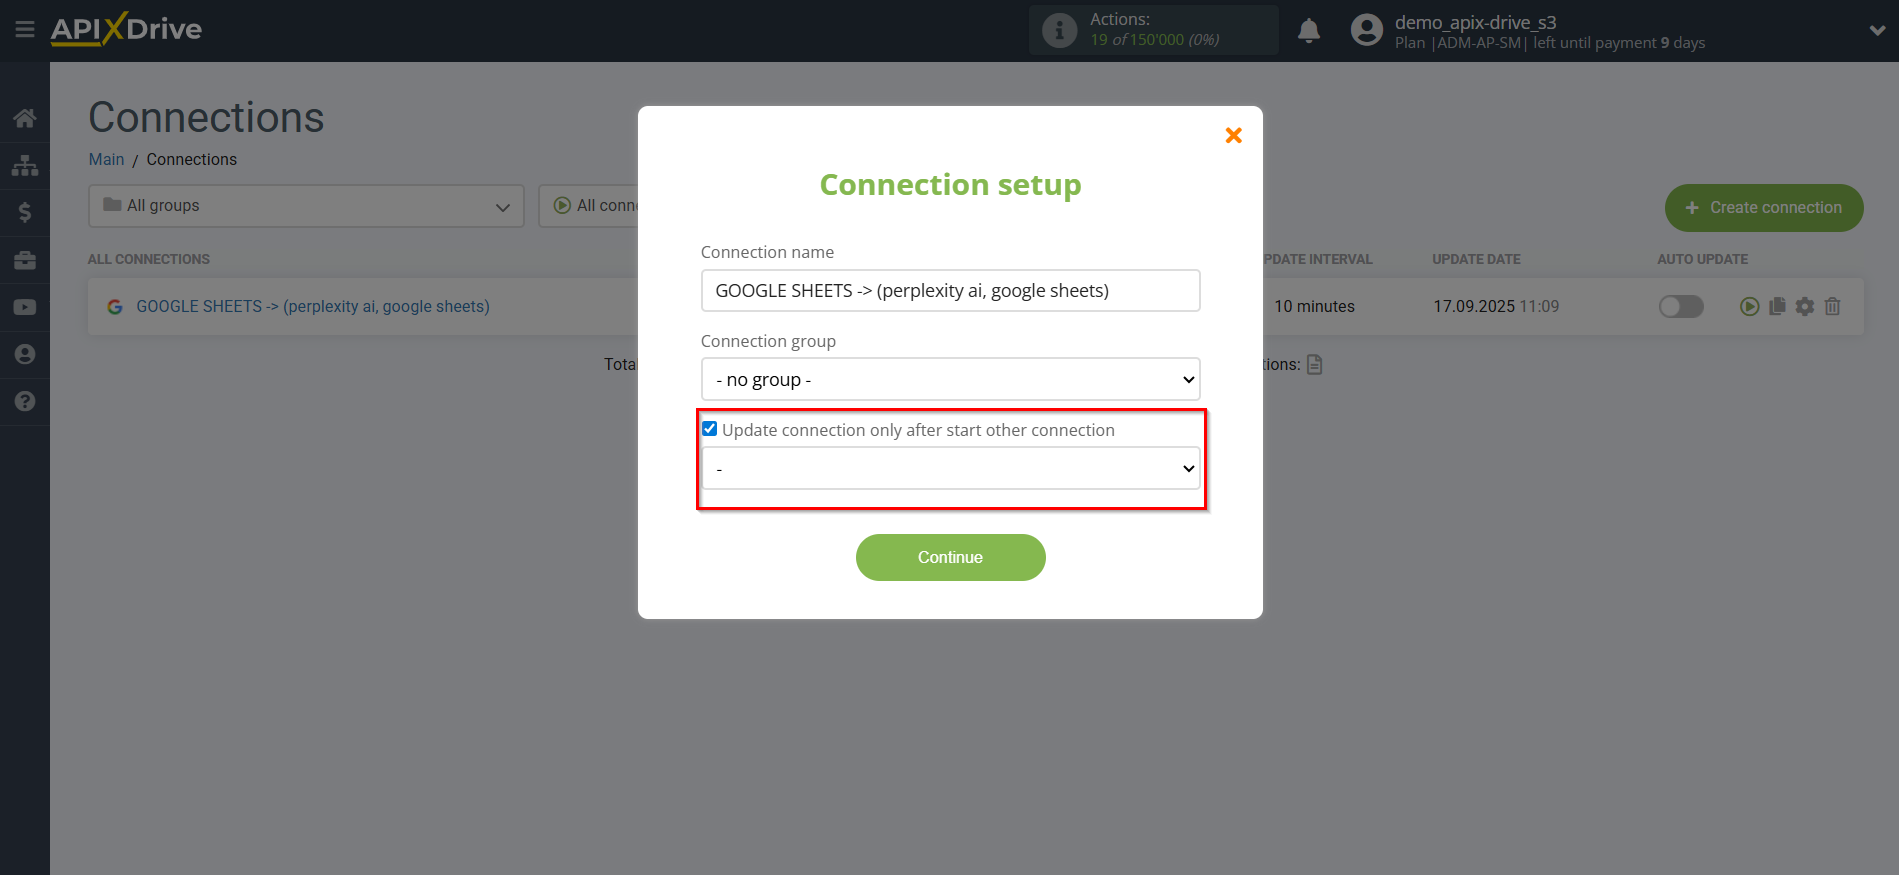
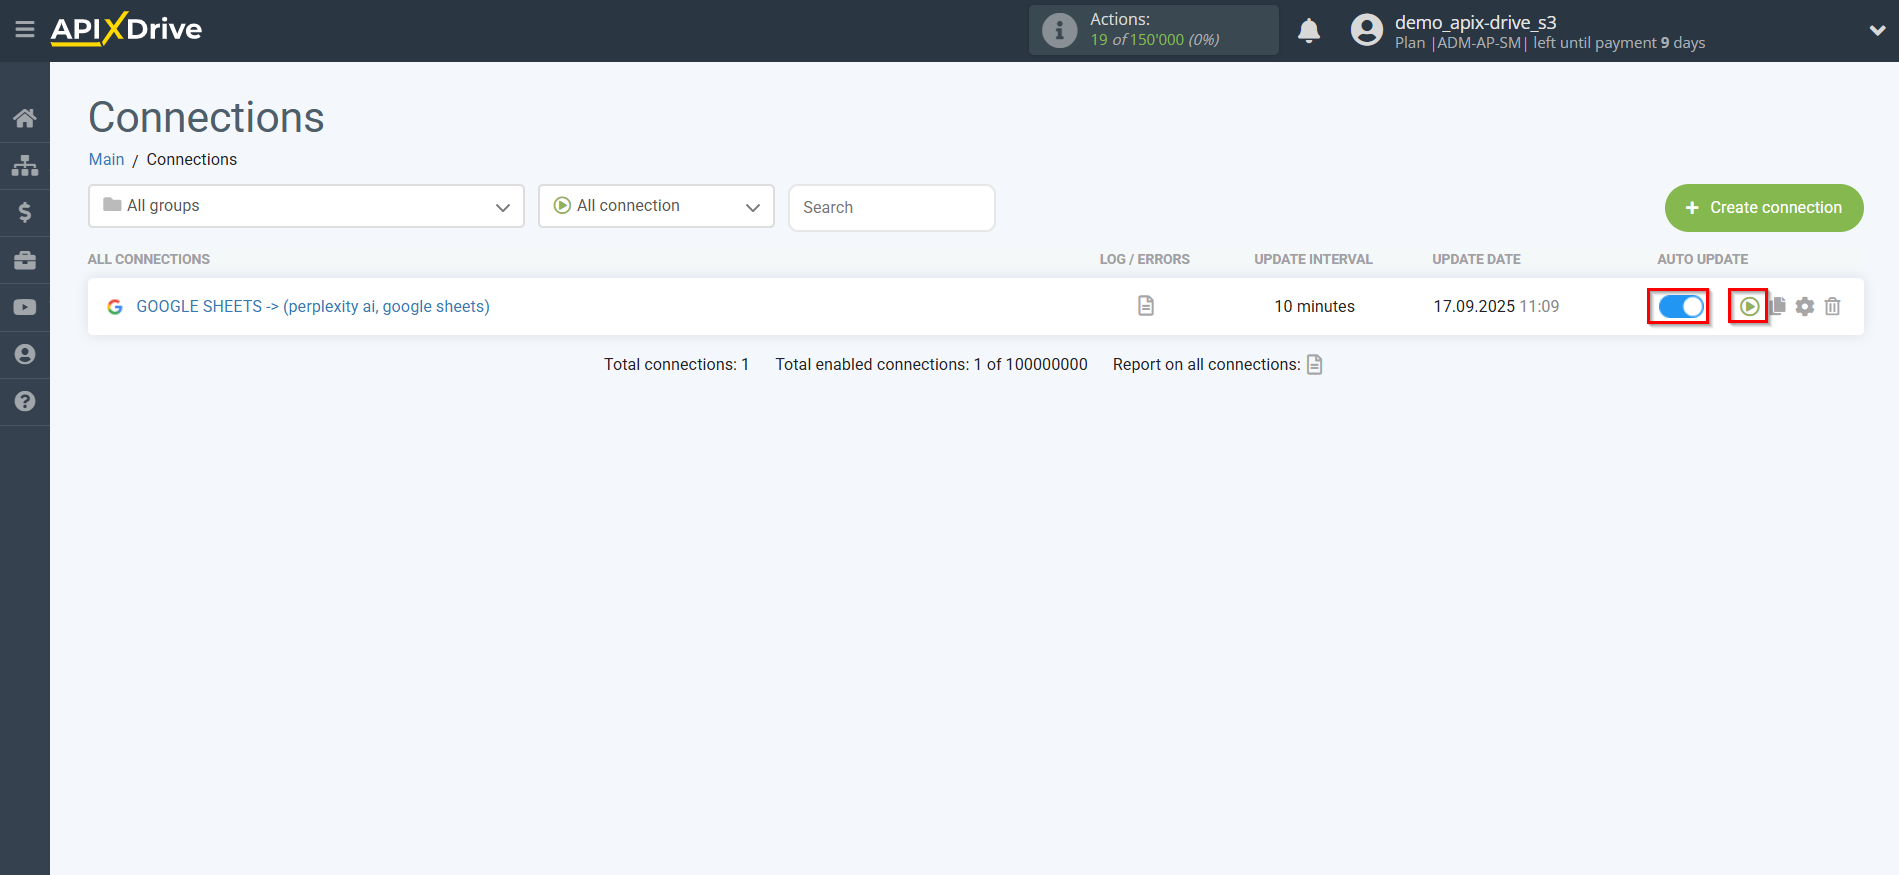
This completes the Perplexity AI Data Search setup! It's pretty simple!
Now you don't have to worry, ApiX-Drive will do everything else on its own!