Google Sheets and ClickUp Integration: Automatic Tasks Creation
In this article, we'll show you how to set up automatic conversion of Google Sheets new rows to tasks in ClickUp. If you regularly transfer data from spreadsheets to the ClickUp workspace, then this tutorial will help you get rid of this routine operation and save time.
Content:
1. How to setup Google Sheets and ClickUp integration
2. Conect Google Sheets
3. Conect ClickUp
4. Turn on automatic updates
5. Result of integration
ClickUp is a universal and multifunctional service for project management and teamwork organization. This SaaS product allows you to transfer most of the tasks and processes to a single interface. ClickUp users can add Google Docs, Google Sheets, Figma, YouTube videos, and more to the workspace to work with all the tools and data they need in one system. It is also possible to customize dashboards, create mind maps and documents, expand functionality through additional applications, and implement automation.
The ClickUp platform is an effective solution for bringing employees together and ensuring communication within a company/department/team. However, not all participants in a workflow always use the same tools. For example, a department head can add tasks to a Google Sheets file because he is used to this service and does not need additional functionality. Google Sheets are also often used as a simple CRM system where orders and customer contacts are recorded.
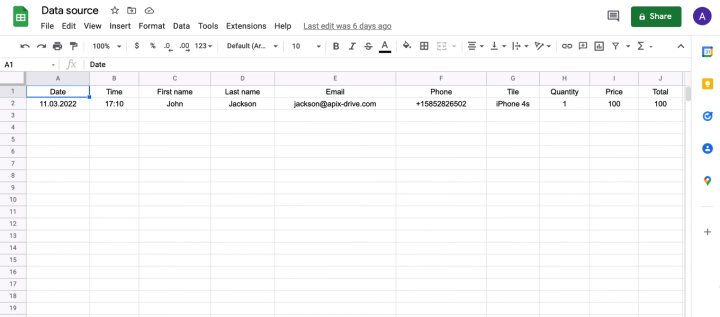
So, we have a convenient and efficient ClickUp service and a Google Sheets file, the data in which is regularly updated and should fall into our workspace. We need to regularly track changes in the spreadsheet and create ClickUp tasks based on new rows in Google Sheets. This process can be easily automated using the ApiX-Drive online connector. By setting up the Google Sheets and ClickUp integration, you will get rid of the need to keep track of new rows in the sheet and create tasks manually.
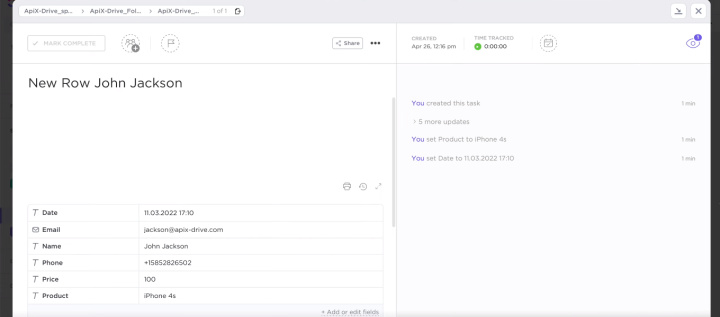
How to setup Google Sheets and ClickUp integration
To set up the Google Sheets and ClickUp integration, we will use the ApiX-Drive online connector. In this system, you can work effectively without special skills and knowledge in the field of programming. ApiX-Drive is a no-code solution for automating various business processes. The simple and intuitive interface provides a comfortable working environment for users of all technical backgrounds.
If you face repetitive tasks or regularly manually transfer data from one system to another, then you need to consider implementing automation. To permanently get rid of a routine operation, you need to spend only 5-10 minutes. Let's take a closer look at how this is done, using the example of creating a Google Sheets and ClickUp integration.
Conect Google Sheets
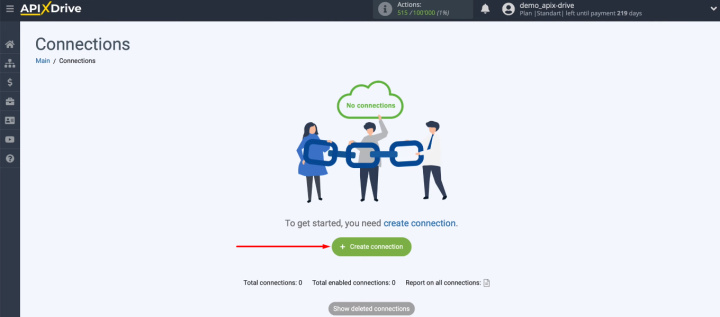
Register on the website apix-drive.com and go to your personal account. Create a new integration — click "Create connection".
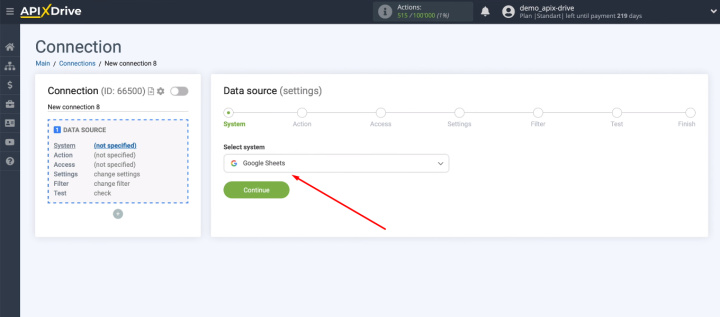
Define the data source. For our task, this is the Google Sheets service.
We need to get data from each added row in the table. Specify the action “Get Rows (New)”.
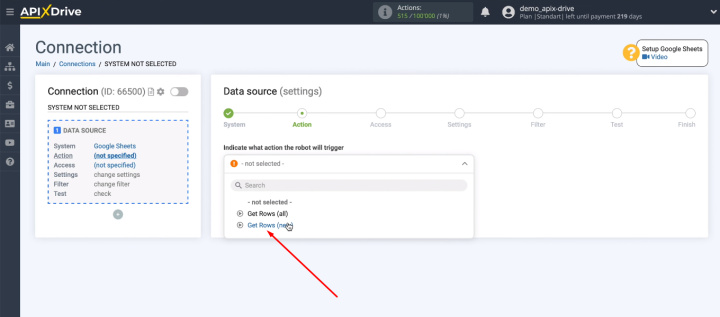
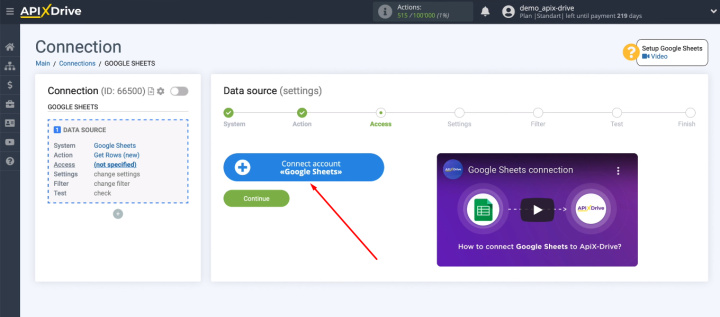
Connect your Google Sheets account to the ApiX-Drive service.
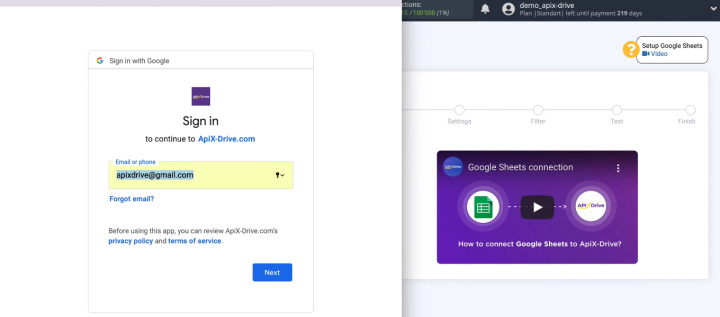
Enter the username of your personal Google account.
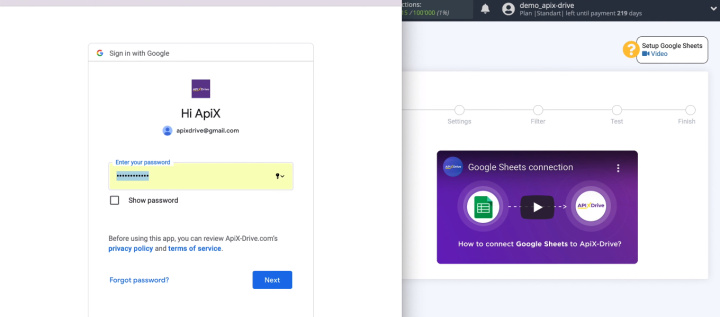
Enter password.
Give to ApiX-Drive the necessary permissions and click "Continue".
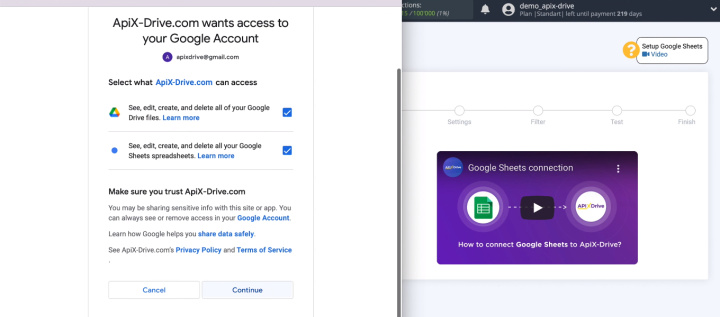
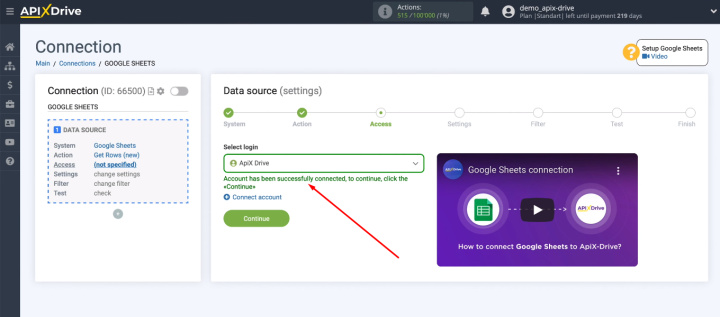
When the connected login appears in the list, select it and continue the setup.
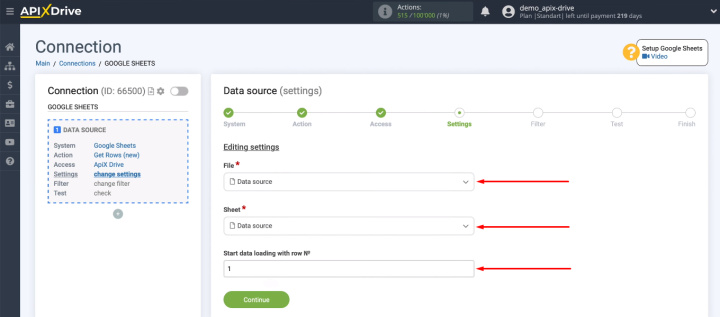
Select a file and spreadsheet sheet. Also determine from which line the ApiX-Drive system will start loading data.
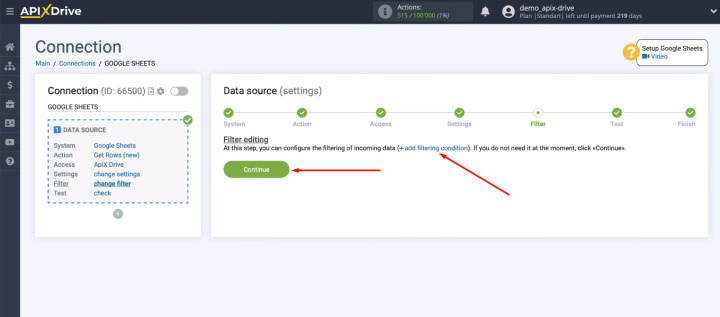
At the “Filter” stage, we can create various filtering conditions for the incoming data. For example, load data if column A is full or contains a certain value.
We will be loading all new table rows, so we simply skip the “Filter” stage.
At the “Test” stage, we see an example of the data that will be uploaded from the Google Sheets file. Check the test data and click “Next”.
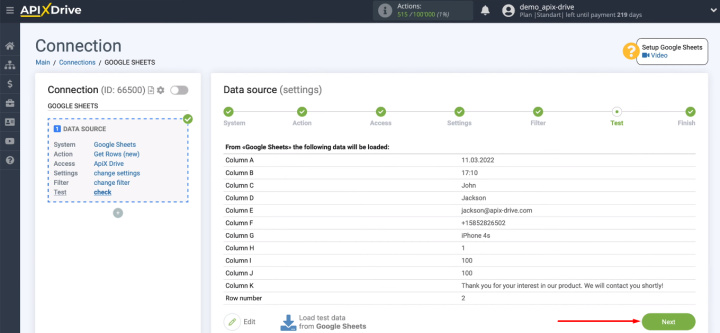
The data source is configured. Let's continue with the receiver.
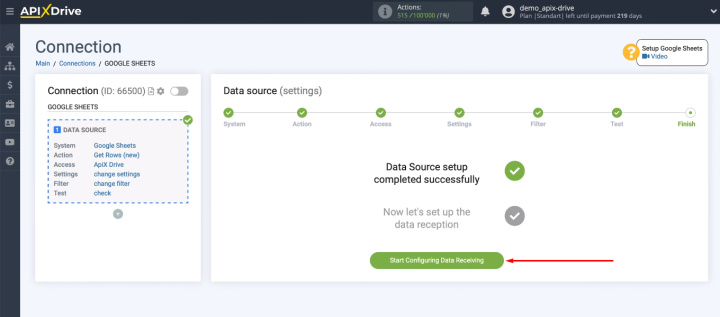
Conect ClickUp
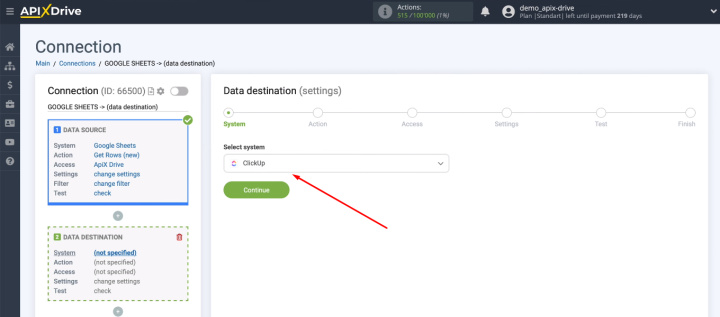
Specify the ClickUp service as the receiving system.
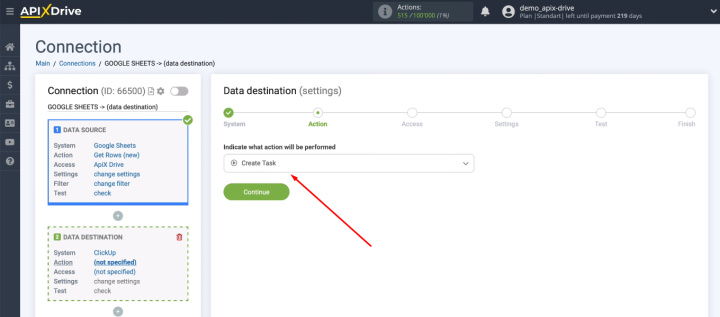
Select the "Create Task" action.
Connect your ClickUp account to the ApiX-Drive system.
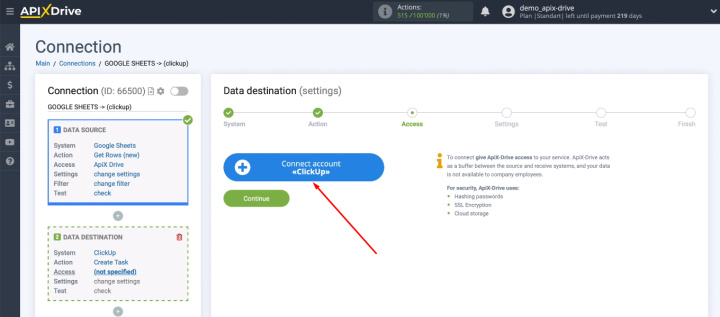
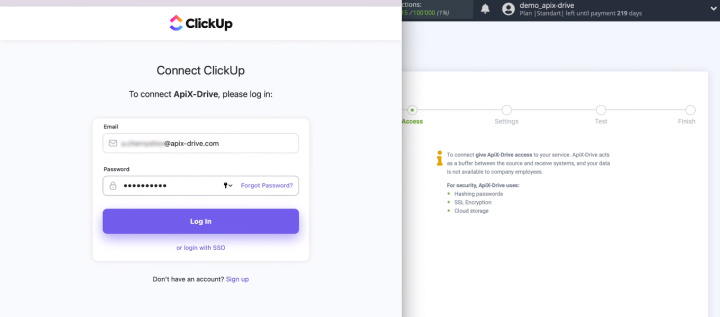
Enter login and password.
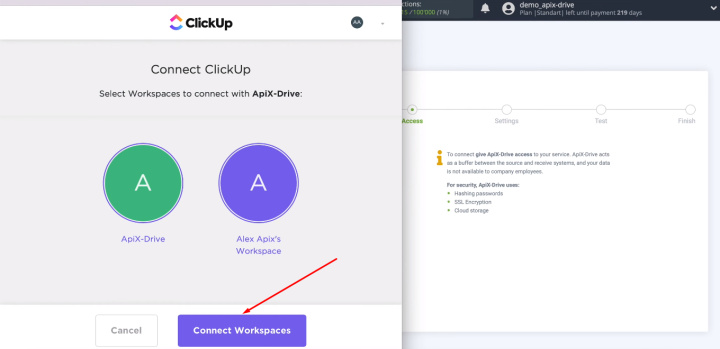
Determine the required workspace for connection.
When the connected login is displayed in the list, select it and click “Continue”.
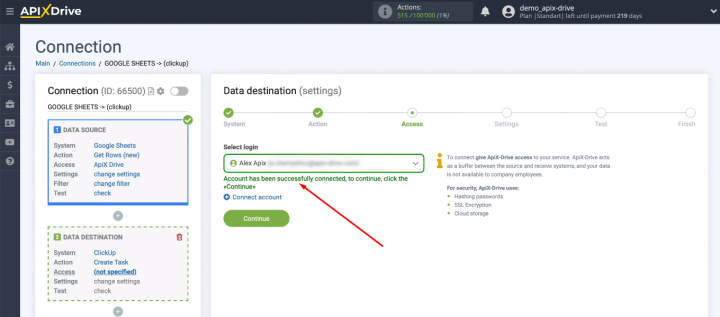
We need to specify three parameters so that the ApiX-Drive service knows where to create new tasks. Define the contents of the fields “Workspace”, “Space” and “List”.
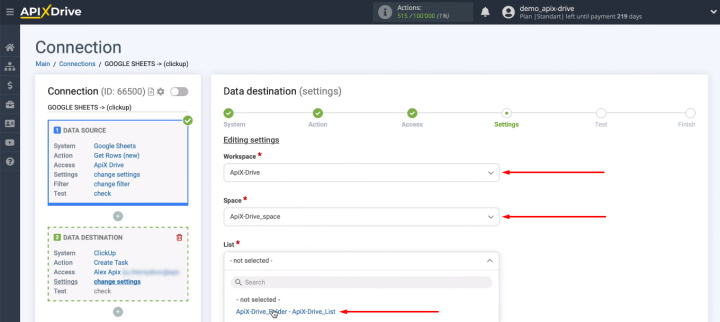
Set up the ClickUp fields that will be used to create new tasks. You can assign a variable by clicking in the field and selecting the desired value from the list.
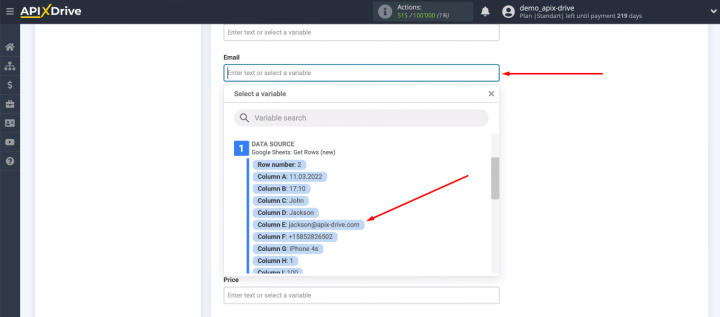
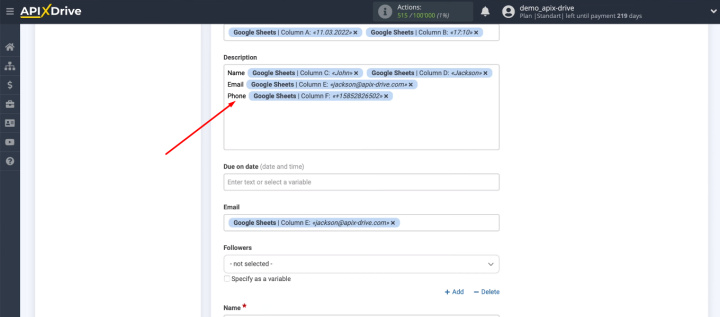
In addition to system variables and variables obtained from Google Sheets, you can use your own text. When all required ClickUp fields are configured, click “Continue”.
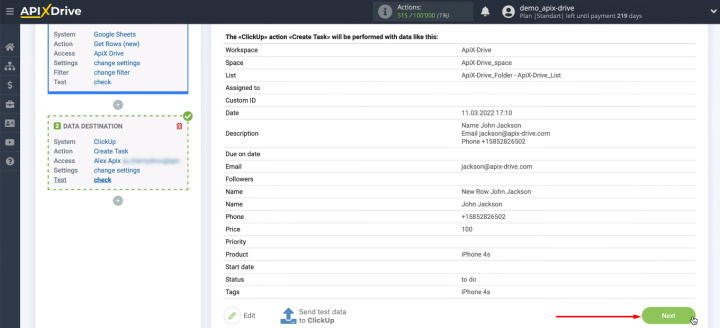
In the next step, check the data that will be passed to ClickUp to create a new task. You can always go back a step to make adjustments. If everything suits, click “Send test data to ClickUp”.
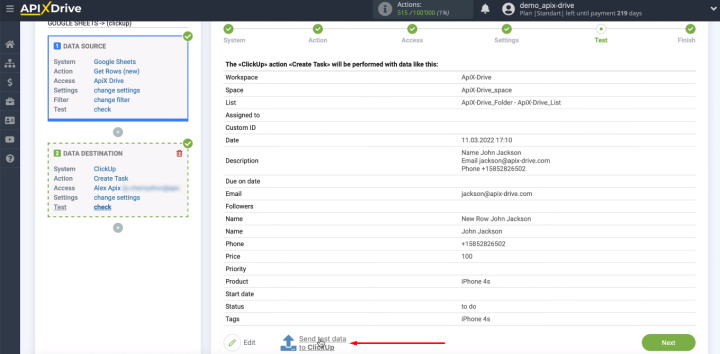
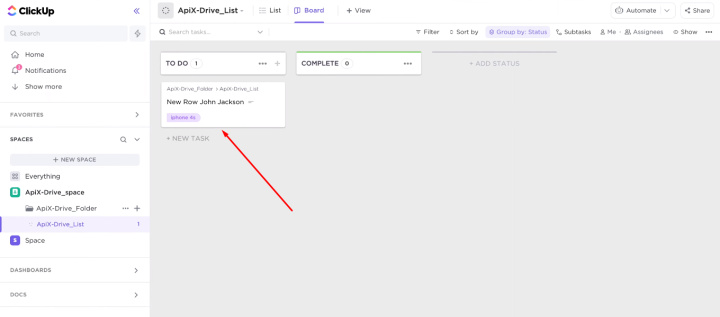
Go to your ClickUp account and check for a new task.
Return to the ApiX-Drive system. Click "Next".
Turn on automatic updates
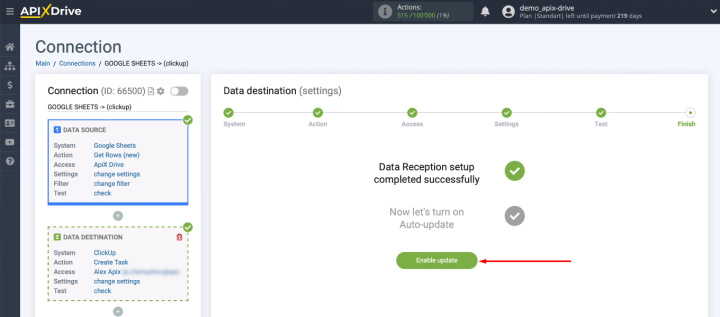
The configured connection works correctly. Now we need to turn on auto-update so that each new line of the Google Sheets file is automatically converted into a task in the ClickUp workspace.
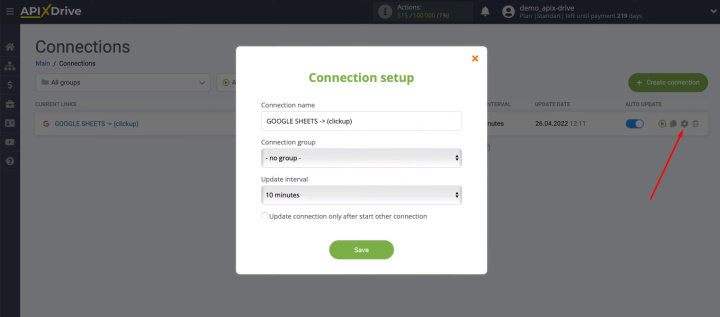
Click the "gear" and open the communication settings. Here you can change the name of the integration, add it to a group, and also select the communication interval.
Result of integration
If you actively use the ClickUp service to organize workflows, then you have probably appreciated the wide functionality of this platform, a convenient interface and the ability to work with many tools in a single space. The modern approach to working time management involves minimizing routine operations.
In this tutorial, we looked at how to quickly and easily automate the process of transferring data from a Google Sheets file to ClickUp. The task was solved using the ApiX-Drive service, an online connector that makes it easy to connect applications and services through a web interface. Create integrations, take routine tasks offline, and make the most of your time.
