Facebook and ClickUp Integration: Automatic Leads Transfer
ClickUp is a universal cloud platform for project management. It makes it possible to assign people responsible for completing tasks, define time frames and deadlines, monitor the progress of employees and more, increasing the level of efficiency and productivity, significantly simplifying work and saving time. In our article, you will learn how to set up ClickUp and Facebook integration and automate the transfer of leads from the social network to the task manager.
If you promote a product or service using Facebook Lead Ads and use
ClickUp to coordinate a team of employees and distribute work tasks, you
will probably, having received new leads,
manually create tasks, set time frames, and appoint executors. Automatic data transfer from
one system to another will greatly simplify the work process and save
you valuable time. By connecting both platforms to each other, you will
increase productivity, not only personally, but also as a team.
Our online connector, ApiX-Drive, will help you do this. With Facebook and ClickUp integration configured correctly, when a new lead arrives through Lead Ads, the potential client’s data is immediately transferred to your task manager. This way, you will get rid of manually entering them and immediately begin assigning performers and monitoring implementation. As a result, you will receive high-quality optimization of your workflow, and the buyer or customer will receive quick feedback. Win-win.
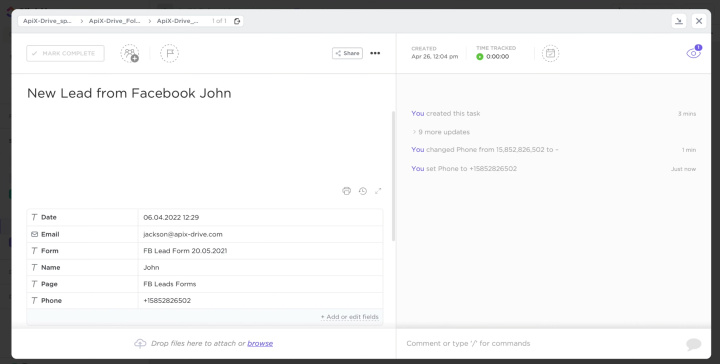
How to Set Up Facebook Lead Ads and ClickUp Integration
Many people believe that the easiest way to do Facebook-Leads and ClickUp integration via API is to ask an IT specialist about it. It turns out that this is not always the case. Colleagues from the IT department may make you wait since, in addition to this task, they have many others, no less important. Hiring an outside programmer will most likely significantly impact your budget. We offer you a faster and more economical alternative – the ApiX-Drive online connector. Our no-code service with an intuitive interface and operating algorithm will help you set up the necessary connection in just a few minutes.
If you imagine the integration of Facebook and ClickUp in a schematic format, it will look like this: “source-connector-receiver”. The ApiX-Drive system monitors the emergence of new leads on Facebook ad accounts around the clock and immediately sends them to ClickUp. To set up and launch such automation, you will need to take a few simple steps.
Setting Up the Data Source – Facebook
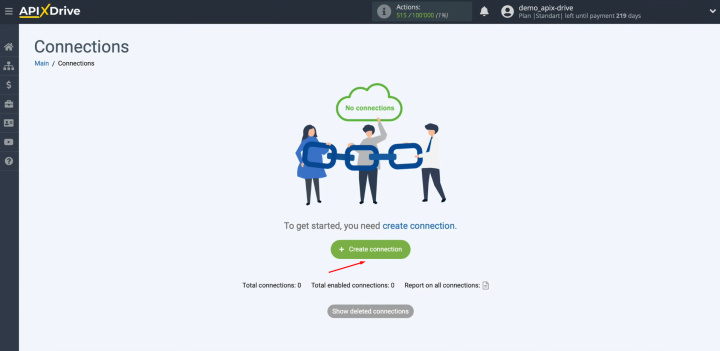
To set up Facebook integration with ClickUp, first have to create a new connection. Click on the button "Create connection".
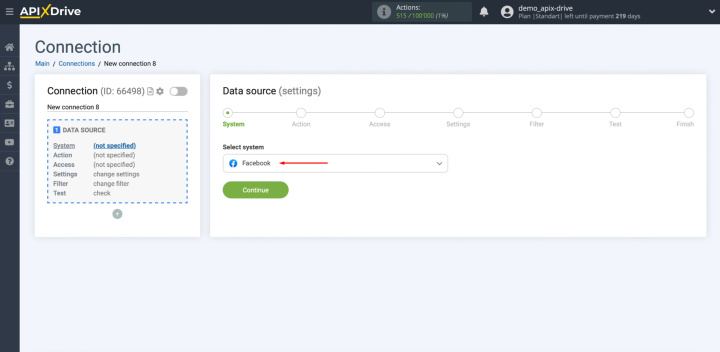
Next, you must select Facebook as the data source.
Click “Continue”.
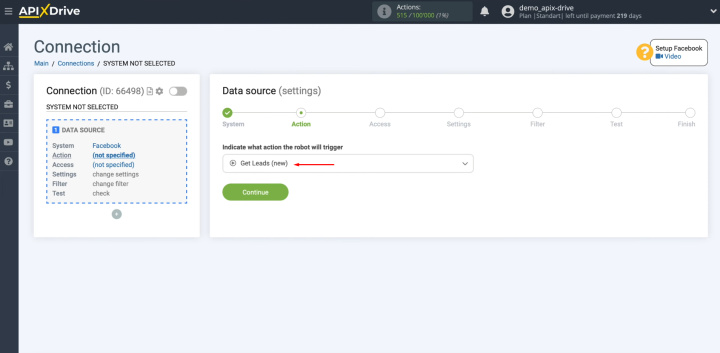
Now you have to specify an action "Get Leads (new)". Click “Continue”.
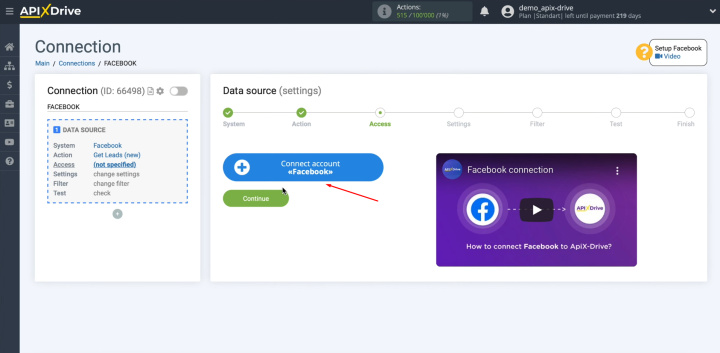
At this stage, you have to connect your Facebook account to the ApiX-Drive
service. Click on the blue button.
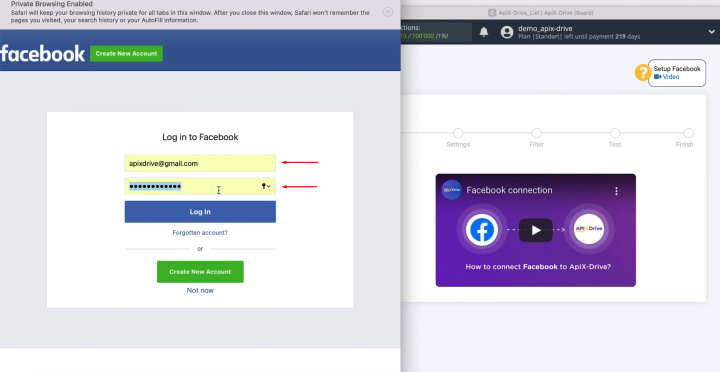
In this window, you must specify the username and password of
the Facebook personal account. Click “Log in”.
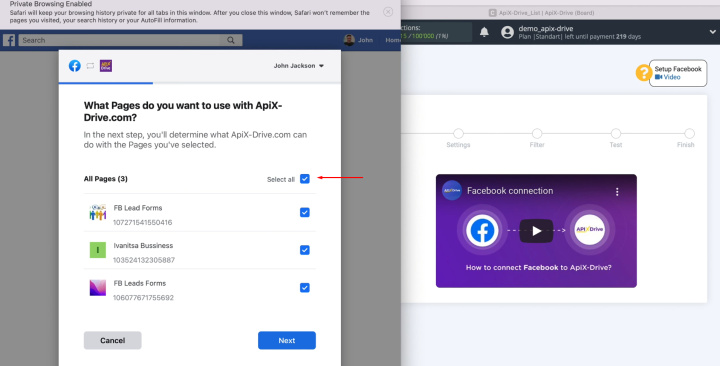
Next, we move on to additional settings. At this stage, you see the advertising pages to which
you have access. The advertising pages for which you want to receive
leads must be ticked. We recommend marking all advertising pages at once to be able to work
with them in the future. Click “Next”.
If you have a new advertising page,
after connecting your Facebook account to ApiX-Drive, you will need to
reconnect via incognito in the browser, and at this stage, mark the new
advertising page with a checkmark.
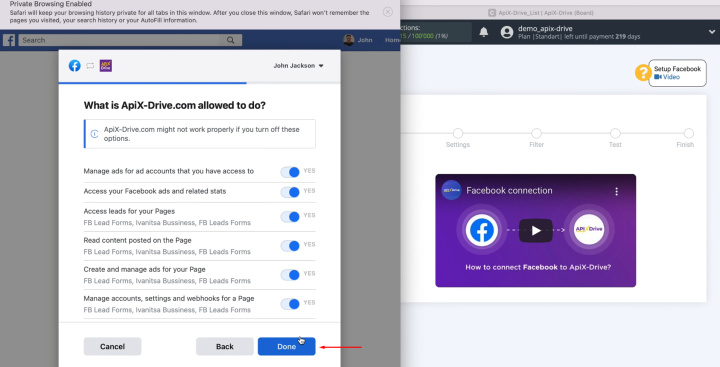
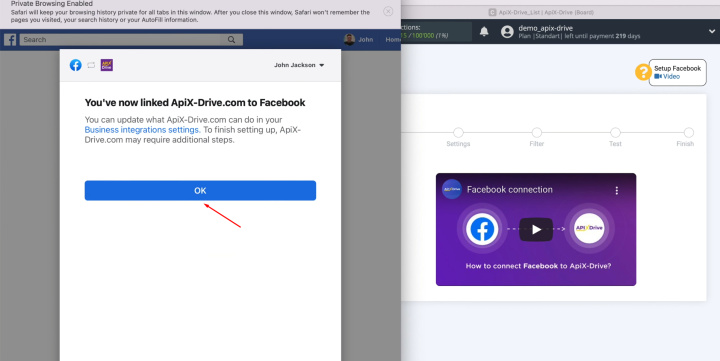
In the next window, leave all checkboxes enabled. Click “Done”.
In this window, click “OK”.
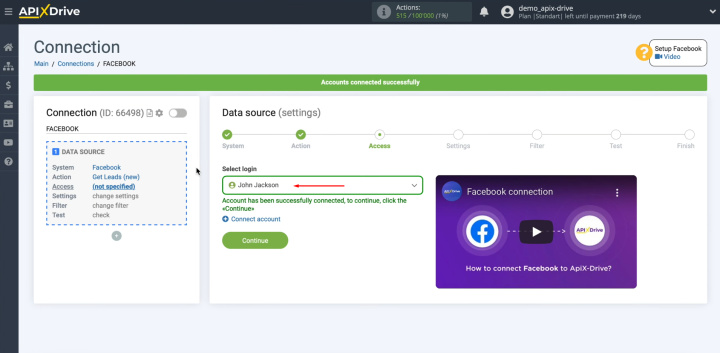
When the connected login is displayed in the list, select it.
Click “Continue”.
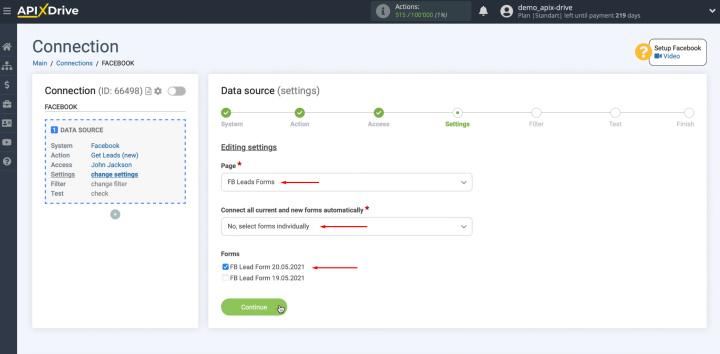
At this stage, you have to select the advertising page for which you want to
receive new leads. If you
would like to receive leads for all advertising forms at once, leave "Yes,
connect all current and new forms". If you would like to receive leads on some specific forms, select "No,
select forms individually" and tick the necessary forms. Click
“Continue”.
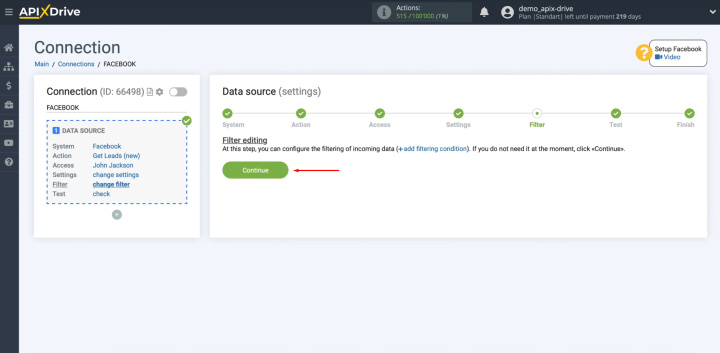
At this stage, you can set up a data
filter. In this case, there is no need for this, so just
click "Continue".
At this point, you see an example of one of your leads.
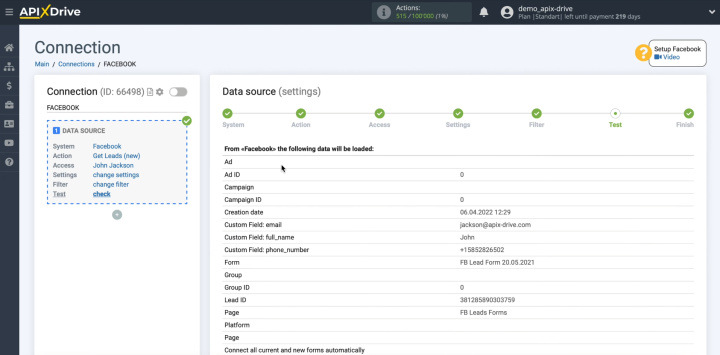
If at this stage there is no data displayed, you have to wait for a real lead or generate a test lead
through Facebook Business Messenger. Once you've done that, click "Load test data from Facebook" and
when the lead appears at this stage, click "Next".
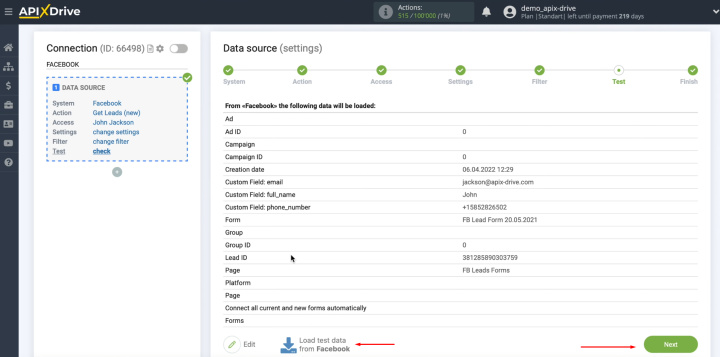
On this, the
Facebook setting has been successfully completed.
Setting Up the Data Receiver – ClickUp
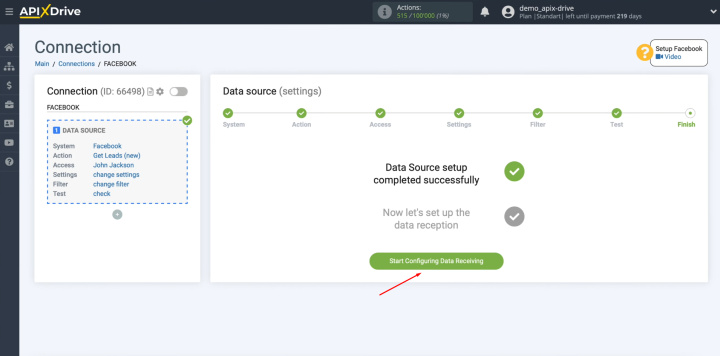
To continue creating the ClickUp integration with Facebook, you have to proceed to the data receive setting. For this, click on the green button, “Start Configuring Data Receiving”.
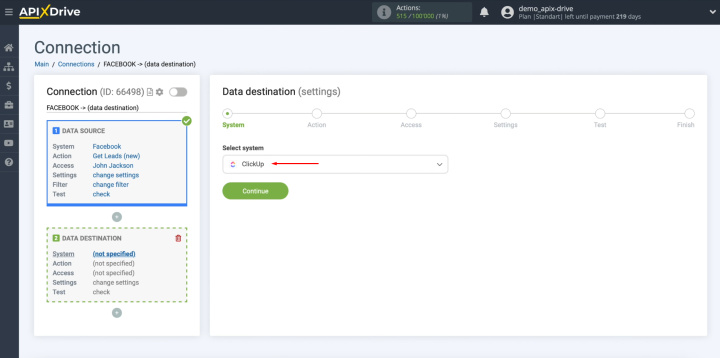
Select ClickUp as the data destination system.
Click “Continue”.
Next, you must select
the action “Create Task”. Click
“Continue”.
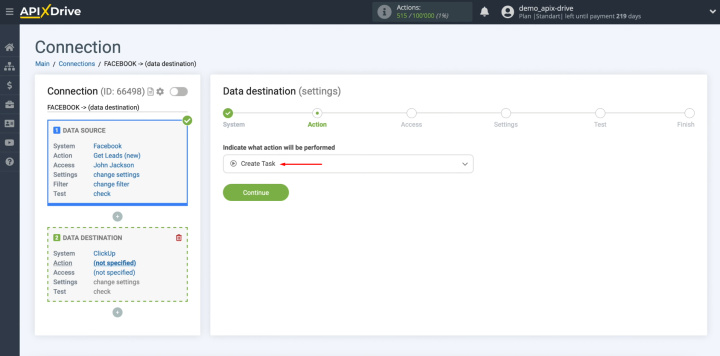
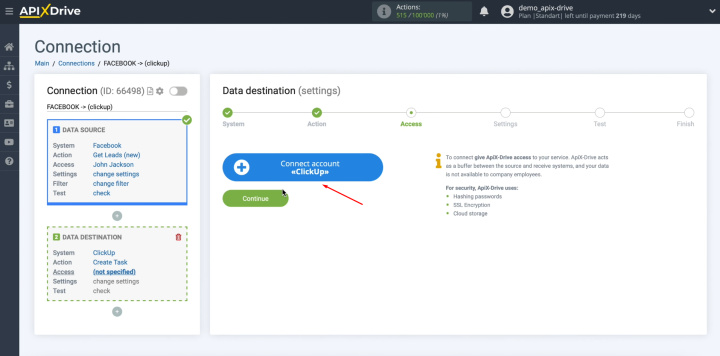
At this point, you have to connect your ClickUp account to the ApiX-Drive
system. Click on the blue button "Connect account ClickUp".
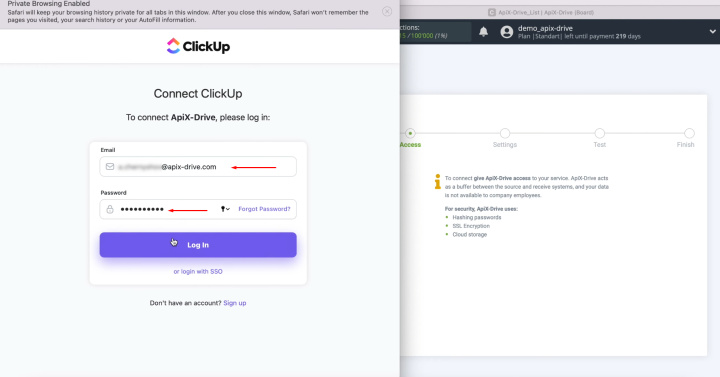
In this window, you must specify the login and password of your
ClickUp personal account. Click “Log in”.
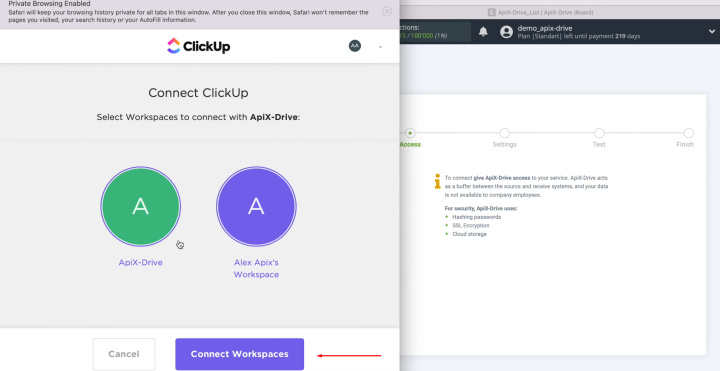
Now you have to grant ApiX-Drive permission to work with your ClickUp account.
Click on the button “Connect Workspaces”.
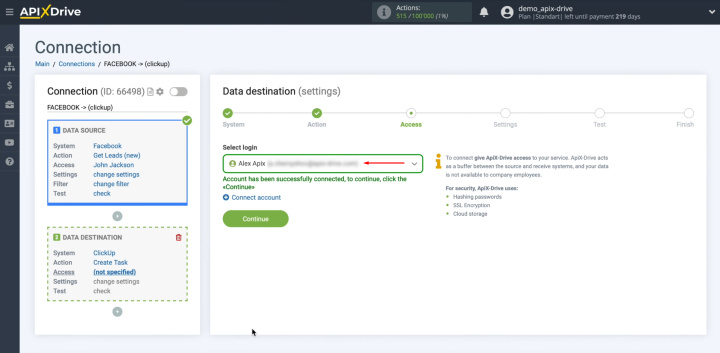
When the connected login is displayed in the list, select it.
Click “Continue”.
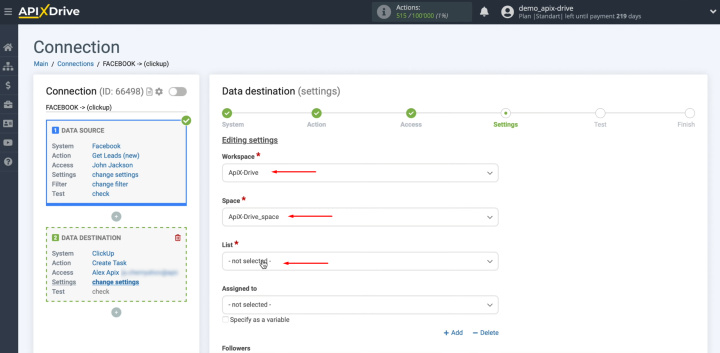
At this stage, you have to select a Workspace, Space and List in which new tasks will be created with each new
lead from Facebook.
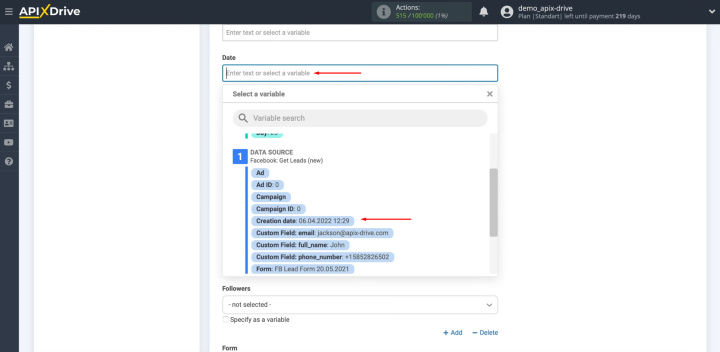
Next, you see the ClickUp fields for creating a new task. In these fields, you can assign variables from
Facebook. To achieve this,
click in the field and select a variable from the drop-down list.
Please note that you can use not only variables but also manually
enter values. To move to the
next line, use Enter.
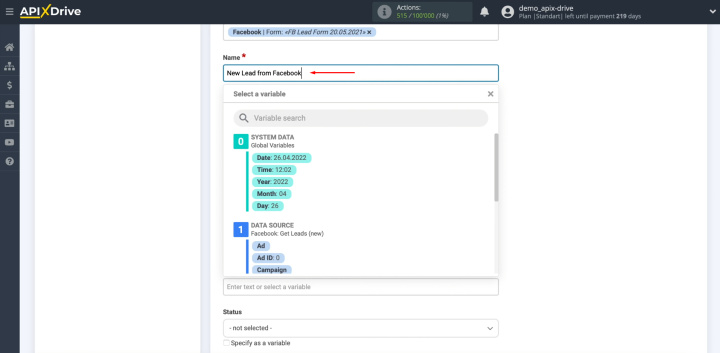
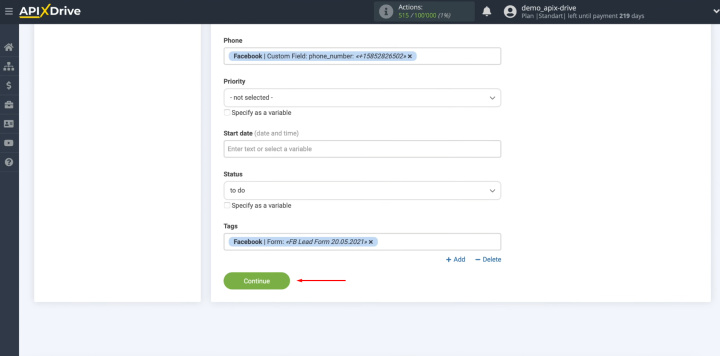
When all required fields are filled in, click "Continue".
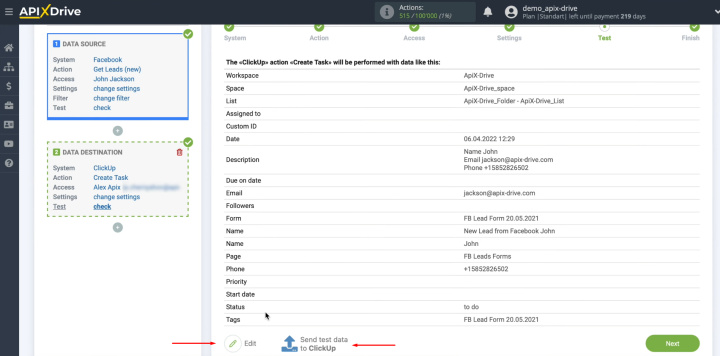
At this point, you see an example of
the data that will be sent to ClickUp as new tasks for each new Facebook
lead. If something does not suit
you, click "Edit" and go back one step. To check the correctness of the
settings, click "Send test data to ClickUp".
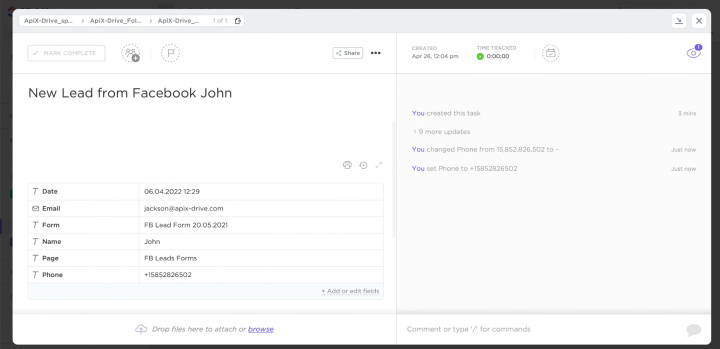
After successful submission, go to ClickUp and check the result.
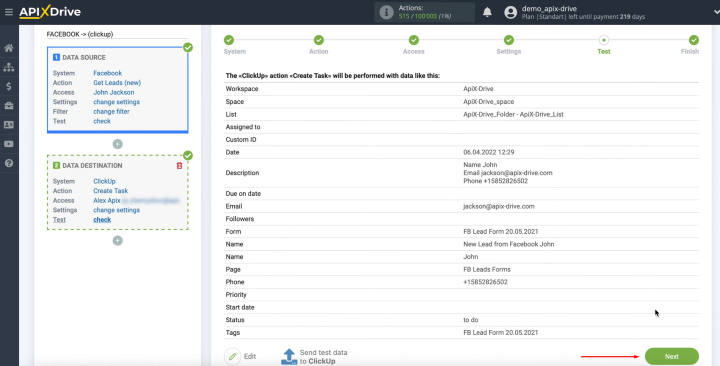
If everything suits you, return to the ApiX-Drive service and
continue the configuration. For this, click “Next”.
Setting Up Auto-Update
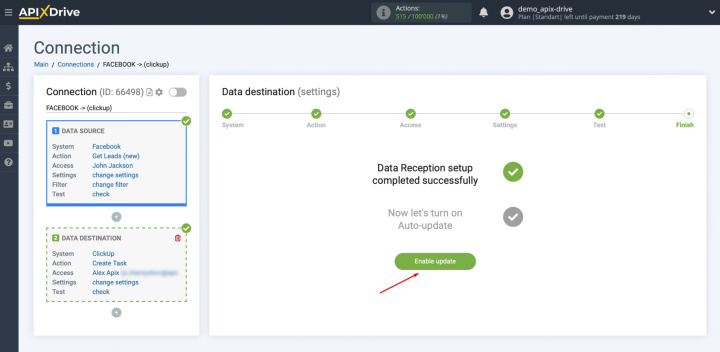
In order for data transfer to occur automatically, you need to configure auto-update. Click on the green button “Enable update”.
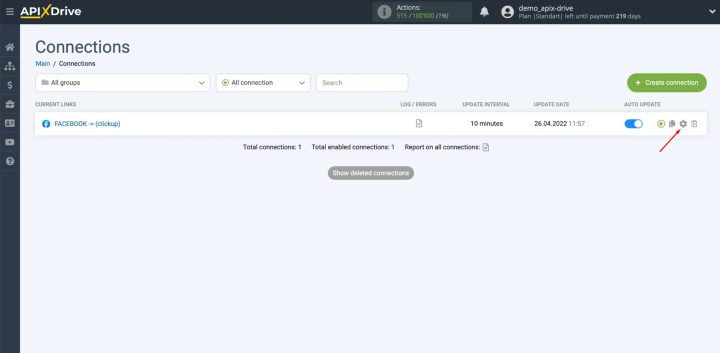
Click on the gear button.
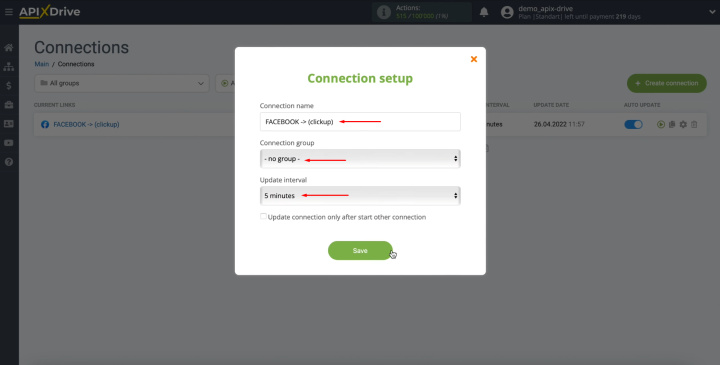
Select the interval for the
operation of the connection. For example, once every 5 minutes. In addition,
here you can change the name of the connection and assign it to the required
group. Click “Save”.
Result of Facebook + ClickUp Integration
Having consistently completed all the steps according to our instructions, you probably received a successfully configured connection for the automatic transfer of new leads from the social network to the task manager. ClickUp + Facebook integration will save you from having to manually transfer lead data received from Lead Ads to a project management service and create tasks for them. All this will happen without your direct participation. Entrust monotonous, same-type, routine actions to our online connector, ApiX-Drive, and use the spare time to search for new marketing strategies, creative solutions, and ideas for business development. Good luck!
Apix-Drive is a universal tool that will quickly streamline any workflow, freeing you from routine and possible financial losses. Try ApiX-Drive in action and see how useful it is for you personally. In the meantime, when you are setting up connections between systems, think about where you are investing your free time, because now you will have much more of it.
