Generate content with OpenAI (ChatGPT)
Integration with OpenAI (ChatGPT) is implemented as a separate AI block (ChatGPT) that can be placed between the Data Source and Data Receiver. This will allow you to create a query based on data from the Data Source and pass data from OpenAI (ChatGPT) to the Data Ingest fields. This way you can automatically receive data from OpenAI (ChatGPT) and transfer it to the services and systems that you use.
The function allows you to analyze data from the Data Source using OpenAI (ChatGPT) and transfer the query result to the Data Destination.
Navigation:
Connecting Google Sheets as a Data Source:
1. What data can you get from Google Sheets?
2. How to connect your Google Sheets account to ApiX-Drive?
3. Select the table and sheet from which rows will be unloaded.
4. An example of data that will be transferred from Google Sheets.
OpenAI (ChatGPT) connection:
1. What data can be obtained from OpenAI (ChatGPT)?
2. How to connect your OpenAI (ChatGPT) account to ApiX-Drive?
3. How to configure data search in OpenAI (ChatGPT) in the selected action?
4. An example of data that will be transferred from OpenAI (ChatGPT).
Setting up data transfer in Discord:
1. What will the Discord integration do?
2. How to connect your Discord account to ApiX-Drive?
3. How to configure data transfer to Discord in the selected action?
4. Example of data that will be sent to your Discord.
5. Auto-update and communication interval.
Setting up Data SOURCE: Google Sheets
Let's look at how the function of requesting data from OpenAI (ChatGPT) and sending the result to Google Sheets works.
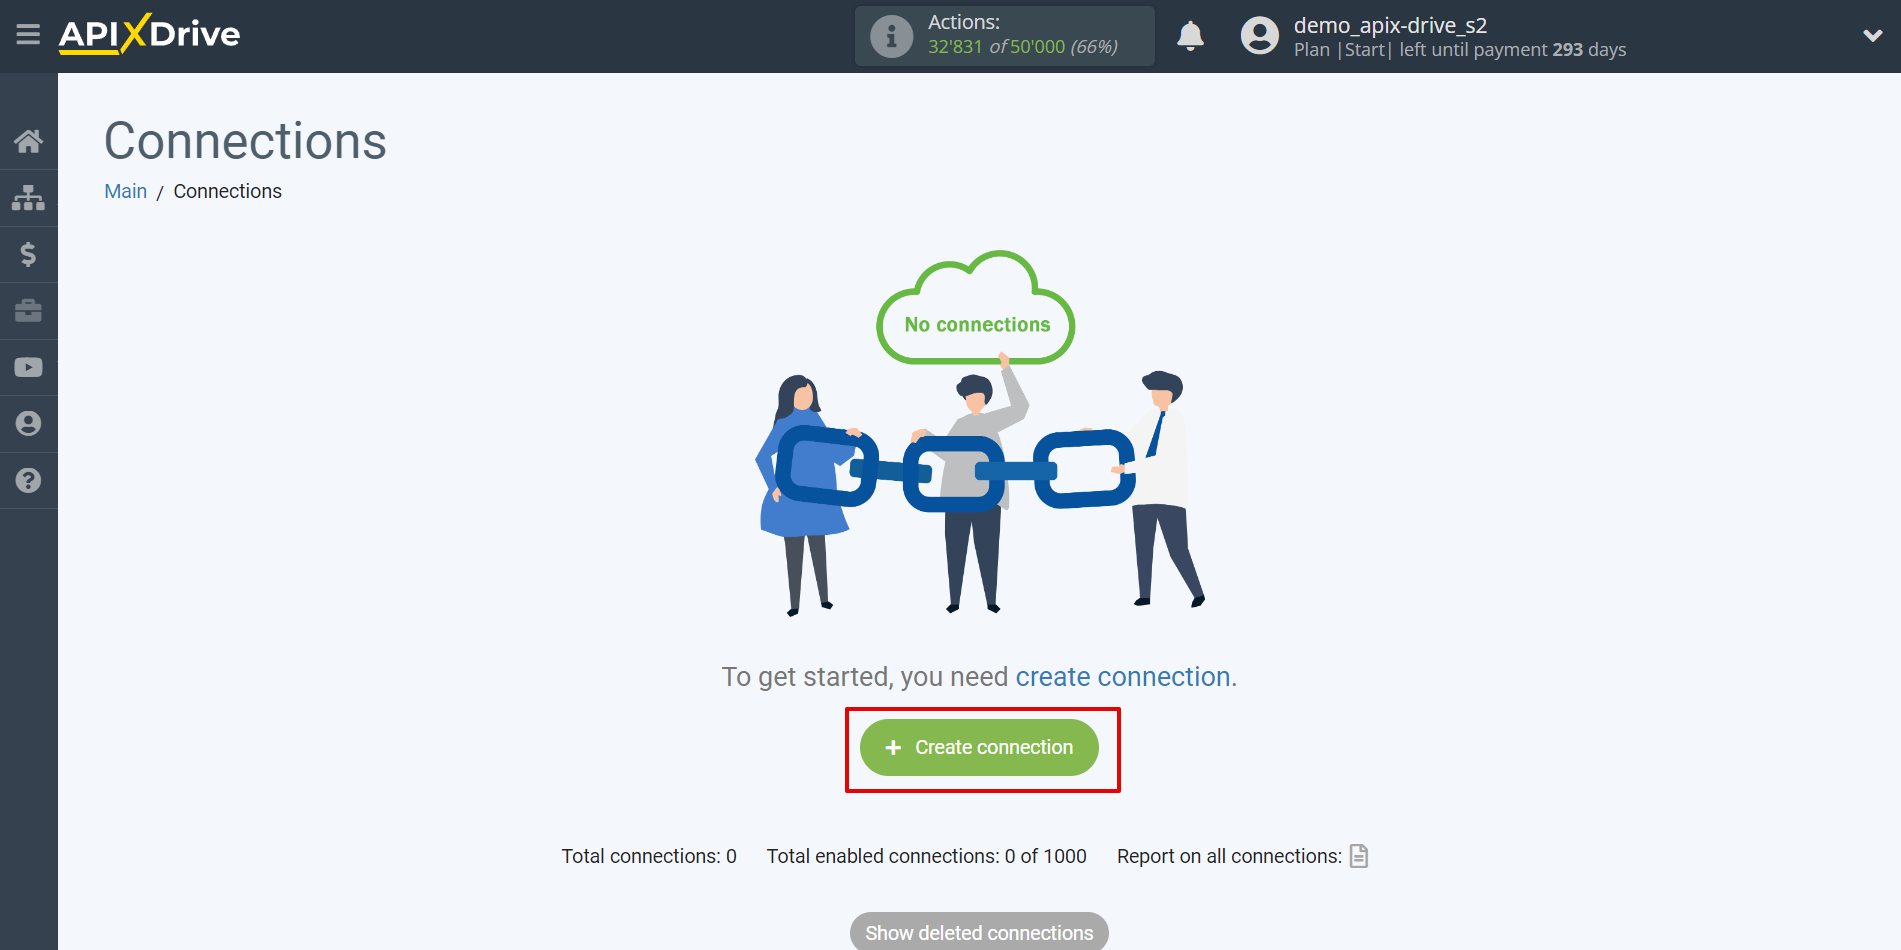
First, you need to create a new connection.
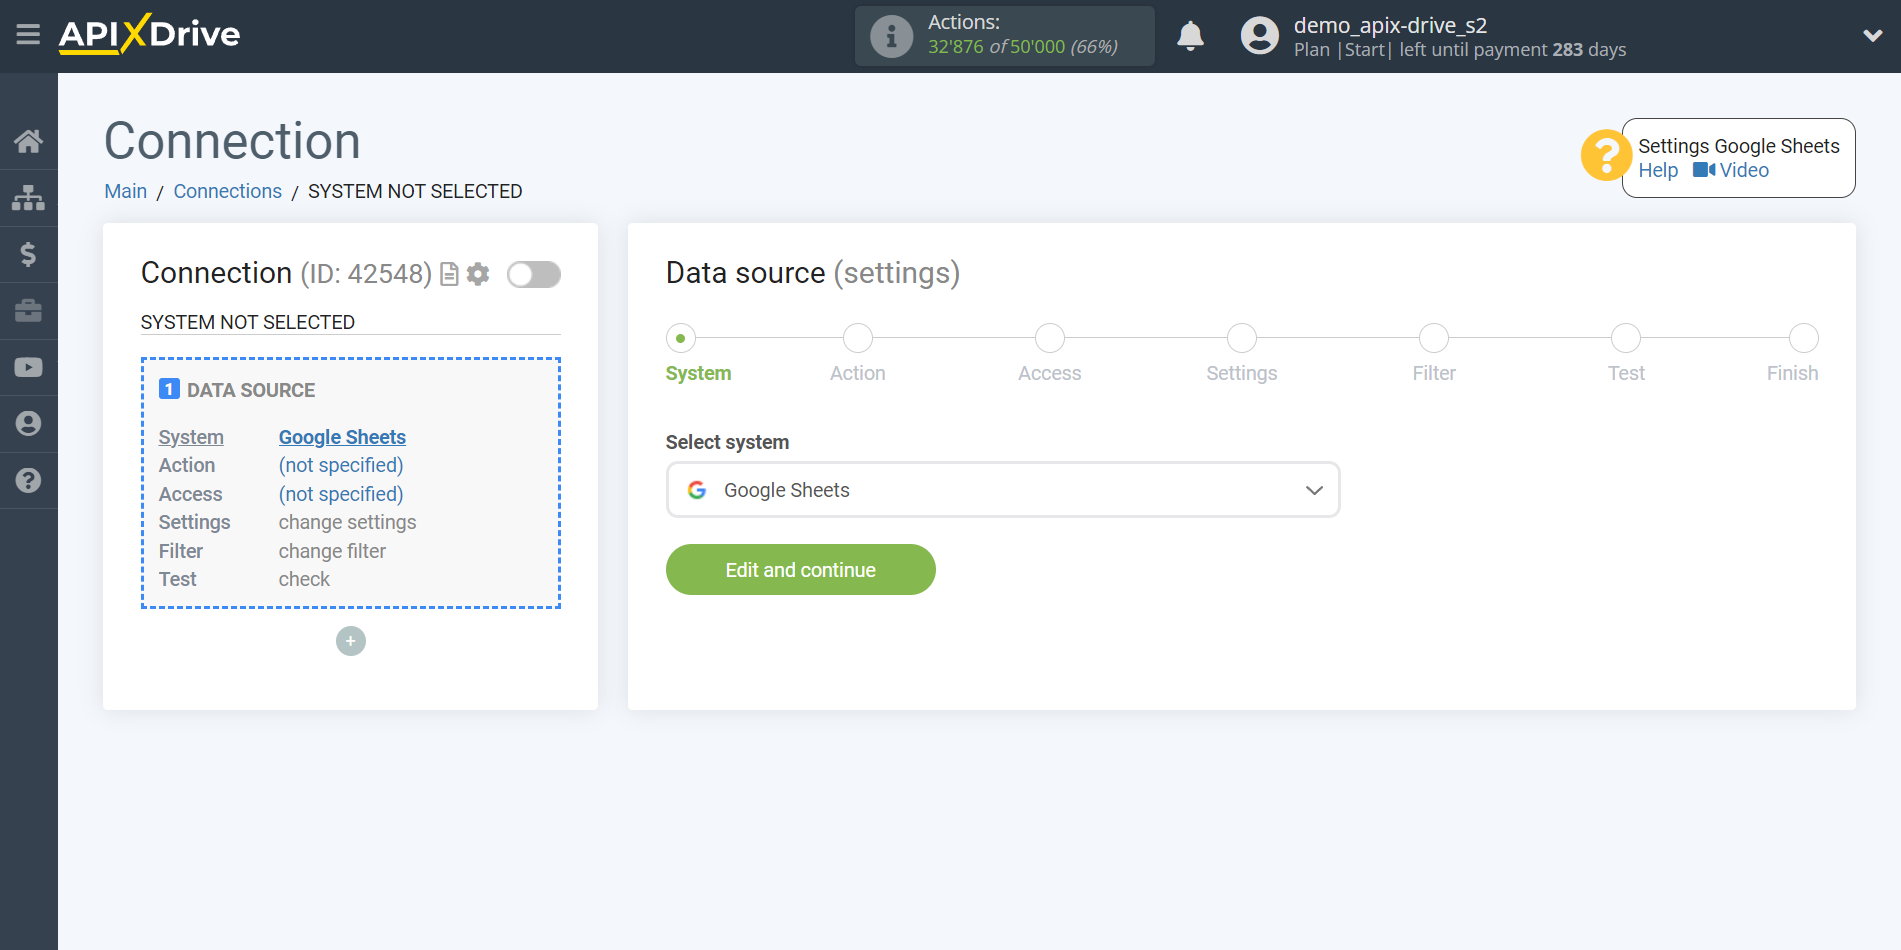
Select the system as the Data Source. In this case, you must specify Google Sheets.
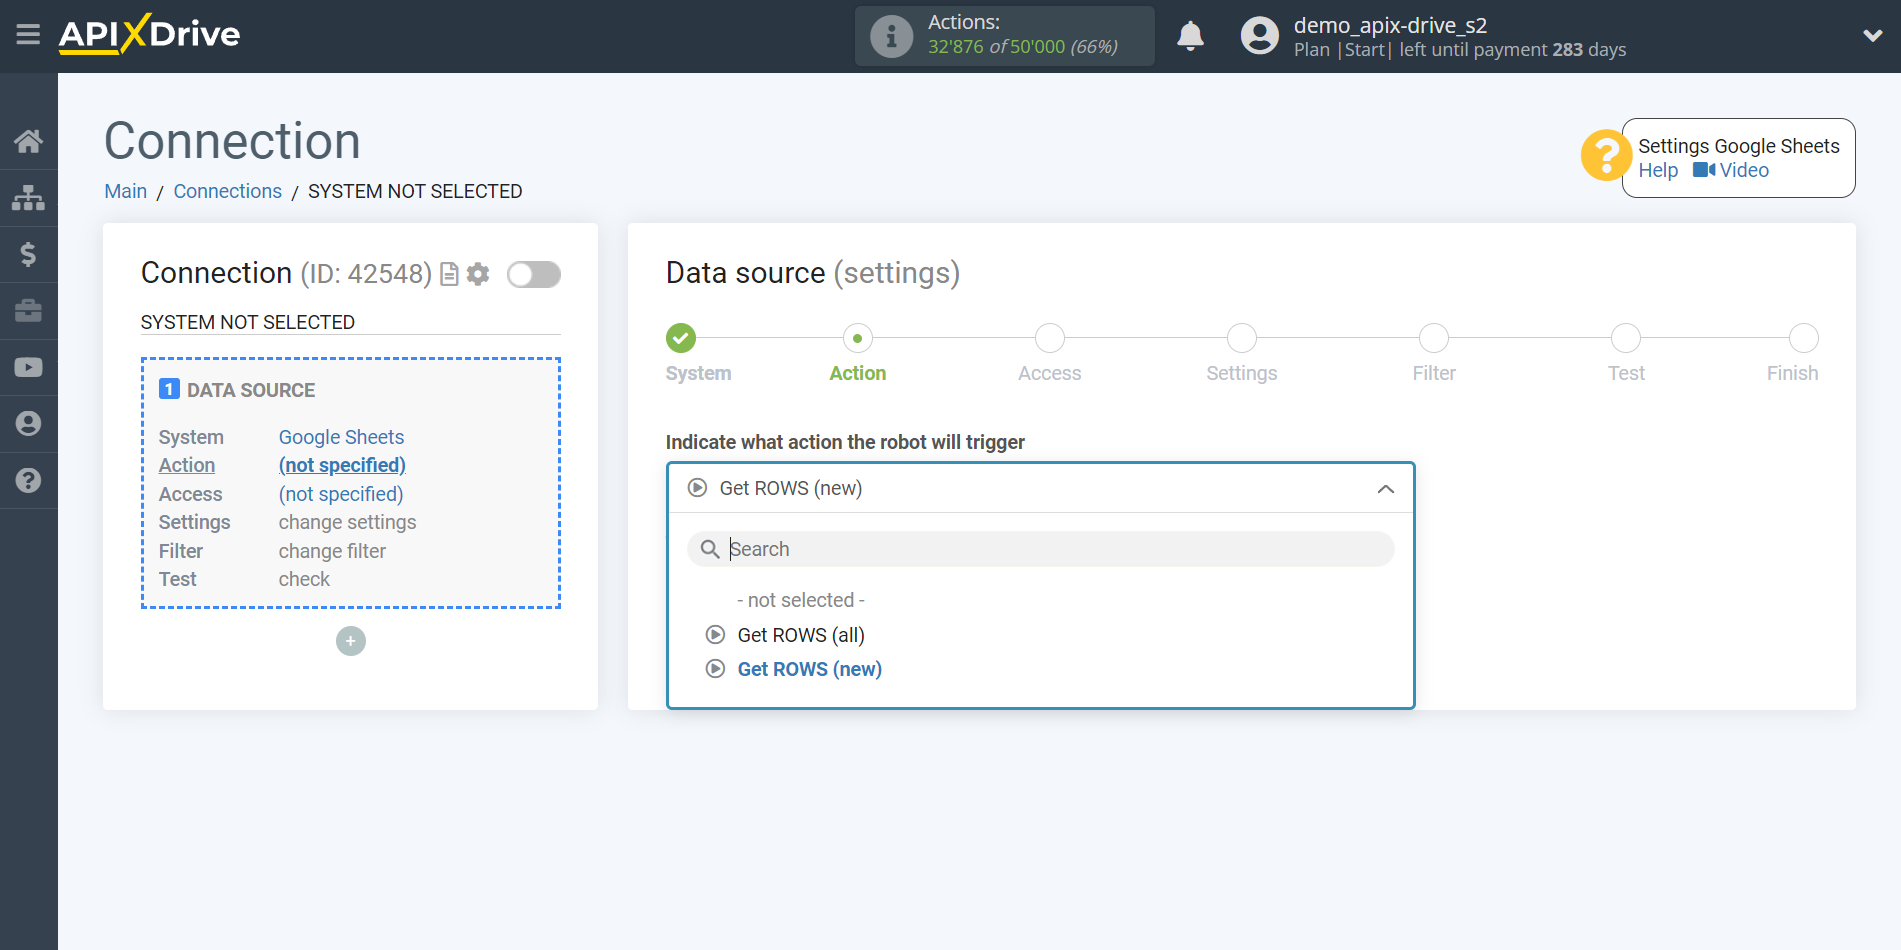
Next, you need to specify the action "Get rows (new)".
The next step is to select a Google Sheets account from which data will be uploaded.
If there are no logins connected to the system, click “Connect account”.
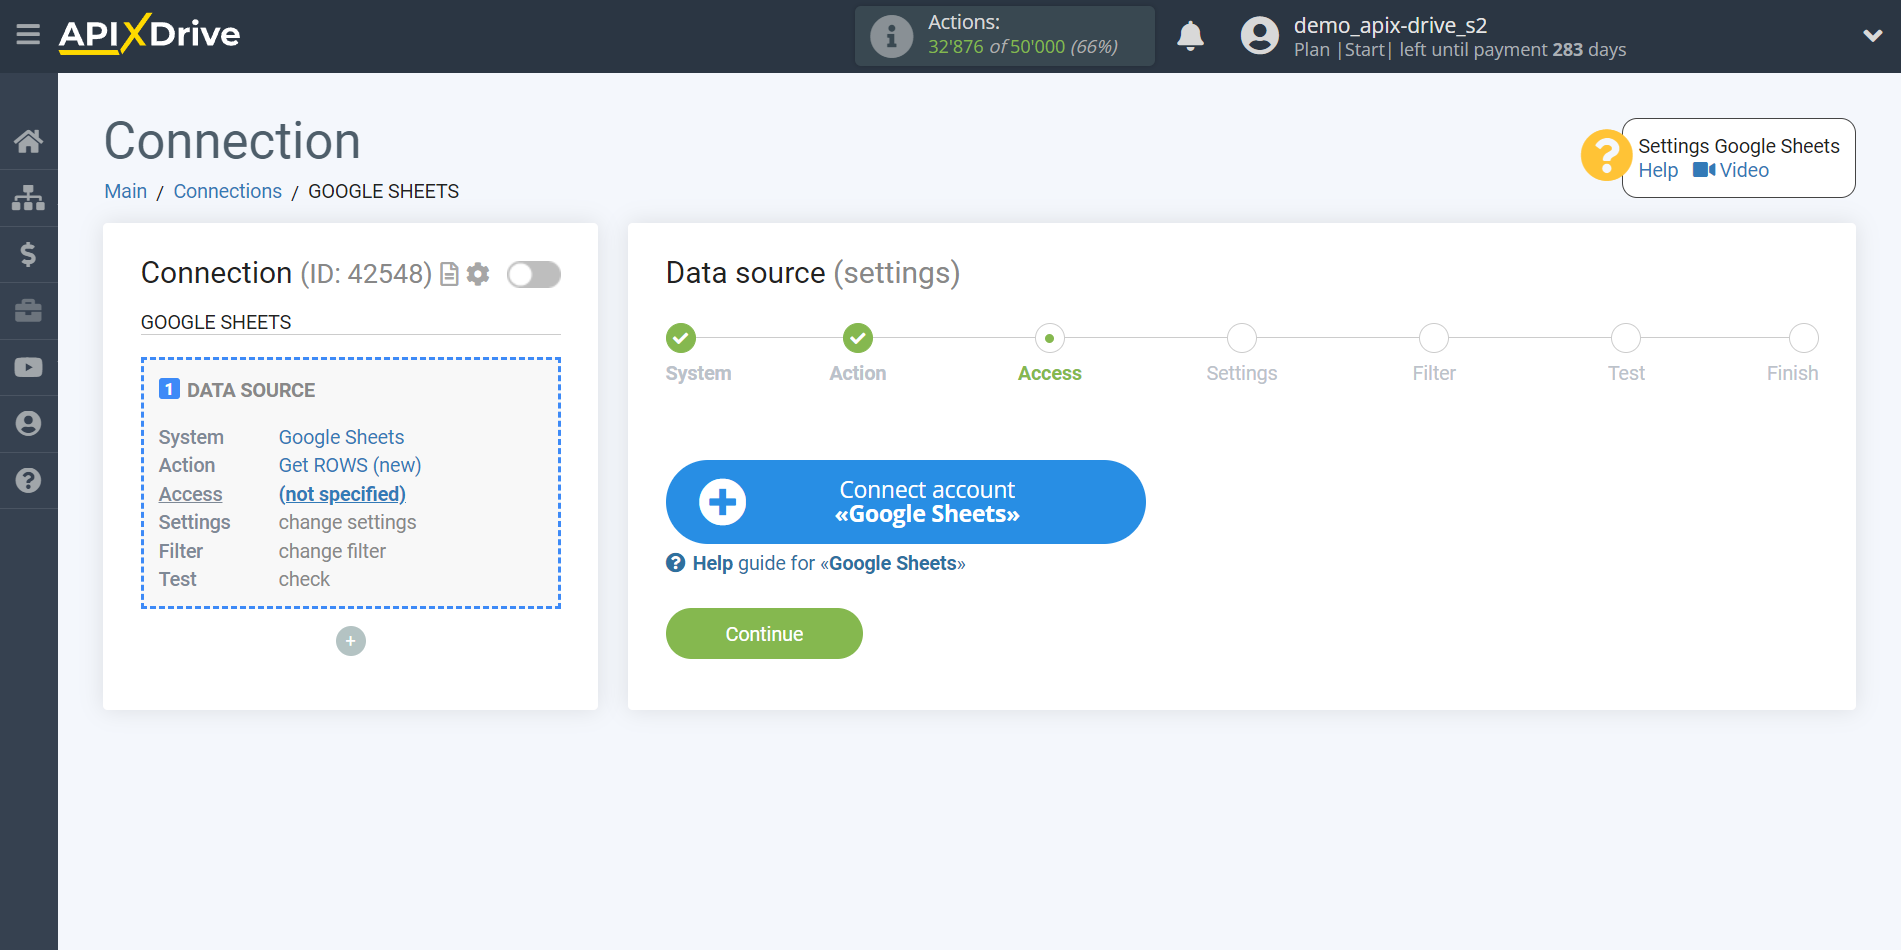
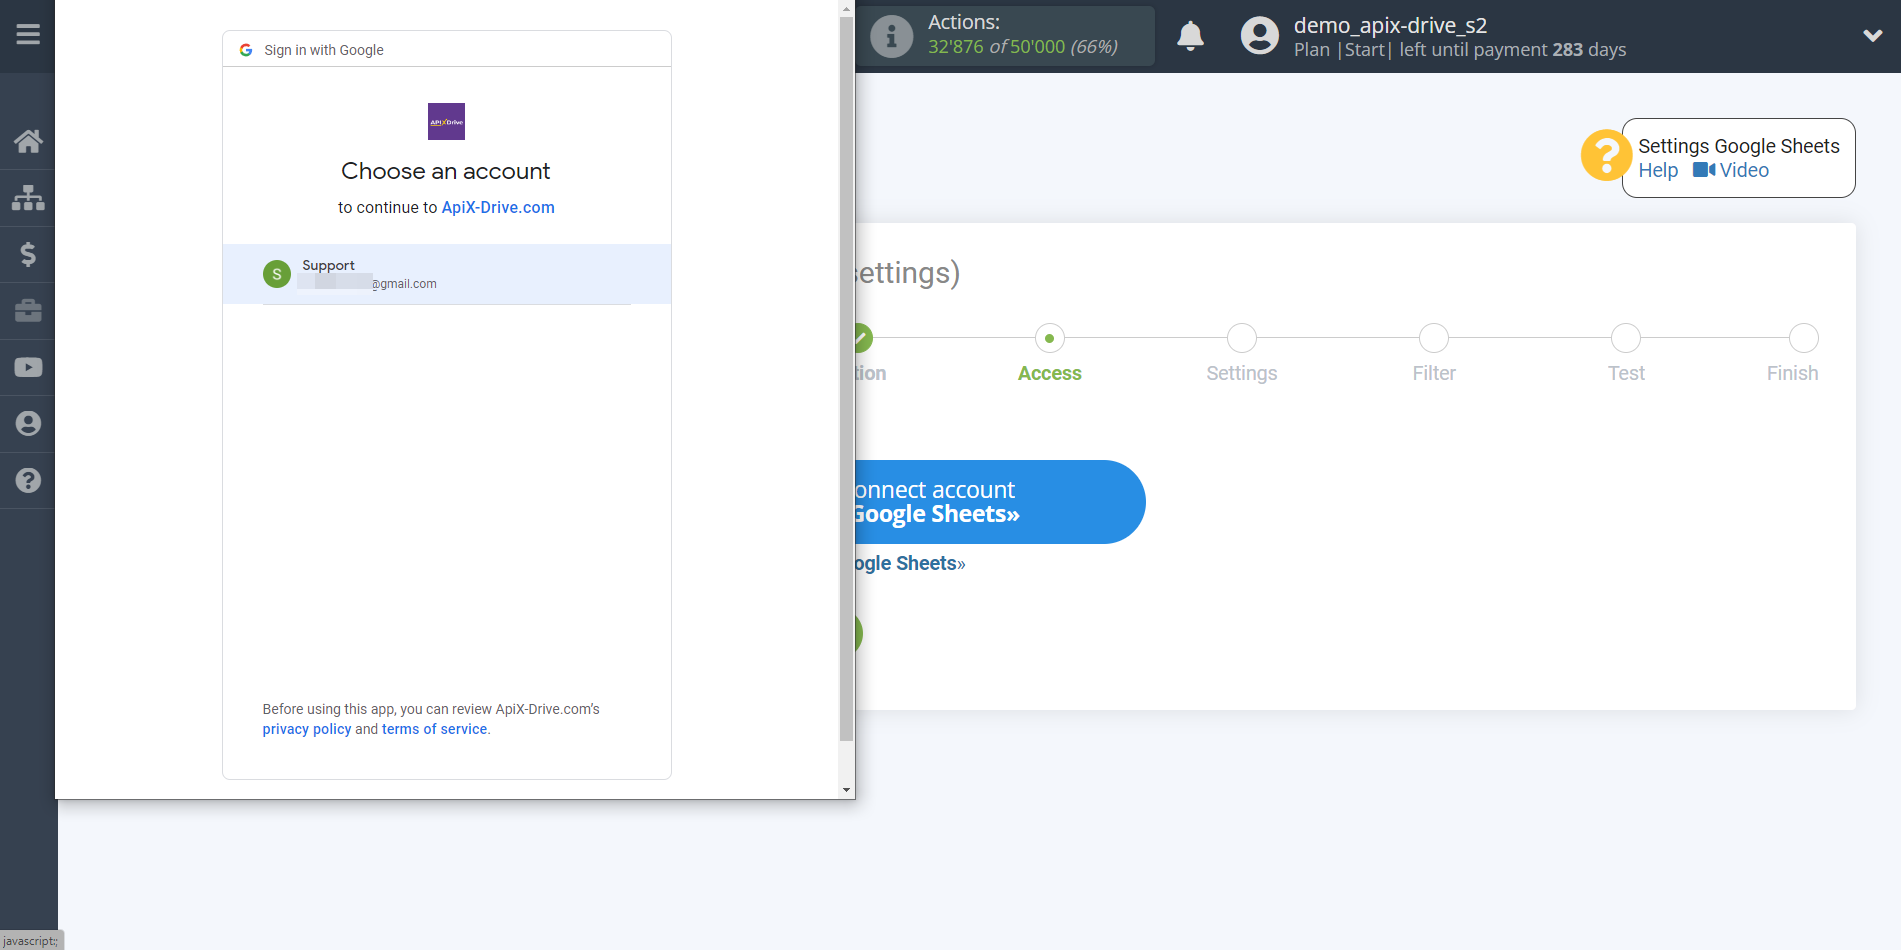
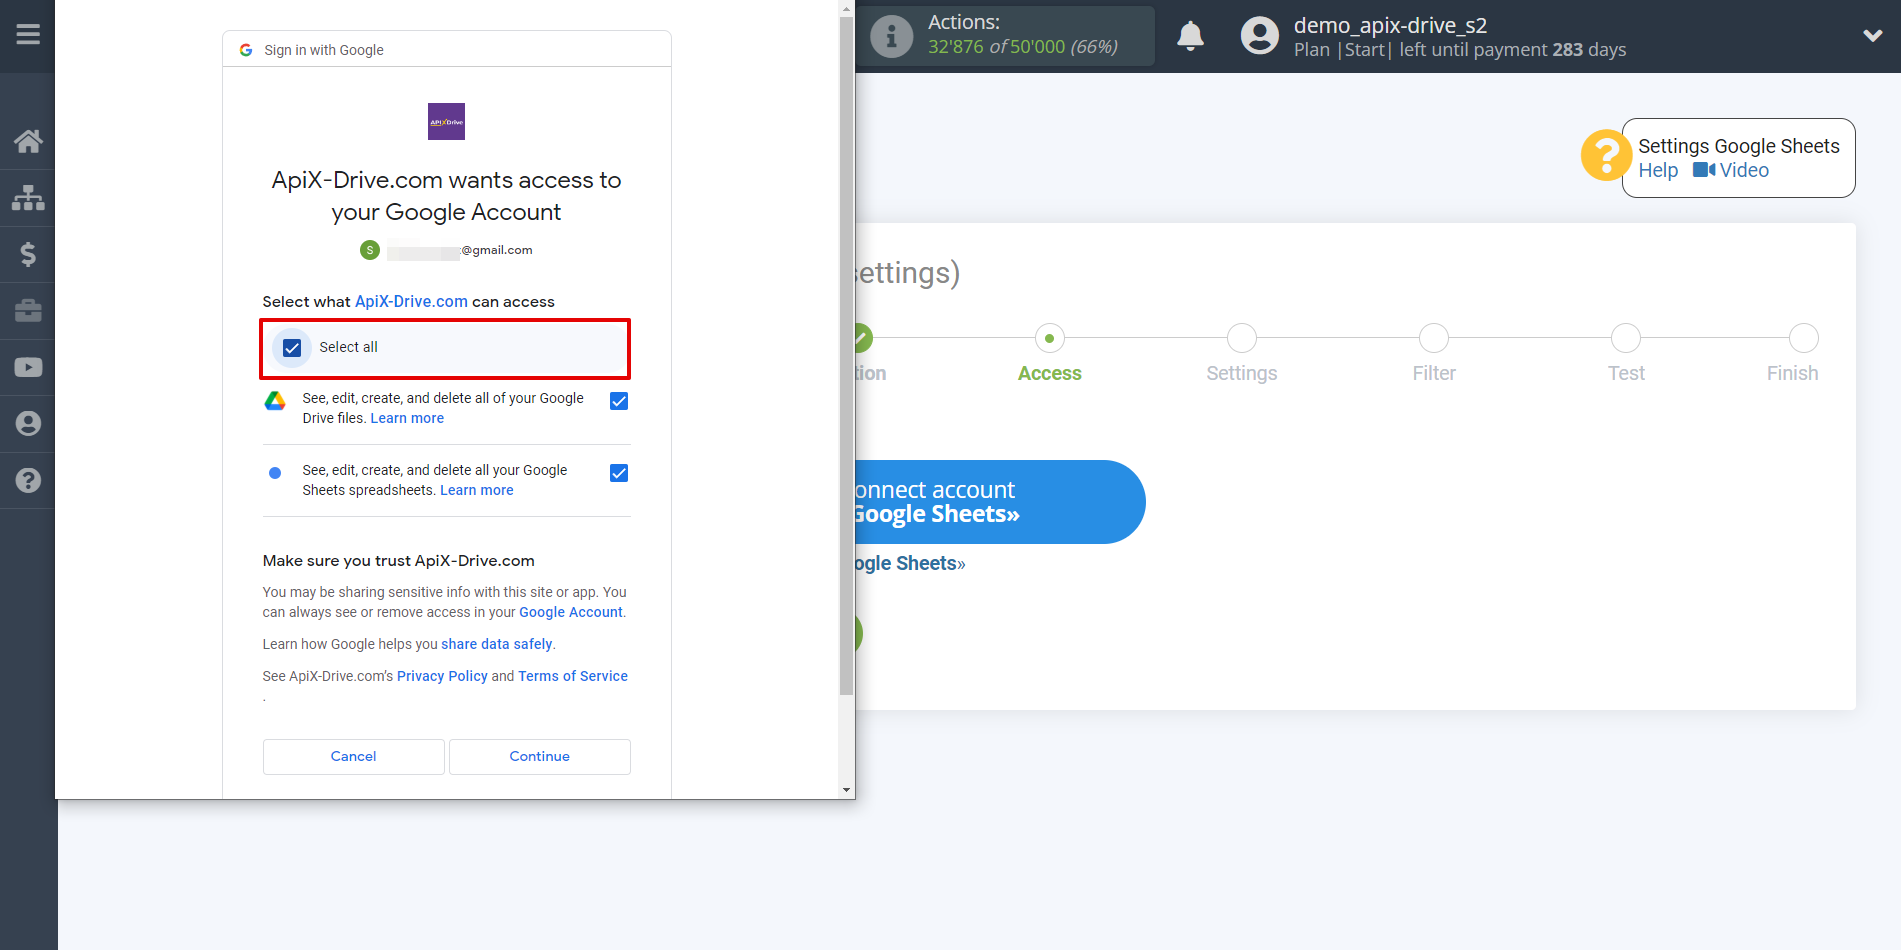
Select which account you want to connect to ApiX-Drive and provide all permissions to work with this account.
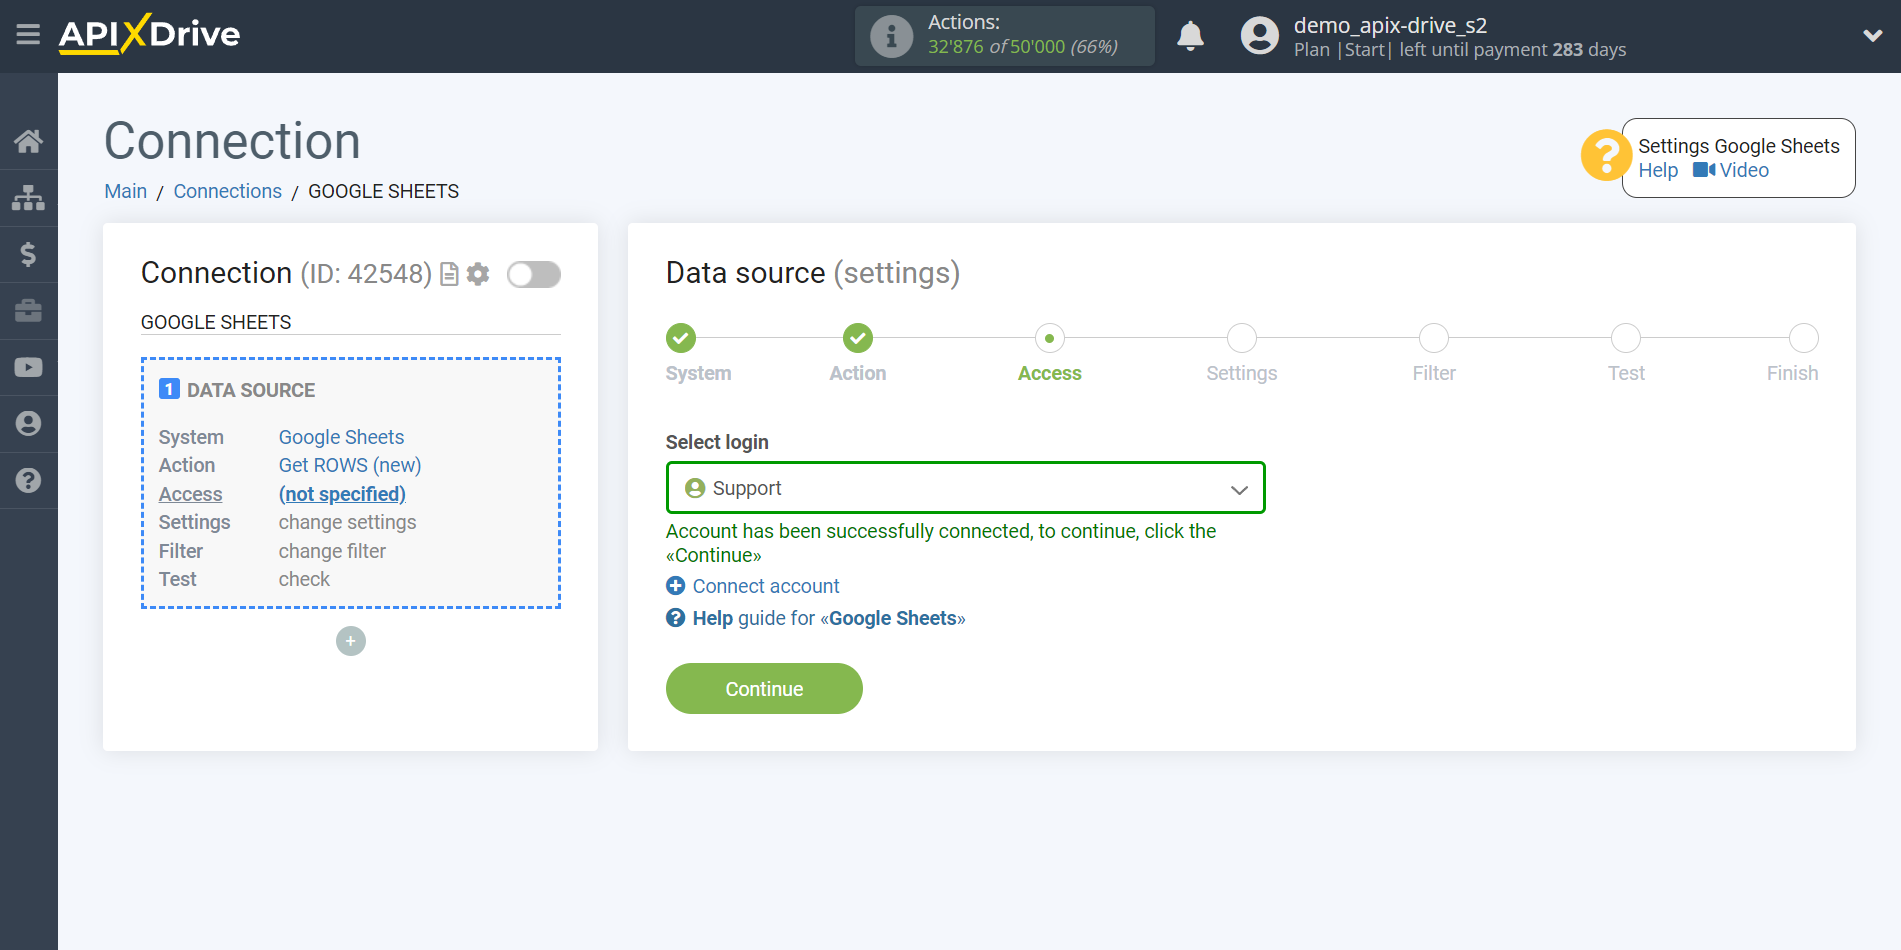
When the connected account appears in the "active accounts" list, select it for further work.
Attention! If your account is on the "inactive accounts" list, check your access to this login!
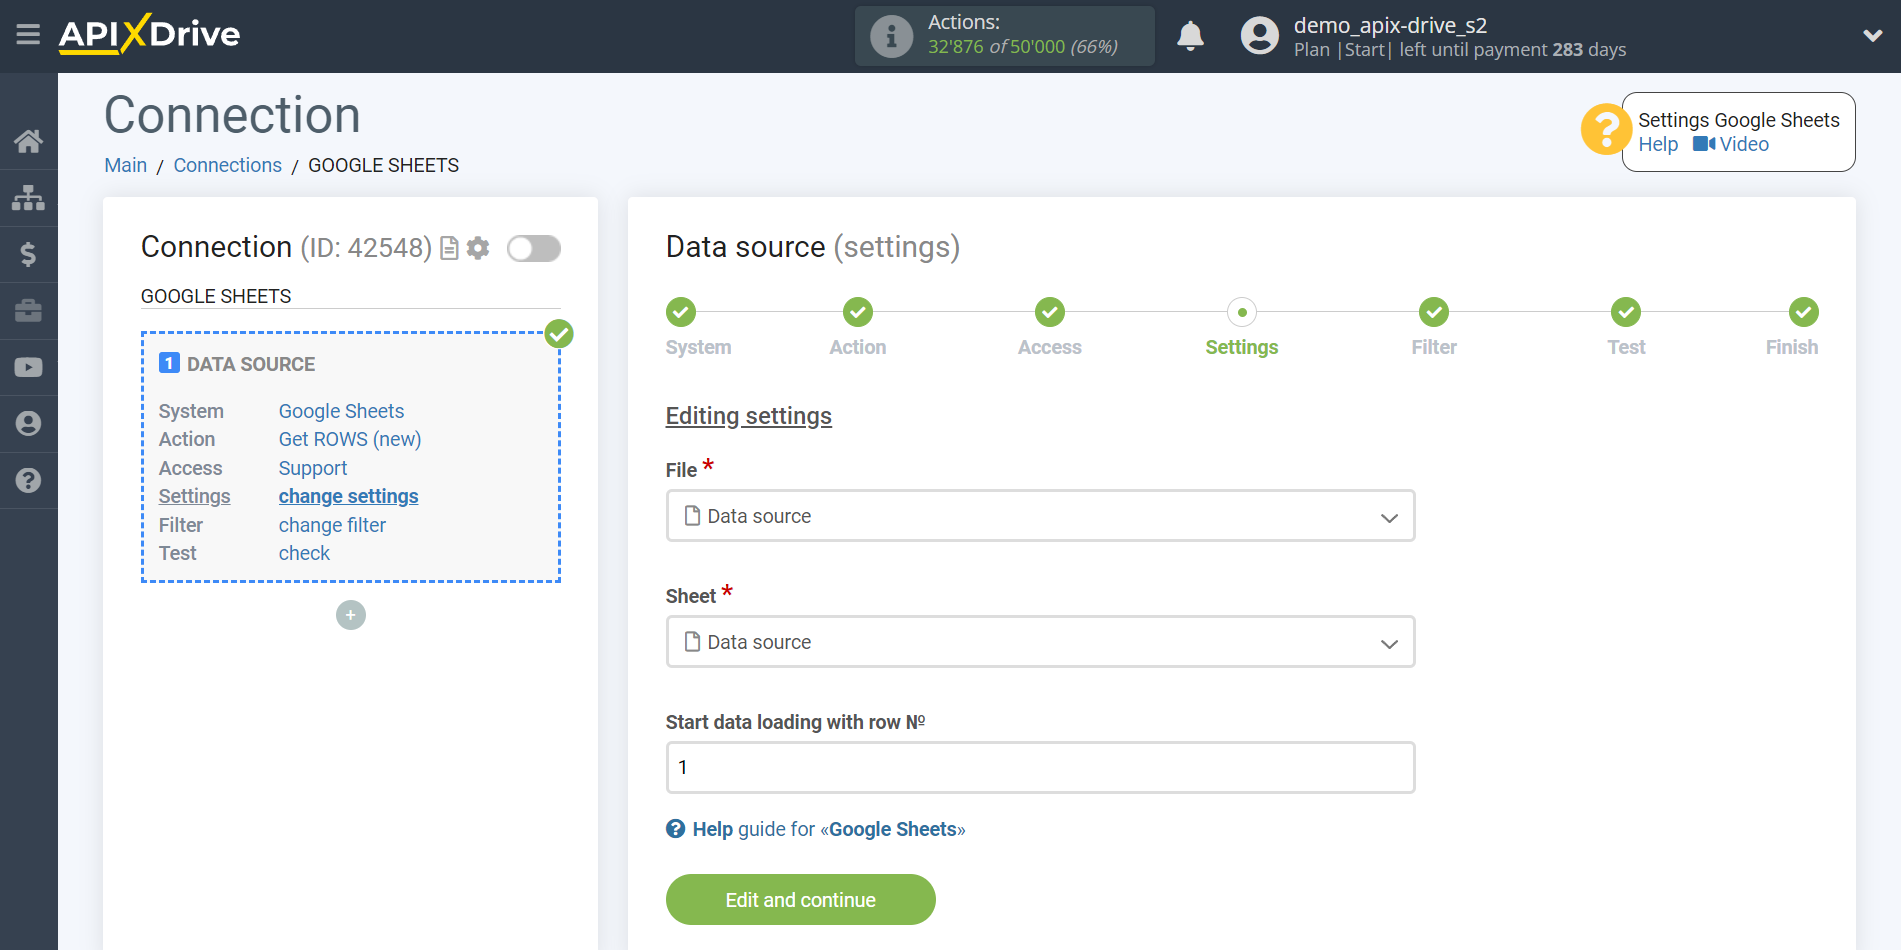
Select the Google Sheets table and sheet where the data you need is located.
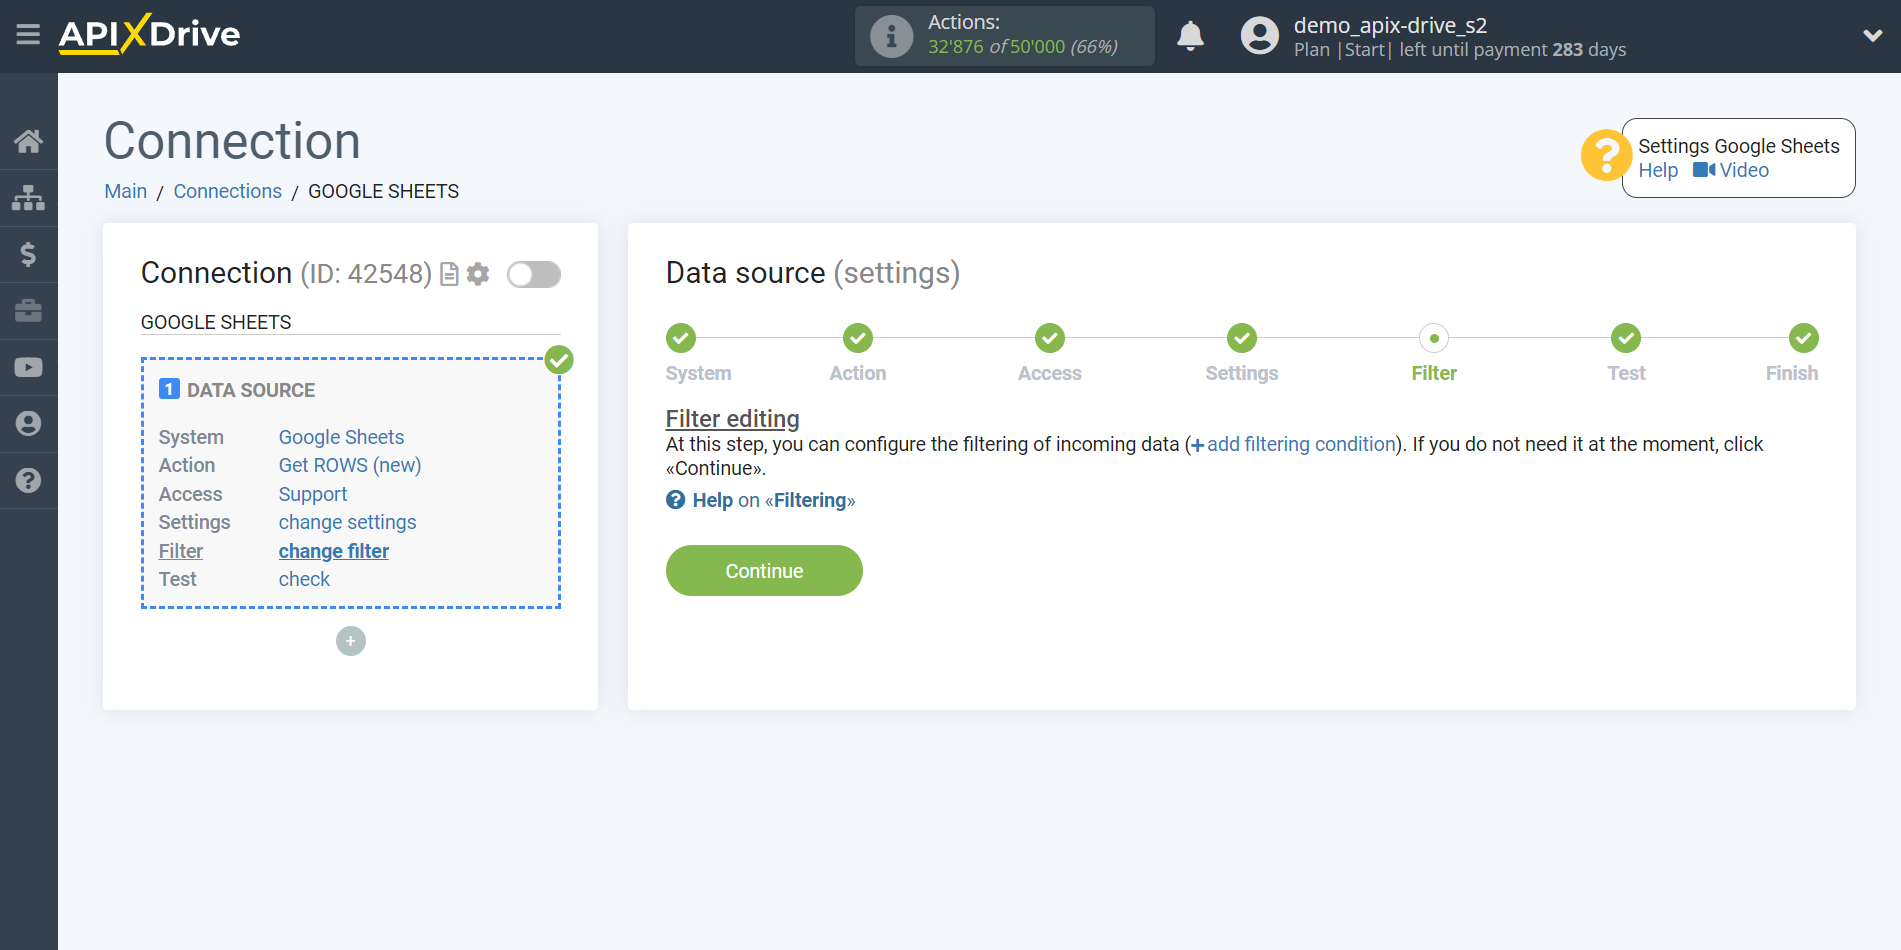
If necessary, you can set up a Data Filter, or click "Continue" to skip this step.
To find out how to setup the Data Filter, follow the link: https://apix-drive.com/en/help/data-filter
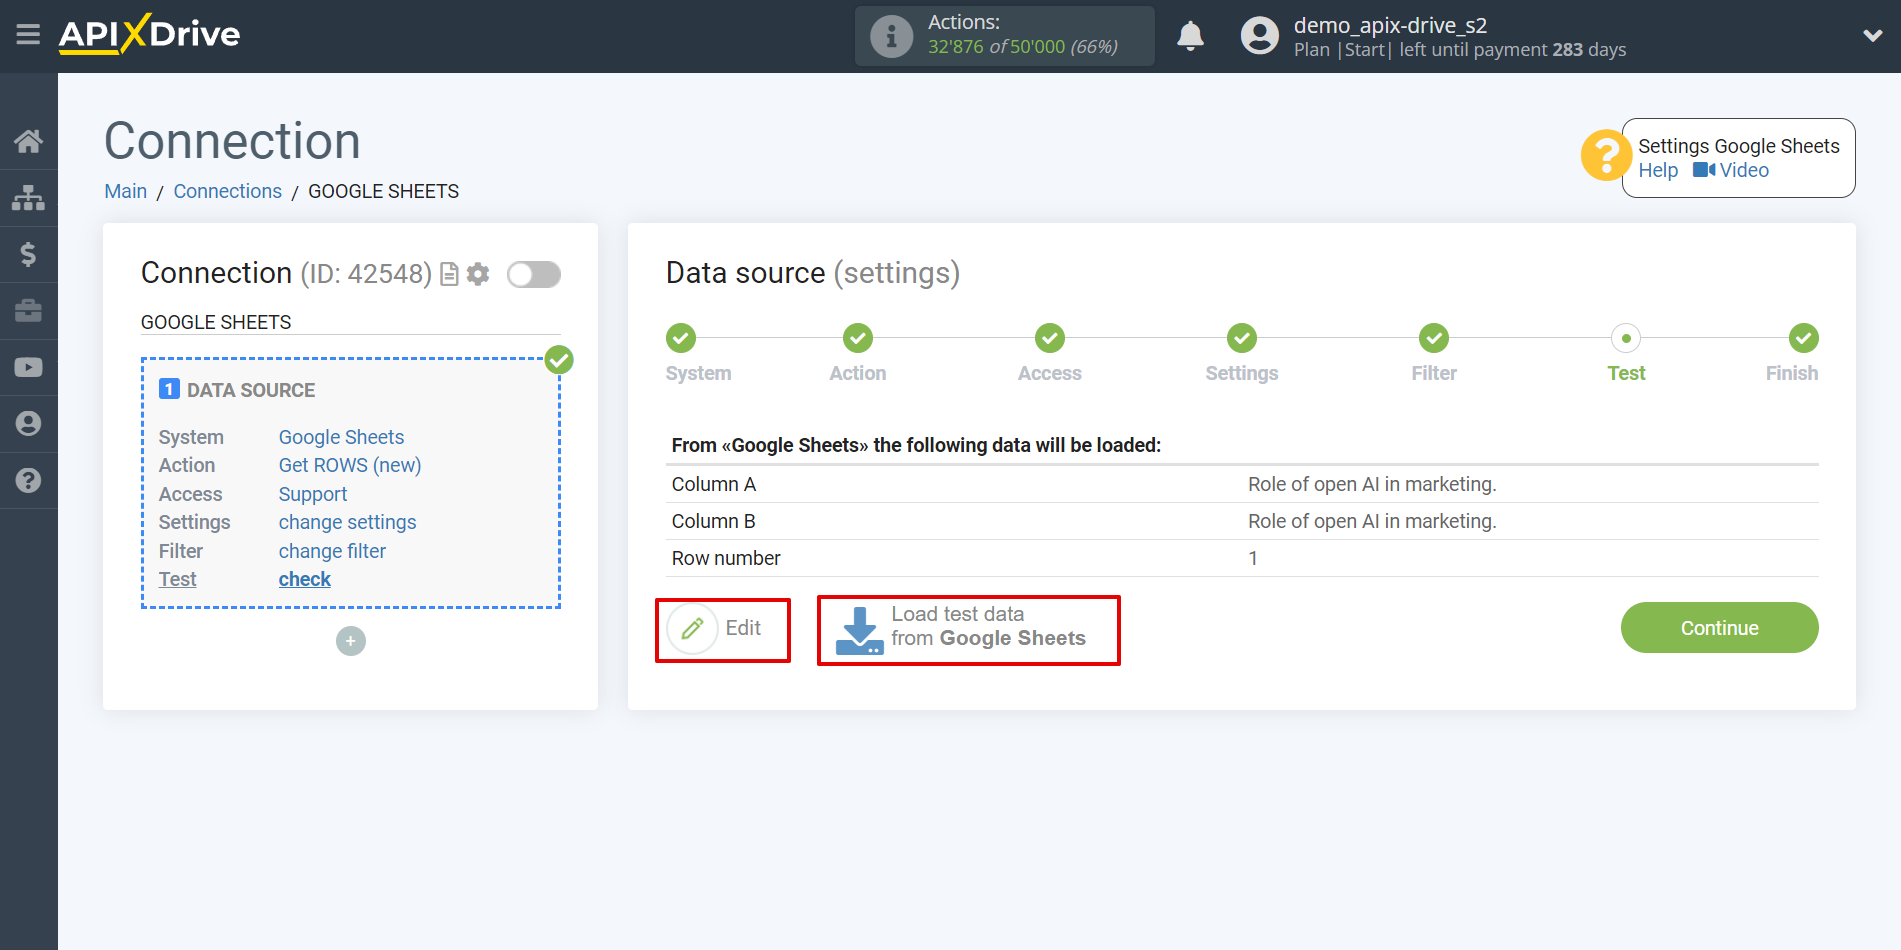
You can now see test data for one of the rows in your Google Sheets table.
If you want to update your test data, click "Download test data from Google Sheets."
If you want to change the settings, click "Edit" and you will go back a step.
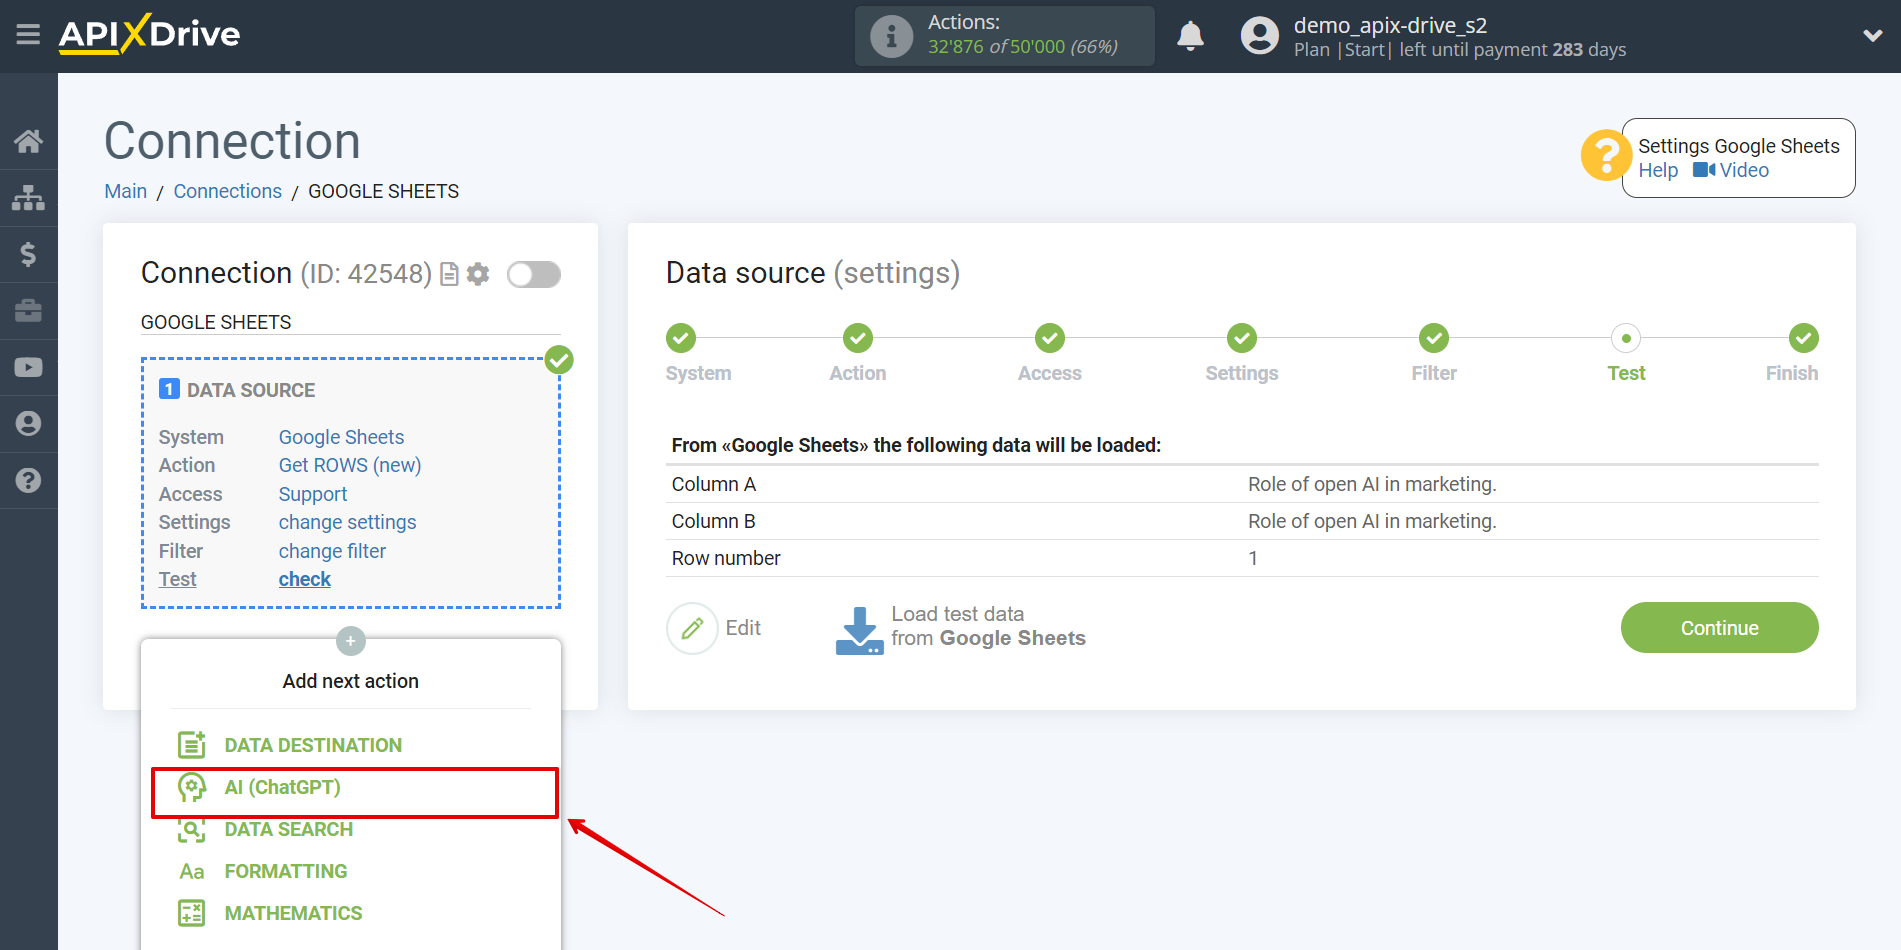
Now we connect the additional OpenAI block (ChatGPT). To do this, click on “+” and select “AI (GPT-Chat)” from the list.
Setting up OpenAI (ChatGPT)
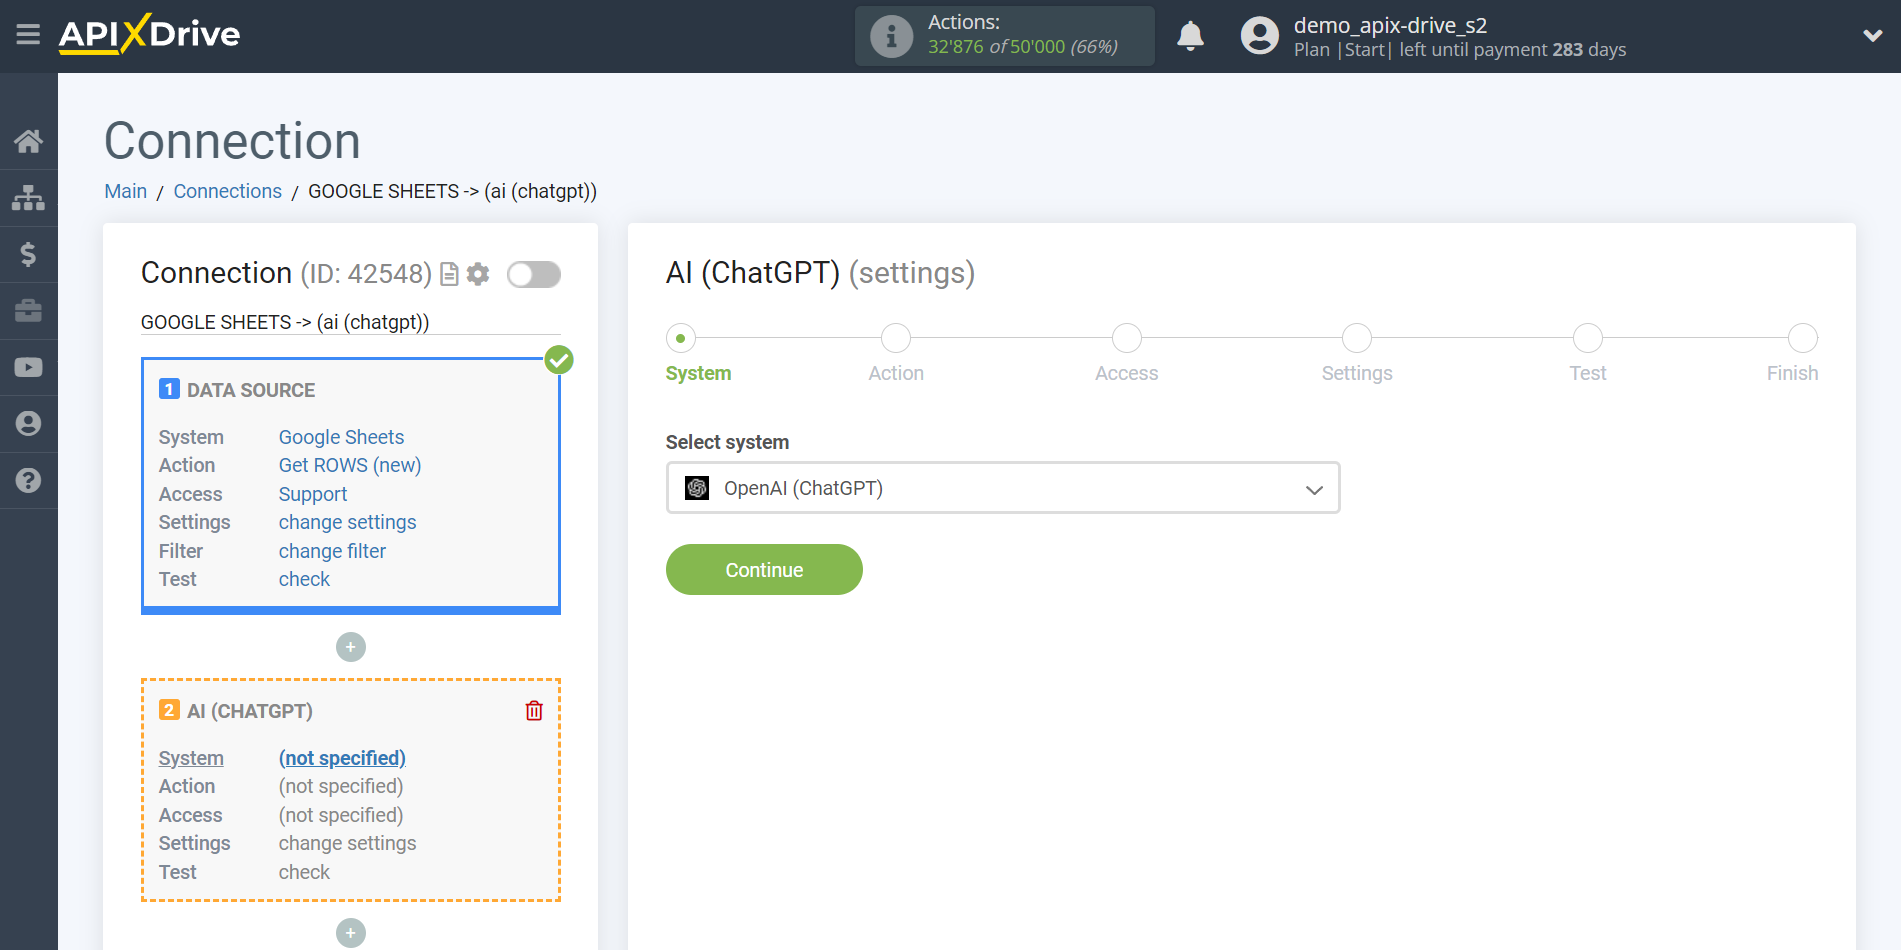
Select "OpenAI (ChatGPT)" as the system in which the search will be performed.
Next, you need to specify the action; for this task we recommend using GPT-4 or GPT-3.5. Select, for example, "Send PROMPT (GPT-3.5)".
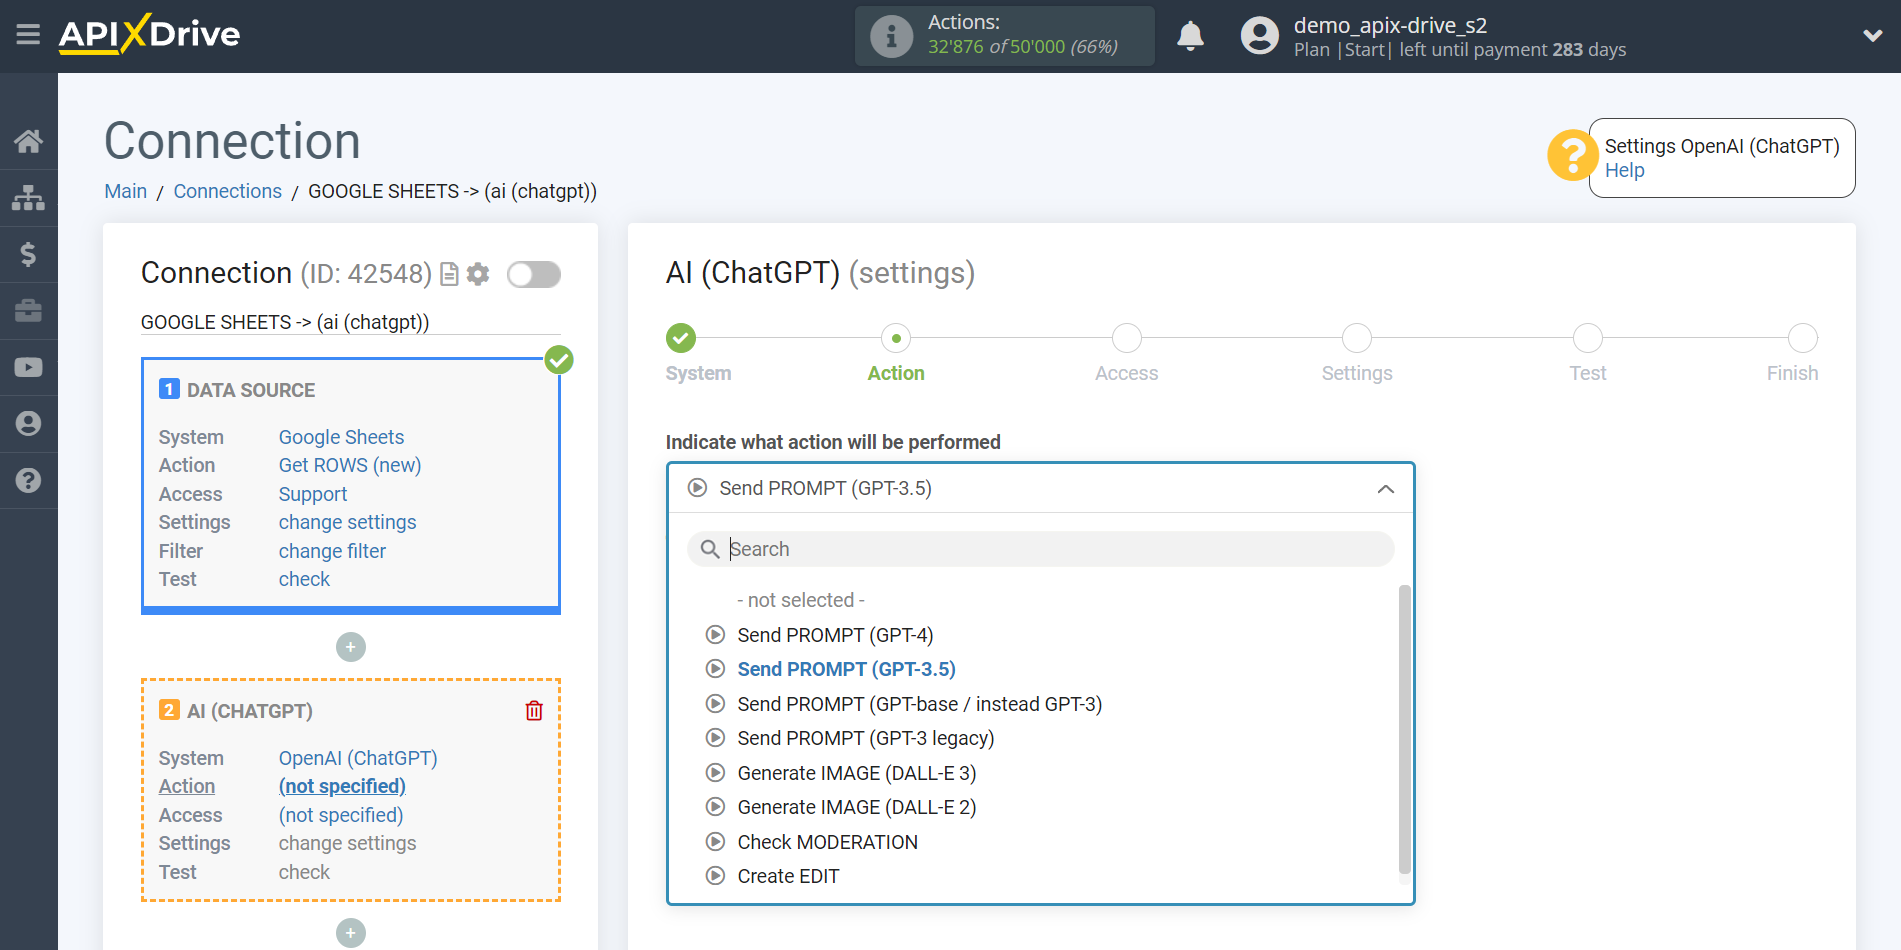
- Send PROMPT (GPT-4) is a large multi-modal model that can solve complex problems with greater accuracy.
(Available in the API for paid OpenAI users only!)
- Send PROMPT (GPT-3.5) - these models can understand and generate natural language or code. The most functional and economical model of the GPT-3.5 family is gpt-3.5-turbo.
The next step is to select an OpenAI (ChatGPT) account.
If there are no logins connected to the ApiX-Drive system, click “Connect account”.
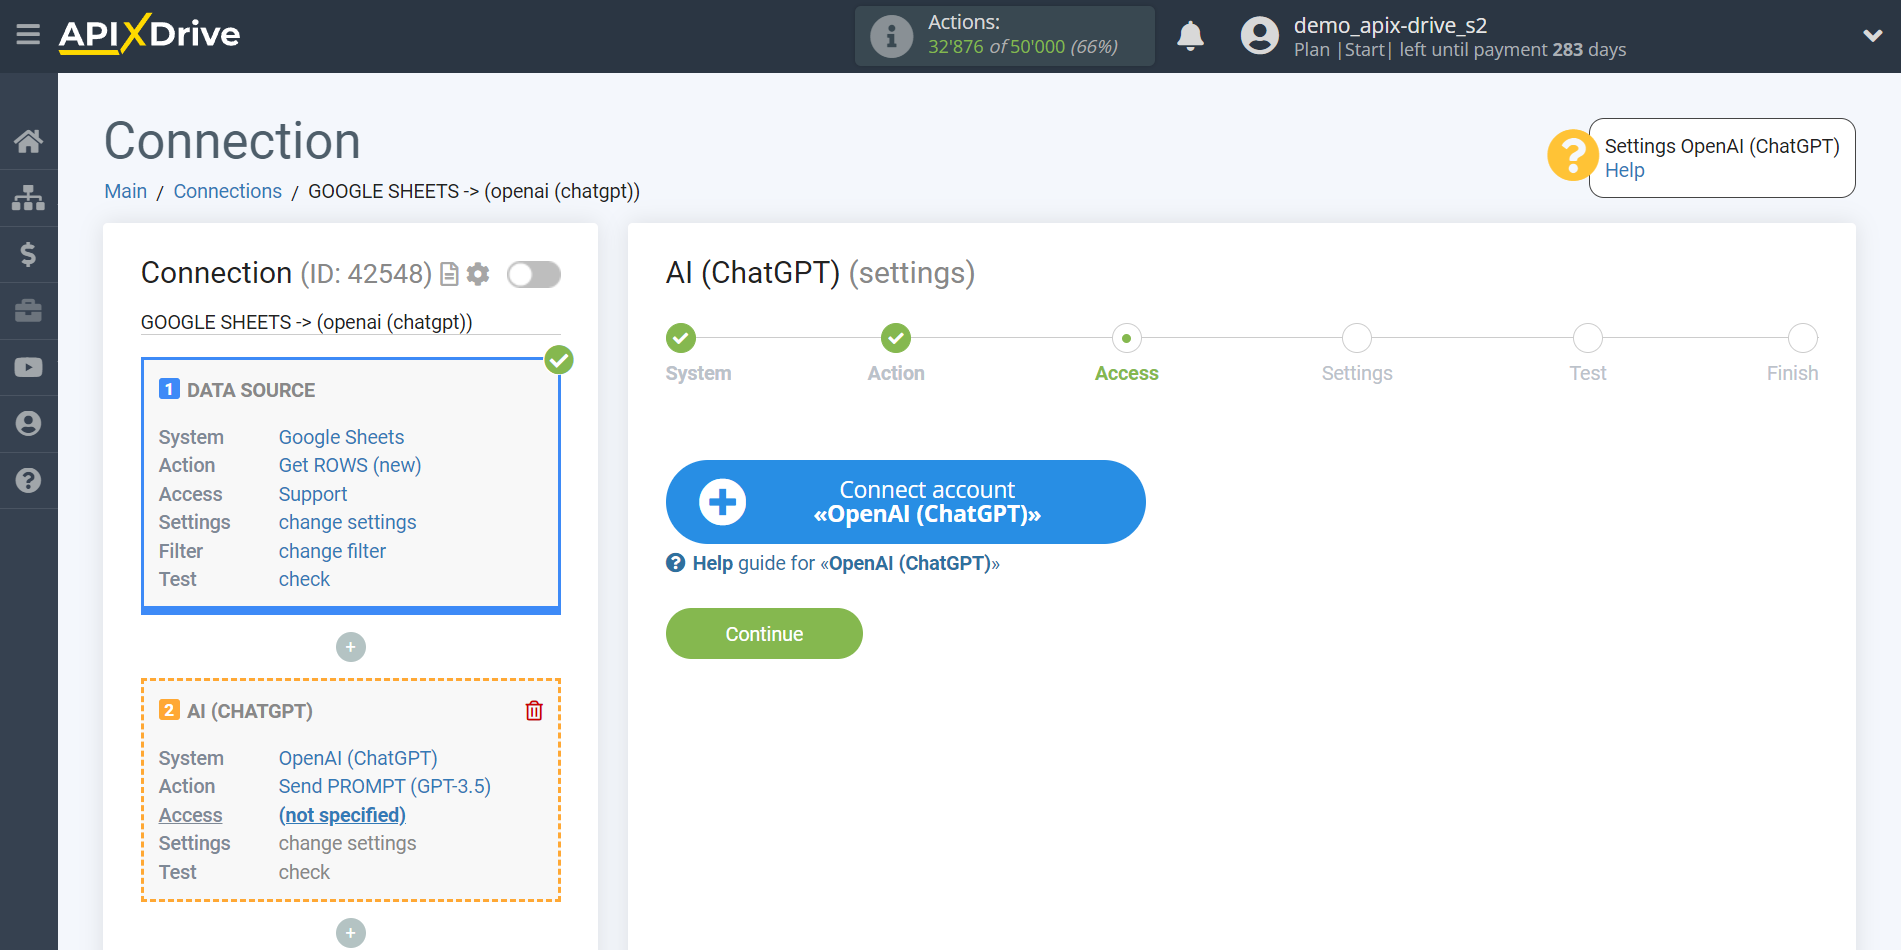
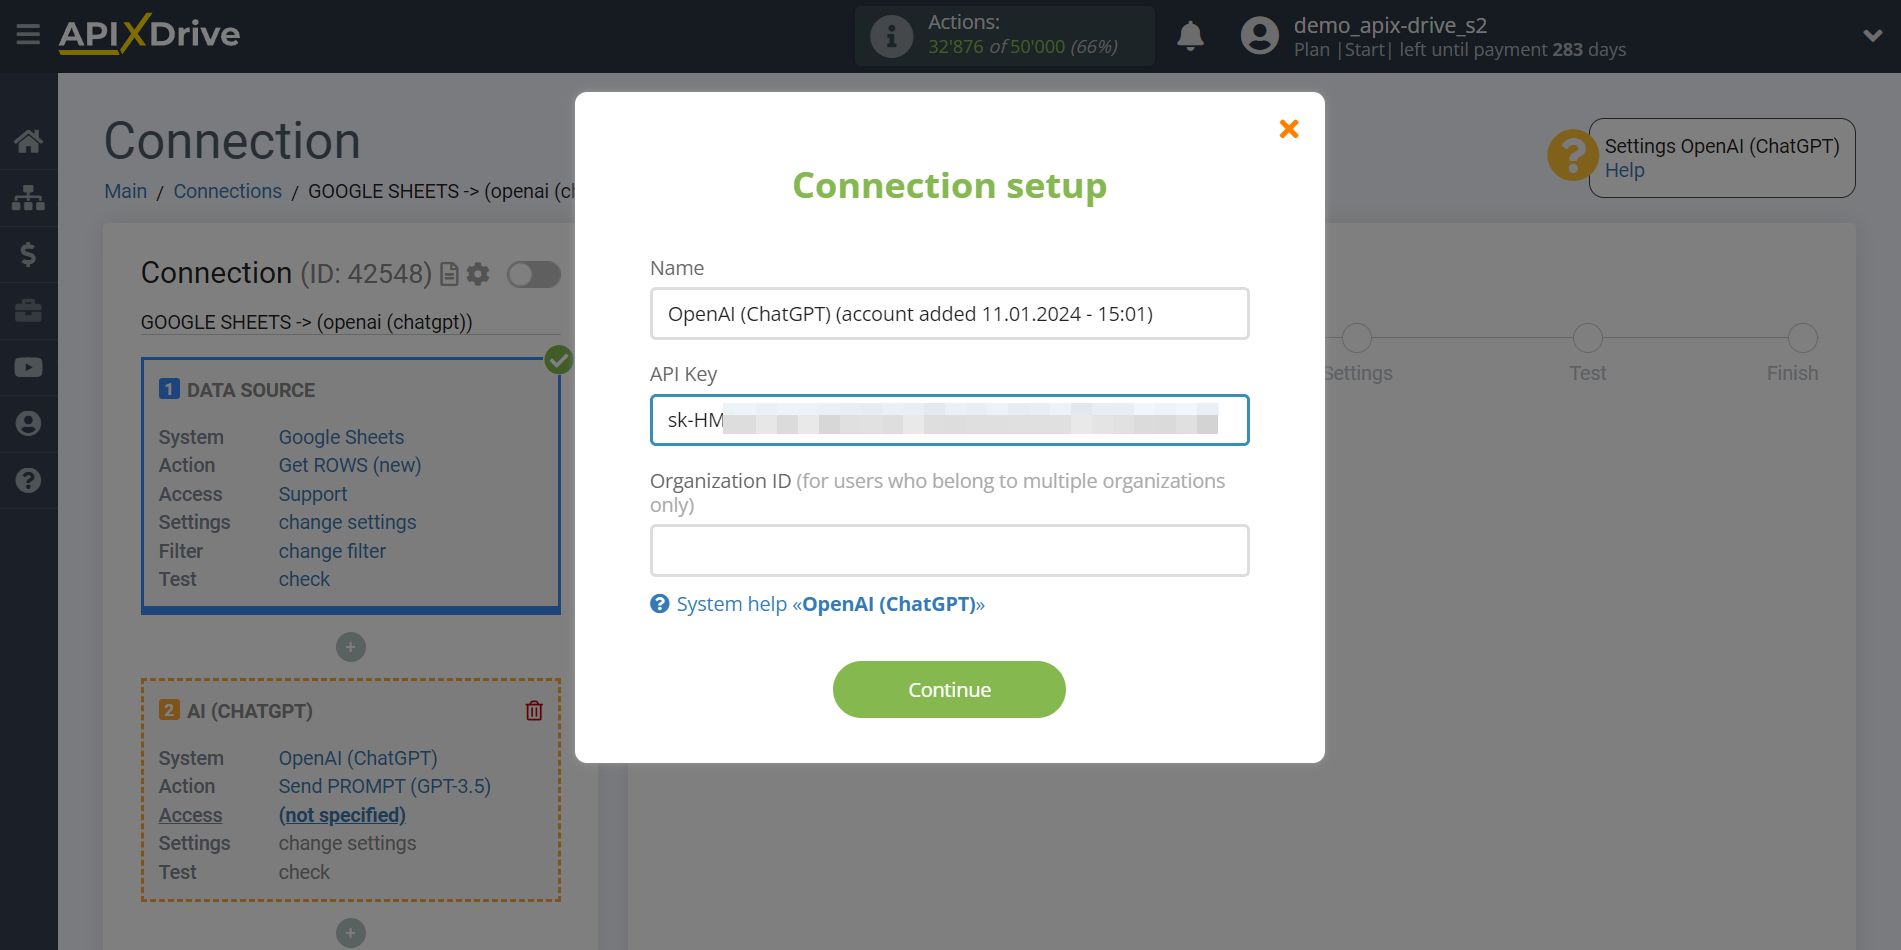
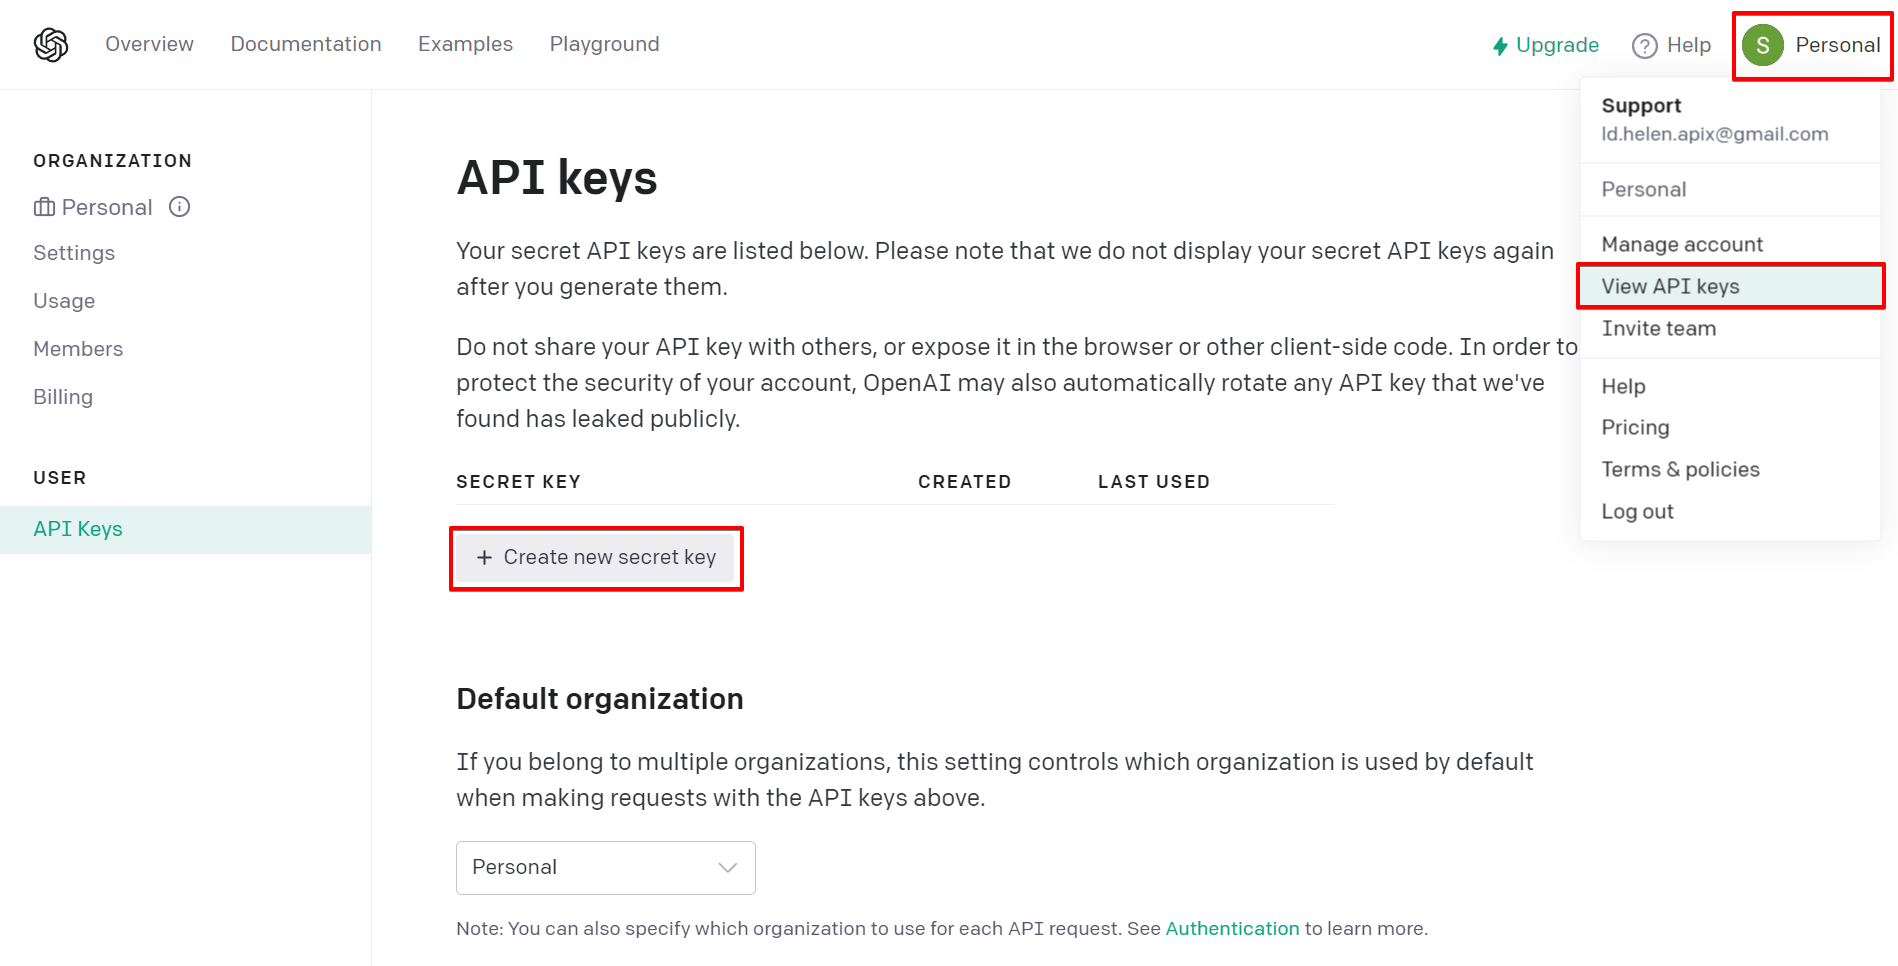
Enter the API key, which is located in the settings of your OpenAI (ChatGPT) personal account.
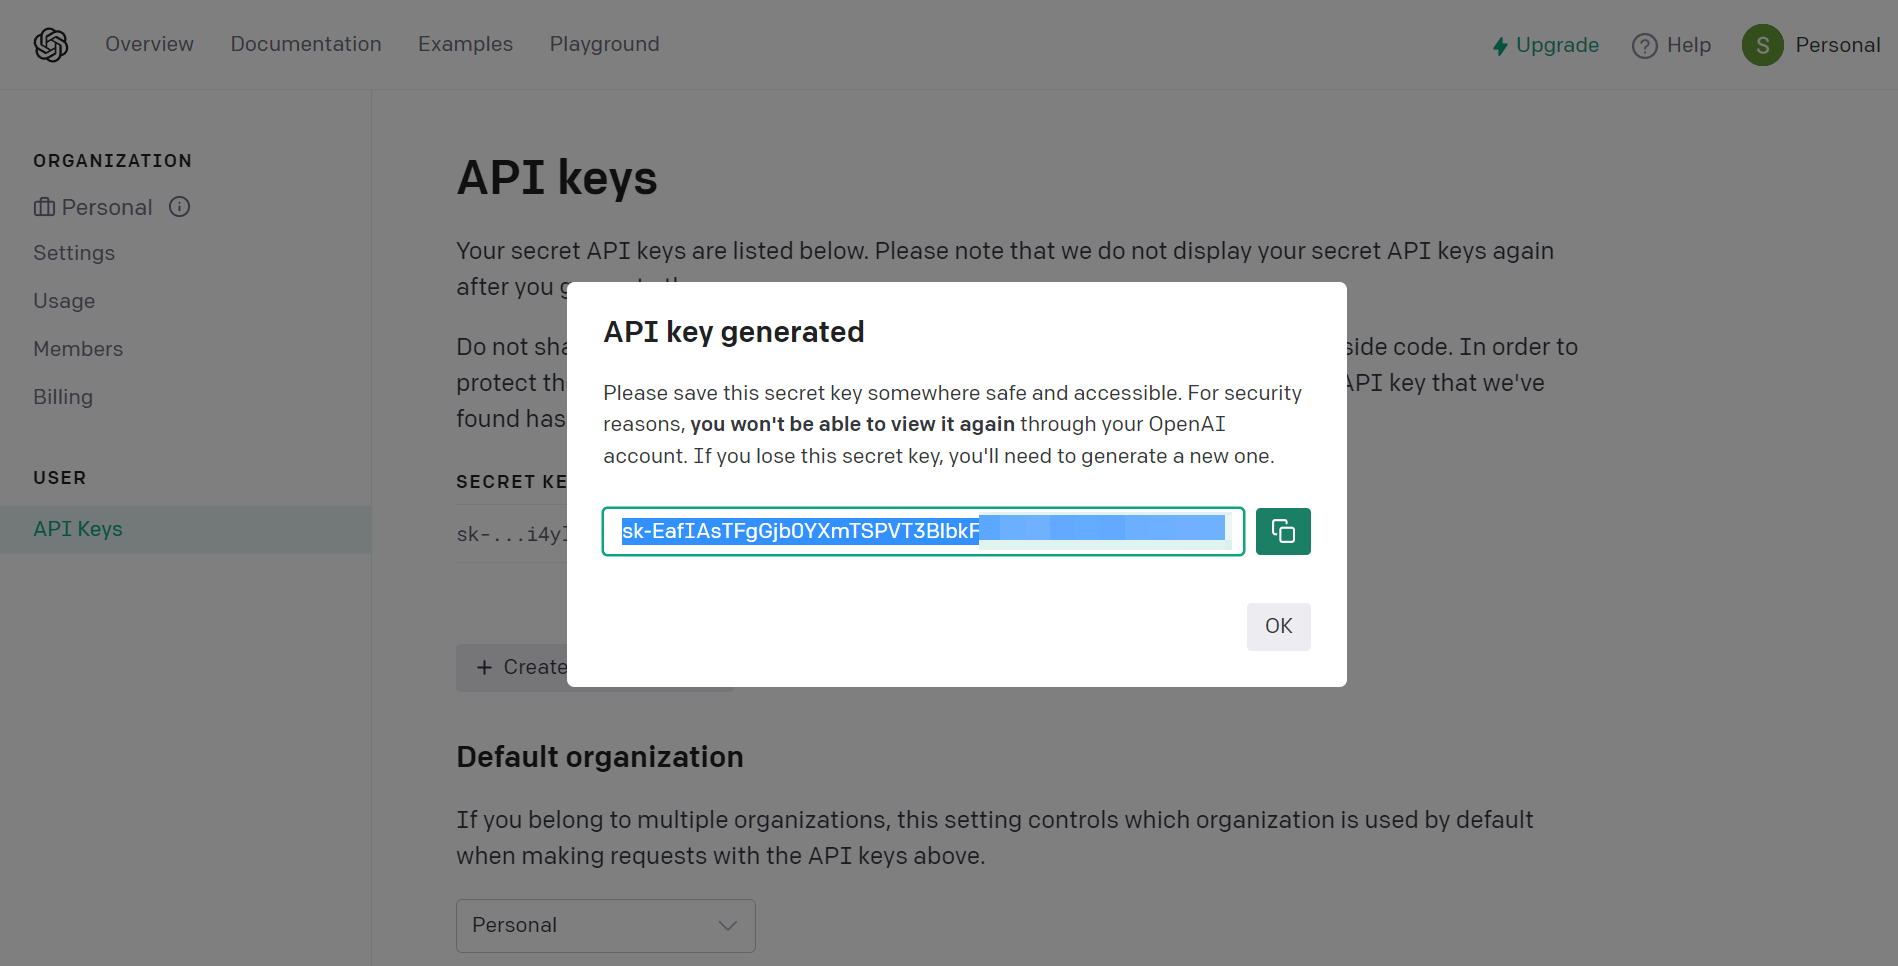
Go to your OpenAI (ChatGPT) account, click on the “Personal” tab in the upper right corner, then go to the “View API keys” section and click “Create new secret key”. Copy the API key and paste it into the appropriate field in the account connection window in the ApiX-Drive system.
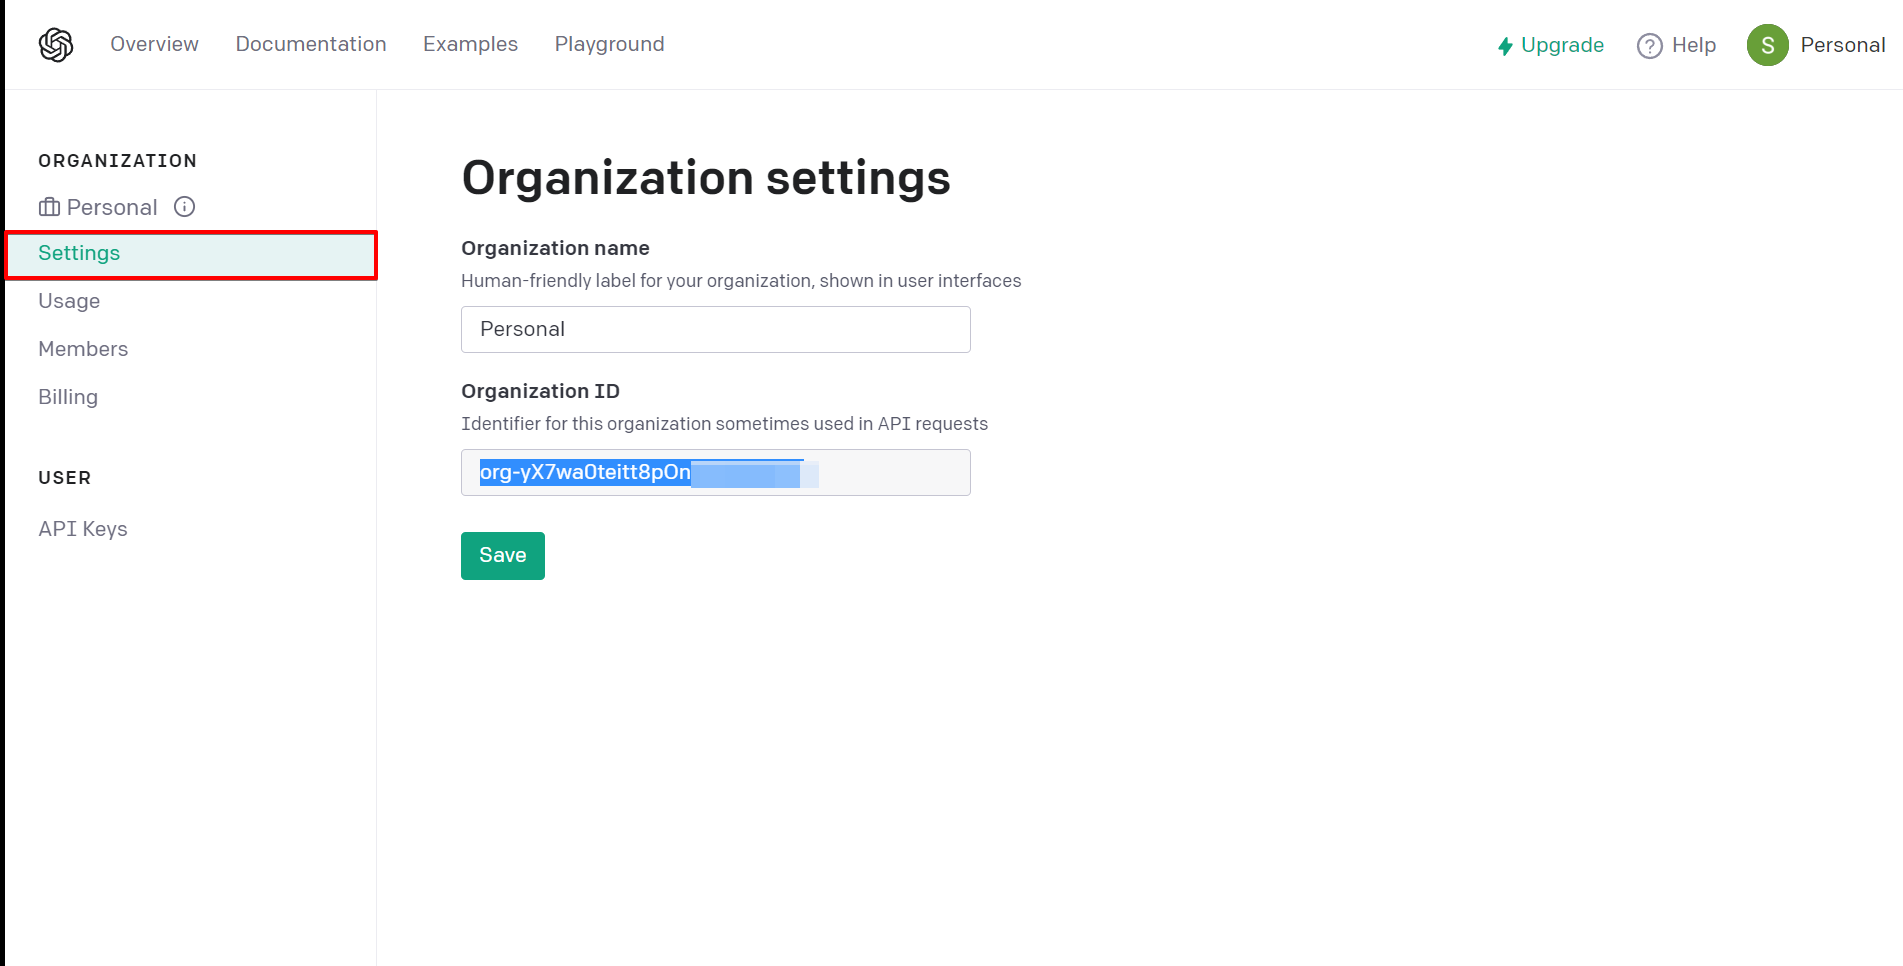
If your OpenAI (ChatGPT) account belongs to multiple organizations, you must also provide the Organization ID. To do this, go to "Settings" and copy the Organization ID.
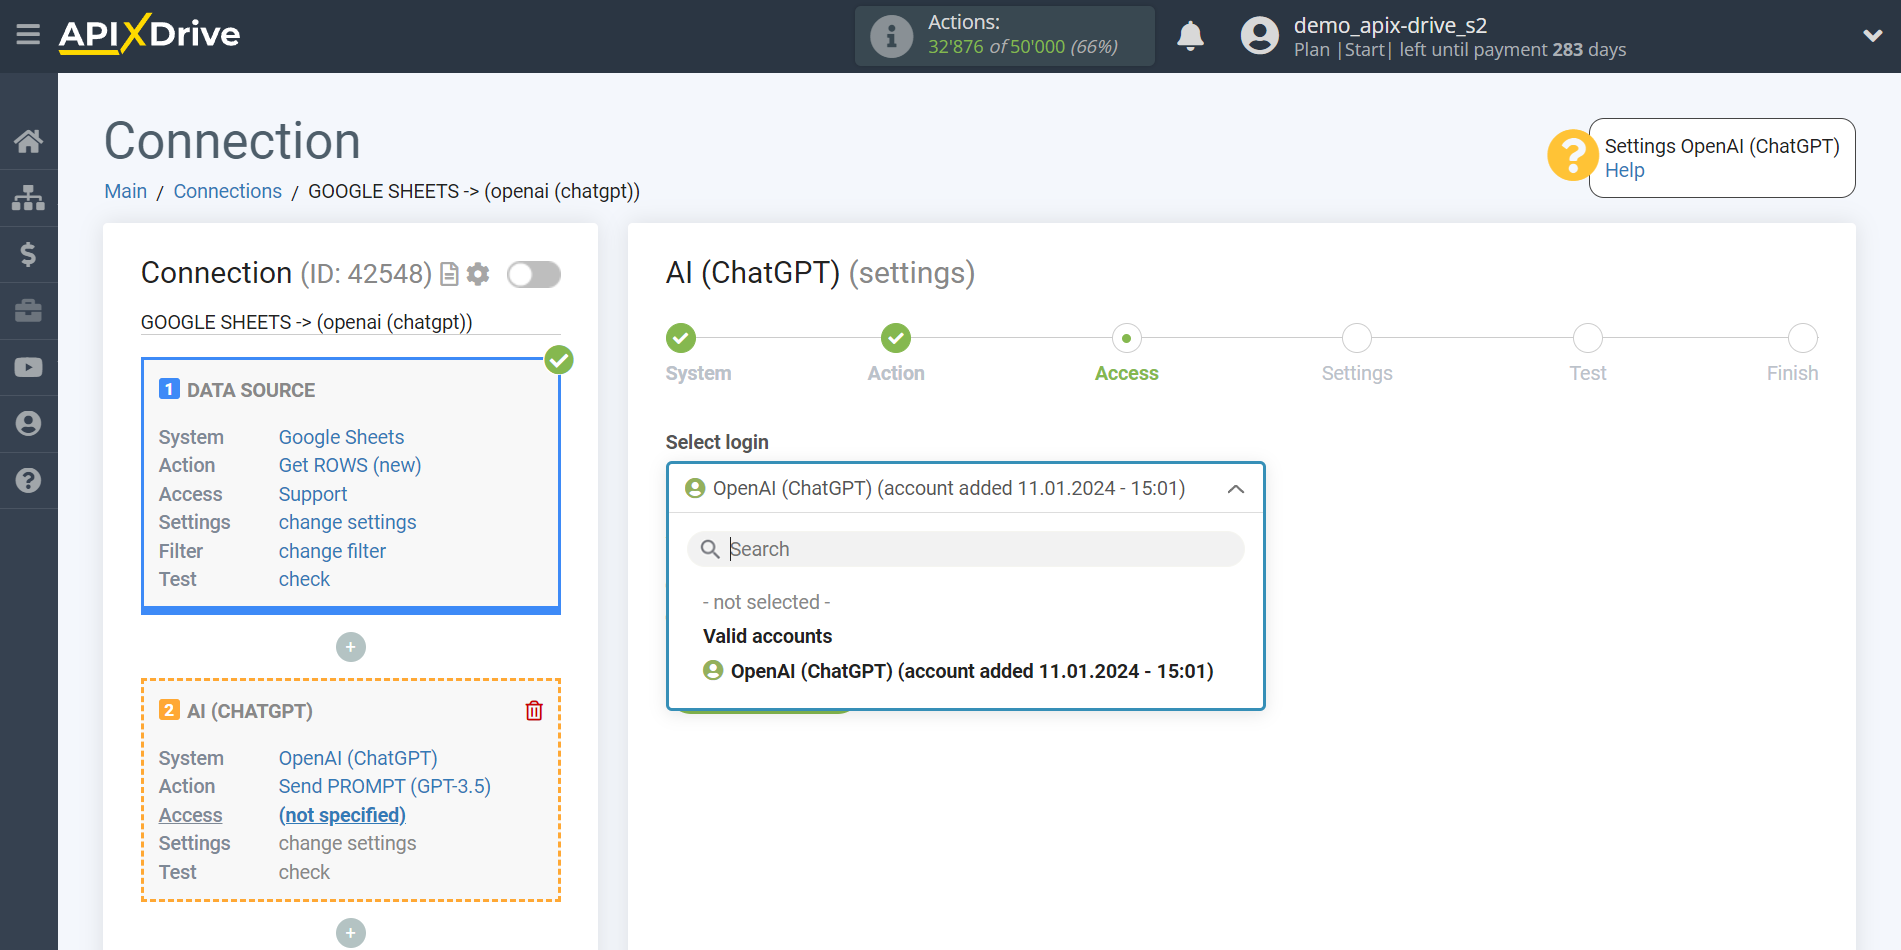
Click "Save" and select the connected OpenAI (ChatGPT) account from the drop-down list.
When the connected account appears in the "active accounts" list, select it for further work.
Attention! If your account is on the "inactive accounts" list, check your access to this login!
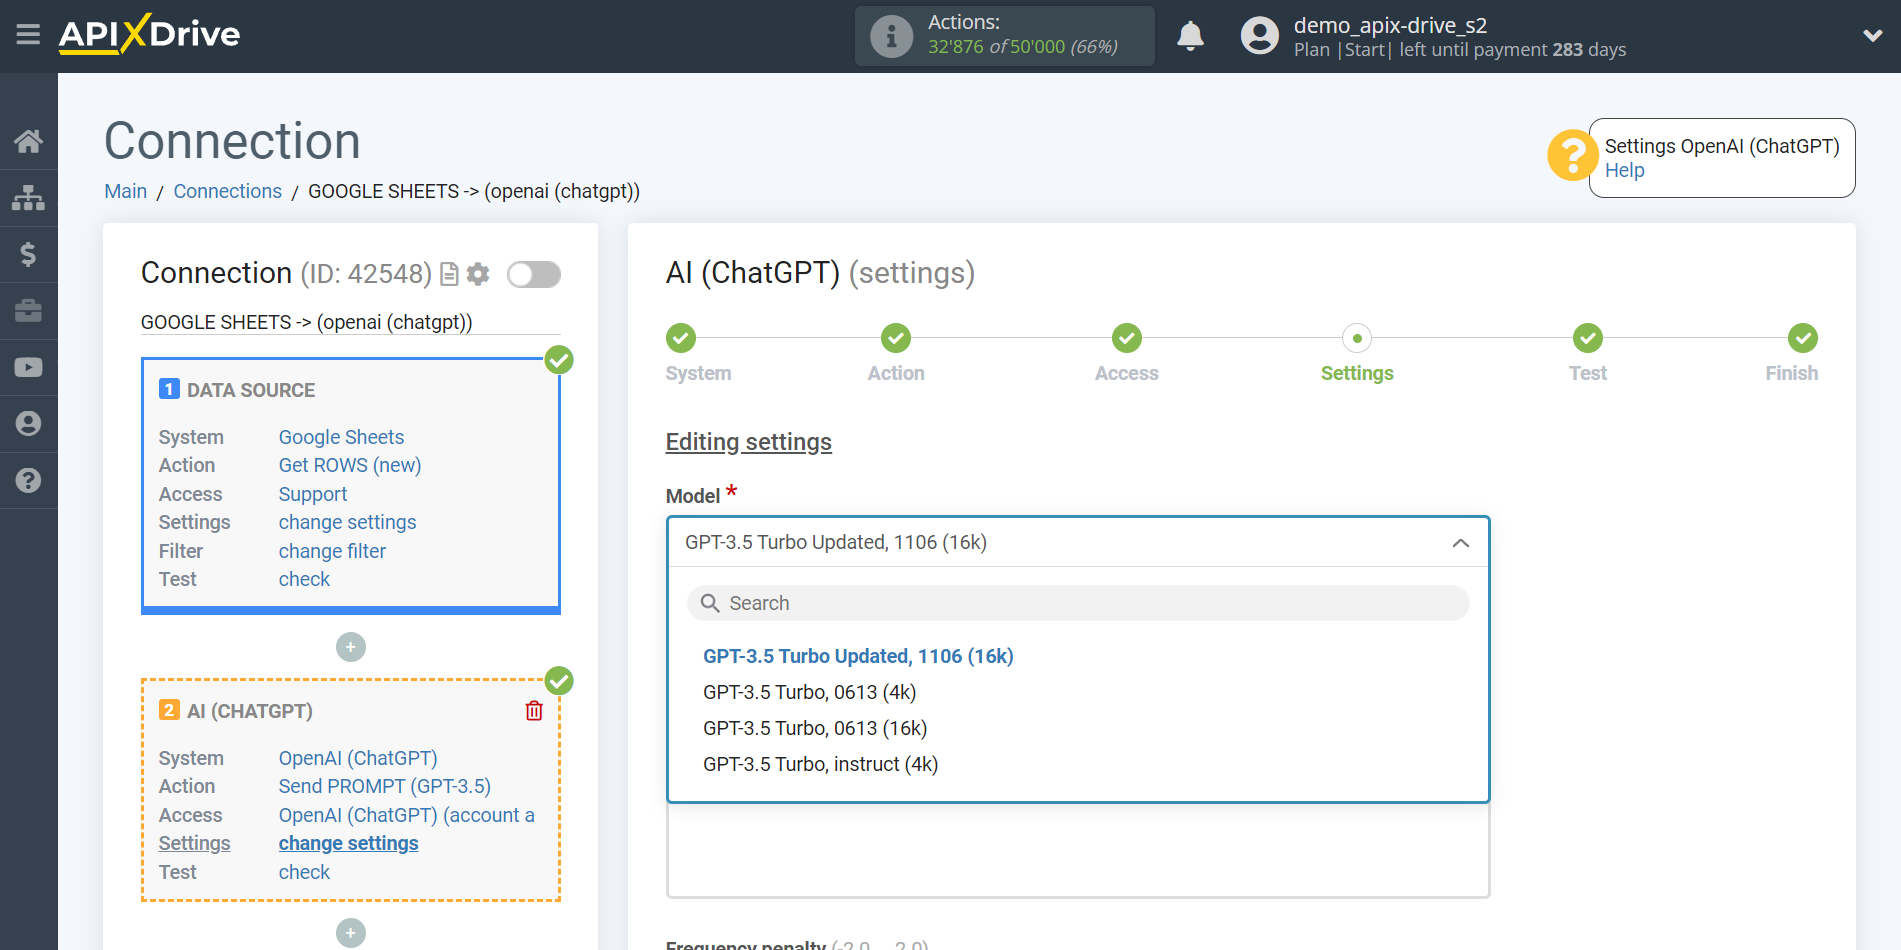
Now you need to select OpenAI Model. The choice of model depends on your task.
GPT-4 models can solve complex problems with greater accuracy than previous models. GPT-4 is optimized for chat and has JSON mode. Models are suitable for writing code, analyzing and writing texts, answering questions about the knowledge base. These models also do a better job of translating into other languages than previous models.
More details about the models:
GPT-4
GPT-3.5 models can understand and generate natural language or code. Functional and economically optimal models. Suitable for traditional tasks such as analysis or generation of text and code, translation of texts.
More details about the models:
In this case, select, for example, "GPT-3.5 Turbo Updated 1106 (16k)".
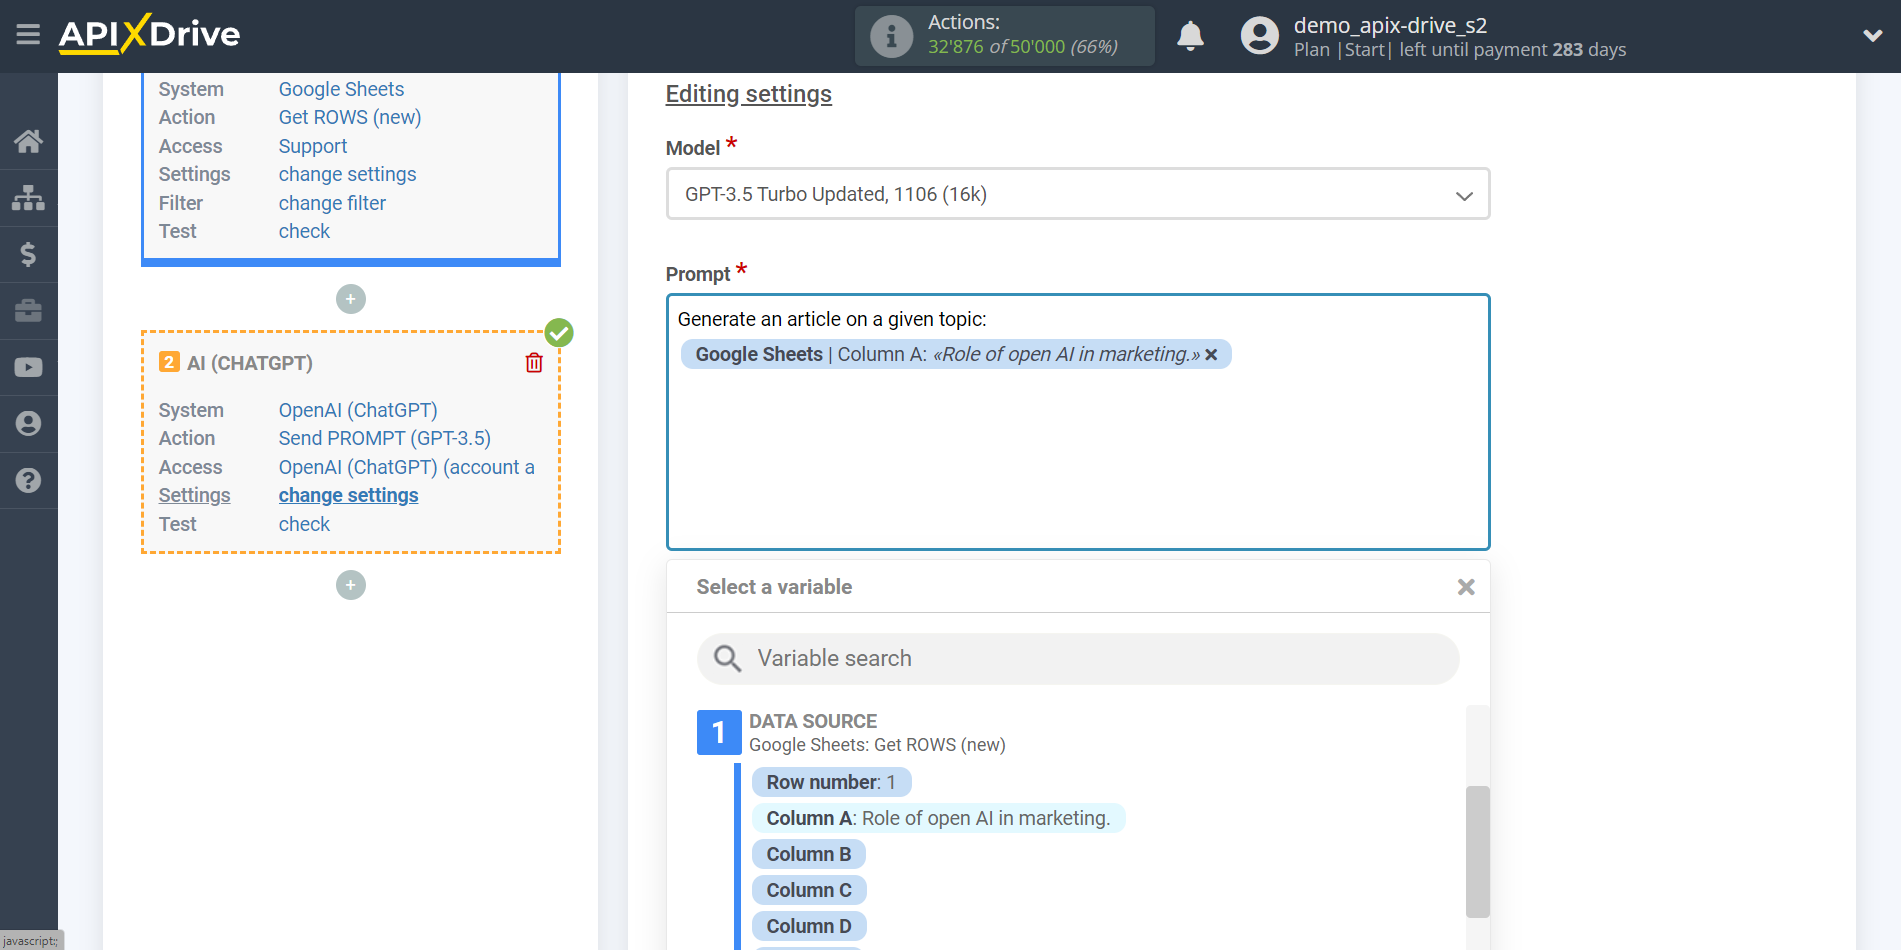
- Prompt - in this field you need to assign which variable of the Data Source table contains the data for which the query will be made on the OpenAI server (ChatGPT), in our case, this is column “A”.
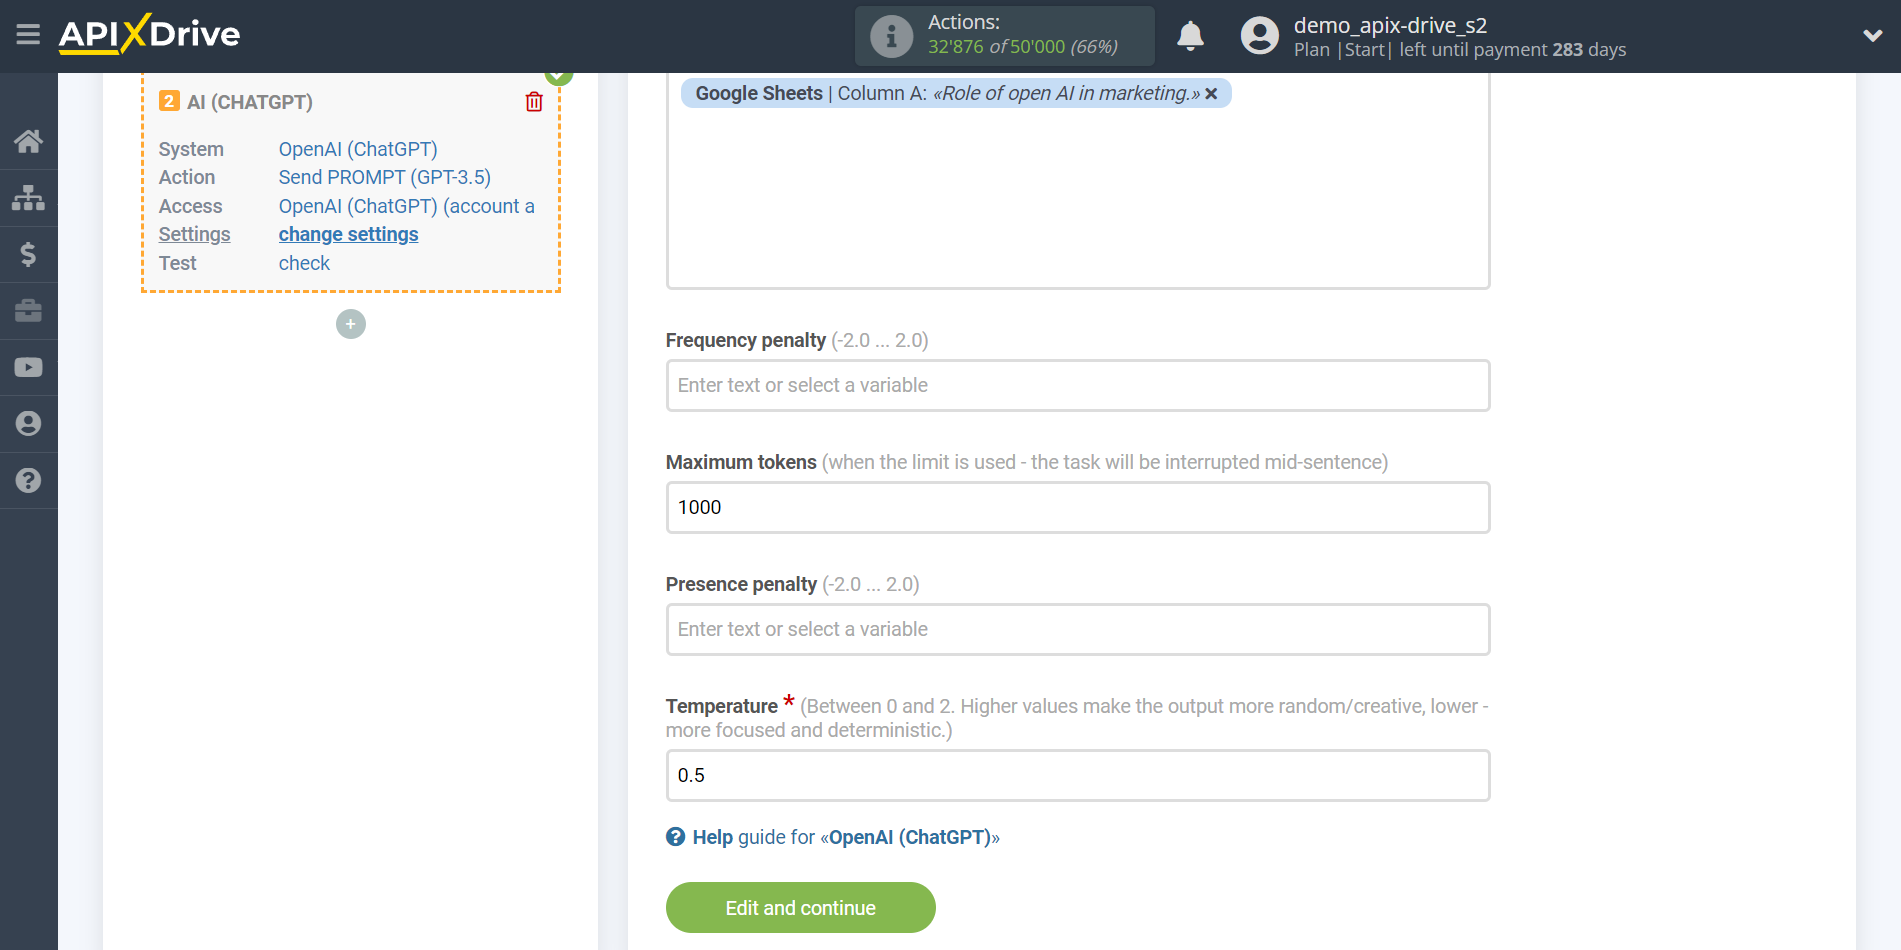
- Maximum tokens - is the number of words up to which generation will continue in OpenAI. 1,000 tokens - 750 words.
-Presence penalty - This parameter is used to encourage the model to include a variety of tokens in the generated text. This is the value that is subtracted from the log likelihood of the token each time it is generated. A higher Presence Penalty value will cause the model to be more likely to generate tokens that were not already included in the generated text.
-Frequency penalty - this parameter is used to prevent the model from repeating the same words or phrases too often in the generated text. This is the value that is added to the log likelihood of the token each time it appears in the generated text. A higher Frequency Penalty value will cause the model to be more conservative in its use of duplicate tokens.
-Temperature - can range from 0 to 2. Higher values such as 0.8 will make the output more random, while lower values such as 0.2 will make it more focused and deterministic.
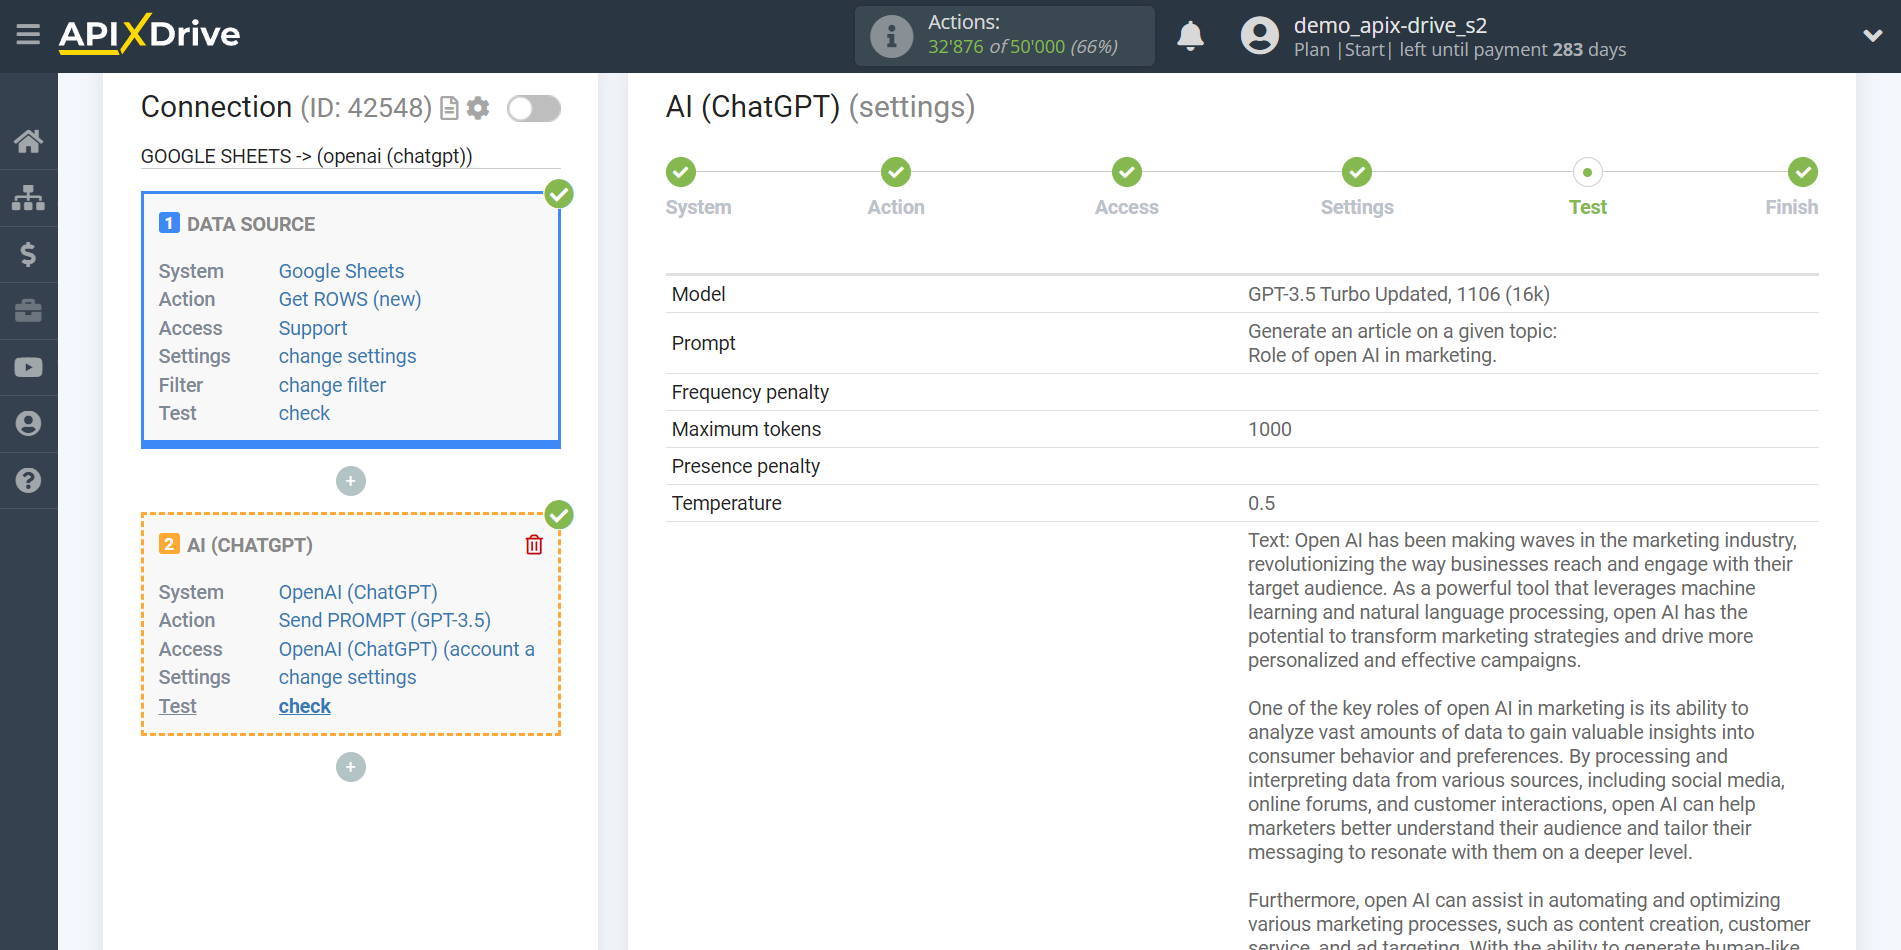
Now you see test data for your request. You can pass this data to your Data Destination.
If test data does not appear automatically, click "Search in OpenAI (ChatGPT)".
If you are not satisfied with something, click “Edit”, go back a step and change the search field settings.
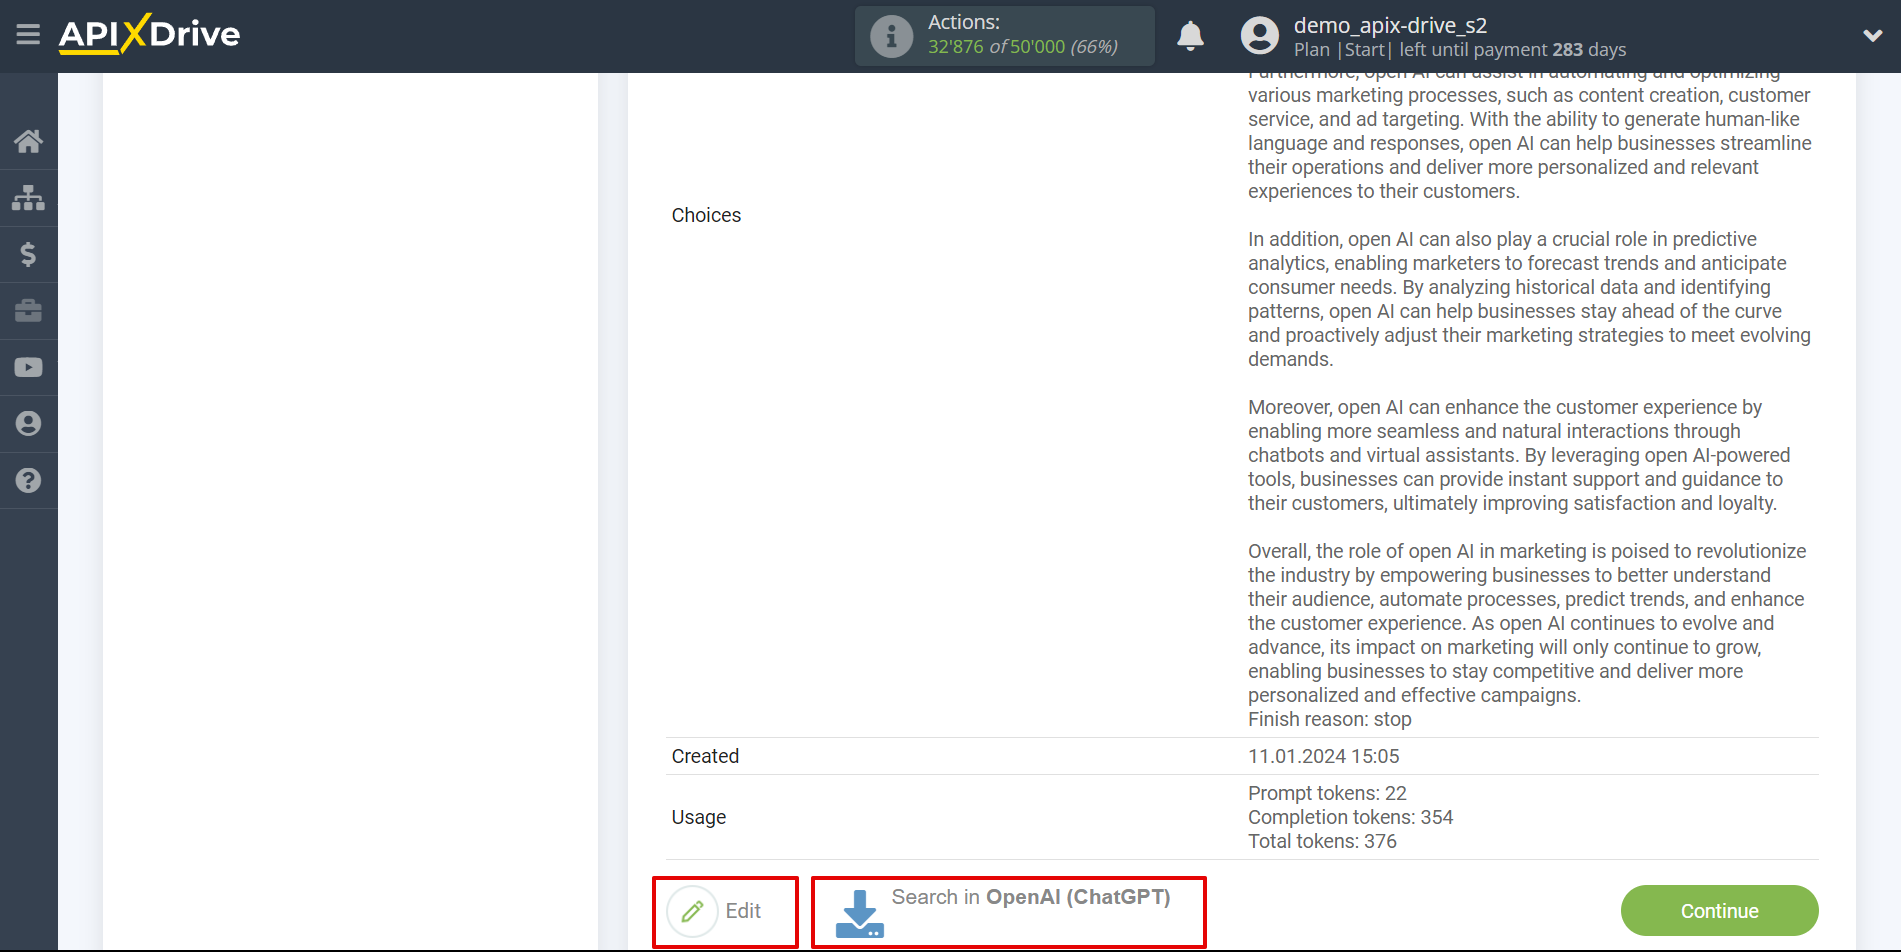
This completes the OpenAI (ChatGPT) data setup!
Now we can start setting up Google Sheets as a Data Destination system.
To do this, click "Add Data Receiver".
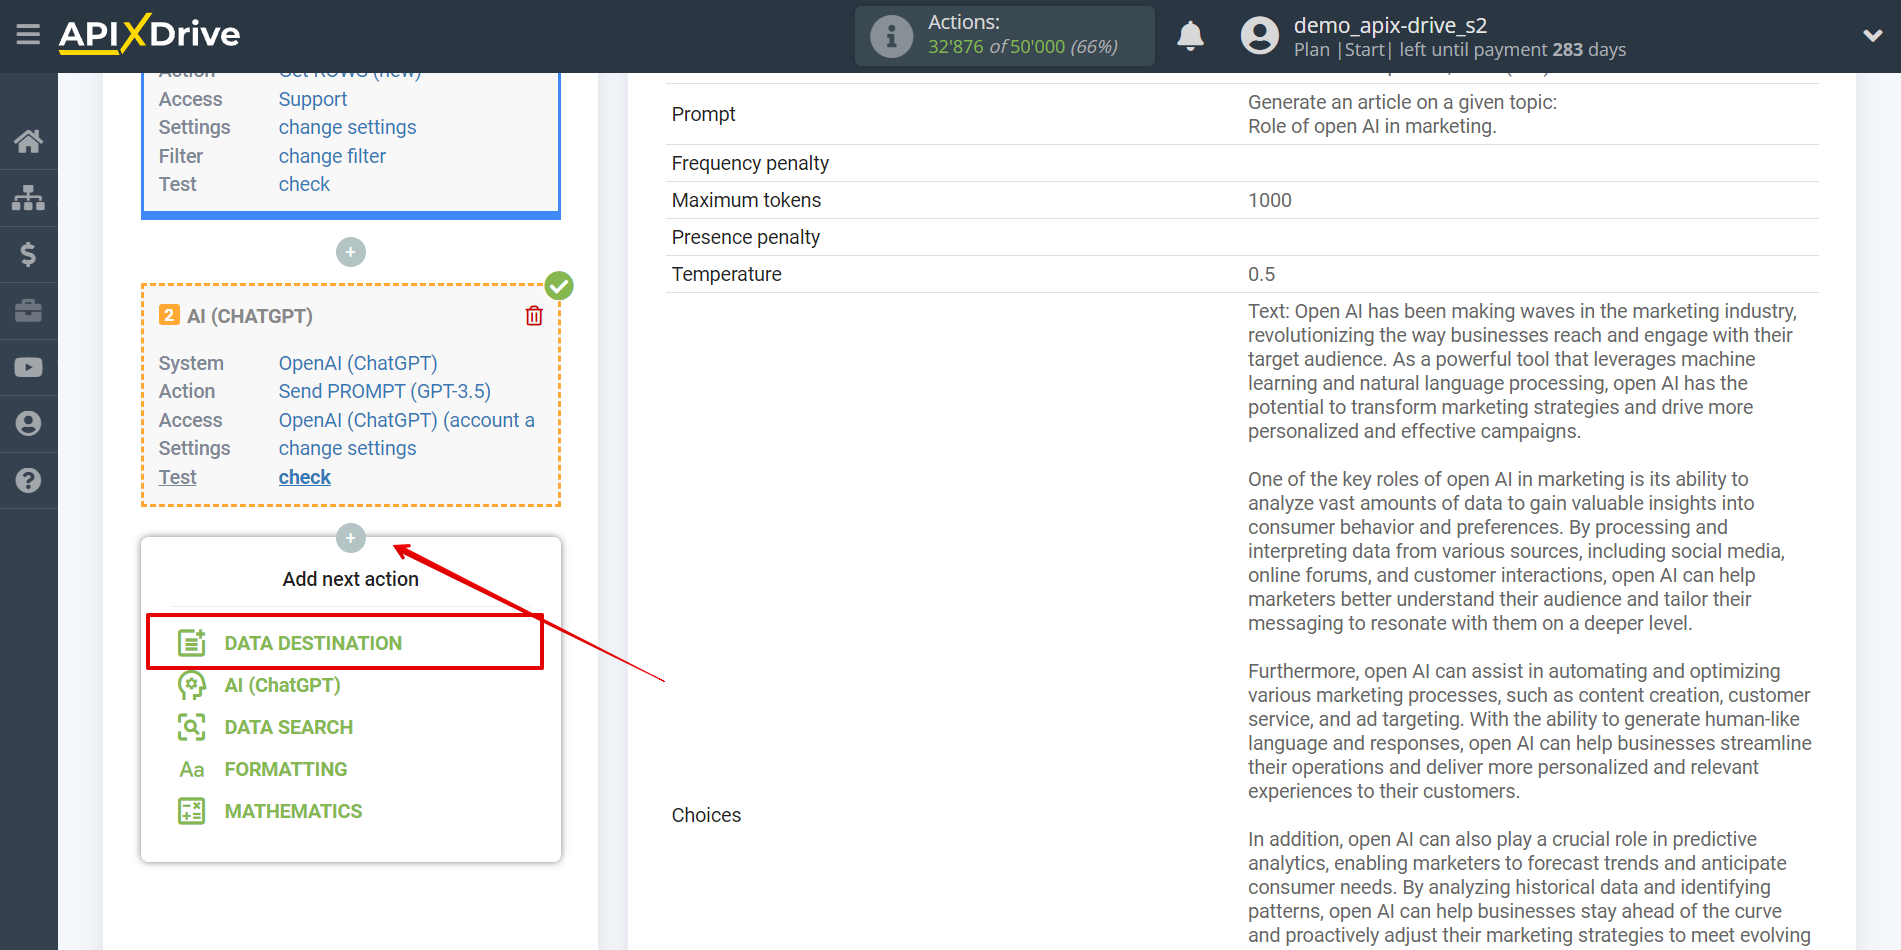
Setting up Data Destination: Discord
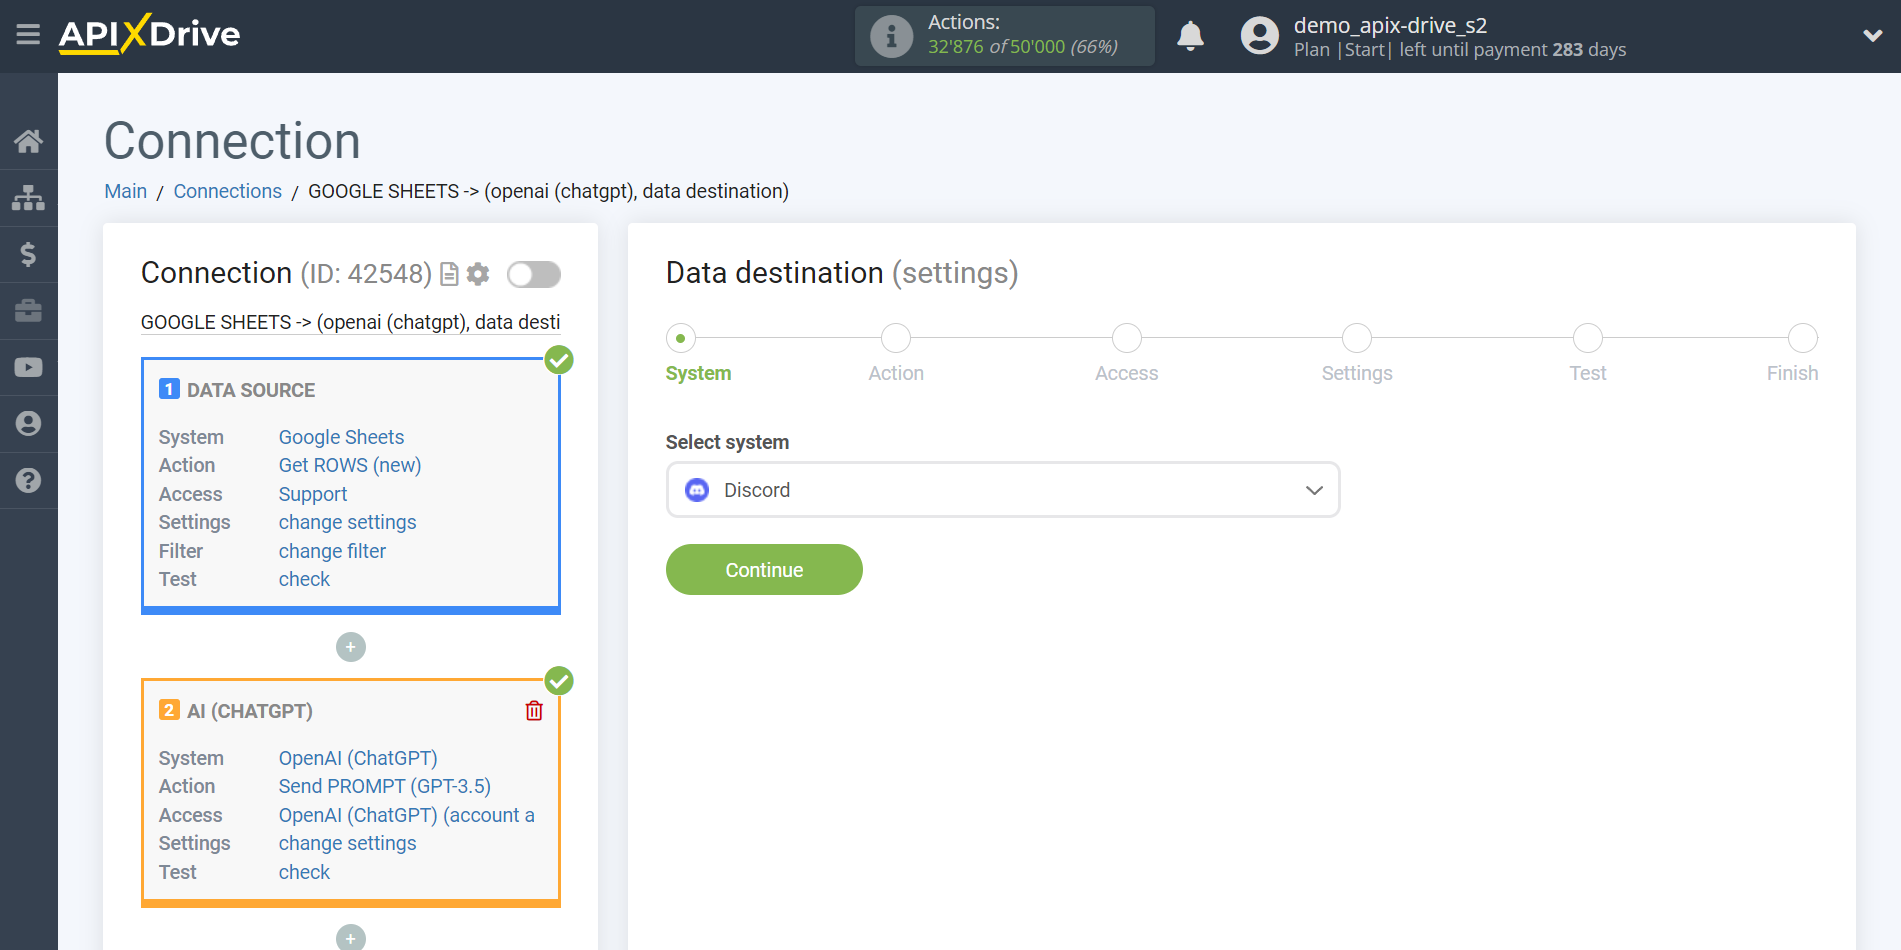
Select the system as Data Receiver. In this case, you must specify Discord.
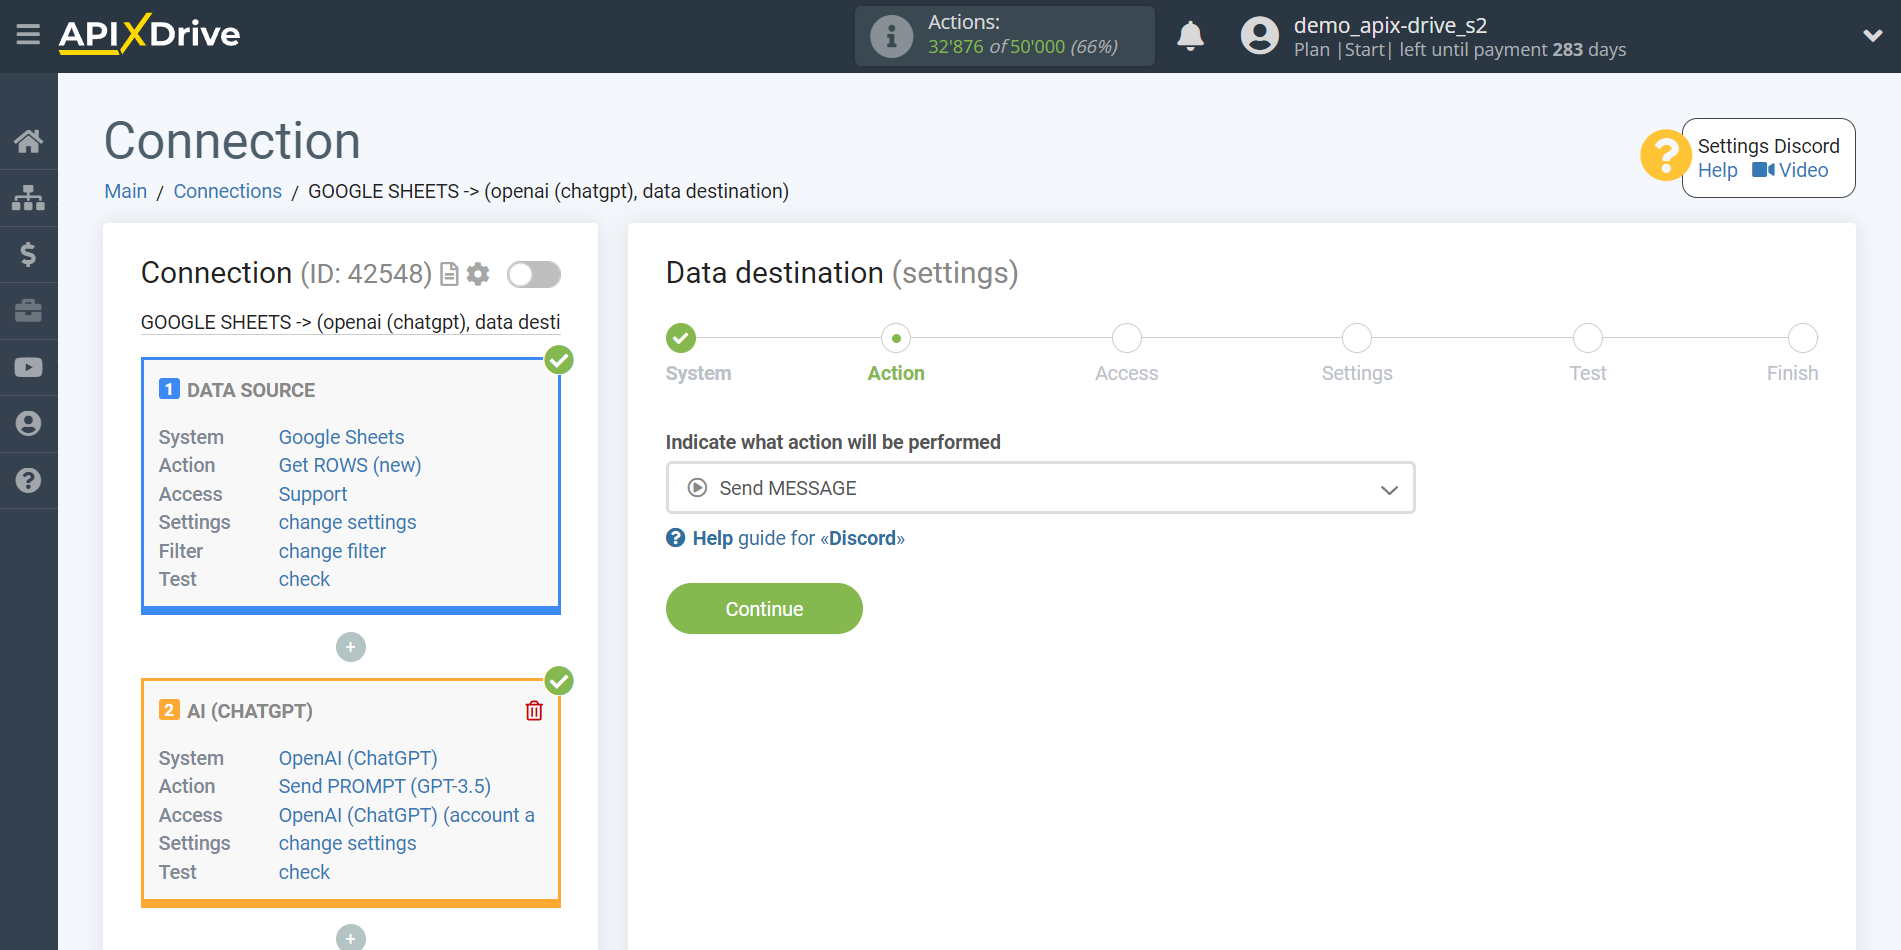
Next, you need to specify the action "Send MESSAGE".
The next step is to select a Discord account to which the result of the OpenAI (ChatGPT) request will be sent. If you already have an account connected, then select it.
If there are no logins connected to the ApiX-Drive system, click “Connect account”.
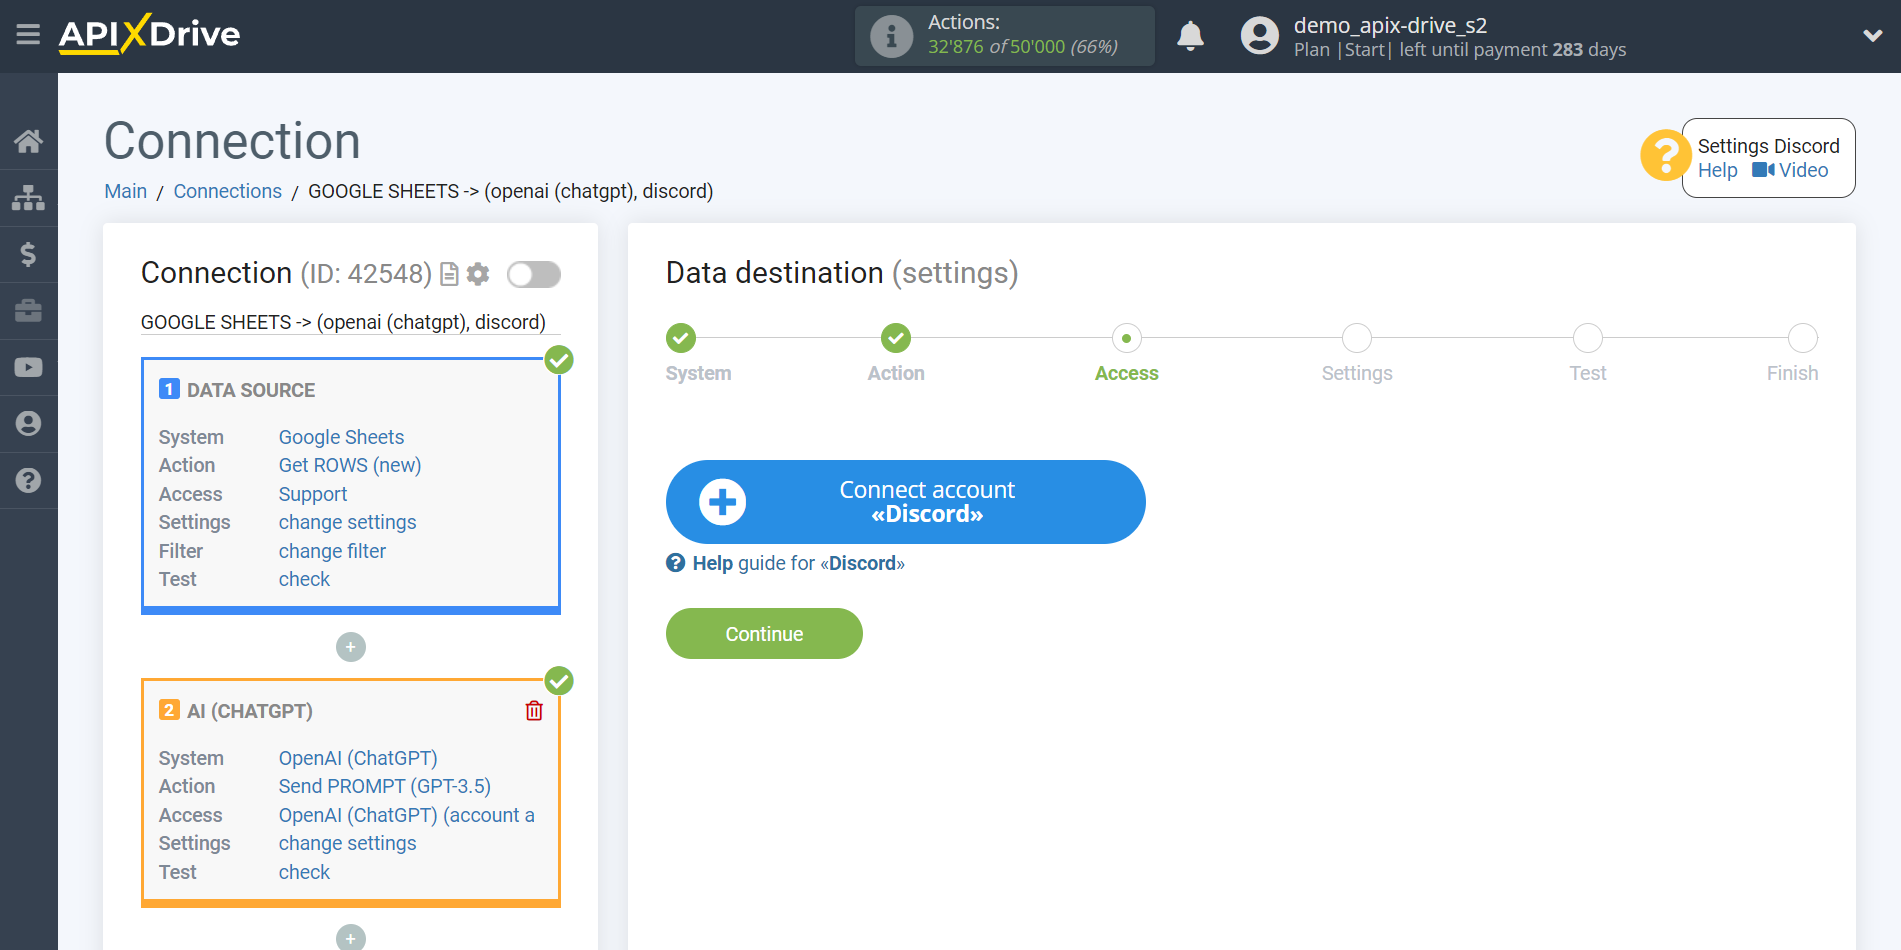
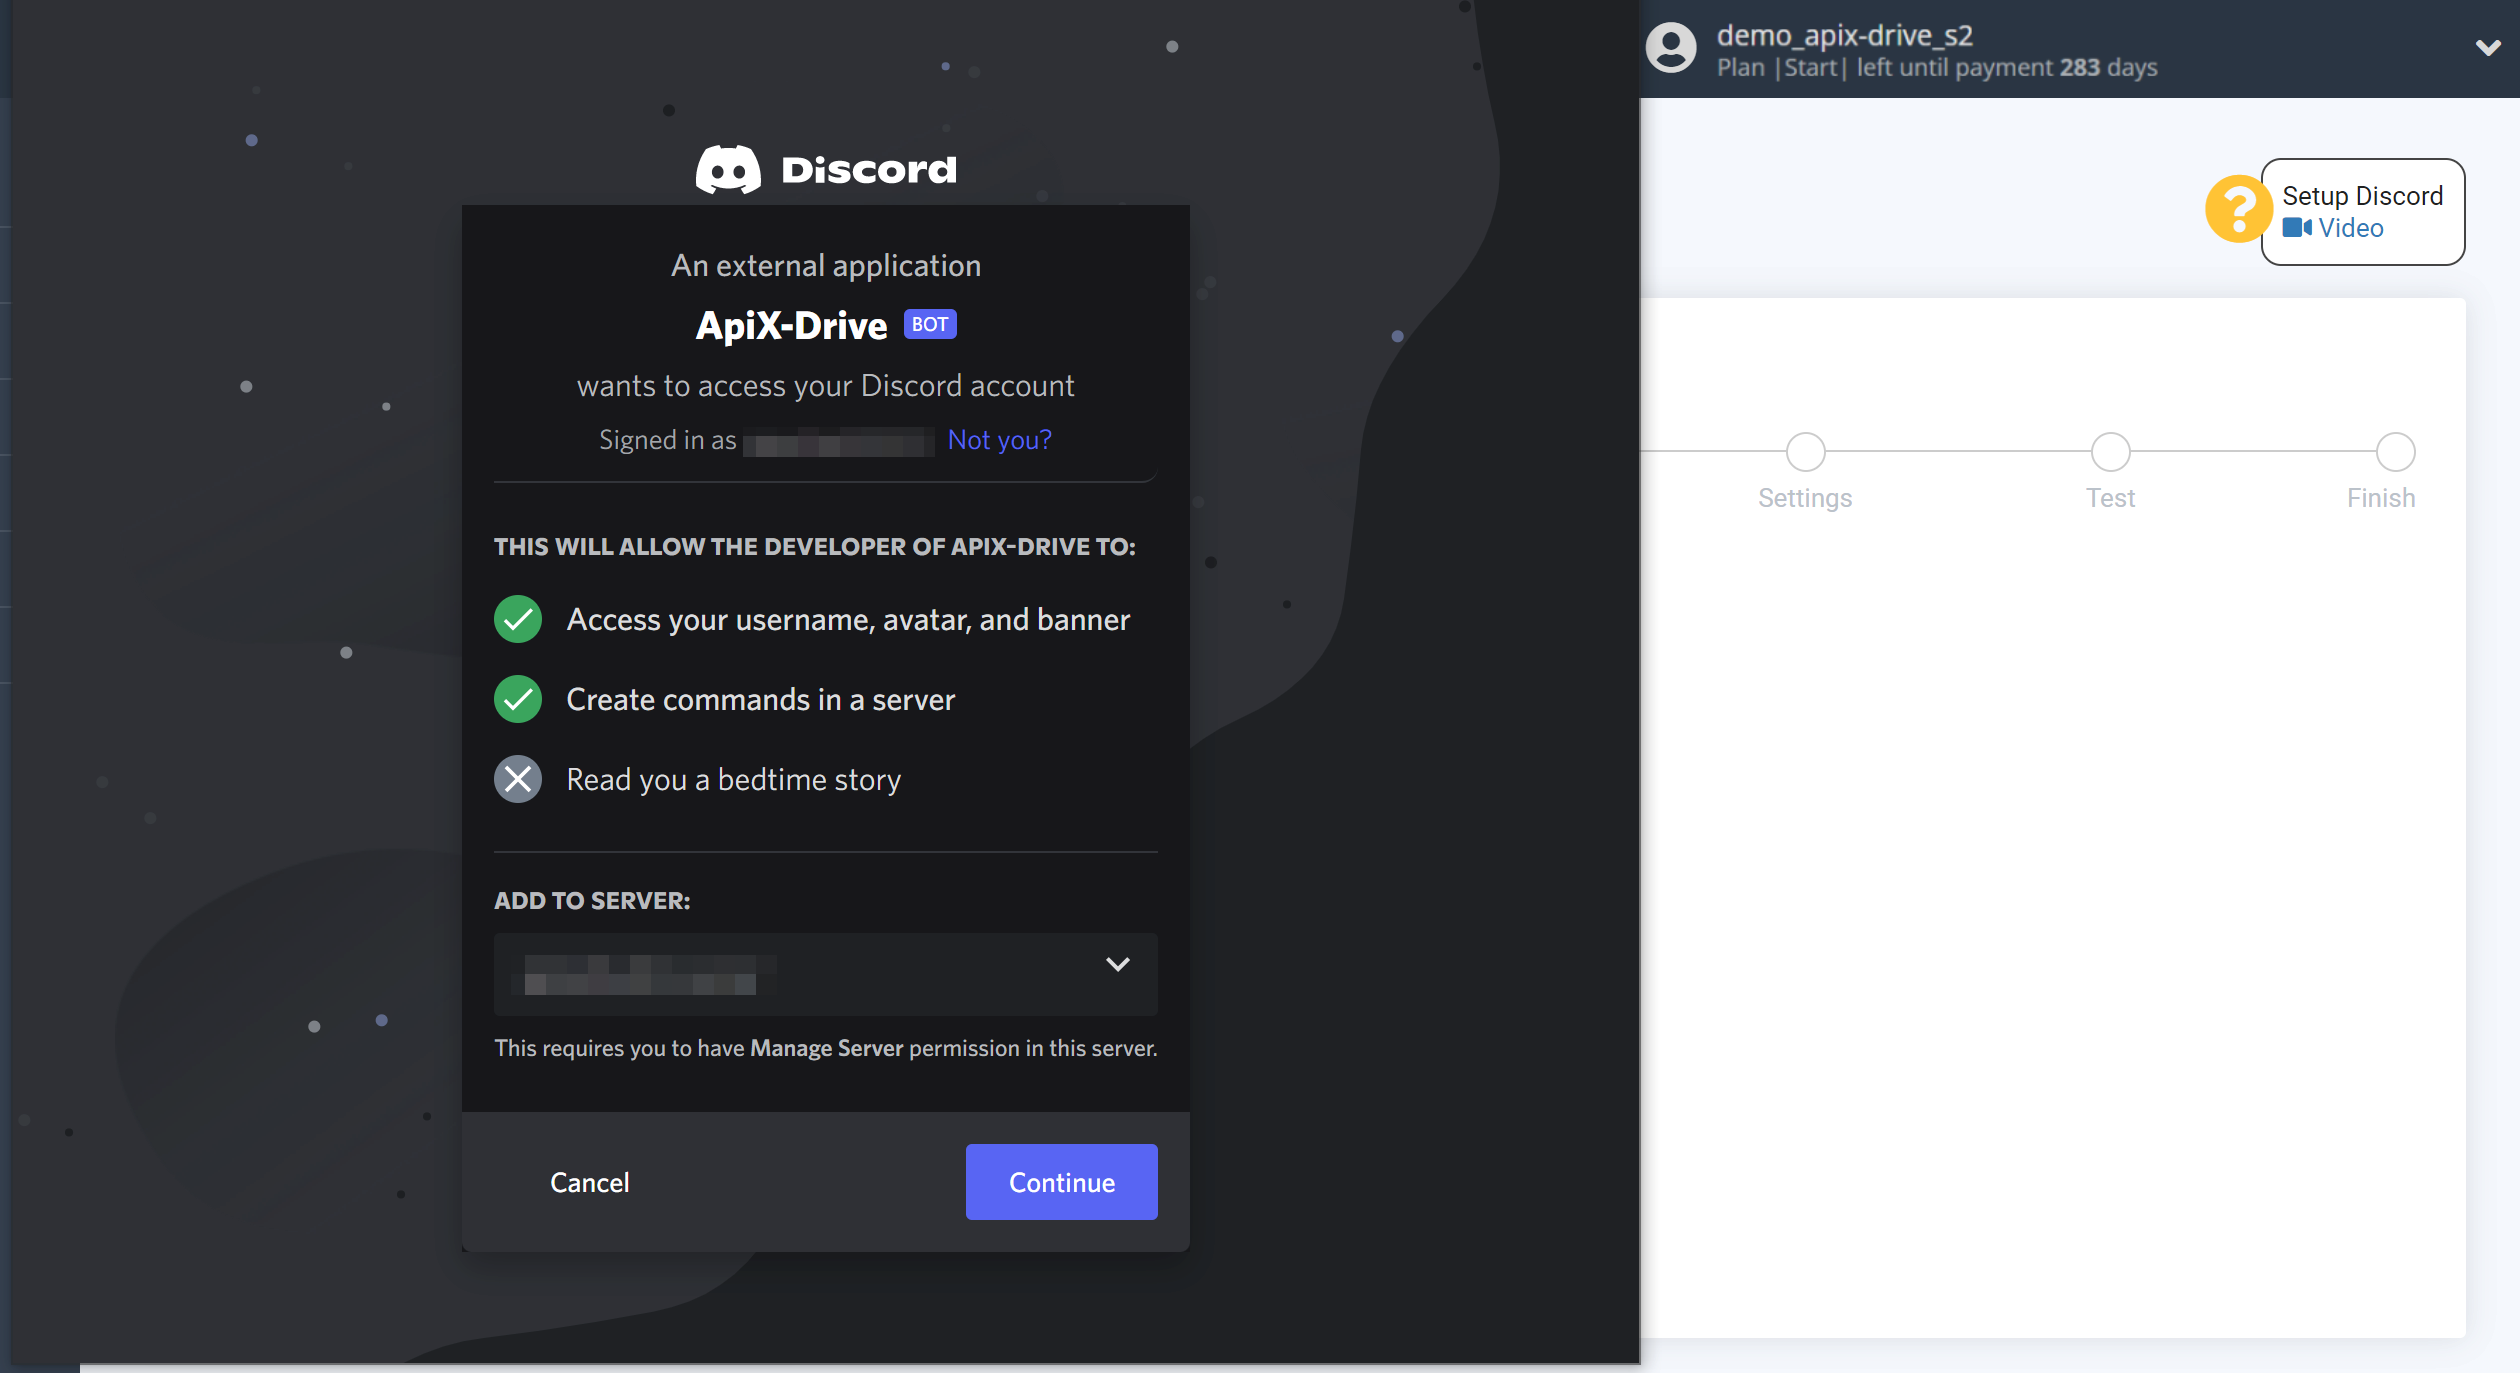
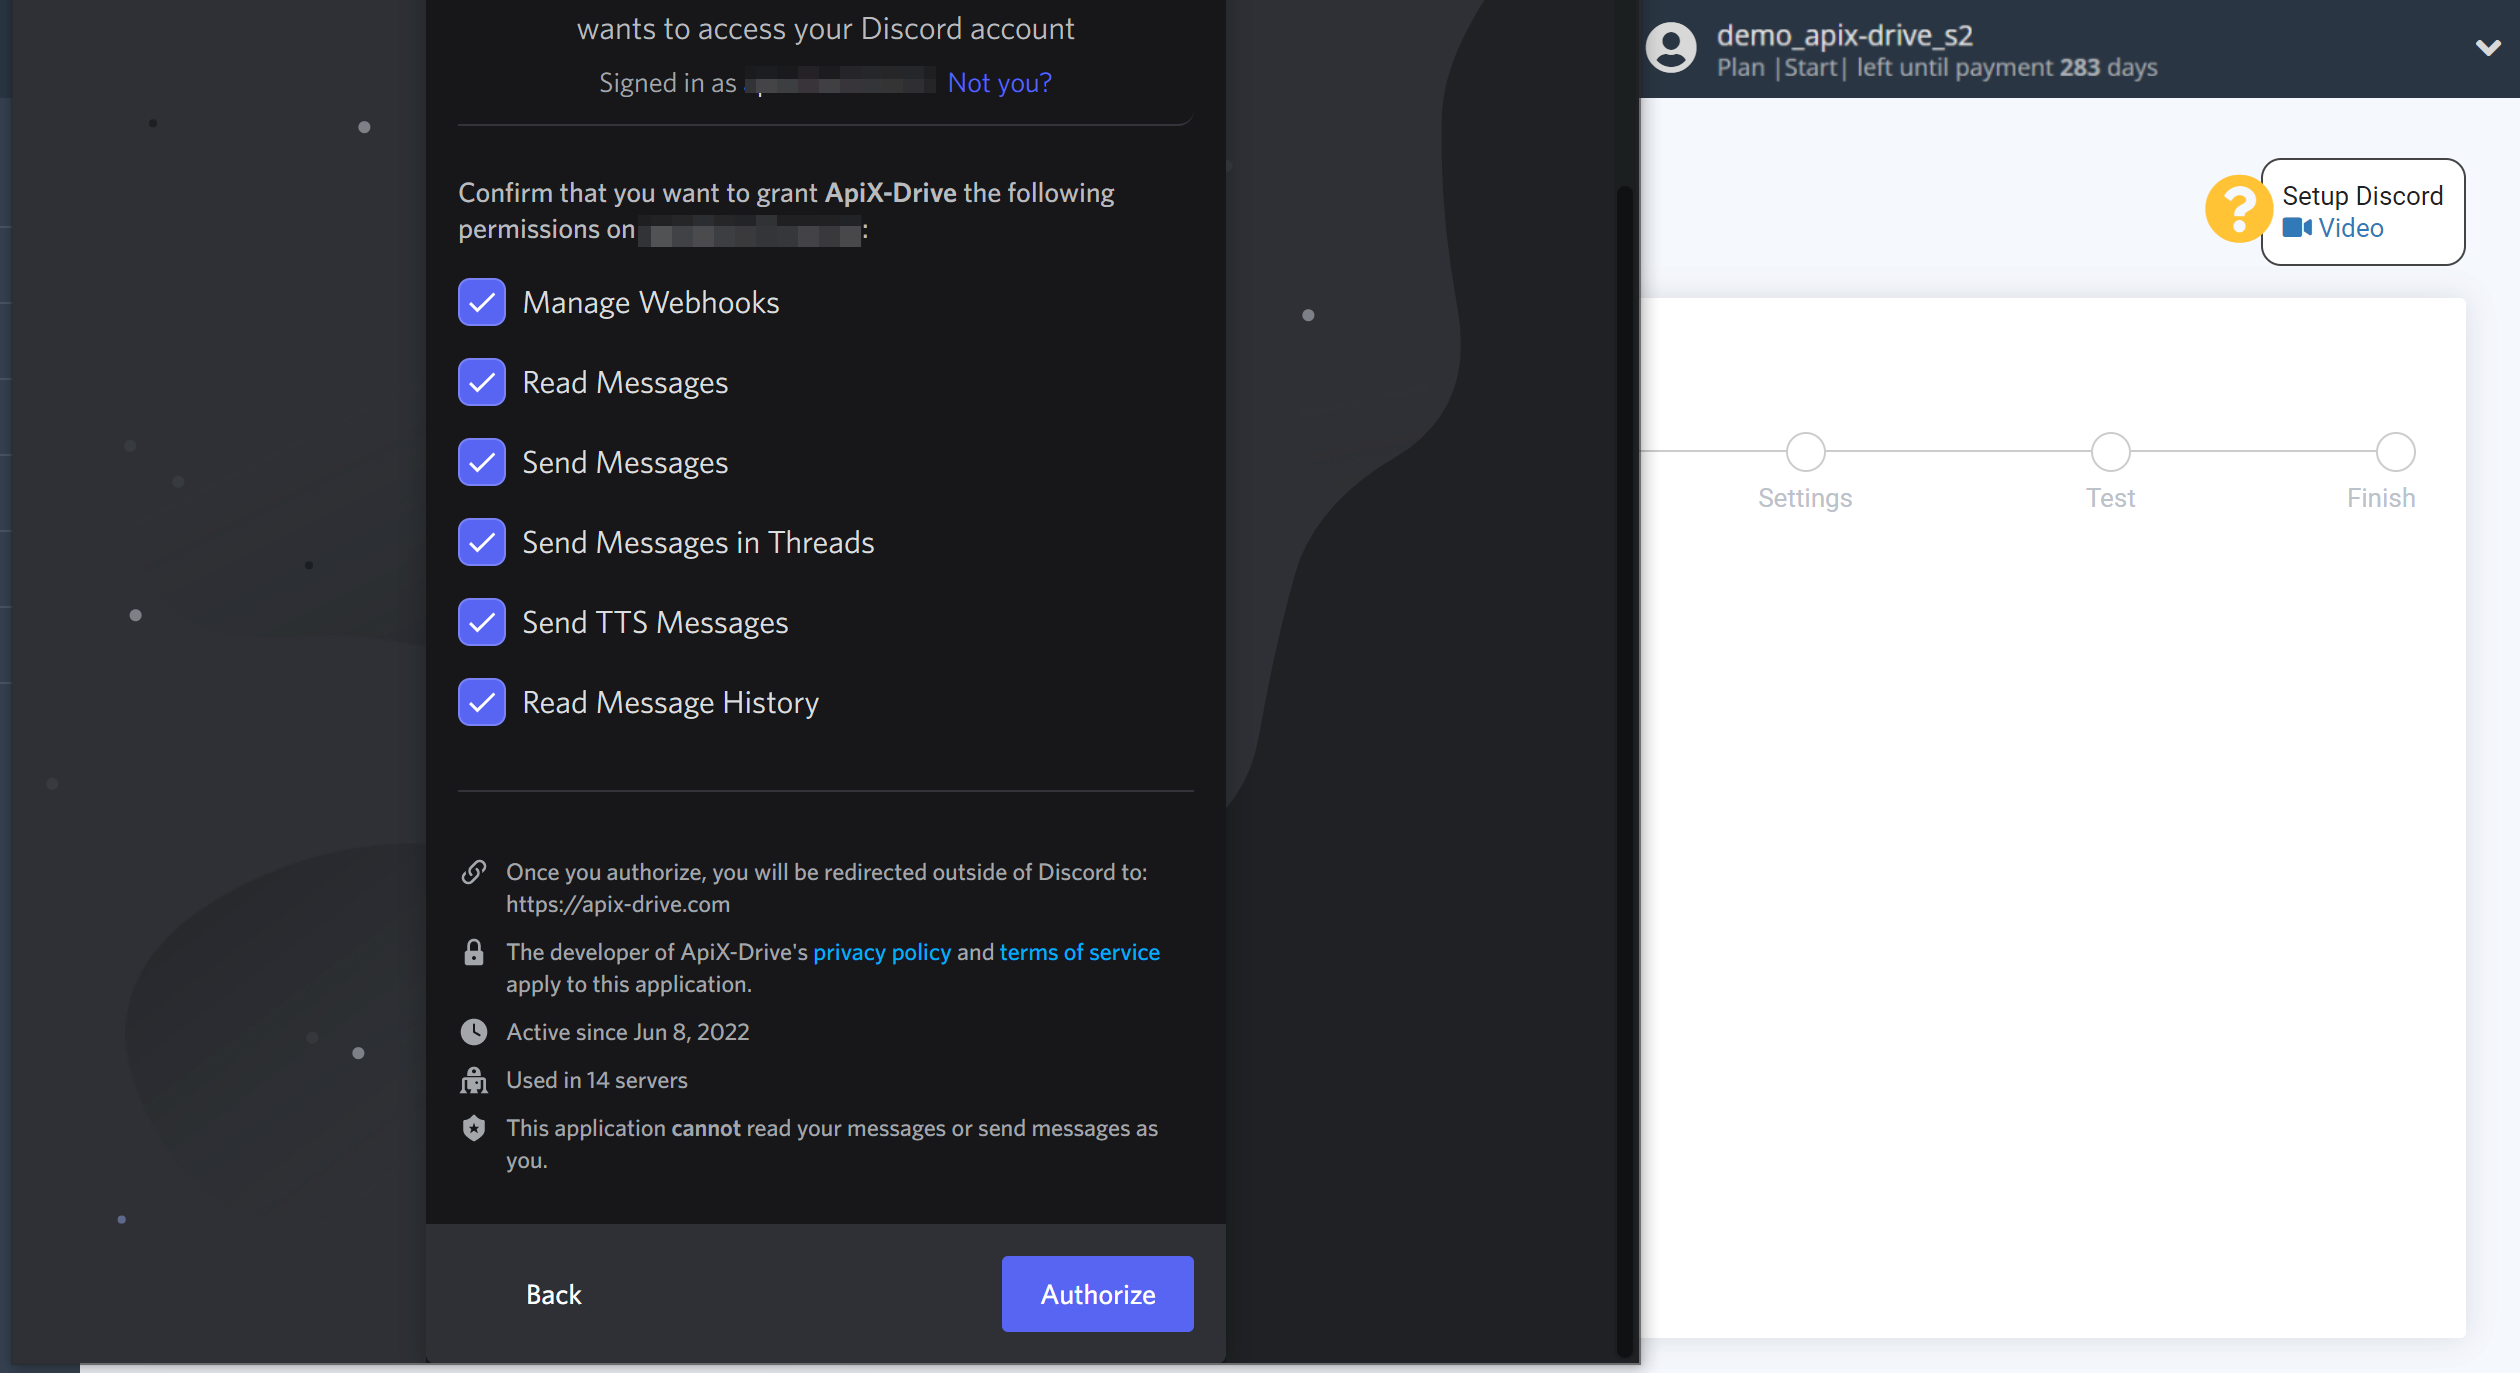
To connect your Discord account, follow the sequence:
1. Enter your Discord username and password.
2. Select your Server Discord from the dropdown list
3. Leave all access checkboxes enabled and click "Authorise" to grant ApiX-Drive permission to work with your Discord.
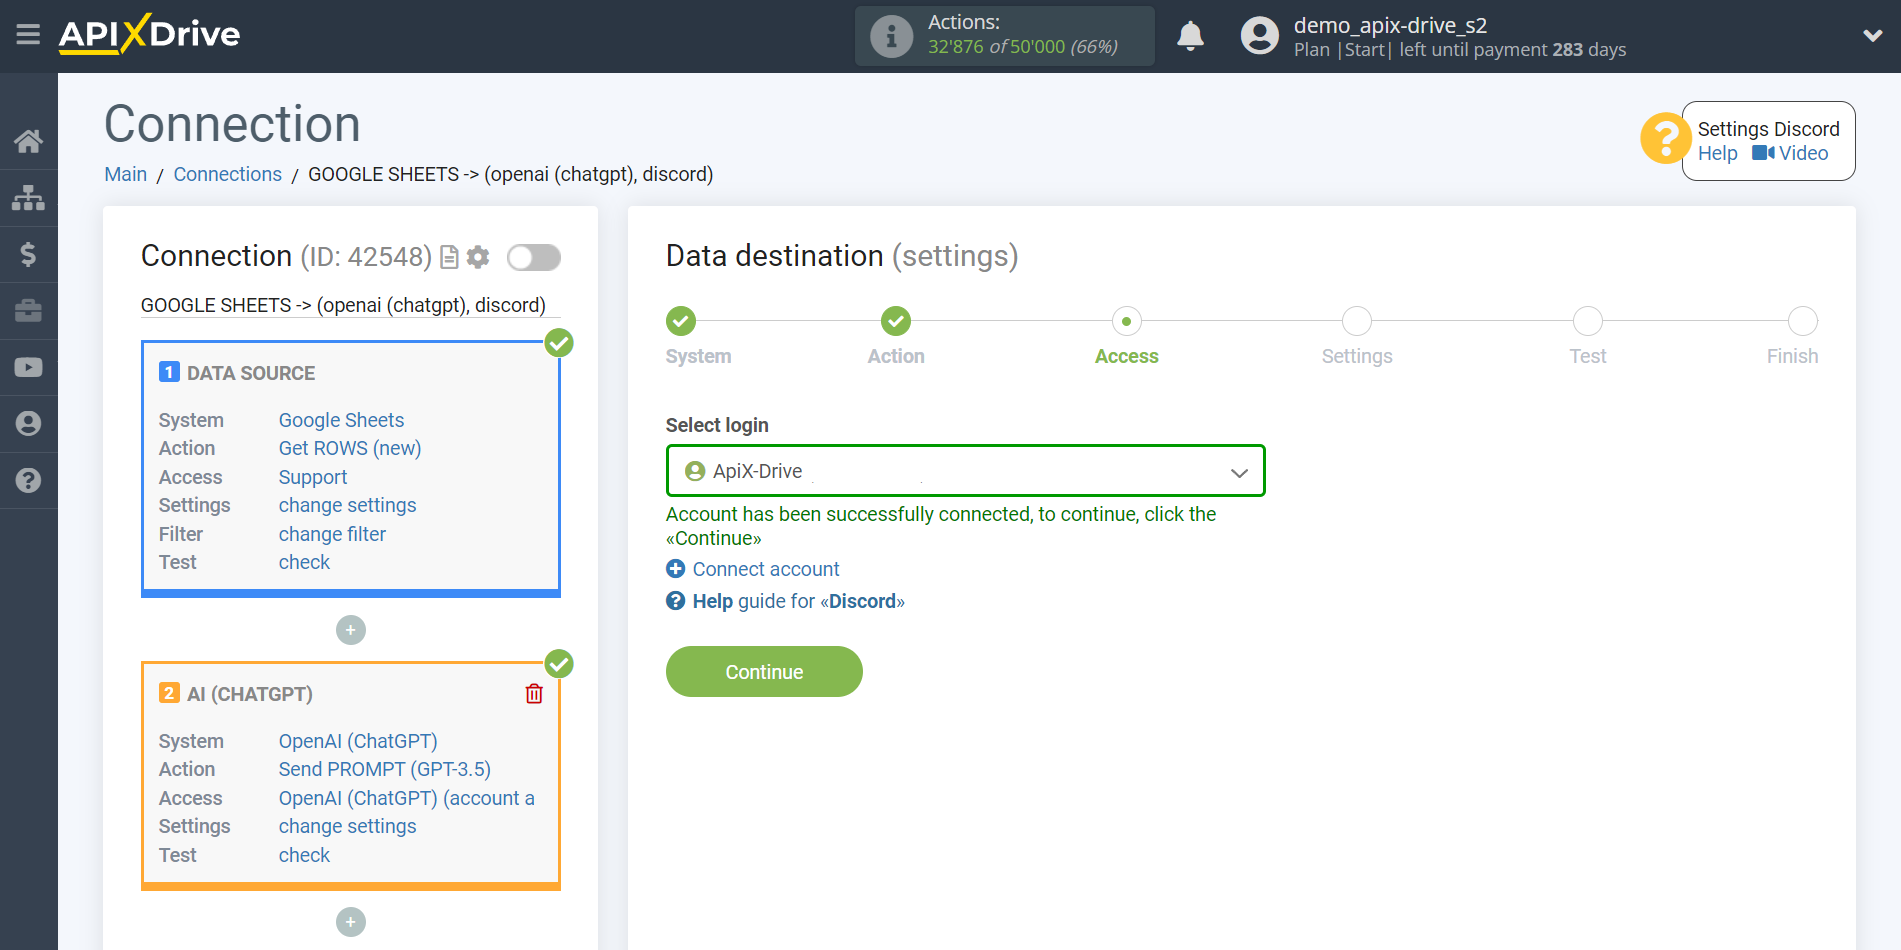
Select your Discord account and click Continue.
Now, you need to compose a message from the data that will be sent to the Discord bot.
To add a variable, click in the "Message" field and select the desired variable from the drop-down list. If necessary, you can write the data manually in a line or construct a message for convenience in a column (to move to the next line you need to use the "Enter" button), as shown in the example.
When the message is generated, click "Edit and continue".
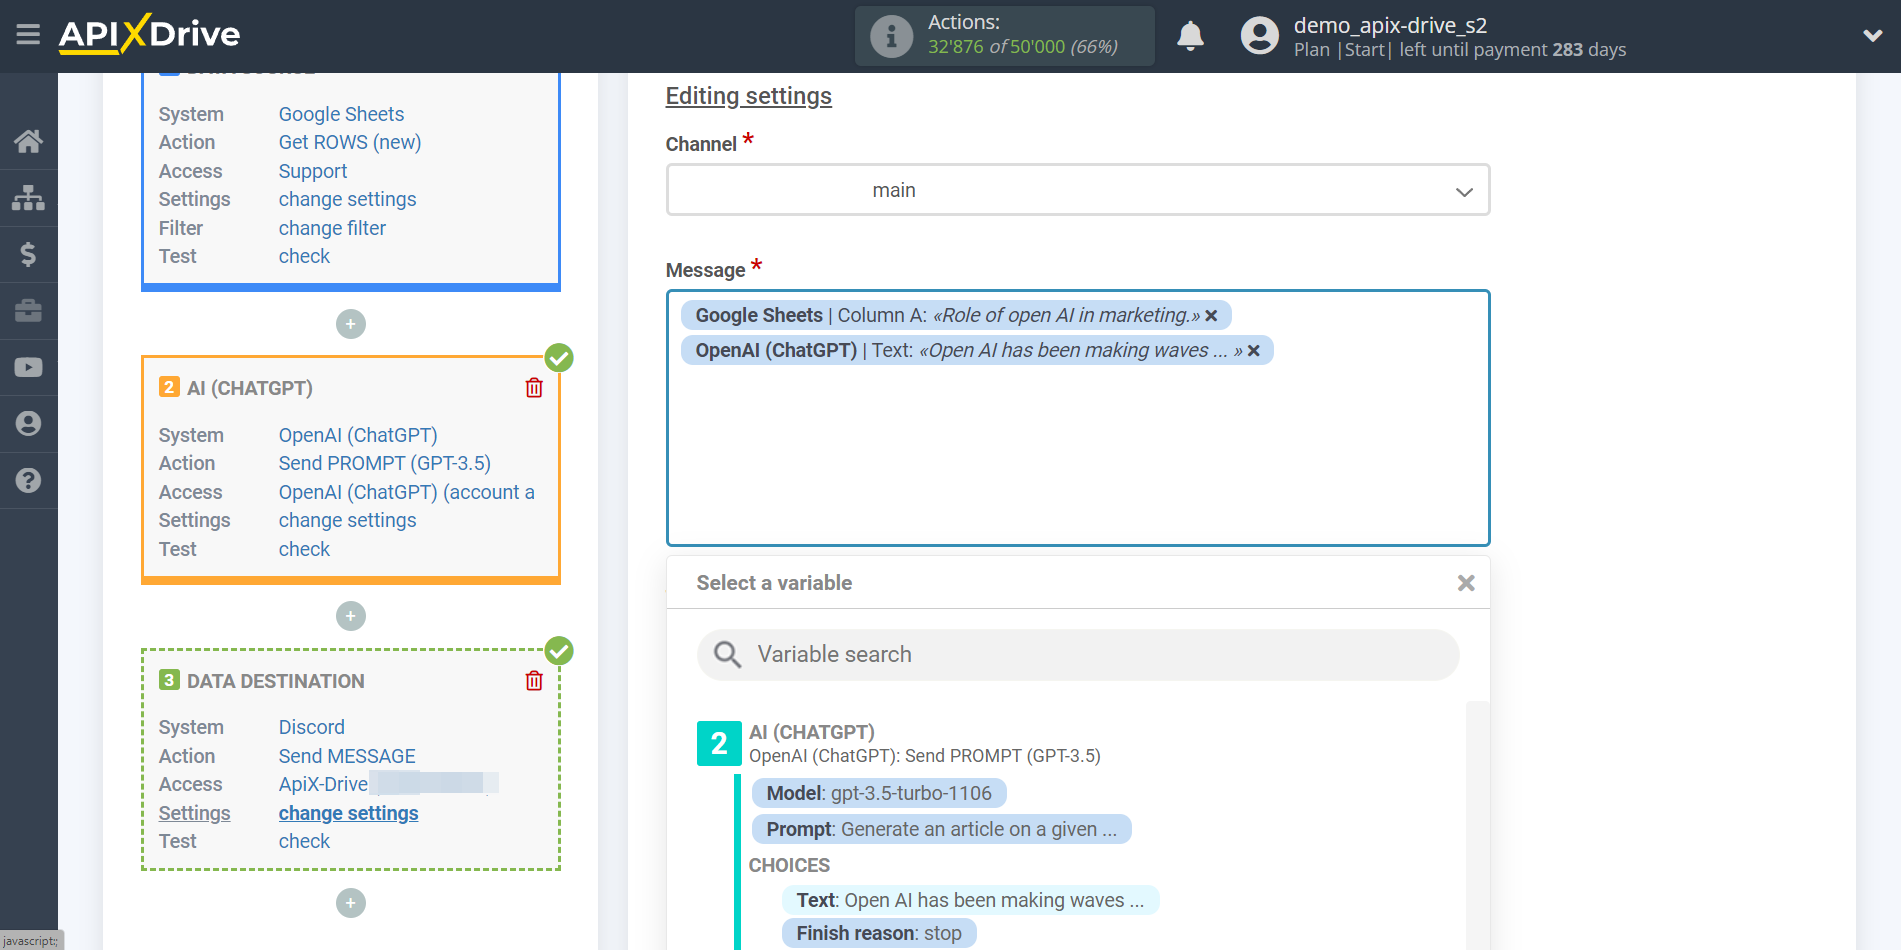
Thus, the OpenAI (ChatGPT) block takes the field in the Data Source in which you have written the request text, queries the OpenAI (ChatGPT) server for the result of this request and transmits this data to the Data Destination field in the form of a message.
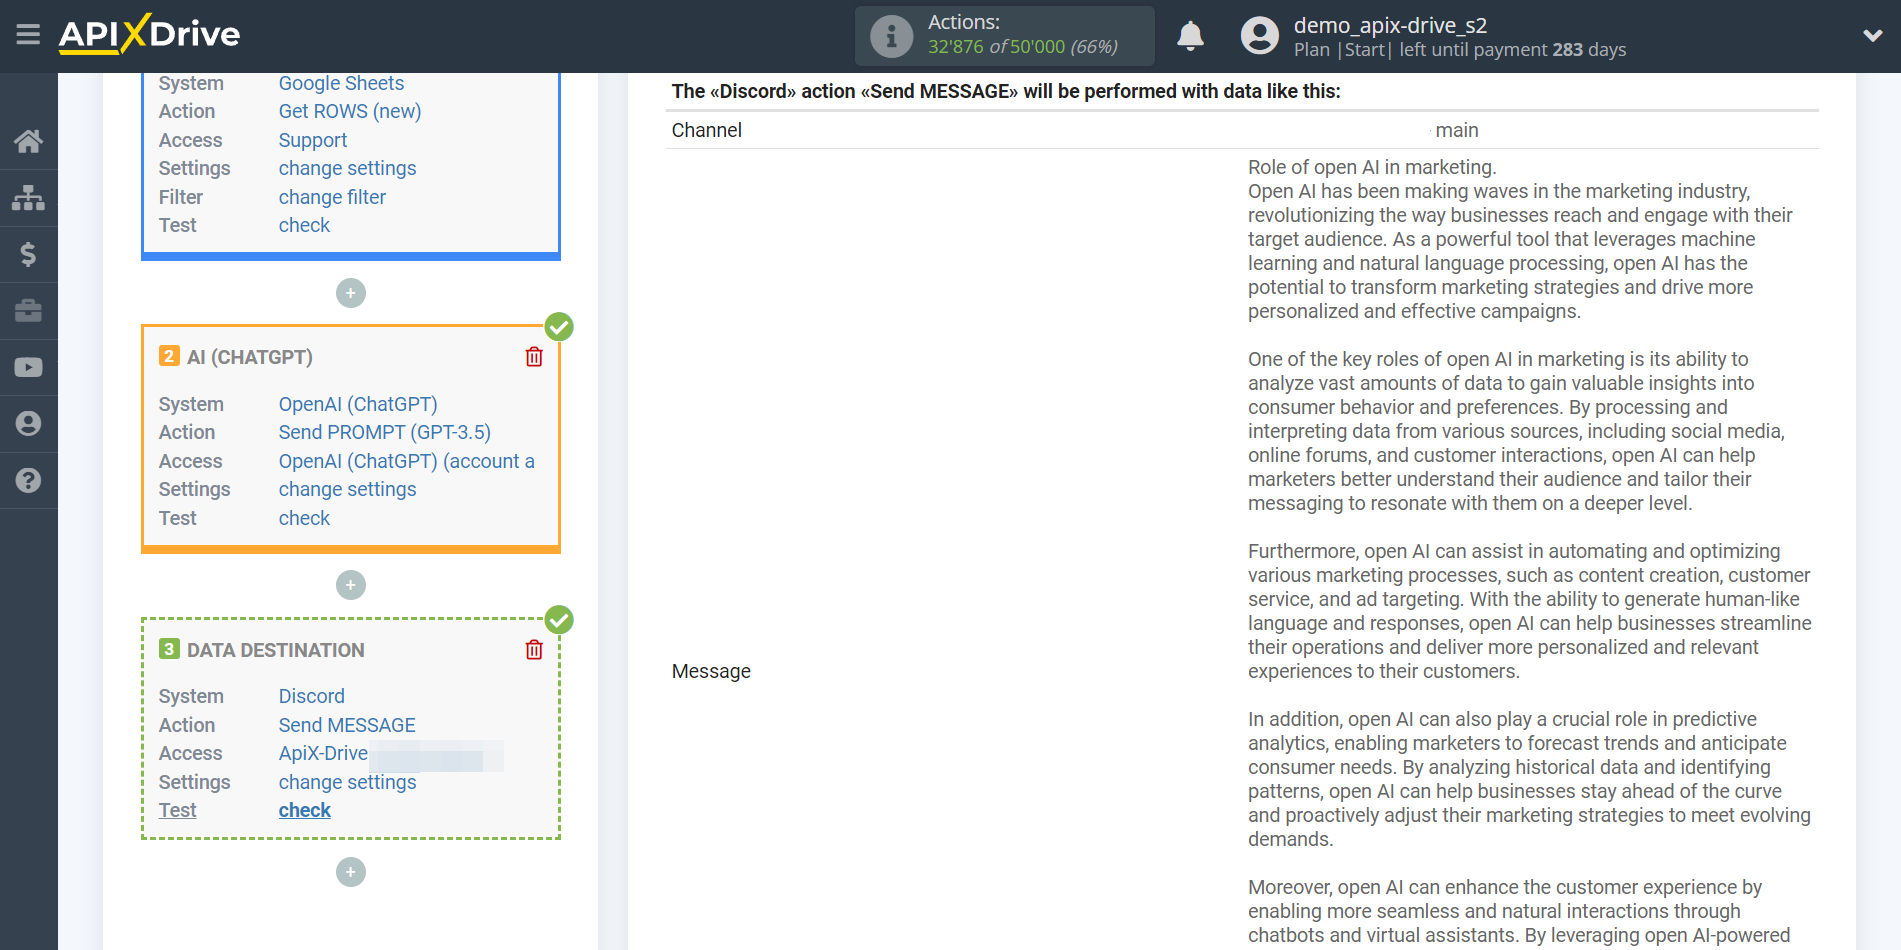
Now you see test data of what your message will look like.
Click "Send test data to Discord" and check the message in the Discord bot.
If you are satisfied with everything, click “Continue” for further settings.
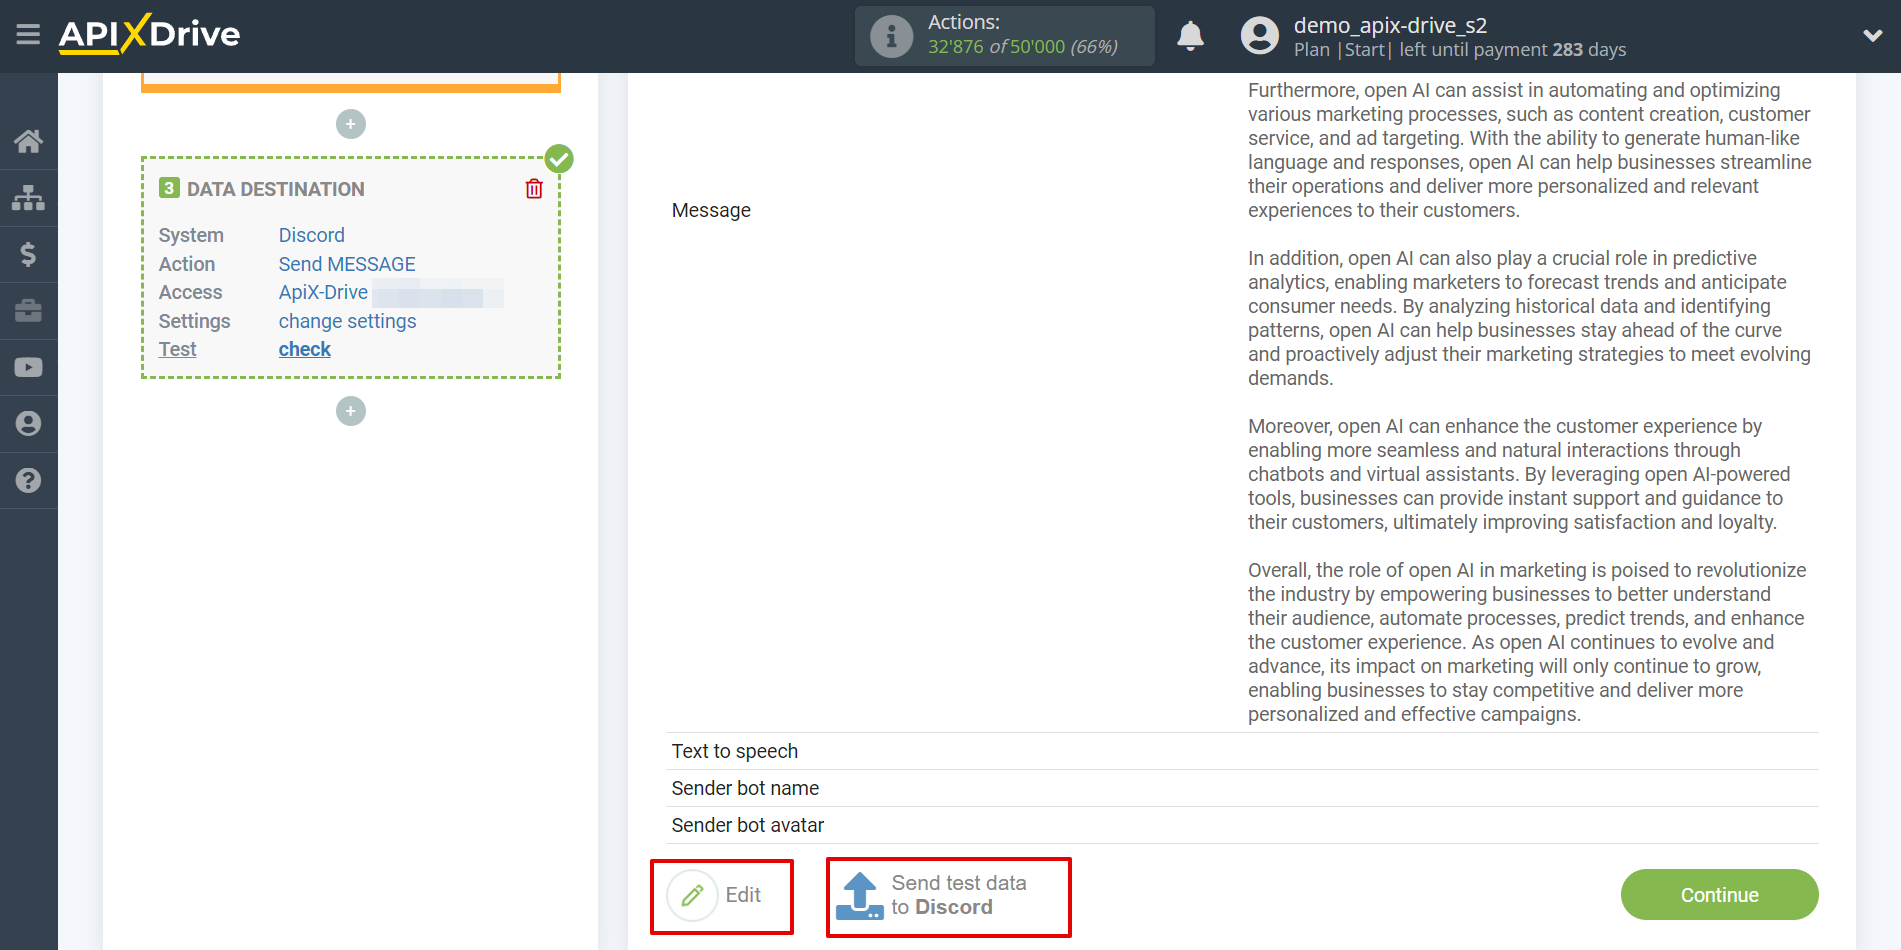
This completes the Data Destination system setup!
Now you can start choosing the update interval and enabling auto-update.
To do this, click "Enable update".
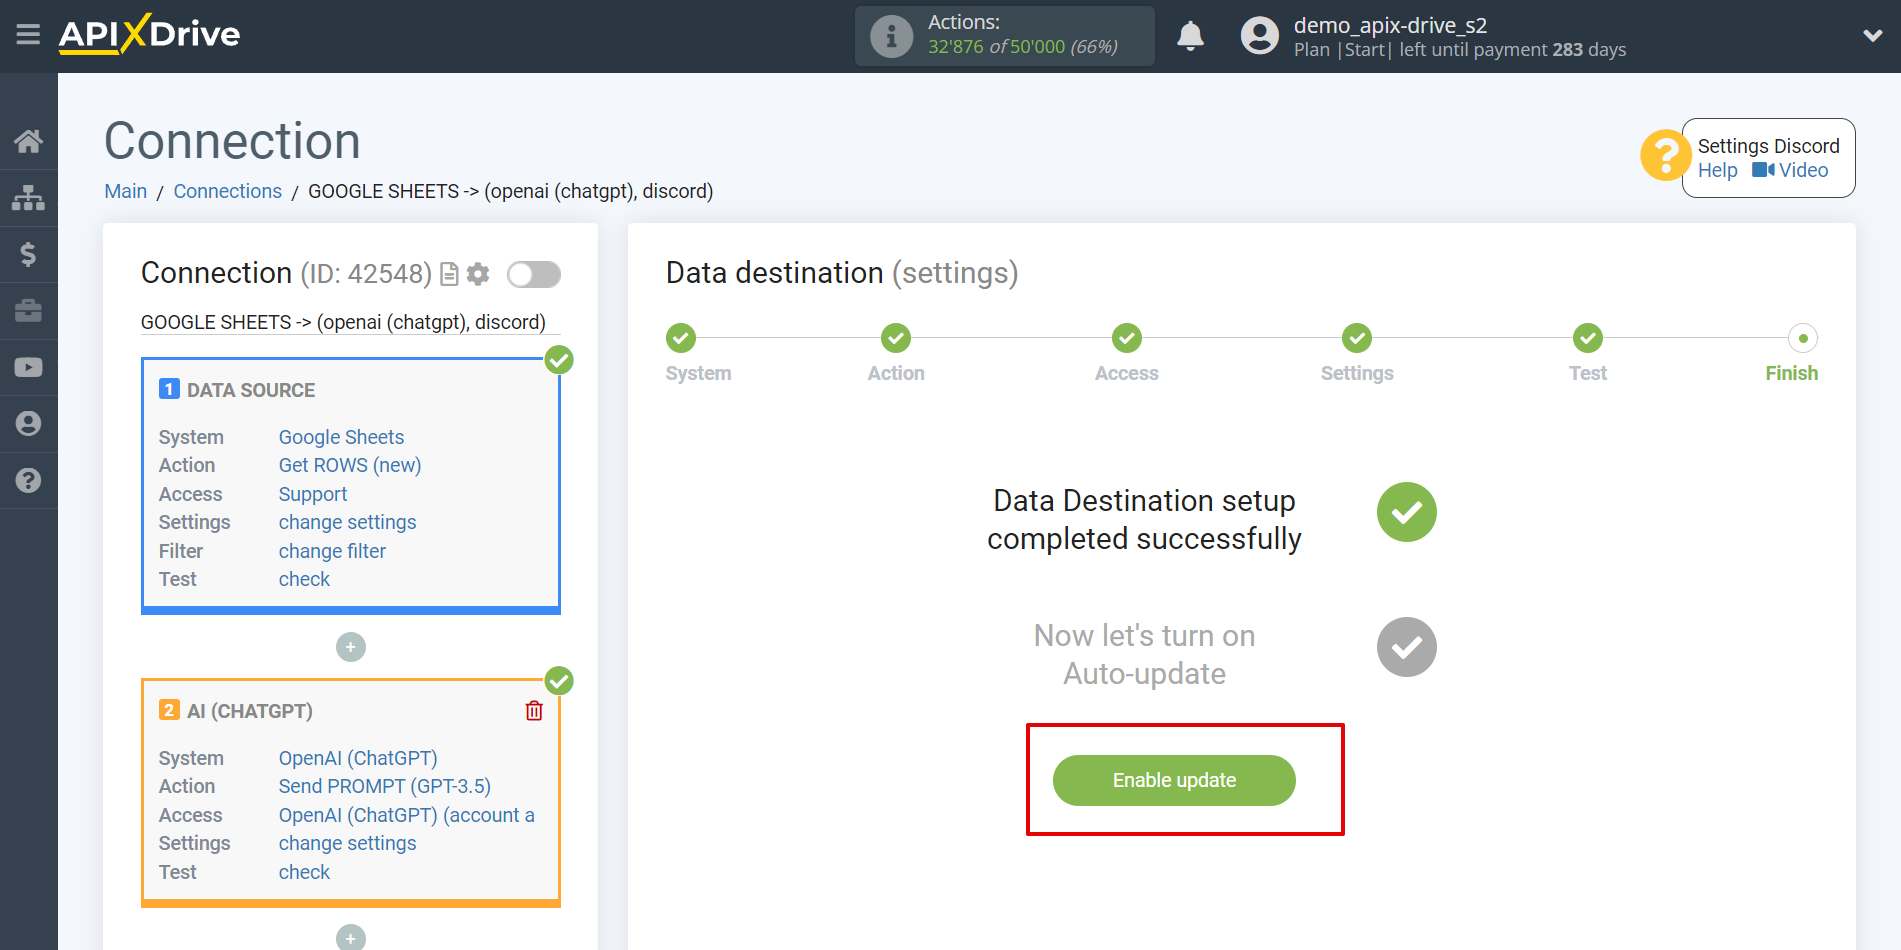
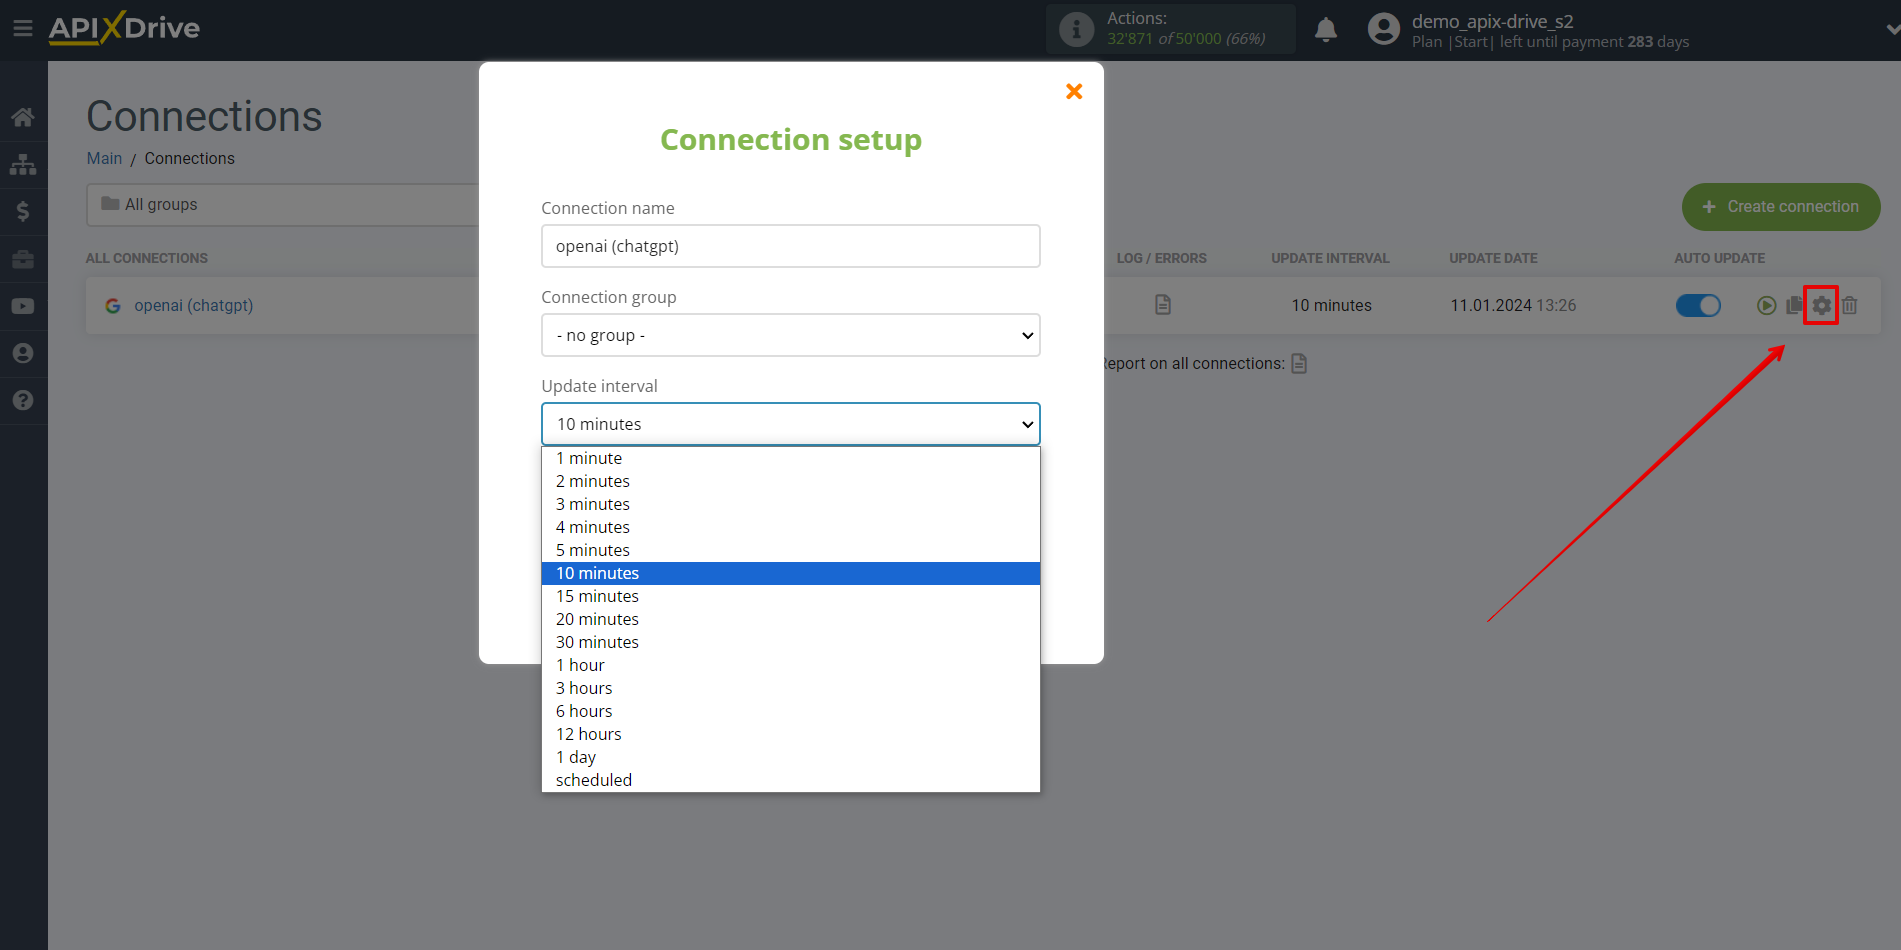
On the main screen, click on the gear icon to select the required update interval or set up scheduled launch. To start the connection by time, select scheduled start and specify the desired time for the connection update to fire, or add several options at once when you need the connection to fire.
Attention! In order for the scheduled run to work at the specified time, the interval between the current time and the specified time must be more than 5 minutes. For example, you select the time 12:10 and the current time is 12:08 - in this case, the automatic update of the connection will occur at 12:10 the next day. If you select the time 12:20 and the current time is 12:13 - the auto-update of the connection will work today and then every day at 12:20.
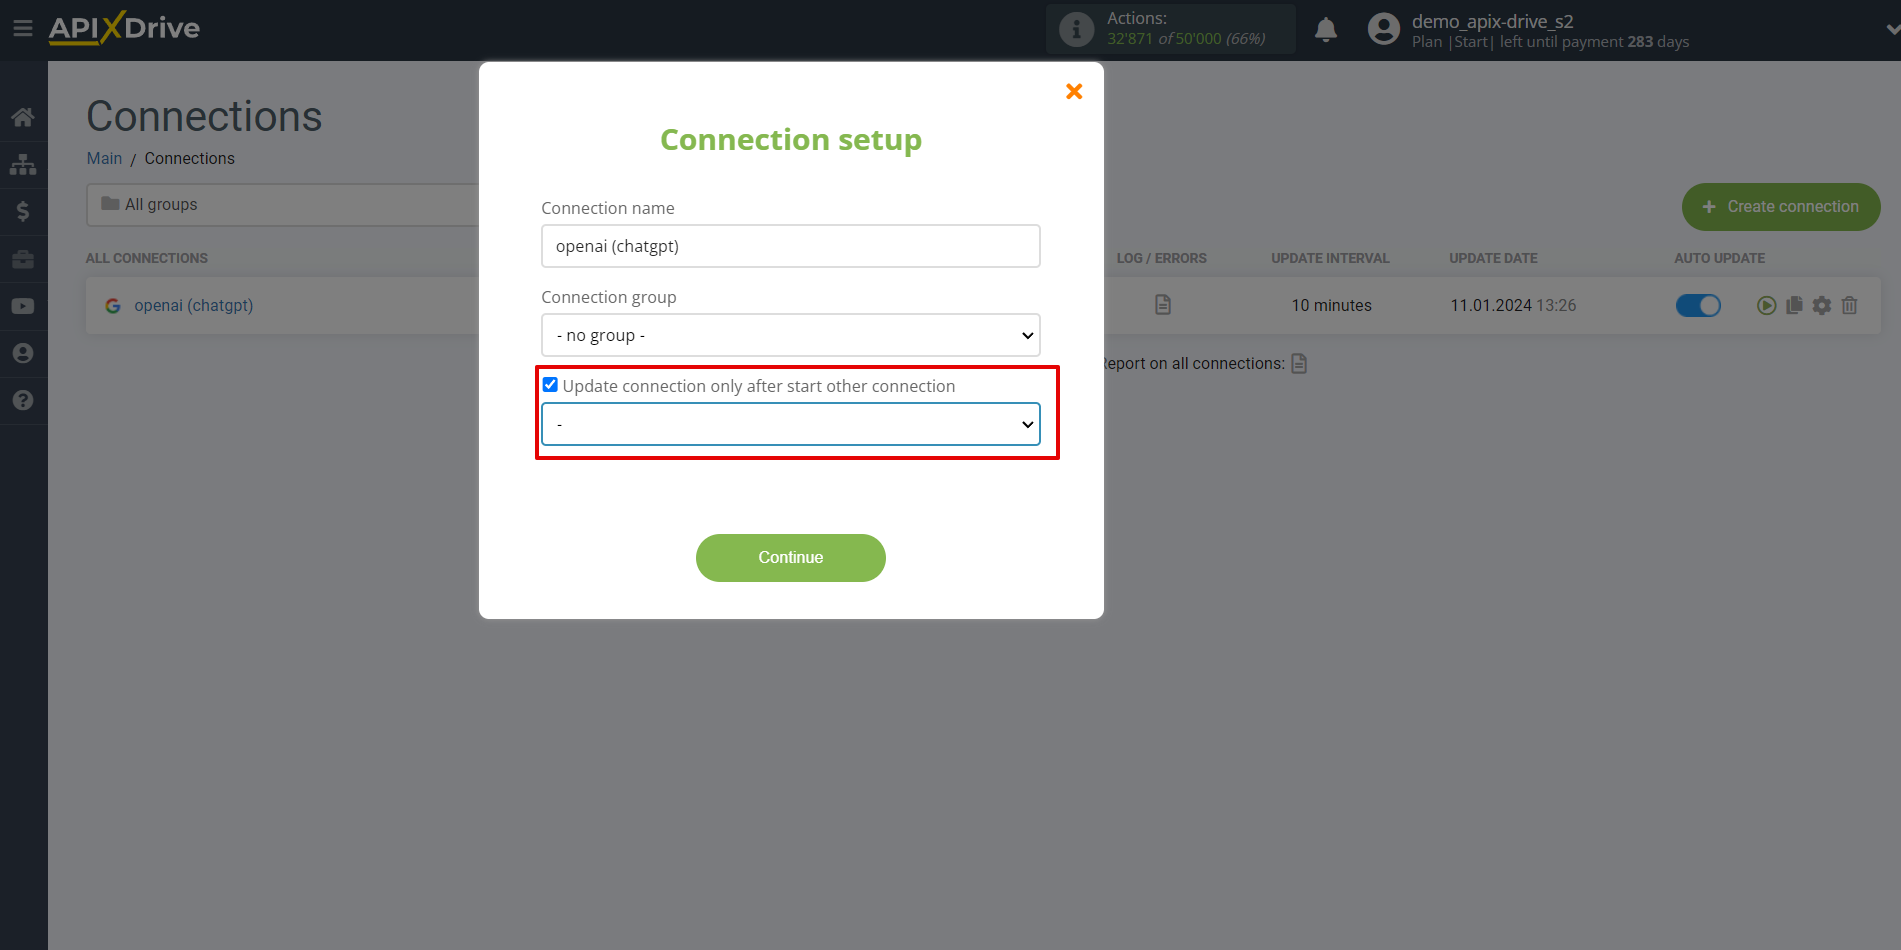
To make the current connection transmit data only after another connection, check the box "Update connection only after start other connection" and specify the connection after which the current connection will be started.
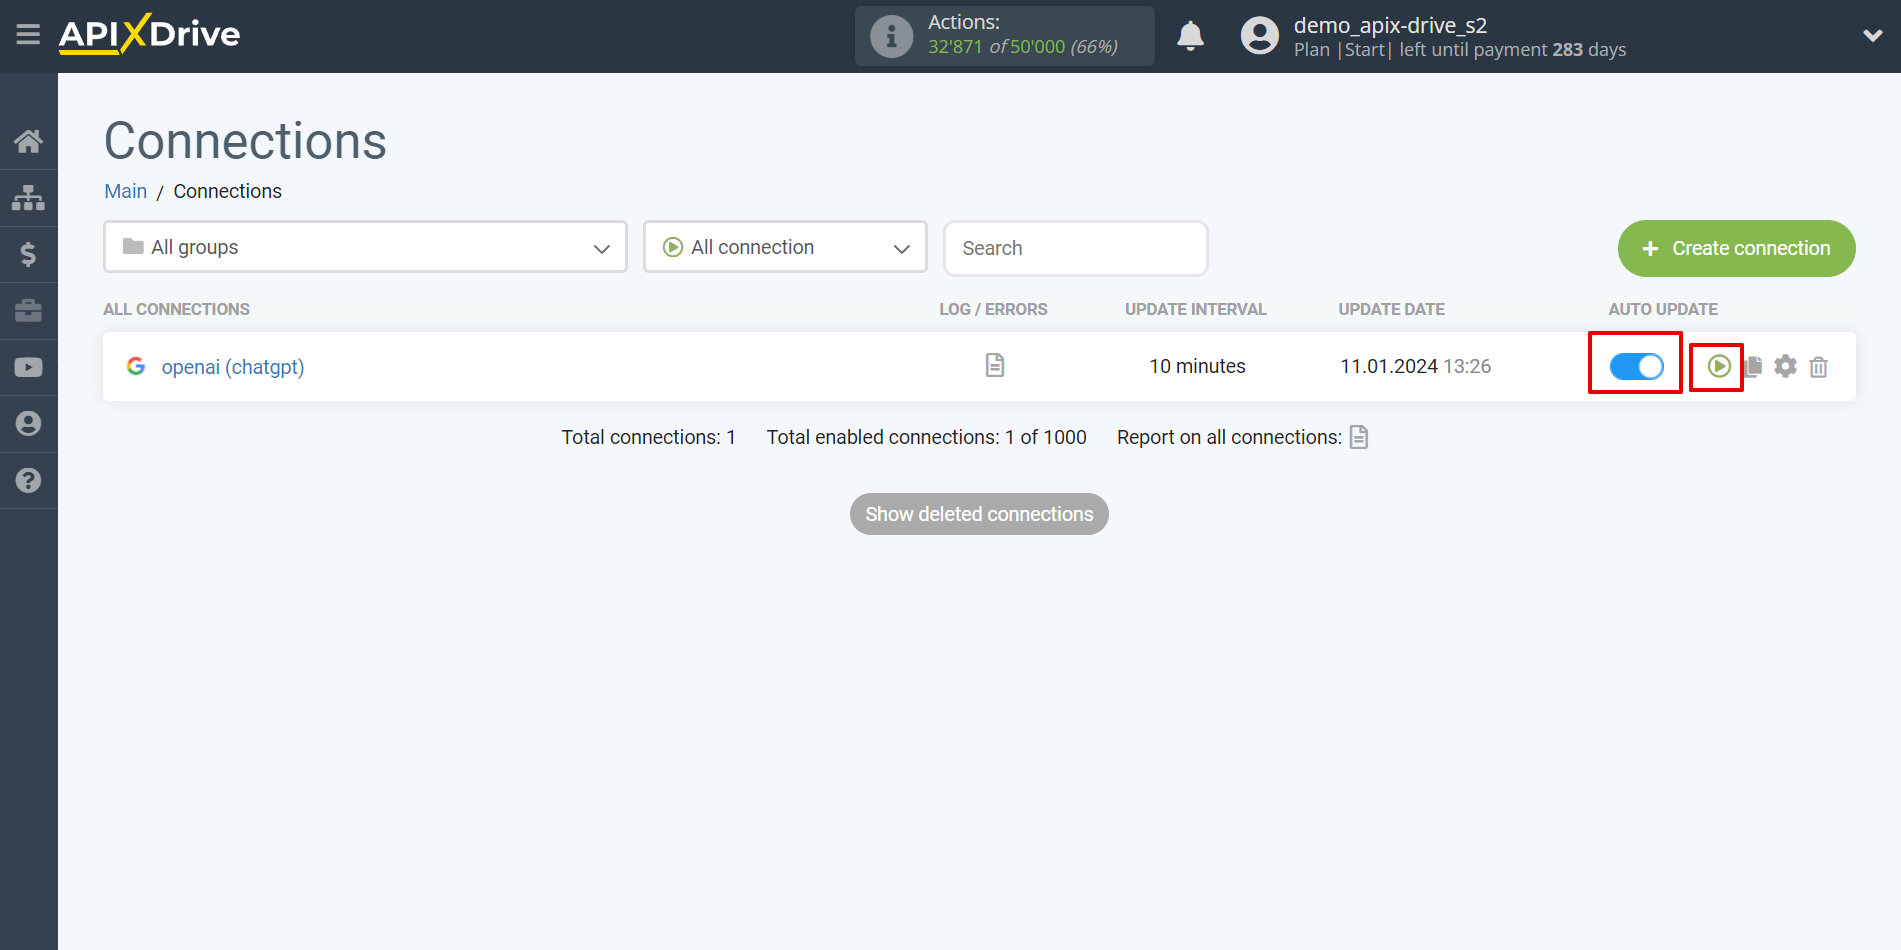
To enable auto-update, switch the slider to the position as shown in the picture.
To force the connection, click on the arrow icon.
This completes the setup of OpenAI (ChatGPT)! Everything is quite simple!
Now don't worry, ApiX-Drive will do everything on its own!